【AI小智硬件程序(六)】
work_task = new WorkTask(4096*2)初始化后台任务模块,该模块是基于生产者 - 消费者模型的调度器,核心作用是专门执行 OPUS 编码这类 CPU 密集型的耗时操作;opus_encoder_ = std::make_unique(16000,1,60)初始化 OPUS 编码器封装类,传入的参数分别是 16000Hz 采样率、单声道、60 的编码参数,该类的核心作用是将
AI小智硬件程序(六)
ESP32实现opus编码
一、前期准备
1.修复之前遗漏的音频信号采集通道参数
改成
i2s_chan_handle_t AudioEs7210::es7210_i2s_init(void)
{
    i2s_chan_handle_t i2s_rx_chan = NULL;  // 定义接收通道句柄
    i2s_chan_config_t i2s_rx_conf = I2S_CHANNEL_DEFAULT_CONFIG(EXAMPLE_I2S_NUM, I2S_ROLE_MASTER); // 配置接收通道
    ESP_ERROR_CHECK(i2s_new_channel(&i2s_rx_conf, NULL, &i2s_rx_chan)); // 创建i2s通道
    ESP_LOGI(TAG, "Configure I2S receive channel to TDM mode");
    // 定义接收通道为I2S TDM模式 并配置
    i2s_tdm_config_t i2s_tdm_rx_conf = {
        .clk_cfg  = {
            .sample_rate_hz = EXAMPLE_I2S_SAMPLE_RATE,
            .clk_src = I2S_CLK_SRC_DEFAULT,
            .mclk_multiple = EXAMPLE_I2S_MCLK_MULTIPLE
        },
        .gpio_cfg = {
            .mclk = EXAMPLE_I2S_MCK_IO,
            .bclk = EXAMPLE_I2S_BCK_IO,
            .ws   = EXAMPLE_I2S_WS_IO,
            .dout = GPIO_NUM_NC, // ES7210 only has ADC capability
            .din  = EXAMPLE_I2S_DI_IO

        },
    };
    if (channel_num==2)
    {
        i2s_tdm_rx_conf.slot_cfg = I2S_TDM_PHILIPS_SLOT_DEFAULT_CONFIG(EXAMPLE_I2S_SAMPLE_BITS, I2S_SLOT_MODE_STEREO, EXAMPLE_I2S_TDM_SLOT_MASK);
    }
    else if (channel_num==1)
    {
        i2s_tdm_rx_conf.slot_cfg = I2S_TDM_PHILIPS_SLOT_DEFAULT_CONFIG(EXAMPLE_I2S_SAMPLE_BITS, I2S_SLOT_MODE_MONO, (i2s_tdm_slot_mask_t)(I2S_TDM_SLOT0));
    }
    ESP_ERROR_CHECK(i2s_channel_init_tdm_mode(i2s_rx_chan, &i2s_tdm_rx_conf)); // 初始化I2S通道为TDM模式
    return i2s_rx_chan;
}
2.添加组件
https://components.espressif.com/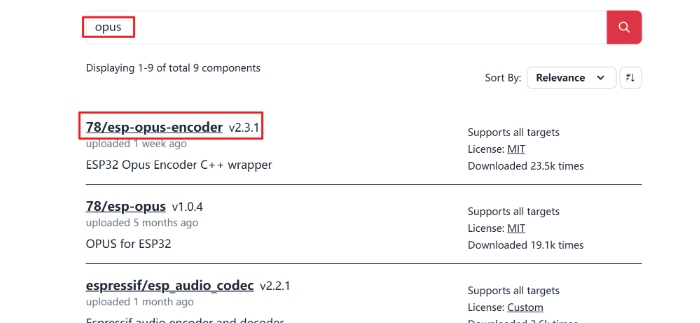
获得命令如下
idf.py add-dependency "78/esp-opus-encoder^2.3.1"

idf.py reconfigure
二、定义三个智能指针
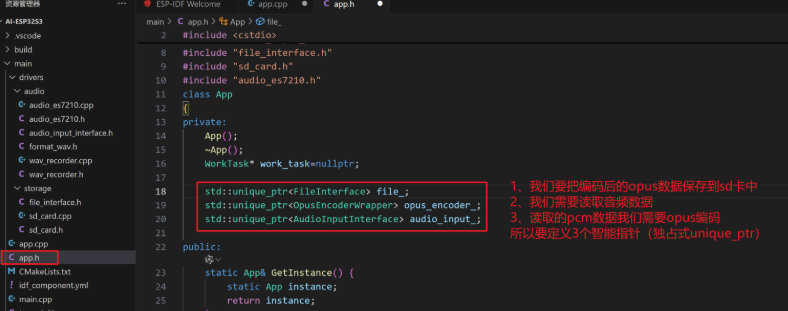
std::unique_ptr<FileInterface> file_;
std::unique_ptr<OpusEncoderWrapper> opus_encoder_;
std::unique_ptr<AudioInputInterface> audio_input_;
- work_task = new WorkTask(4096*2)初始化后台任务模块,该模块是基于生产者 - 消费者模型的调度器,核心作用是专门执行 OPUS 编码这类 CPU 密集型的耗时操作;
- opus_encoder_ = std::make_unique(16000,1,60)初始化 OPUS 编码器封装类,传入的参数分别是 16000Hz 采样率、单声道、60 的编码参数,该类的核心作用是将采集到的原始 PCM 音频数据压缩为 OPUS 格式;
- audio_input_ = std::make_unique(16000,1)初始化音频采集模块,其中 ES7210 是负责音频采集的 ADC 芯片,传入的 16000Hz 采样率、单声道为采集参数,该模块的核心作用是从硬件层面采集原始的 PCM 音频数据;
- file_ = std::make_unique()初始化 SD 卡操作模块,该模块的核心作用是将编码完成后的 OPUS 格式音频数据写入 SD 卡进行存储。
三、代码编写
初始化
App::App(){
    work_task = new WorkTask(4096*8);
    opus_encoder_ = std::make_unique<OpusEncoderWrapper>(16000,1,60);
    audio_input_ = std::make_unique<AudioEs7210>(16000,1);
    file_ = std::make_unique<SdCard>();

}
执行代码
void App::run(){

    ESP_ERROR_CHECK(file_->open("test.opus","wb"));
    std::printf("开始说话\n");
    //启动录音
    audio_input_->enable();
    vTaskDelay(pdMS_TO_TICKS(1000));

    for (size_t i = 0; i < 50; i++)
    {
        std::vector<int16_t> pcm(960);

        audio_input_->read(pcm.data(), pcm.size()*sizeof(int16_t), nullptr);

        work_task->add_task([this,pcm = std::move(pcm)]() mutable{
            opus_encoder_->Encode(std::move(pcm), [this](std::vector<uint8_t>&& opus){
                // 编码完成
                uint32_t frame_size = static_cast<uint32_t>(opus.size());

                // 2、转为大端序
                uint32_t frame_size_big_endian = htonl(frame_size); // 转为大端序 0x12345678 -> 0x78563412

                // 3. 先写入帧长度(4字节)
                file_->write_file(reinterpret_cast<const char*>(&frame_size_big_endian), sizeof(frame_size_big_endian));


                // 4. 再写入编码后的数据
                file_->write_file(reinterpret_cast<const char*>(opus.data()), opus.size());
            });
        });
    }

    //延时(必要,等待后台任务执行完成)
    vTaskDelay(pdMS_TO_TICKS(1000));
    audio_input_->disable();
    file_->close();
    std::printf("结束说话\n");

    while (true)
    {
        vTaskDelay(pdMS_TO_TICKS(1000));
        print_all_tasks();
    }
}
步骤 1:初始化准备(打开文件 + 启动录音)
// 调用SdCard模块(file_):打开SD卡中的test.opus文件,以二进制写模式(wb)准备存储编码后的数据
ESP_ERROR_CHECK(file_->open("test.opus","wb"));
std::printf("开始说话\n");
// 调用AudioEs7210模块(audio_input_):启动音频采集(硬件层面开始录制原始PCM音频)
audio_input_->enable();
vTaskDelay(pdMS_TO_TICKS(1000)); // 延时1秒,等待录音模块稳定
步骤 2:循环采集 + 后台编码(核心流程,调用 WorkTask+OpusEncoderWrapper)
// 录音50帧(每帧60ms,总计3秒)
for (size_t i = 0; i < 50; i++)
{
    // 1. 准备存储原始PCM数据的容器:960个int16_t(对应16000Hz采样率、60ms单声道的采样点数)
    std::vector<int16_t> pcm(960);

    // 2. 调用AudioEs7210模块:读取硬件采集的原始PCM音频数据
    //    注意:read的第二个参数是字节数,所以要乘以sizeof(int16_t)(每个采样点占2字节)
    audio_input_->read(pcm.data(), pcm.size()*sizeof(int16_t), nullptr);

    // 3. 调用WorkTask模块(work_task):把编码任务提交到后台线程执行(避免阻塞主线程)
    work_task->add_task([this,pcm = std::move(pcm)]() mutable {
        // 4. 调用OpusEncoderWrapper模块(opus_encoder_):对PCM数据进行OPUS编码
        opus_encoder_->Encode(std::move(pcm),[this](std::vector<uint8_t>&& opus){
            // 编码完成后的回调函数:把OPUS数据写入SD卡
            // 5. 处理帧长度(大端序):跨平台兼容(不同设备字节序统一)
            uint32_t frame_size = static_cast<uint32_t>(opus.size());
            uint32_t frame_size_big_endian = htonl(frame_size); // 转为大端序

            // 6. 调用SdCard模块:先写帧长度(4字节),再写OPUS数据(规范存储,方便后续解码)
            file_->write_file(reinterpret_cast<const char*>(&frame_size_big_endian), sizeof(frame_size_big_endian));
            file_->write_file(reinterpret_cast<const char*>(opus.data()), opus.size());
        });
    });
}
步骤 3:收尾操作(停止录音 + 关闭文件)
// 延时1秒:等待后台任务把最后几帧OPUS数据写完(核心!避免数据丢失)
vTaskDelay(pdMS_TO_TICKS(1000));
// 调用AudioEs7210模块:停止音频采集
audio_input_->disable();
std::printf("结束说话\n");
// 调用SdCard模块:关闭文件,确保数据刷入SD卡
file_->close();

// 死循环:每秒打印任务列表,监控系统状态(无实际业务作用,仅调试)
while (true)
{
    vTaskDelay(pdMS_TO_TICKS(1000));
    print_all_tasks();
}
四、结果验证
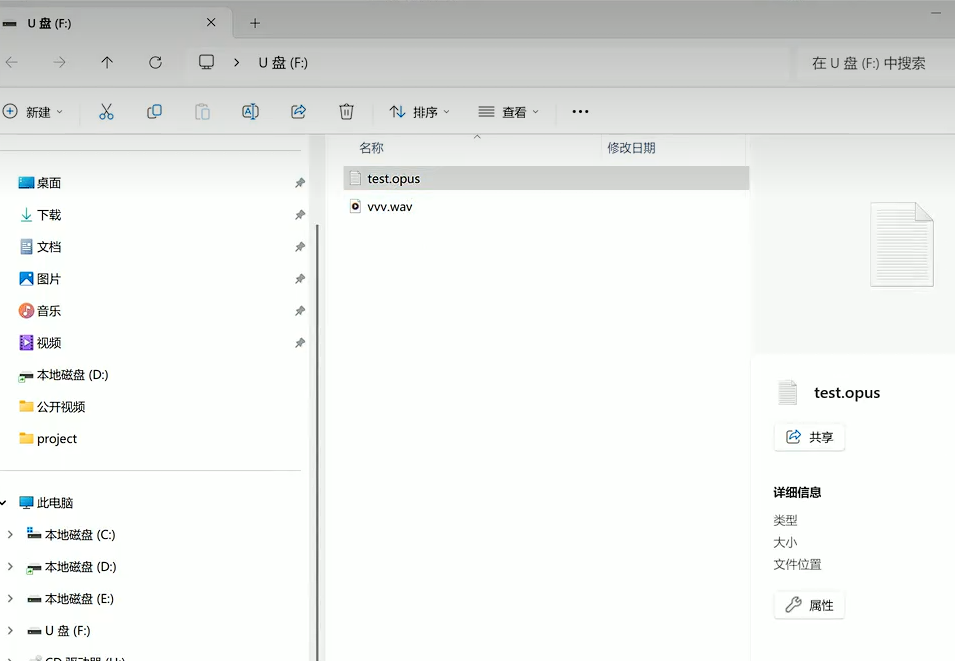
这是保存的二进制录音文件,看起来是乱码。
接下来用之前写的后端程序来解析这个opus格式的文件。
把加载自定义opus文件的代码写回来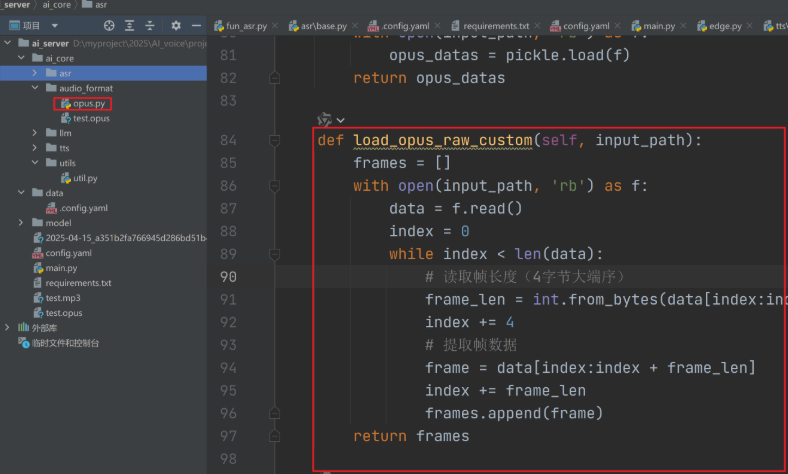
    def save_opus_raw_custom(self, opus_frames, output_path):
        """保存帧数据 + 长度信息"""
        with open(output_path, 'wb') as f:
            for frame in opus_frames:
                # 写入帧长度(4字节大端序) + 帧数据
                f.write(len(frame).to_bytes(4, byteorder='big'))
                f.write(frame)
        print(f"Saved raw opus data to {output_path}")

    def load_opus_raw_custom(self,input_path):
        frames = []
        with open(input_path, 'rb') as f:
            data = f.read()
            index = 0
            while index < len(data):
                # 读取帧长度(4字节大端序)
                frame_len = int.from_bytes(data[index:index + 4], byteorder='big')
                index += 4
                # 提取帧数据
                frame = data[index:index + frame_len]
                index += frame_len
                frames.append(frame)
        return frames
接下里替换main里的方法,测试即可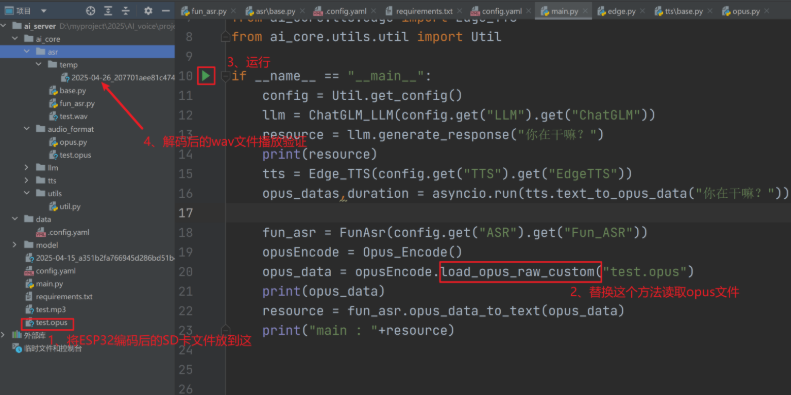
结果是一个能正常播放的音频文件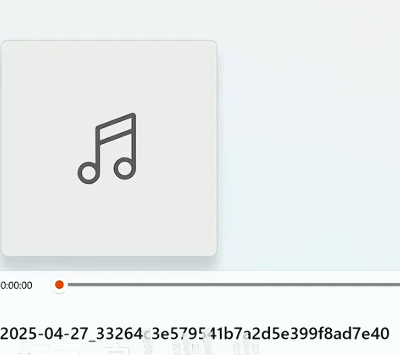
ESP32实现opus解码
代码编写
1.声明
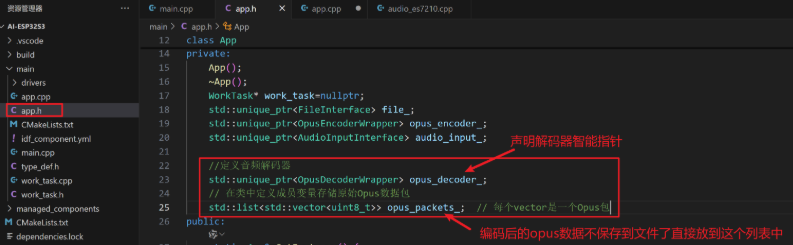
同理添加到App.h中,这里不保存到sd卡中了,直接保存到list里查看
    //定义音频解码器
    std::unique_ptr<OpusDecoderWrapper> opus_decoder_;
    // 在类中定义成员变量存储原始Opus数据包
    std::list<std::vector<uint8_t>> opus_packets_;  // 每个vector是一个Opus包
2.初始化
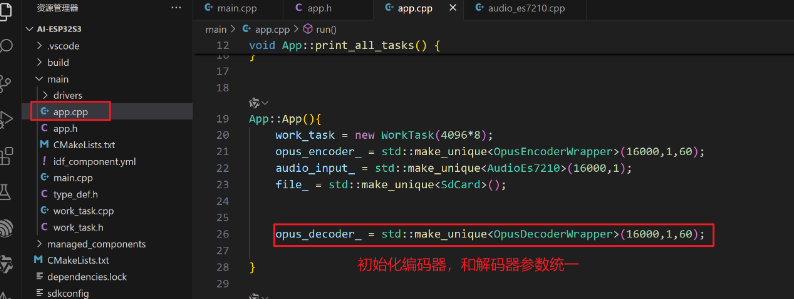
在App.cpp中初始化
opus_decoder_ = std::make_unique<OpusDecoderWrapper>(16000,1,60);
3.具体逻辑代码
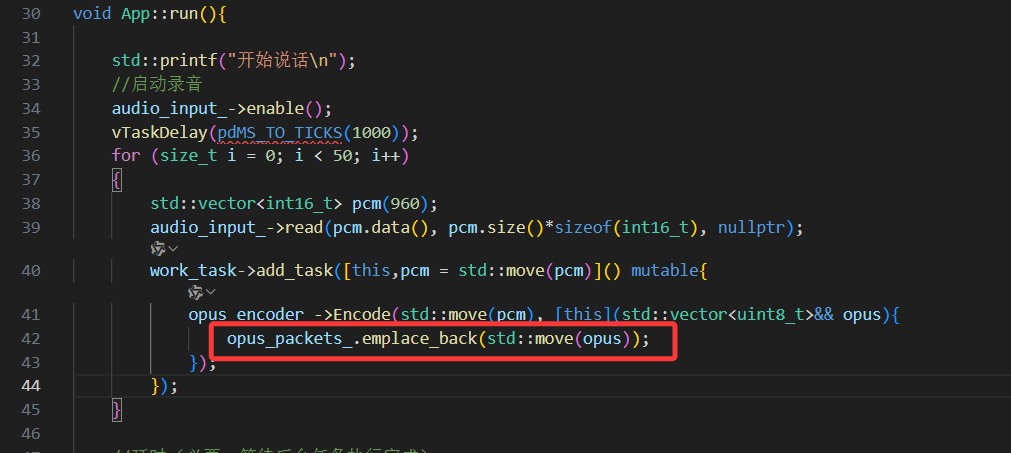
这里不保存到文件,而是将 Opus 数据包放入内存列表
 // 直接保存Opus数据包(不需要帧长度头)
opus_packets_.emplace_back(std::move(opus));
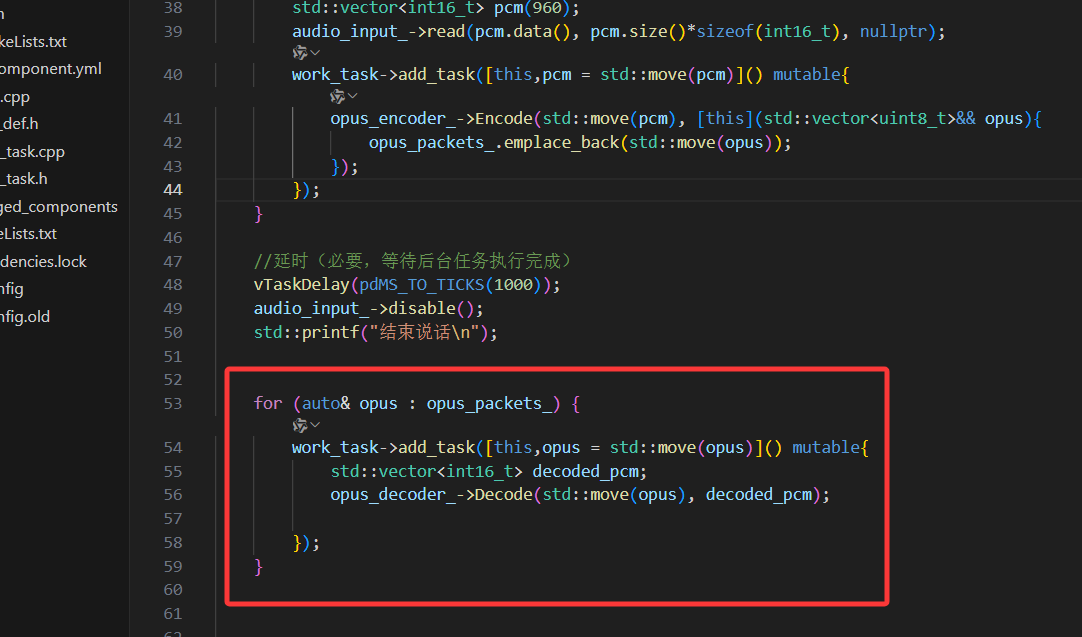
从列表中取出opus帧逐个解析,解码完成后,没有任何写入文件、存入类成员、播放等操作,这里只是示例。
for (auto& opus : opus_packets_) {
        work_task->add_task([this,opus = std::move(opus)]() mutable{
            std::vector<int16_t> decoded_pcm;
            opus_decoder_->Decode(std::move(opus), decoded_pcm);

        });
    }
EPS32实现PCM音频播放
一、添加组件
使用 ES8311 音频 DAC 芯片(搭配功放 + 喇叭)
https://components.espressif.com/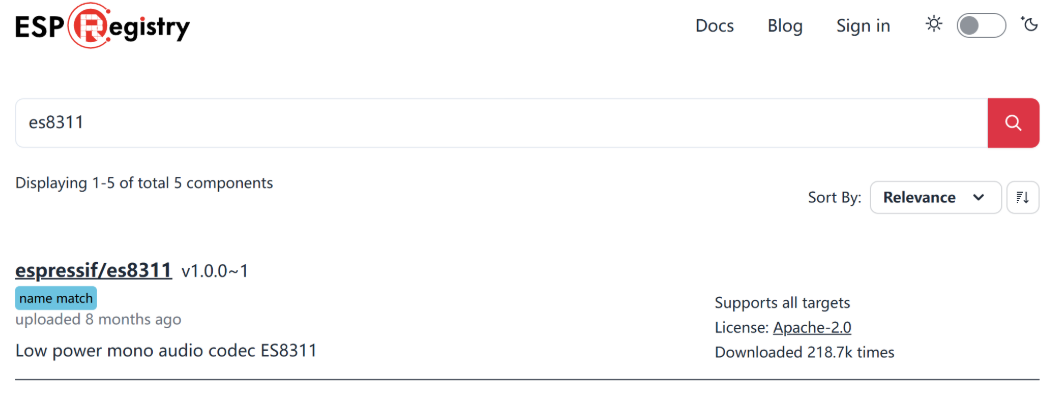
idf.py add-dependency "espressif/es8311^1.0.0~1"

idf.py reconfigure
二、创建文件
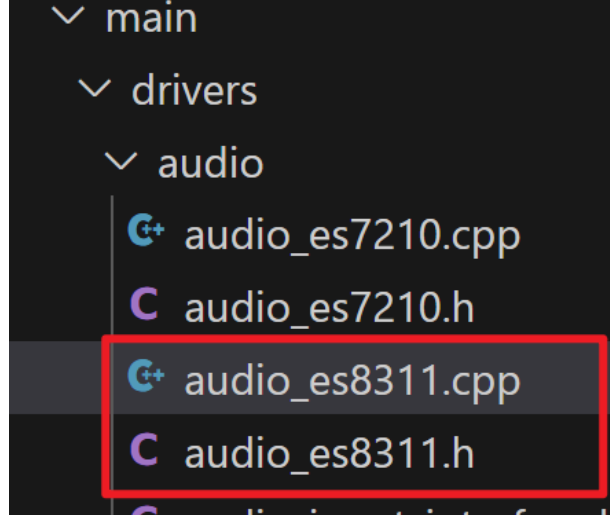
创建相应文件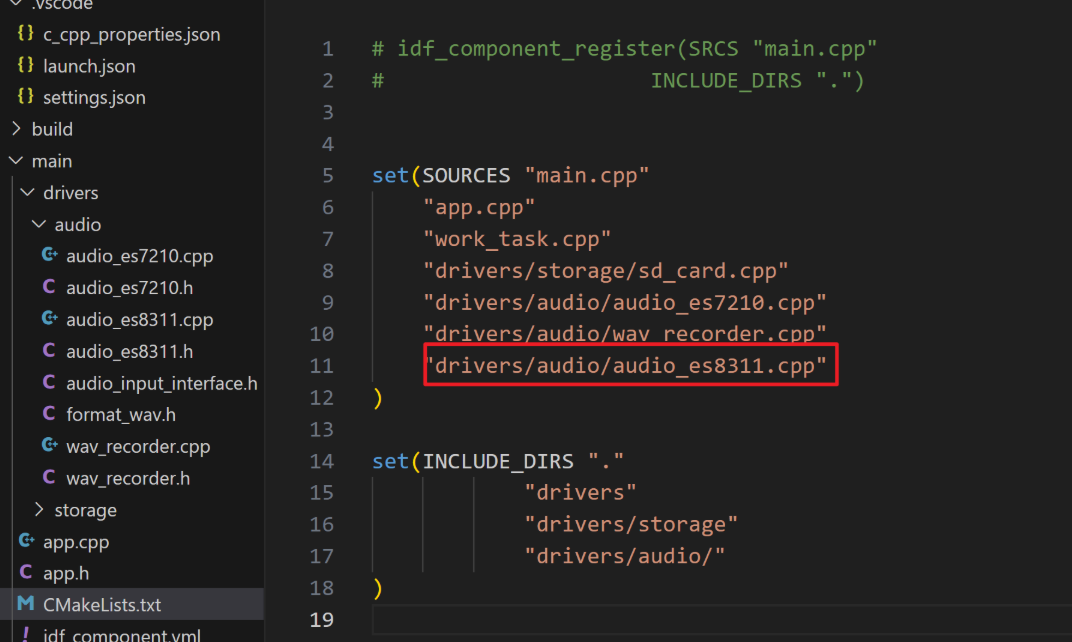
CMakeLists中更改
三、代码编写
audio_esp8211.h
#pragma once
#include <cstdio>
#include "freertos/FreeRTOS.h"
#include "freertos/task.h"
#include <esp_err.h>
#include <driver/i2s_std.h>
#include <driver/i2s_common.h>


#define EXAMPLE_RECV_BUF_SIZE   (2400)
#define EXAMPLE_SAMPLE_RATE     (16000)
#define EXAMPLE_MCLK_MULTIPLE   (256) // If not using 24-bit data width, 256 should be enough
#define EXAMPLE_MCLK_FREQ_HZ    (EXAMPLE_SAMPLE_RATE * EXAMPLE_MCLK_MULTIPLE)
#define EXAMPLE_VOICE_VOLUME    (80)
#define I2S_DO_IO       (GPIO_NUM_45)
#define EXAMPLE_I2S_MCK_IO         GPIO_NUM_38
#define EXAMPLE_I2S_BCK_IO         GPIO_NUM_14
#define EXAMPLE_I2S_WS_IO          GPIO_NUM_13


class AudioES8311
{
private:
    esp_err_t i2s_driver_init(void);
    esp_err_t es8311_codec_init(void);
    i2s_chan_handle_t tx_handle = NULL;
public:
    AudioES8311();
    ~AudioES8311();
    esp_err_t enable();
    esp_err_t disable();
    esp_err_t output(void *data, size_t size);
    void i2s_music();
};
1.定义音频相关通用参数(采样率 16000Hz、音量 80、硬件管脚等),适配 ES8311 硬件接线和音频播放需求;
2.封装AudioES8311类,声明 I2S 驱动 / ES8311 芯片初始化的私有方法,以及使能、禁用、音频输出等公有接口,简化外部对音频播放硬件的调用。
audio_esp8211.cpp
#include "audio_es8311.h"
#include <esp_err.h>
#include <es8311.h>
#include <esp_check.h>

static const char *TAG = "i2s_es8311";
#define GPIO_OUTPUT_IO    GPIO_NUM_18


esp_err_t AudioES8311::enable(){
    return i2s_channel_enable(tx_handle);
}

esp_err_t AudioES8311::disable(){
    return i2s_channel_disable(tx_handle);
}

esp_err_t AudioES8311::output(void *data, size_t size){
   return i2s_channel_write(tx_handle, data,size, nullptr, portMAX_DELAY);
}
AudioES8311::AudioES8311()
{
    gpio_config_t io_conf = {};
    io_conf.intr_type = GPIO_INTR_DISABLE;
    io_conf.mode = GPIO_MODE_OUTPUT;
    io_conf.pin_bit_mask = ((1ULL<<GPIO_OUTPUT_IO));
    io_conf.pull_down_en = GPIO_PULLDOWN_DISABLE;
    io_conf.pull_up_en = GPIO_PULLUP_DISABLE;
    gpio_config(&io_conf);
    // 设置PA0(GPIO0)为高电平
    gpio_set_level(GPIO_OUTPUT_IO, 1);
    i2s_driver_init();
    es8311_codec_init();
}

AudioES8311::~AudioES8311()
{
}


esp_err_t AudioES8311::es8311_codec_init(void)
{

    /* 初始化es8311芯片 */
    es8311_handle_t es_handle = es8311_create(I2C_NUM_0, ES8311_ADDRRES_0);
    ESP_RETURN_ON_FALSE(es_handle, ESP_FAIL, TAG, "es8311 create failed");
    const es8311_clock_config_t es_clk = {
        .mclk_inverted = false,
        .sclk_inverted = false,
        .mclk_from_mclk_pin = true,
        .mclk_frequency = EXAMPLE_MCLK_FREQ_HZ,
        .sample_frequency = EXAMPLE_SAMPLE_RATE
    };

    ESP_ERROR_CHECK(es8311_init(es_handle, &es_clk, ES8311_RESOLUTION_16, ES8311_RESOLUTION_16));
    ESP_RETURN_ON_ERROR(es8311_sample_frequency_config(es_handle, EXAMPLE_SAMPLE_RATE * EXAMPLE_MCLK_MULTIPLE, EXAMPLE_SAMPLE_RATE), TAG, "set es8311 sample frequency failed");
    ESP_RETURN_ON_ERROR(es8311_voice_volume_set(es_handle, EXAMPLE_VOICE_VOLUME, NULL), TAG, "set es8311 volume failed");
    ESP_RETURN_ON_ERROR(es8311_microphone_config(es_handle, false), TAG, "set es8311 microphone failed");

    return ESP_OK;
}


esp_err_t AudioES8311::i2s_driver_init(void)
{
    /* 配置i2s发送通道 */
    i2s_chan_config_t chan_cfg = I2S_CHANNEL_DEFAULT_CONFIG(I2S_NUM_0, I2S_ROLE_MASTER);
    chan_cfg.auto_clear = true; // Auto clear the legacy data in the DMA buffer
    ESP_ERROR_CHECK(i2s_new_channel(&chan_cfg, &tx_handle, NULL));
    /* 初始化i2s为std模式 并打开i2s发送通道 */
    i2s_std_config_t std_cfg = {
        .clk_cfg ={
            .sample_rate_hz = 16000,
            .clk_src = I2S_CLK_SRC_DEFAULT,
            .mclk_multiple = I2S_MCLK_MULTIPLE_384
        },
        .slot_cfg = I2S_STD_PHILIPS_SLOT_DEFAULT_CONFIG(I2S_DATA_BIT_WIDTH_16BIT, I2S_SLOT_MODE_MONO),
        .gpio_cfg = {
            .mclk = EXAMPLE_I2S_MCK_IO,
            .bclk = EXAMPLE_I2S_BCK_IO,
            .ws   = EXAMPLE_I2S_WS_IO,
            .dout = I2S_DO_IO, // ES7210 only has ADC capability
            .din  = GPIO_NUM_NC ,
            .invert_flags = {
                .mclk_inv = 0,
                .bclk_inv = 0,
                .ws_inv = 0,
            },
        },
    };

    ESP_ERROR_CHECK(i2s_channel_init_std_mode(tx_handle, &std_cfg));
    ESP_ERROR_CHECK(i2s_channel_enable(tx_handle));

    return ESP_OK;
}
1.实现头文件声明的接口:enable()/disable()控制 I2S 通道启停,output()通过 I2S 写入 PCM 数据实现音频播放;
2.构造函数初始化硬件:配置功放使能脚(IO18)为高电平,初始化 I2S 驱动(适配 16000Hz 单声道输出)和 ES8311 芯片(设置采样率、音量,关闭麦克风);
3.封装底层驱动逻辑:将 ESP-IDF 的 I2S/ES8311 官方 API 封装为类方法,完成音频播放硬件的底层配置。
四、测试编写
在app.h中添加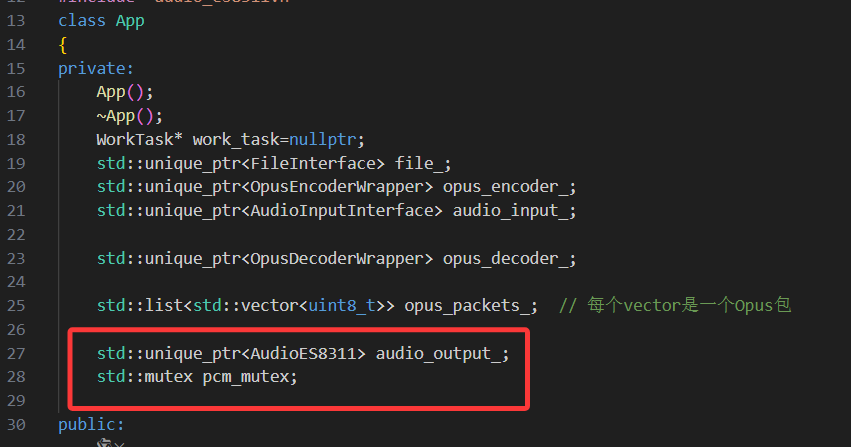
    std::unique_ptr<AudioES8311> audio_output_;
    std::mutex pcm_mutex;
work_task:后台任务调度器,执行编解码等耗时操作;
audio_input_/audio_output_:音频采集(ES7210)、播放(ES8311)硬件封装;
opus_encoder_/opus_decoder_:OPUS 音频编解码工具;
opus_packets_:内存存储编码后的 OPUS 数据包;
file_:SD 卡文件操作(未实际写入);
pcm_mutex:播放时的互斥锁,解决硬件资源竞争。
app.cpp中
初始化智能指针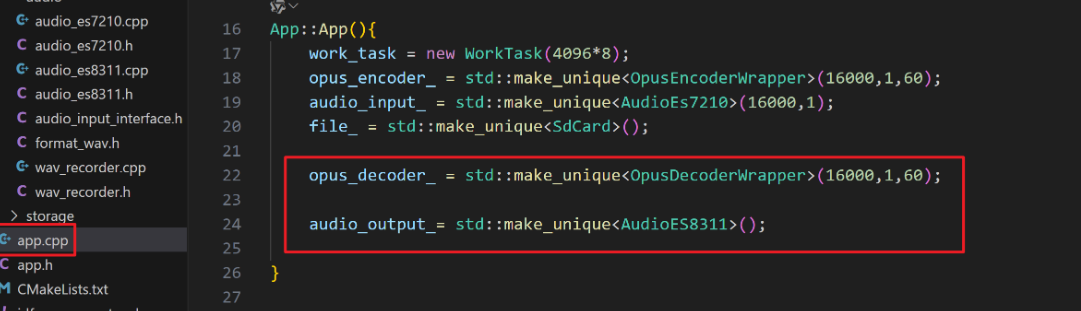
    opus_decoder_ = std::make_unique<OpusDecoderWrapper>(16000,1,60);

    audio_output_= std::make_unique<AudioES8311>();
主要代码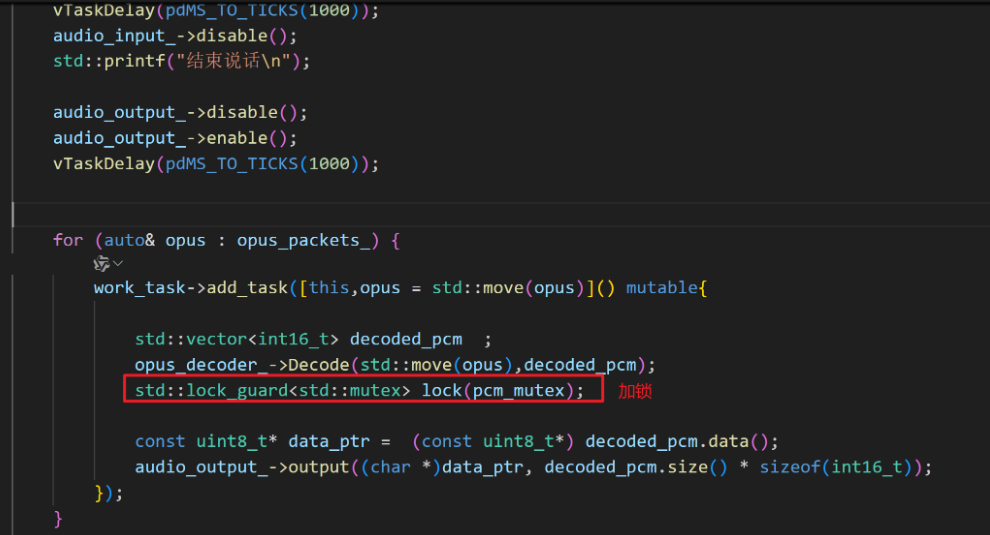
audio_output_->disable();
audio_output_->enable();
vTaskDelay(pdMS_TO_TICKS(1000));


for (auto& opus : opus_packets_) {
    work_task->add_task([this,opus = std::move(opus)]() mutable{

        std::vector<int16_t> decoded_pcm  ;
        opus_decoder_->Decode(std::move(opus),decoded_pcm);
        std::lock_guard<std::mutex> lock(pcm_mutex);

        const uint8_t* data_ptr =  (const uint8_t*) decoded_pcm.data();
        audio_output_->output((char *)data_ptr, decoded_pcm.size() * sizeof(int16_t));
    });
}
这段代码完成「内存中 OPUS 数据包→解码为 PCM→硬件播放」的核心流程,通过后台任务异步解码并加锁保证播放线程安全。

有“AI”的1024 = 2048,欢迎大家加入2048 AI社区
更多推荐


 13
13 0
0- 0


 已为社区贡献12条内容

所有评论(0)