Spring AI 入门
·
环境
- JDK:21, 最低要求是17
- Maven: 3.9.9
- IDE: IntelliJ 2023.3
- Spring Boot: 3.5.6, 要求
3.4.x或者3.5.x - 操作系统:windows 10
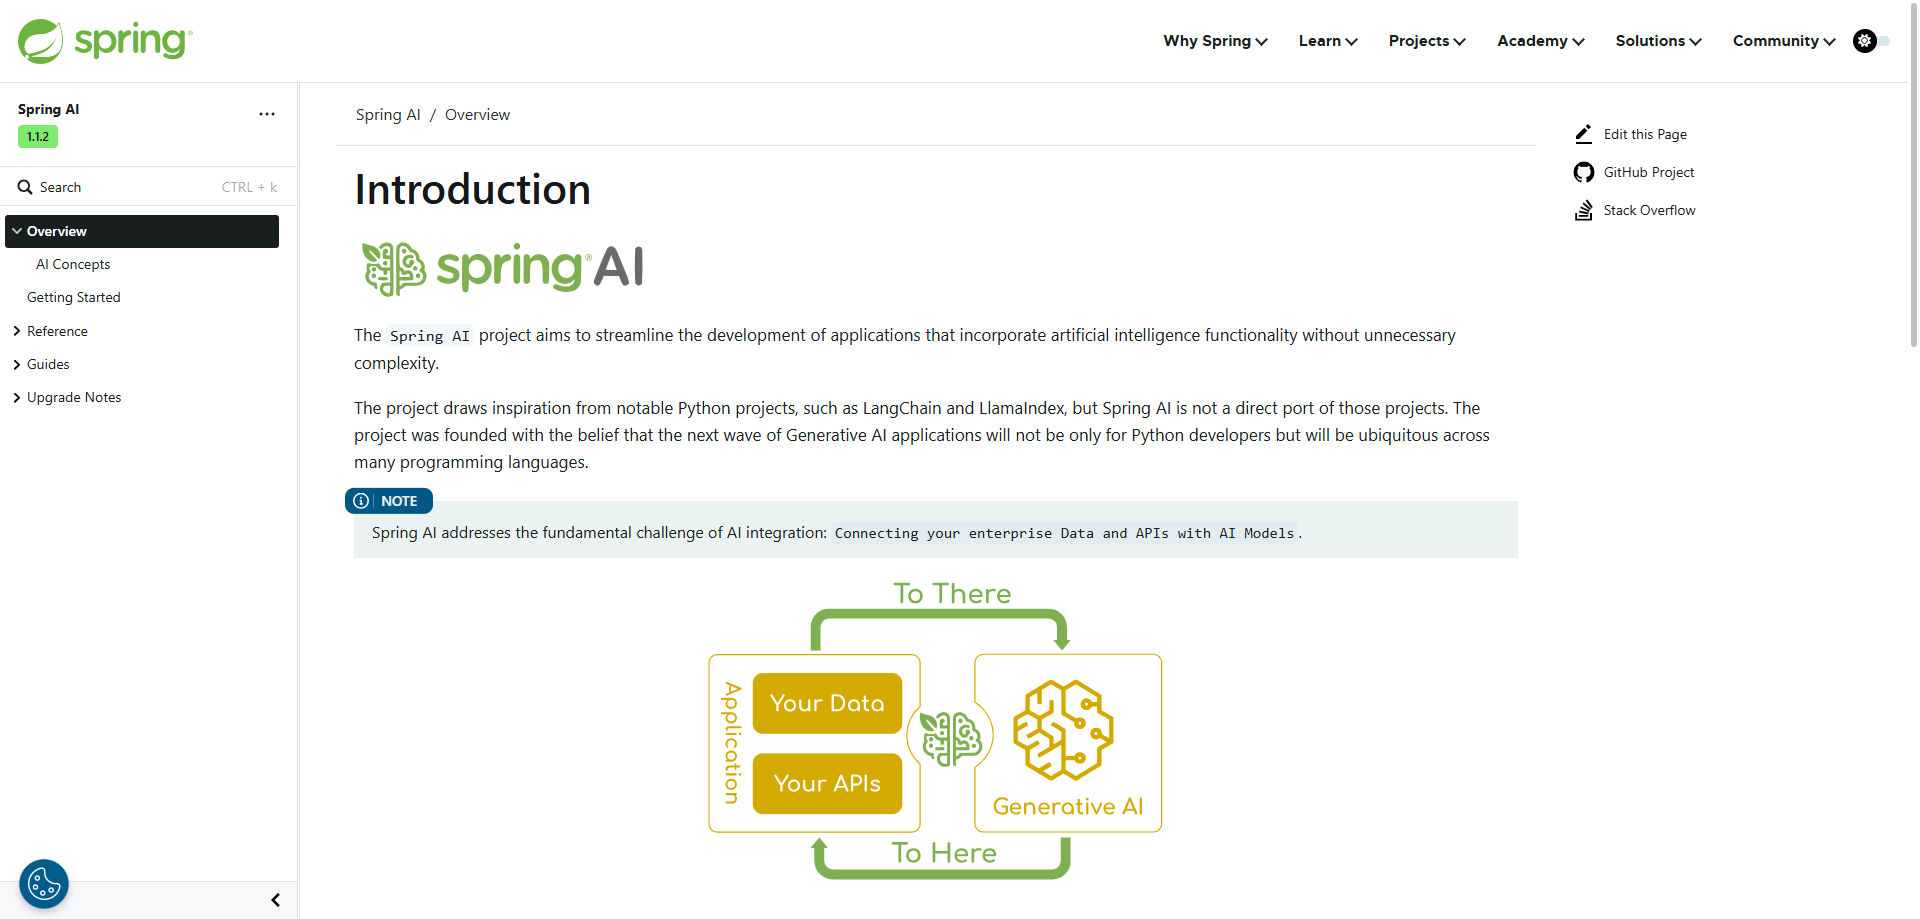
文档
准备
创建项目
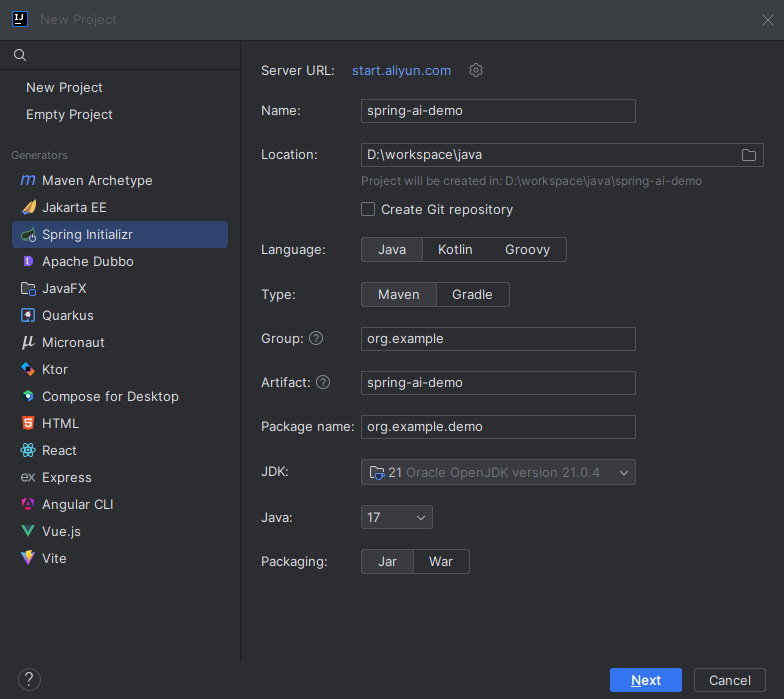
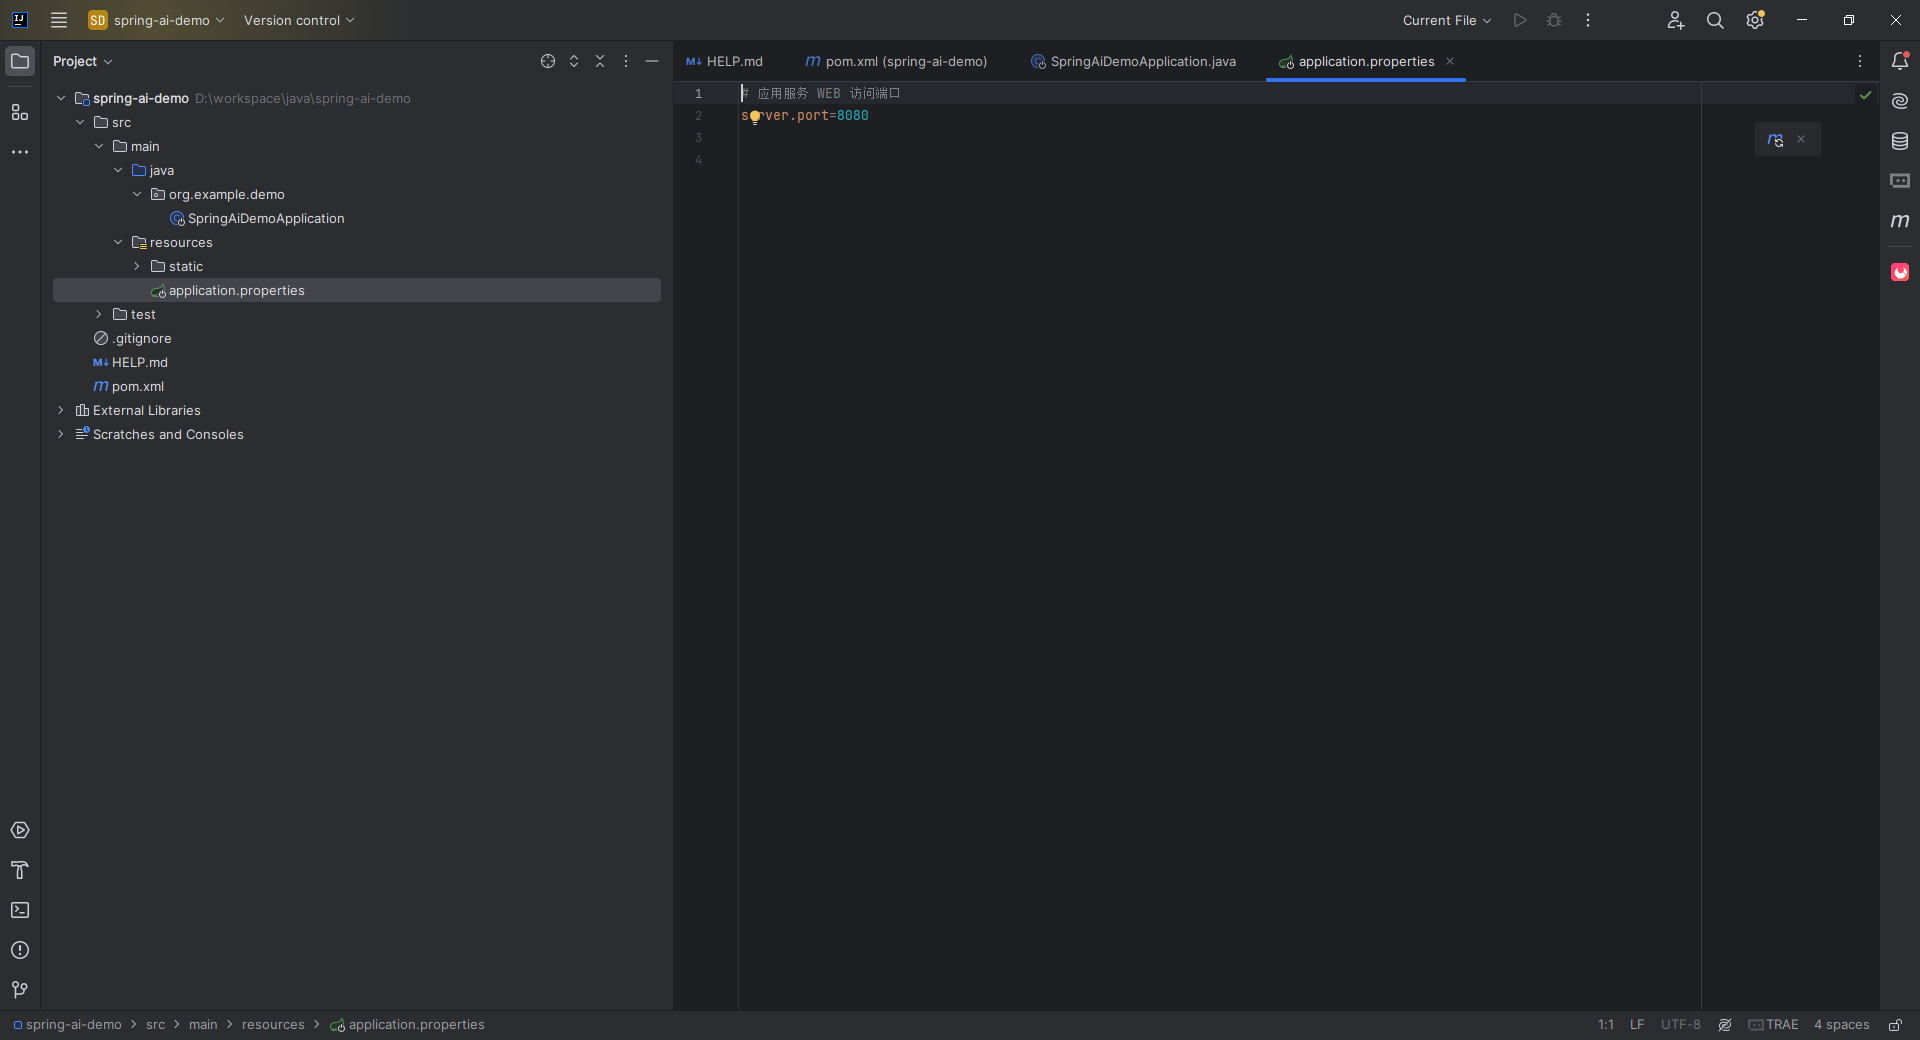
创建一个Spring Boot 项目,这里仅依赖了web-starter
获取ApiKey
看Spring AI 官网支持的模型分类
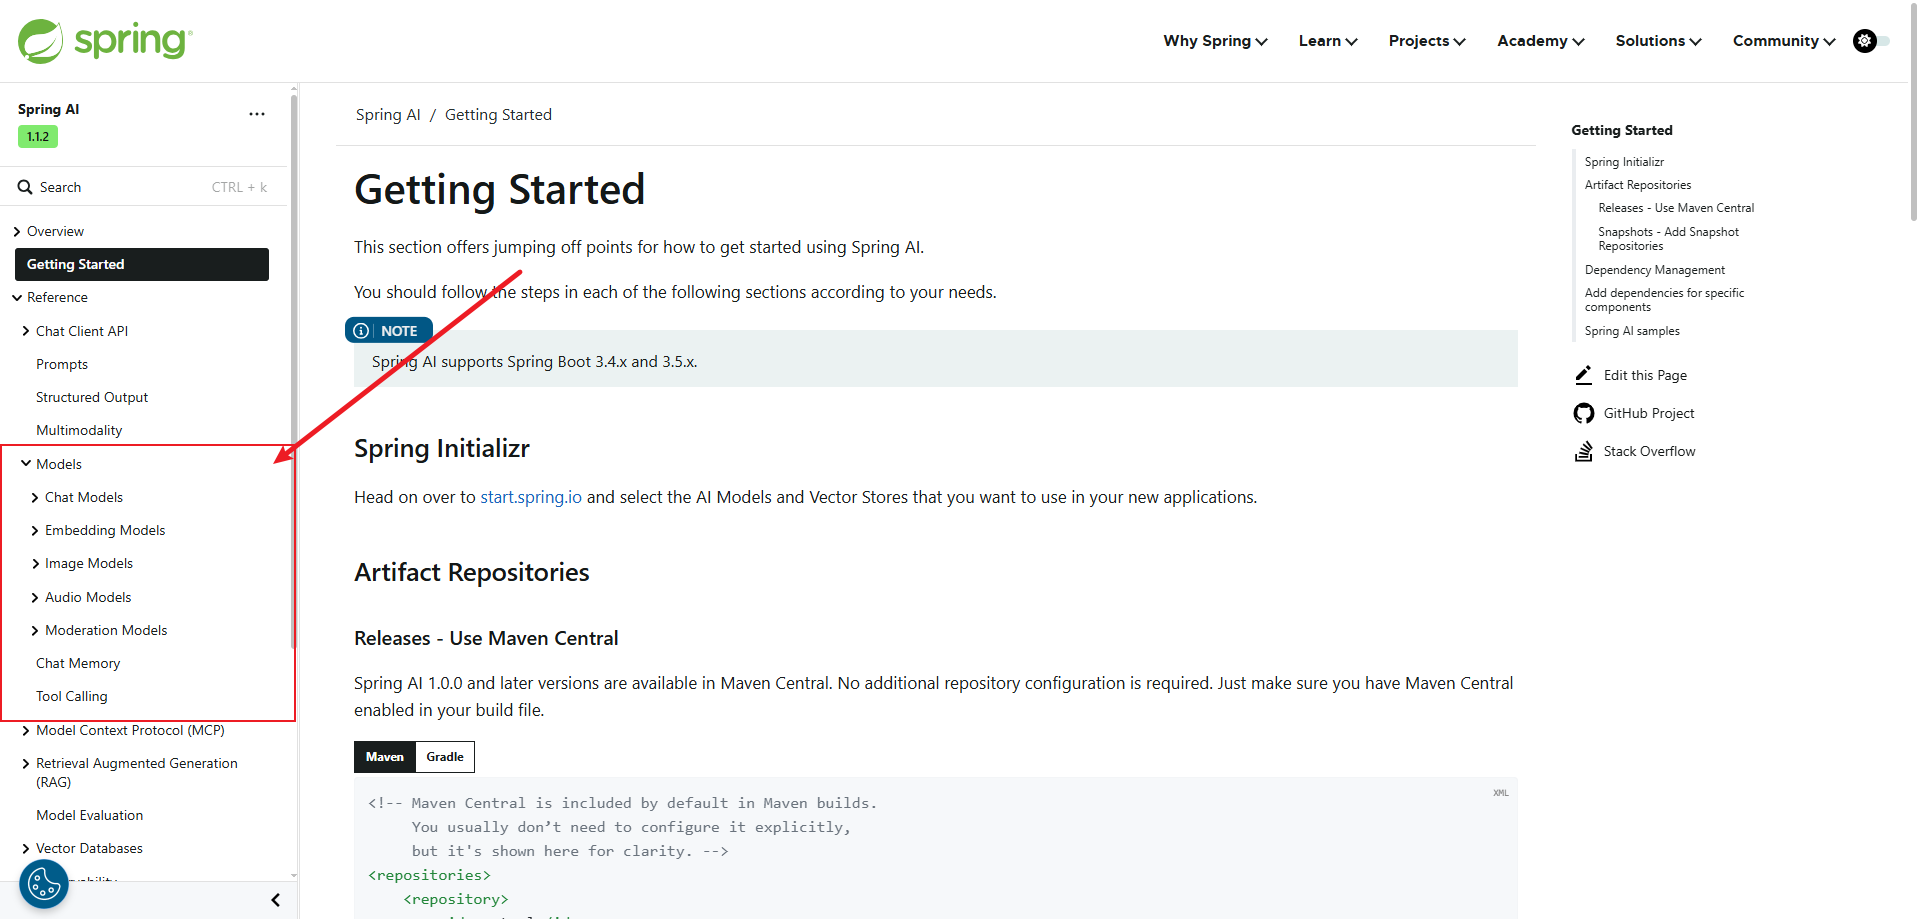
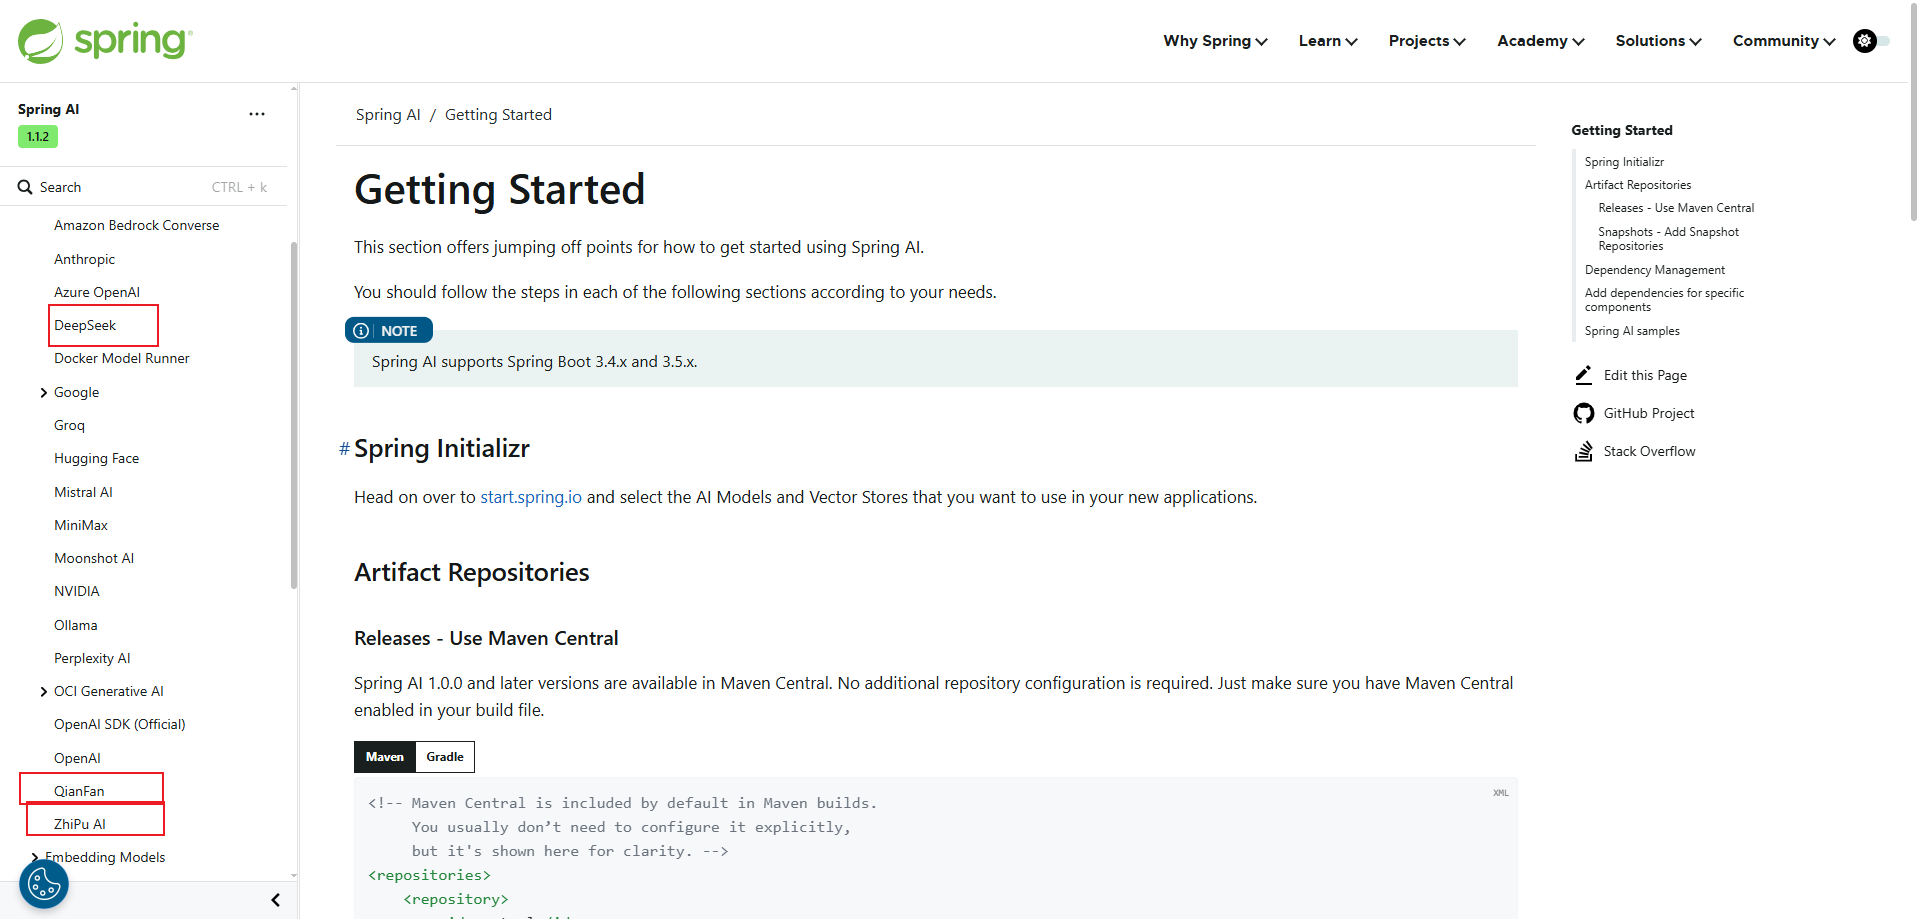
这里看到了DeepSeek、智谱、千帆
暂且看着三个,不用翻墙。
DeepSeek
智谱AI
千帆
引入依赖
这里以智谱为例子。因为有免费额度。我创建一个apikey。
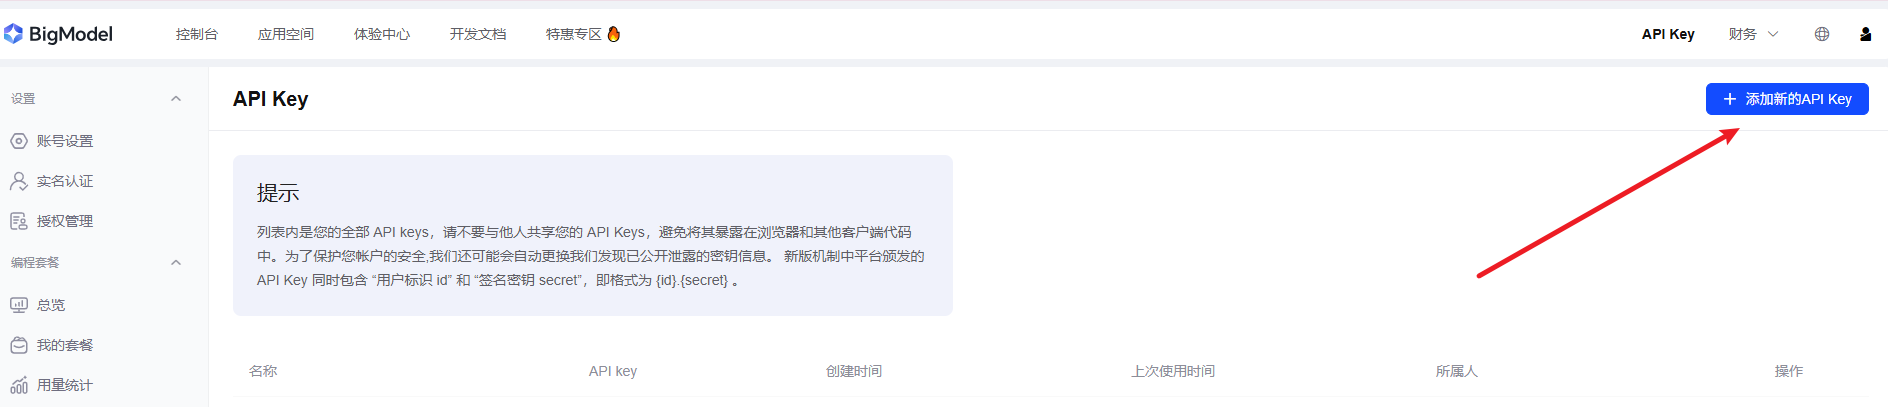

智谱AI相关依赖文档
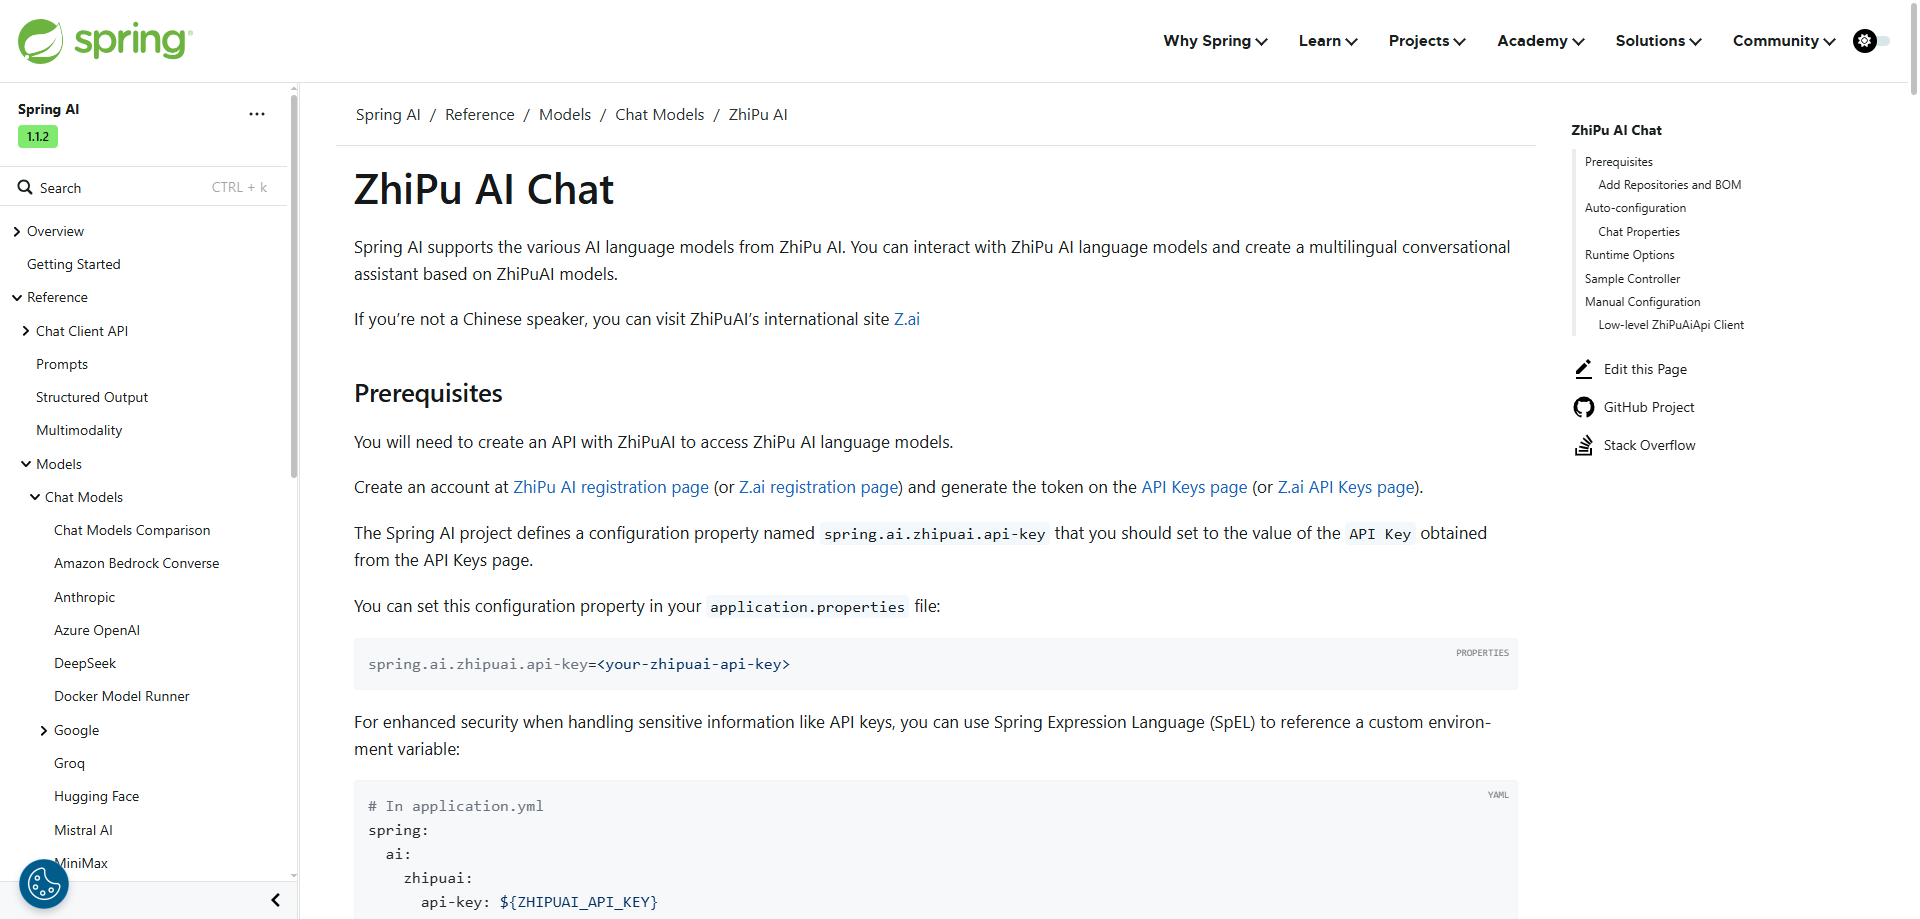
Maven依赖
<spring-boot.version>3.5.6</spring-boot.version>
<spring-ai.version>1.0.3</spring-ai.version>
<dependencies>
	<dependency>
	    <groupId>org.springframework.ai</groupId>
	    <artifactId>spring-ai-starter-model-zhipuai</artifactId>
	</dependency>
</dependencies>
<dependencyManagement>
		<dependencies>
			<dependency>
				<groupId>org.springframework.boot</groupId>
				<artifactId>spring-boot-dependencies</artifactId>
				<version>${spring-boot.version}</version>
				<type>pom</type>
				<scope>import</scope>
			</dependency>
			<dependency>
				<groupId>org.springframework.ai</groupId>
				<artifactId>spring-ai-bom</artifactId>
				<version>${spring-ai.version}</version>
				<type>pom</type>
				<scope>import</scope>
			</dependency>
		</dependencies>
	</dependencyManagement>
配置
从上面得到的api-key配置到application.yml中
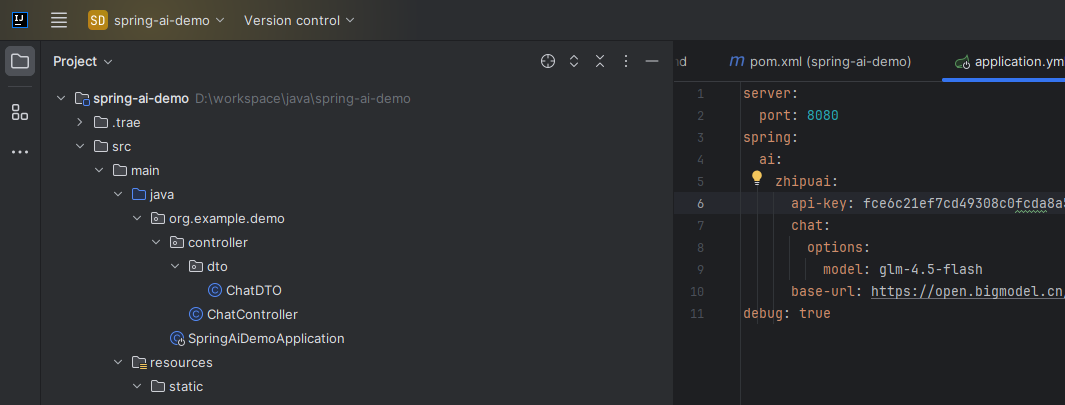
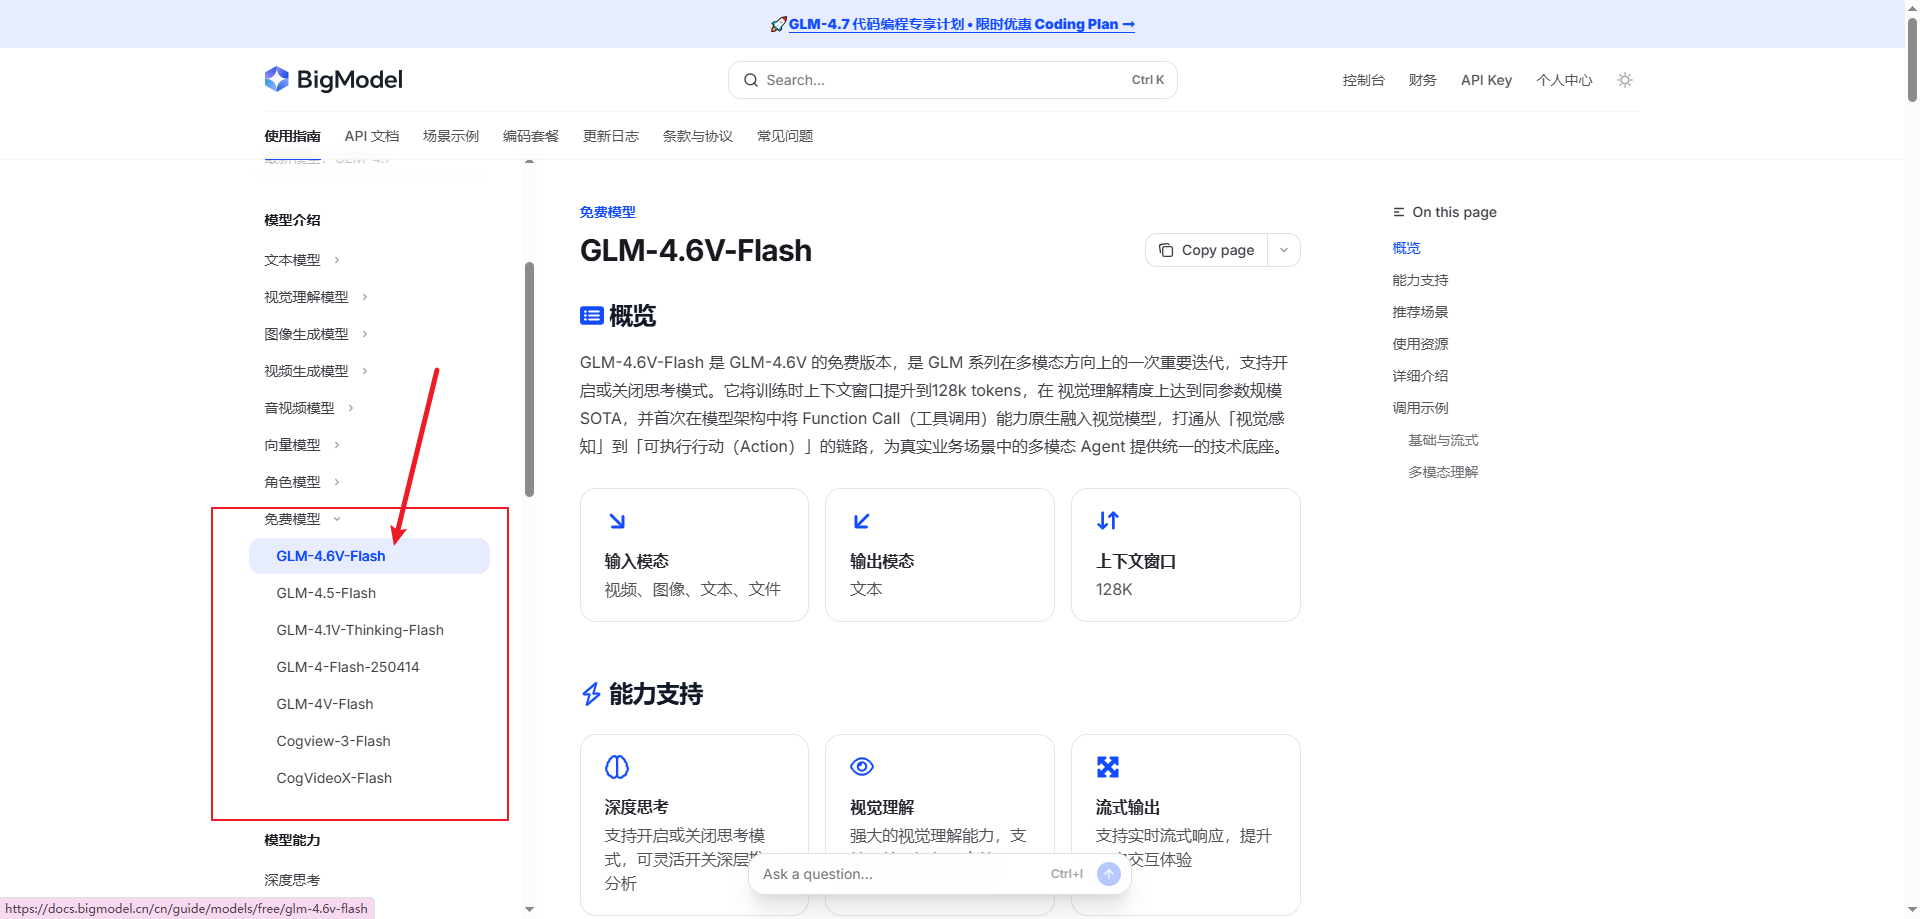
使用哪个模型,这里一一个有免费额度的模型为例子。
具体可以查看智谱AI大模型开发文档
这里使用glm-4.5-flash
编写代码
这里直接注入对应模型即可
package org.example.demo.controller;

import jakarta.annotation.Resource;
import org.example.demo.controller.dto.ChatDTO;
import org.springframework.ai.zhipuai.ZhiPuAiChatModel;
import org.springframework.web.bind.annotation.PostMapping;
import org.springframework.web.bind.annotation.RequestBody;
import org.springframework.web.bind.annotation.RequestMapping;
import org.springframework.web.bind.annotation.RestController;

import java.util.Objects;

@RestController
@RequestMapping("/chat")
public class ChatController {
    @Resource
    private ZhiPuAiChatModel zhiPuAiChatModel;

    @PostMapping("/zhi-pu")
    public String zhiPu(@RequestBody ChatDTO chatDTO) {
        String message = chatDTO.getMessage();
        if (Objects.isNull(message) || message.isEmpty()) {
            return "消息不能为空";
        }
        return zhiPuAiChatModel.call(message);
    }
}
package org.example.demo.controller.dto;

import lombok.Getter;
import lombok.Setter;

@Getter
@Setter
public class ChatDTO {
    private String message;
}
编写测试页面
可以使用postman或者apifox,也可以自己写个页面
这里用trae写一个页面。
<!DOCTYPE html>
<html lang="zh-CN">
<head>
    <meta charset="UTF-8">
    <meta name="viewport" content="width=device-width, initial-scale=1.0">
    <title>Spring AI 聊天演示</title>
    <style>
        * {
            margin: 0;
            padding: 0;
            box-sizing: border-box;
        }

        body {
            font-family: -apple-system, BlinkMacSystemFont, 'Segoe UI', Roboto, 'Helvetica Neue', Arial, sans-serif;
            background-color: #f0f2f5;
            height: 100vh;
            display: flex;
            justify-content: center;
            align-items: center;
        }

        .chat-container {
            width: 100%;
            max-width: 800px;
            height: 90vh;
            background-color: white;
            border-radius: 10px;
            box-shadow: 0 2px 10px rgba(0, 0, 0, 0.1);
            display: flex;
            flex-direction: column;
            overflow: hidden;
        }

        .chat-header {
            background-color: #409EFF;
            color: white;
            padding: 15px 20px;
            font-size: 18px;
            font-weight: 600;
            border-bottom: 1px solid #e8e8e8;
        }

        .chat-messages {
            flex: 1;
            padding: 20px;
            overflow-y: auto;
            background-color: #fafafa;
        }

        .message {
            margin-bottom: 15px;
            display: flex;
            align-items: flex-start;
        }

        .message.user {
            justify-content: flex-end;
        }

        .message.ai {
            justify-content: flex-start;
        }

        .message-content {
            max-width: 70%;
            padding: 12px 16px;
            border-radius: 18px;
            font-size: 14px;
            line-height: 1.4;
        }

        .user .message-content {
            background-color: #409EFF;
            color: white;
            border-bottom-right-radius: 4px;
        }

        .ai .message-content {
            background-color: white;
            color: #333;
            border: 1px solid #e8e8e8;
            border-bottom-left-radius: 4px;
        }

        .message-loading {
            background-color: white;
            color: #333;
            border: 1px solid #e8e8e8;
            border-radius: 18px;
            padding: 12px 16px;
            font-size: 14px;
            display: inline-block;
        }

        .loading-dots {
            display: inline-block;
            width: 18px;
            height: 18px;
            position: relative;
        }

        .loading-dots::after {
            content: '';
            display: block;
            width: 6px;
            height: 6px;
            background-color: #909399;
            border-radius: 50%;
            position: absolute;
            animation: loading 1.4s infinite ease-in-out both;
        }

        .loading-dots::before {
            content: '';
            display: block;
            width: 6px;
            height: 6px;
            background-color: #909399;
            border-radius: 50%;
            position: absolute;
            left: -8px;
            animation: loading 1.4s infinite ease-in-out both -0.2s;
        }

        .loading-dots span {
            display: block;
            width: 6px;
            height: 6px;
            background-color: #909399;
            border-radius: 50%;
            position: absolute;
            right: -8px;
            animation: loading 1.4s infinite ease-in-out both -0.4s;
        }

        @keyframes loading {
            0%, 80%, 100% {
                transform: scale(0);
            }
            40% {
                transform: scale(1);
            }
        }

        .chat-input-area {
            padding: 15px 20px;
            background-color: white;
            border-top: 1px solid #e8e8e8;
            display: flex;
            align-items: flex-end;
            gap: 10px;
        }

        #messageInput {
            flex: 1;
            border: 1px solid #dcdfe6;
            border-radius: 20px;
            padding: 12px 16px;
            font-size: 14px;
            resize: none;
            min-height: 40px;
            max-height: 120px;
            outline: none;
            transition: border-color 0.2s;
        }

        #messageInput:focus {
            border-color: #409EFF;
        }

        #sendButton {
            background-color: #409EFF;
            color: white;
            border: none;
            border-radius: 50%;
            width: 40px;
            height: 40px;
            font-size: 18px;
            cursor: pointer;
            display: flex;
            align-items: center;
            justify-content: center;
            transition: background-color 0.2s;
            flex-shrink: 0;
        }

        #sendButton:hover {
            background-color: #66b1ff;
        }

        #sendButton:active {
            background-color: #3a8ee6;
        }

        #sendButton:disabled {
            background-color: #c0c4cc;
            cursor: not-allowed;
        }

        @media (max-width: 600px) {
            .chat-container {
                height: 100vh;
                border-radius: 0;
            }

            .message-content {
                max-width: 85%;
            }
        }
    </style>
</head>
<body>
    <div class="chat-container">
        <div class="chat-header">
            Spring AI 聊天演示
        </div>
        <div class="chat-messages" id="chatMessages">
            <div class="message ai">
                <div class="message-content">
                    你好!有什么可以帮助你的吗?
                </div>
            </div>
        </div>
        <div class="chat-input-area">
            <textarea id="messageInput" placeholder="输入消息..." rows="1"></textarea>
            <button id="sendButton">➤</button>
        </div>
    </div>

    <script>
        const chatMessages = document.getElementById('chatMessages');
        const messageInput = document.getElementById('messageInput');
        const sendButton = document.getElementById('sendButton');

        // 自动调整输入框高度
        messageInput.addEventListener('input', function() {
            this.style.height = 'auto';
            this.style.height = Math.min(this.scrollHeight, 120) + 'px';
        });

        // 发送消息
        async function sendMessage() {
            const message = messageInput.value.trim();
            if (!message) return;

            // 显示用户消息
            addMessage(message, 'user');
            messageInput.value = '';
            messageInput.style.height = 'auto';
            sendButton.disabled = true;

            // 显示加载状态
            const loadingElement = addLoading();

            try {
                // 调用后端API
                const response = await fetch('/chat/zhi-pu', {
                    method: 'POST',
                    headers: {
                        'Content-Type': 'application/json'
                    },
                    body: JSON.stringify({ message: message })
                });

                const result = await response.text();

                // 移除加载状态
                loadingElement.remove();

                // 显示AI回复
                addMessage(result, 'ai');
            } catch (error) {
                console.error('发送消息失败:', error);
                loadingElement.remove();
                addMessage('发送消息失败,请重试', 'ai');
            } finally {
                sendButton.disabled = false;
            }
        }

        // 添加消息到聊天区域
        function addMessage(content, type) {
            const messageDiv = document.createElement('div');
            messageDiv.className = `message ${type}`;

            const contentDiv = document.createElement('div');
            contentDiv.className = 'message-content';
            contentDiv.textContent = content;

            messageDiv.appendChild(contentDiv);
            chatMessages.appendChild(messageDiv);

            // 滚动到底部
            chatMessages.scrollTop = chatMessages.scrollHeight;
        }

        // 添加加载状态
        function addLoading() {
            const messageDiv = document.createElement('div');
            messageDiv.className = 'message ai';

            const contentDiv = document.createElement('div');
            contentDiv.className = 'message-loading';

            const loadingDots = document.createElement('span');
            loadingDots.className = 'loading-dots';
            loadingDots.innerHTML = '<span></span>';

            contentDiv.textContent = '正在思考... ';
            contentDiv.appendChild(loadingDots);

            messageDiv.appendChild(contentDiv);
            chatMessages.appendChild(messageDiv);

            // 滚动到底部
            chatMessages.scrollTop = chatMessages.scrollHeight;

            return messageDiv;
        }

        // 发送按钮点击事件
        sendButton.addEventListener('click', sendMessage);

        // 回车键发送消息
        messageInput.addEventListener('keydown', function(event) {
            if (event.key === 'Enter' && !event.shiftKey) {
                event.preventDefault();
                sendMessage();
            }
        });
    </script>
</body>
</html>
展示
访问http://localhost:8080
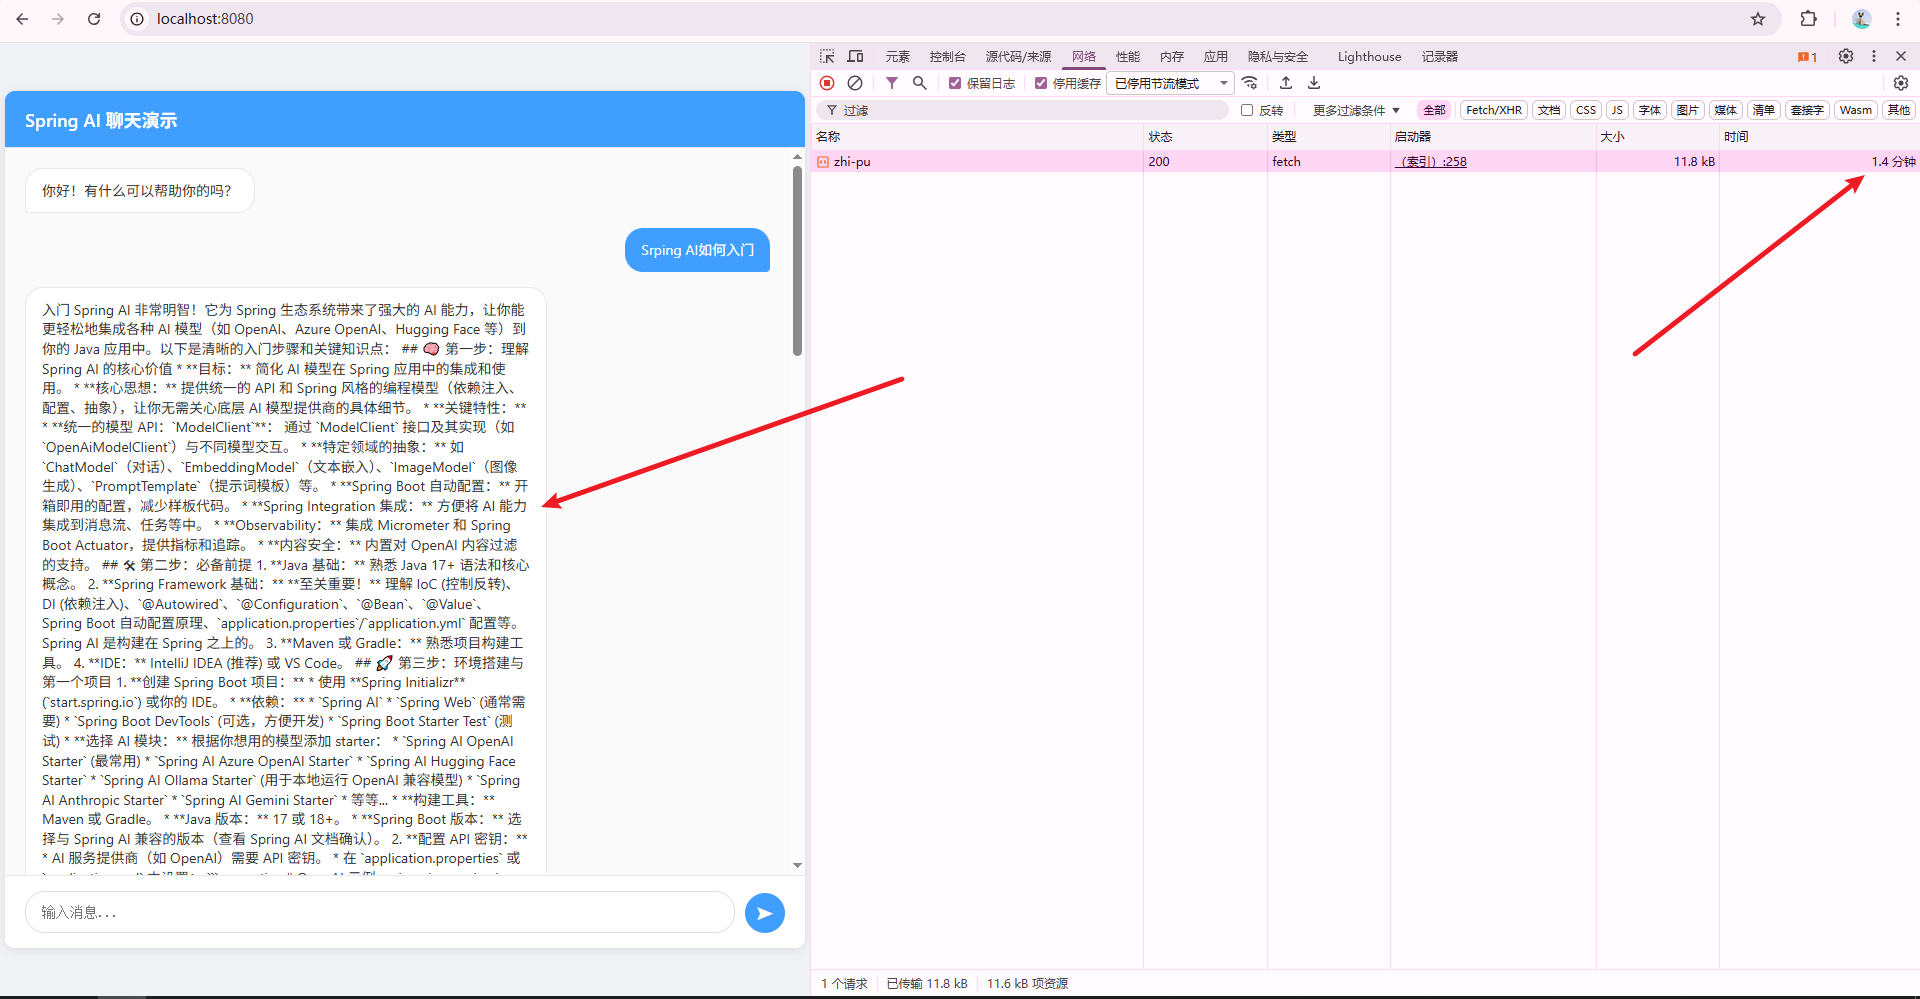
时间有点长,可以去掉深度思考模式。
说明
着仅仅是例子,实际上不会只用一家AI,一家AI也可能有多个ApiKey。或者托管用户的ApiKey。
所以会有多个实例。
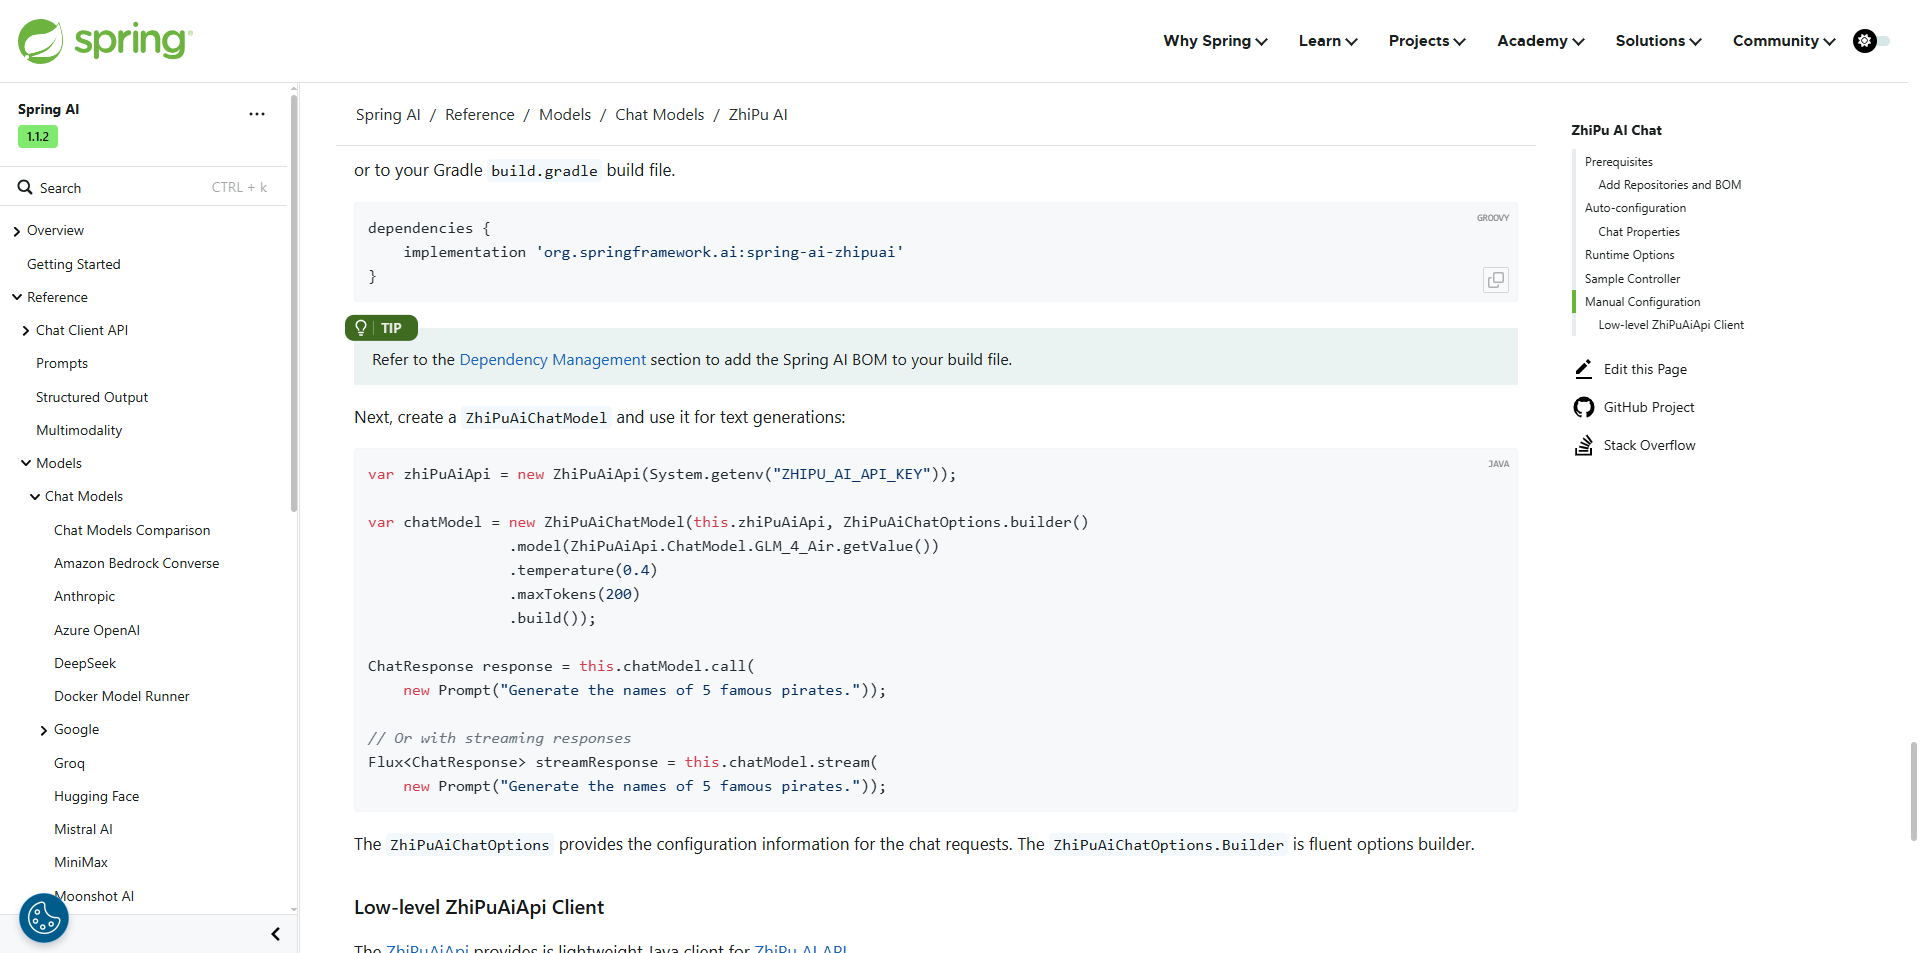
Spring AI也支持自定义实例。
比如智谱AI文档
支持手动配置,自定义实例。

有“AI”的1024 = 2048,欢迎大家加入2048 AI社区
更多推荐
 18
18 0
0- 0


 已为社区贡献2条内容

所有评论(0)