Elastic AI agent builder 介绍(二)
本文详细介绍了Elastic AI Agent Builder的API使用方法,包括工具的增删改查(GET、PUT、DELETE)、代理管理(创建、更新、删除)、对话功能(发起聊天、获取对话记录)以及MCP服务器和A2A协议的通信方式。文章提供了具体API请求示例,如获取所有工具、创建代理、执行聊天对话等操作,并强调需要根据实际环境配置KIBANA_URL和API_KEY。这些API操作既能通过命
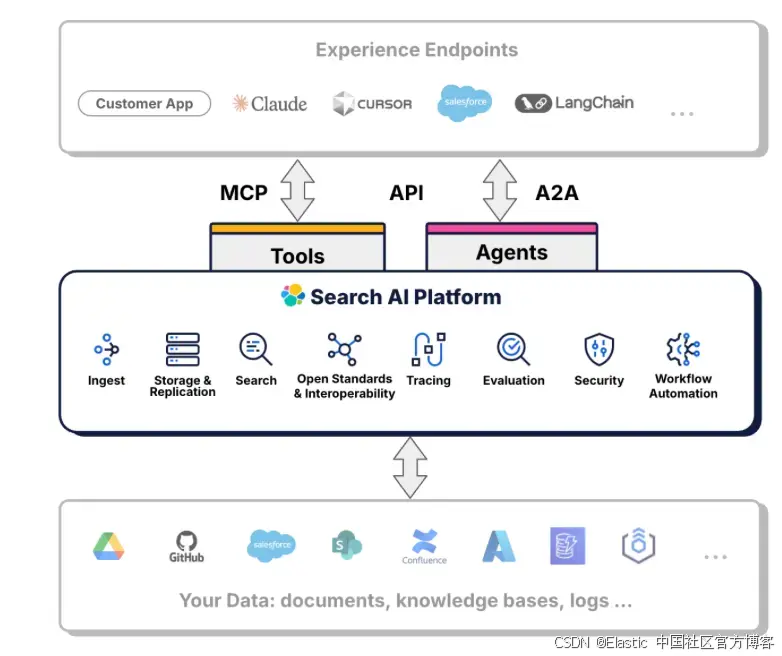
在之前的文章 “Elastic AI agent builder 介绍(一)”,我们用一个例子展示了如何使用 AI agent builder 来创建我们希望的 agents。在今天的文章里,我们来介绍 AI agent builder 相关的 APIs。这样我们对它有更进一步的认识。
Tools
获取所有的工具
我们可以通过如下的 API 来获取所有的 tools
GET kbn://api/agent_builder/tools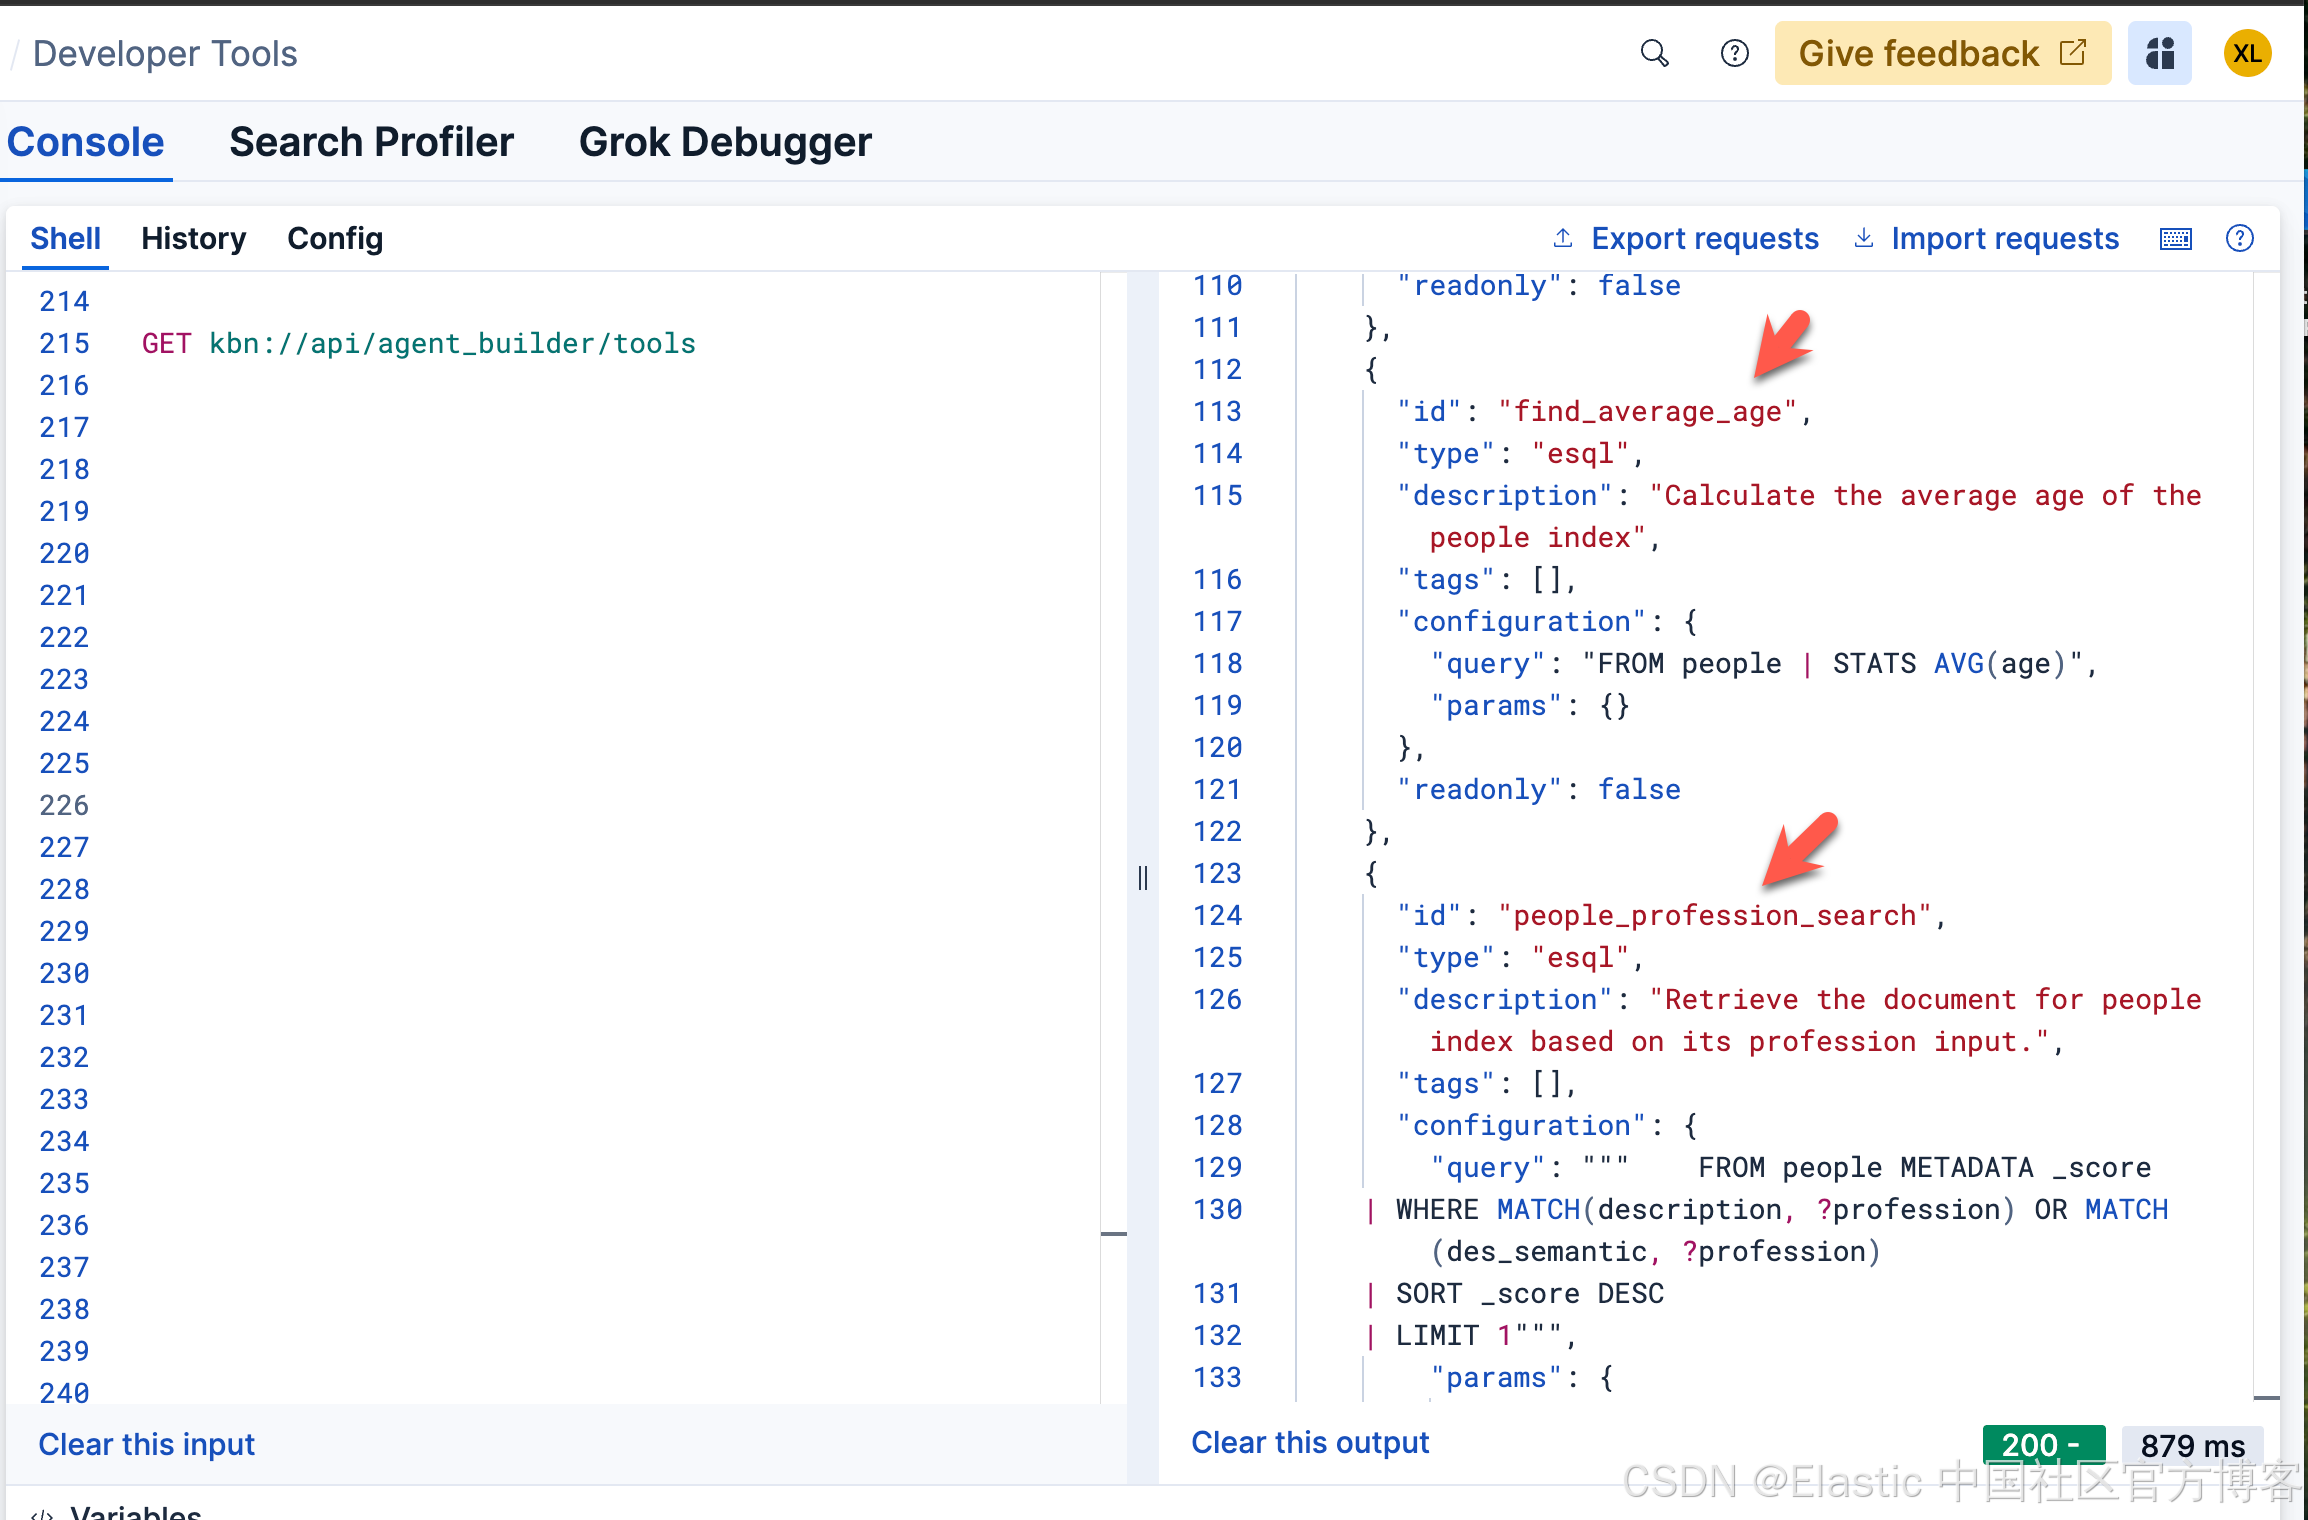
上面的 API 显示所有已经创建的和系统本身自带的 tools。我们也可以使用如下的方式来得到:
export KIBANA_URL="your-kibana-url"
export API_KEY="your-api-key"
curl -X GET "https://${KIBANA_URL}/api/agent_builder/tools" \
-H "Authorization: ApiKey ${API_KEY}"针对我们的安装:
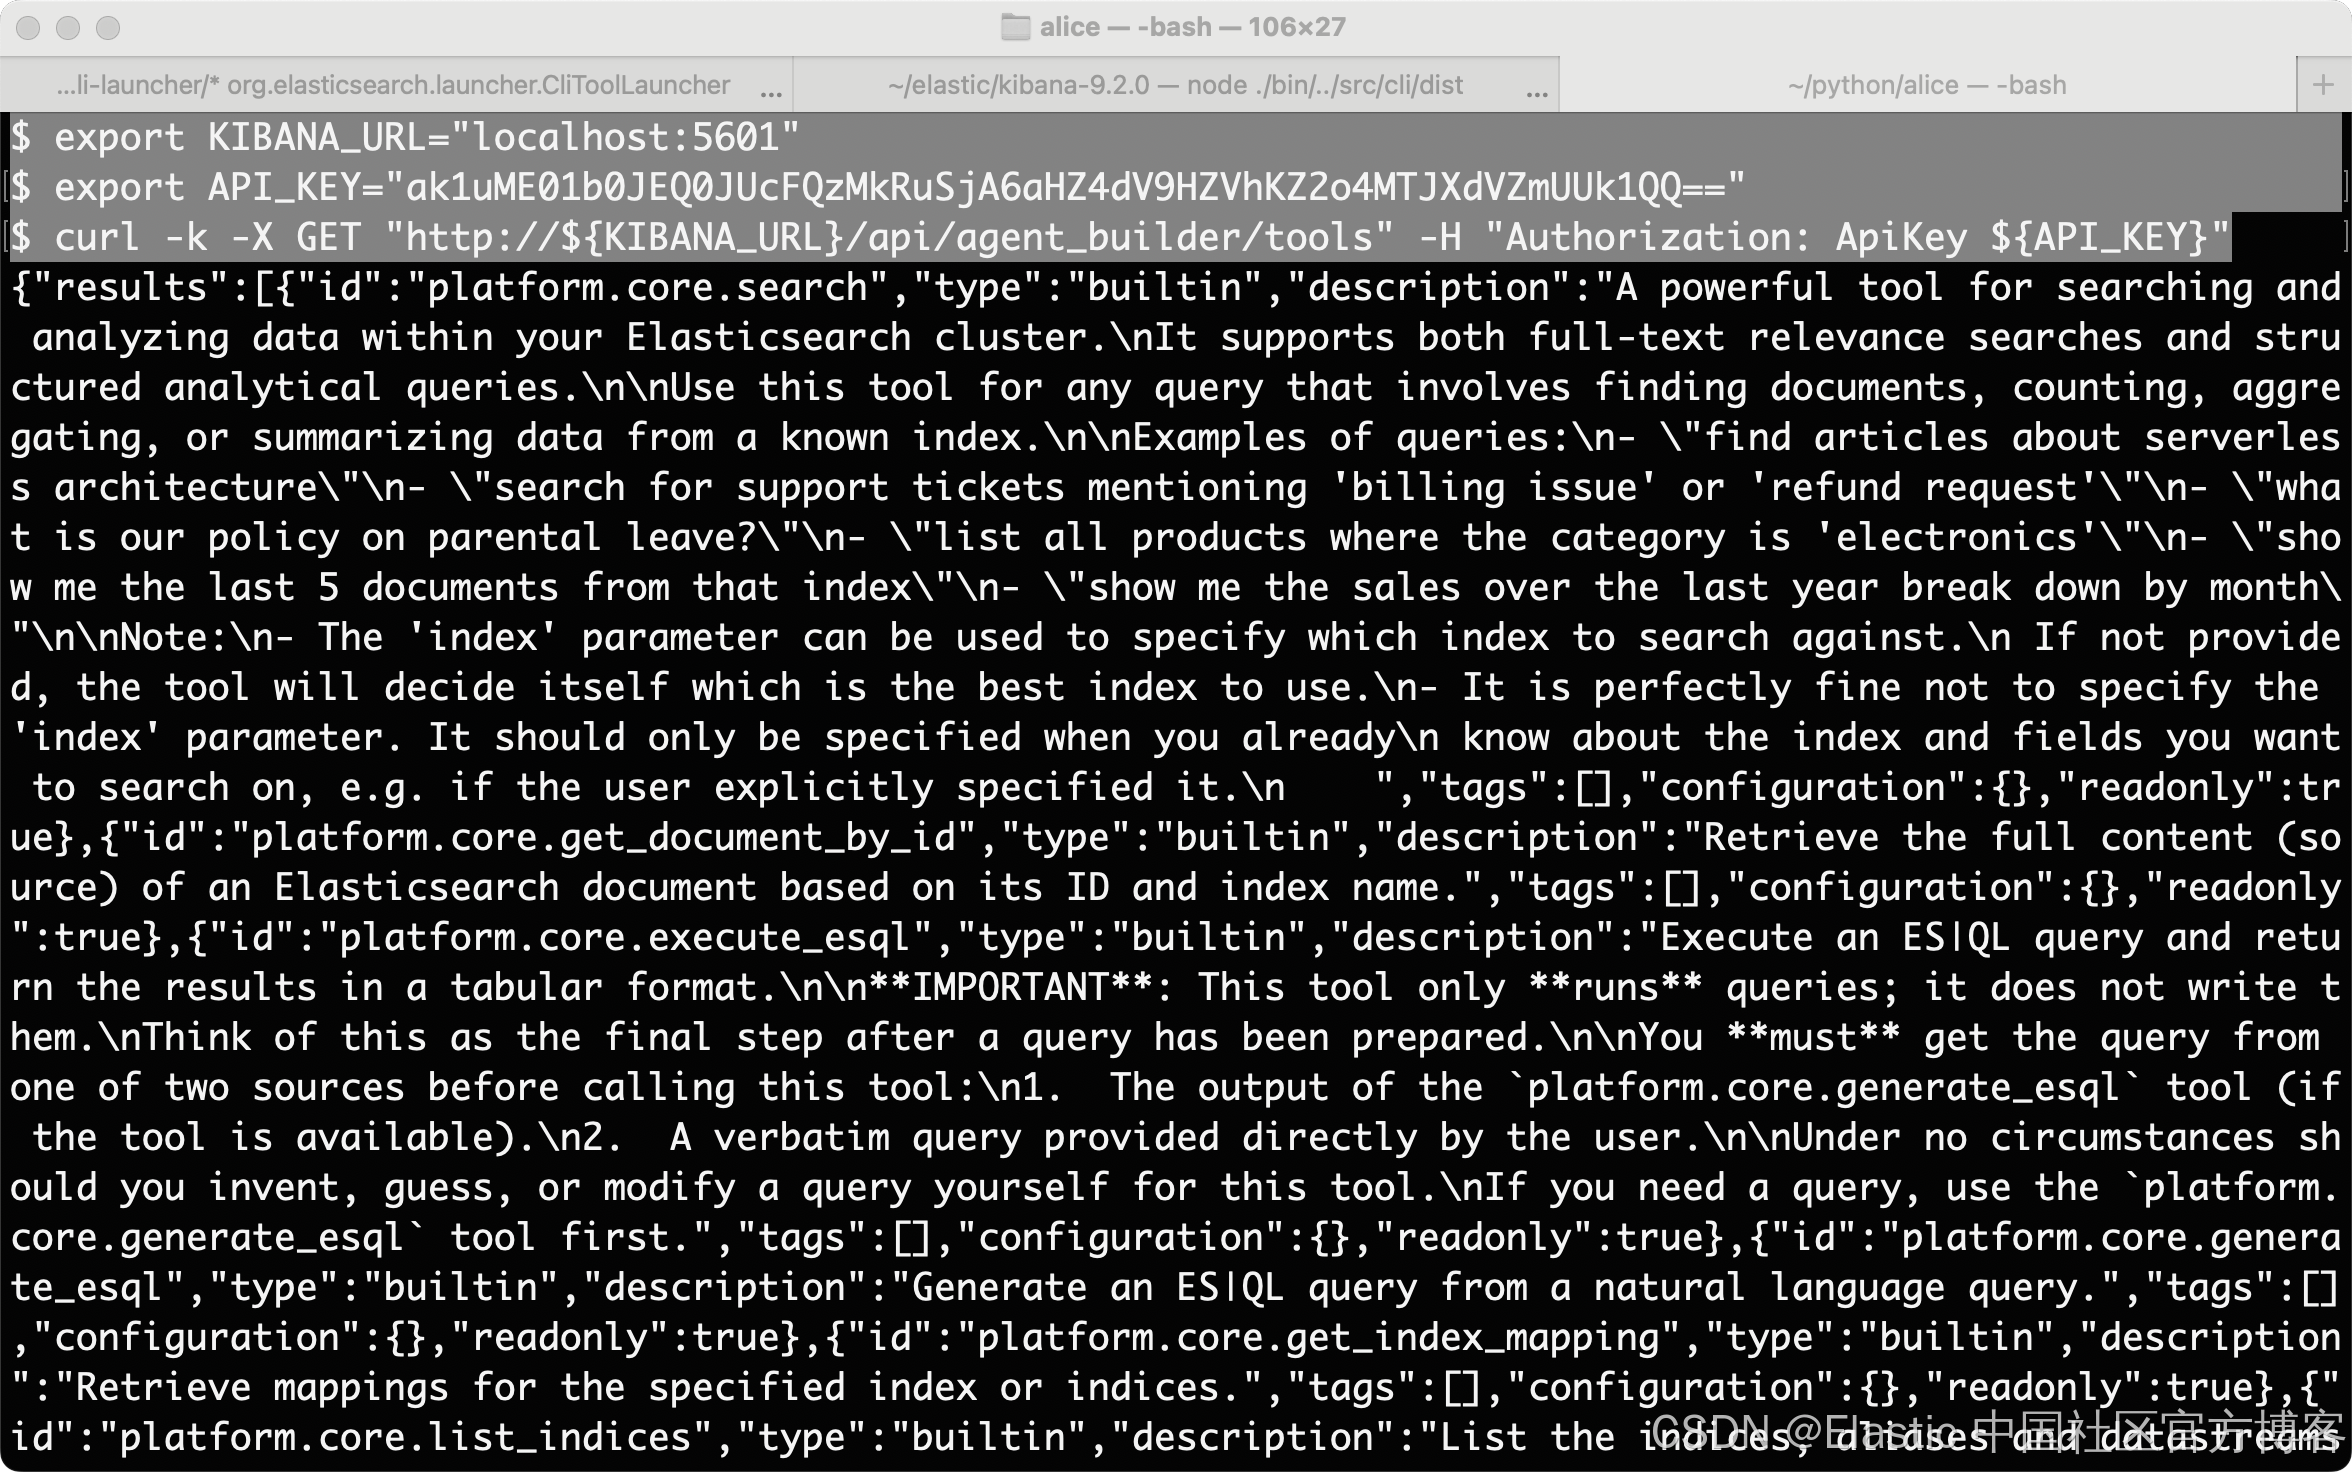
注意:你需要根据自己的 Elasticsearch 及 Kibana 配置修改上面的 http/https 协议。你需要配置响应的环境变量 KIBANA_URL 及 API_KEY
根据 ID 获得 tool
GET kbn://api/agent_builder/tools/{id}GET kbn://api/agent_builder/tools/find_average_age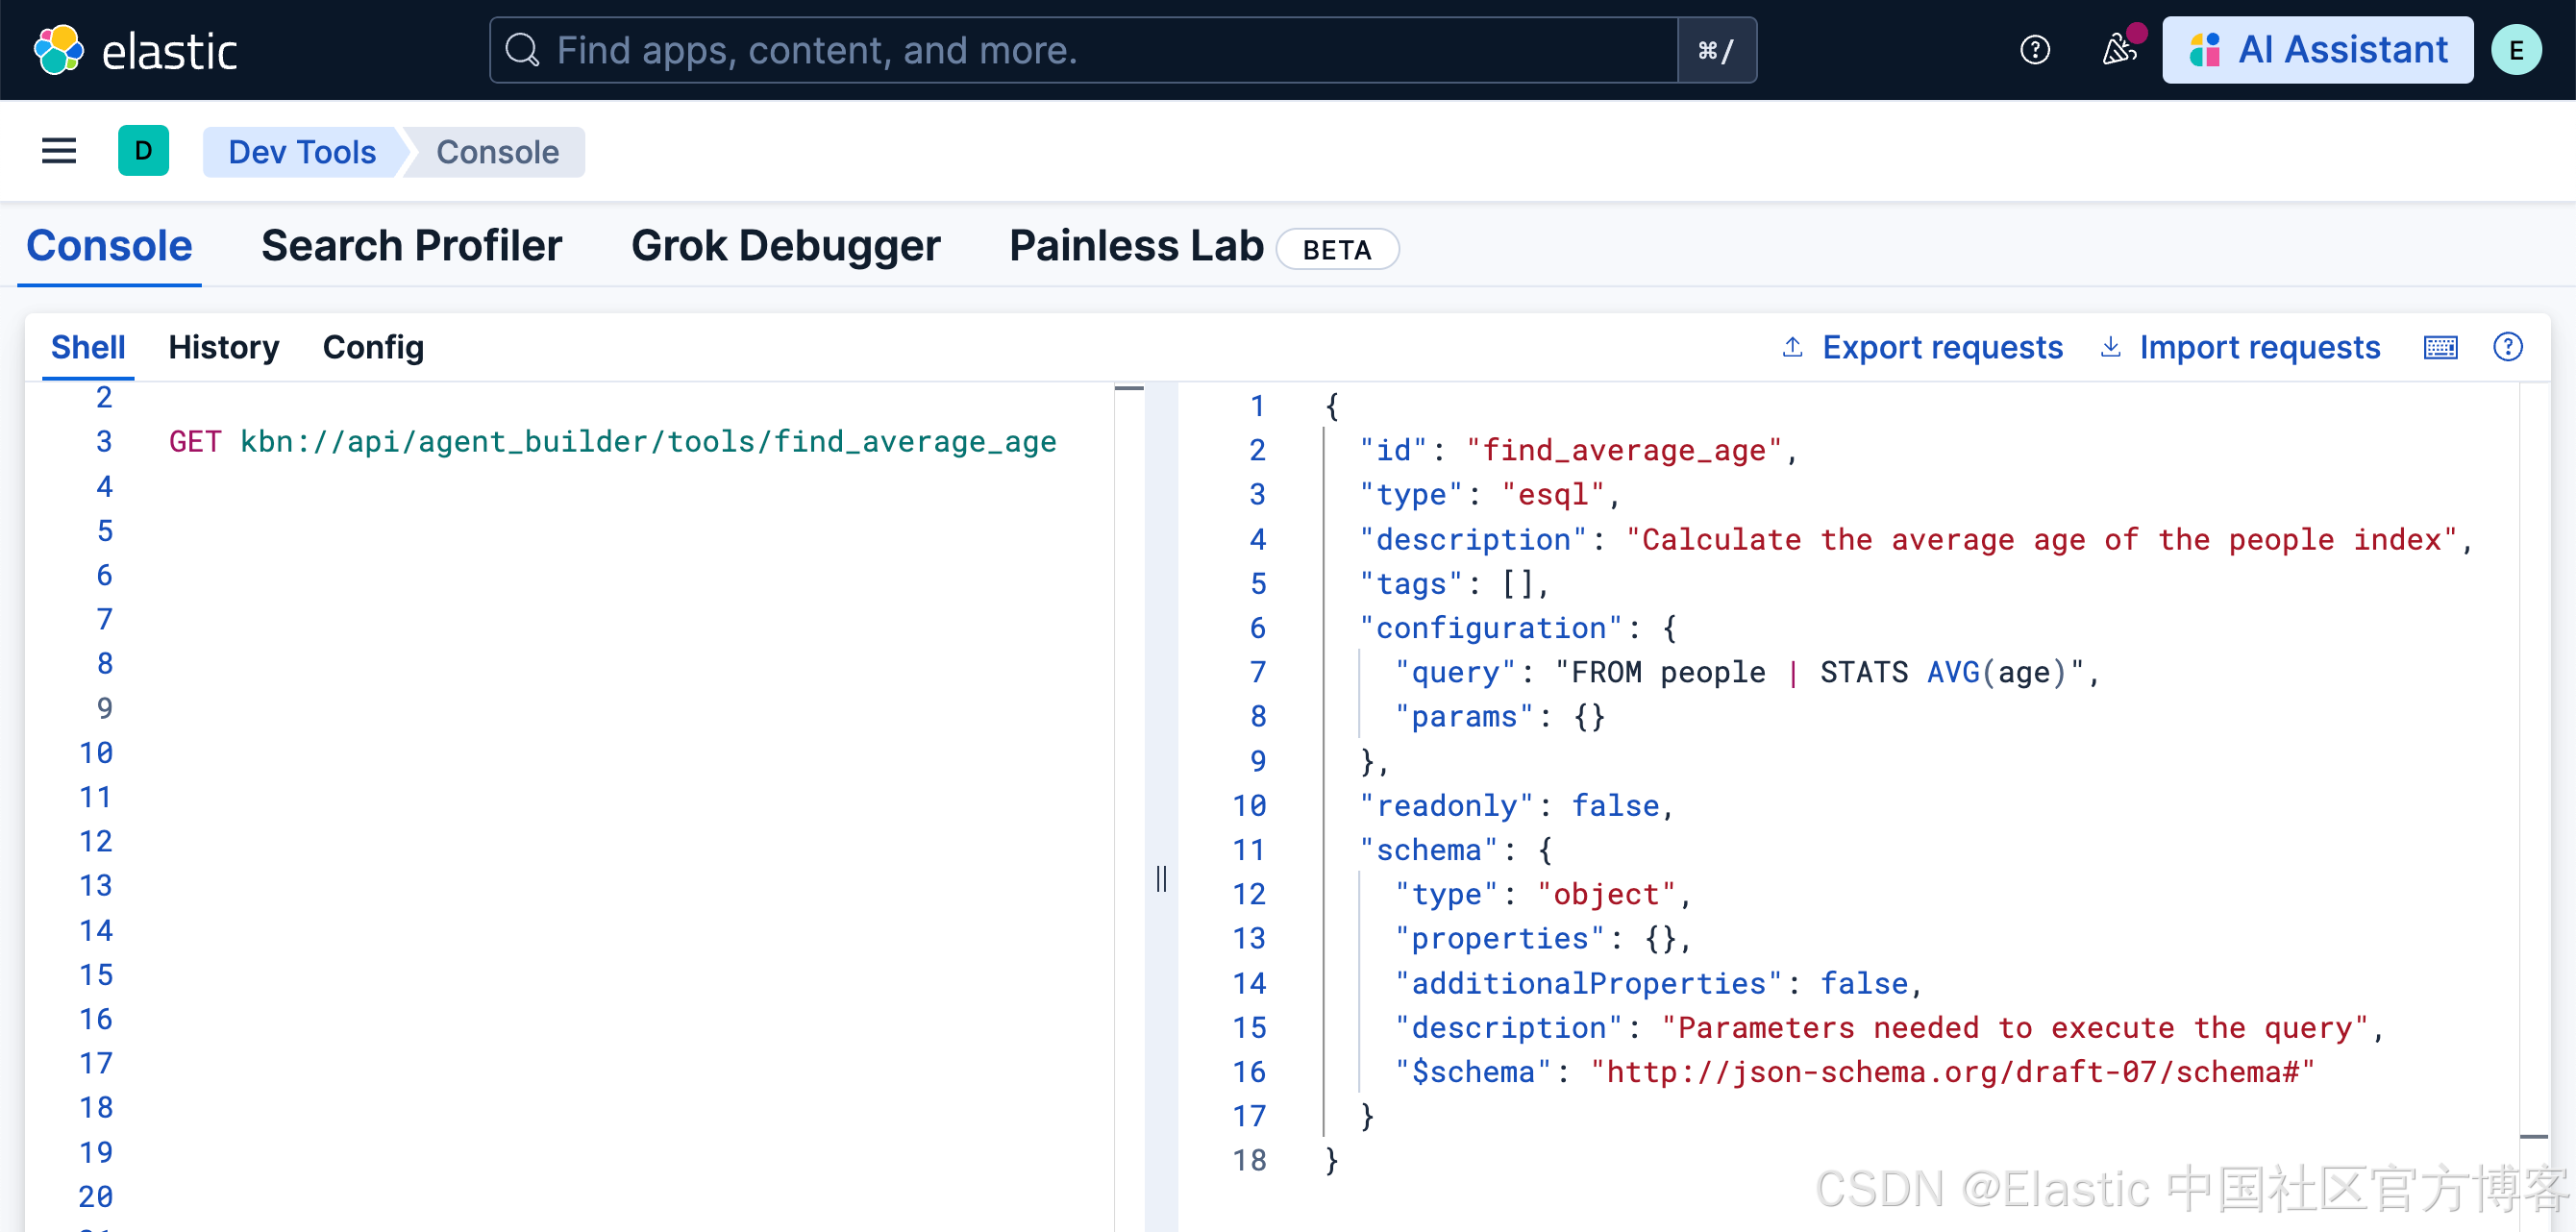
根据 ID 删除一个 tool
DELETE kbn://api/agent_builder/tools/{id}DELETE kbn://api/agent_builder/tools/find_average_age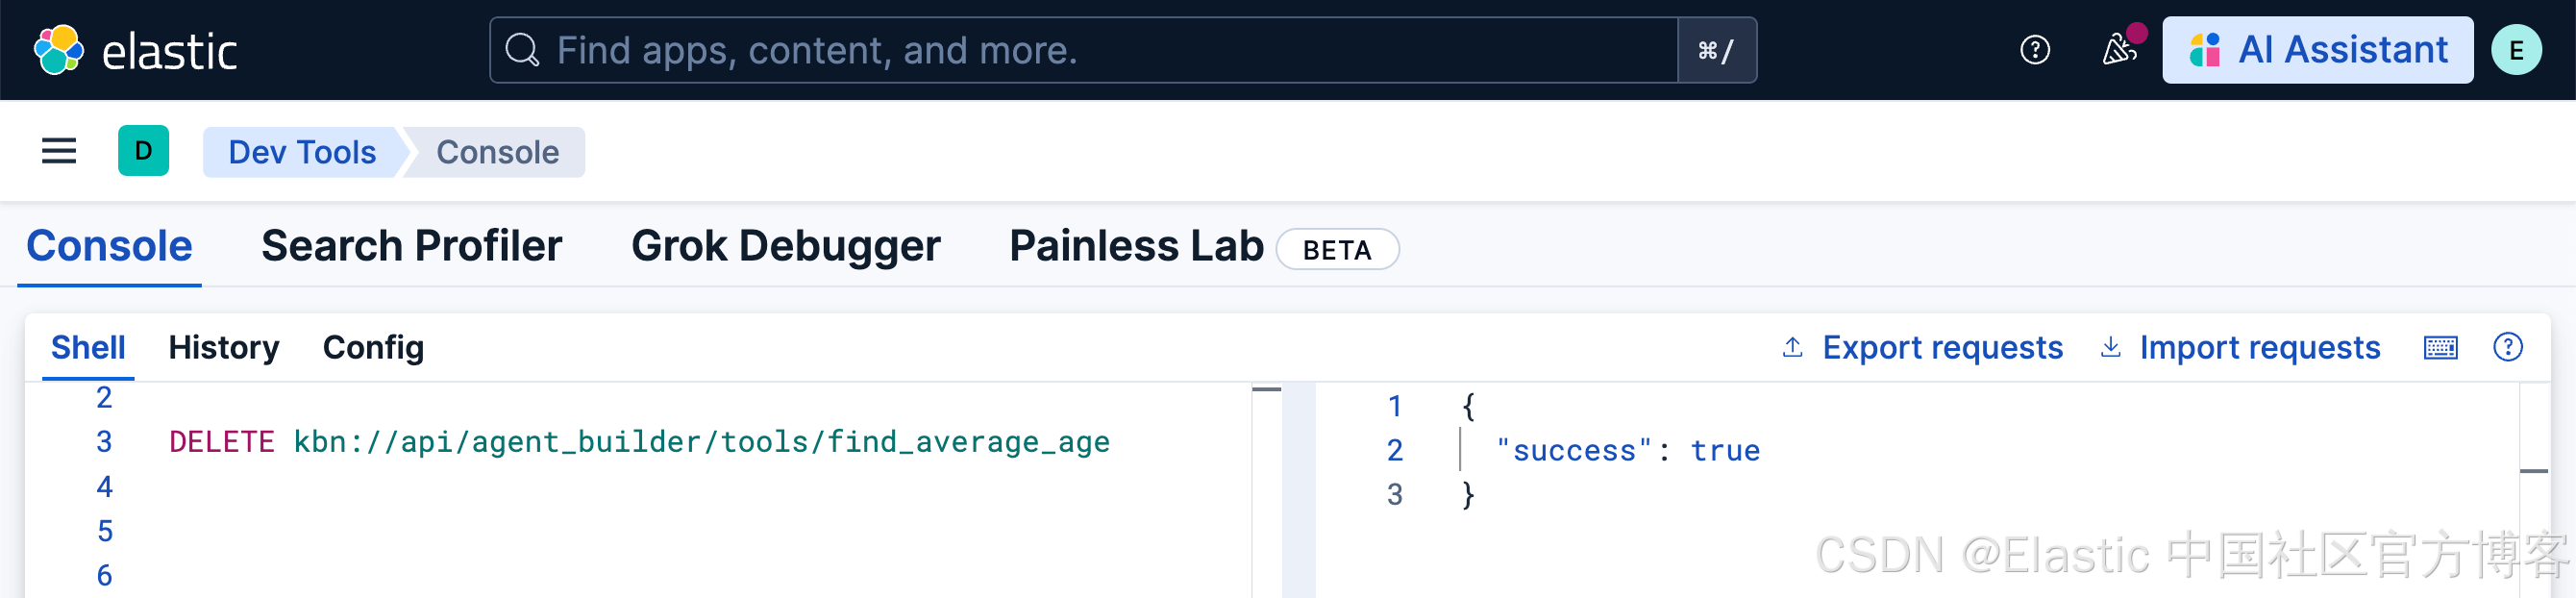
我们可以再使用上面的 GET kbn://api/agent_builder/tools 命令来查看 find_average_age 已经被删除。我们也可以在界面中查看:
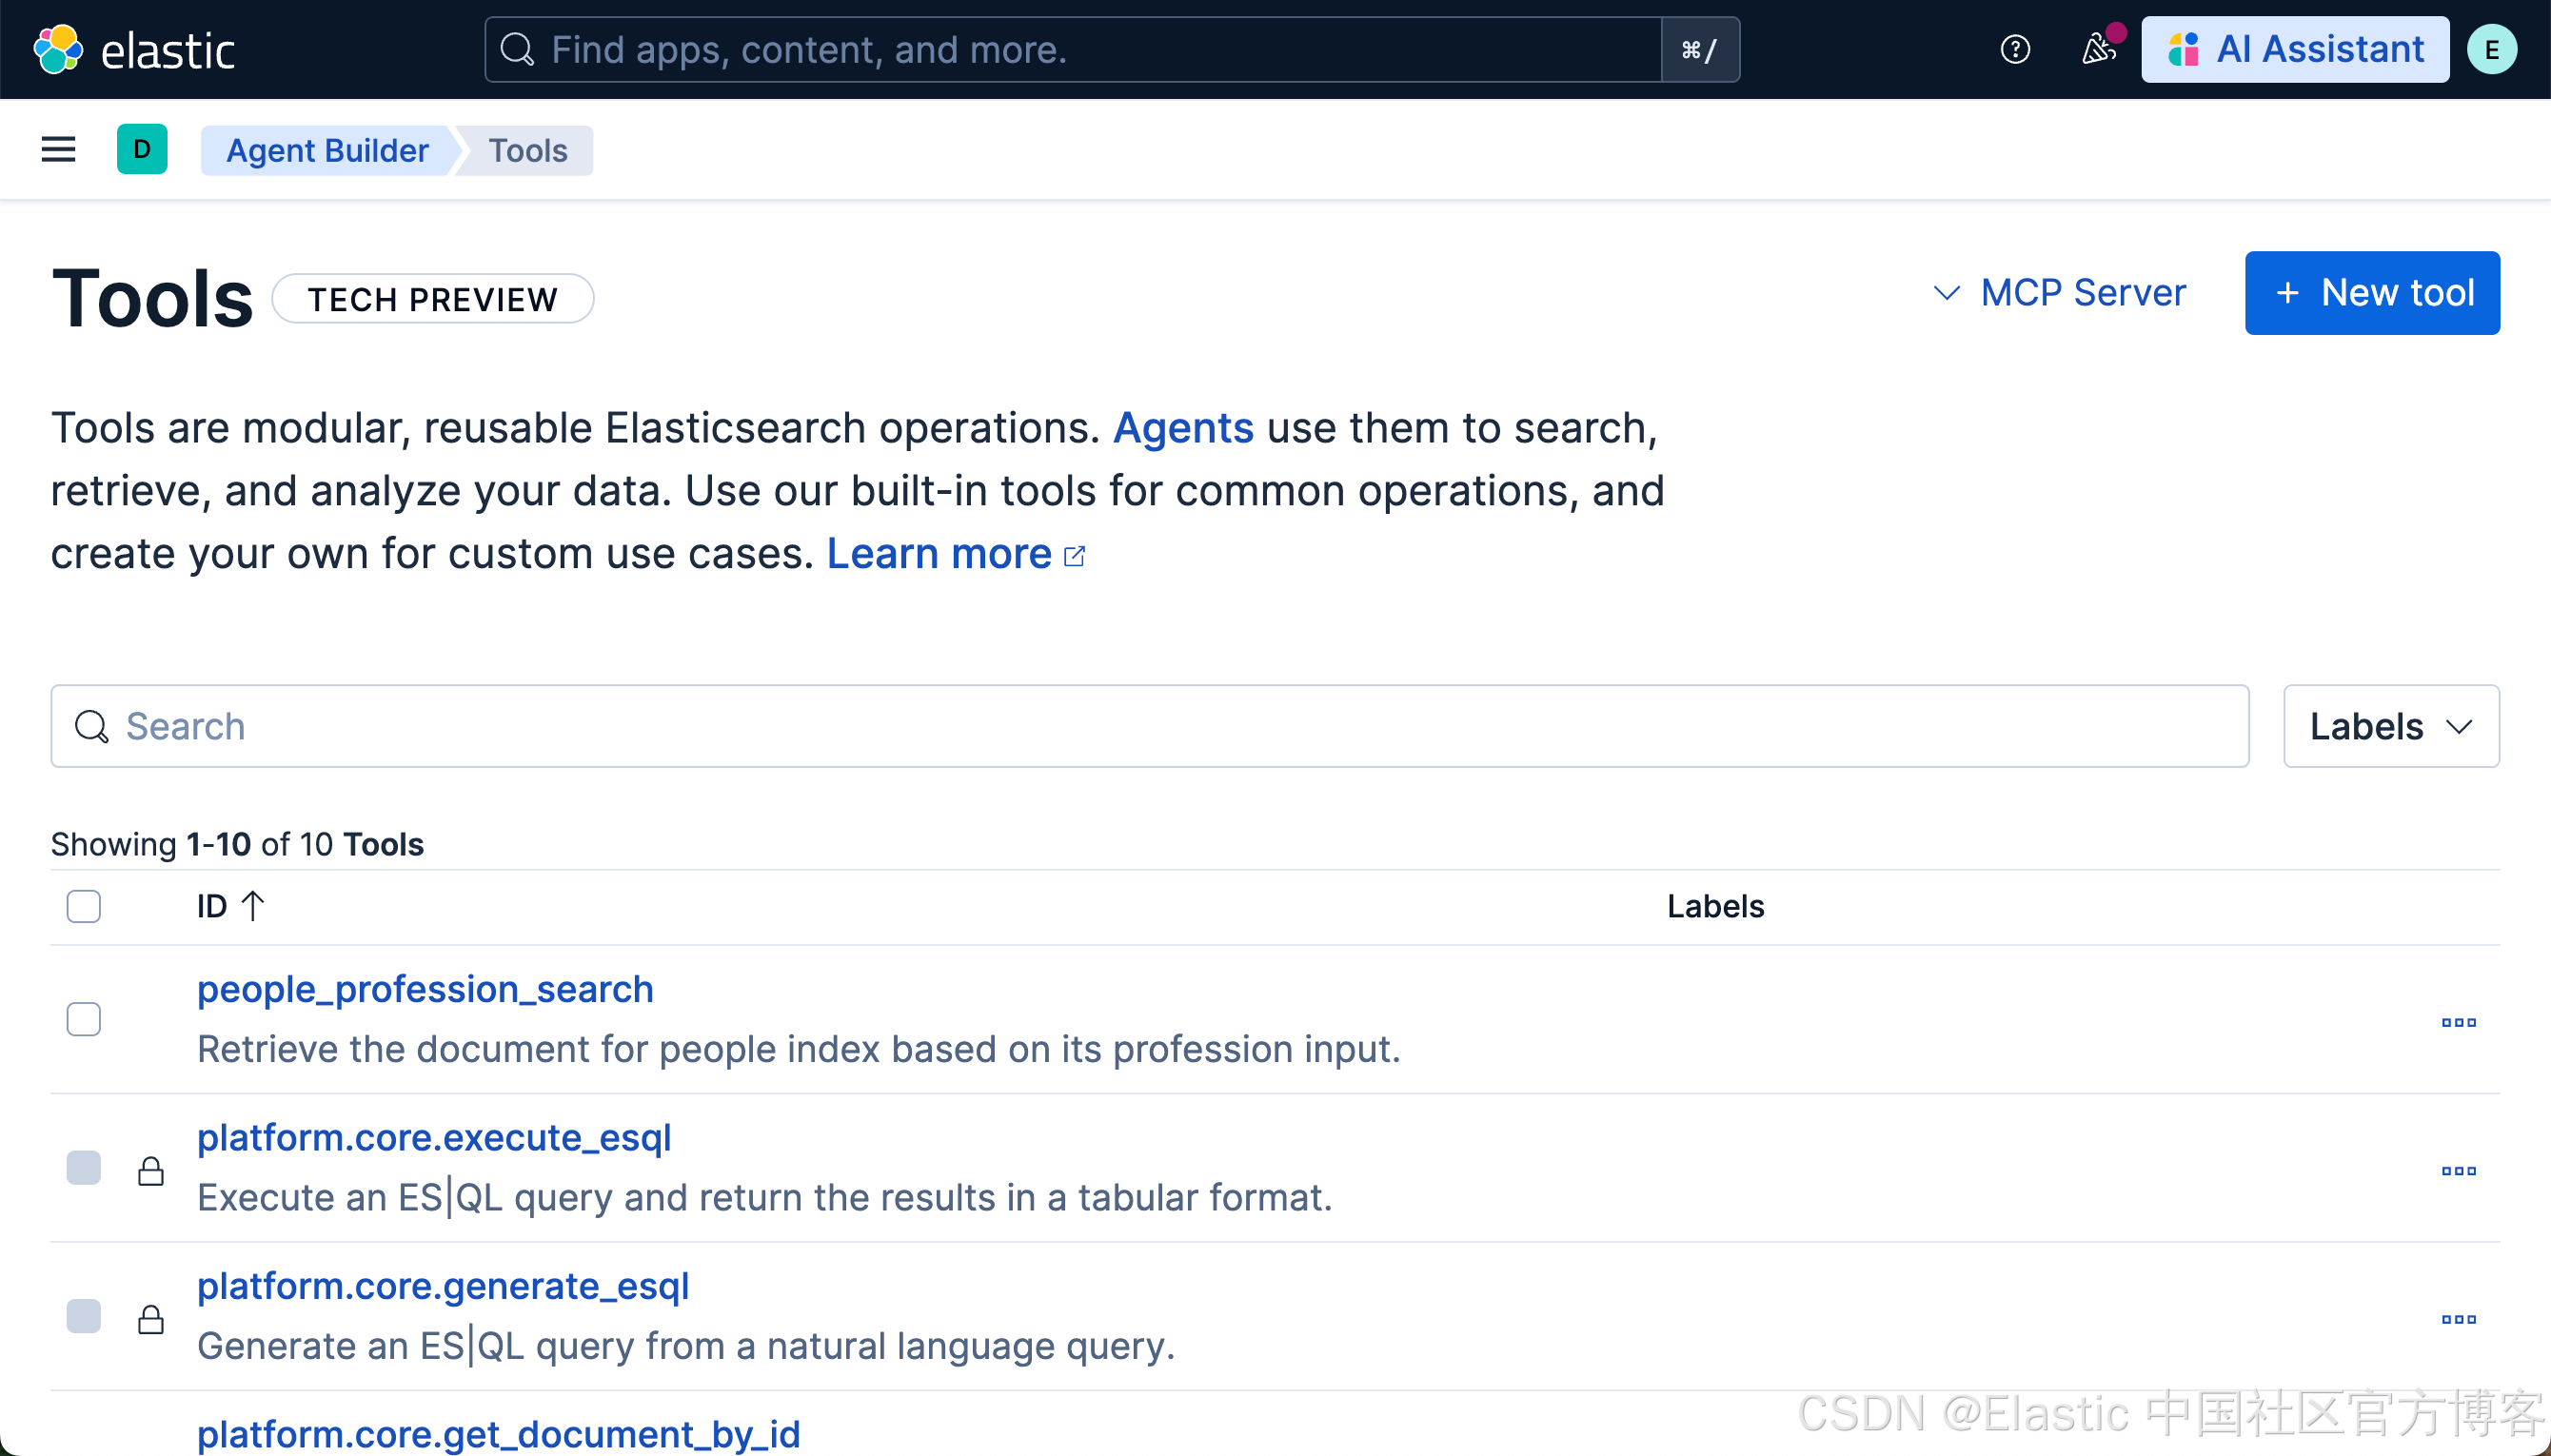
在这两个页面中没有 find_average_age 工具了。能够进行下面的操作,我们参考 “Elastic AI agent builder 介绍(一)” ,再次创建这个 tool。
根据 ID 来更新一个 tool
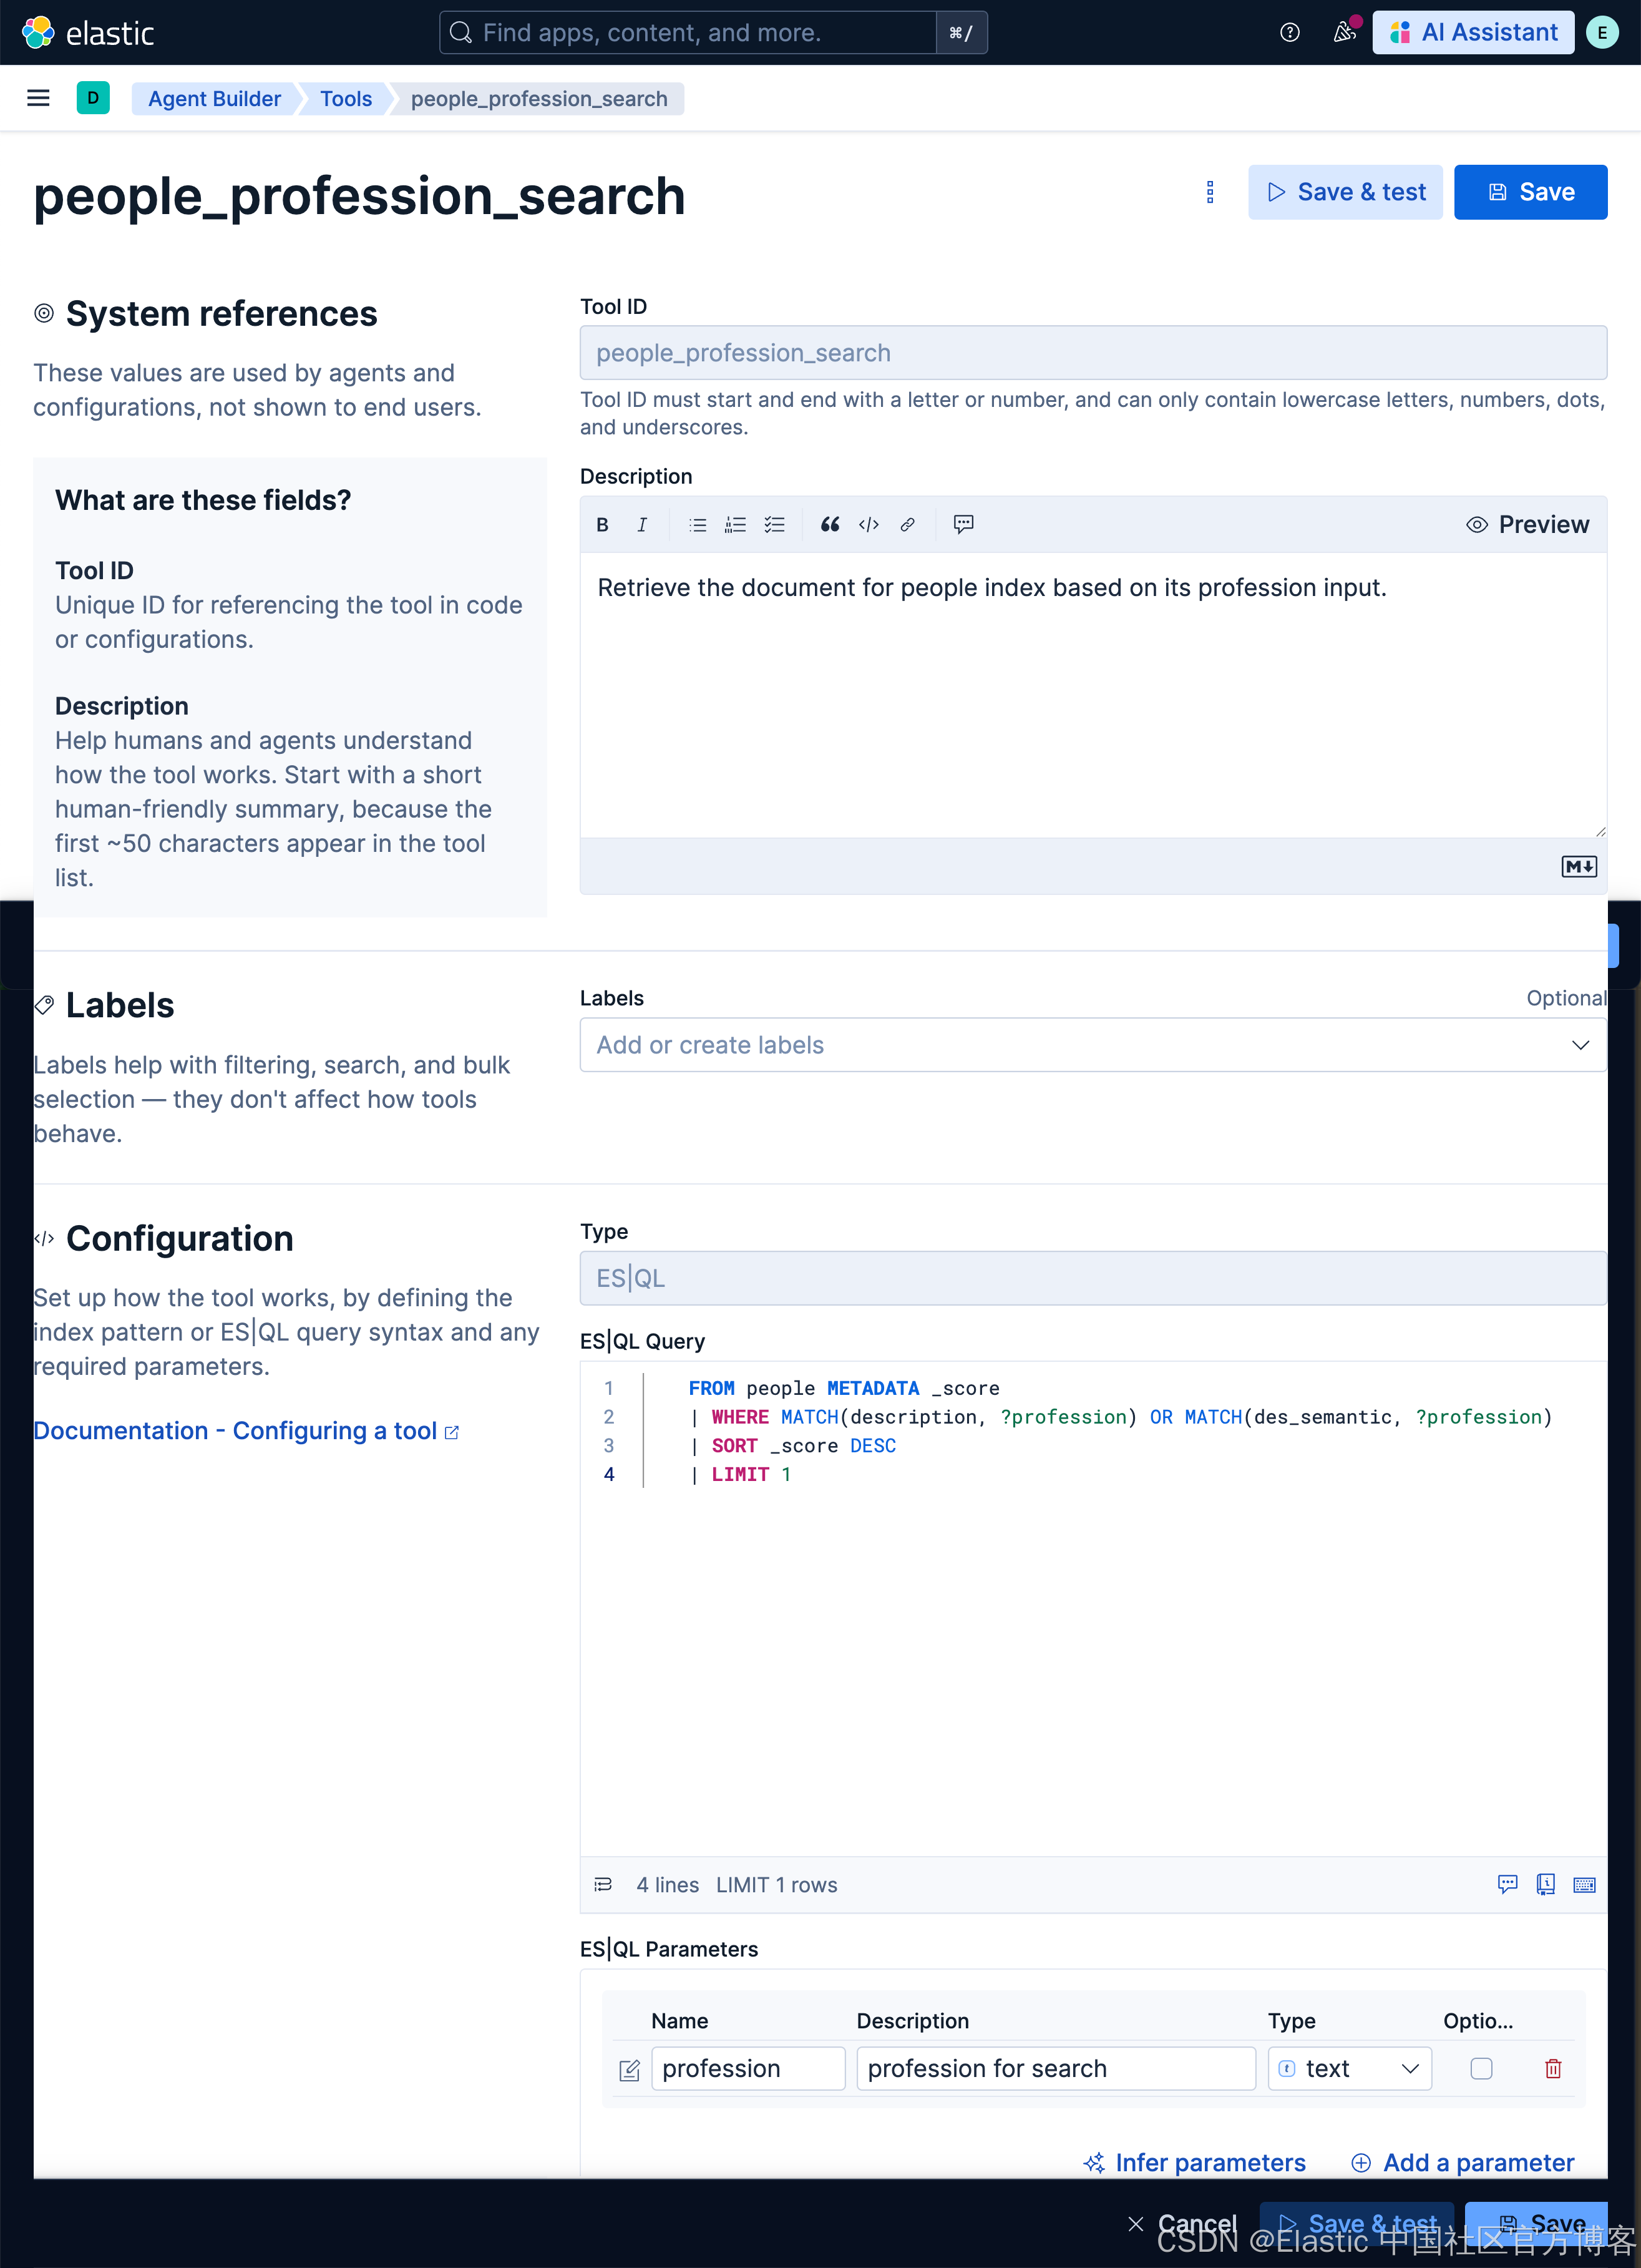
没有修改之前 people_profession_search ID 的设计是这样的:
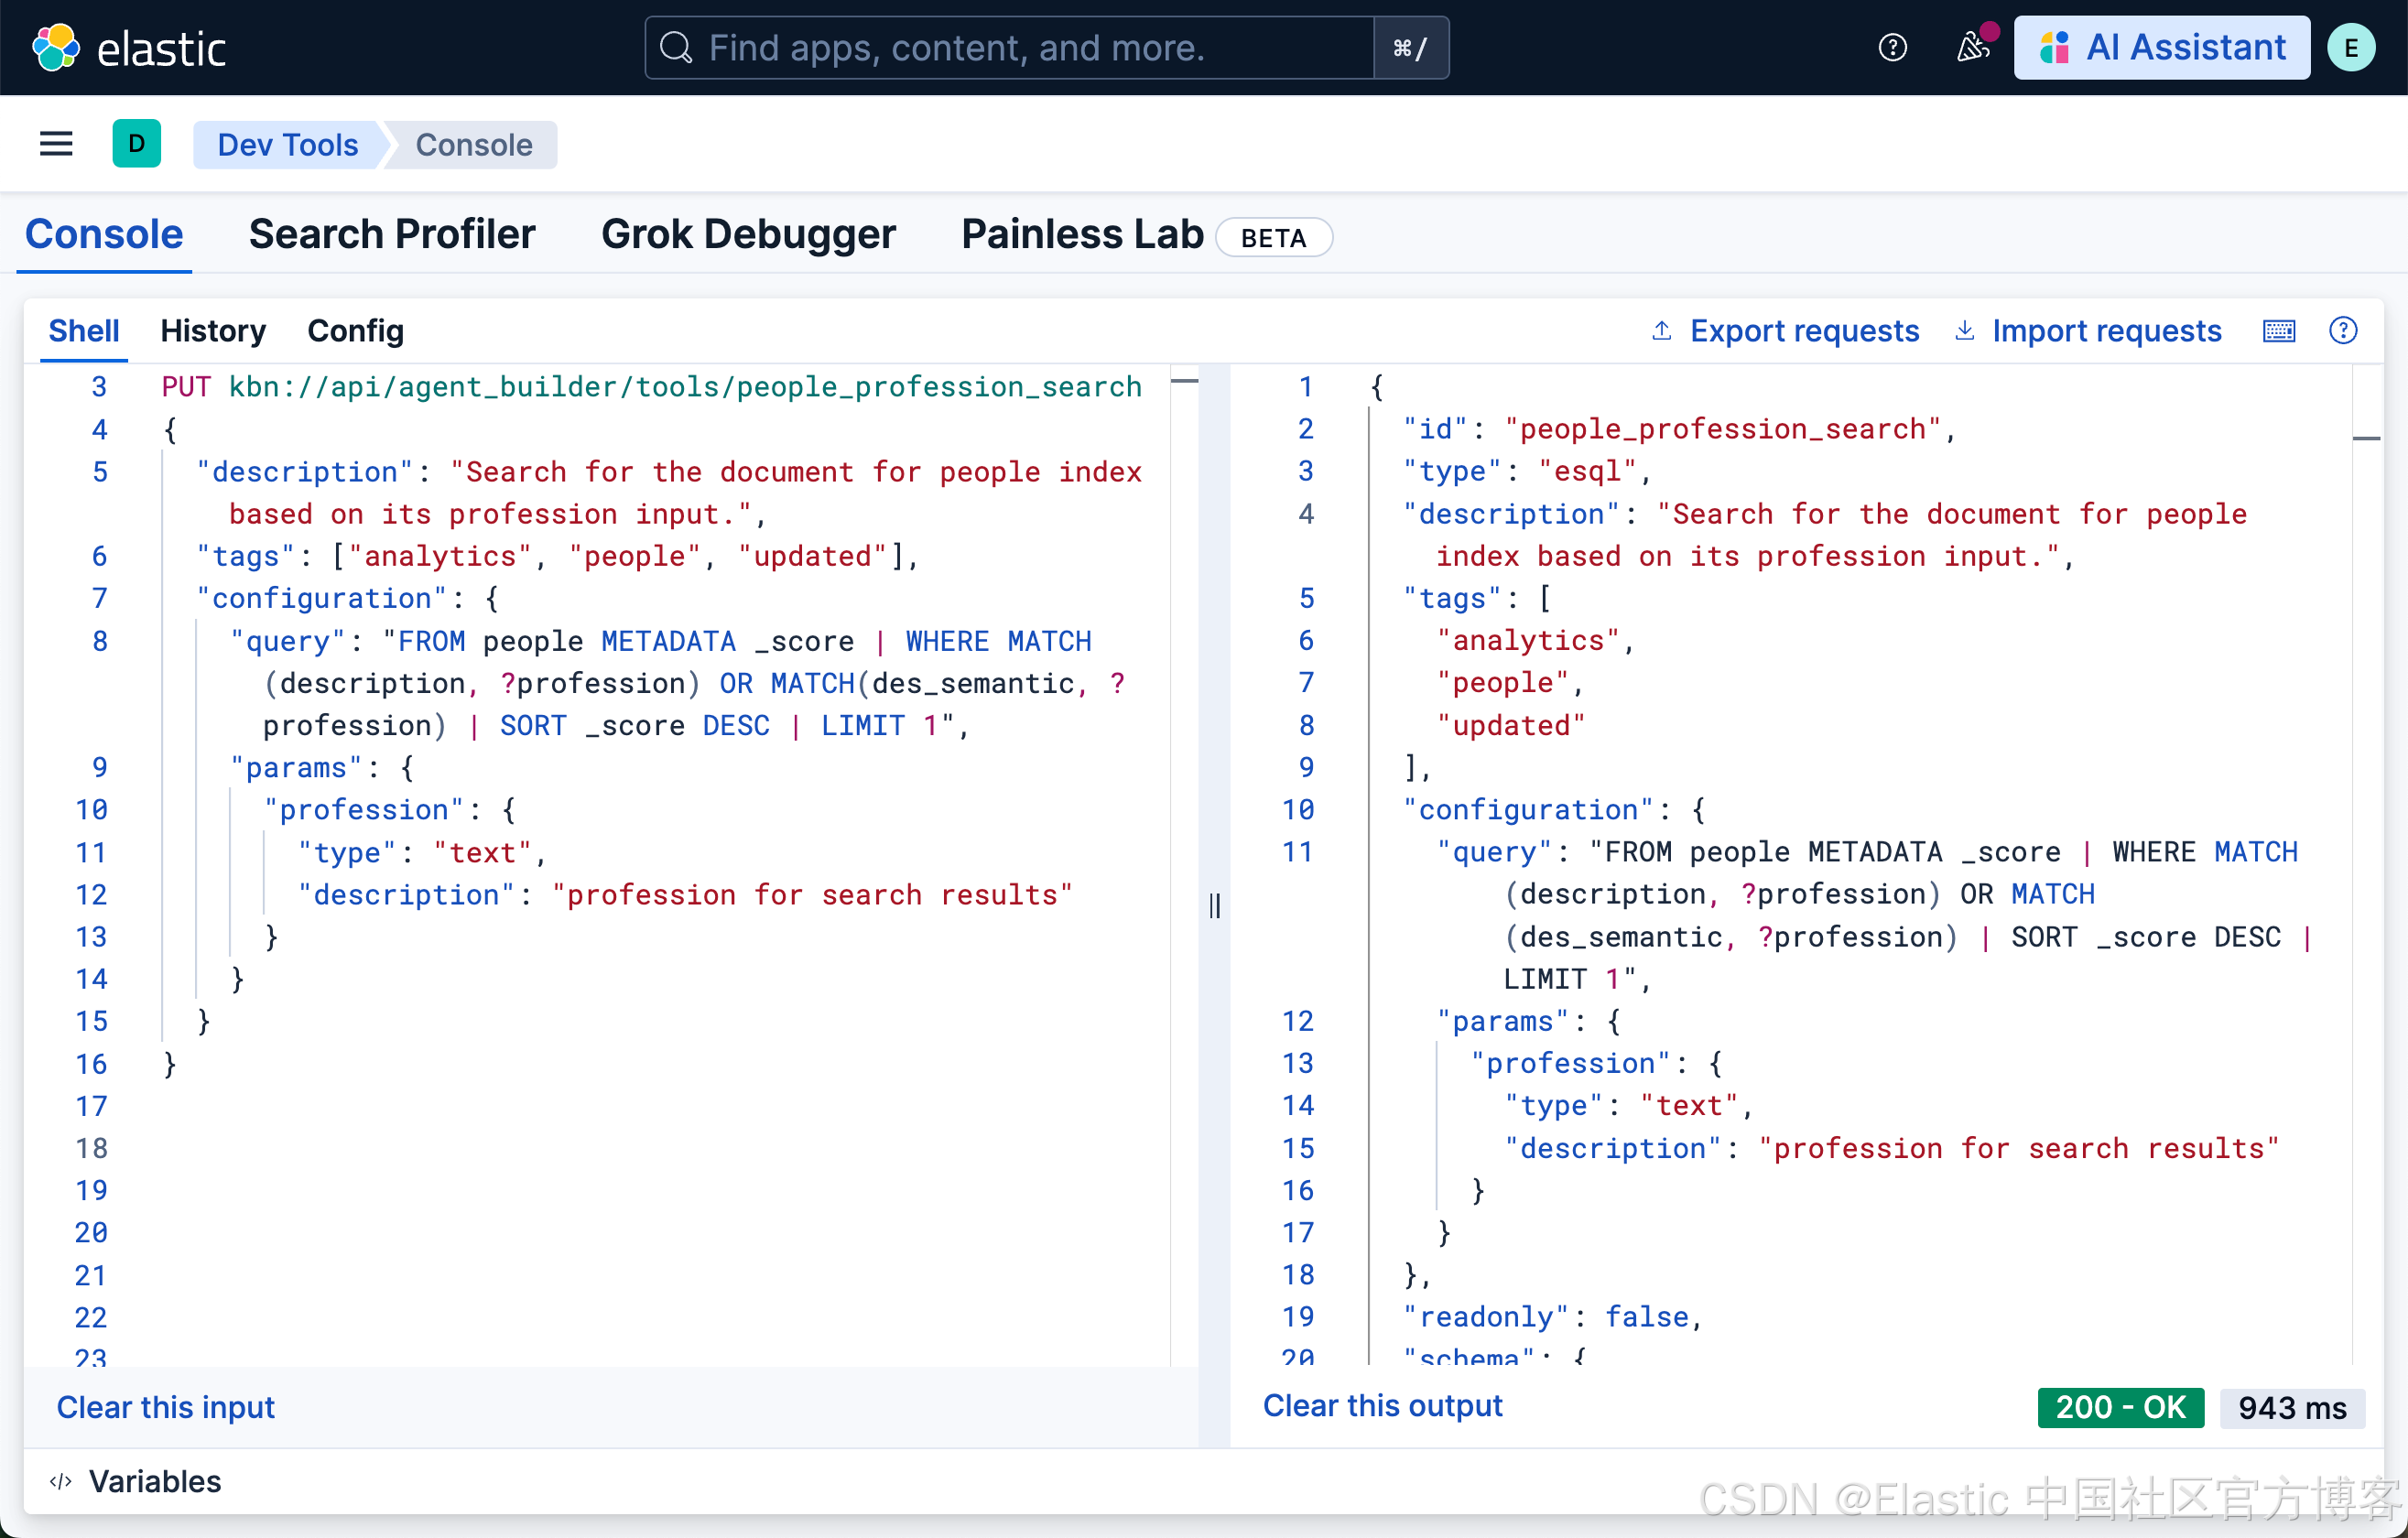
我们现在使用如下的格式来进行更新:
PUT kbn://api/agent_builder/tools/people_profession_search
{
  "description": "Search for the document for people index based on its profession input.",
  "tags": ["analytics", "people", "updated"],
  "configuration": {
    "query": "FROM people METADATA _score | WHERE MATCH(description, ?profession) OR MATCH(des_semantic, ?profession) | SORT _score DESC | LIMIT 1",
    "params": {
      "profession": {
        "type": "text",
        "description": "profession for search results"
      }
    }
  }
}
我们再次查看更新后的 people_profession_search ID:
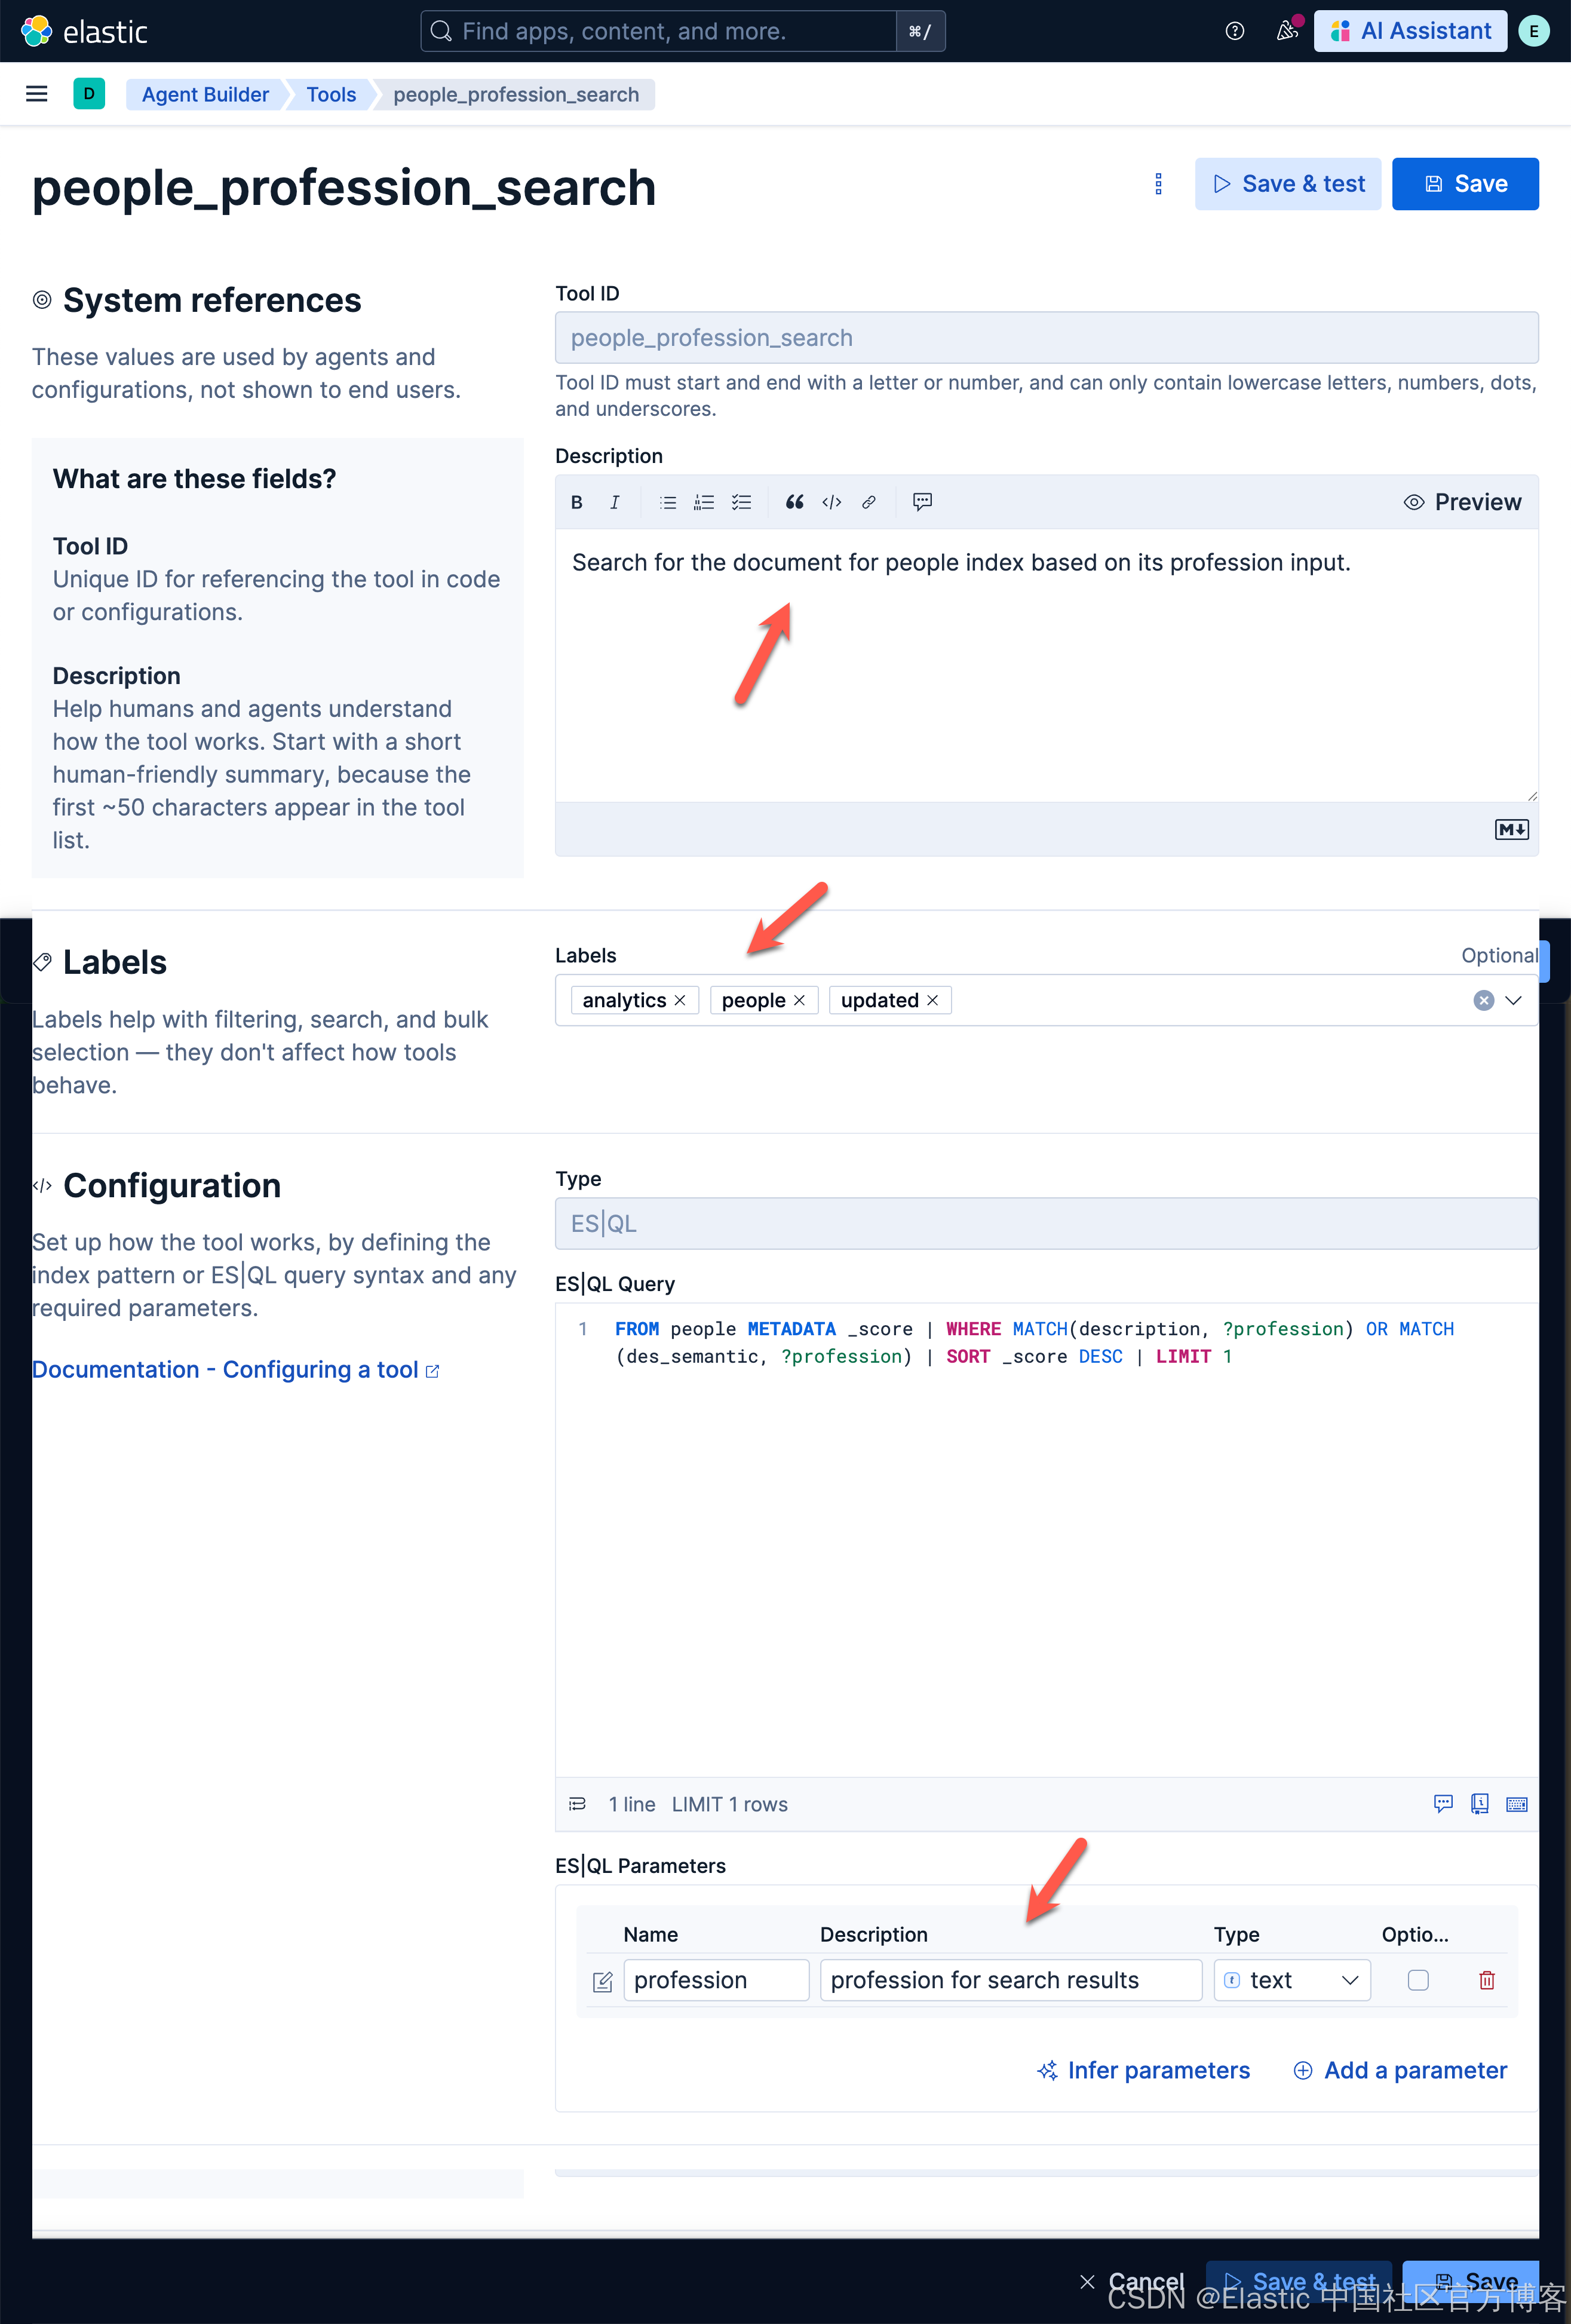
我们可以看到有三处已经被修改。我们可以看到新增加的 Labels。我们可以通过如下的练习来建议一下:
who are the reporters?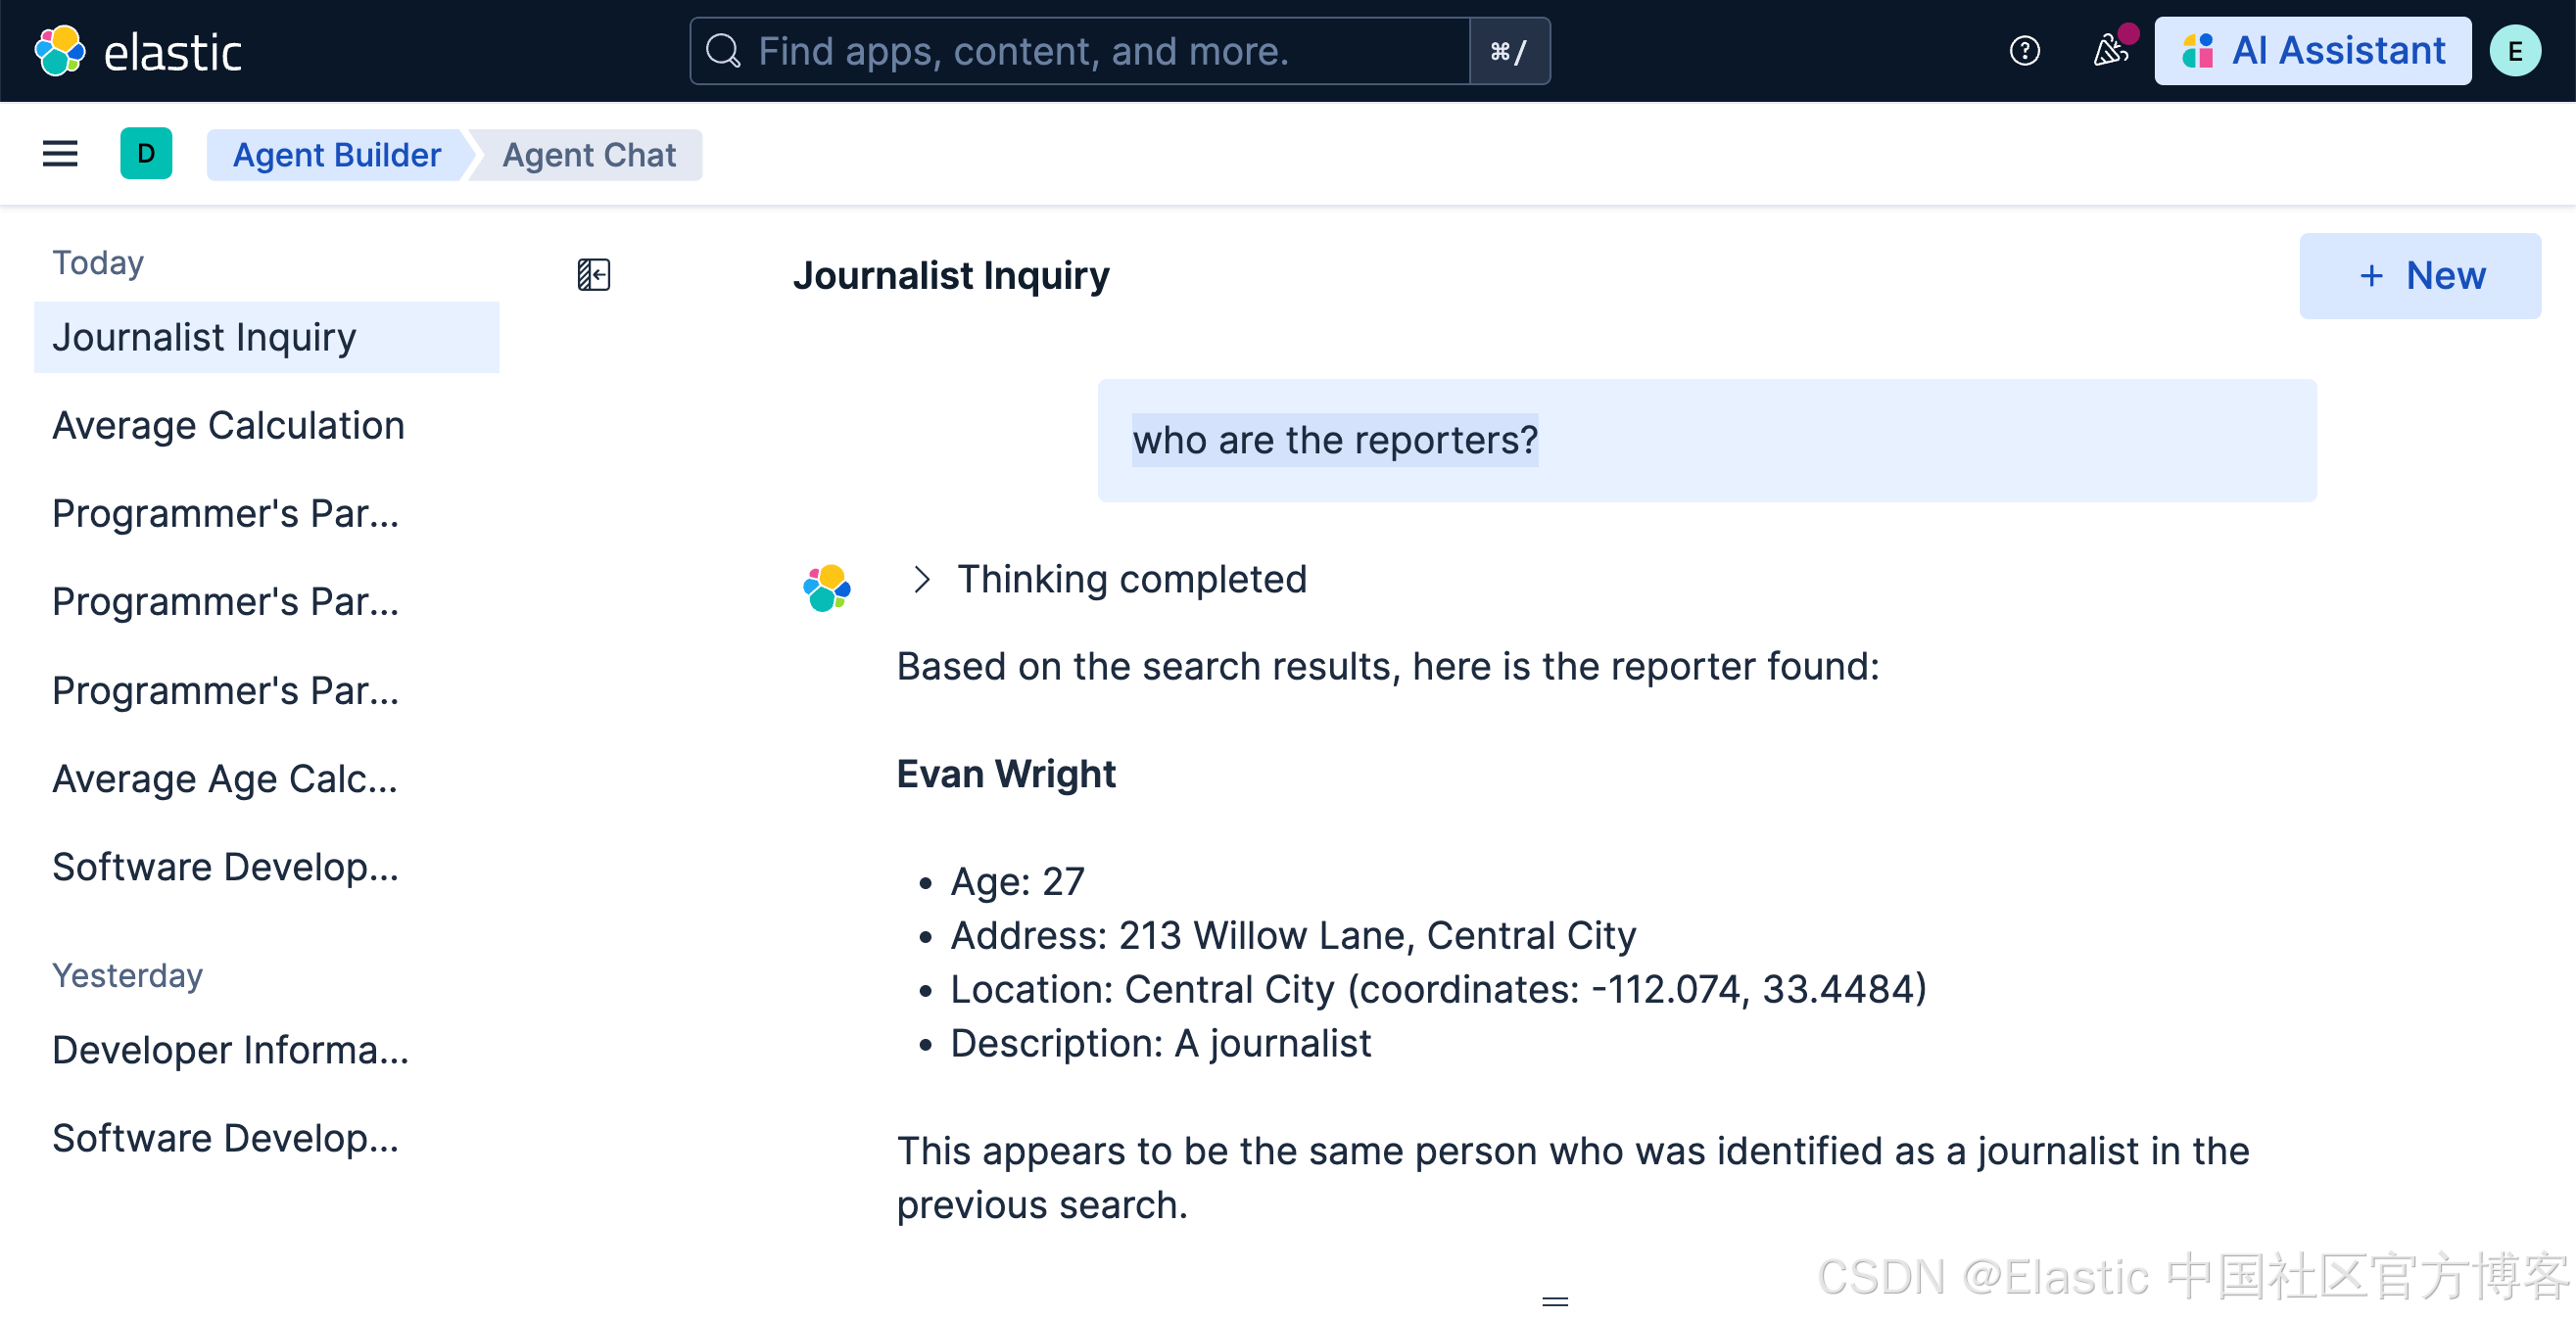
who are the heros?
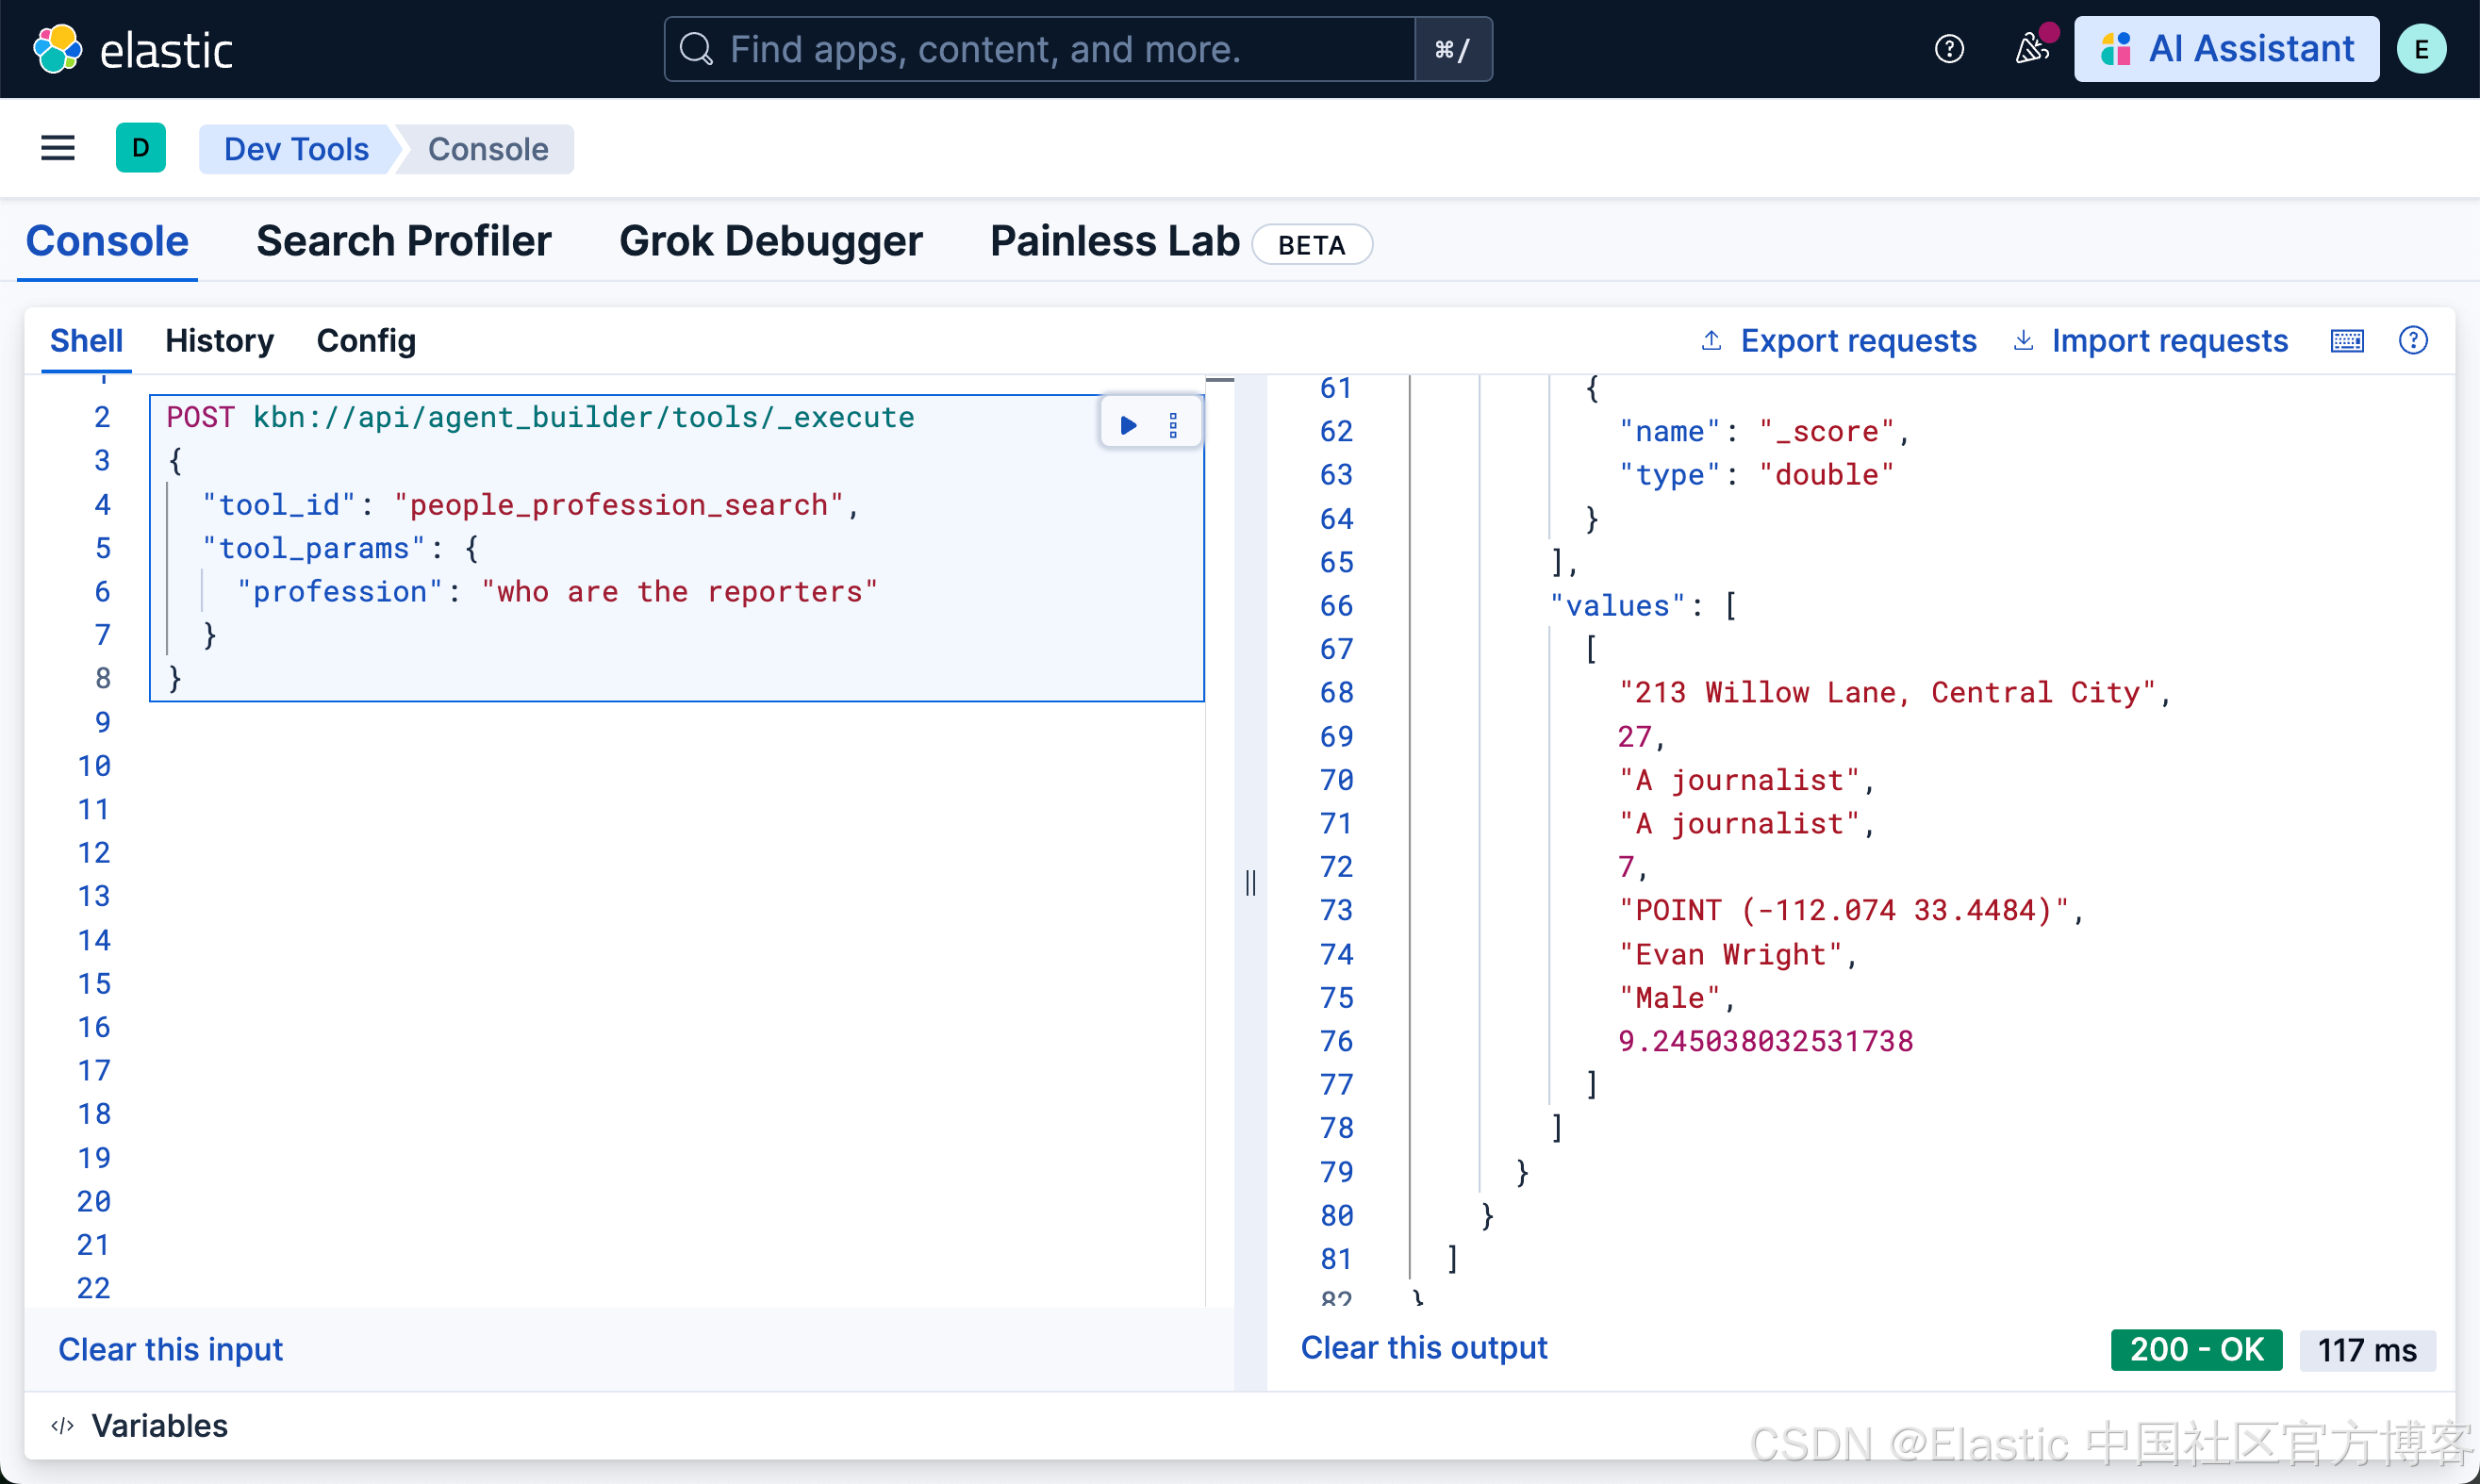
运行一个 tool
我们可以使用如下的方式来运行一个 tool:
POST kbn://api/agent_builder/tools/_execute
{
  "tool_id": "people_profession_search",
  "tool_params": {
    "profession": "who are the reporters"
  }
}
Agents
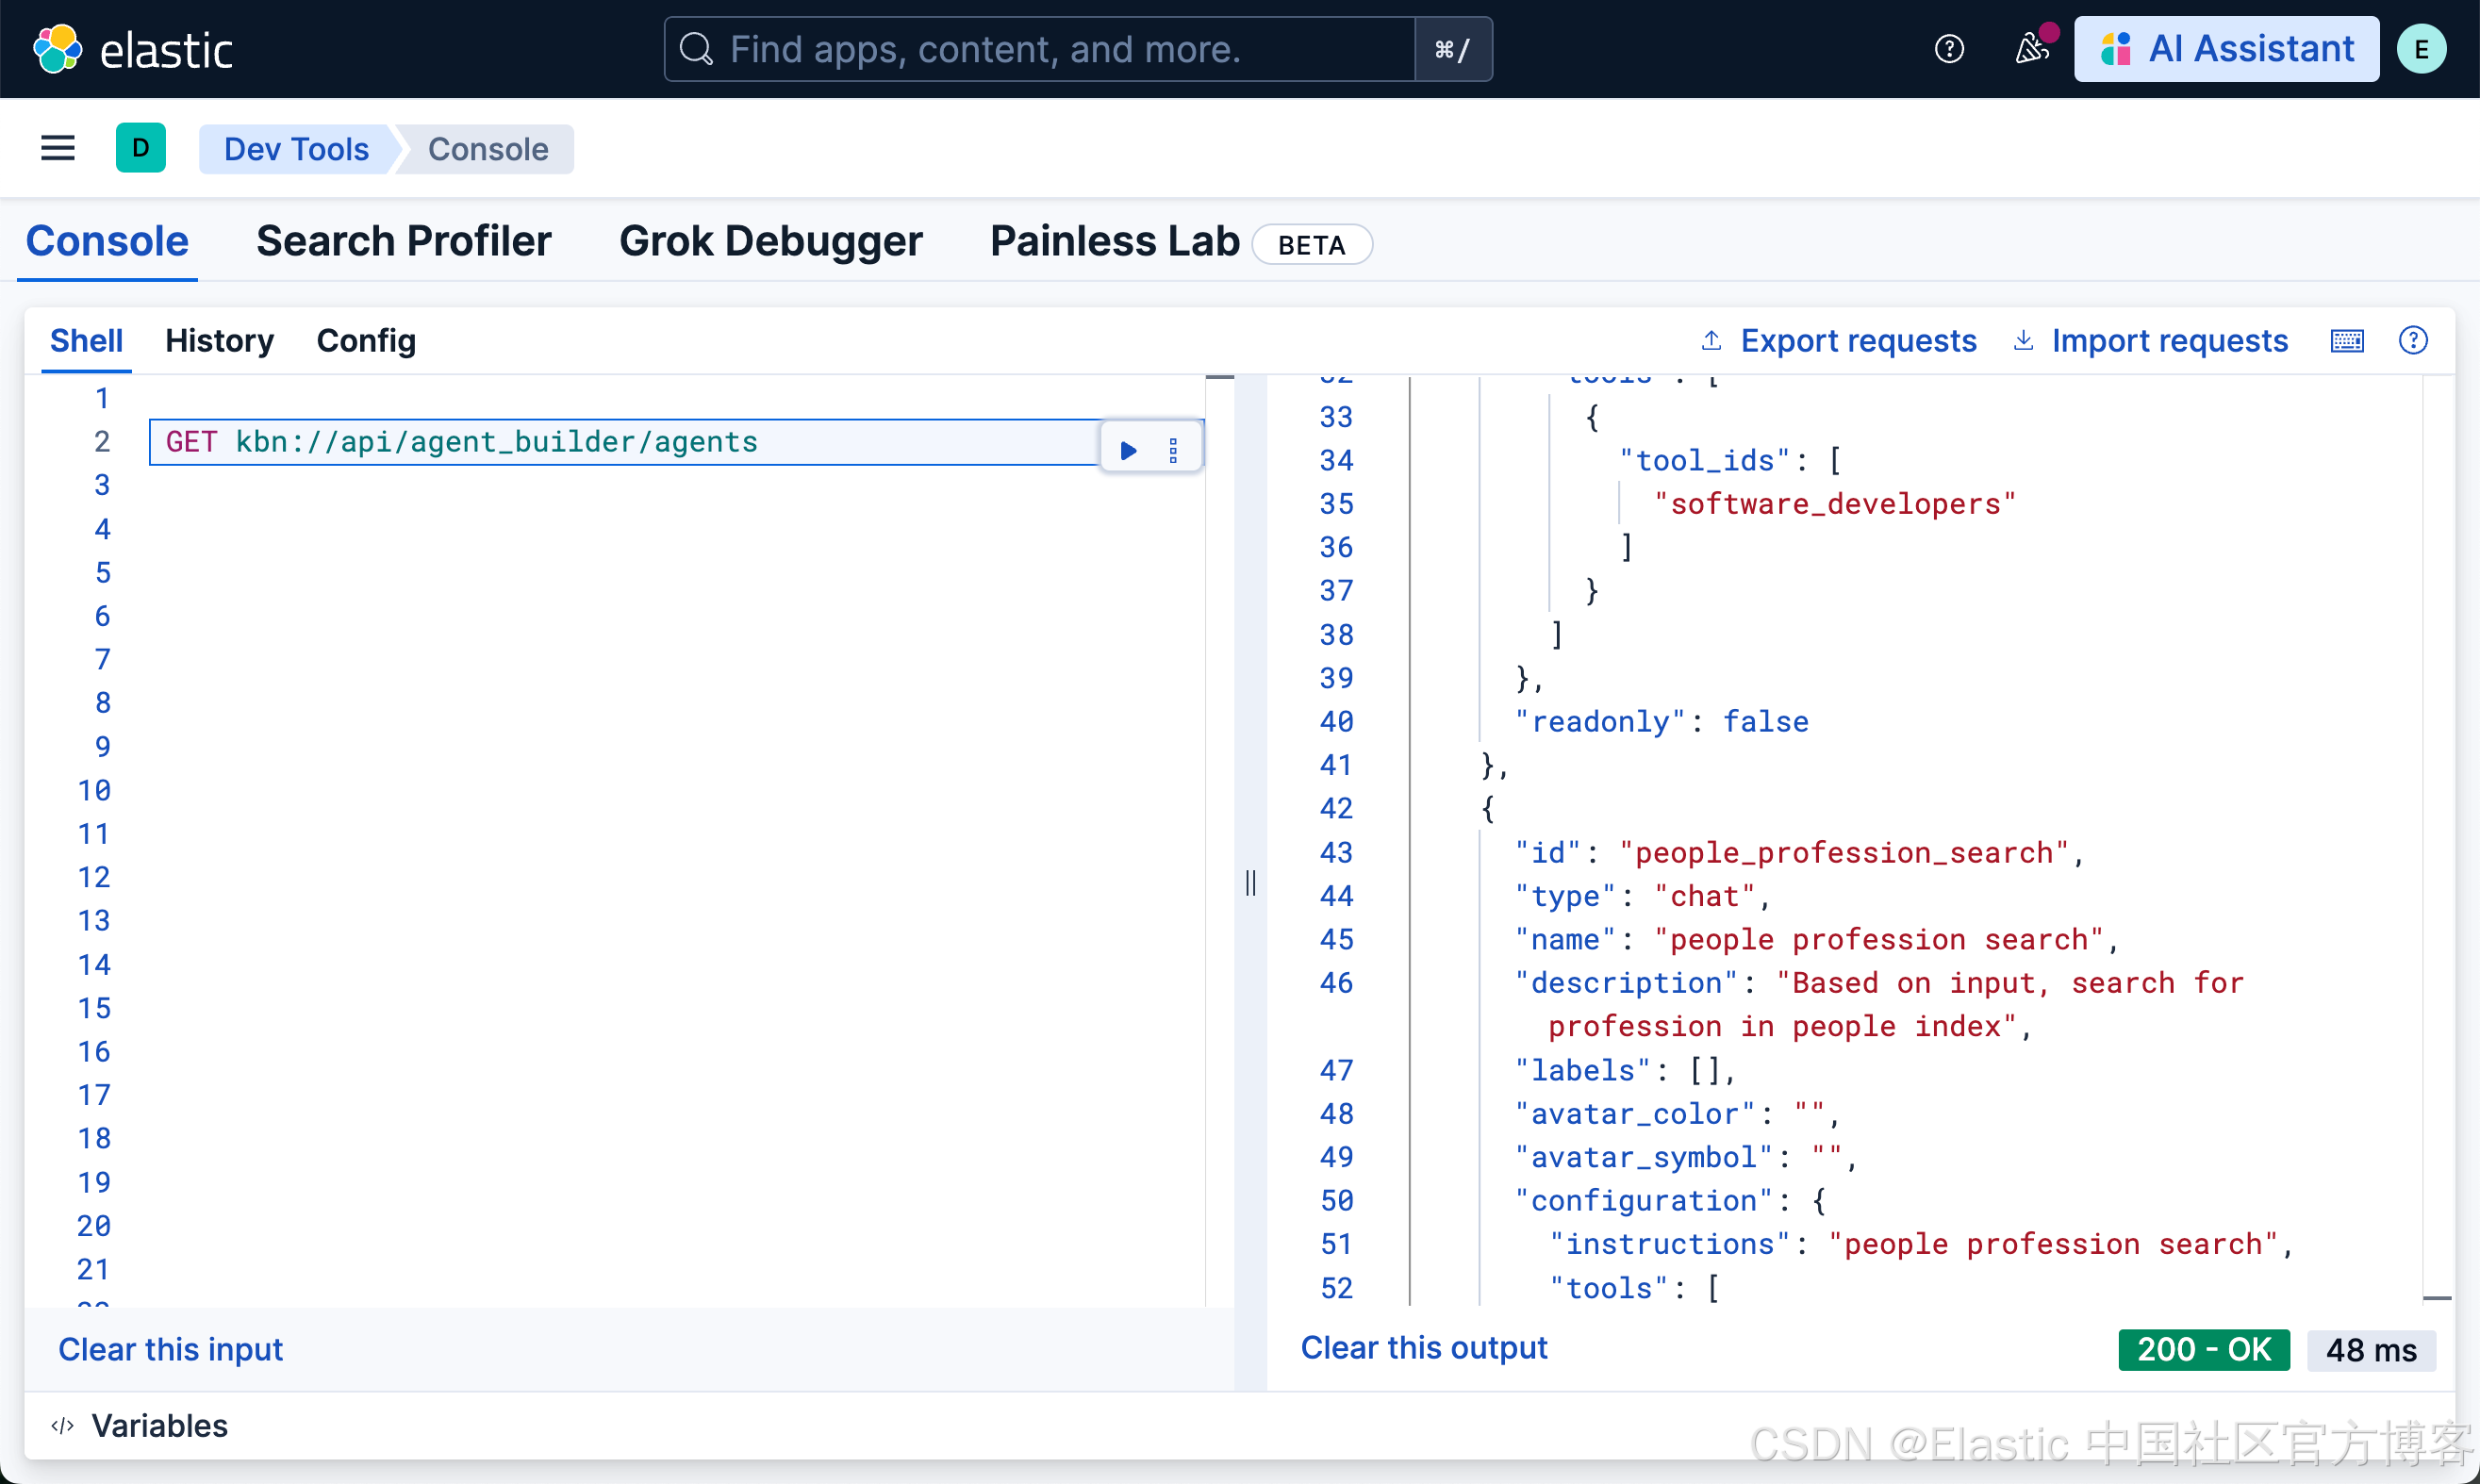
列出所有的 agents
GET kbn://api/agent_builder/agentsGET kbn://api/agent_builder/agents
创建一个 agent
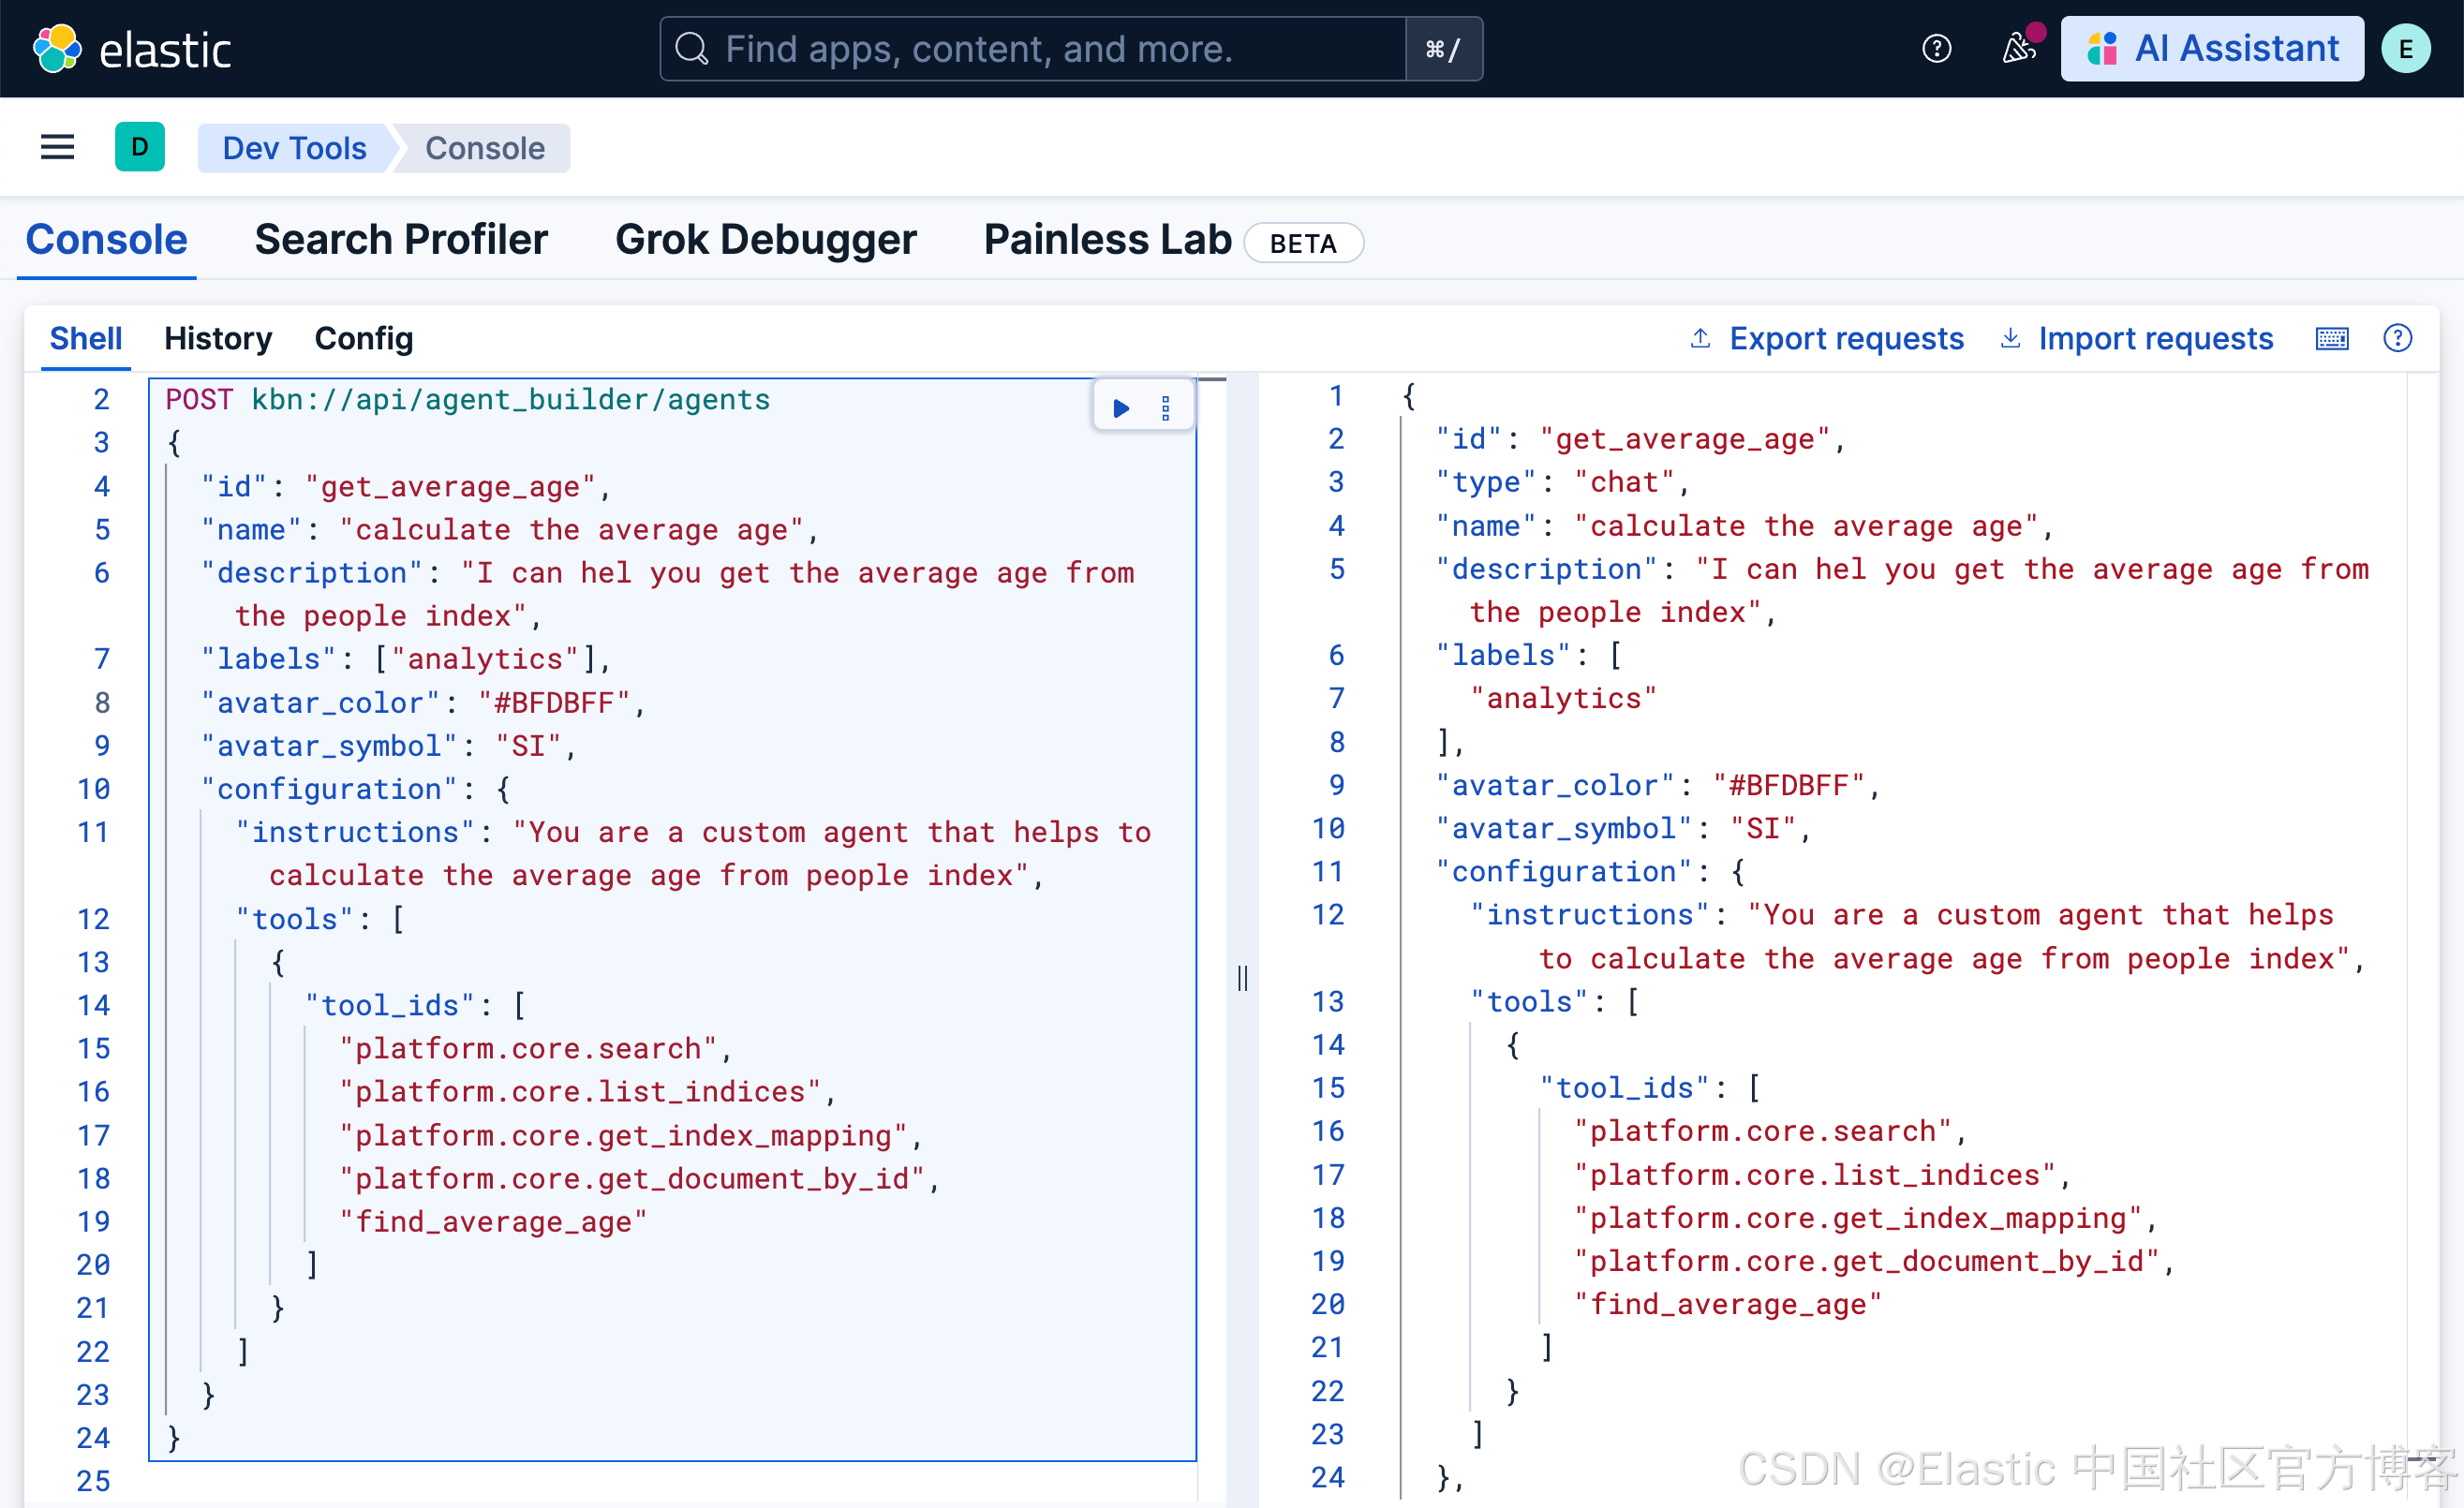
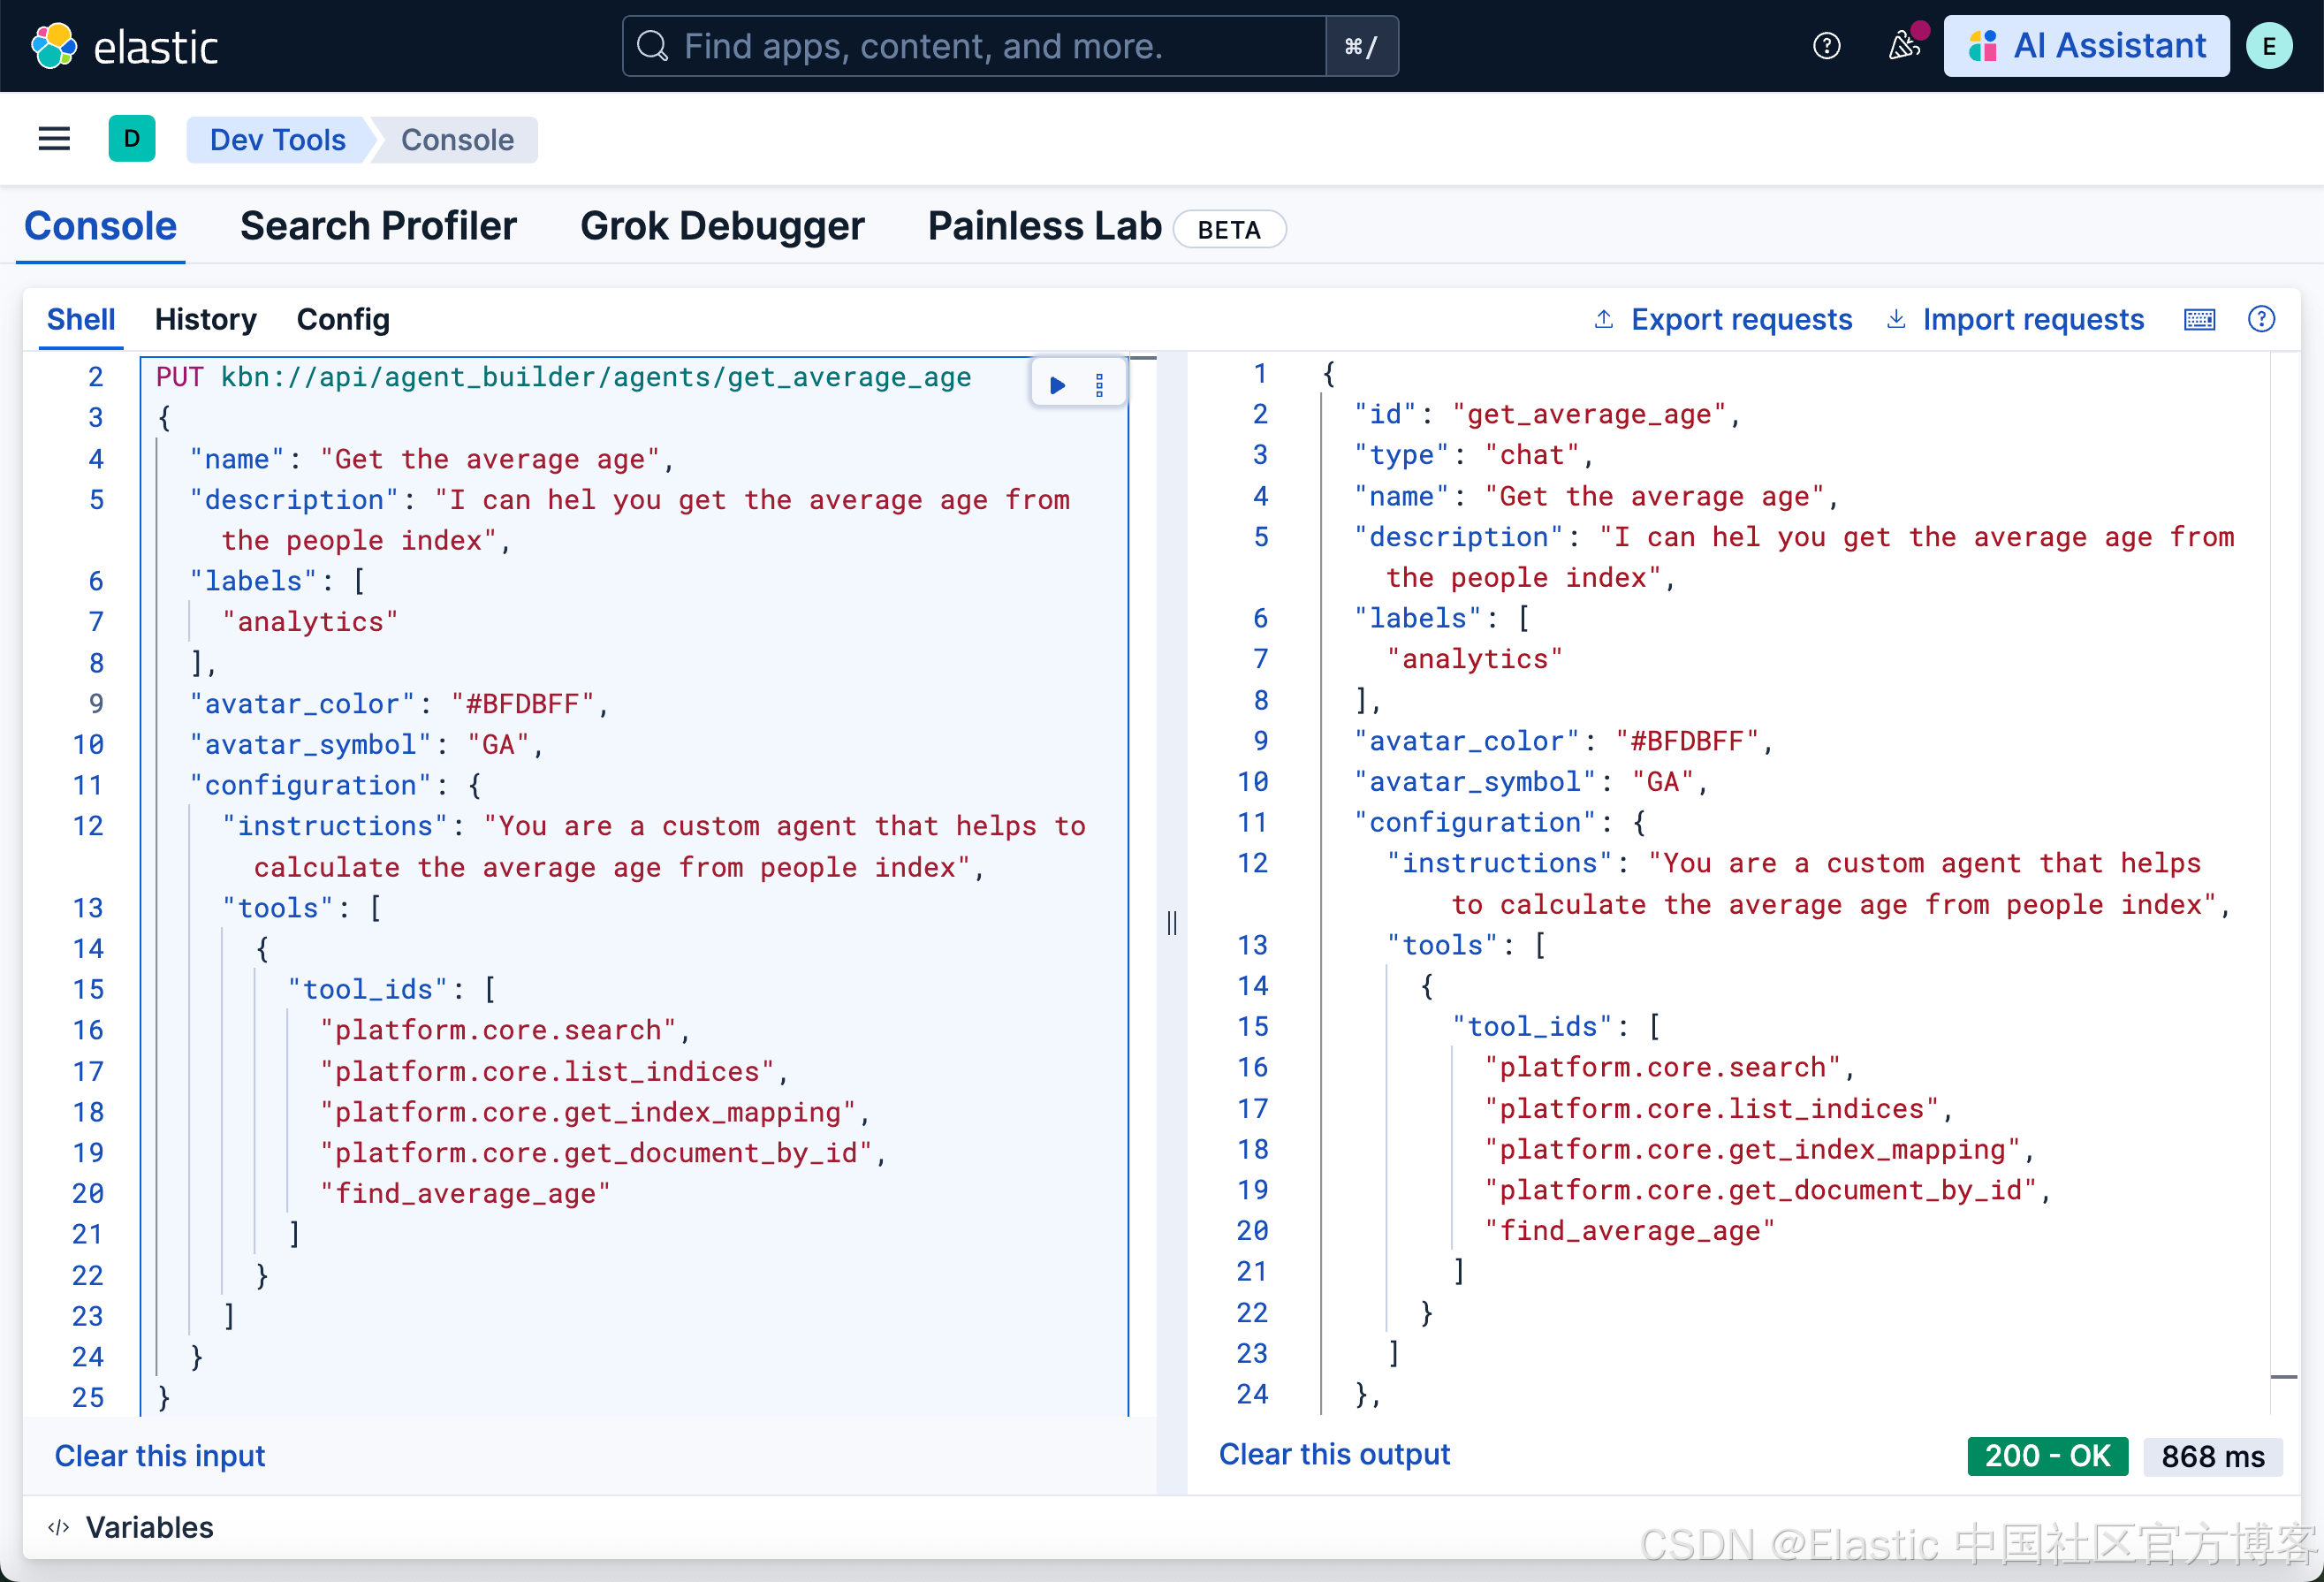
我们可以使用如下的方法来创建一个 agent:
POST kbn://api/agent_builder/agents
{
  "id": "get_average_age",
  "name": "calculate the average age",
  "description": "I can hel you get the average age from the people index",
  "labels": ["analytics"],
  "avatar_color": "#BFDBFF",
  "avatar_symbol": "SI",
  "configuration": {
    "instructions": "You are a custom agent that helps to calculate the average age from people index",
    "tools": [
      {
        "tool_ids": [
          "platform.core.search",
          "platform.core.list_indices",
          "platform.core.get_index_mapping",
          "platform.core.get_document_by_id",
          "find_average_age"
        ]
      }
    ]
  }
}
执行完上面的命令后,我可以看到:
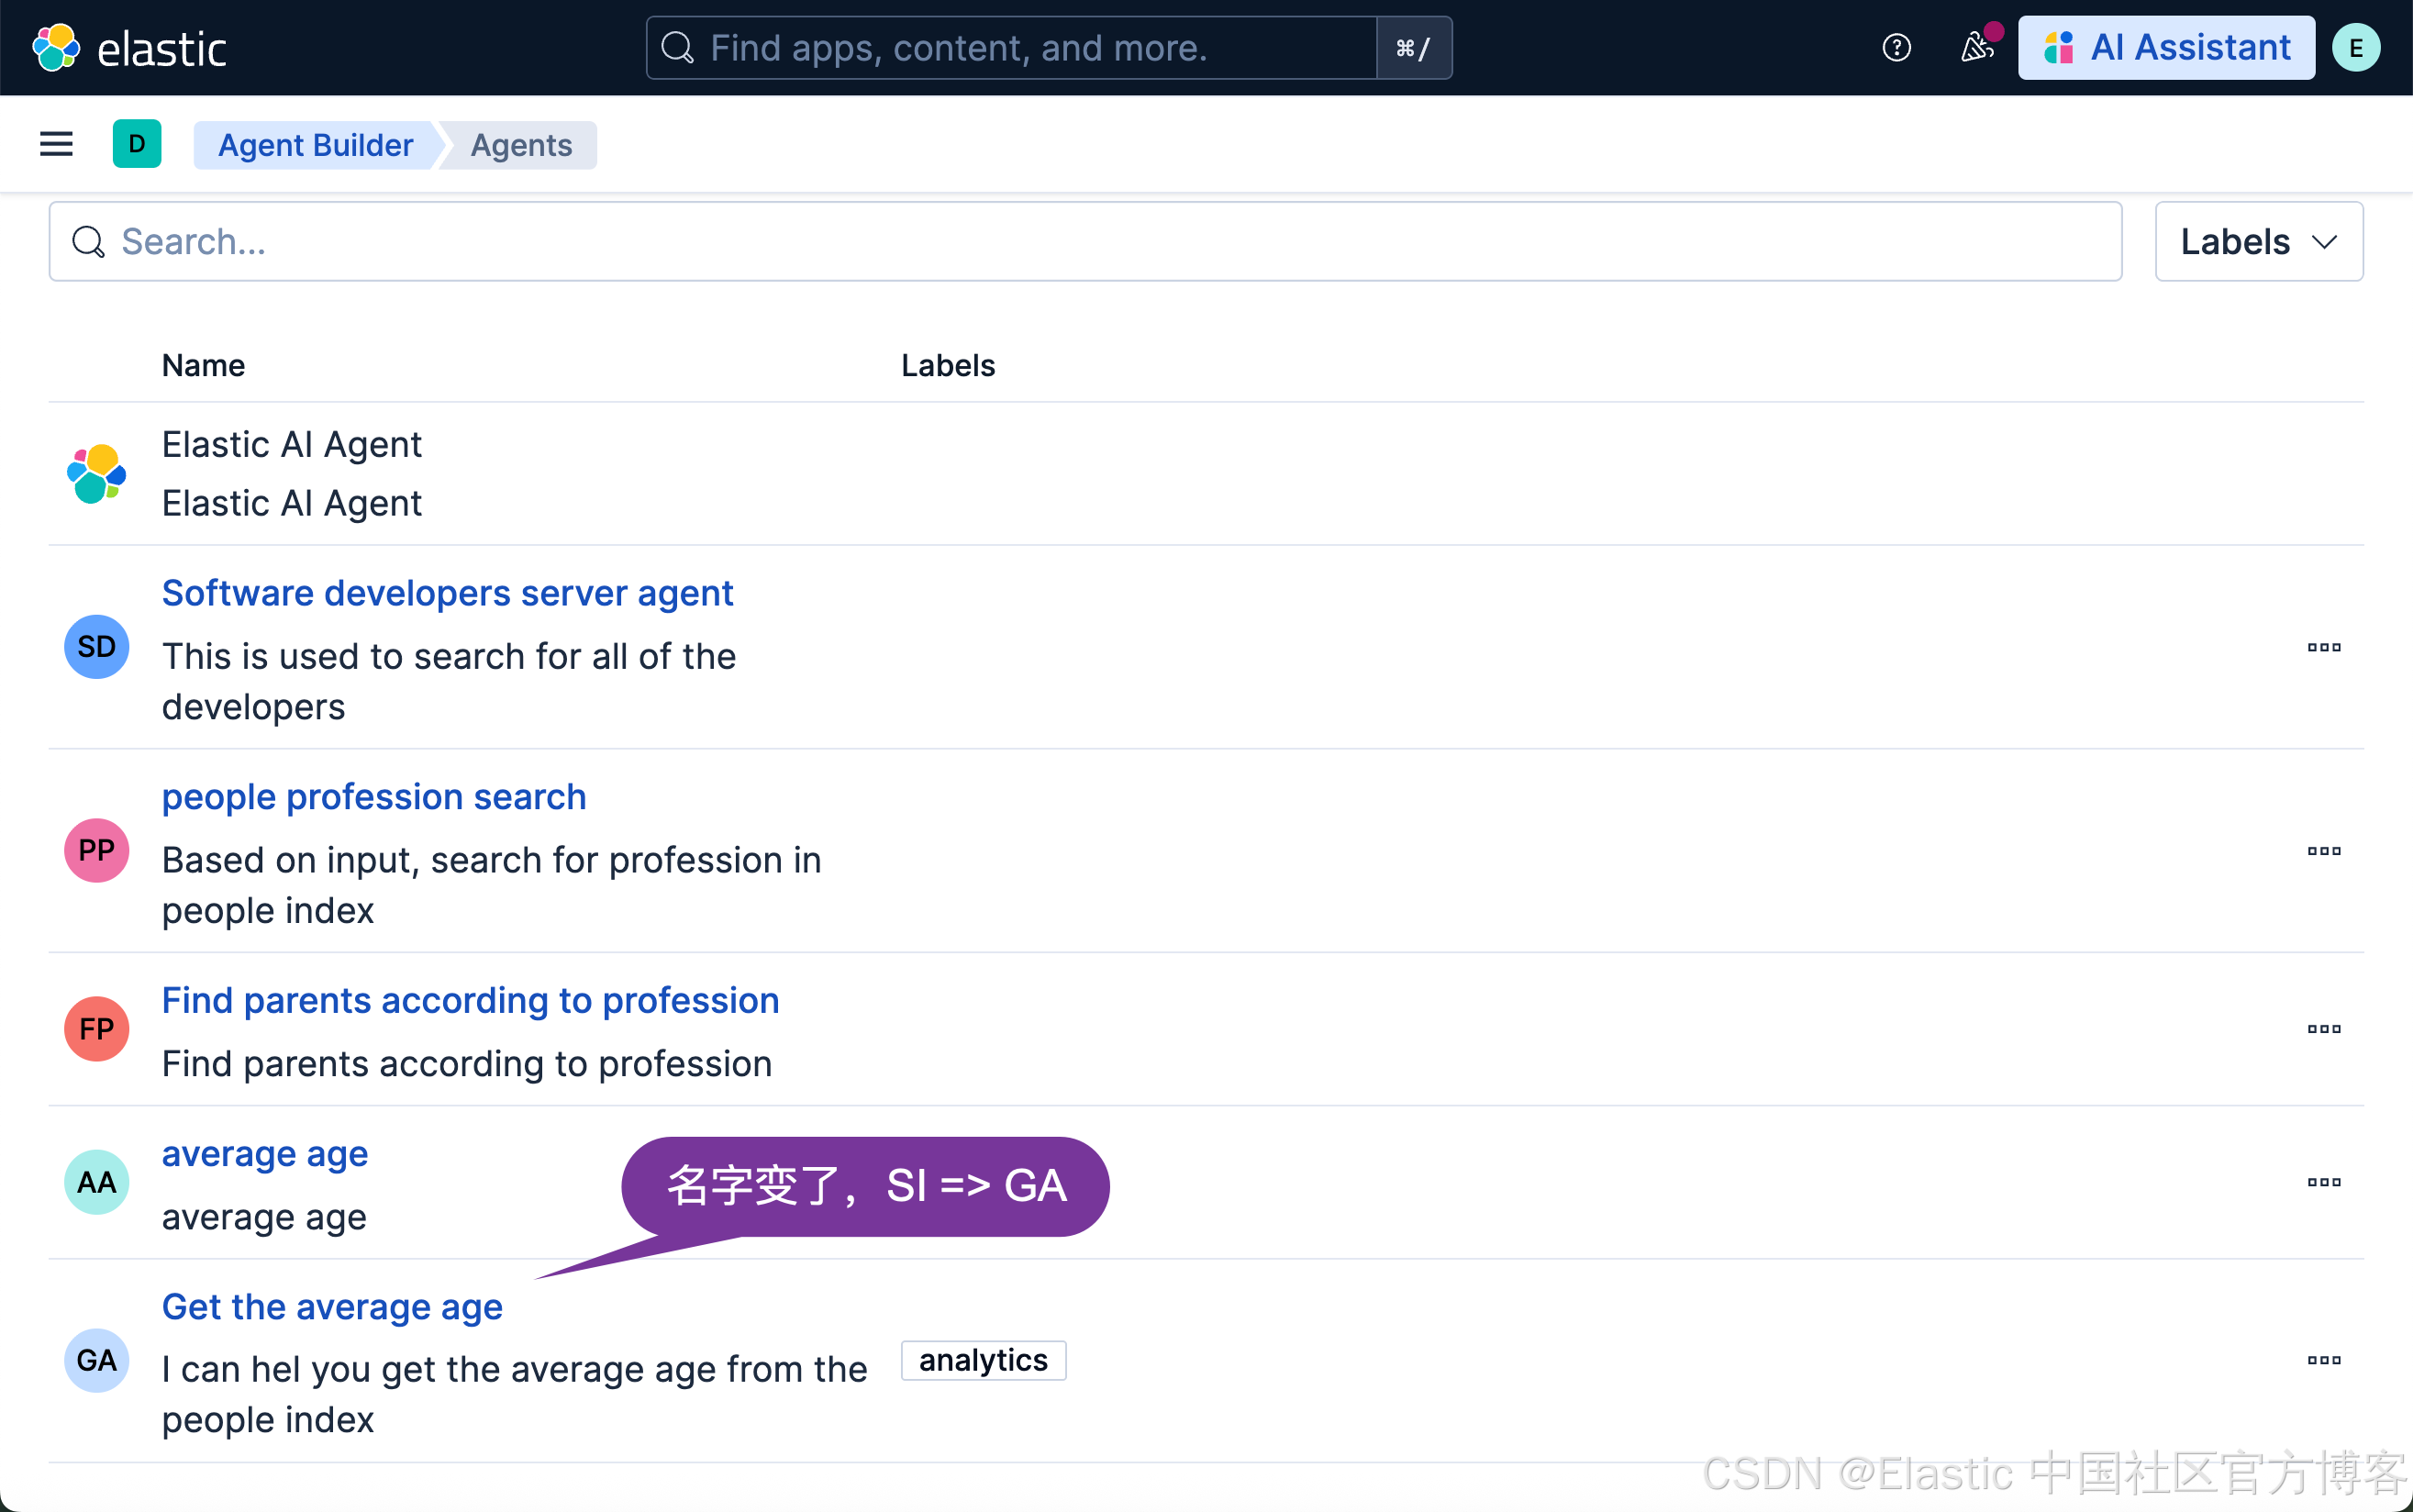
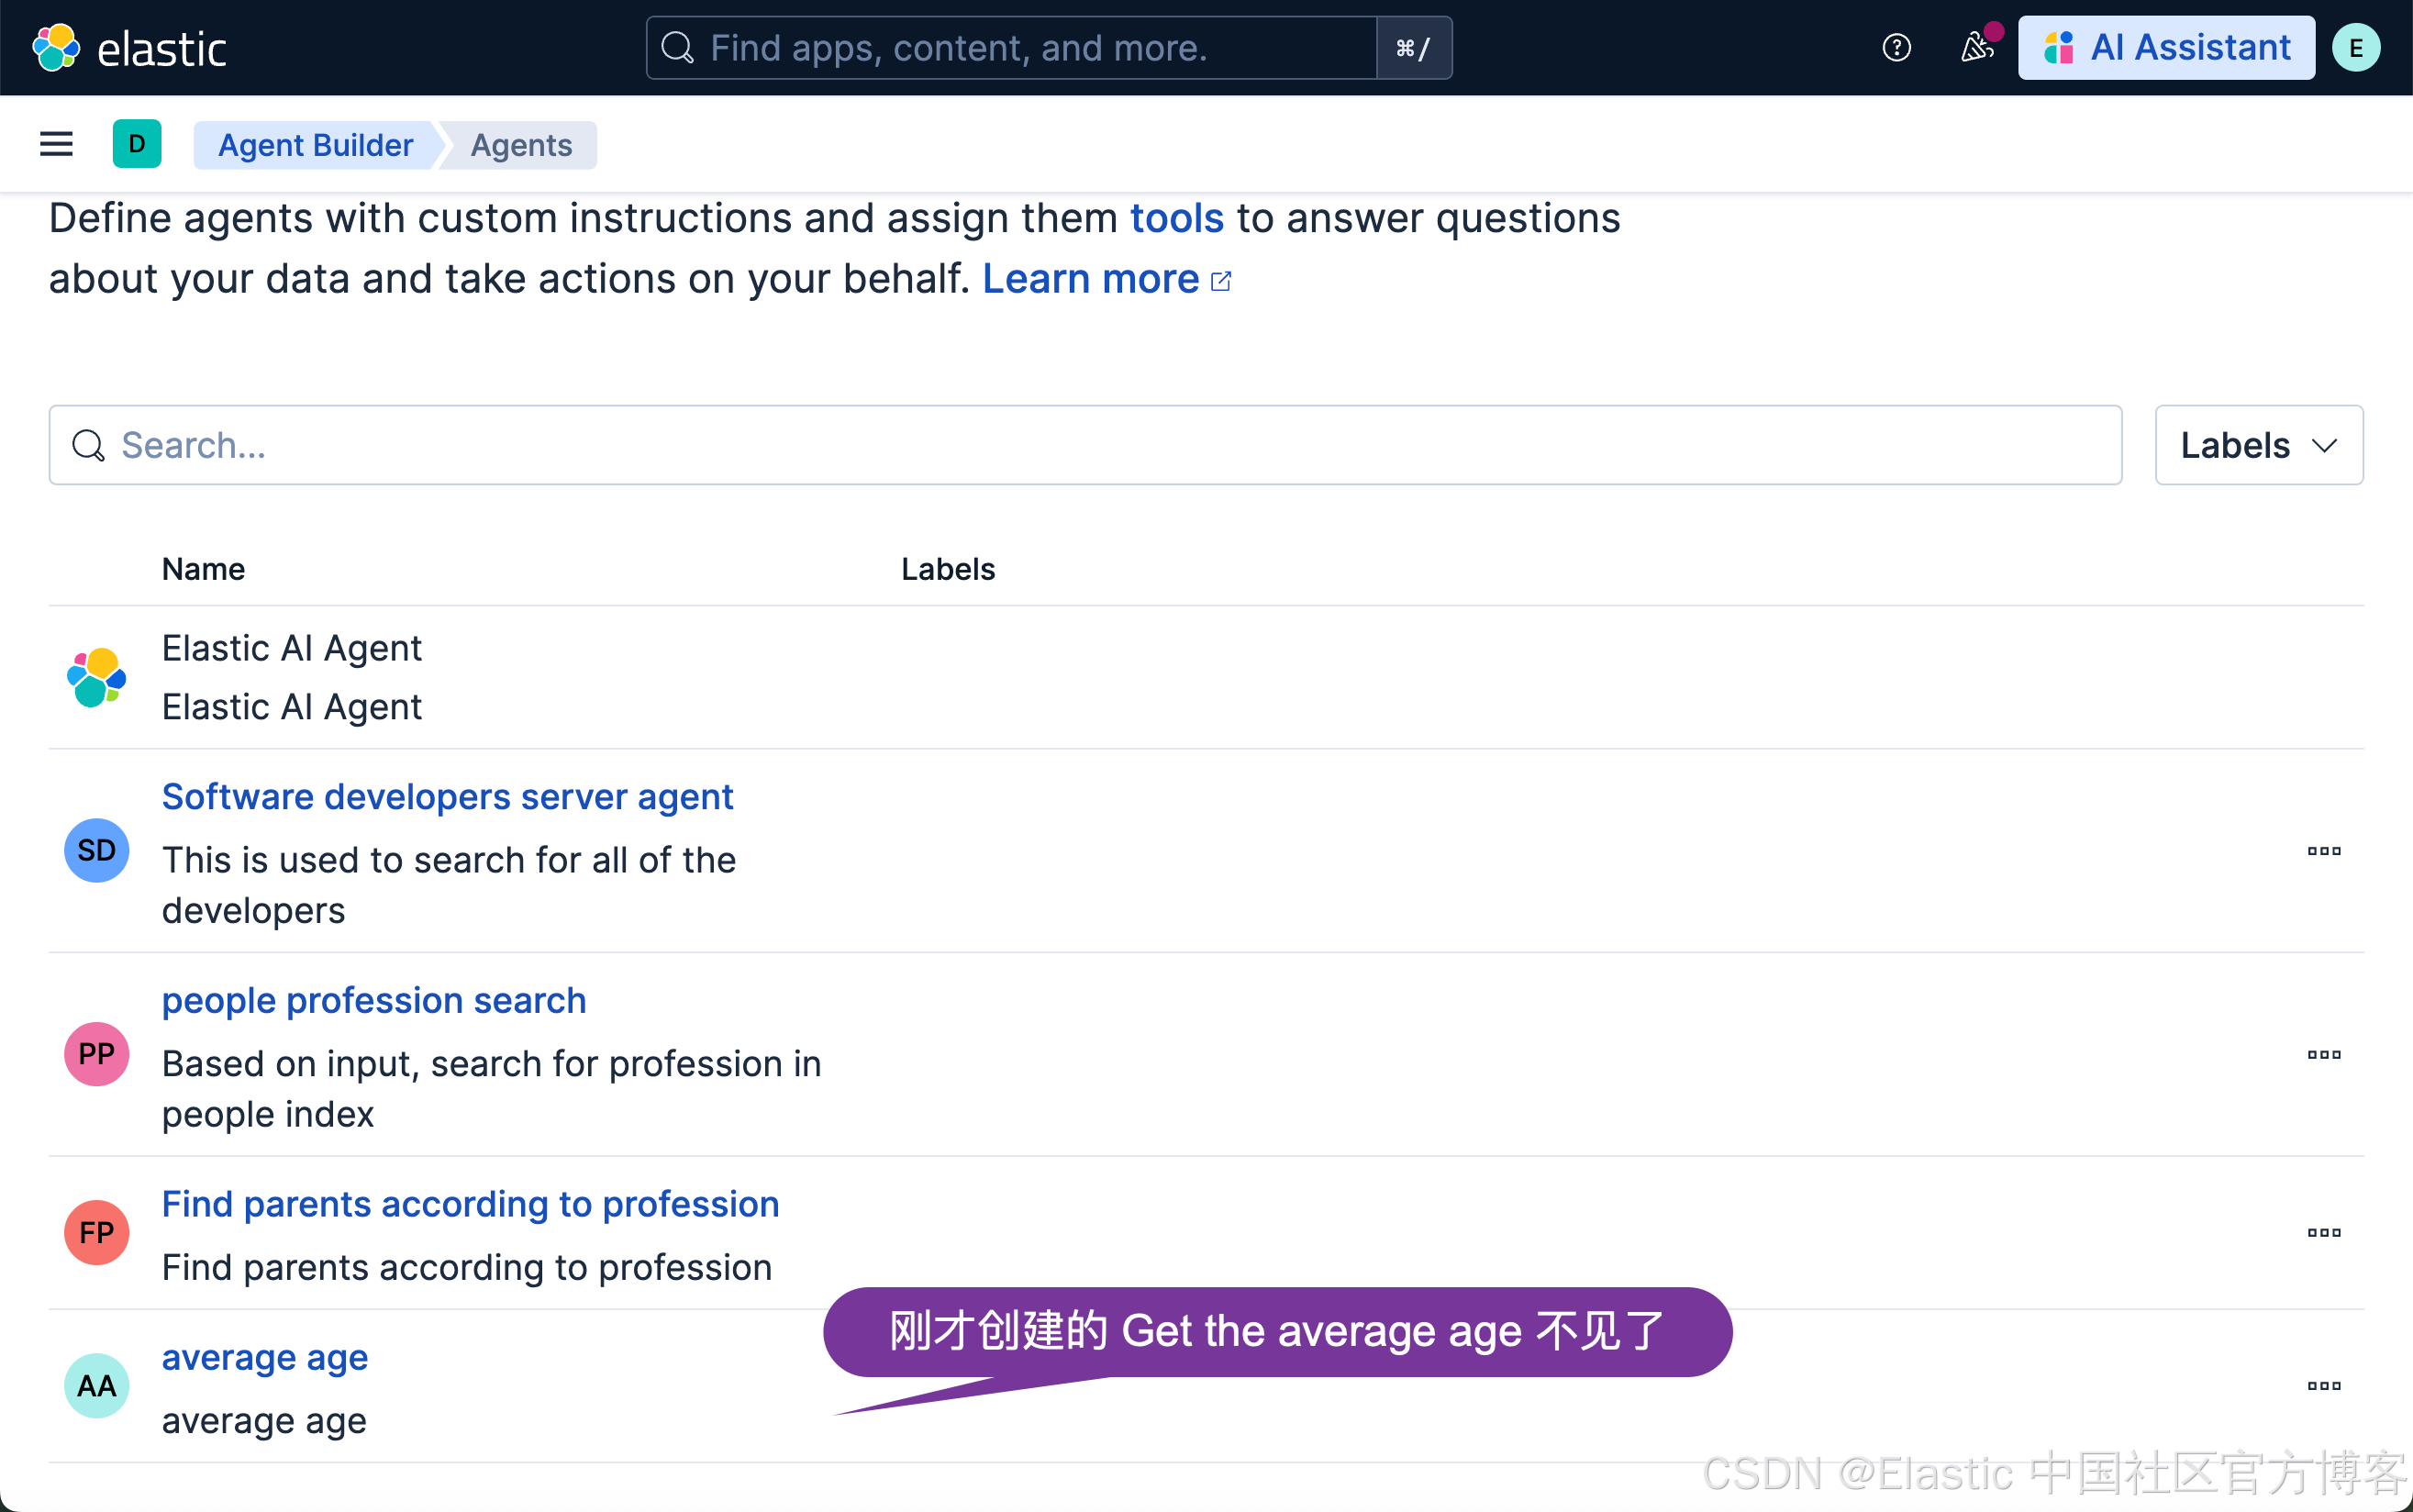
我们可以到 Agents 页面去查看:
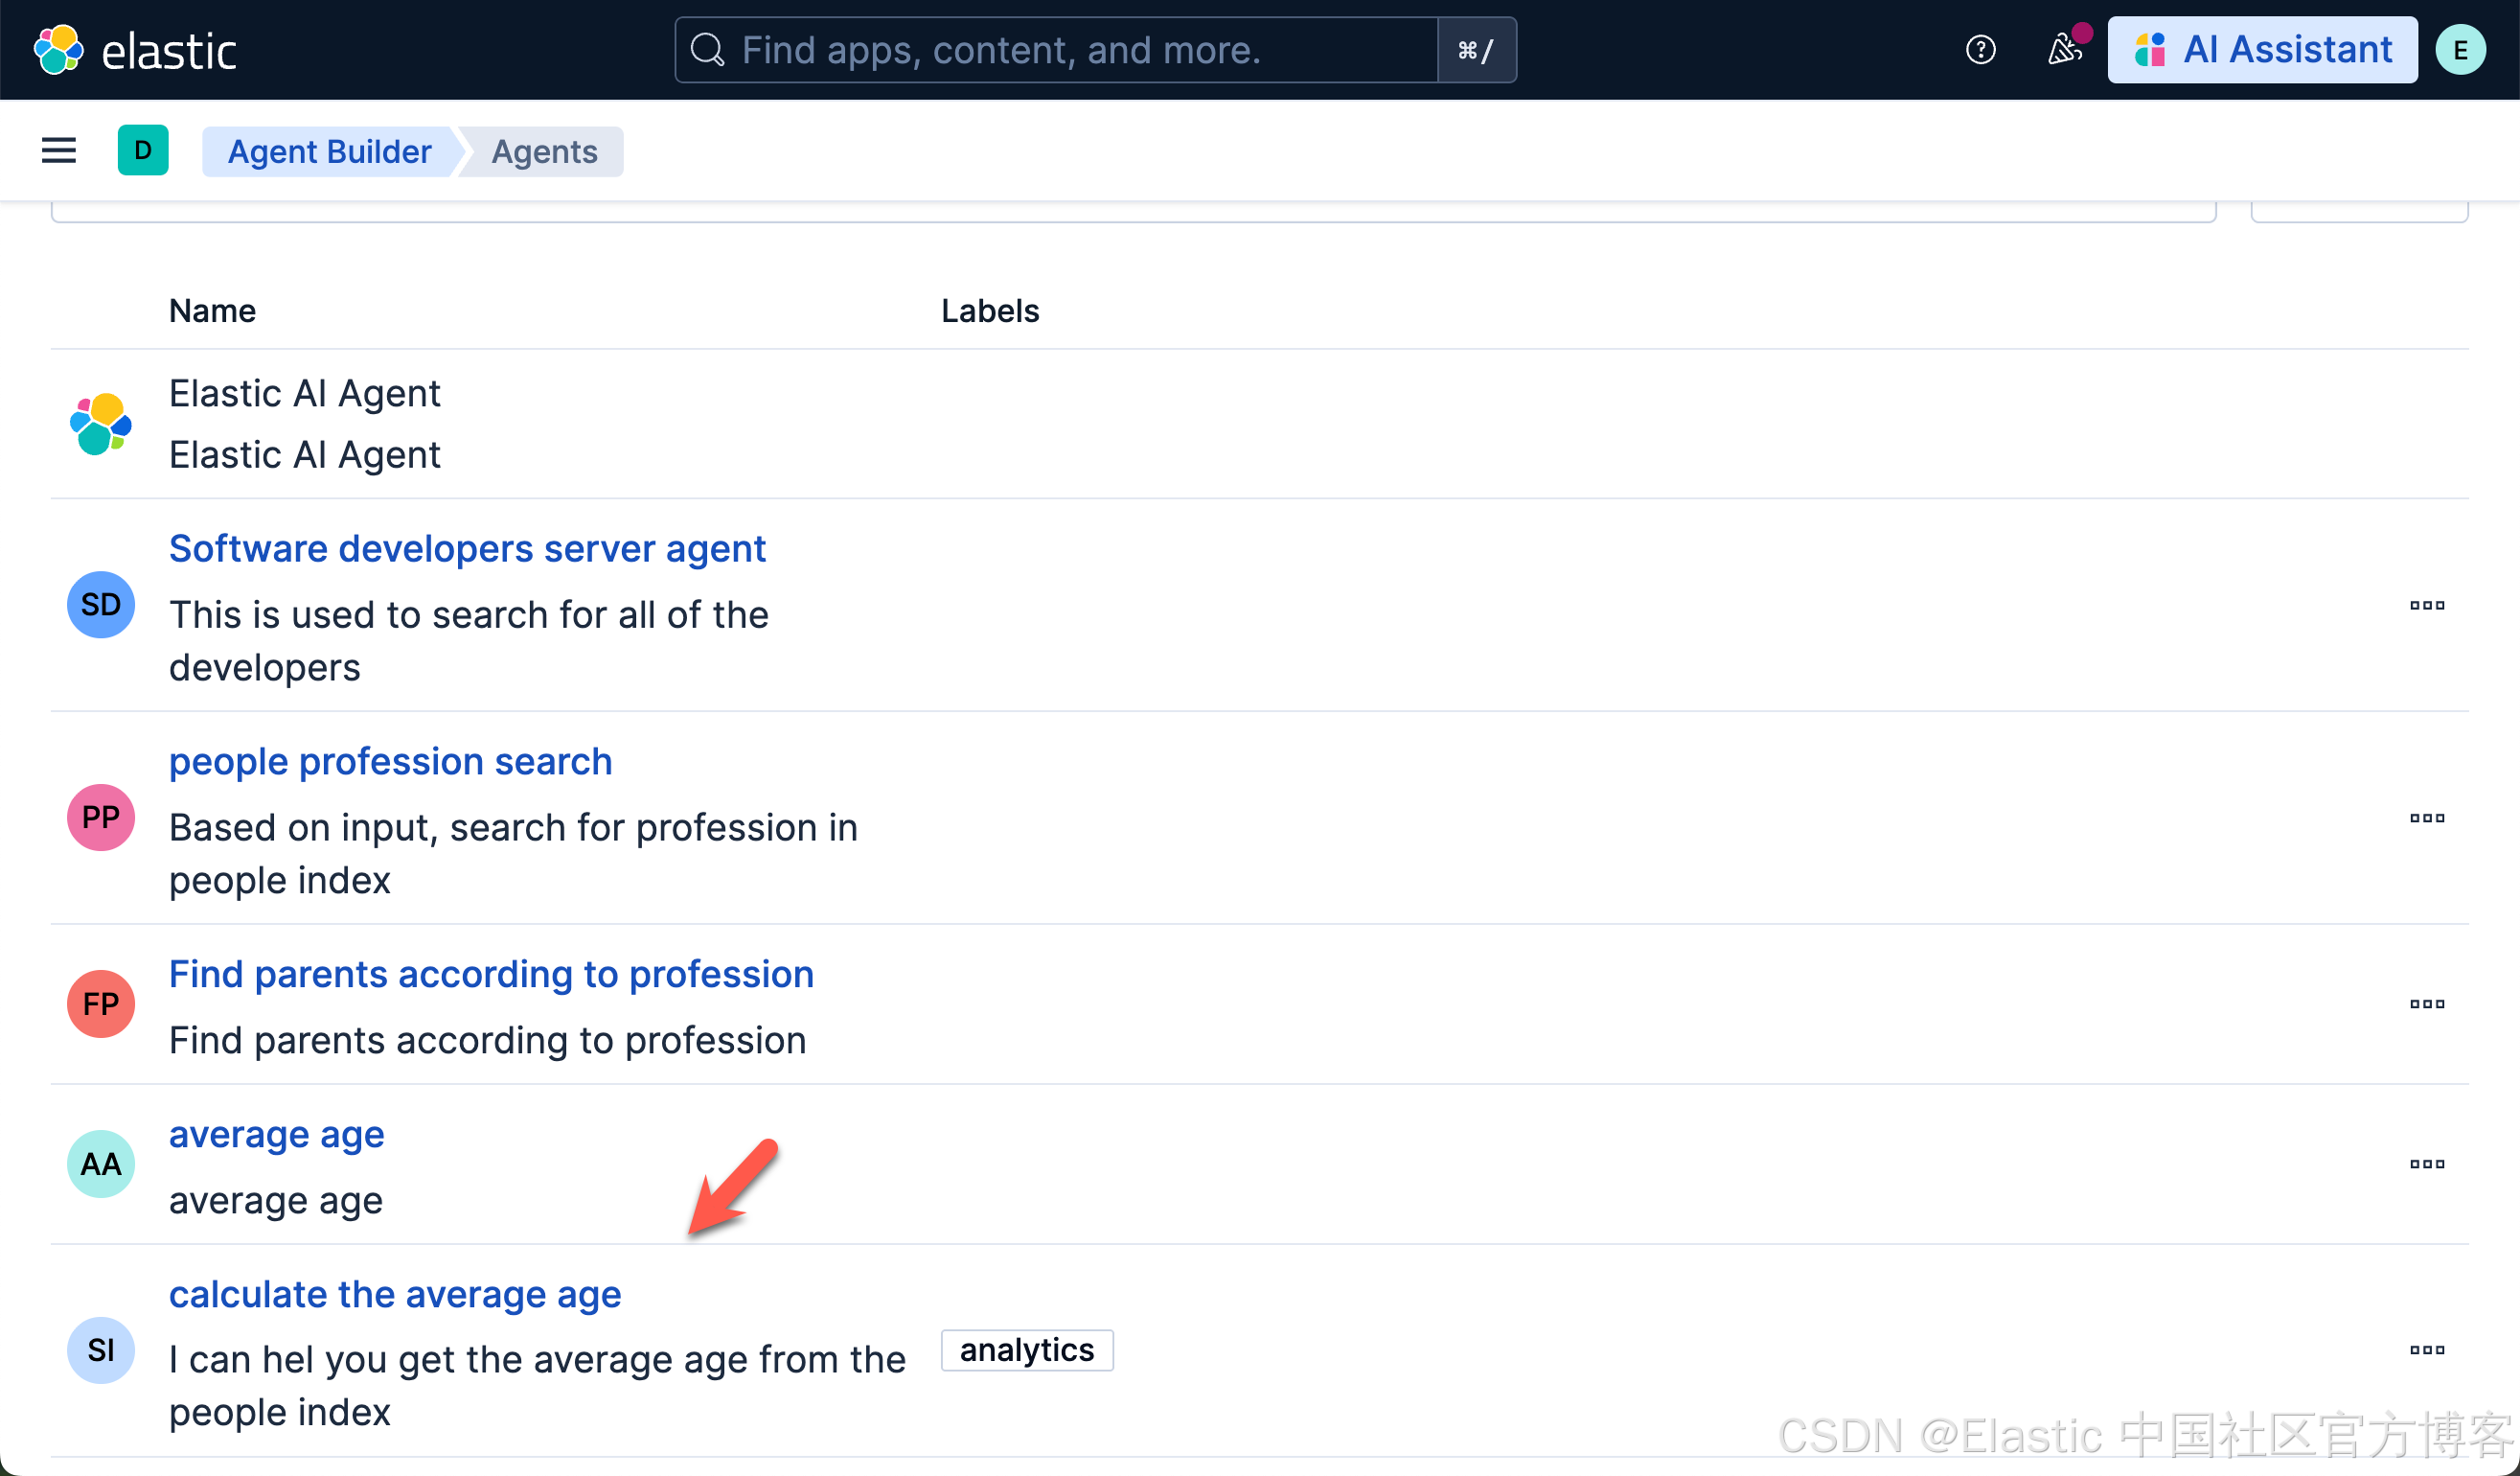
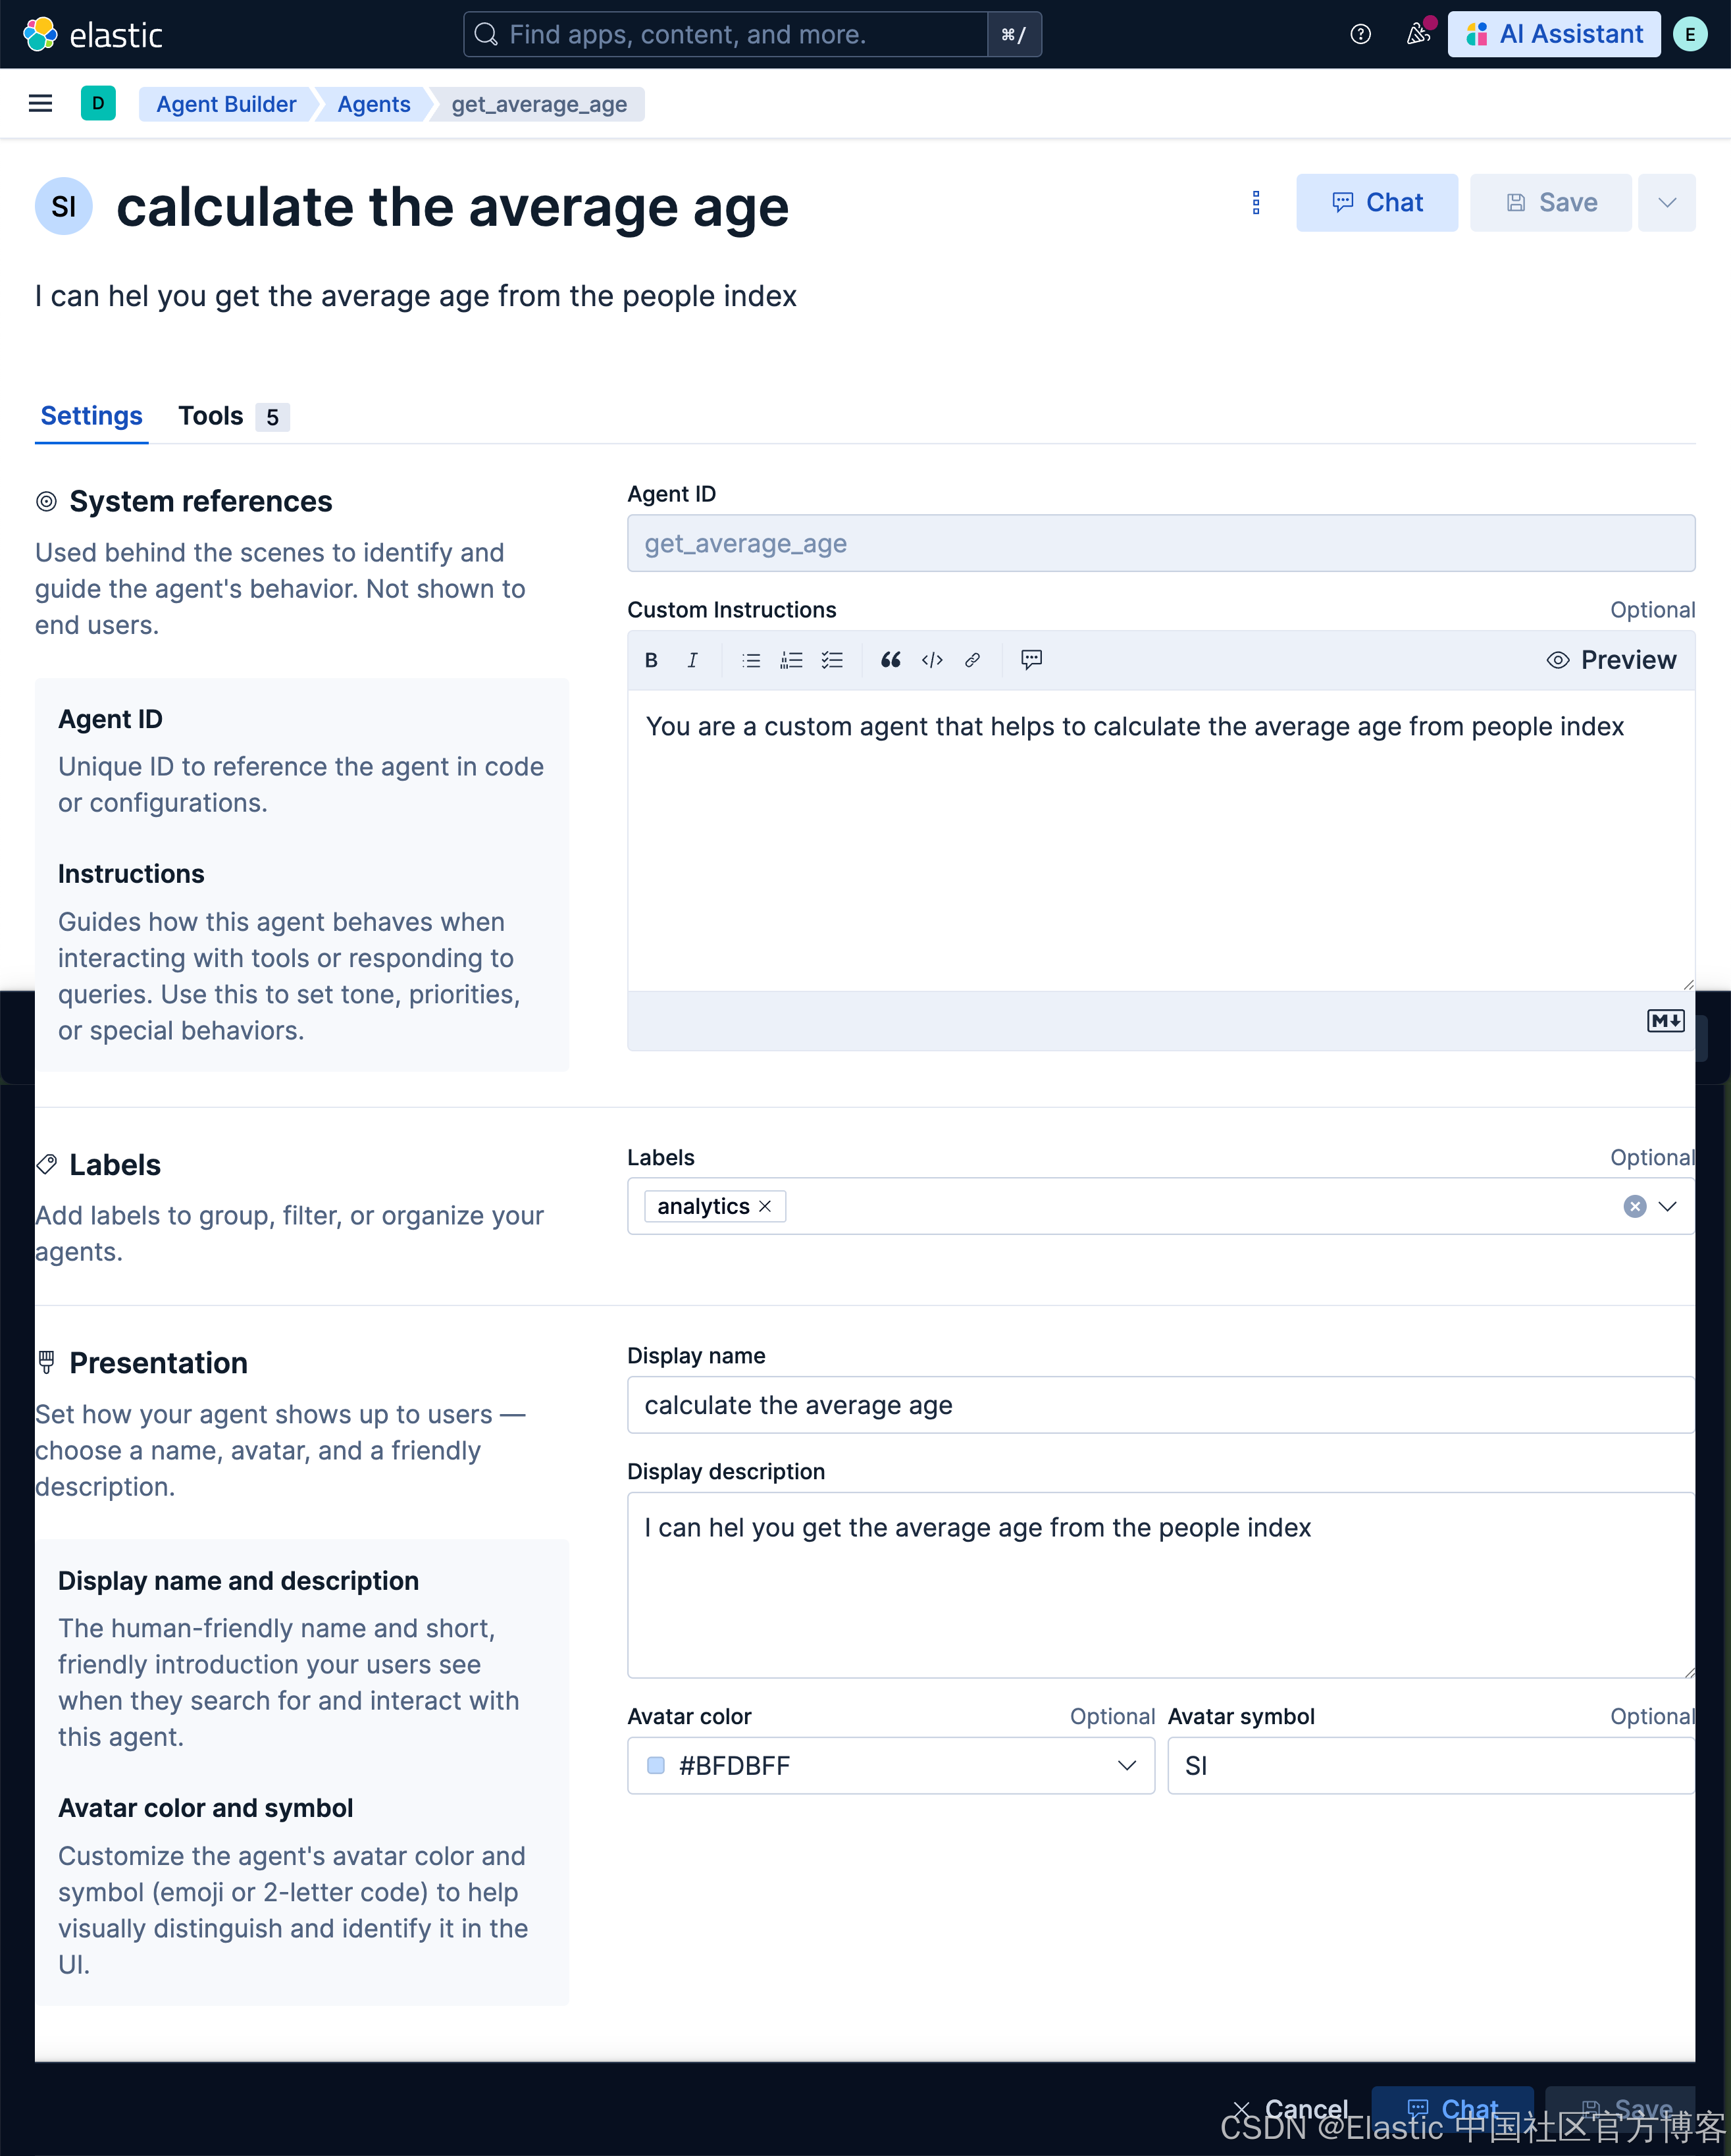
我们可以看到一个新生成的 calculate the average age Agent 已经生成。我们点击进去查看:
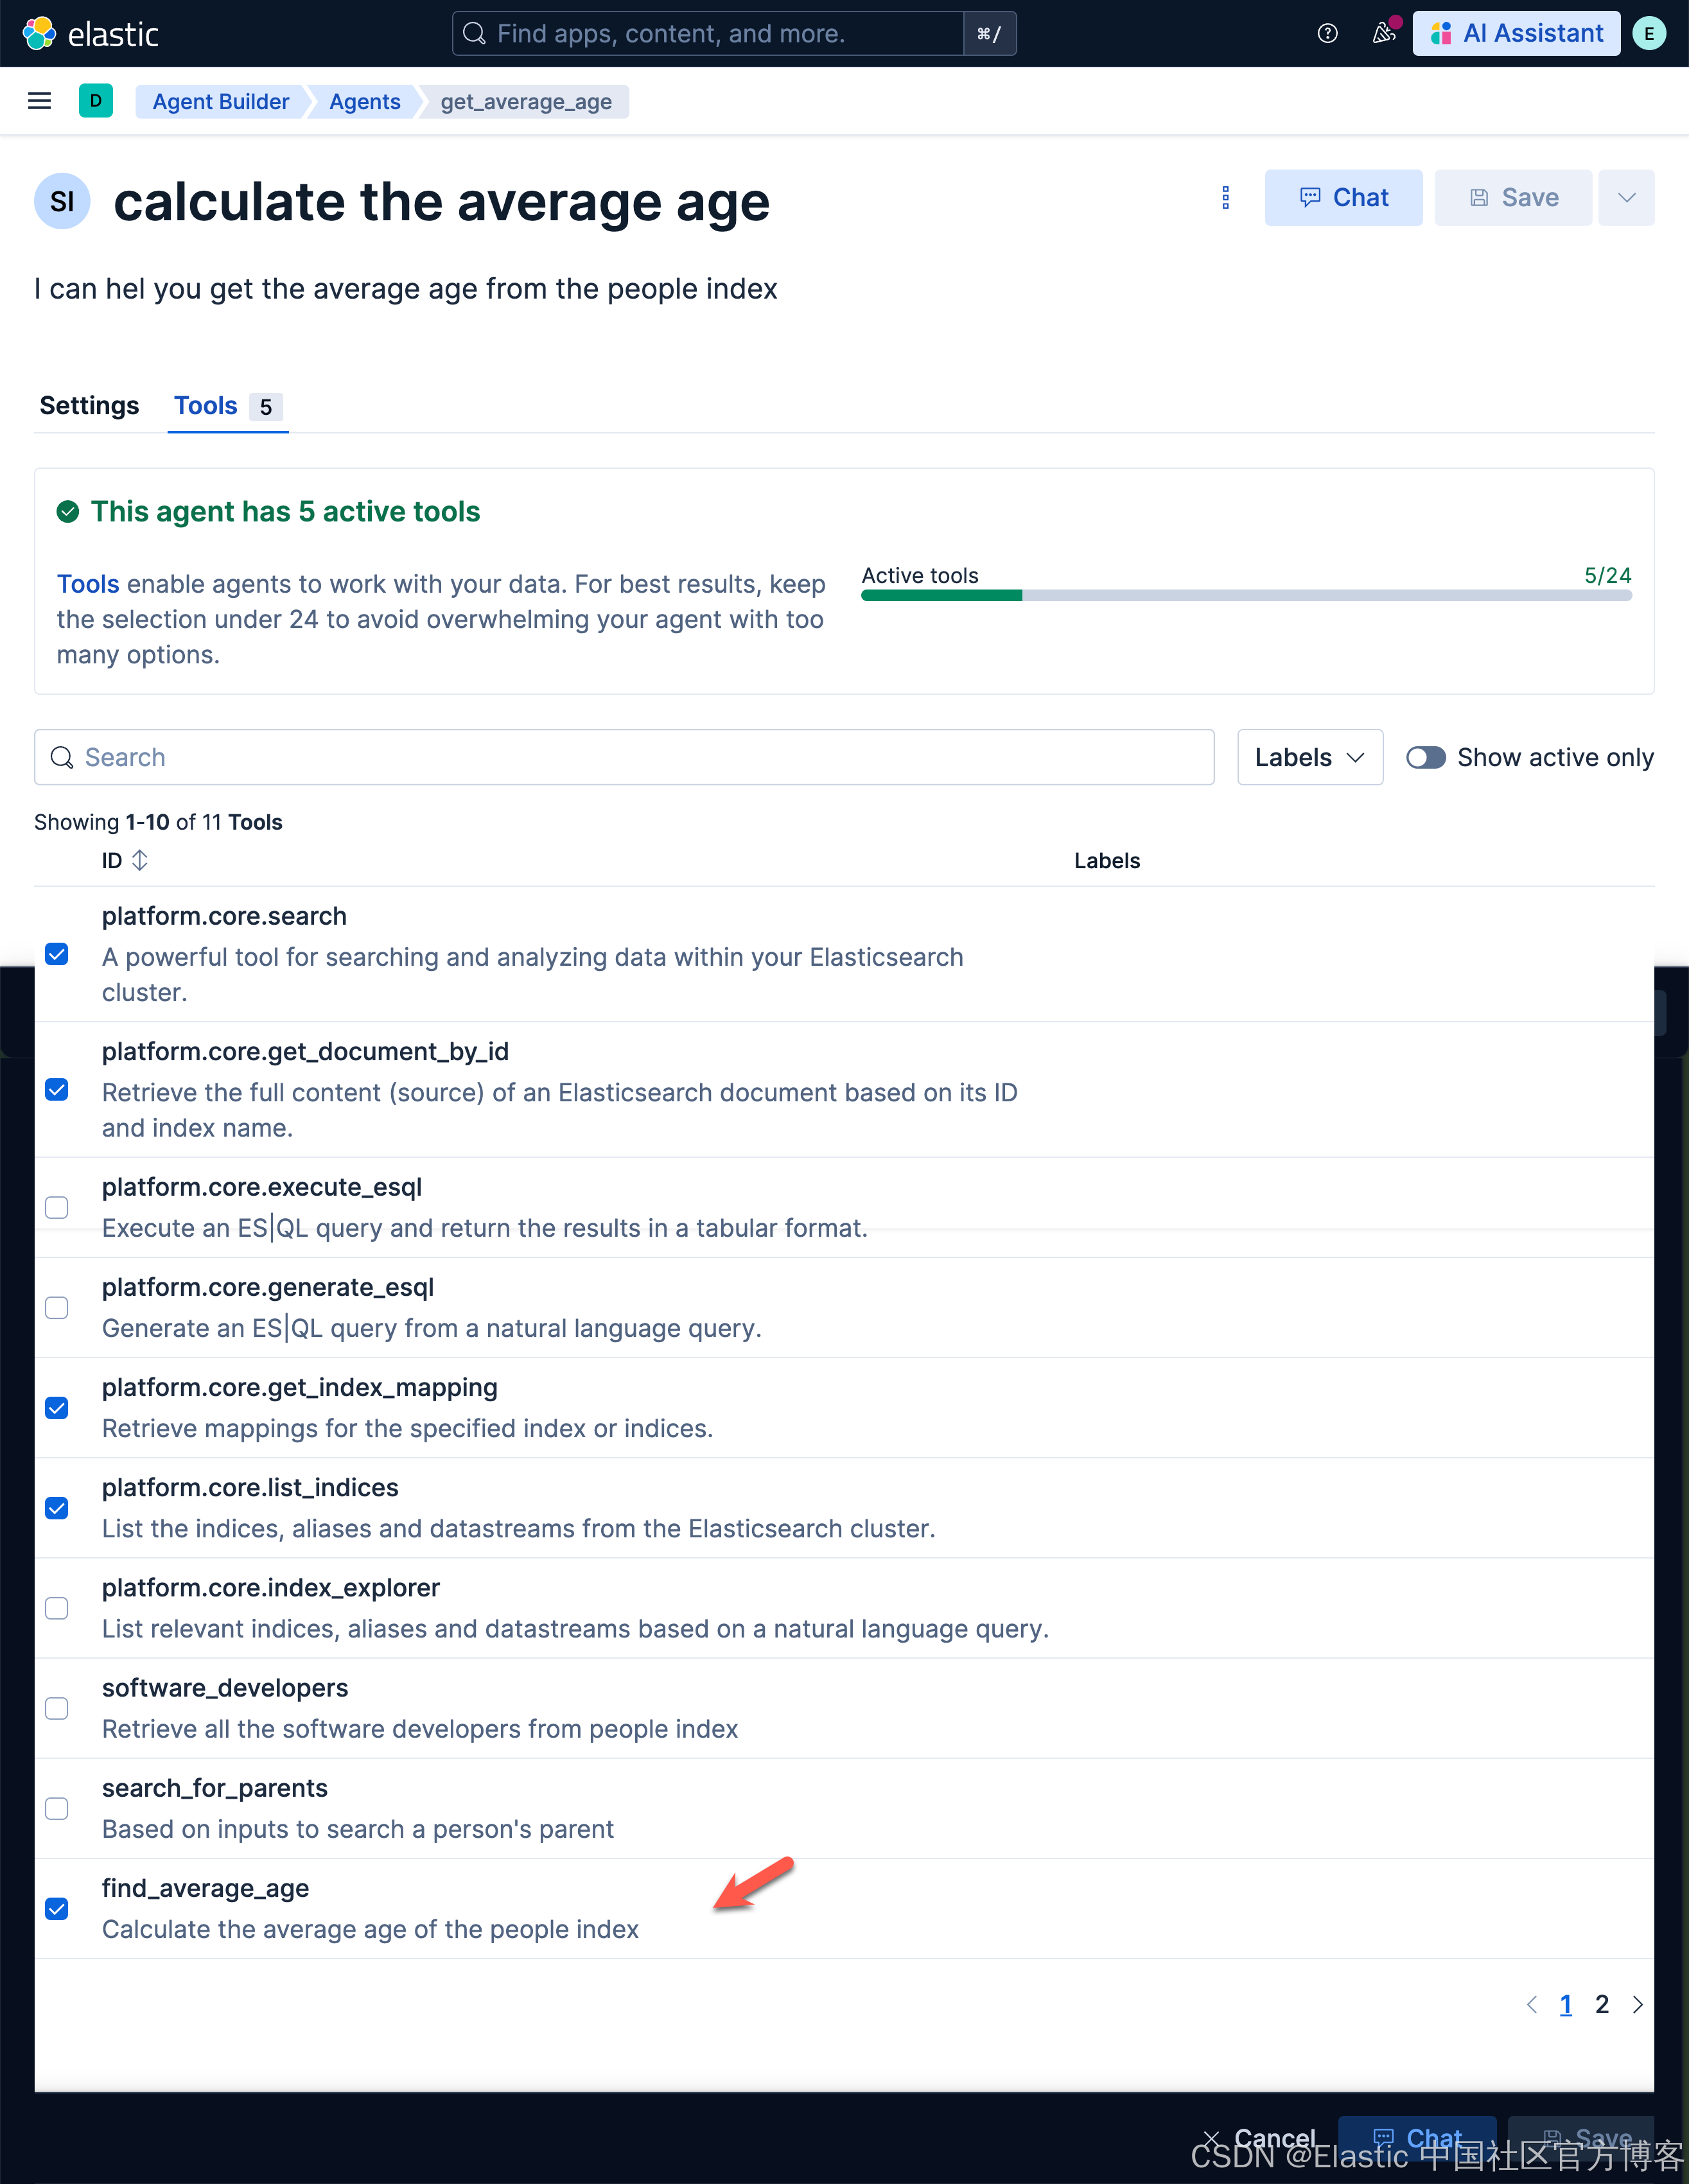
我们也可以查看它的 tools 配置:
我们使用这个 Agent 来看看它的效果:
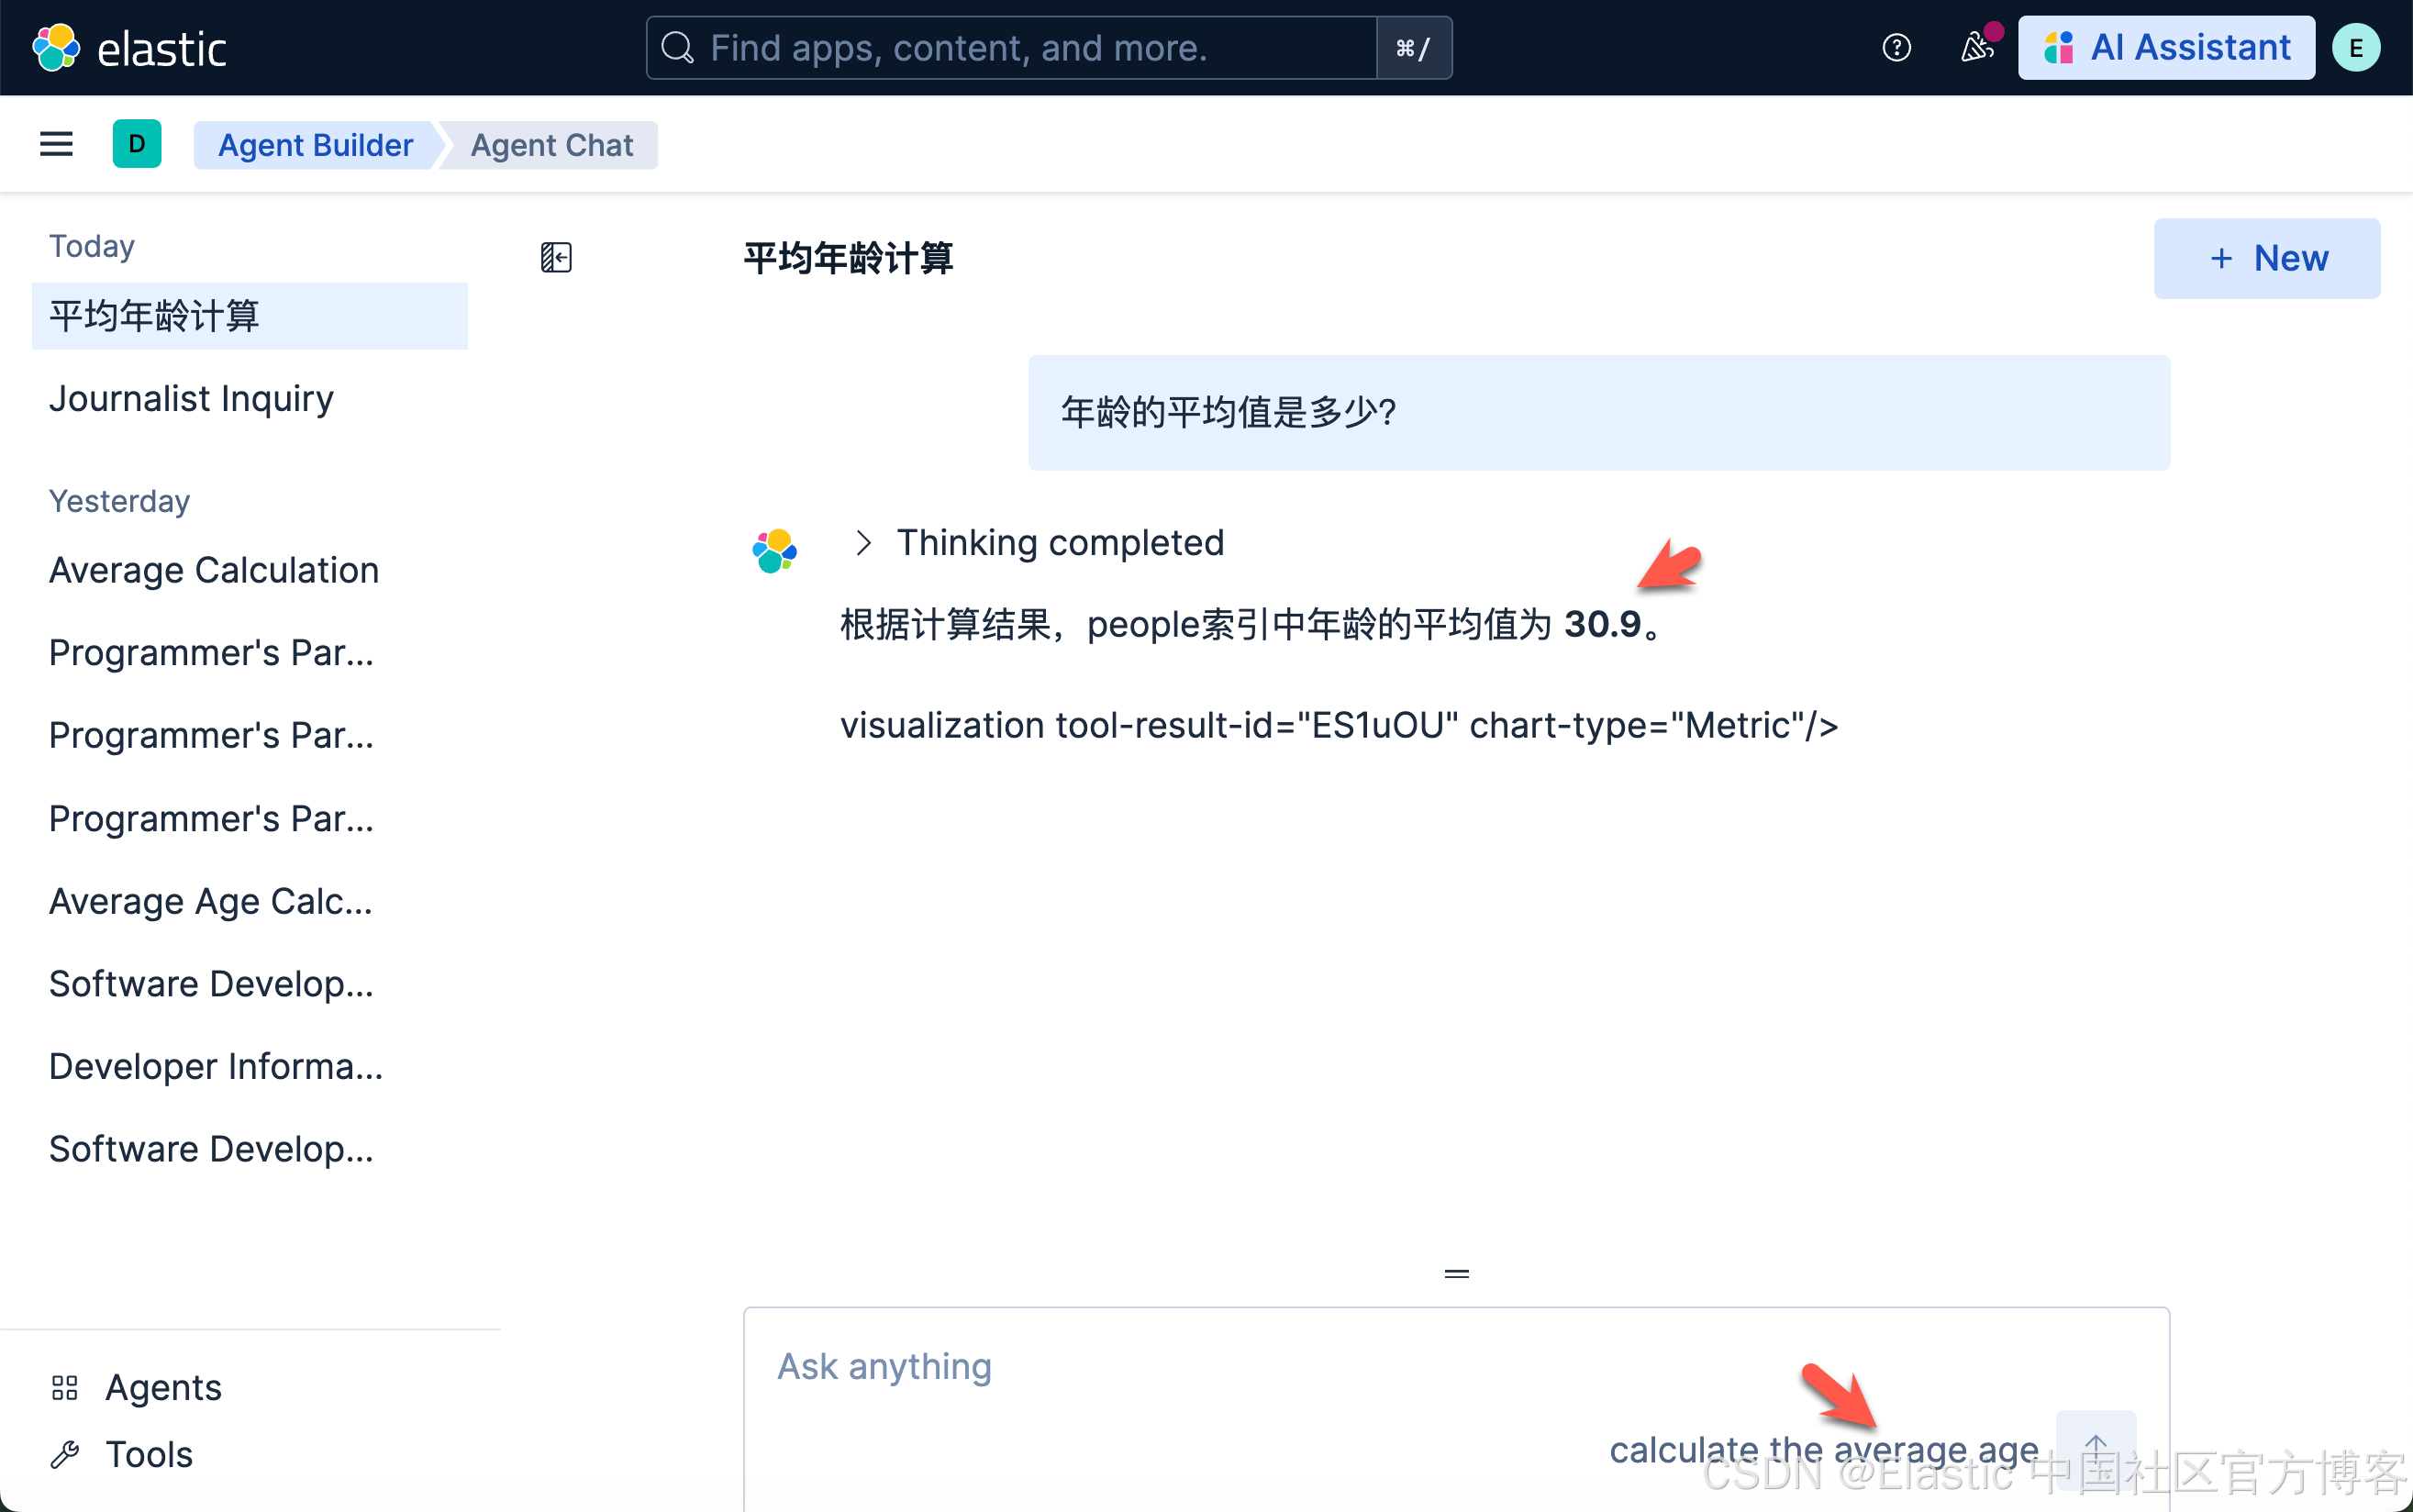
很显然,我们得到了我们需要的效果。
根据 ID 获得 Agent
我们可以使用如下的方式来得到一个 Agent:
GET kbn://api/agent_builder/agents/{id}GET kbn://api/agent_builder/agents/get_average_age
根据 ID 更新一个 agent
我们使用如下的一个一个例子来展示如何更新刚才生成的 agent:
PUT kbn://api/agent_builder/agents/get_average_age
{
  "name": "Get the average age",
  "description": "I can hel you get the average age from the people index",
  "labels": [
    "analytics"
  ],
  "avatar_color": "#BFDBFF",
  "avatar_symbol": "GA",
  "configuration": {
    "instructions": "You are a custom agent that helps to calculate the average age from people index",
    "tools": [
      {
        "tool_ids": [
          "platform.core.search",
          "platform.core.list_indices",
          "platform.core.get_index_mapping",
          "platform.core.get_document_by_id",
          "find_average_age"
        ]
      }
    ]
  }
}
运行完上面的命令后,我们可以到 Agents 页面进行查看:
根据 ID 删除一个 agent
我们使用如下的命令来删除刚才创建的 agent:
DELETE kbn://api/agent_builder/agents/{id}DELETE kbn://api/agent_builder/agents/get_average_age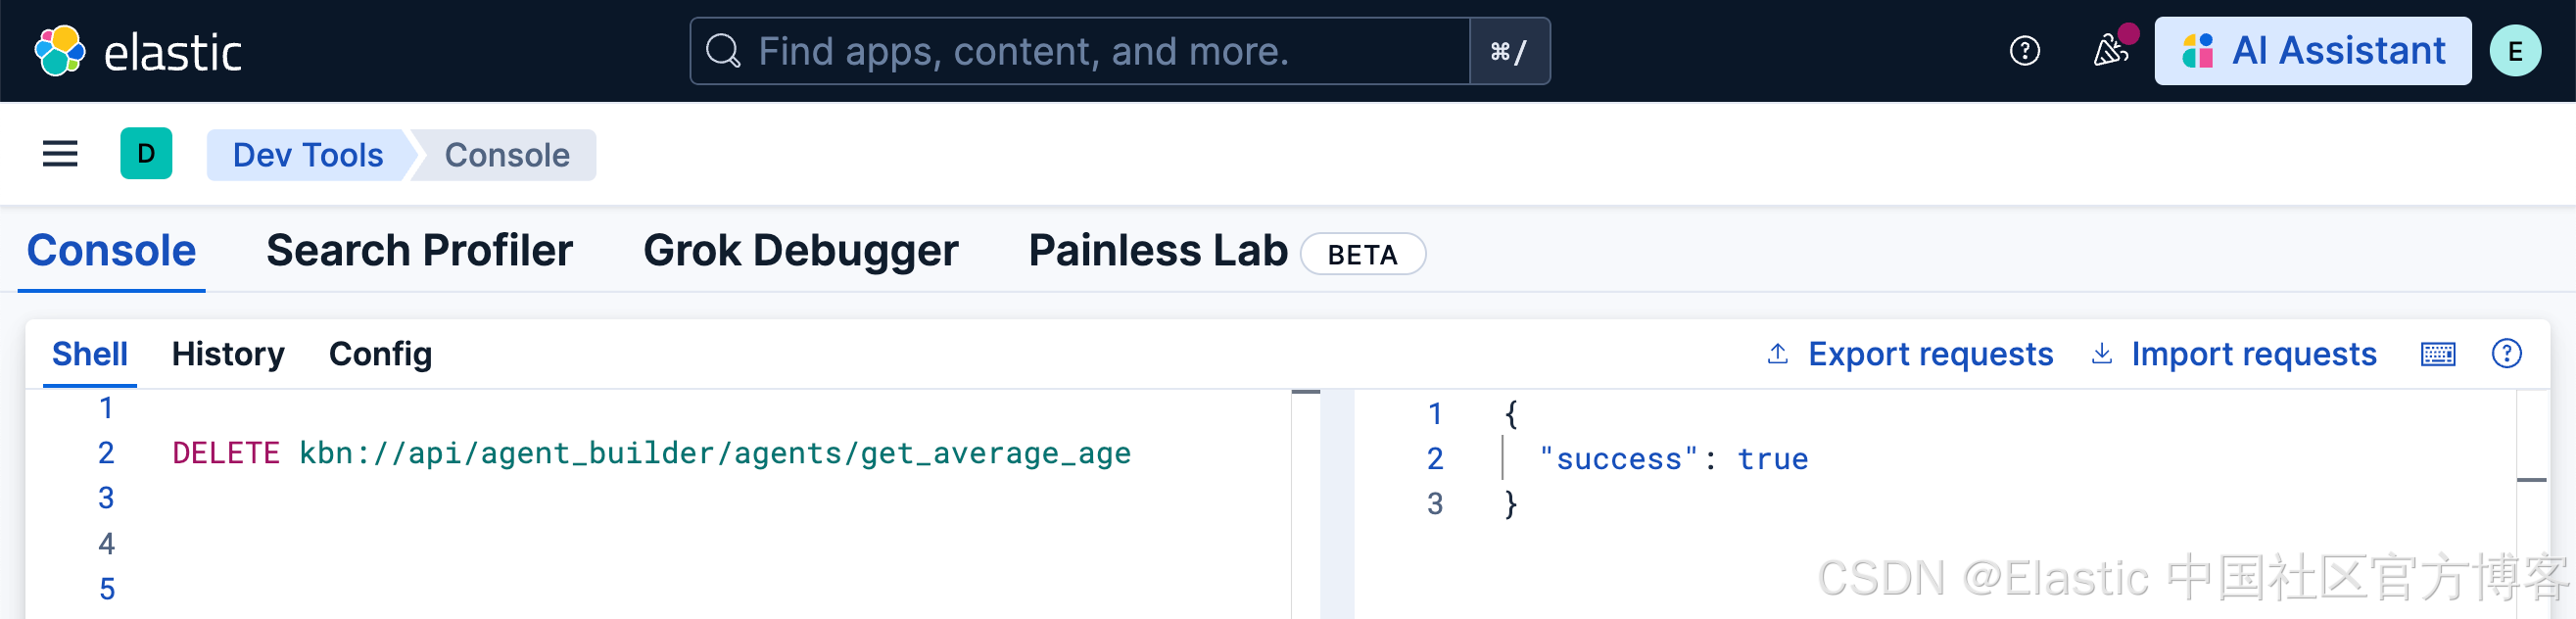
当我们运行完上面的命令后,我们再到 Agents 页面查看:
聊天和对话
我们使用如下的例子来展示如何使用一个 agent 来进行聊天:
POST kbn://api/agent_builder/converse
{
  "input": "who are the heros?",
  "agent_id": "people_profession_search"
}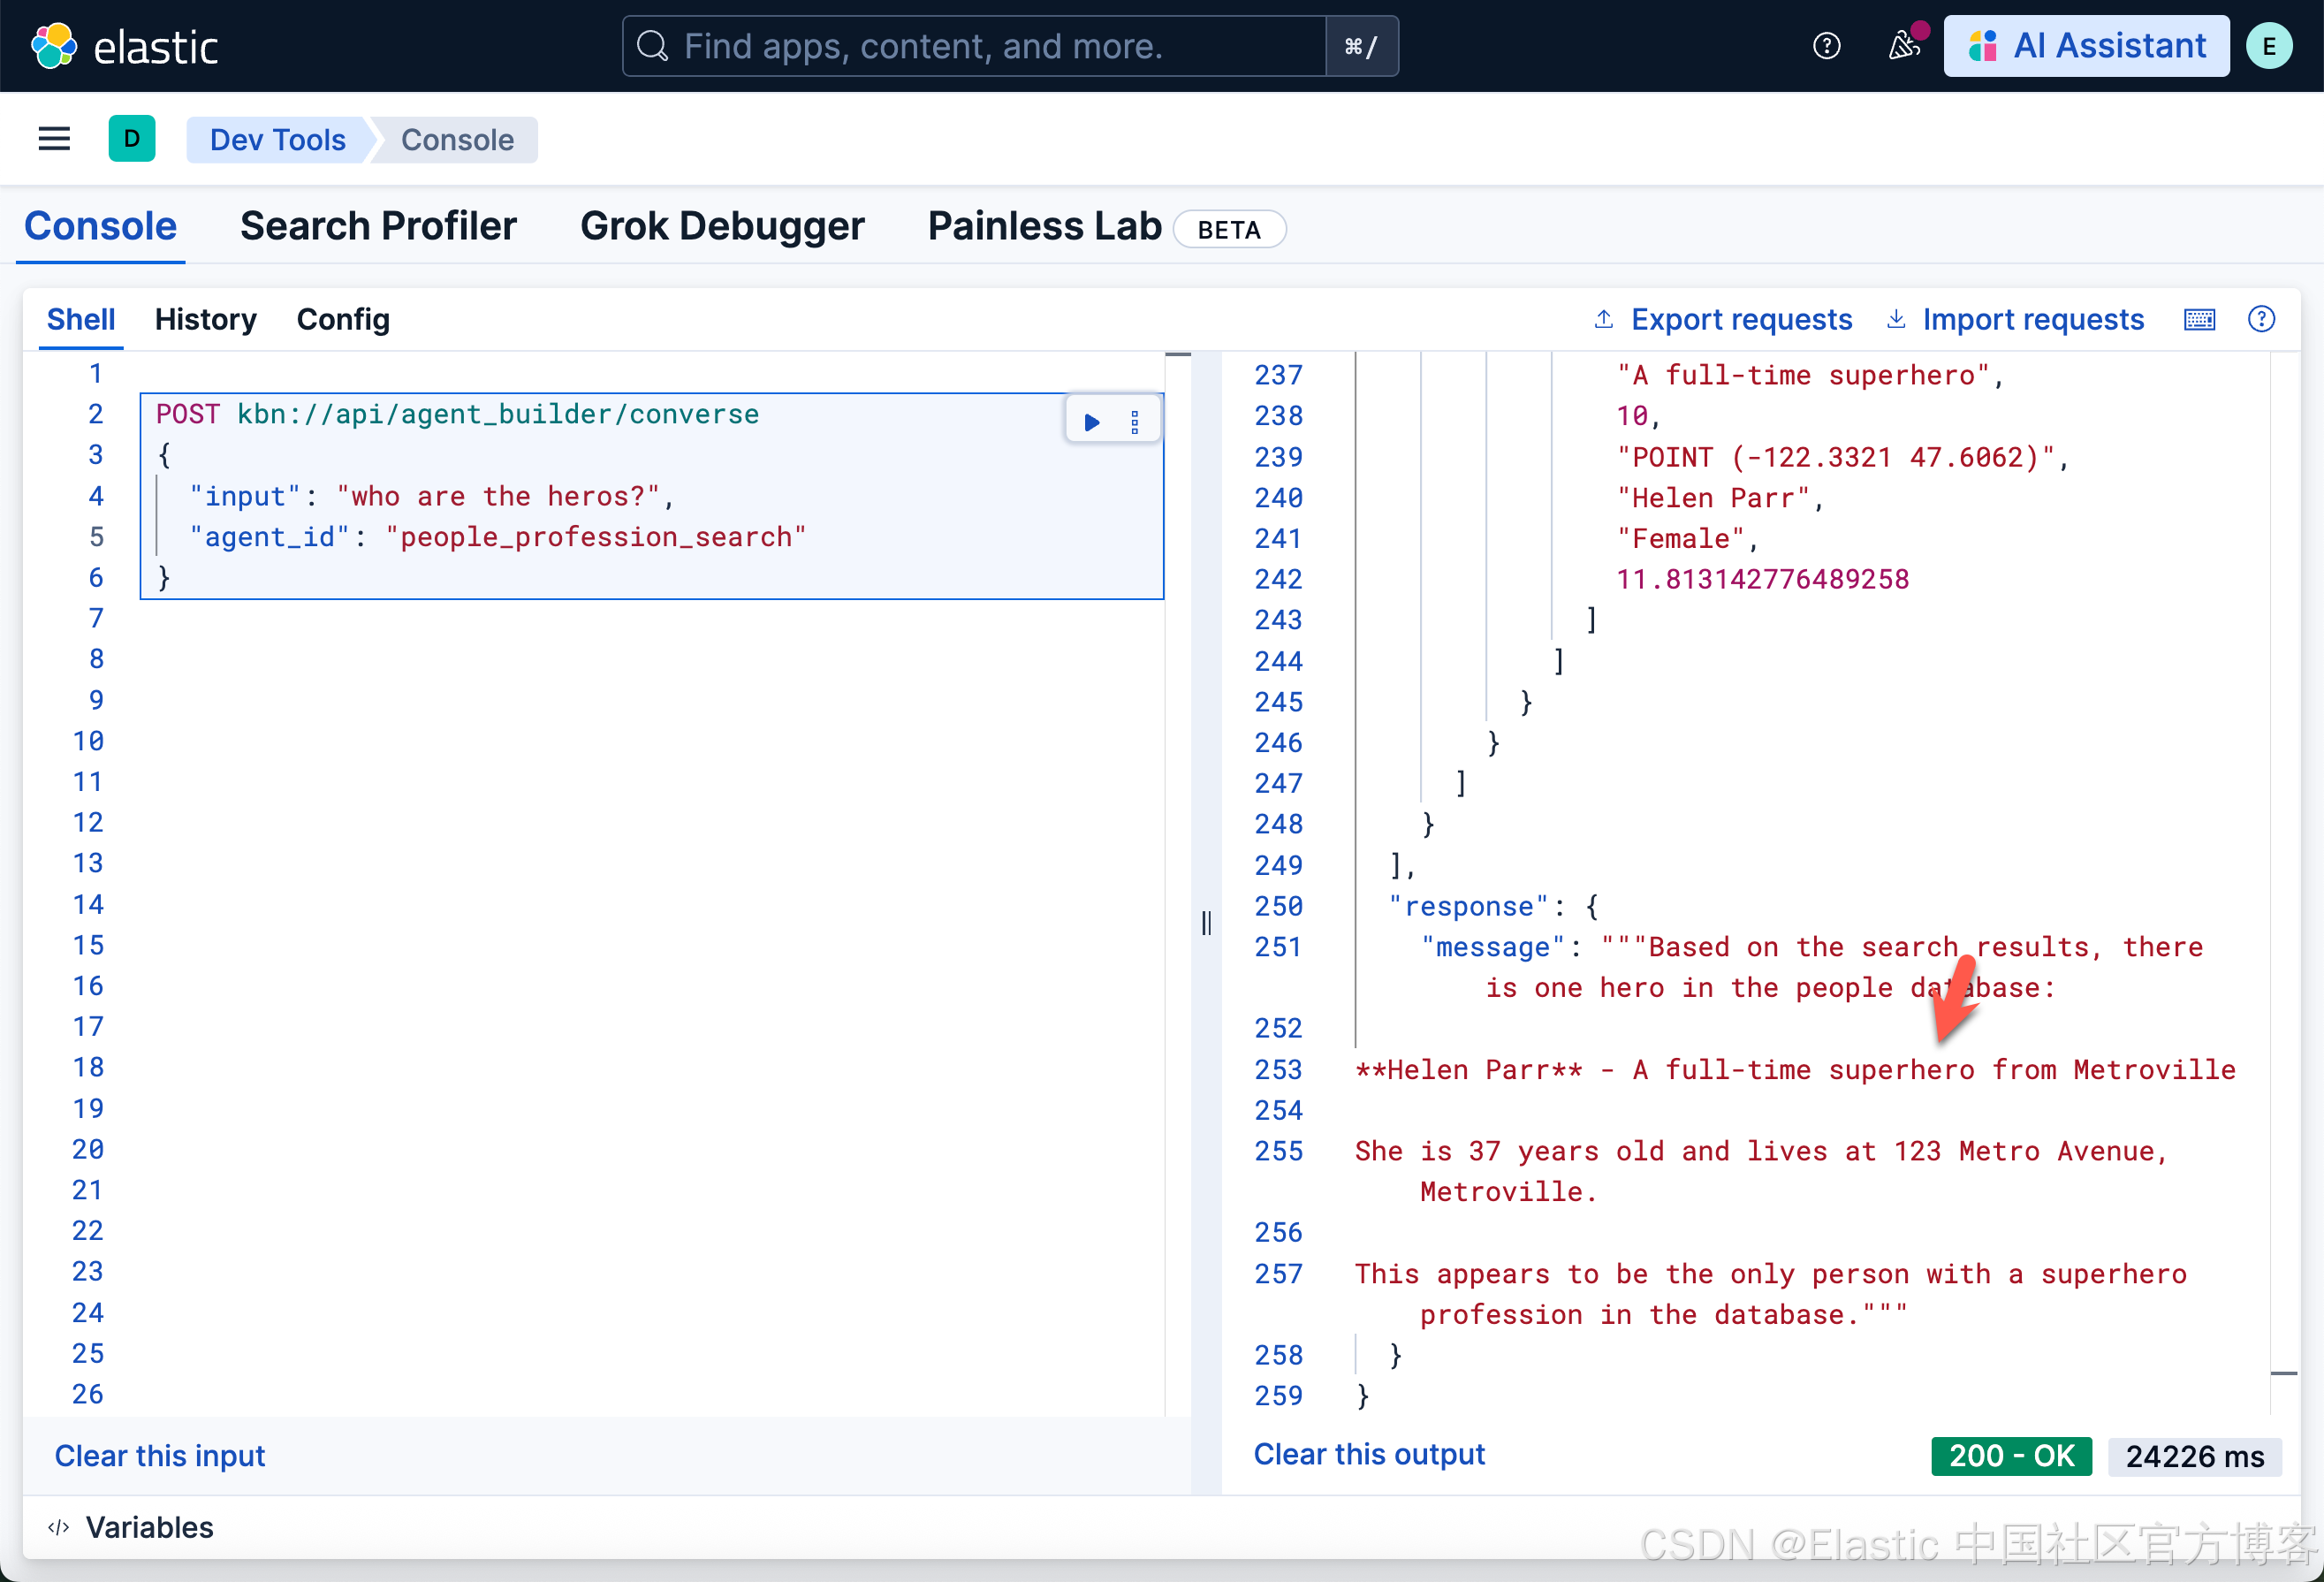
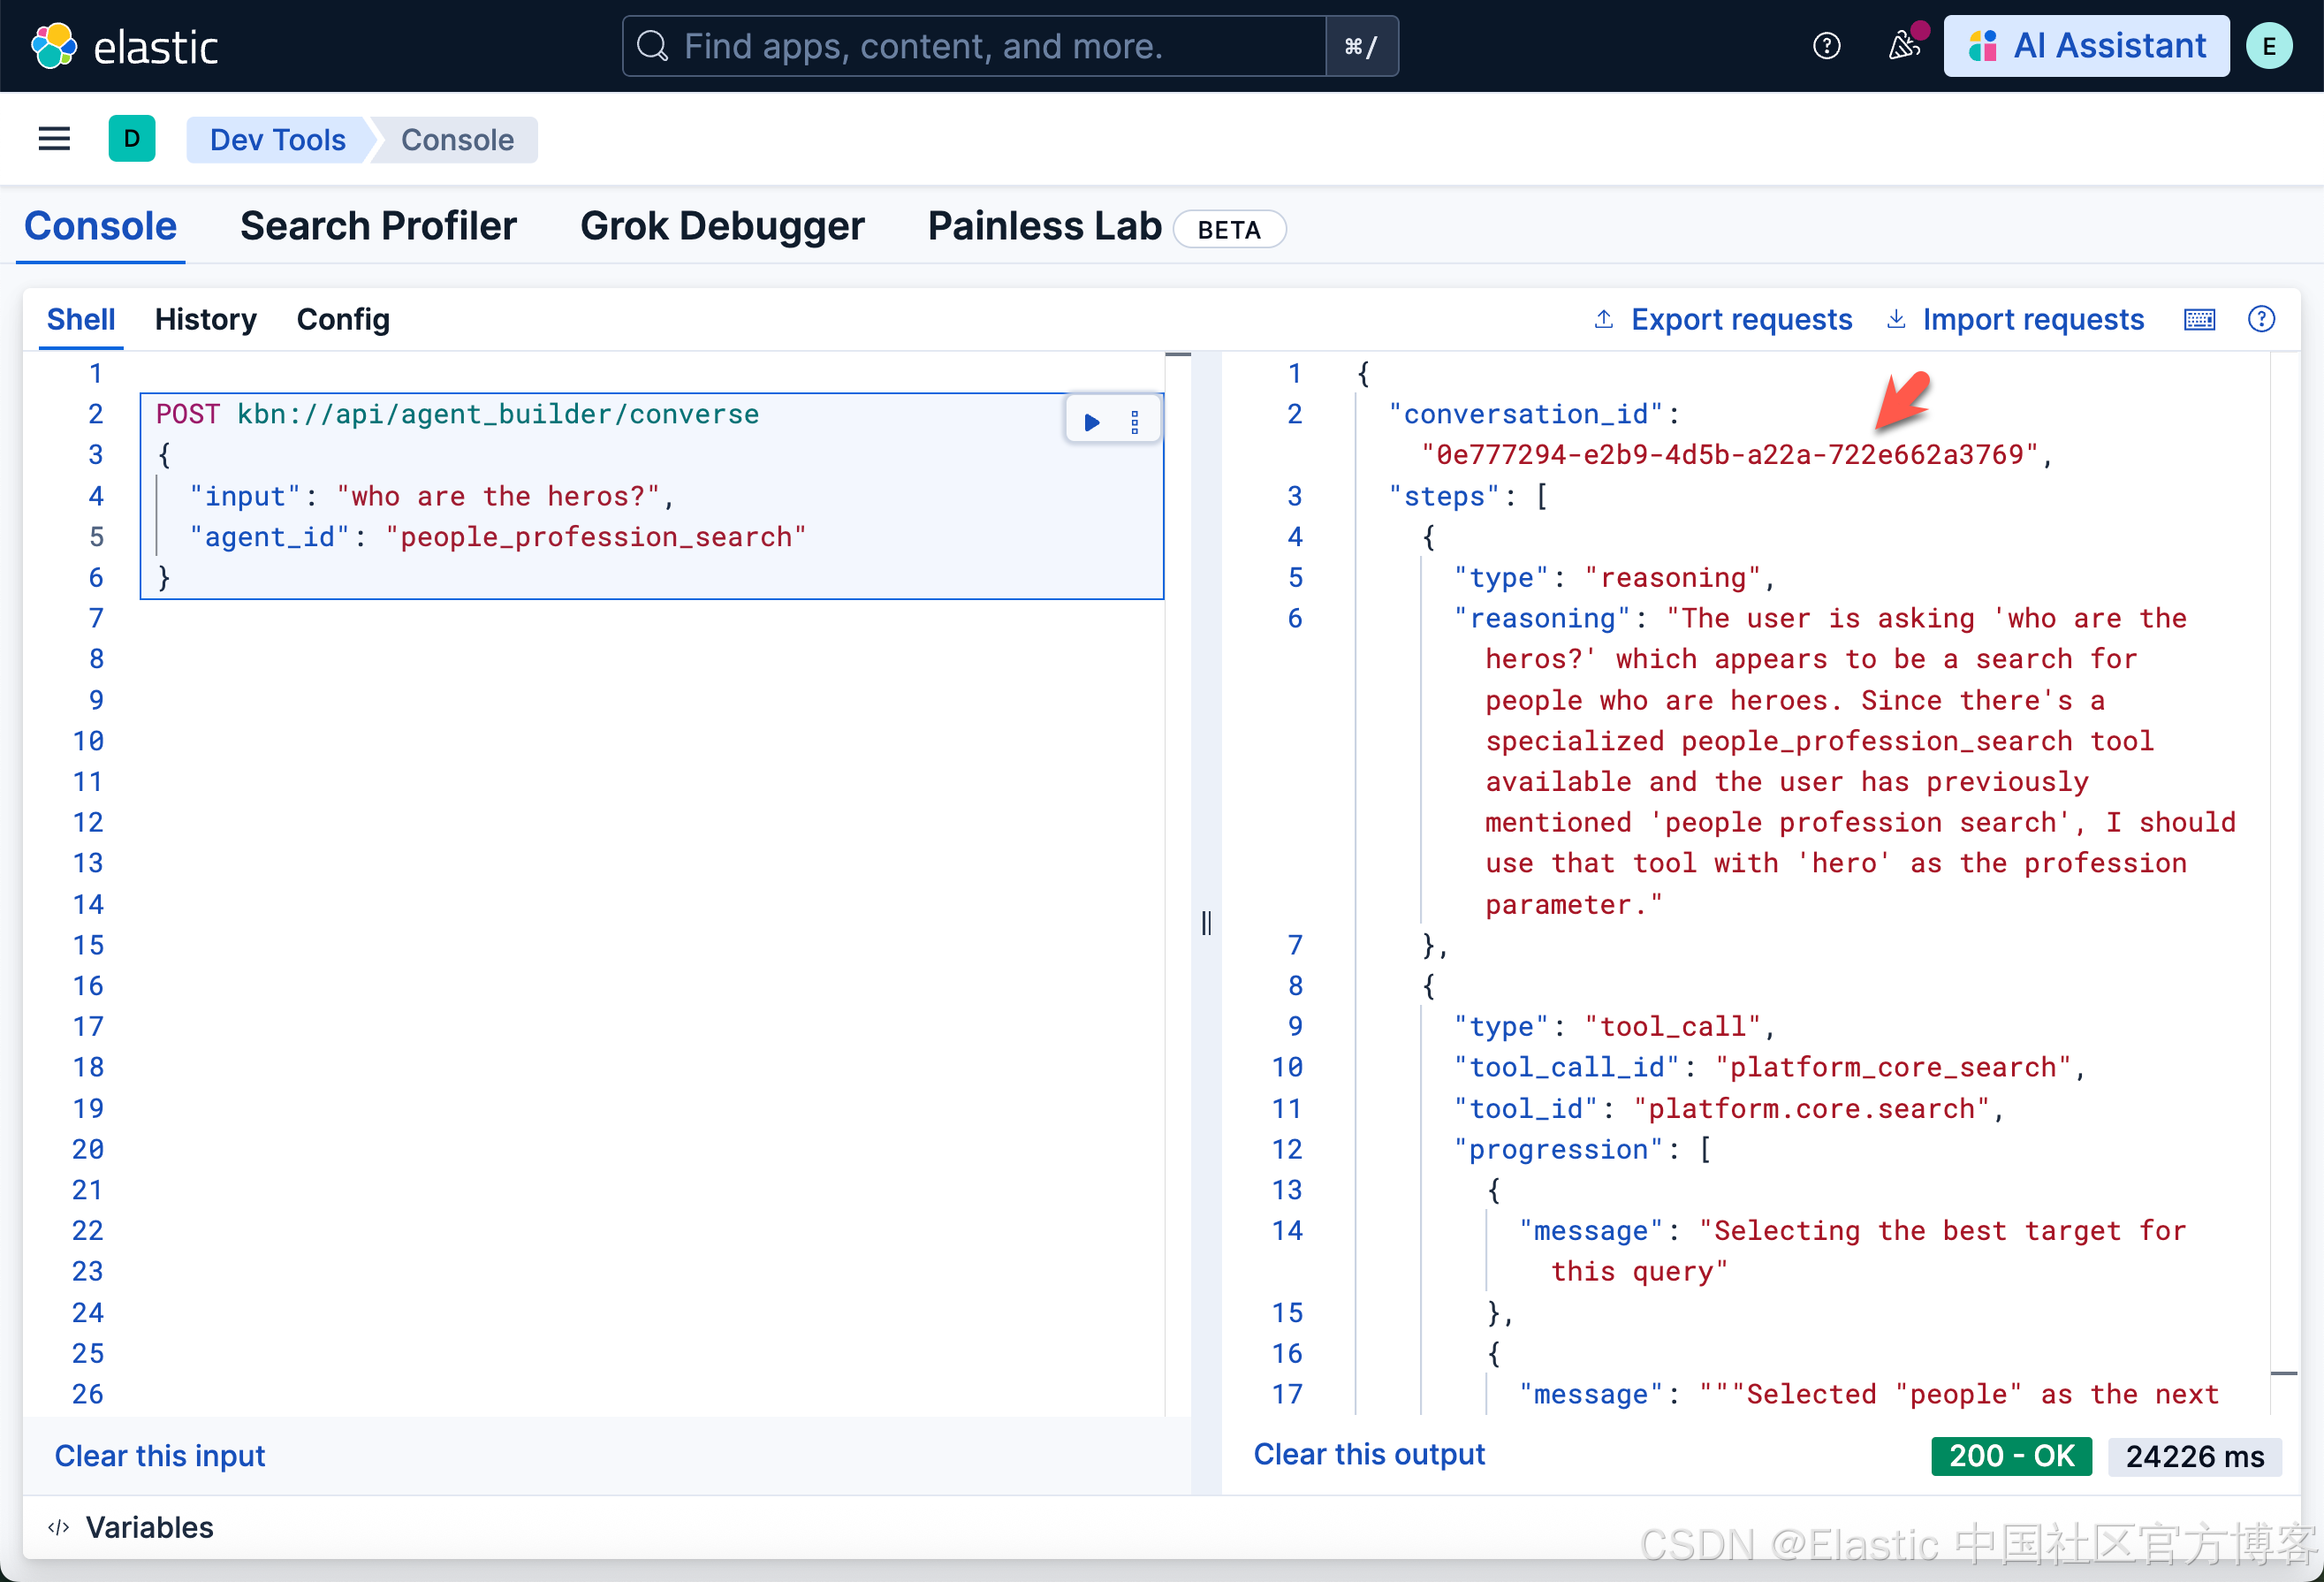
如上所示,我们可以看到一个叫做 0e777294-e2b9-4d5b-a22a-722e662a3769 的 converstaion_id。
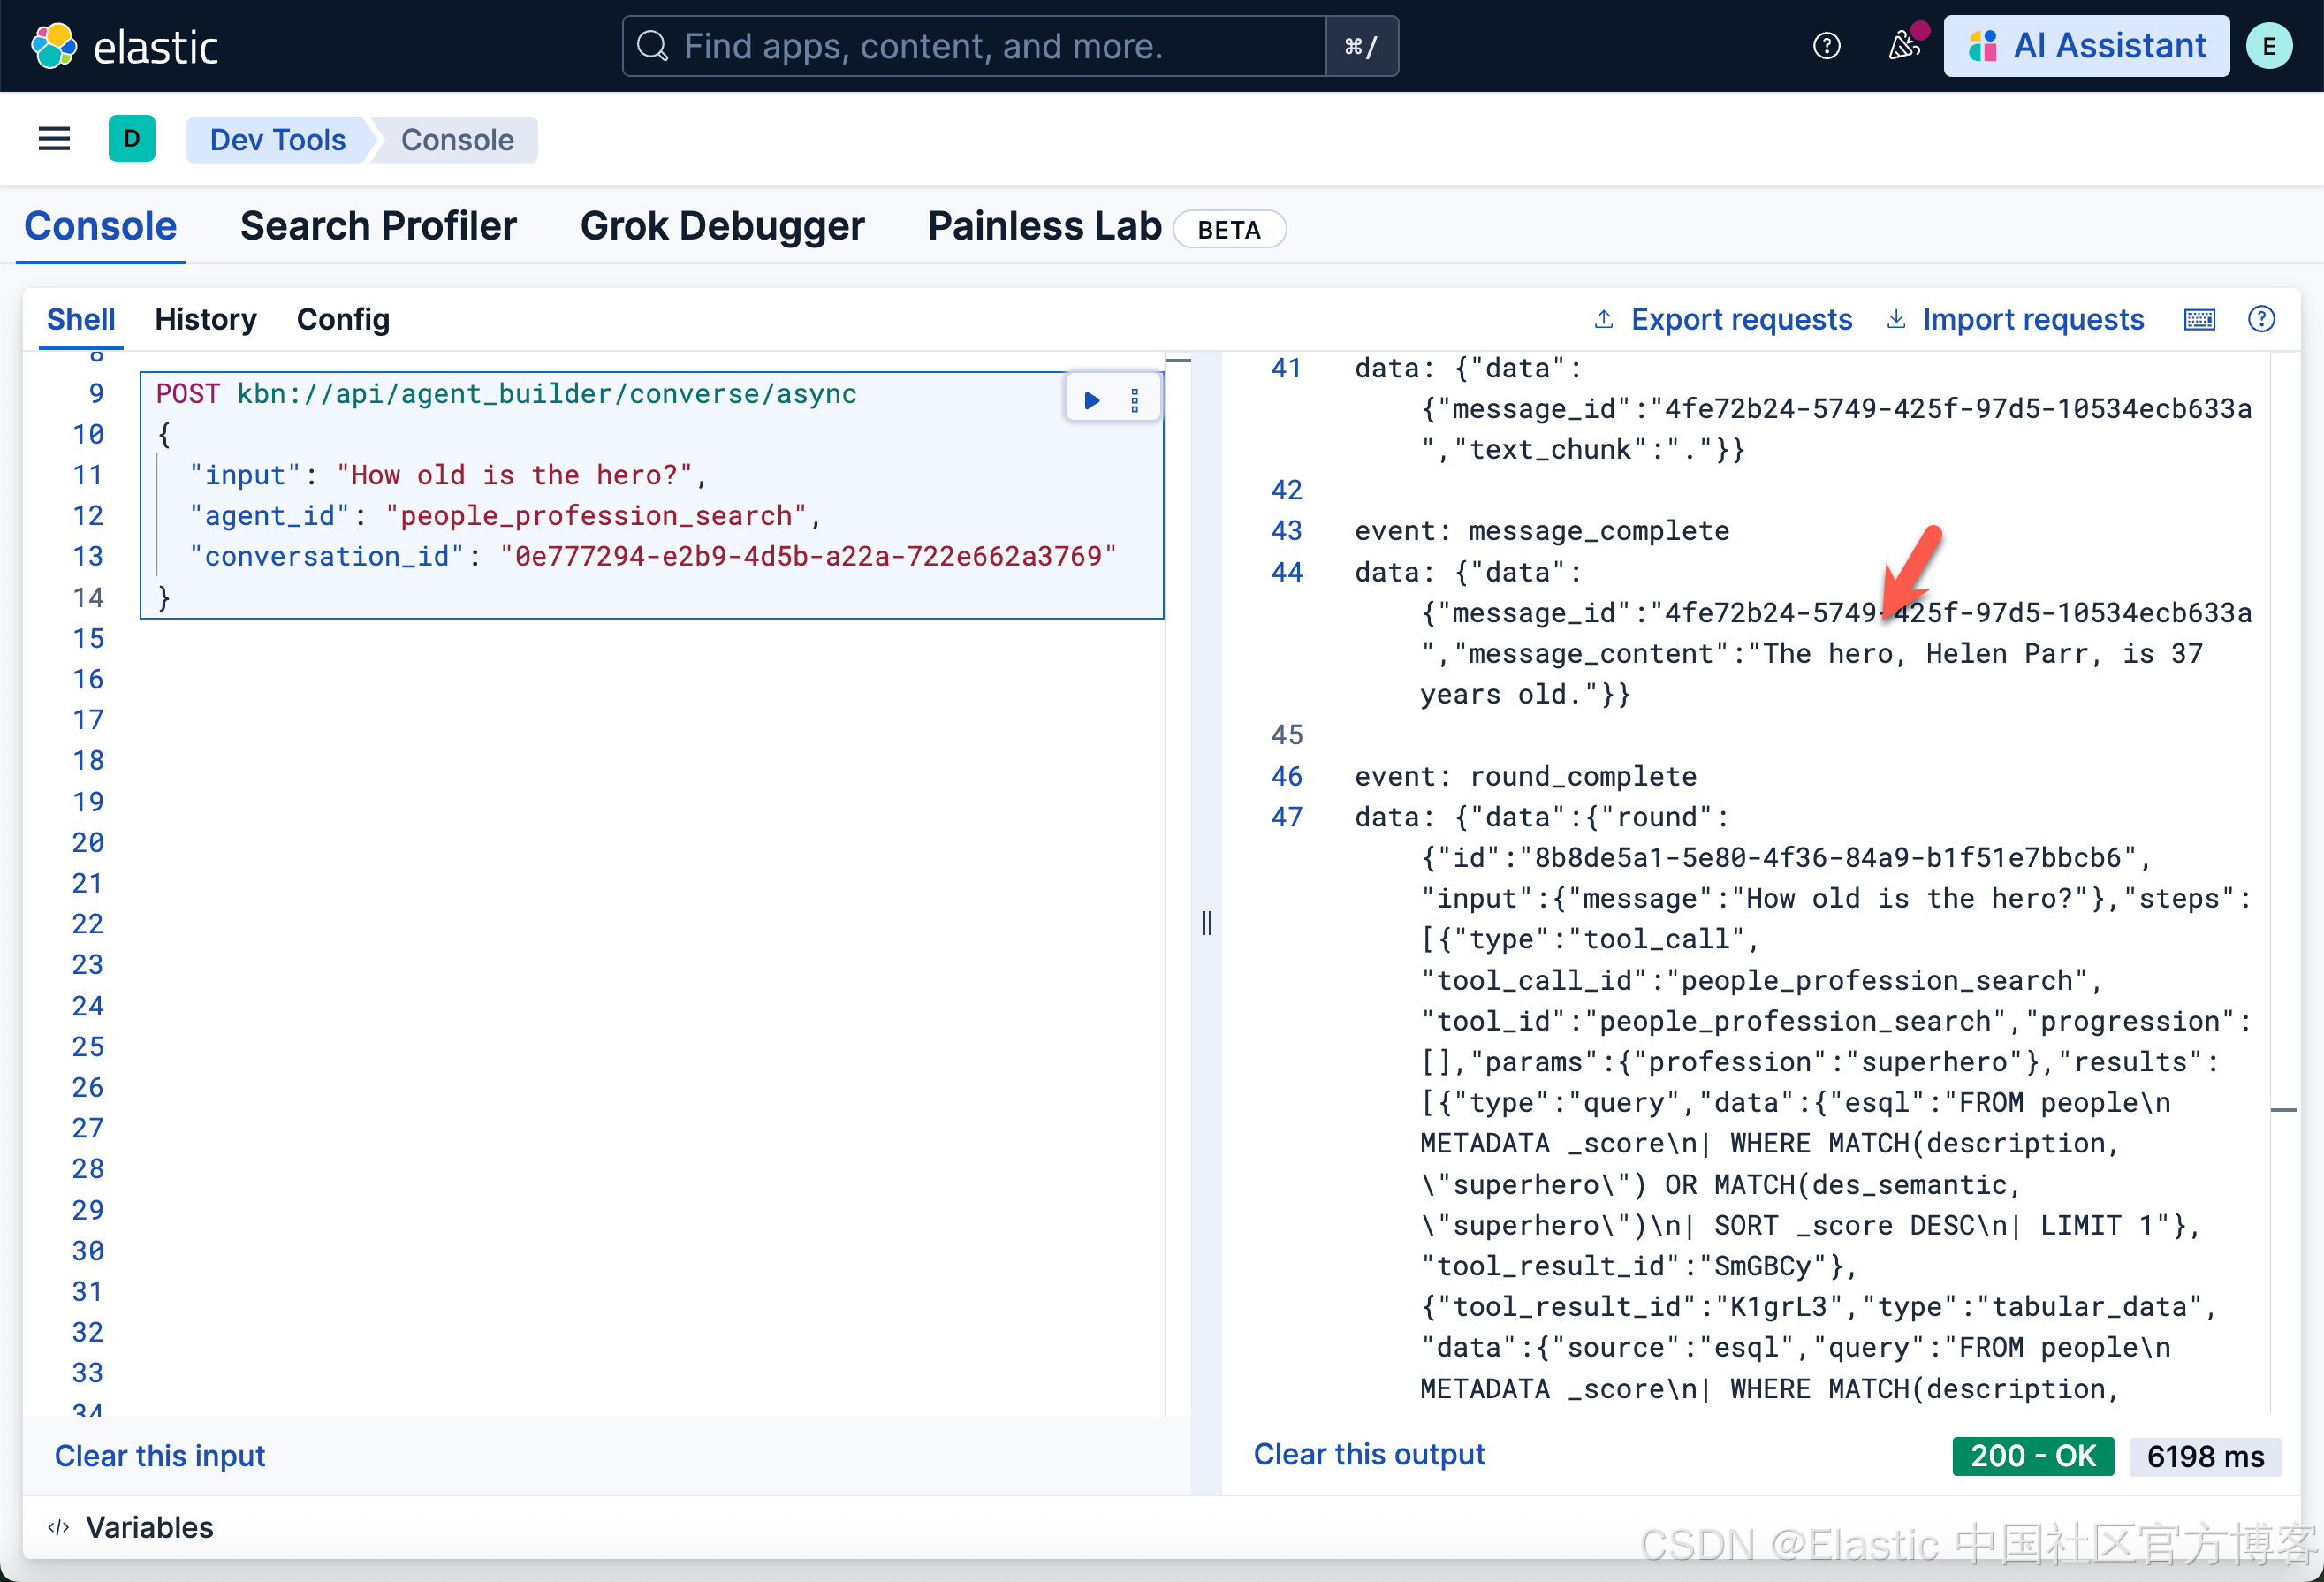
与代理聊天并流式传输事件
我们使用上面的 conversation_id 来进一步聊天:
POST kbn://api/agent_builder/converse/async
{
  "input": "Who is a teacher?",
  "agent_id": "people_profession_search",
  "conversation_id": "0e777294-e2b9-4d5b-a22a-722e662a3769"
}
列出对话
GET kbn://api/agent_builder/conversations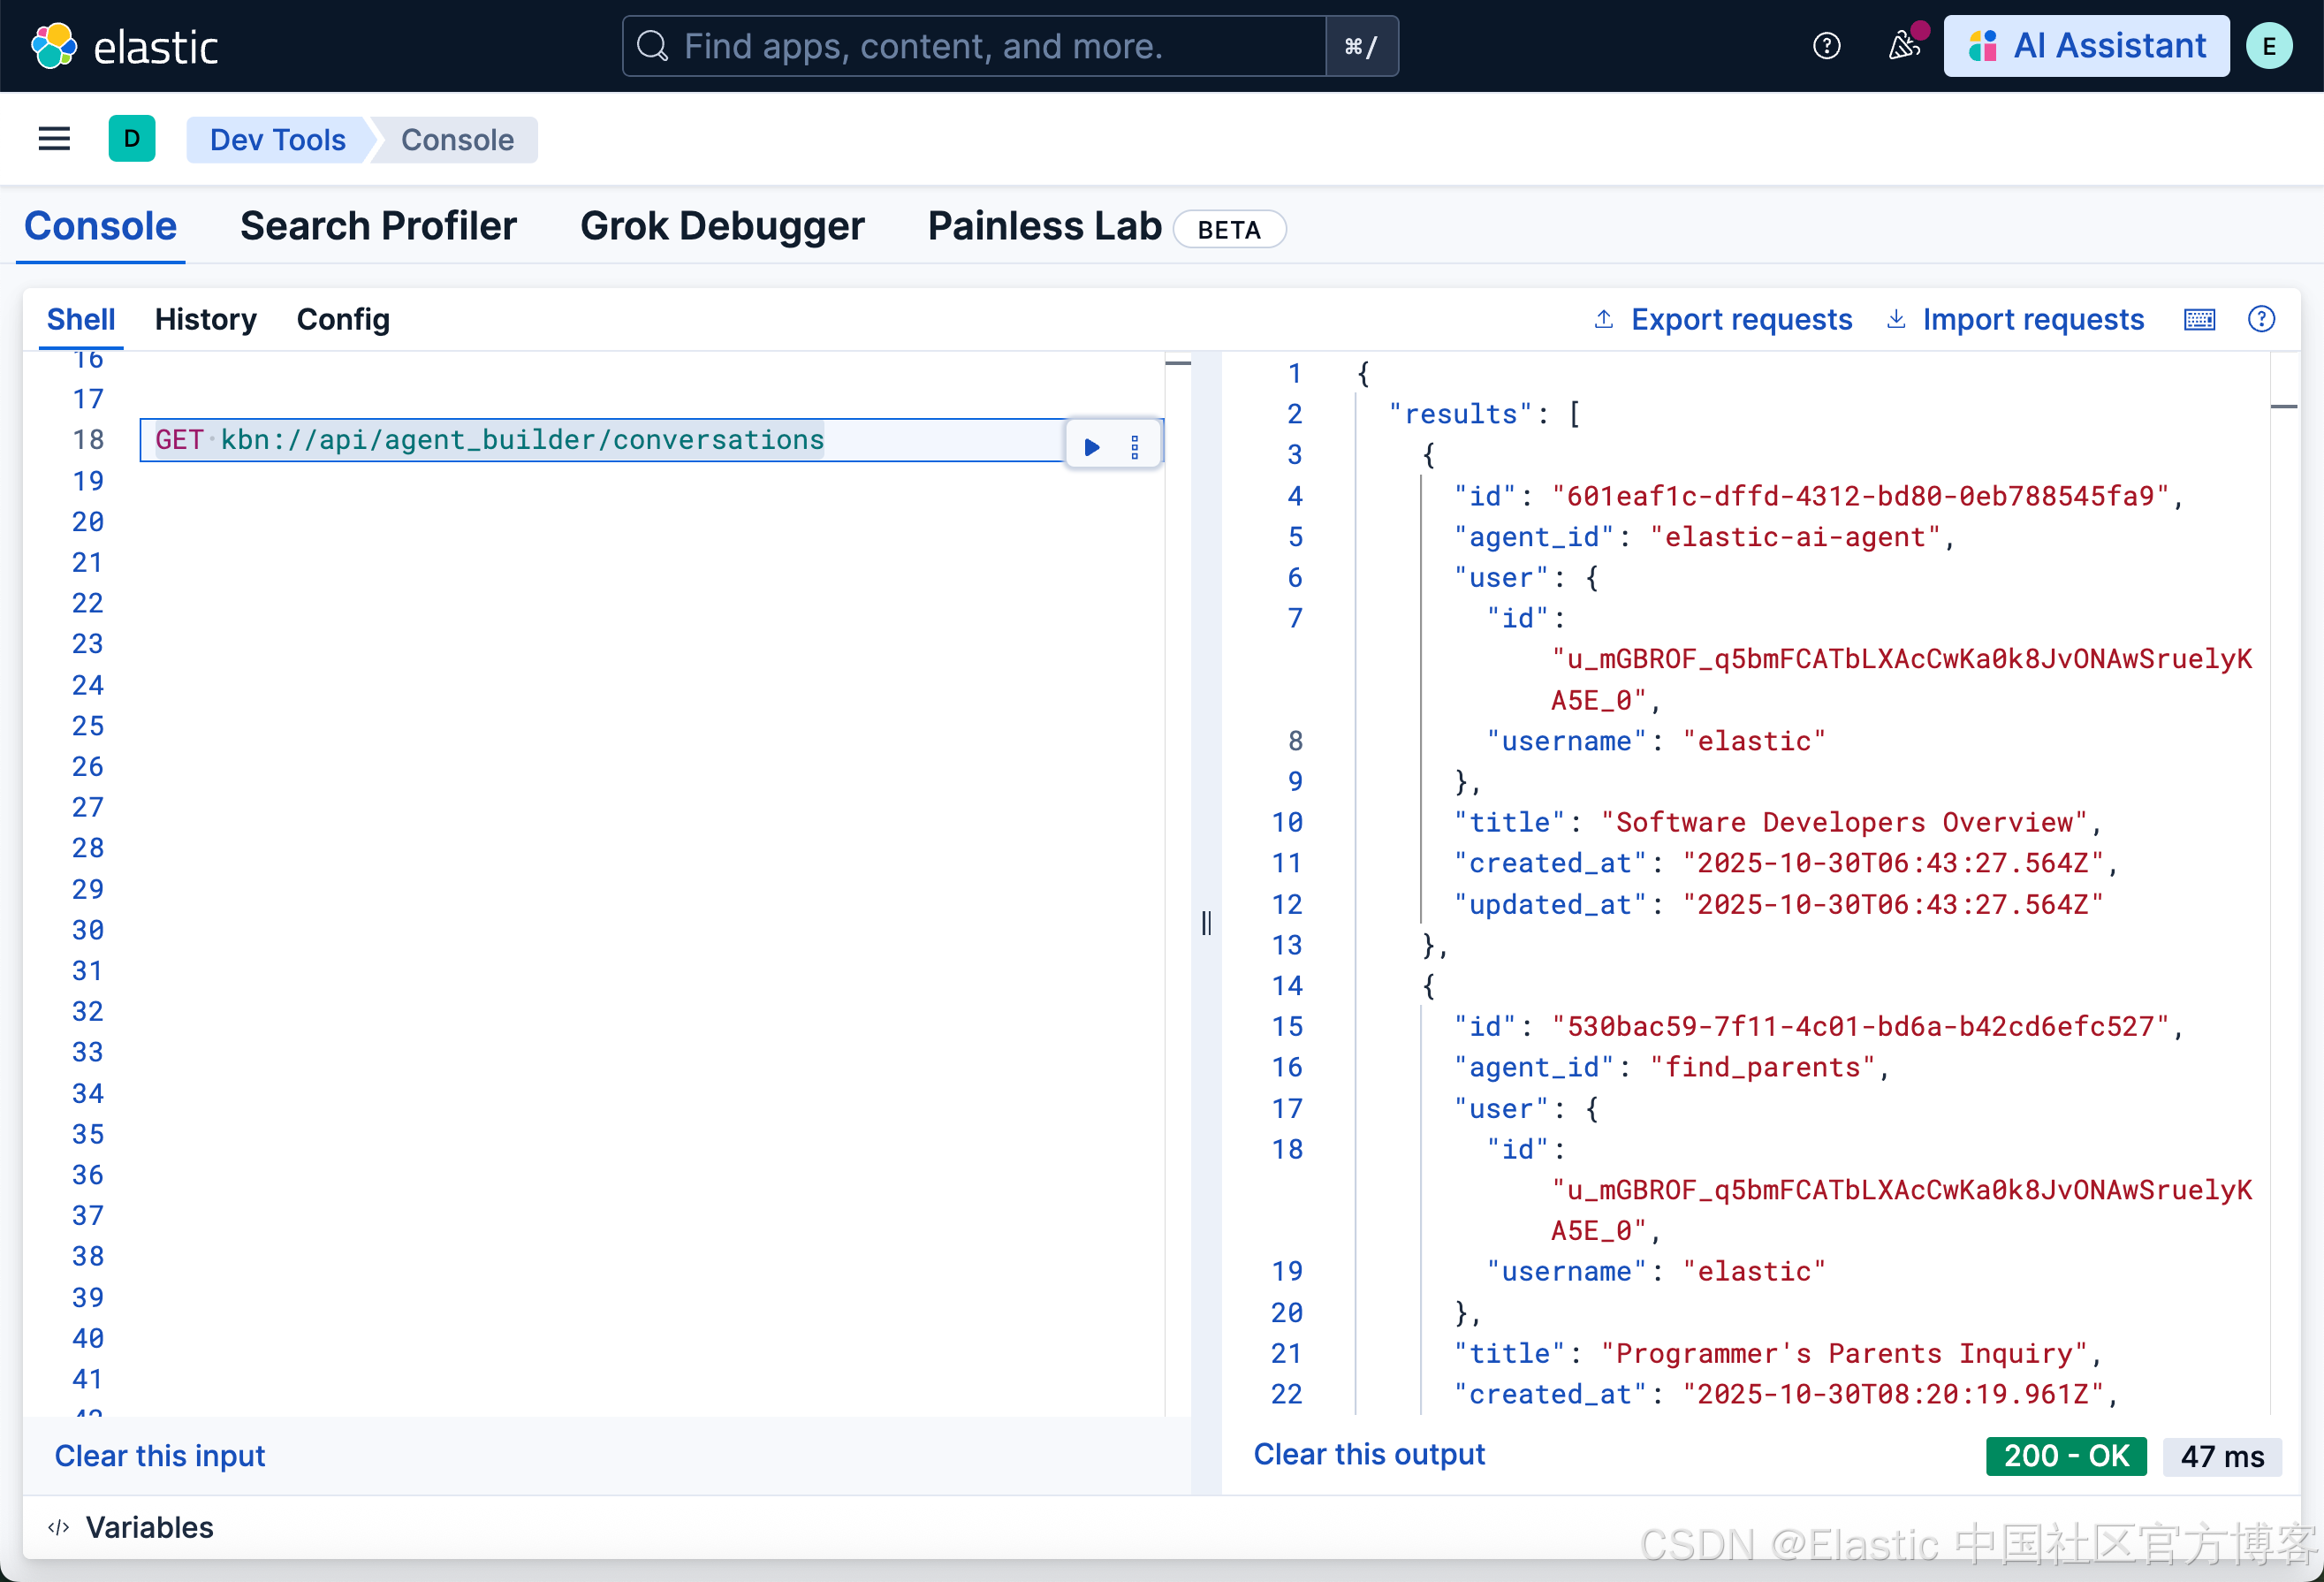
根据 ID 获取对话
GET kbn://api/agent_builder/conversations/{conversation_id}GET kbn://api/agent_builder/conversations/530bac59-7f11-4c01-bd6a-b42cd6efc527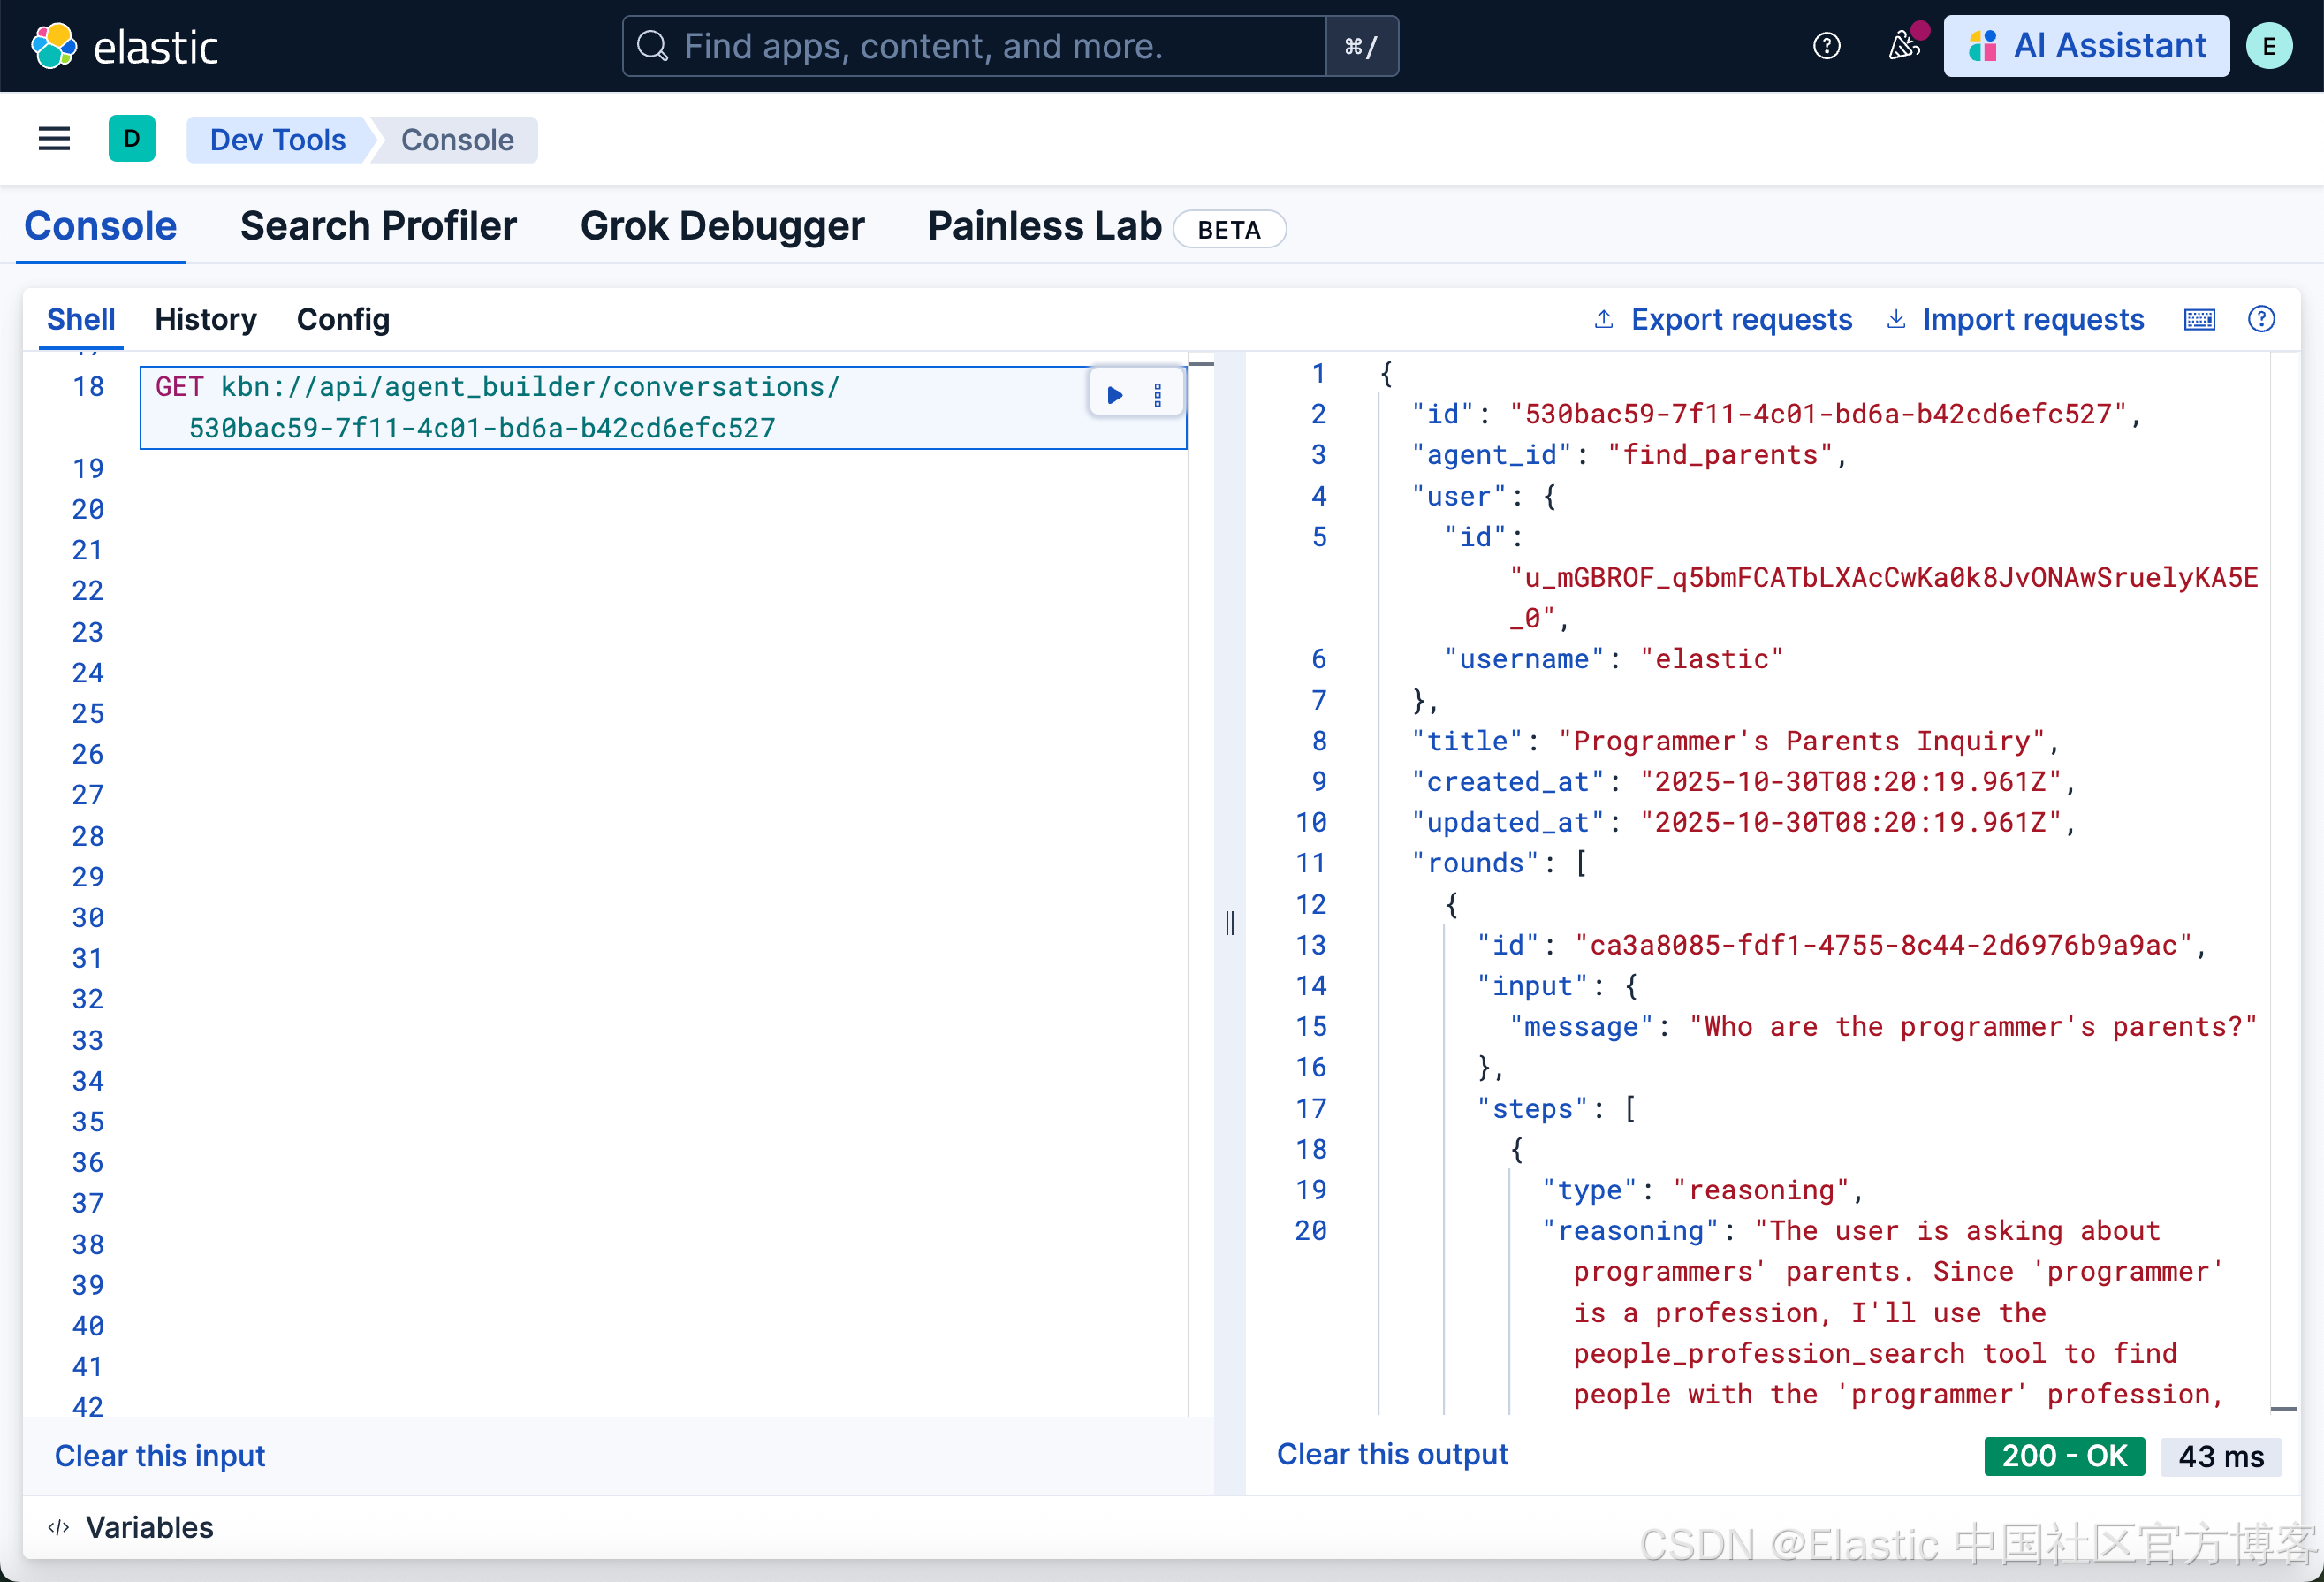
根据 ID 删除对话
DELETE kbn://api/agent_builder/conversations/{conversation_id}DELETE kbn://api/agent_builder/conversations/530bac59-7f11-4c01-bd6a-b42cd6efc527MCP 服务器 API
有关更多信息,请参考 Model Context Protocol (MCP) 服务器。
使用 JSON-RPC 2.0 与 MCP 服务器通信。
curl -k -X POST "http://${KIBANA_URL}/api/agent_builder/mcp" \
    -H "Authorization: ApiKey ${API_KEY}" \
    -H "Content-Type: application/json" \
    -H "Accept: application/json" \
    -H "kbn-xsrf: true" \
    -d '{
        "jsonrpc": "2.0",
        "id": 1,
        "method": "tools/list"
    }'
注意:你需要根据自己的 Elasticsearch 及 Kibana 配置修改上面的 http/https 协议。你需要配置响应的环境变量 KIBANA_URL 及 API_KEY
A2A 协议
有关更多信息,请参考 Agent-to-Agent (A2A) 服务器。
示例:获取 A2A 代理卡配置
GET kbn://api/agent_builder/a2a/{agentId}.json
GET kbn://api/agent_builder/a2a/people_profession_search.json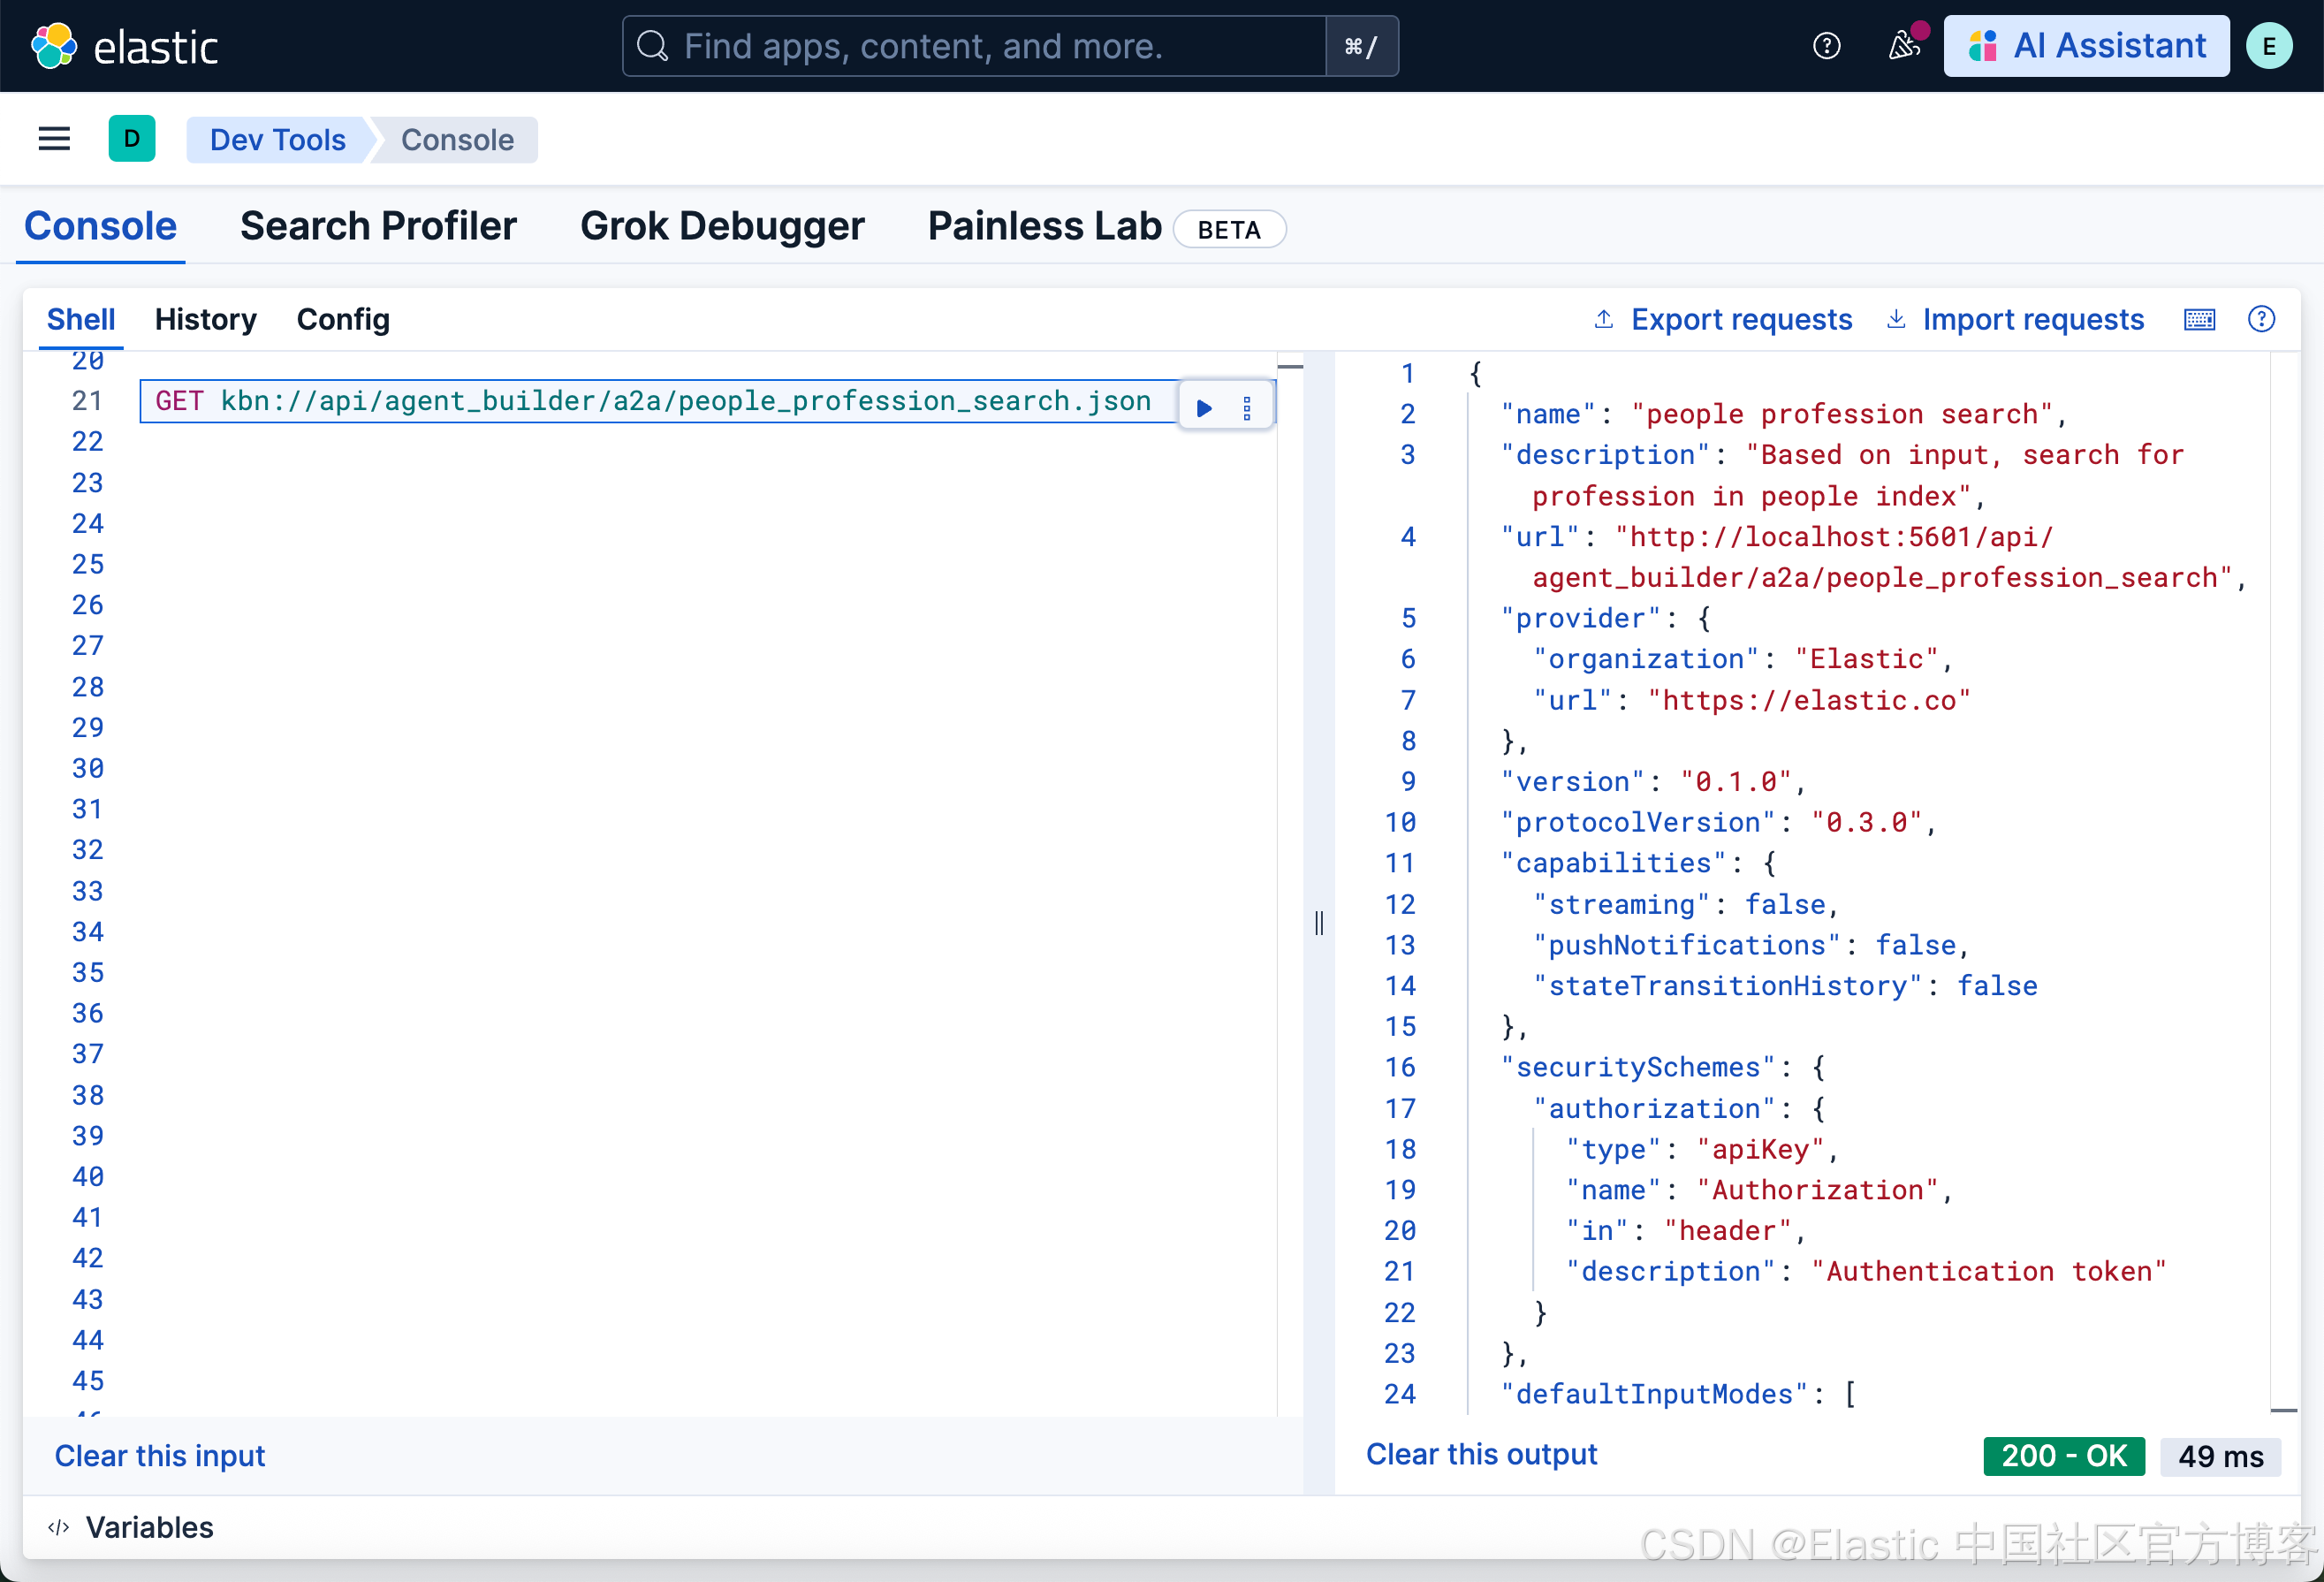
更多 API 的详细描述,请参考 Kibana API reference

有“AI”的1024 = 2048,欢迎大家加入2048 AI社区
更多推荐

 10
10 0
0- 0


 已为社区贡献61条内容

所有评论(0)