如何部署gitlab服务
服务器准备:系统ubuntu22.04、内存4G、磁盘20G
部署流程
前提说明:8080端口不要有程序占用,安装后启动会需要用到8080端口
sudo apt update
sudo apt install ca-certificates curl openssh-server postfix tzdata perl
开始安装
cd /tmp
下载脚本
curl -LO https://packages.gitlab.com/install/repositories/gitlab/gitlab-ce/script.deb.sh
运行安装程序
sudo bash /tmp/script.deb.sh
安装
sudo apt install gitlab-ce(时间较久,2G左右)
安装成功后,编辑GitLab配置文件
sudo nano /etc/gitlab/gitlab.rb
搜索external_url配置行。并将它的值改成你的域名,并确保将http更改为https
● 说明:这里也可以用http,如果需要指定端口后面也可以加上。
● 接下来,找到letsencrypt[‘contact_emails’]设置。如果你使用的是nano,可以通过按CTRL+W来搜索提示。
将letsencrypt[‘contact_emails’]写入提示,然后按ENTER。
这个设置定义了Let’s Encrypt可以用来联系你的电子邮件地址列表。建议取消注释并填写,基本上是用来提醒你的域名SSL证书是否快要过期:
letsencrypt[‘contact_emails’] = [‘you_email@gmail.com’]
运行以下命令重新配置GitLab
sudo gitlab-ctl reconfigure
这是一个完全自动化的过程,所以你不需要做什么事情。该过程还将自动为你的域名配置 Let’s Encrypt 证书。
通过Web界面进行初始配置
GitLab运行后,你可以通过Web界面对应用程序进行初始配置。
在浏览器中输入你的的 GitLab 服务器的域名:https://your_domain
GitLab会生成一个初始的安全密码。可以使用sudo用户查看改文件中的密码:
sudo nano /etc/gitlab/initial_root_password
# WARNING: This value is valid only in the following conditions

#          1. If provided manually (either via `GITLAB_ROOT_PASSWORD` environment variable or via `gitlab_rails['initial_root_password']` setting in `gitlab.rb`, it was provided before database was seeded for the first time

#          2. Password hasn't been changed manually, either via UI or via command line.

#

#          If the password shown here doesn't work, you must reset the admin password following https://docs.gitlab.com/ee/security/reset_user_password.html#reset-your-root-password.

Password: YOUR_PASSWORD  # 在这里!!!

# NOTE: This file will be automatically deleted in the first reconfigure run after 24 hours.
回到登录页面,输入以下内容:
用户名:root
密码:/etc/gitlab/initial_root_password中查看到的密码
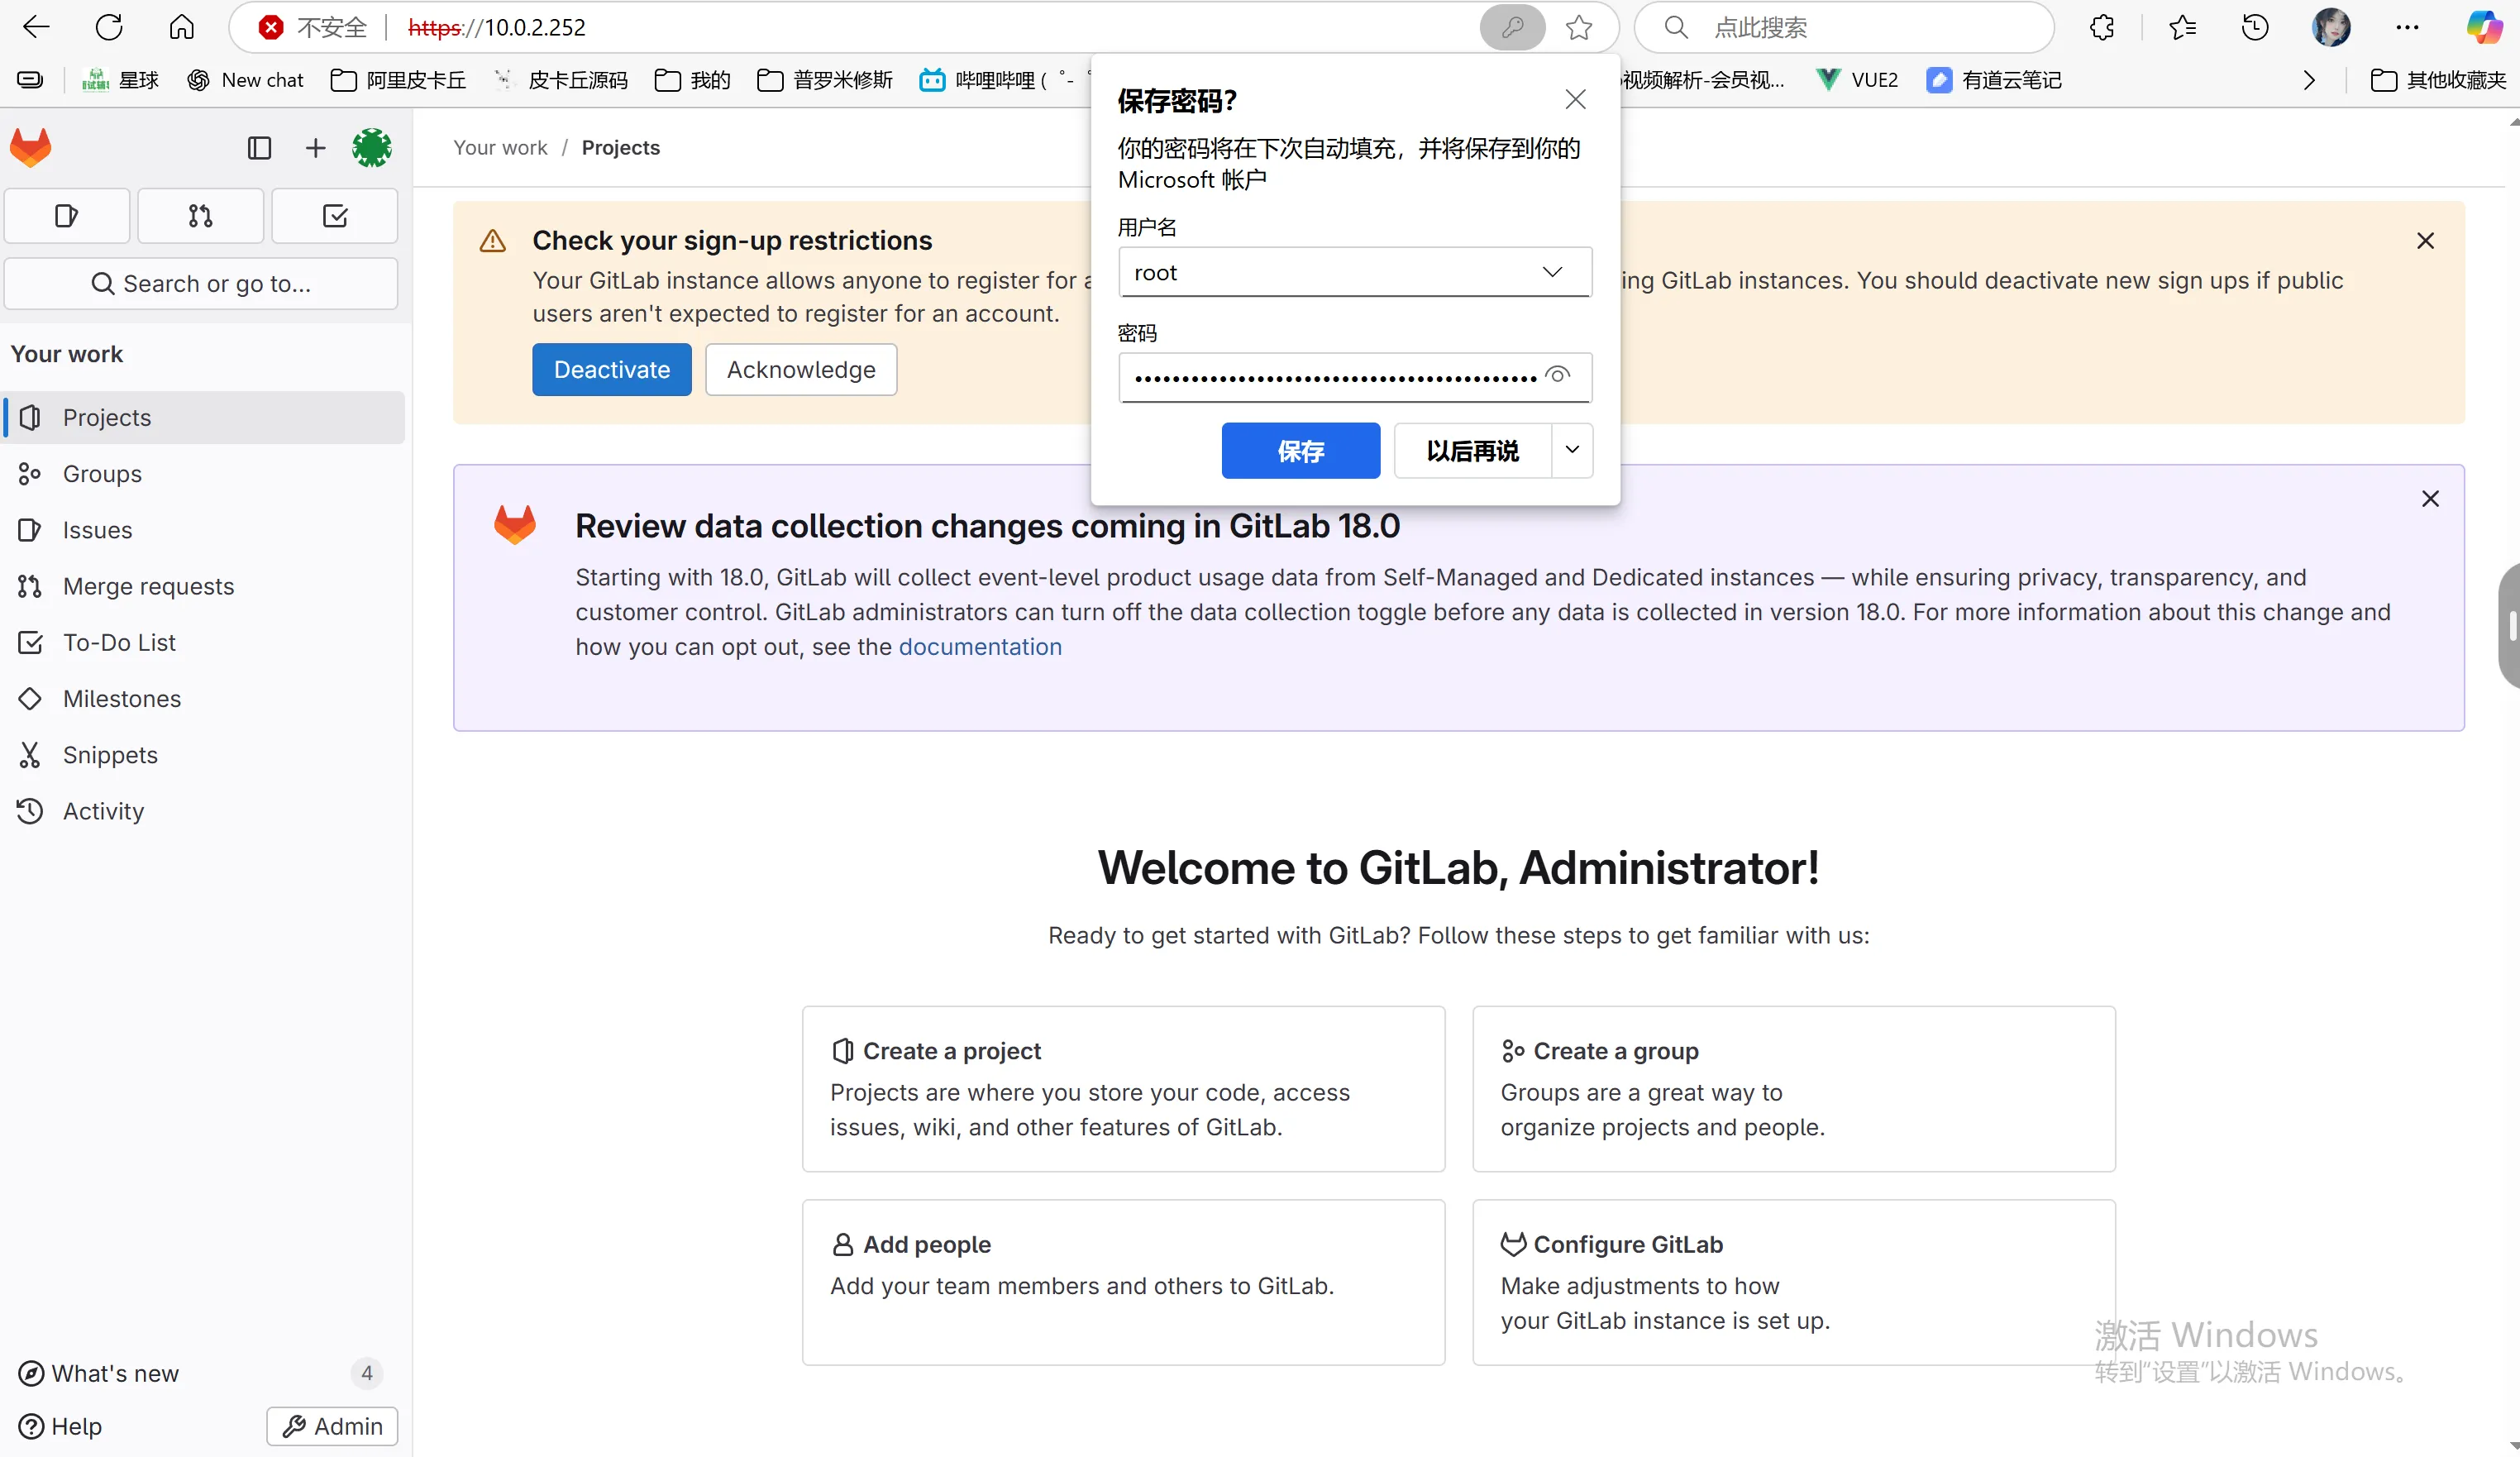
然后点击登录按钮,就可以看到 以下画面了:

有“AI”的1024 = 2048,欢迎大家加入2048 AI社区
更多推荐


 7
7 0
0- 0


 已为社区贡献1条内容

所有评论(0)