统一调度:用 EasyCLI + CLIProxyAPI 打造你的私人“AI 路由器”
本文详细介绍如何利用 EasyCLI 与 cliproxyapi 搭建私有 AI 代理,实现多平台 Key 的统一管理与透明分发。通过本地路由联动 OpenCode,助你一键聚合官方及三方模型,彻底解决多模型切换繁琐与网络连通难题。
一、 痛点:为什么我们的开发环境需要一个“路由器”?
在深度使用 AI 编程后,通常会遇到以下三个尴尬场景:
- Key 的碎片化:Gemini 有个 Key,Claude 有个 Key, OpenAPI 也有个 Key ……
- 配置繁琐:每个 IDE 插件、每个项目都要重复填一堆 BaseURL 和 API Key。
- 网络阻碍:官方接口连不上,三方接口地址又各不相同。
解决方案: 搭建一套 “前店后厂” 模式。CLIProxyAPI 在后台负责脏活累活(协议转换、分发),EasyCLI 在前台负责貌美如花(图形化管理),而 OpenCode/Claude Code 只需要无脑连接本地代理。
二、用 EasyCLI + CLIProxyAPI 实现 AI 模型的一站式透明分发
2.1 为什么需要这套组合?
- CLIProxyAPI:后端引擎,负责协议转换(OpenAI 格式化)与请求转发。
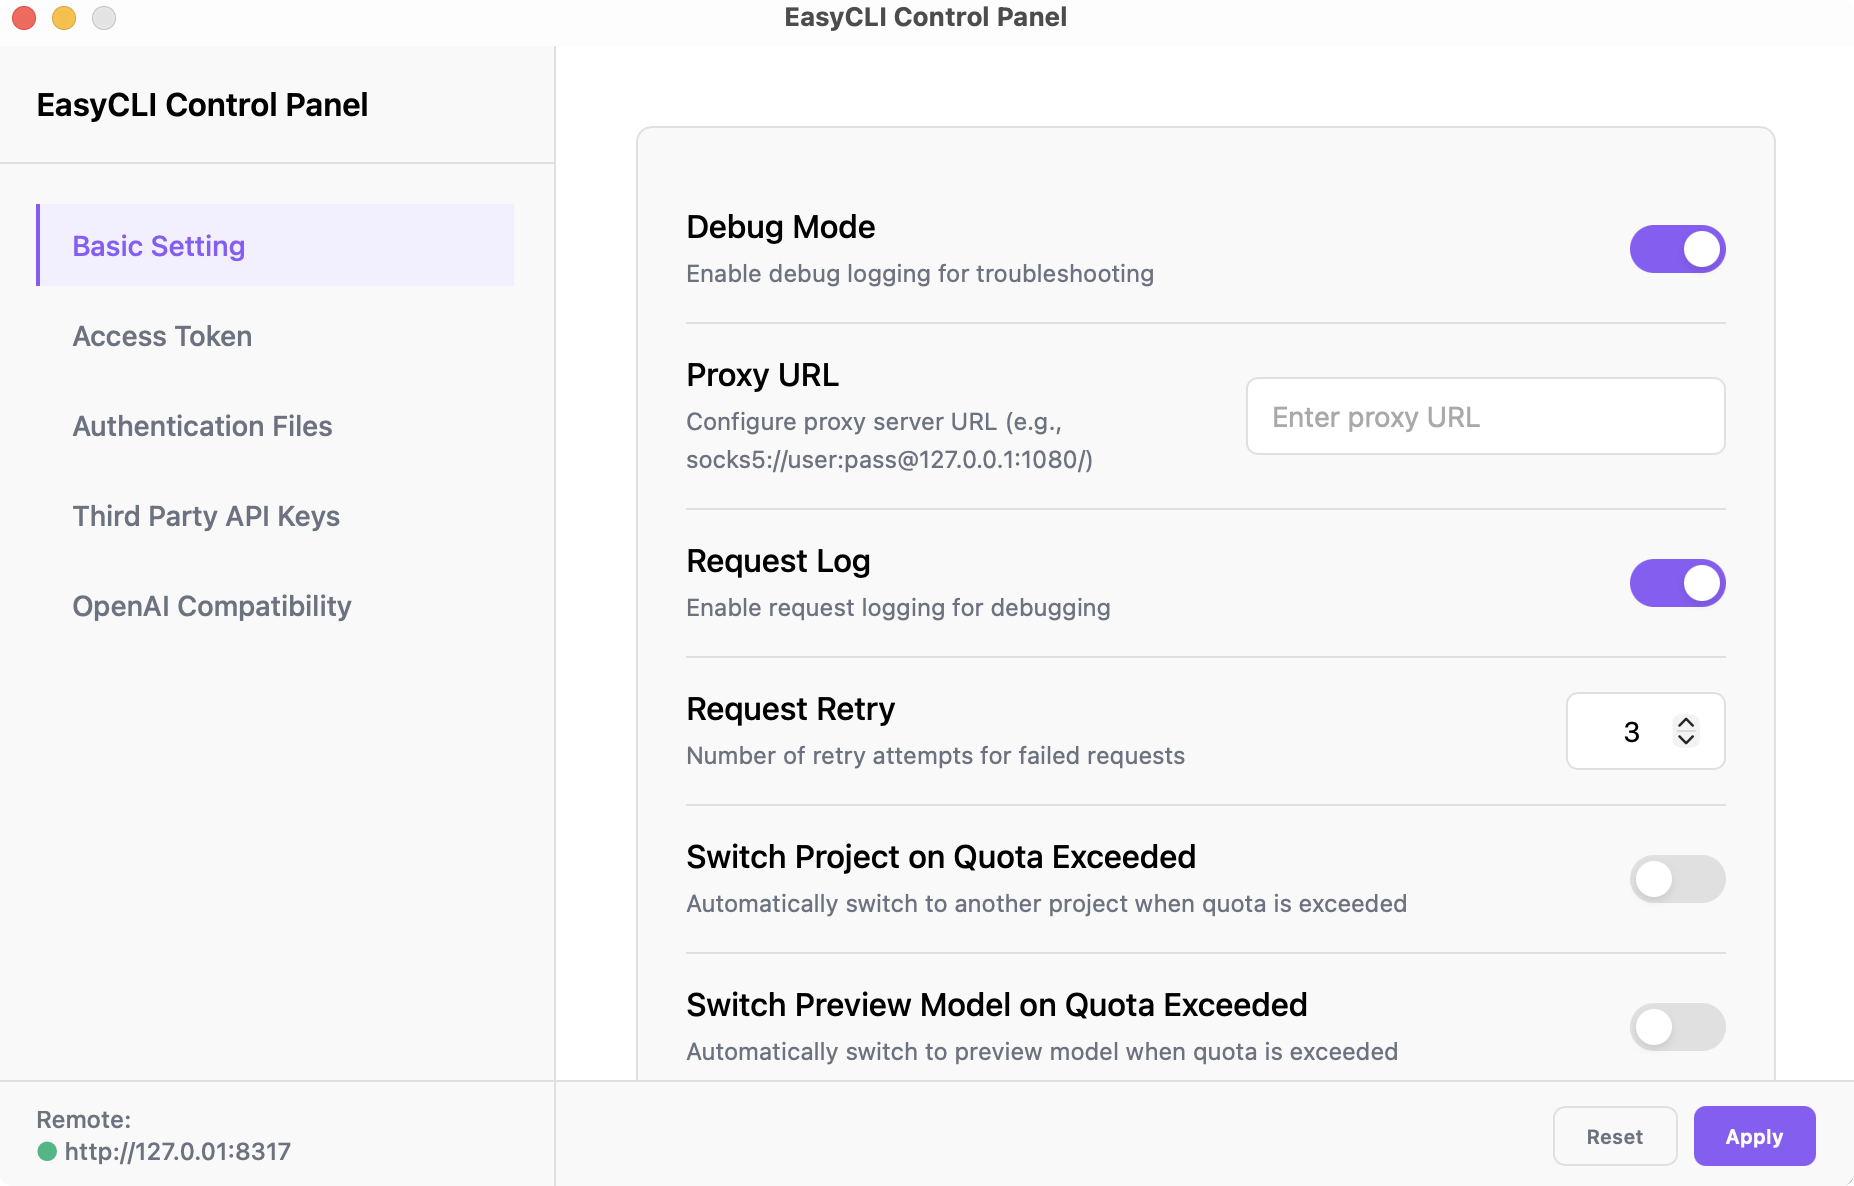
- EasyCLI:图形化控制台,让你告别枯燥的
.conf配置文件,实现可视化路由。 - OpenCode/Claude Code:生产力终端,只需配置一个本地代理地址,即可调用全球模型。
2.2 环境搭建:从零开始部署
第一步:安装 CLIProxyAPI 后端
在 macOS 上,我们推荐使用 Homebrew 进行一键安装:
# 1. 添加 tap 仓库
brew tap z-shone/cliproxyapi

# 2. 安装服务端
brew install cliproxyapi

# 3. 启动服务(并设置为开机自启)
brew services start cliproxyapi
第二步:安装 EasyCLI 管理界面
EasyCLI 是一个跨平台的 GUI 客户端,你可以从其官方仓库的 Releases 页面下载对应系统的安装包(如 .dmg 或 .exe)。
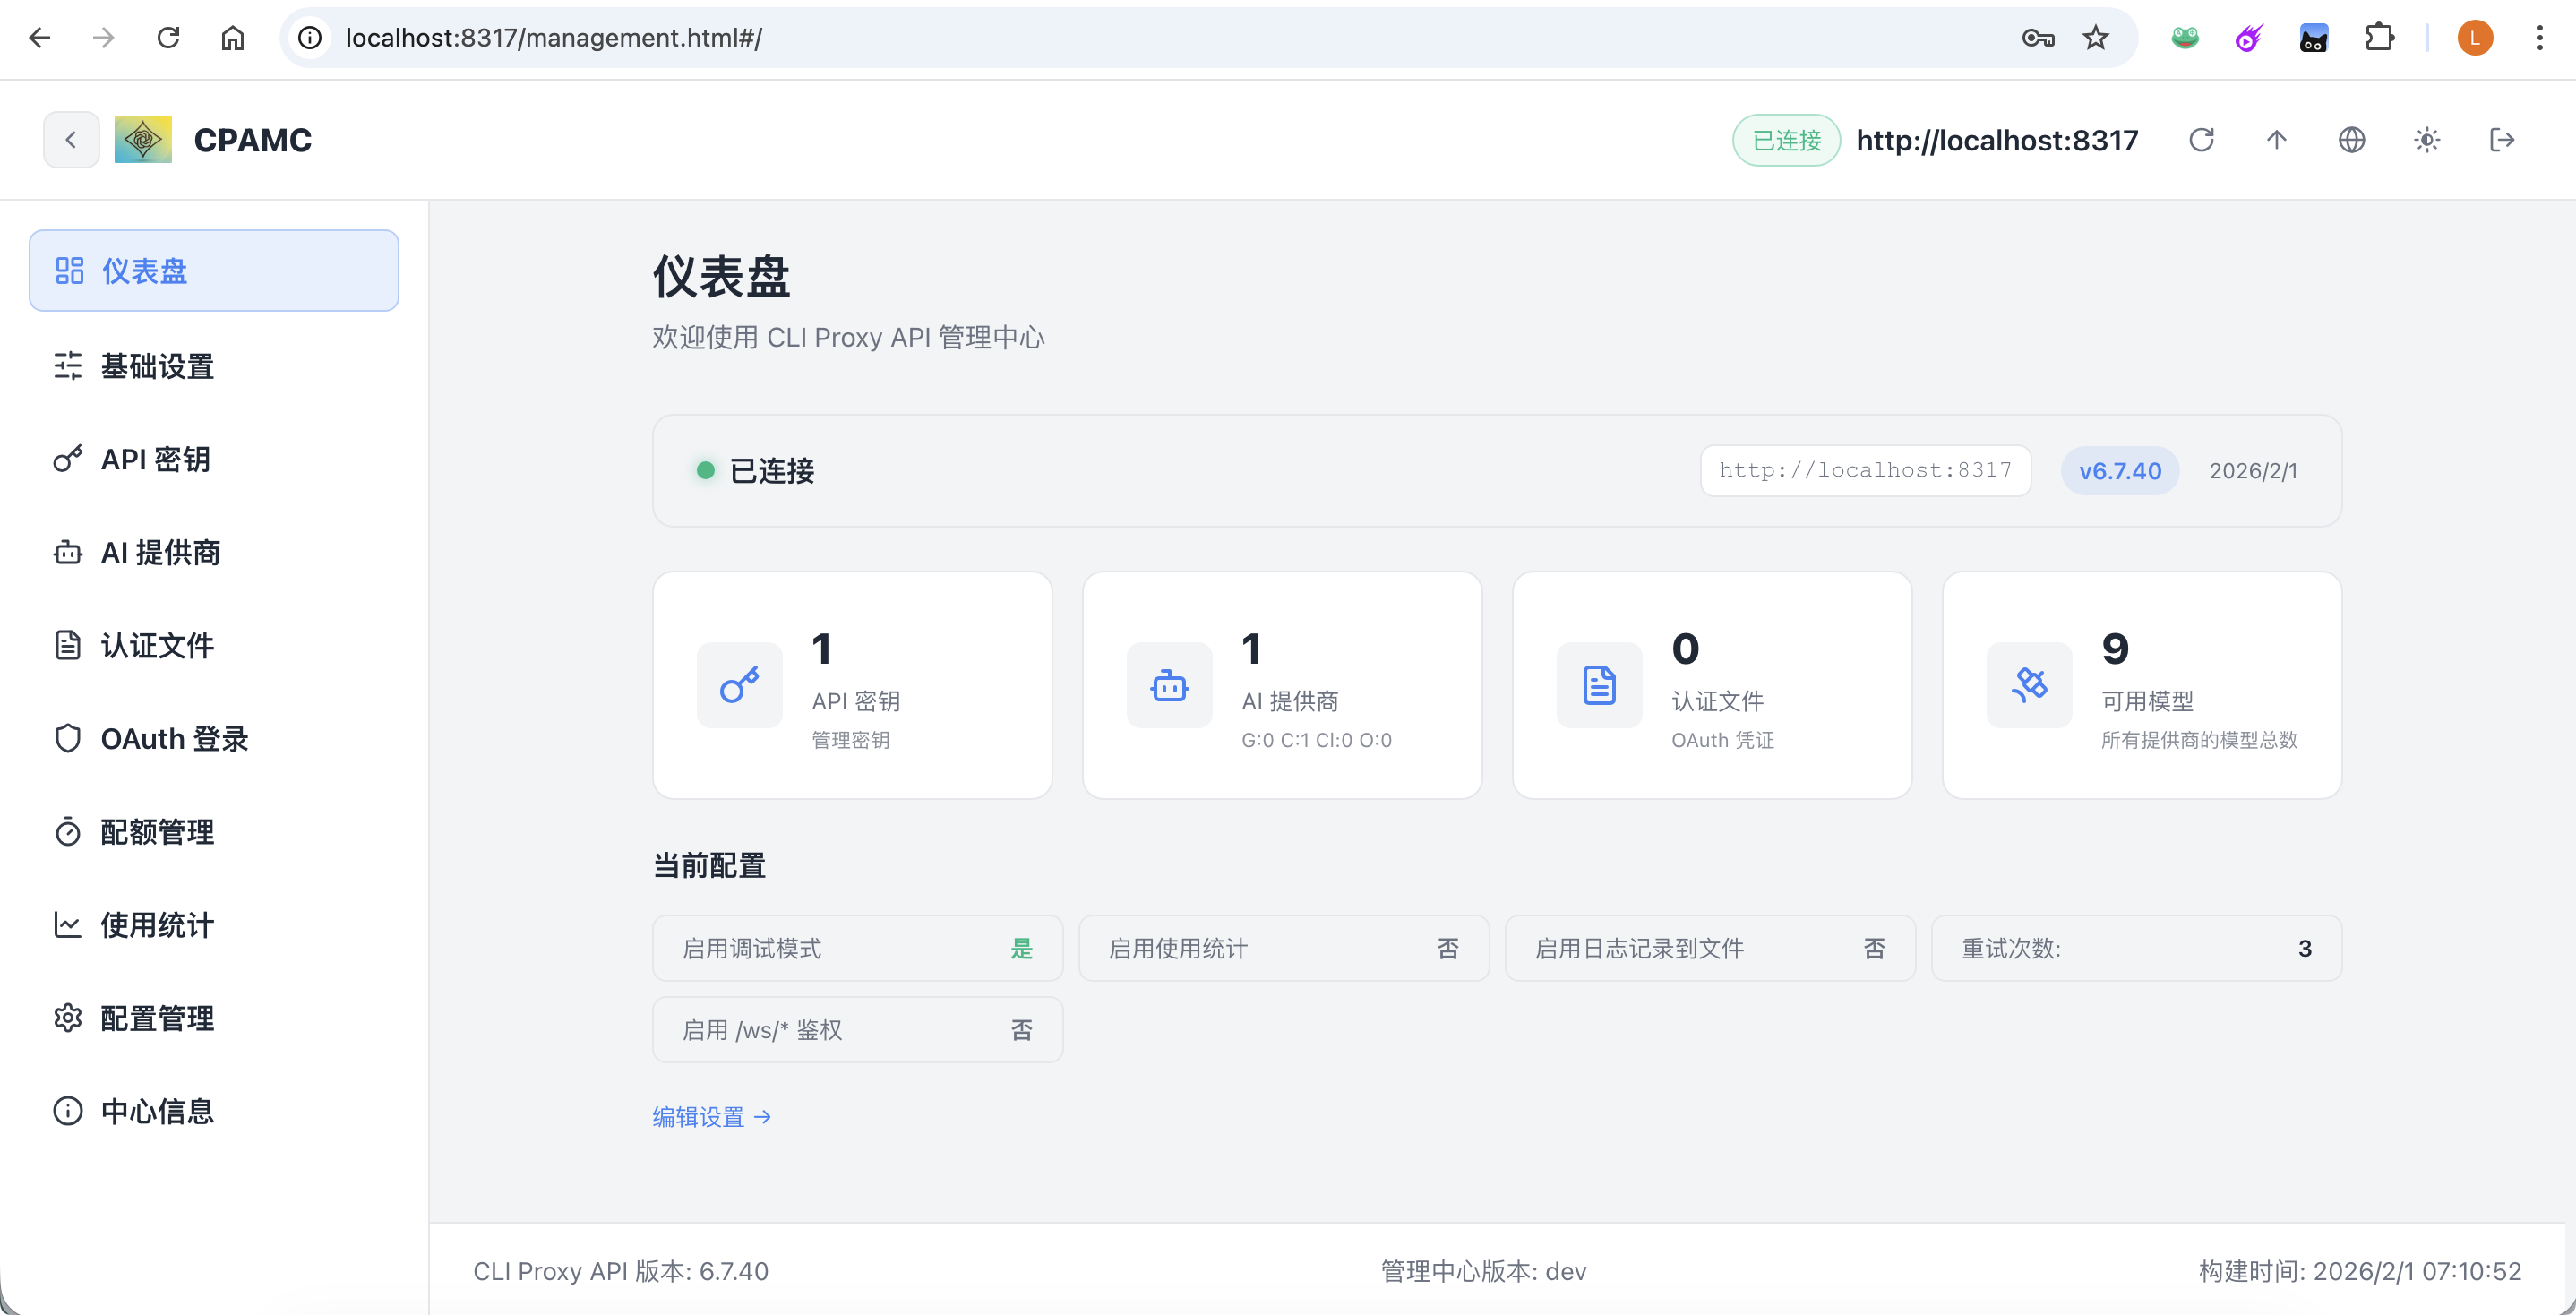
2.3 核心架构:理清“三权分立”的密钥体系
为了让配置不迷路,首先要分清这三个核心概念:
| 密钥名称 | 角色 | 存放/配置位置 | 核心作用 |
|---|---|---|---|
| Management Key | 系统总闸 | cliproxyapi.conf |
管理员权限:用于 EasyCLI 成功连接并控制后台服务。 |
| Access Token | 私人通行证 | EasyCLI -> Access Token | 用户权限:OpenCode 插件请求代理时使用的“本地密钥”。 |
| Third Party Key | 外部提款卡 | EasyCLI -> Third Party | 实际消费:你购买的 Gemini/OpenAI 或三方中转的真实 Key。 |
三、 实战:如何接入一个三方 OpenAI 格式接口?
假设你有一个像 api.tabcode.cc 这样的中转地址,我们按照以下步骤联动:
Step 1. 后端对接 (EasyCLI)
- 确保 EasyCLI 左下角 Remote 状态为绿色。
- 进入 Third Party API Keys,点击 Add。
- Base URL:填入三方地址(例如
https://api.tabcode.cc/openai/v1)。 - API Key:填入你从该平台获取的
sk-user-xxxxxx。 - Apply:点击应用,配置即刻生效。
Step 2. 签发通行证 (Access Token)
在 EasyCLI 的 Access Token 页面生成一个新的 Token(例如 at-easycli)。
四、落地:OpenCode 的“极简”配置
得益于 cliproxyapi 的协议归一化功能,无论你后端接了多少个不同的三方供应商,在 OpenCode 里你只需要配置一个 Provider。
opencode.json 配置示例:
{
    "plugin": [
        "oh-my-opencode"
    ],
    "$schema": "https://opencode.ai/config.json",
    "mcp": {
        "context7": {
            "type": "local",
            "command": [
                "npx",
                "@upstash/context7-mcp"
            ],
            "enabled": true
        }
    },
    "provider": {
        "cpa-oai": {
            "npm": "@ai-sdk/openai",
            "name": "cpa-oai",
            "options": {
                "baseURL": "http://127.0.0.1:8317/v1",
                "setCacheKey": true
            },
            "models": {
                "gpt-5.2": {
                    "name": "gpt-5.2",
                    "thinking": true,
                    "options": {
                        "include": [
                            "reasoning.encrypted_content"
                        ],
                        "store": false
                    },
                    "variants": {
                        "xhigh": {
                            "reasoningEffort": "xhigh",
                            "textVerbosity": "medium",
                            "reasoningSummary": "auto"
                        },
                        "high": {
                            "reasoningEffort": "high",
                            "textVerbosity": "medium",
                            "reasoningSummary": "auto"
                        },
                        "medium": {
                            "reasoningEffort": "medium",
                            "textVerbosity": "medium",
                            "reasoningSummary": "auto"
                        },
                        "low": {
                            "reasoningEffort": "low",
                            "textVerbosity": "medium",
                            "reasoningSummary": "auto"
                        }
                    }
                },
                "gpt-5.2-codex": {
                    "name": "gpt-5.2-codex",
                    "thinking": true,
                    "options": {
                        "include": [
                            "reasoning.encrypted_content"
                        ],
                        "store": false
                    },
                    "variants": {
                        "xhigh": {
                            "reasoningEffort": "xhigh",
                            "textVerbosity": "medium",
                            "reasoningSummary": "auto"
                        },
                        "high": {
                            "reasoningEffort": "high",
                            "textVerbosity": "medium",
                            "reasoningSummary": "auto"
                        },
                        "medium": {
                            "reasoningEffort": "medium",
                            "textVerbosity": "medium",
                            "reasoningSummary": "auto"
                        },
                        "low": {
                            "reasoningEffort": "low",
                            "textVerbosity": "medium",
                            "reasoningSummary": "auto"
                        }
                    }
                },
                "gpt-5.1-codex-max": {
                    "name": "gpt-5.1-codex-max",
                    "thinking": true,
                    "options": {
                        "include": [
                            "reasoning.encrypted_content"
                        ],
                        "store": false
                    },
                    "variants": {
                        "xhigh": {
                            "reasoningEffort": "xhigh",
                            "textVerbosity": "medium",
                            "reasoningSummary": "auto"
                        },
                        "high": {
                            "reasoningEffort": "high",
                            "textVerbosity": "medium",
                            "reasoningSummary": "auto"
                        },
                        "medium": {
                            "reasoningEffort": "medium",
                            "textVerbosity": "medium",
                            "reasoningSummary": "auto"
                        },
                        "low": {
                            "reasoningEffort": "low",
                            "textVerbosity": "medium",
                            "reasoningSummary": "auto"
                        }
                    }
                }
            }
        }
    }
}
接着配置 oh-my-opencode.json
{
  "$schema": "https://raw.githubusercontent.com/code-yeongyu/oh-my-opencode/master/assets/oh-my-opencode.schema.json",
  "agents": {
    "sisyphus": {
      "model": "cpa-oai/gpt-5.2-codex"
    },
    "librarian": {
      "model": "cpa-oai/gpt-5.2-codex"
    },
    "explore": {
      "model": "cpa-oai/gpt-5.2-codex"
    },
    "oracle": {
      "model": "cpa-oai/gpt-5.2-codex"
    },
    "frontend-ui-ux-engineer": {
      "model": "cpa-oai/gpt-5.2-codex"
    },
    "document-writer": {
      "model": "cpa-oai/gpt-5.2-codex"
    },
    "multimodal-looker": {
      "model": "cpa-oai/gpt-5.2-codex"
    }
  }
}
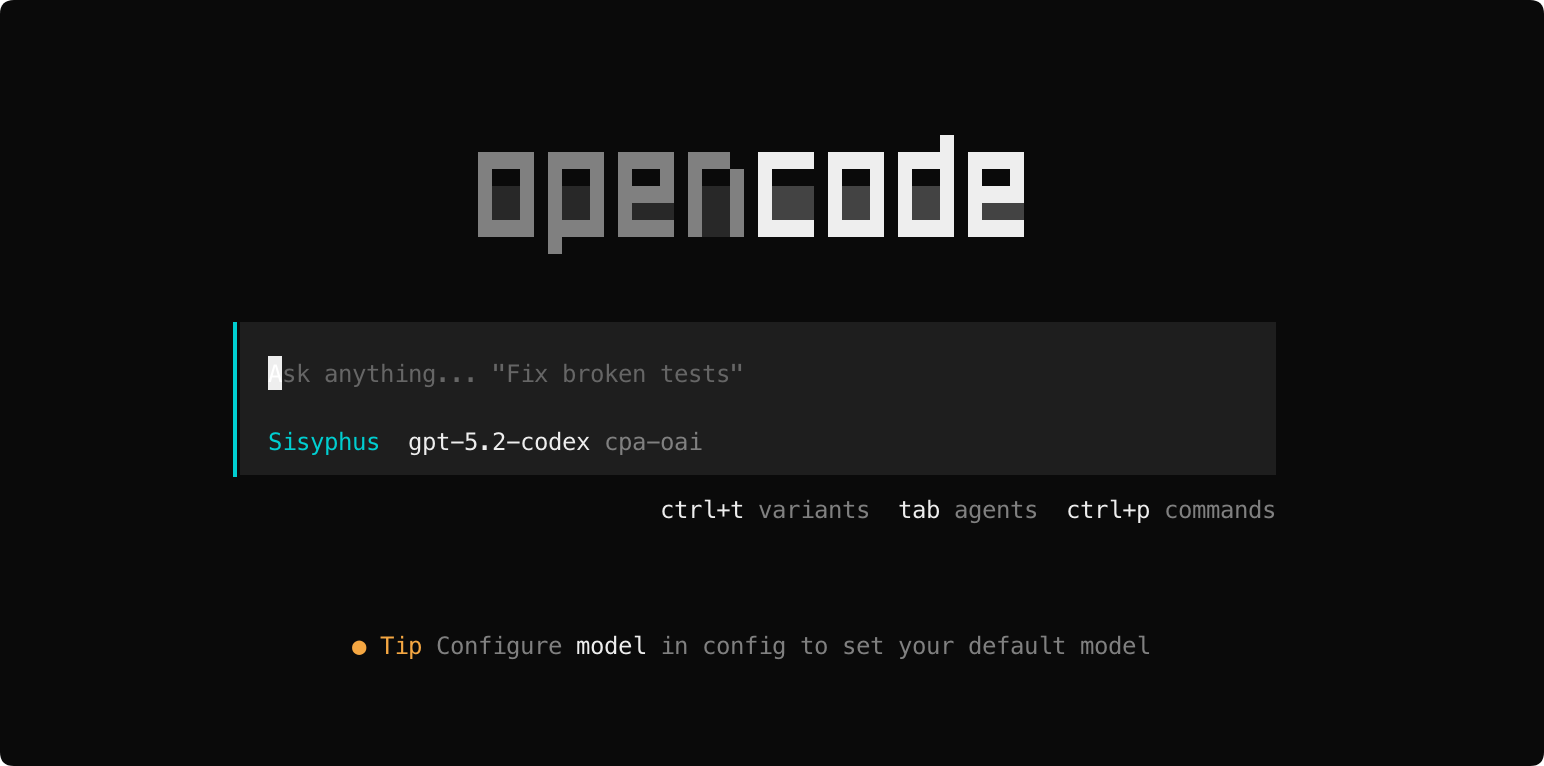
接下里就是在 opencode 连接这个 Provider

找到 cpa-oa 确认

粘贴 cliproxyapi的 accessToken ,也就是那个 at-easycli,然后就能看到
五、 常见问题排查 (FAQ)
- 明明改了配置却不生效? 记得在 EasyCLI 界面点击右下角的 Apply。
- OpenCode 报 Bad Gateway? 检查
opencode.json里的baseURL是否为CLIProxyAPI的地址。 - 无法连接到 127.0.0.1? 如果你在 Docker 环境中使用,请尝试将
baseURL改为宿主机 IP(如172.22.0.1)。
六、 结语
这套方案的精髓在于:将“外部多变的 API 环境”与“内部稳定的开发环境”解耦。一旦搭建完成,你再也不需要因为更换了 AI 供应商而跑遍所有的编辑器去改配置。

有“AI”的1024 = 2048,欢迎大家加入2048 AI社区
更多推荐
 18
18 1
1- 0


 已为社区贡献13条内容

所有评论(0)