03.02.04.04 Enable Split Layout in a List View 在列表视图中启用分屏布局
Enable Split Layout in a List View 在列表视图中启用分屏布局
This lesson explains how to enable a Split Layout in a List View.
本课程讲解如何在列表视图中启用分屏布局。
The Detail View opens when you select an object from the List View. In ASP.NET Core Blazor applications, this Detail View replaces the List View. In Windows Forms applications, XAF renders a new window.
当您从列表视图中选择一个对象时,将打开详细视图。在ASP.NET Core Blazor应用程序中,此详细视图会替换列表视图。而在Windows Forms应用程序中,XAF会呈现一个新窗口。
The instructions below explain how to show the Detail View of the selected Department object alongside the Department List View.
以下说明介绍了如何在部门列表视图旁边显示所选部门对象的详细信息视图。
Step-by-Step Instructions 分步说明
1.In the MySolution.Module project, open the Model.DesignedDiffs.xafml file in the Model Editor. Navigate to the Views | MySolution.Module.BusinessObjects | Department | Department_ListView node. Set the MasterDetailMode property of this node to ListViewAndDetailView.
在 MySolution.Module 项目中,用模型编辑器打开 Model.DesignedDiffs.xafml 文件。导航至 视图 | MySolution.Module.BusinessObjects | Department | Department_ListView 节点。将此节点的 MasterDetailMode 属性设置为 ListViewAndDetailView。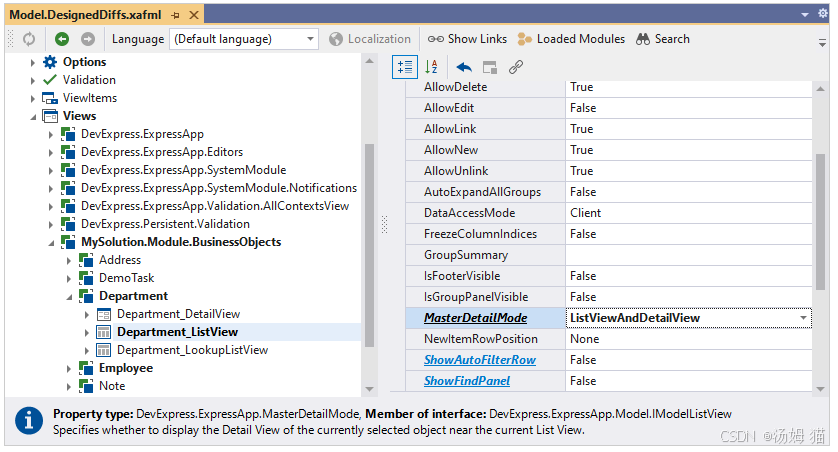
2.Run the application. Open the Department List View and select an object to see the object’s Detail View in the same window:
运行应用程序。打开 部门 列表视图并在同一窗口中选择一个对象以查看该对象的详细信息视图:
ASP.NET Core Blazor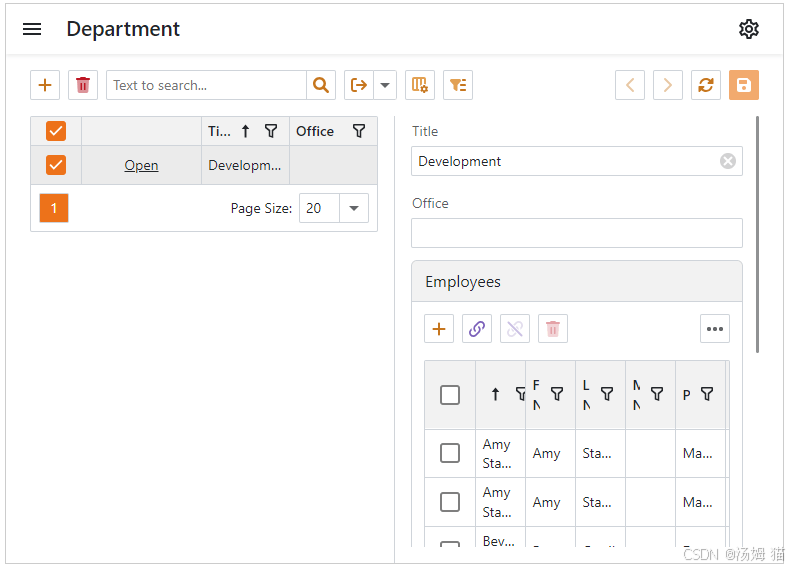
Windows Forms: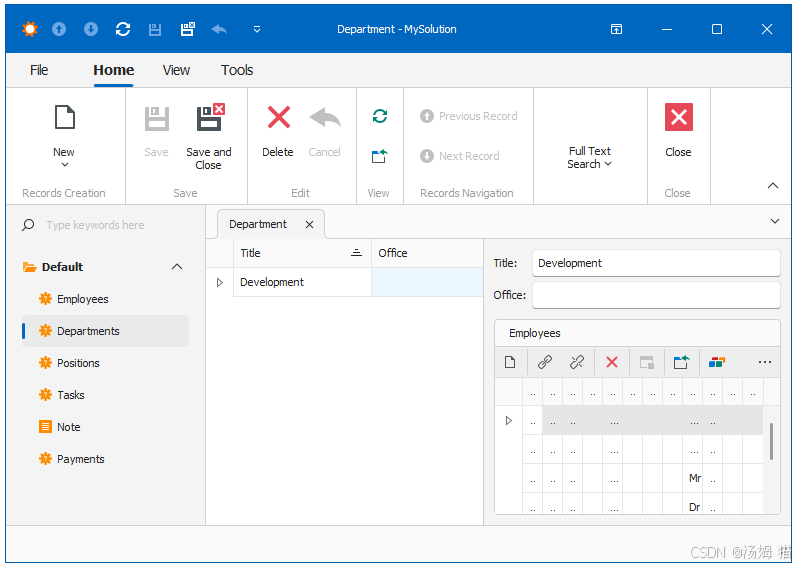
The Detail View is context-sensitive and its content depends on the selected Department object.
详细视图是上下文相关的,其内容取决于所选的部门对象。
Tip
To specify the Detail View that appears alongside the List View, use the MasterDetailView property.
To customize the Detail View location, use the Direction and ViewsOrder properties of the _ListView | SplitLayout node.
要指定与列表视图一起显示的详细视图,请使用 MasterDetailView 属性。
要自定义详细视图的位置,请使用 _ListView | SplitLayout 节点的 Direction 和 ViewsOrder 属性。

有“AI”的1024 = 2048,欢迎大家加入2048 AI社区
更多推荐


 12
12 0
0- 0


 已为社区贡献11条内容

所有评论(0)