Flutter for OpenHarmony 个人理财管理App实战 - 项目初始化与架构搭建
本文介绍了开发跨平台个人理财管理应用的技术选型和实现过程。项目采用Flutter框架,支持OpenHarmony及其他主流平台。技术栈方面,选用GetX进行状态管理,配合flutter_screenutil处理多端适配,使用fl_chart实现图表展示。文章详细说明了pubspec.yaml的依赖配置,包括版本控制、核心功能库和UI组件库的选择。应用入口main.dart完成了初始化设置、屏幕适配
最近在做一个跨平台的个人理财管理应用,目标是同时支持 OpenHarmony 和其他主流平台。这篇文章记录一下项目从零开始搭建的过程,包括依赖配置、架构设计、数据模型等核心内容。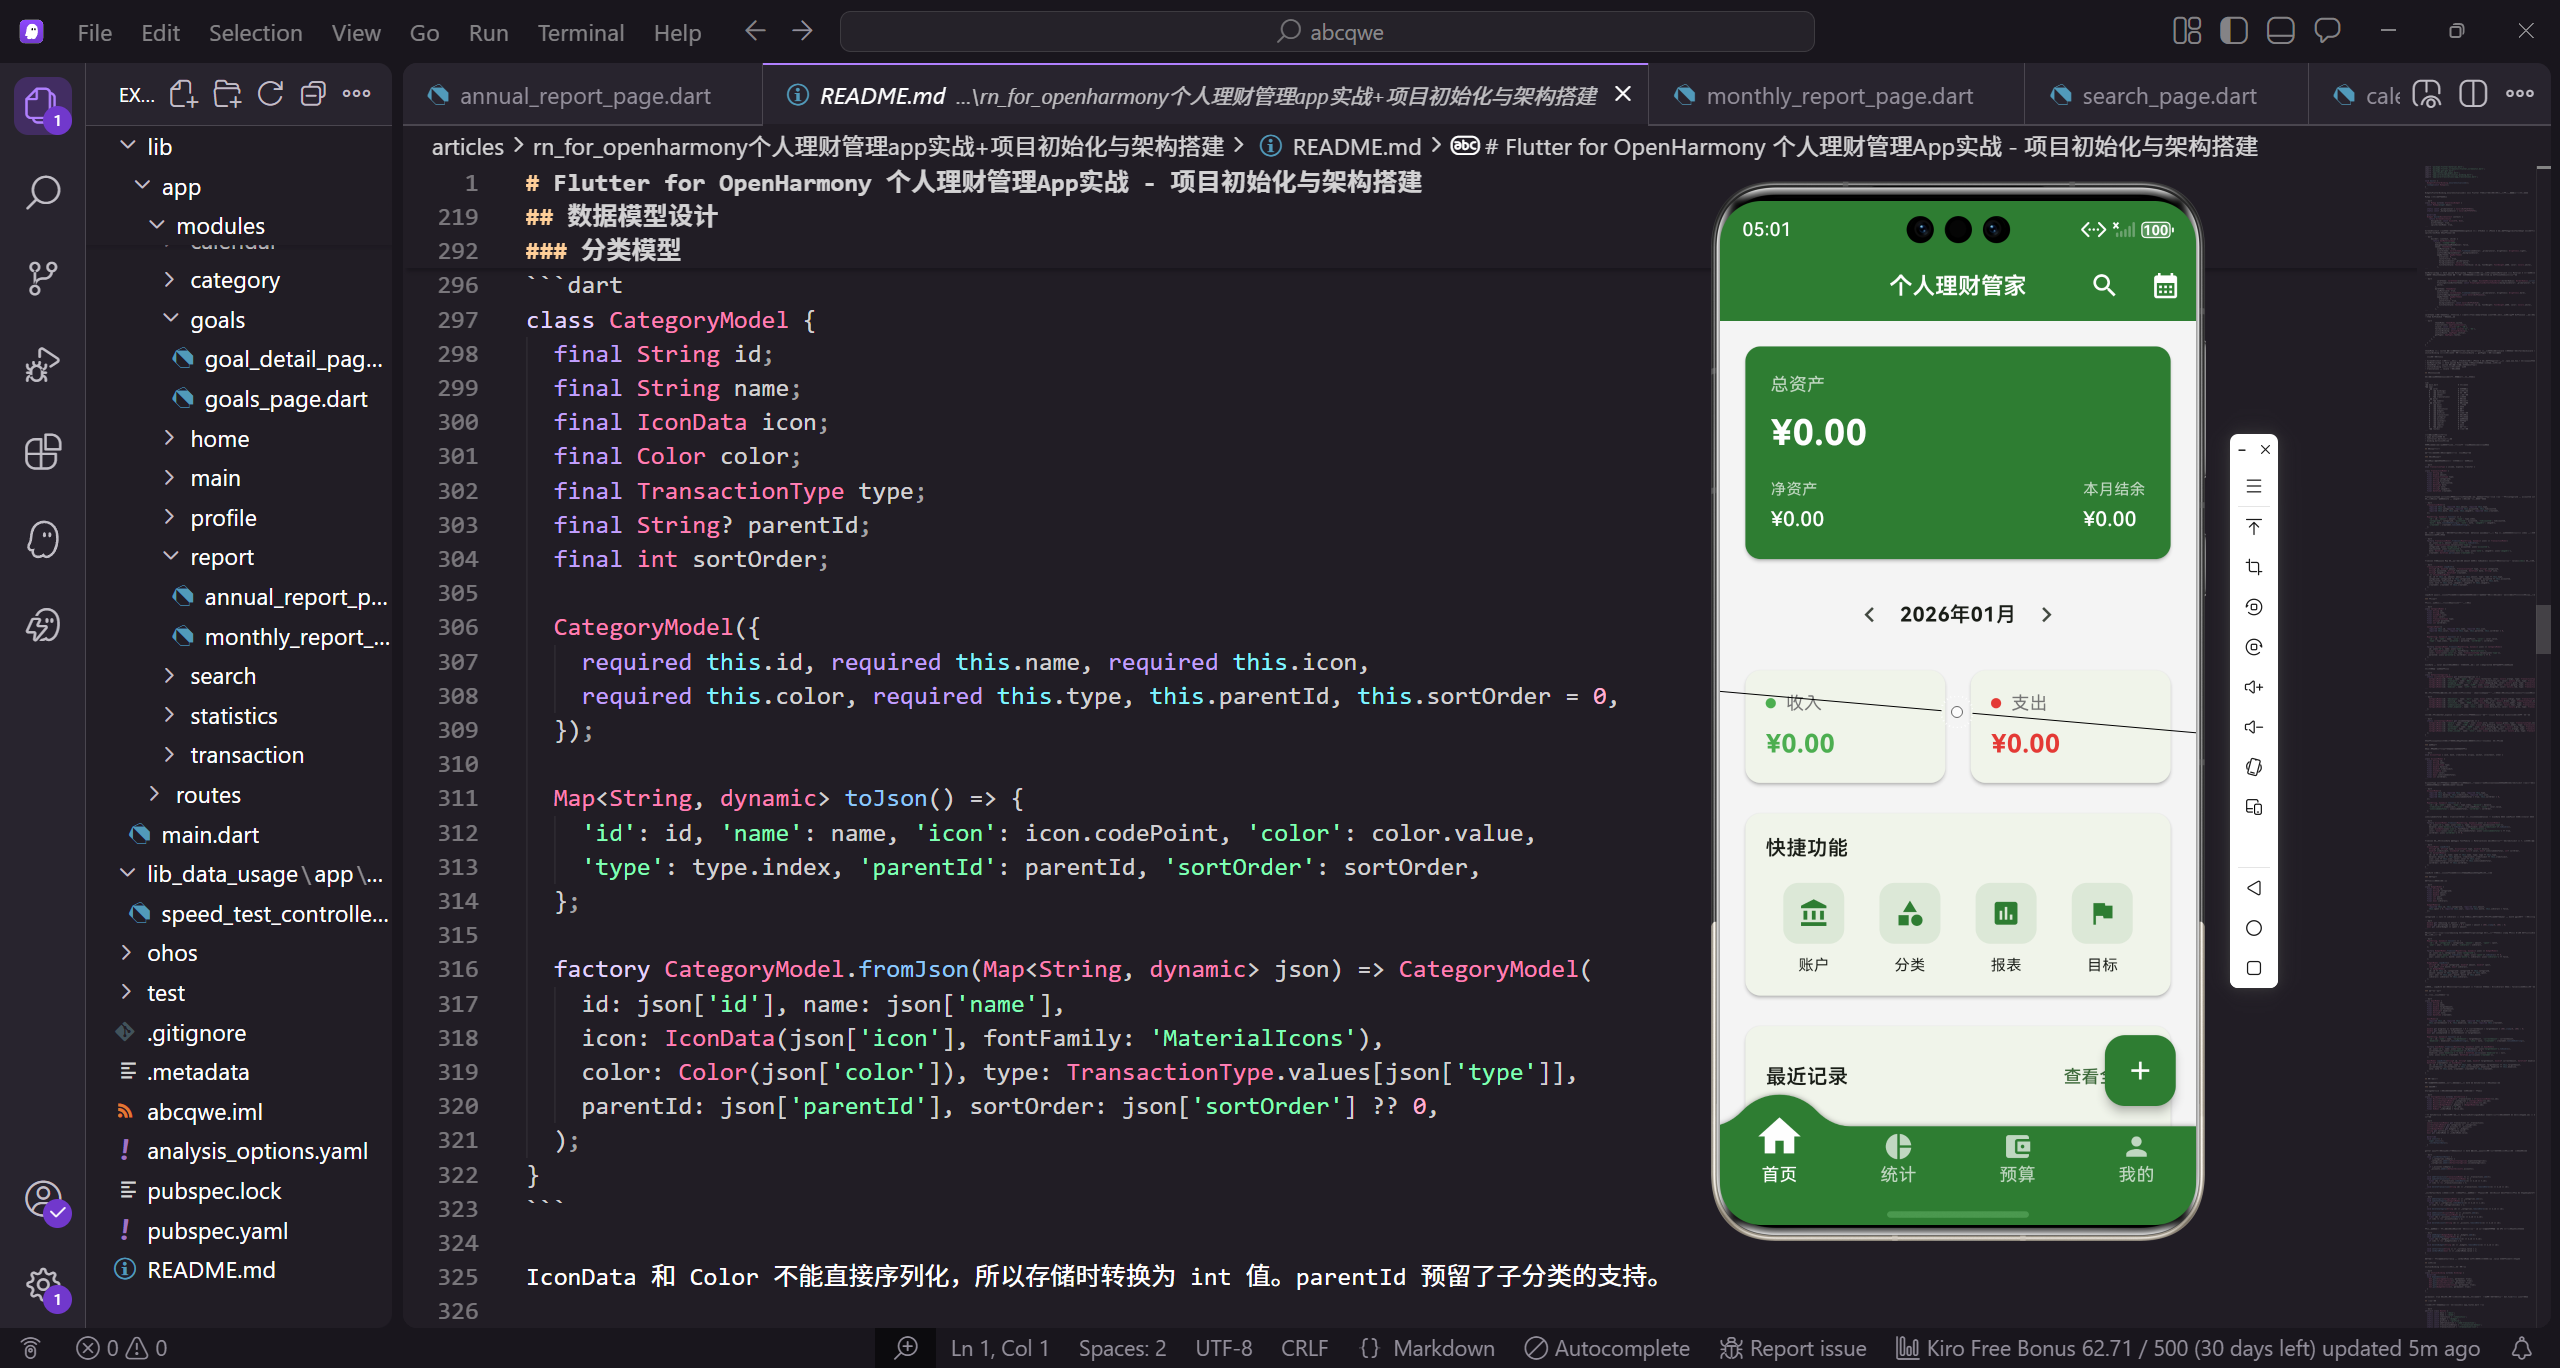
技术选型
做理财类应用,数据管理和状态同步是核心痛点。经过调研,最终选定了 GetX 作为状态管理方案。原因很简单:轻量、够用、学习成本低。相比 BLoC 那套繁琐的模板代码,GetX 写起来确实舒服很多。
GetX 的优势在于它是一个全能型框架,不仅提供状态管理,还包含路由管理、依赖注入、国际化等功能。这意味着不需要引入多个库来实现这些功能,减少了依赖冲突的风险。
屏幕适配方面用了 flutter_screenutil,这个库在多端适配上表现稳定。图表展示选了 fl_chart,功能全面,自定义程度高,后面统计分析模块会大量用到。
依赖配置
先看 pubspec.yaml 的基础配置:
name: finance_manager
description: 免费开源的跨平台个人理财管理工具
publish_to: 'none'
version: 2.1.3+2010133
name 是项目名称,description 是项目描述。publish_to 设为 none 表示这个包不会发布到 pub.dev,纯粹是本地项目使用。version 是版本号,2.1.3 是语义化版本号(主版本.次版本.修订号),+2010133 是构建号,用于版本追踪和热更新管理。
SDK 版本约束:
environment:
  sdk: '>=2.19.6 <3.0.0'
environment 定义 SDK 版本约束。sdk 设为 >=2.19.6 ❤️.0.0,表示兼容 Dart 2.19.6 及以上的所有 2.x 版本,但不包括 3.0.0。这个范围选择比较保守,确保项目在大多数环境下都能正常运行,同时为将来升级到 Dart 3 留有余地。
核心依赖配置:
dependencies:
  flutter:
    sdk: flutter
  cupertino_icons: ^1.0.2
  get: ^4.6.5
dependencies 定义项目依赖。flutter 是 Flutter SDK 本身。cupertino_icons 提供 iOS 风格的图标,虽然主要用 Material Icons,但有些场景下 iOS 图标更合适。get 是 GetX 的包名,4.6.5 是目前比较稳定的版本。^ 前缀表示兼容该主版本的所有更新,比如 ^4.6.5 会自动更新到 4.x.x 的最新版本,但不会更新到 5.0.0。
UI 和图表相关的依赖:
  fl_chart: ^0.65.0
  intl: ^0.20.2
  percent_indicator: ^4.2.3
  convex_bottom_bar: ^3.0.0
fl_chart 用来画各种统计图表,支持折线图、柱状图、饼图等,高度可定制。intl 是国际化和日期格式化的标准库,处理多语言和日期显示必不可少。percent_indicator 做进度环和进度条,预算模块展示使用进度时会用到。convex_bottom_bar 实现底部凸起的导航栏效果,比原生的 BottomNavigationBar 好看不少。
更多工具依赖:
  lottie: ^2.3.2
  flutter_screenutil: ^5.9.0
  uuid: ^4.2.2
  table_calendar: ^3.0.9
lottie 用于播放 Lottie 动画,可以让应用更生动。flutter_screenutil 处理屏幕适配,设计稿按 375x812 来做,基本能覆盖大部分机型。uuid 用于生成唯一标识,这在本地数据管理中很重要,每条交易记录都需要一个唯一 ID。table_calendar 是日历组件,用于按日期查看交易记录。
应用入口
main.dart 是整个应用的入口,需要完成初始化、配置屏幕适配、设置主题、注册路由等工作。
import 'package:flutter/material.dart';
import 'package:flutter_screenutil/flutter_screenutil.dart';
import 'package:get/get.dart';
import 'app/routes/app_pages.dart';
import 'app/core/bindings/initial_binding.dart';
import 'app/core/translations/app_translations.dart';

void main() {
  WidgetsFlutterBinding.ensureInitialized();
  runApp(const MyApp());
}
导入必要的包:flutter 核心包、flutter_screenutil 屏幕适配包、GetX 状态管理包。导入项目内部的路由配置、依赖注入和国际化配置。main 函数是应用入口,WidgetsFlutterBinding.ensureInitialized() 确保 Flutter 框架初始化完成,这在使用某些原生功能前是必须的。runApp 启动应用,传入根组件 MyApp。
MyApp 是应用的根组件:
class MyApp extends StatelessWidget {
const MyApp({super.key});
static const _primaryColor = Color(0xFF2E7D32);
static const _backgroundColor = Color(0xFFF5F5F5);
Widget build(BuildContext context) {
return ScreenUtilInit(
designSize: const Size(375, 812),
MyApp 使用 StatelessWidget 因为不需要管理状态。定义两个静态常量颜色:_primaryColor 是主题绿色,_backgroundColor 是背景浅灰色。build 方法返回 ScreenUtilInit,这是屏幕适配的核心组件。designSize 设为 375x812 是 iPhone X 的逻辑分辨率,后续使用 .sp、.w、.h、.r 等扩展方法时会自动适配不同屏幕。
      minTextAdapt: true,
      splitScreenMode: true,
      builder: (context, child) {
        return GetMaterialApp(
          title: '个人理财管家',
          debugShowCheckedModeBanner: false,
          theme: ThemeData(
            useMaterial3: true,
minTextAdapt 设为 true 确保文字在小屏幕上也能自适应。splitScreenMode 设为 true 支持分屏模式。builder 回调中返回 GetMaterialApp,这是 GetX 提供的 MaterialApp 替代品,内置路由和依赖注入。title 是应用标题。debugShowCheckedModeBanner 设为 false 隐藏右上角的 debug 标签。theme 定义亮色主题,useMaterial3 启用 Material 3 设计规范。
            colorScheme: ColorScheme.fromSeed(seedColor: _primaryColor, brightness: Brightness.light),
            scaffoldBackgroundColor: _backgroundColor,
            appBarTheme: AppBarTheme(
              elevation: 0,
              centerTitle: true,
              backgroundColor: _primaryColor,
              foregroundColor: Colors.white,
colorScheme 使用 ColorScheme.fromSeed 根据主色自动生成配色方案,brightness 设为 light 表示亮色主题。scaffoldBackgroundColor 设置页面背景色为浅灰色。appBarTheme 统一配置所有页面的顶部导航栏样式:elevation 设为 0 去掉阴影,centerTitle 设为 true 标题居中,backgroundColor 设为主题绿色,foregroundColor 设为白色。
              titleTextStyle: TextStyle(fontSize: 18.sp, fontWeight: FontWeight.w600, color: Colors.white),
            ),
            cardTheme: CardTheme(elevation: 2, shape: RoundedRectangleBorder(borderRadius: BorderRadius.circular(12.r))),
            floatingActionButtonTheme: const FloatingActionButtonThemeData(backgroundColor: _primaryColor, foregroundColor: Colors.white),
          ),
titleTextStyle 设置标题文字样式:字号 18.sp 会根据屏幕尺寸自动缩放,字重 w600(半粗体),颜色白色。cardTheme 设置卡片的阴影为 2 和圆角为 12.r。floatingActionButtonTheme 设置浮动按钮的背景色为主题绿色,前景色为白色。这些统一的主题配置让整个应用的视觉风格保持一致。
          darkTheme: ThemeData(
            useMaterial3: true,
            colorScheme: ColorScheme.fromSeed(seedColor: _primaryColor, brightness: Brightness.dark),
            scaffoldBackgroundColor: const Color(0xFF121212),
            appBarTheme: AppBarTheme(
              elevation: 0,
              centerTitle: true,
              backgroundColor: const Color(0xFF1E1E1E),
              titleTextStyle: TextStyle(fontSize: 18.sp, fontWeight: FontWeight.w600, color: Colors.white),
            ),
          ),
darkTheme 定义暗色主题,结构与亮色主题类似。brightness 设为 dark 表示暗色主题。scaffoldBackgroundColor 用深灰 0xFF121212 而不是纯黑,视觉上更舒适。appBarTheme 的 backgroundColor 用稍浅的 0xFF1E1E1E 形成层次感。暗色模式下的配色需要特别注意对比度和可读性。
          themeMode: ThemeMode.system,
          translations: AppTranslations(),
          locale: const Locale('zh', 'CN'),
          fallbackLocale: const Locale('en', 'US'),
          initialBinding: InitialBinding(),
          initialRoute: AppPages.initial,
          getPages: AppPages.routes,
        );
      },
    );
  }
}
themeMode 设为 system 跟随系统切换明暗模式。translations 注册 AppTranslations 国际化翻译类。locale 设置默认中文(简体),fallbackLocale 设置备选语言为英文,找不到翻译时使用。initialBinding 在启动时注入全局服务。initialRoute 设置初始路由,getPages 配置所有路由页面。这些配置完成了应用的基础架构搭建。
项目目录结构
采用功能模块化的目录结构,便于团队协作和后期维护:
lib/
├── main.dart                    # 应用入口
└── app/
    ├── core/                    # 核心功能
    │   ├── bindings/            # 依赖注入
    │   ├── services/            # 全局服务
    │   ├── theme/               # 主题配置
    │   └── translations/        # 国际化
    ├── data/                    # 数据层
    │   └── models/              # 数据模型
    ├── modules/                 # 功能模块
    │   ├── main/                # 主框架
    │   ├── home/                # 首页
    │   ├── statistics/          # 统计
    │   ├── budget/              # 预算
    │   ├── profile/             # 个人中心
    │   ├── transaction/         # 交易记录
    │   ├── category/            # 分类管理
    │   ├── account/             # 账户管理
    │   ├── calendar/            # 日历视图
    │   ├── search/              # 搜索
    │   ├── report/              # 报告
    │   └── goals/               # 理财目标
    └── routes/                  # 路由配置
每个功能模块通常包含:
- page.dart:页面 UI
- controller.dart:业务逻辑
- binding.dart:依赖注入
这种结构的好处是模块之间相互独立,修改一个模块不会影响其他模块。
数据模型设计
理财应用的核心是数据,需要设计好几个关键模型。
交易记录模型
交易记录是最核心的数据,每一笔收支都是一条记录:
enum TransactionType { income, expense, transfer }

class TransactionModel {
  final String id;
  final double amount;
  final TransactionType type;
  final String categoryId;
  final String accountId;
  final String? toAccountId;
TransactionType 枚举定义三种交易类型:income 收入、expense 支出、transfer 转账。TransactionModel 类定义交易记录的数据结构。id 是唯一标识,用 UUID 生成。amount 是金额。type 是交易类型。categoryId 关联分类,accountId 关联账户。toAccountId 仅在转账时使用,表示目标账户,其他类型为 null。
  final DateTime date;
  final String? note;
  final String? imageUrl;
  final DateTime createdAt;

  TransactionModel({
    required this.id, required this.amount, required this.type,
    required this.categoryId, required this.accountId, this.toAccountId,
    required this.date, this.note, this.imageUrl, required this.createdAt,
  });
date 是交易日期,用户可以选择。note 是可选的备注信息。imageUrl 是可选的附件图片路径。createdAt 是创建时间,记录数据何时添加。构造函数中 required 标记必填字段,可选字段不加 required。这种设计让创建交易记录时只需提供必要信息,其他信息可选。
  Map<String, dynamic> toJson() => {
    'id': id, 'amount': amount, 'type': type.index,
    'categoryId': categoryId, 'accountId': accountId, 'toAccountId': toAccountId,
    'date': date.toIso8601String(), 'note': note, 'imageUrl': imageUrl,
    'createdAt': createdAt.toIso8601String(),
  };
toJson 方法将对象转为 Map 用于持久化存储。枚举用 index 转为整数(income=0, expense=1, transfer=2)。DateTime 用 toIso8601String() 转为 ISO8601 格式字符串,这是标准的日期时间格式,确保跨平台兼容。可选字段直接存储,为 null 时 JSON 中也是 null。
  factory TransactionModel.fromJson(Map<String, dynamic> json) => TransactionModel(
    id: json['id'], amount: json['amount'].toDouble(),
    type: TransactionType.values[json['type']],
    categoryId: json['categoryId'], accountId: json['accountId'],
    toAccountId: json['toAccountId'],
    date: DateTime.parse(json['date']), note: json['note'], imageUrl: json['imageUrl'],
    createdAt: DateTime.parse(json['createdAt']),
  );
fromJson 工厂方法从 Map 还原对象。amount 调用 toDouble() 确保类型正确,因为 JSON 中可能是 int。type 通过 TransactionType.values[index] 从整数还原枚举。date 和 createdAt 用 DateTime.parse 解析 ISO8601 字符串。这种序列化和反序列化的实现是数据持久化的基础。
  TransactionModel copyWith({
    String? id, double? amount, TransactionType? type, String? categoryId,
    String? accountId, String? toAccountId, DateTime? date, String? note,
    String? imageUrl, DateTime? createdAt,
  }) => TransactionModel(
    id: id ?? this.id, amount: amount ?? this.amount, type: type ?? this.type,
    categoryId: categoryId ?? this.categoryId, accountId: accountId ?? this.accountId,
    toAccountId: toAccountId ?? this.toAccountId, date: date ?? this.date,
    note: note ?? this.note, imageUrl: imageUrl ?? this.imageUrl,
    createdAt: createdAt ?? this.createdAt,
  );
}
copyWith 方法用于创建修改后的副本,符合不可变数据的设计理念。参数都是可选的,传入哪个就修改哪个,其余保持原值。使用 ?? 运算符,如果参数为 null 则使用原对象的值。这在编辑交易记录时非常有用,比如只修改金额而保持其他字段不变。
分类模型
分类用于对交易进行归类,支持自定义图标和颜色:
class CategoryModel {
  final String id;
  final String name;
  final IconData icon;
  final Color color;
  final TransactionType type;
  final String? parentId;
  final int sortOrder;

  CategoryModel({
    required this.id, required this.name, required this.icon,
    required this.color, required this.type, this.parentId, this.sortOrder = 0,
  });

  Map<String, dynamic> toJson() => {
    'id': id, 'name': name, 'icon': icon.codePoint, 'color': color.value,
    'type': type.index, 'parentId': parentId, 'sortOrder': sortOrder,
  };

  factory CategoryModel.fromJson(Map<String, dynamic> json) => CategoryModel(
    id: json['id'], name: json['name'],
    icon: IconData(json['icon'], fontFamily: 'MaterialIcons'),
    color: Color(json['color']), type: TransactionType.values[json['type']],
    parentId: json['parentId'], sortOrder: json['sortOrder'] ?? 0,
  );
}
IconData 和 Color 不能直接序列化,所以存储时转换为 int 值。parentId 预留了子分类的支持。
应用内置了一套默认分类:
class DefaultCategories {
  static List<CategoryModel> get expenseCategories => [
    CategoryModel(id: 'food', name: '餐饮', icon: Icons.restaurant, color: Colors.orange, type: TransactionType.expense),
    CategoryModel(id: 'transport', name: '交通', icon: Icons.directions_car, color: Colors.blue, type: TransactionType.expense),
    CategoryModel(id: 'shopping', name: '购物', icon: Icons.shopping_bag, color: Colors.pink, type: TransactionType.expense),
    CategoryModel(id: 'entertainment', name: '娱乐', icon: Icons.movie, color: Colors.purple, type: TransactionType.expense),
    CategoryModel(id: 'medical', name: '医疗', icon: Icons.local_hospital, color: Colors.red, type: TransactionType.expense),
支出分类覆盖日常生活的主要场景。每个分类都有唯一 id、显示名称、图标和颜色。颜色选择上尽量让相近类型用相近色系,比如餐饮用暖色橙色,医疗用警示红色。
    CategoryModel(id: 'education', name: '教育', icon: Icons.school, color: Colors.indigo, type: TransactionType.expense),
    CategoryModel(id: 'housing', name: '住房', icon: Icons.home, color: Colors.brown, type: TransactionType.expense),
    CategoryModel(id: 'utilities', name: '水电', icon: Icons.flash_on, color: Colors.amber, type: TransactionType.expense),
    CategoryModel(id: 'communication', name: '通讯', icon: Icons.phone, color: Colors.teal, type: TransactionType.expense),
    CategoryModel(id: 'other_expense', name: '其他', icon: Icons.more_horiz, color: Colors.grey, type: TransactionType.expense),
  ];
其他支出分类。other_expense 作为兜底分类,用灰色表示通用性。图标都选自 Material Icons,保证跨平台一致性。
  static List<CategoryModel> get incomeCategories => [
    CategoryModel(id: 'salary', name: '工资', icon: Icons.work, color: Colors.green, type: TransactionType.income),
    CategoryModel(id: 'bonus', name: '奖金', icon: Icons.card_giftcard, color: Colors.amber, type: TransactionType.income),
    CategoryModel(id: 'investment', name: '投资', icon: Icons.trending_up, color: Colors.blue, type: TransactionType.income),
    CategoryModel(id: 'parttime', name: '兼职', icon: Icons.access_time, color: Colors.orange, type: TransactionType.income),
    CategoryModel(id: 'other_income', name: '其他', icon: Icons.more_horiz, color: Colors.grey, type: TransactionType.income),
  ];
}
收入分类相对较少,工资用绿色表示正向收入。用户可以在应用中自定义添加更多分类。
账户模型
支持多种账户类型,方便管理不同的资金来源:
enum AccountType { cash, bank, creditCard, alipay, wechat, investment, other }

class AccountModel {
  final String id;
  final String name;
  final AccountType type;
  final double balance;
  final double? creditLimit;
  final IconData icon;
  final Color color;
  final bool isIncludedInTotal;
  final int sortOrder;
AccountType 枚举覆盖了常见的账户类型:现金、银行卡、信用卡、支付宝、微信、投资账户等。creditLimit 是信用卡的额度,isIncludedInTotal 控制是否计入总资产(比如信用卡负债可能不想计入)。
  AccountModel({
    required this.id, required this.name, required this.type,
    required this.balance, this.creditLimit, required this.icon,
    required this.color, this.isIncludedInTotal = true, this.sortOrder = 0,
  });

  Map<String, dynamic> toJson() => {
    'id': id, 'name': name, 'type': type.index, 'balance': balance,
    'creditLimit': creditLimit, 'icon': icon.codePoint, 'color': color.value,
    'isIncludedInTotal': isIncludedInTotal, 'sortOrder': sortOrder,
  };
isIncludedInTotal 默认为 true,sortOrder 用于自定义排序。toJson 中 IconData 存储 codePoint 整数值,Color 存储 value 整数值,这样就能序列化了。
  factory AccountModel.fromJson(Map<String, dynamic> json) => AccountModel(
    id: json['id'], name: json['name'], type: AccountType.values[json['type']],
    balance: json['balance'].toDouble(), creditLimit: json['creditLimit']?.toDouble(),
    icon: IconData(json['icon'], fontFamily: 'MaterialIcons'),
    color: Color(json['color']), isIncludedInTotal: json['isIncludedInTotal'] ?? true,
    sortOrder: json['sortOrder'] ?? 0,
  );
fromJson 还原时,IconData 需要指定 fontFamily 为 MaterialIcons 才能正确显示图标。creditLimit 用 ?. 安全调用因为可能为 null。
  AccountModel copyWith({
    String? id, String? name, AccountType? type, double? balance,
    double? creditLimit, IconData? icon, Color? color, bool? isIncludedInTotal, int? sortOrder,
  }) => AccountModel(
    id: id ?? this.id, name: name ?? this.name, type: type ?? this.type,
    balance: balance ?? this.balance, creditLimit: creditLimit ?? this.creditLimit,
    icon: icon ?? this.icon, color: color ?? this.color,
    isIncludedInTotal: isIncludedInTotal ?? this.isIncludedInTotal,
    sortOrder: sortOrder ?? this.sortOrder,
  );
}
copyWith 同样用于创建修改后的副本,在编辑账户信息或更新余额时使用。
预算模型
预算帮助用户控制支出:
class BudgetModel {
  final String id;
  final String? categoryId;
  final double amount;
  final double spent;
  final int year;
  final int month;
  final bool isOverall;

  BudgetModel({
    required this.id, this.categoryId, required this.amount,
    this.spent = 0, required this.year, required this.month, this.isOverall = false,
  });
categoryId 为 null 且 isOverall 为 true 时表示总预算,否则是某个分类的预算。year 和 month 指定预算所属月份,spent 记录已花费金额。
  double get remaining => amount - spent;
  double get percentage => amount > 0 ? (spent / amount * 100).clamp(0, 100) : 0;
  bool get isOverBudget => spent > amount;
这三个计算属性非常实用:remaining 返回剩余预算,percentage 返回使用百分比(用 clamp 限制在 0-100 之间),isOverBudget 判断是否超支。UI 层可以直接使用这些属性。
  Map<String, dynamic> toJson() => {
    'id': id, 'categoryId': categoryId, 'amount': amount, 'spent': spent,
    'year': year, 'month': month, 'isOverall': isOverall,
  };

  factory BudgetModel.fromJson(Map<String, dynamic> json) => BudgetModel(
    id: json['id'], categoryId: json['categoryId'],
    amount: json['amount'].toDouble(), spent: json['spent']?.toDouble() ?? 0,
    year: json['year'], month: json['month'], isOverall: json['isOverall'] ?? false,
  );

  BudgetModel copyWith({
    String? id, String? categoryId, double? amount, double? spent,
    int? year, int? month, bool? isOverall,
  }) => BudgetModel(
    id: id ?? this.id, categoryId: categoryId ?? this.categoryId,
    amount: amount ?? this.amount, spent: spent ?? this.spent,
    year: year ?? this.year, month: month ?? this.month,
    isOverall: isOverall ?? this.isOverall,
  );
}
序列化和 copyWith 的实现与其他模型类似。spent 在 fromJson 时默认为 0,isOverall 默认为 false,保证数据兼容性。
理财目标模型
用于设定和追踪储蓄目标:
class GoalModel {
  final String id;
  final String name;
  final double targetAmount;
  final double currentAmount;
  final DateTime? deadline;
  final String? note;
  final DateTime createdAt;

  GoalModel({
    required this.id, required this.name, required this.targetAmount,
    this.currentAmount = 0, this.deadline, this.note, required this.createdAt,
  });

  double get progress => targetAmount > 0 ? (currentAmount / targetAmount * 100).clamp(0, 100) : 0;
  double get remaining => targetAmount - currentAmount;
  bool get isCompleted => currentAmount >= targetAmount;

  Map<String, dynamic> toJson() => {
    'id': id, 'name': name, 'targetAmount': targetAmount, 'currentAmount': currentAmount,
    'deadline': deadline?.toIso8601String(), 'note': note, 'createdAt': createdAt.toIso8601String(),
  };

  factory GoalModel.fromJson(Map<String, dynamic> json) => GoalModel(
    id: json['id'], name: json['name'], targetAmount: json['targetAmount'].toDouble(),
    currentAmount: json['currentAmount']?.toDouble() ?? 0,
    deadline: json['deadline'] != null ? DateTime.parse(json['deadline']) : null,
    note: json['note'], createdAt: DateTime.parse(json['createdAt']),
  );

  GoalModel copyWith({String? id, String? name, double? targetAmount, double? currentAmount, DateTime? deadline, String? note, DateTime? createdAt}) => GoalModel(
    id: id ?? this.id, name: name ?? this.name, targetAmount: targetAmount ?? this.targetAmount,
    currentAmount: currentAmount ?? this.currentAmount, deadline: deadline ?? this.deadline,
    note: note ?? this.note, createdAt: createdAt ?? this.createdAt,
  );
}
服务层设计
服务层负责数据的存储和业务逻辑处理,使用 GetX 的 GetxService 实现单例模式。
存储服务
StorageService 是数据存储的核心,管理所有数据的增删改查:
class StorageService extends GetxService {
  final RxList<TransactionModel> _transactions = <TransactionModel>[].obs;
  final RxList<CategoryModel> _categories = <CategoryModel>[].obs;
  final RxList<AccountModel> _accounts = <AccountModel>[].obs;
  final RxList<BudgetModel> _budgets = <BudgetModel>[].obs;
  final RxString _currency = '¥'.obs;
  final RxBool _isDarkMode = false.obs;
继承 GetxService 实现单例服务。使用 RxList、RxString、RxBool 等响应式类型,数据变化时 UI 会自动更新。.obs 是 GetX 的语法糖,将普通类型转为响应式类型。
List<TransactionModel> get transactions => _transactions;
List<CategoryModel> get categories => _categories;
List<AccountModel> get accounts => _accounts;
List<BudgetModel> get budgets => _budgets;
String get currency => _currency.value;
bool get isDarkMode => _isDarkMode.value;
void onInit() {
super.onInit();
_initDefaultData();
}
getter 方法暴露数据给外部访问。onInit 是 GetX 生命周期方法,在服务初始化时调用,这里用来加载默认数据。
  void _initDefaultData() {
    if (_categories.isEmpty) {
      _categories.addAll(DefaultCategories.expenseCategories);
      _categories.addAll(DefaultCategories.incomeCategories);
    }
    if (_accounts.isEmpty) {
      _accounts.addAll(DefaultAccounts.accounts);
    }
  }

  void addTransaction(TransactionModel t) => _transactions.add(t);
  void updateTransaction(TransactionModel t) {
    final idx = _transactions.indexWhere((e) => e.id == t.id);
    if (idx != -1) _transactions[idx] = t;
  }
  void deleteTransaction(String id) => _transactions.removeWhere((e) => e.id == id);
_initDefaultData 在首次启动时加载默认分类和账户。增删改方法都很简洁,RxList 的修改会自动触发 UI 更新。updateTransaction 通过 id 查找索引再替换。
  void addCategory(CategoryModel c) => _categories.add(c);
  void updateCategory(CategoryModel c) {
    final idx = _categories.indexWhere((e) => e.id == c.id);
    if (idx != -1) _categories[idx] = c;
  }
  void deleteCategory(String id) => _categories.removeWhere((e) => e.id == id);

  void addAccount(AccountModel a) => _accounts.add(a);
  void updateAccount(AccountModel a) {
    final idx = _accounts.indexWhere((e) => e.id == a.id);
    if (idx != -1) _accounts[idx] = a;
  }
  void deleteAccount(String id) => _accounts.removeWhere((e) => e.id == id);
分类和账户的增删改逻辑与交易记录完全一致,都是通过 id 定位元素。这种统一的 API 设计让代码更易维护。
  void addBudget(BudgetModel b) => _budgets.add(b);
  void updateBudget(BudgetModel b) {
    final idx = _budgets.indexWhere((e) => e.id == b.id);
    if (idx != -1) _budgets[idx] = b;
  }
  void deleteBudget(String id) => _budgets.removeWhere((e) => e.id == id);

  void setCurrency(String c) => _currency.value = c;
  void setDarkMode(bool v) => _isDarkMode.value = v;
}
预算的增删改同理。setCurrency 和 setDarkMode 修改设置项,直接赋值给 .value 即可触发响应式更新。
依赖注入
InitialBinding 在应用启动时注册全局服务:
class InitialBinding extends Bindings {
void dependencies() {
Get.put(StorageService(), permanent: true);
Get.put(CategoryService(), permanent: true);
Get.put(AccountService(), permanent: true);
Get.put(TransactionService(), permanent: true);
Get.put(BudgetService(), permanent: true);
}
}
permanent: true 表示这些服务在整个应用生命周期内都不会被销毁。服务之间可以通过 Get.find() 相互访问。
路由配置
路由采用集中管理的方式,所有路由定义在 app_routes.dart 中:
abstract class Routes {
  static const main = '/main';
  static const home = '/home';
  static const statistics = '/statistics';
  static const budget = '/budget';
  static const profile = '/profile';
  static const addTransaction = '/add-transaction';
  static const transactionDetail = '/transaction-detail';
  static const transactionList = '/transaction-list';
  static const categoryList = '/category-list';
  static const categoryEdit = '/category-edit';
使用 abstract class 定义路由常量,避免被实例化。路由名称采用小写加连字符的 URL 风格,语义清晰。前五个是底部导航的主要页面。
  static const accountList = '/account-list';
  static const accountDetail = '/account-detail';
  static const accountEdit = '/account-edit';
  static const budgetEdit = '/budget-edit';
  static const budgetDetail = '/budget-detail';
  static const incomeAnalysis = '/income-analysis';
  static const expenseAnalysis = '/expense-analysis';
  static const trendAnalysis = '/trend-analysis';
  static const categoryAnalysis = '/category-analysis';
  static const settings = '/settings';
账户、预算、统计分析相关的路由。每个功能模块通常有列表页、详情页、编辑页三种页面类型。
  static const currency = '/currency';
  static const about = '/about';
  static const feedback = '/feedback';
  static const exportData = '/export-data';
  static const calendar = '/calendar';
  static const search = '/search';
  static const monthlyReport = '/monthly-report';
  static const annualReport = '/annual-report';
  static const goals = '/goals';
  static const goalDetail = '/goal-detail';
}
设置相关页面和其他功能页面。集中定义路由的好处是修改路由名称时只需改一处,IDE 也能提供自动补全。
路由页面映射在 app_pages.dart 中配置:
class AppPages {
  static const initial = Routes.main;

  static final routes = [
    GetPage(name: Routes.main, page: () => const MainPage(), binding: MainBinding()),
    GetPage(name: Routes.home, page: () => const HomePage(), binding: HomeBinding()),
    GetPage(name: Routes.statistics, page: () => const StatisticsPage(), binding: StatisticsBinding()),
    GetPage(name: Routes.budget, page: () => const BudgetPage(), binding: BudgetBinding()),
    GetPage(name: Routes.profile, page: () => const ProfilePage(), binding: ProfileBinding()),
    GetPage(name: Routes.addTransaction, page: () => const AddTransactionPage()),
    GetPage(name: Routes.transactionDetail, page: () => const TransactionDetailPage()),
    // ... 更多路由配置
  ];
}
GetPage 的 binding 参数指定页面专属的依赖注入,页面销毁时相关 Controller 也会自动销毁。
国际化配置
AppTranslations 定义多语言文本:
class AppTranslations extends Translations {
Map<String, Map<String, String>> get keys => {
'zh_CN': {
'app_name': '个人理财管家',
'home': '首页', 'statistics': '统计', 'budget': '预算', 'profile': '我的',
'income': '收入', 'expense': '支出', 'balance': '结余', 'total_assets': '总资产',
'add_transaction': '添加记录', 'edit_transaction': '编辑记录',
'category': '分类', 'amount': '金额', 'date': '日期', 'note': '备注',
'save': '保存', 'cancel': '取消', 'delete': '删除', 'confirm': '确认',
'monthly_budget': '月度预算', 'budget_remaining': '剩余预算',
'settings': '设置', 'account': '账户', 'currency': '货币',
'export_data': '导出数据', 'import_data': '导入数据',
'about': '关于', 'version': '版本', 'feedback': '反馈',
},
'en_US': {
'app_name': 'Finance Manager',
'home': 'Home', 'statistics': 'Stats', 'budget': 'Budget', 'profile': 'Profile',
// ... 更多翻译
},
};
}
使用时通过 ‘key’.tr 获取当前语言的文本,切换语言只需调用 Get.updateLocale()。
小结
这篇文章介绍了项目的基础架构搭建,包括:
- 依赖配置:GetX 状态管理、flutter_screenutil 屏幕适配、fl_chart 图表等
- 应用入口:ScreenUtilInit 和 GetMaterialApp 的配置
- 目录结构:功能模块化的组织方式
- 数据模型:交易、分类、账户、预算、目标五个核心模型
- 服务层:StorageService 统一管理数据
- 依赖注入:InitialBinding 注册全局服务
- 路由配置:集中管理的路由定义
- 国际化:多语言支持
下一篇将介绍主框架与底部导航的实现

有“AI”的1024 = 2048,欢迎大家加入2048 AI社区
更多推荐


 0
0 0
0- 0


 已为社区贡献1条内容

所有评论(0)