本地部署 ChatGLM2-6B【保姆级教程】:从零搭建你的中英双语大模型对话助手
清华大学开源对话模型ChatGLM2-6B本地部署指南 摘要:本文详细介绍了如何在个人电脑上部署清华大学开源的ChatGLM2-6B对话模型。该模型支持中英双语,通过4-bit量化技术仅需6GB显存即可运行(如RTX 3060显卡)。部署步骤包括:1) 硬件与环境准备(建议Linux/Windows WSL2);2) 安装PyTorch和相关依赖;3) 通过ModelScope下载模型权重;4)
前言
ChatGLM2-6B 是清华大学开源的、在中英双语上表现卓越的对话模型。它不仅性能强劲,更重要的是它对硬件非常友好,通过 4-bit 量化技术,我们甚至可以在一张只有 6GB 显存 的家用显卡(如 RTX 3060)上流畅运行。今天我们就来手把手完成它的本地部署,并写一个属于自己的对话 Demo。
一、 硬件与环境准备
在开始之前,请确认你的机器满足以下要求:
- 显卡:建议显存 ≥ 6GB (INT4模式) 或 ≥ 14GB (FP16模式)。
- 操作系统:Windows (建议使用 WSL2) 或 Linux (Ubuntu)。
- 开发工具:已安装 Anaconda 或 Miniconda。
根据你的 CUDA 版本安装 PyTorch,并安装 Transformers 等核心库:
# 安装 PyTorch (以 CUDA 11.8 为例)
pip install torch torchvision torchaudio --index-url https://download.pytorch.org/whl/cu118
如果是直接选用配置好Pytorch的服务器来做的话就可以跳过上一步,进入下一步。
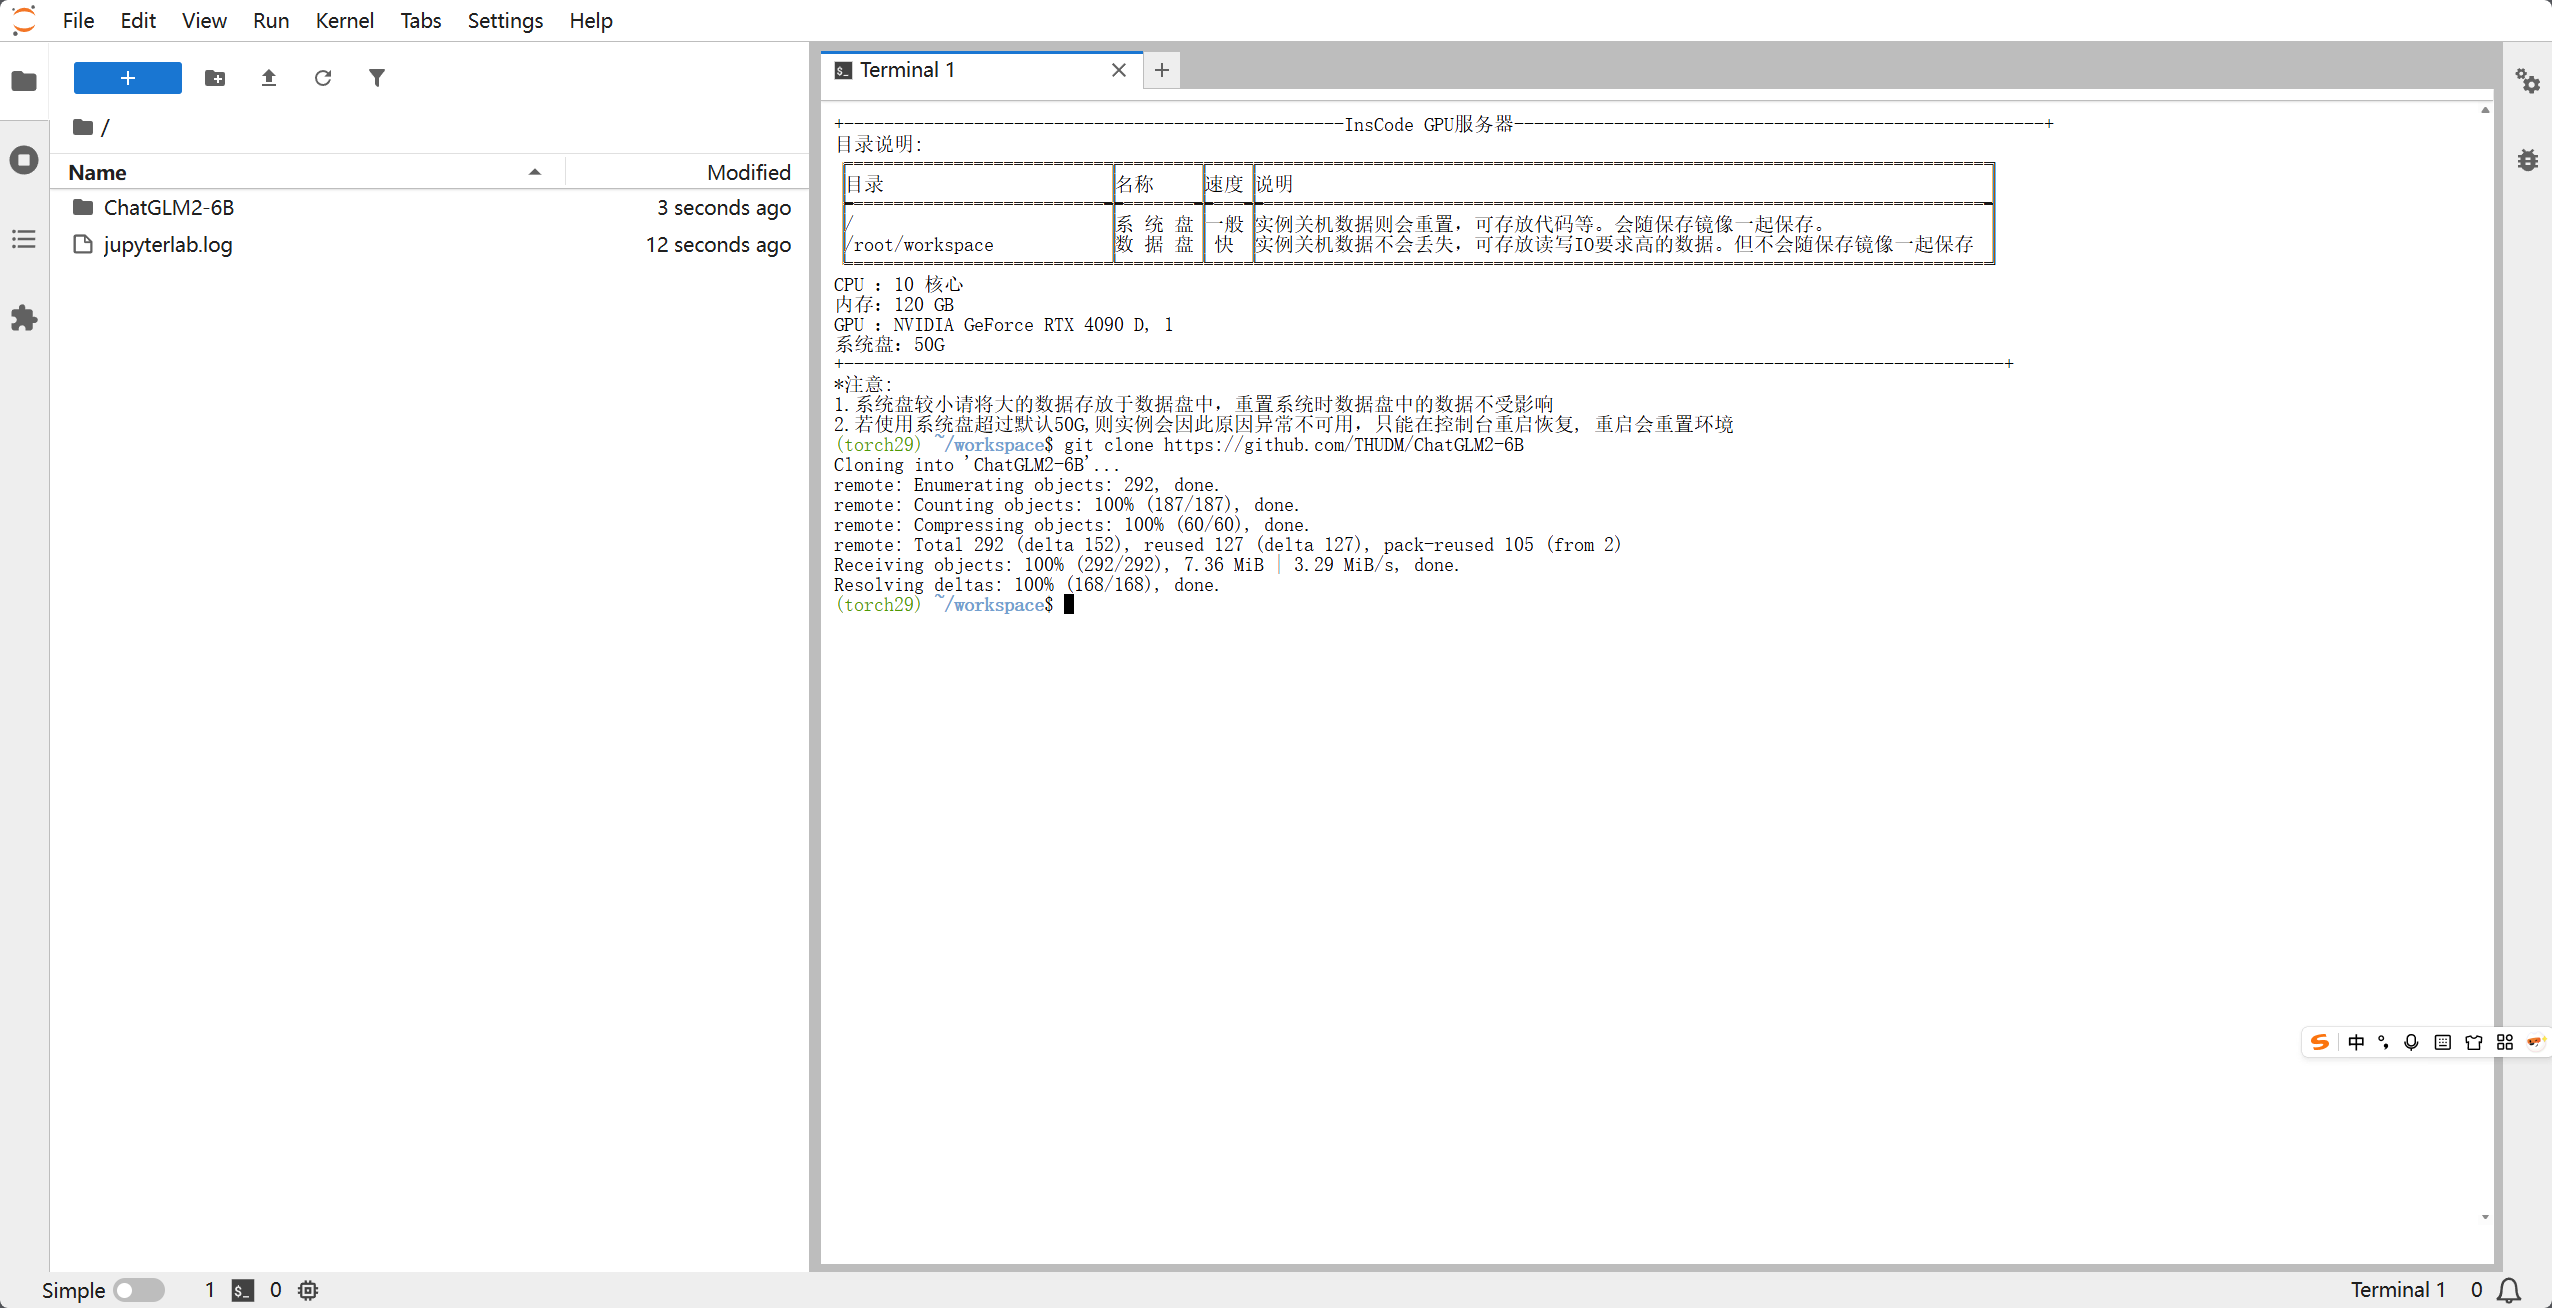
# 克隆代码库并安装依赖
git clone https://github.com/THUDM/ChatGLM2-6B
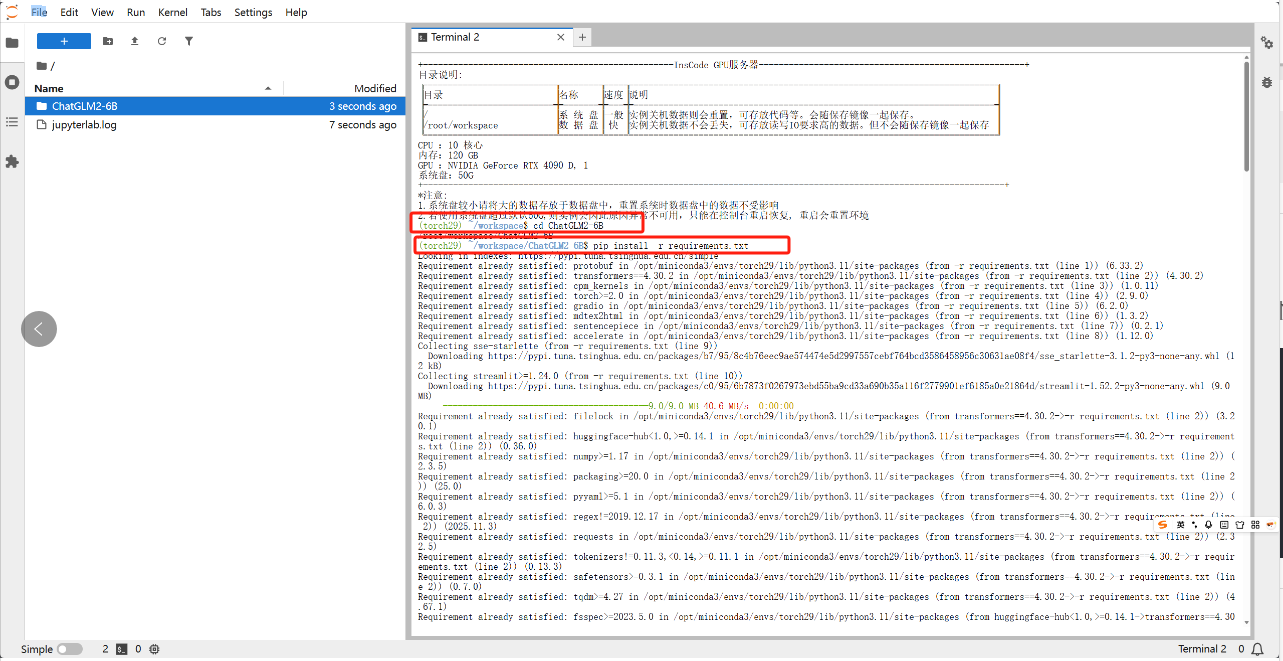
cd ChatGLM2-6B
pip install -r requirements.txt
二、 下载模型权重
由于模型权重文件较大(约 12GB),国内用户推荐使用 ModelScope (魔搭社区) 下载,速度更快:
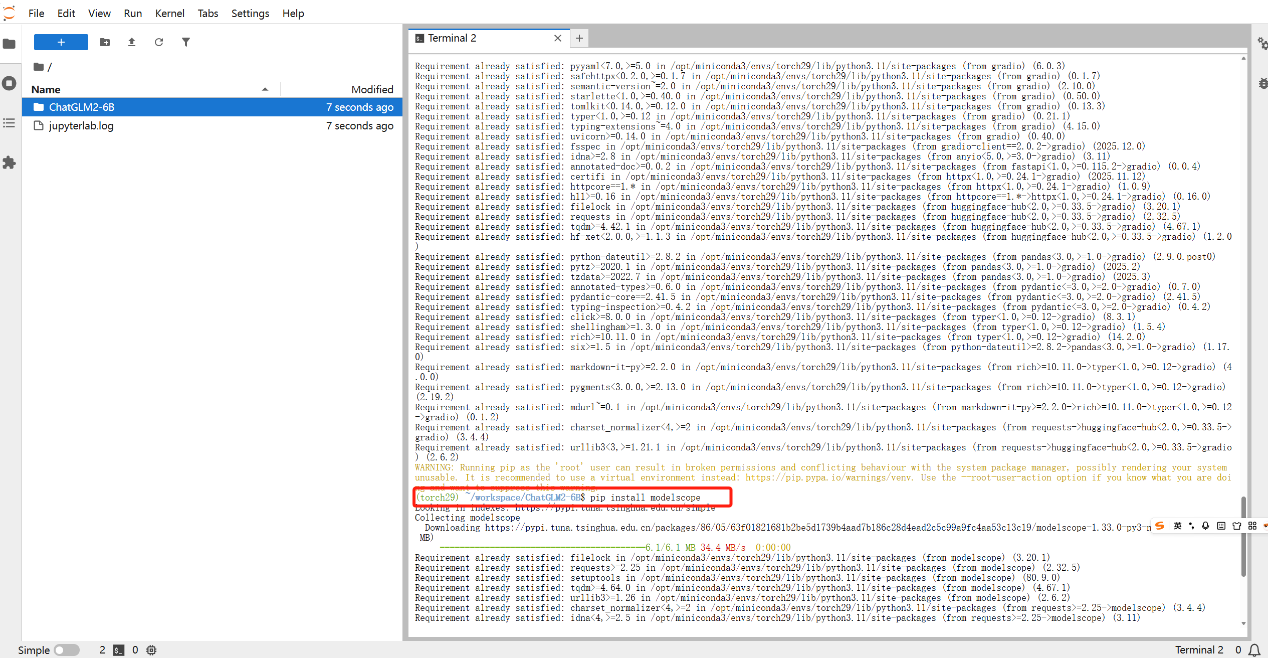
# 安装 modelscope
pip install modelscope
python -c "from modelscope import snapshot_download; snapshot_download('ZhipuAl/chatglm2-6b', cache dir='./')"
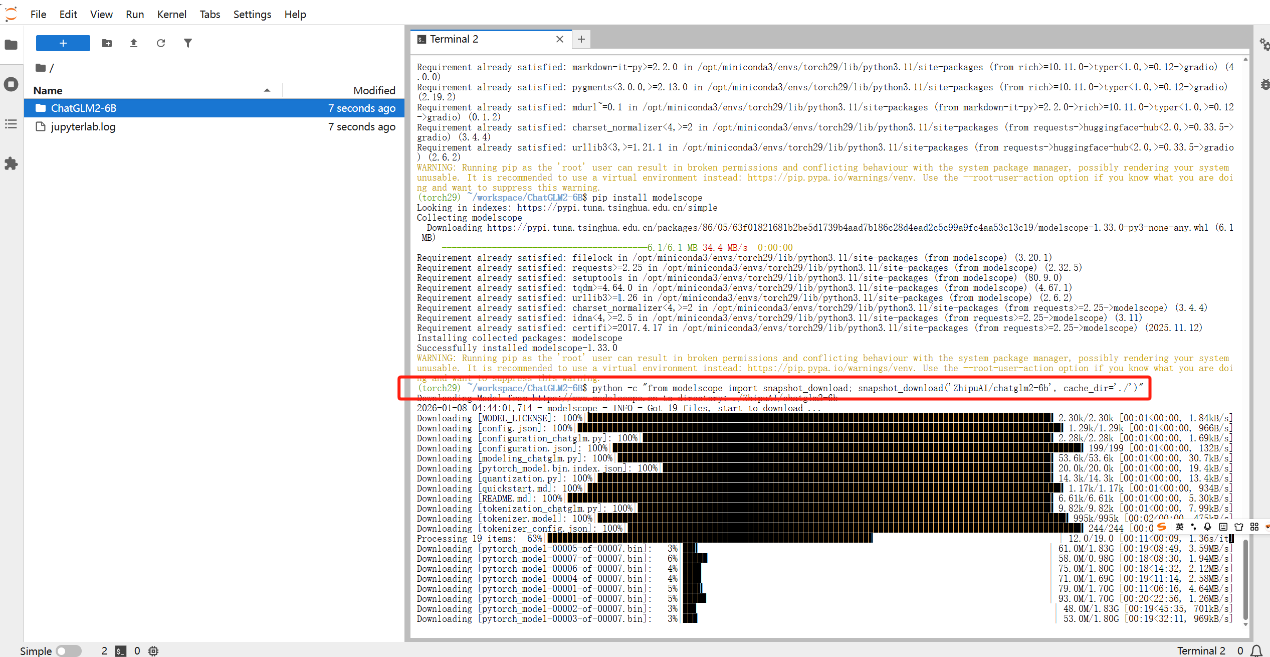
下载过程相对来说长一点,根据网络情况浮动,大约需要二十分钟左右
三、 测试
创建python输入以下代码:
from transformers import AutoTokenizer, AutoModel
import torch

# 1. 模型路径(如果是当前目录,直接填文件夹名)
model_path = "ZhipuAI/chatglm2-6b"

# 2. 加载 Tokenizer
tokenizer = AutoTokenizer.from_pretrained(model_path, trust_remote_code=True)

# 3. 加载模型(根据显存选择一种)

# 方案 A:显存 > 13G (FP16)
model = AutoModel.from_pretrained(model_path, trust_remote_code=True).cuda()

# 方案 B:显存 6G-8G (INT4 量化 - 最常用)
# model = AutoModel.from_pretrained(model_path, trust_remote_code=True).quantize(4).cuda()

# 方案 C:无显卡 (CPU 模式)
# model = AutoModel.from_pretrained(model_path, trust_remote_code=True).float()

model = model.eval()

# 4. 开始对话
response, history = model.chat(tokenizer, "你好,请介绍一下你自己", history=[])
print(response)
并保存为test.py
在终端中执行:
python my_chat.py
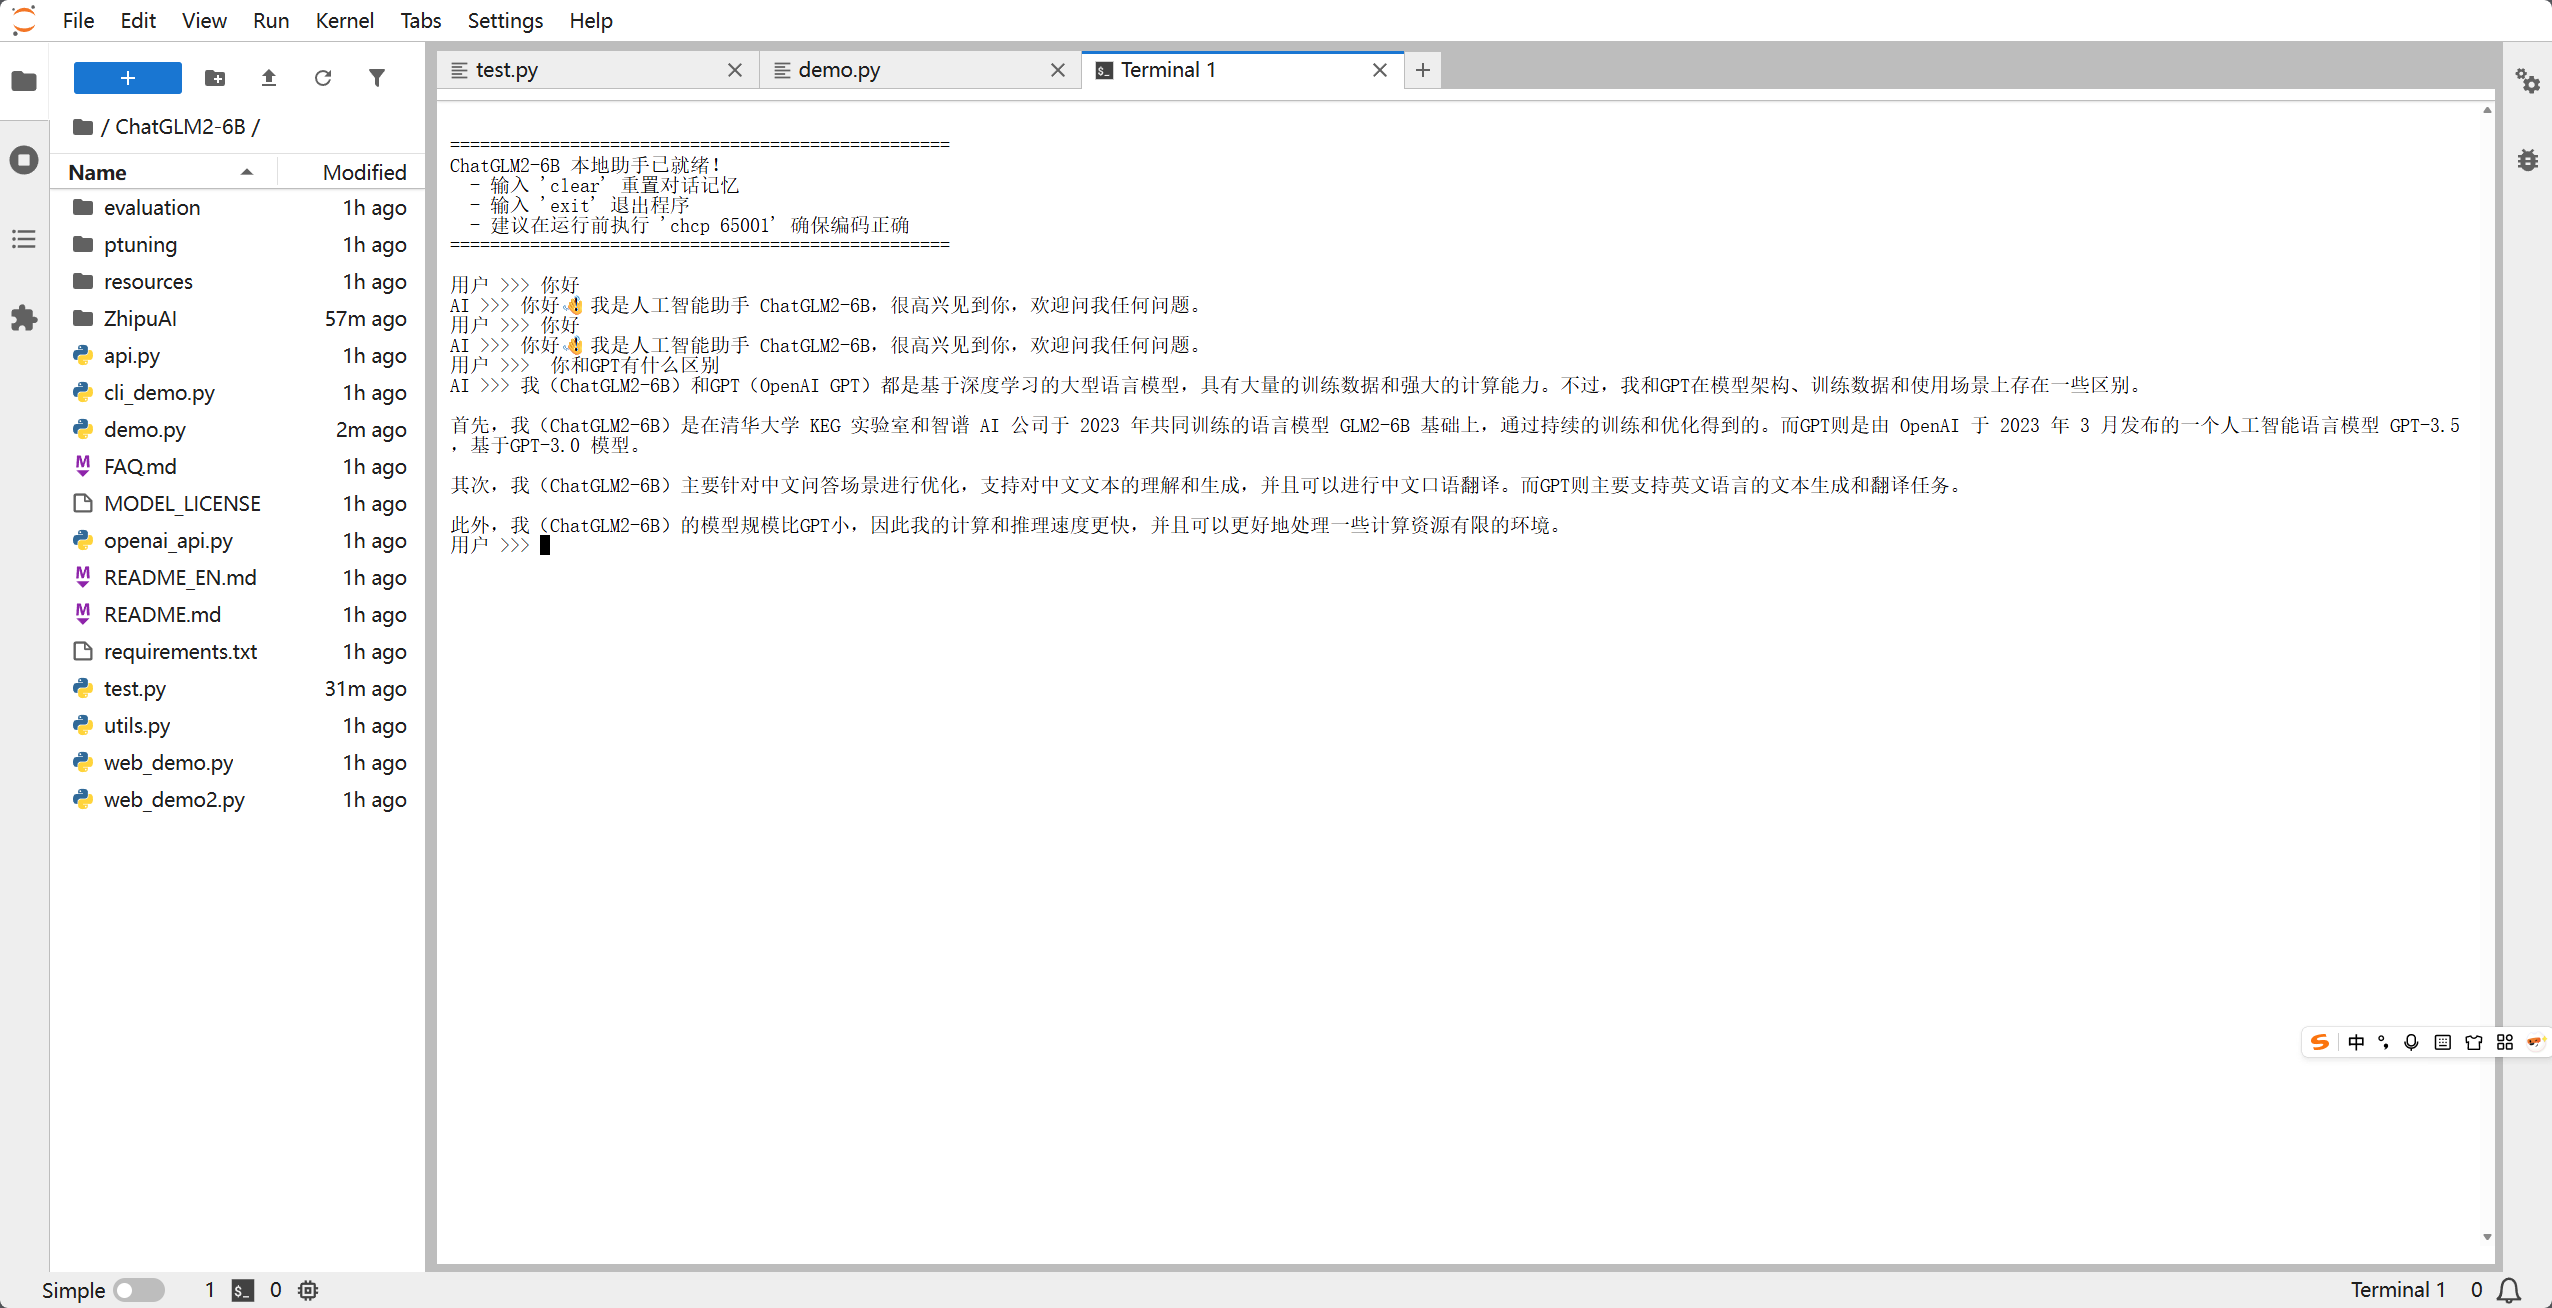
出现以下界面大概率就是可以的了,这个进度条是正在加载权重文件,每次重新运行程序的时候需要加载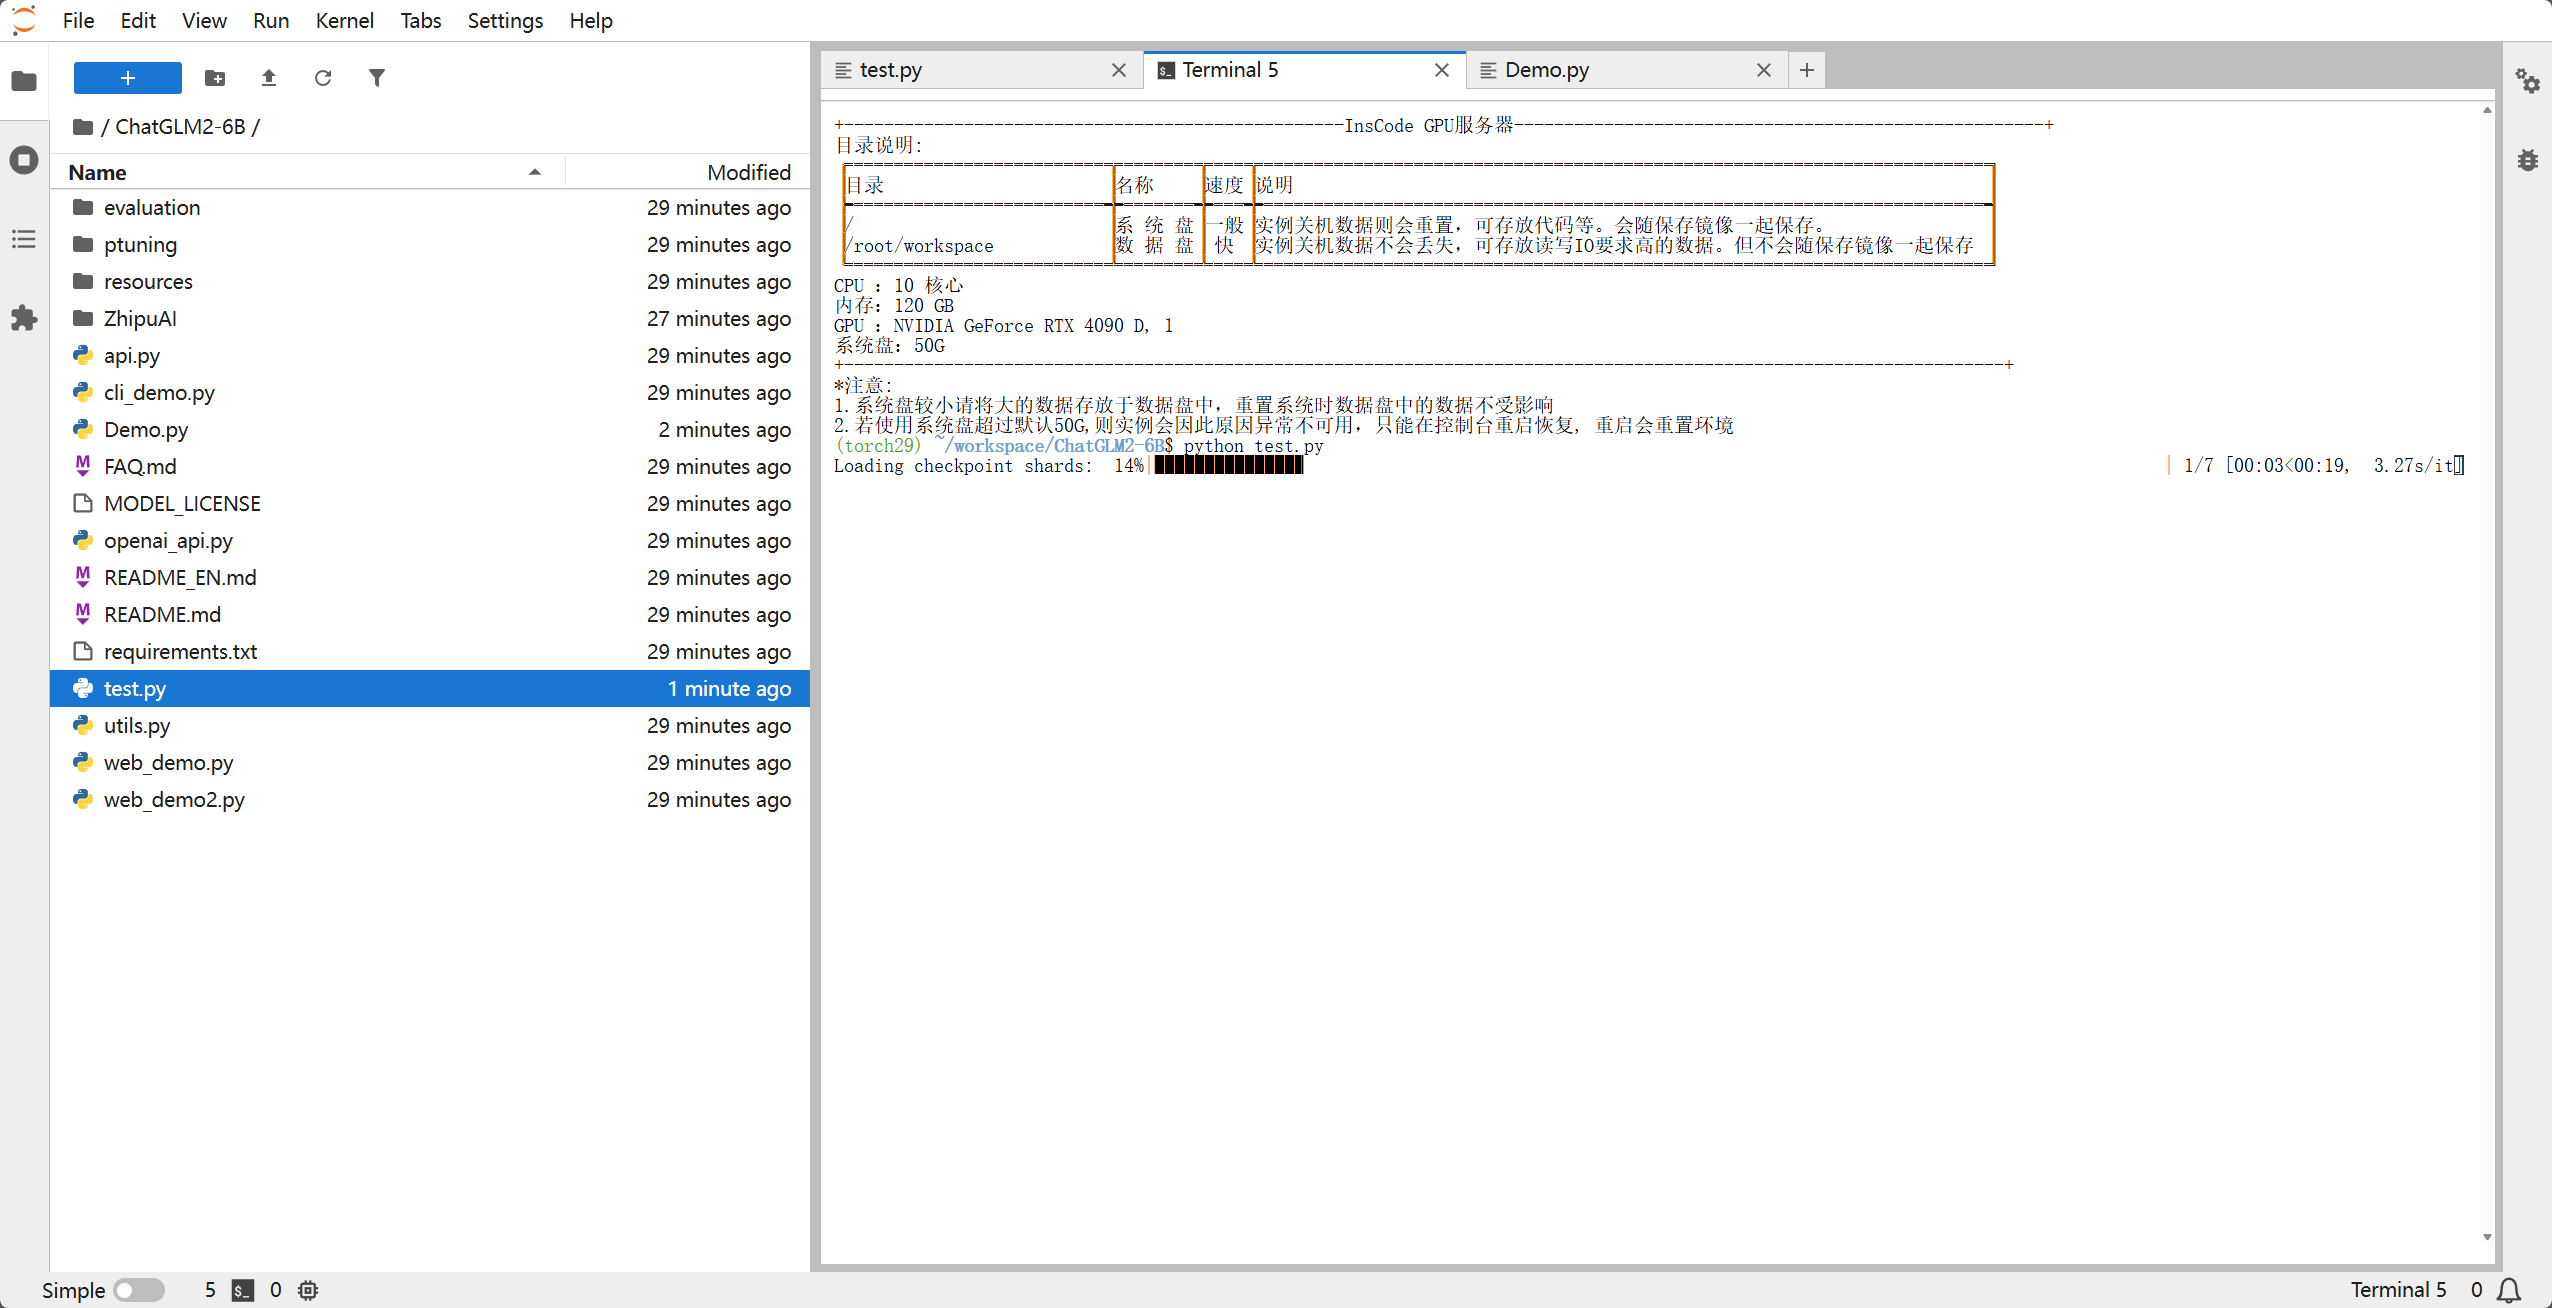
出现以下界面,也就是AI给的答复,那就是ok了的,这是对我们程序里面的那句话 你好,请介绍一下你自己 的答复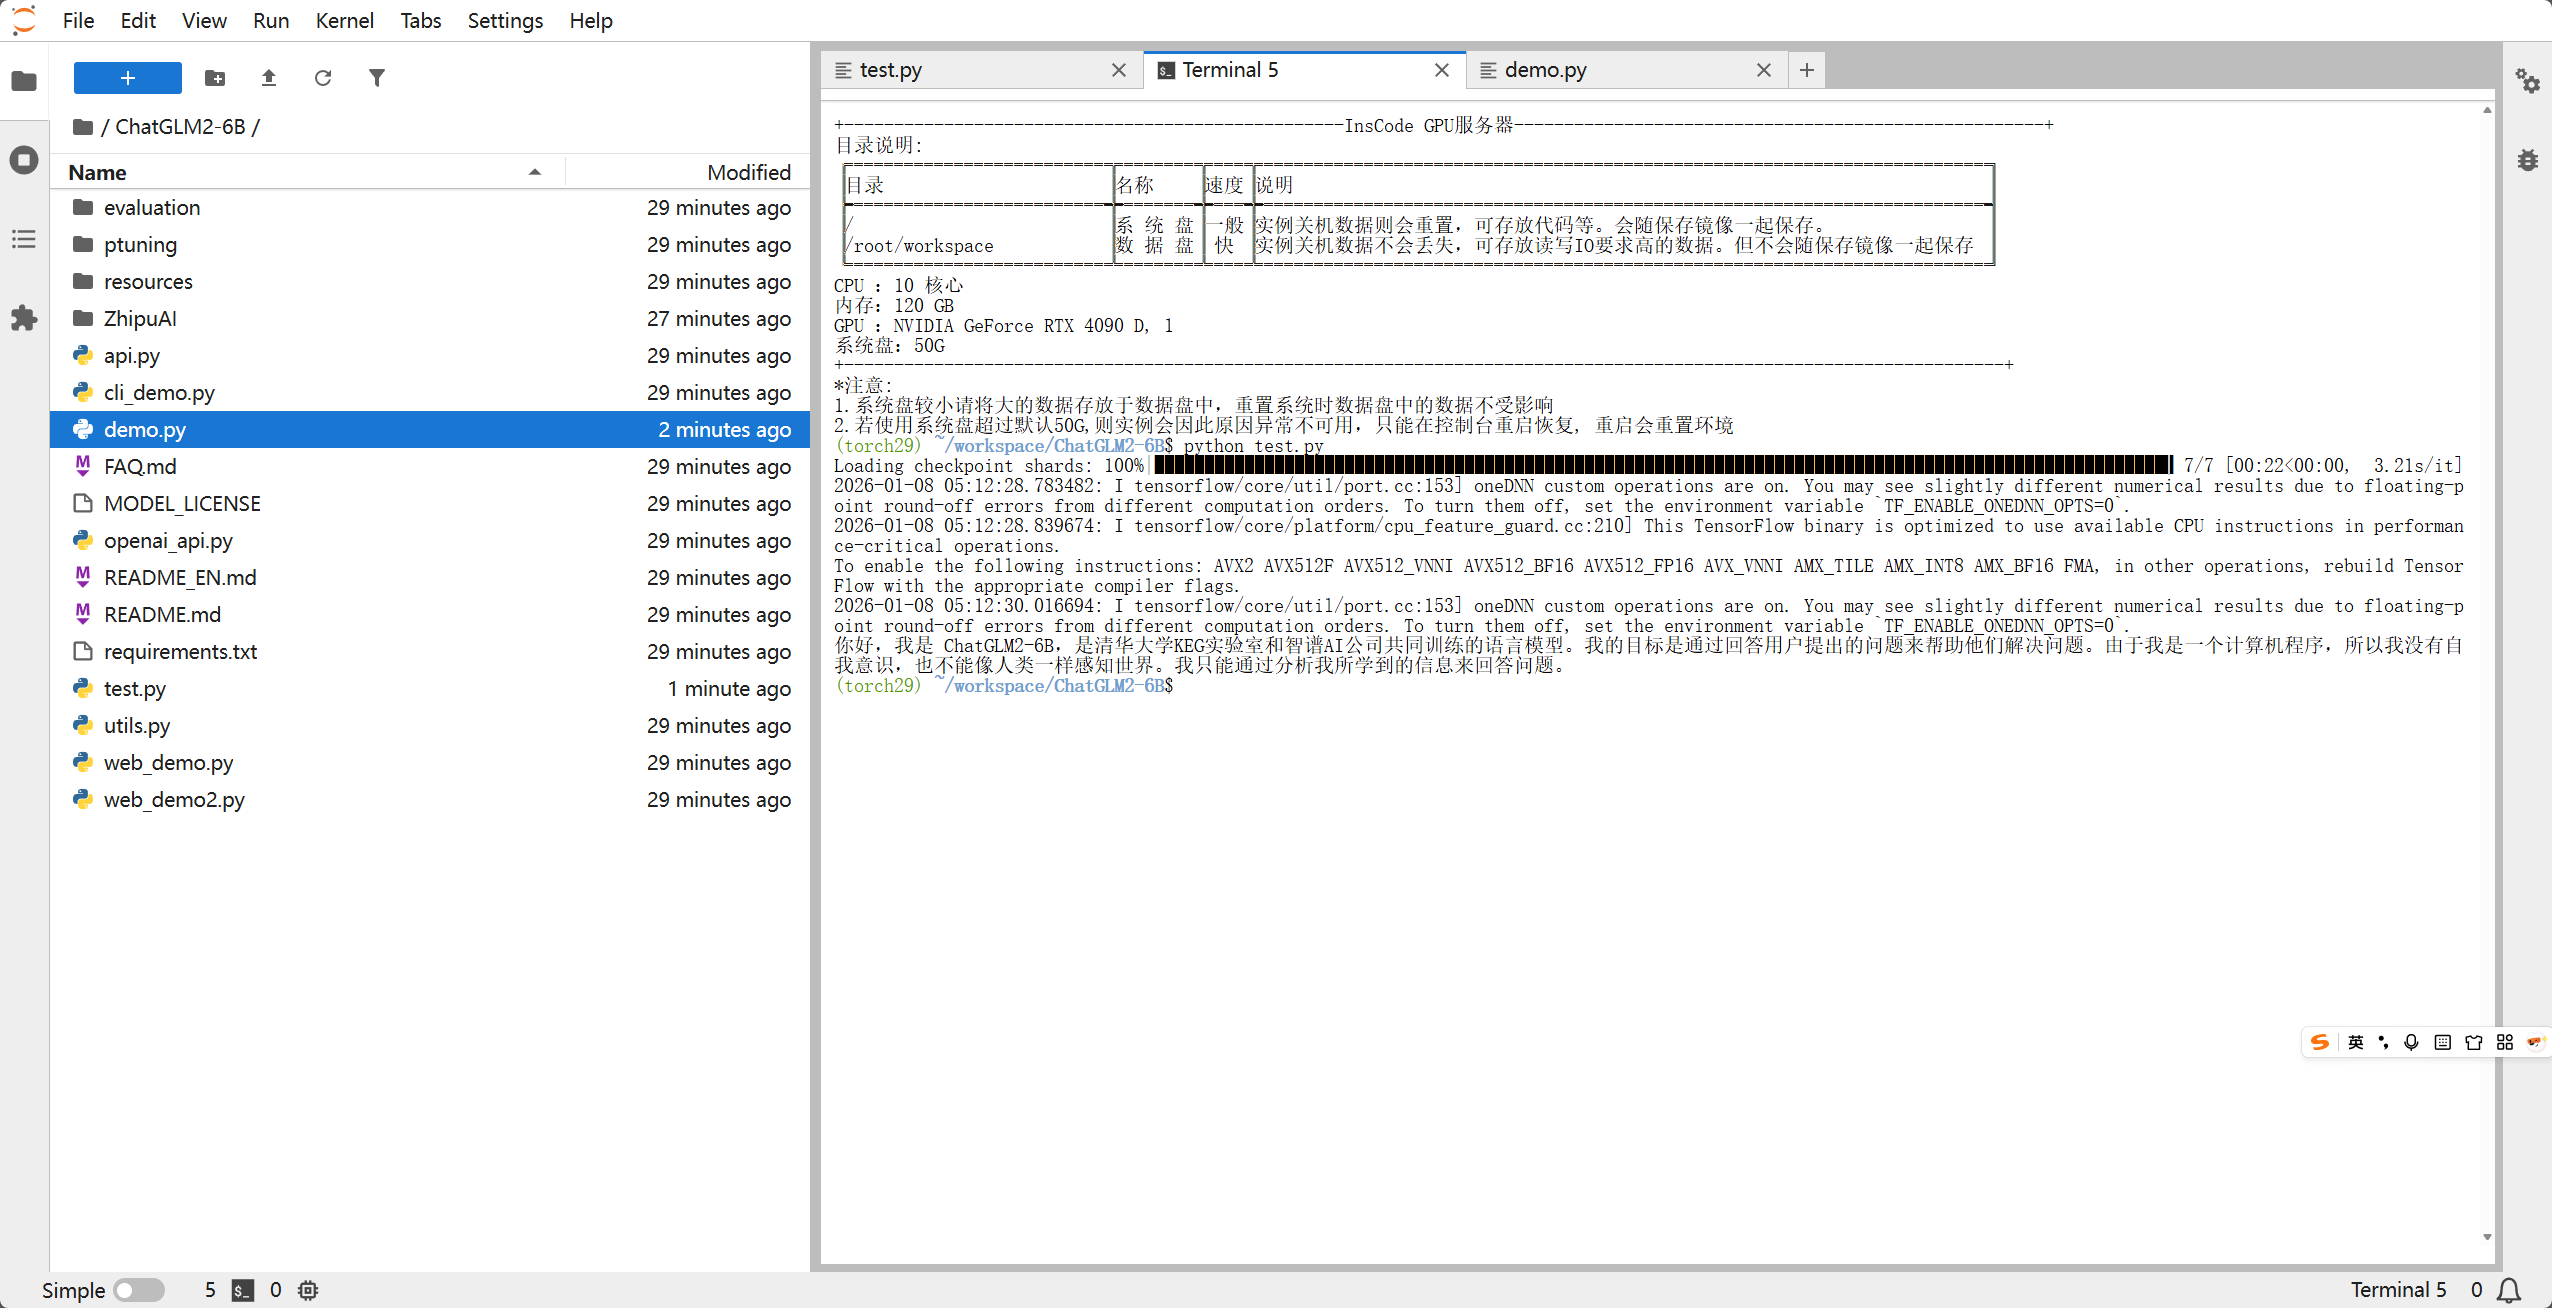
三、 编写对话 Demo 程序
ChatGLM2本身有提供web程序,但是由于部分服务器并没有分配公网IP,并且为了不依赖复杂的 Web 界面,我们直接写一个高效的 终端流式对话程序。流式对话可以让模型像“打字机”一样实时输出结果,体验极佳。
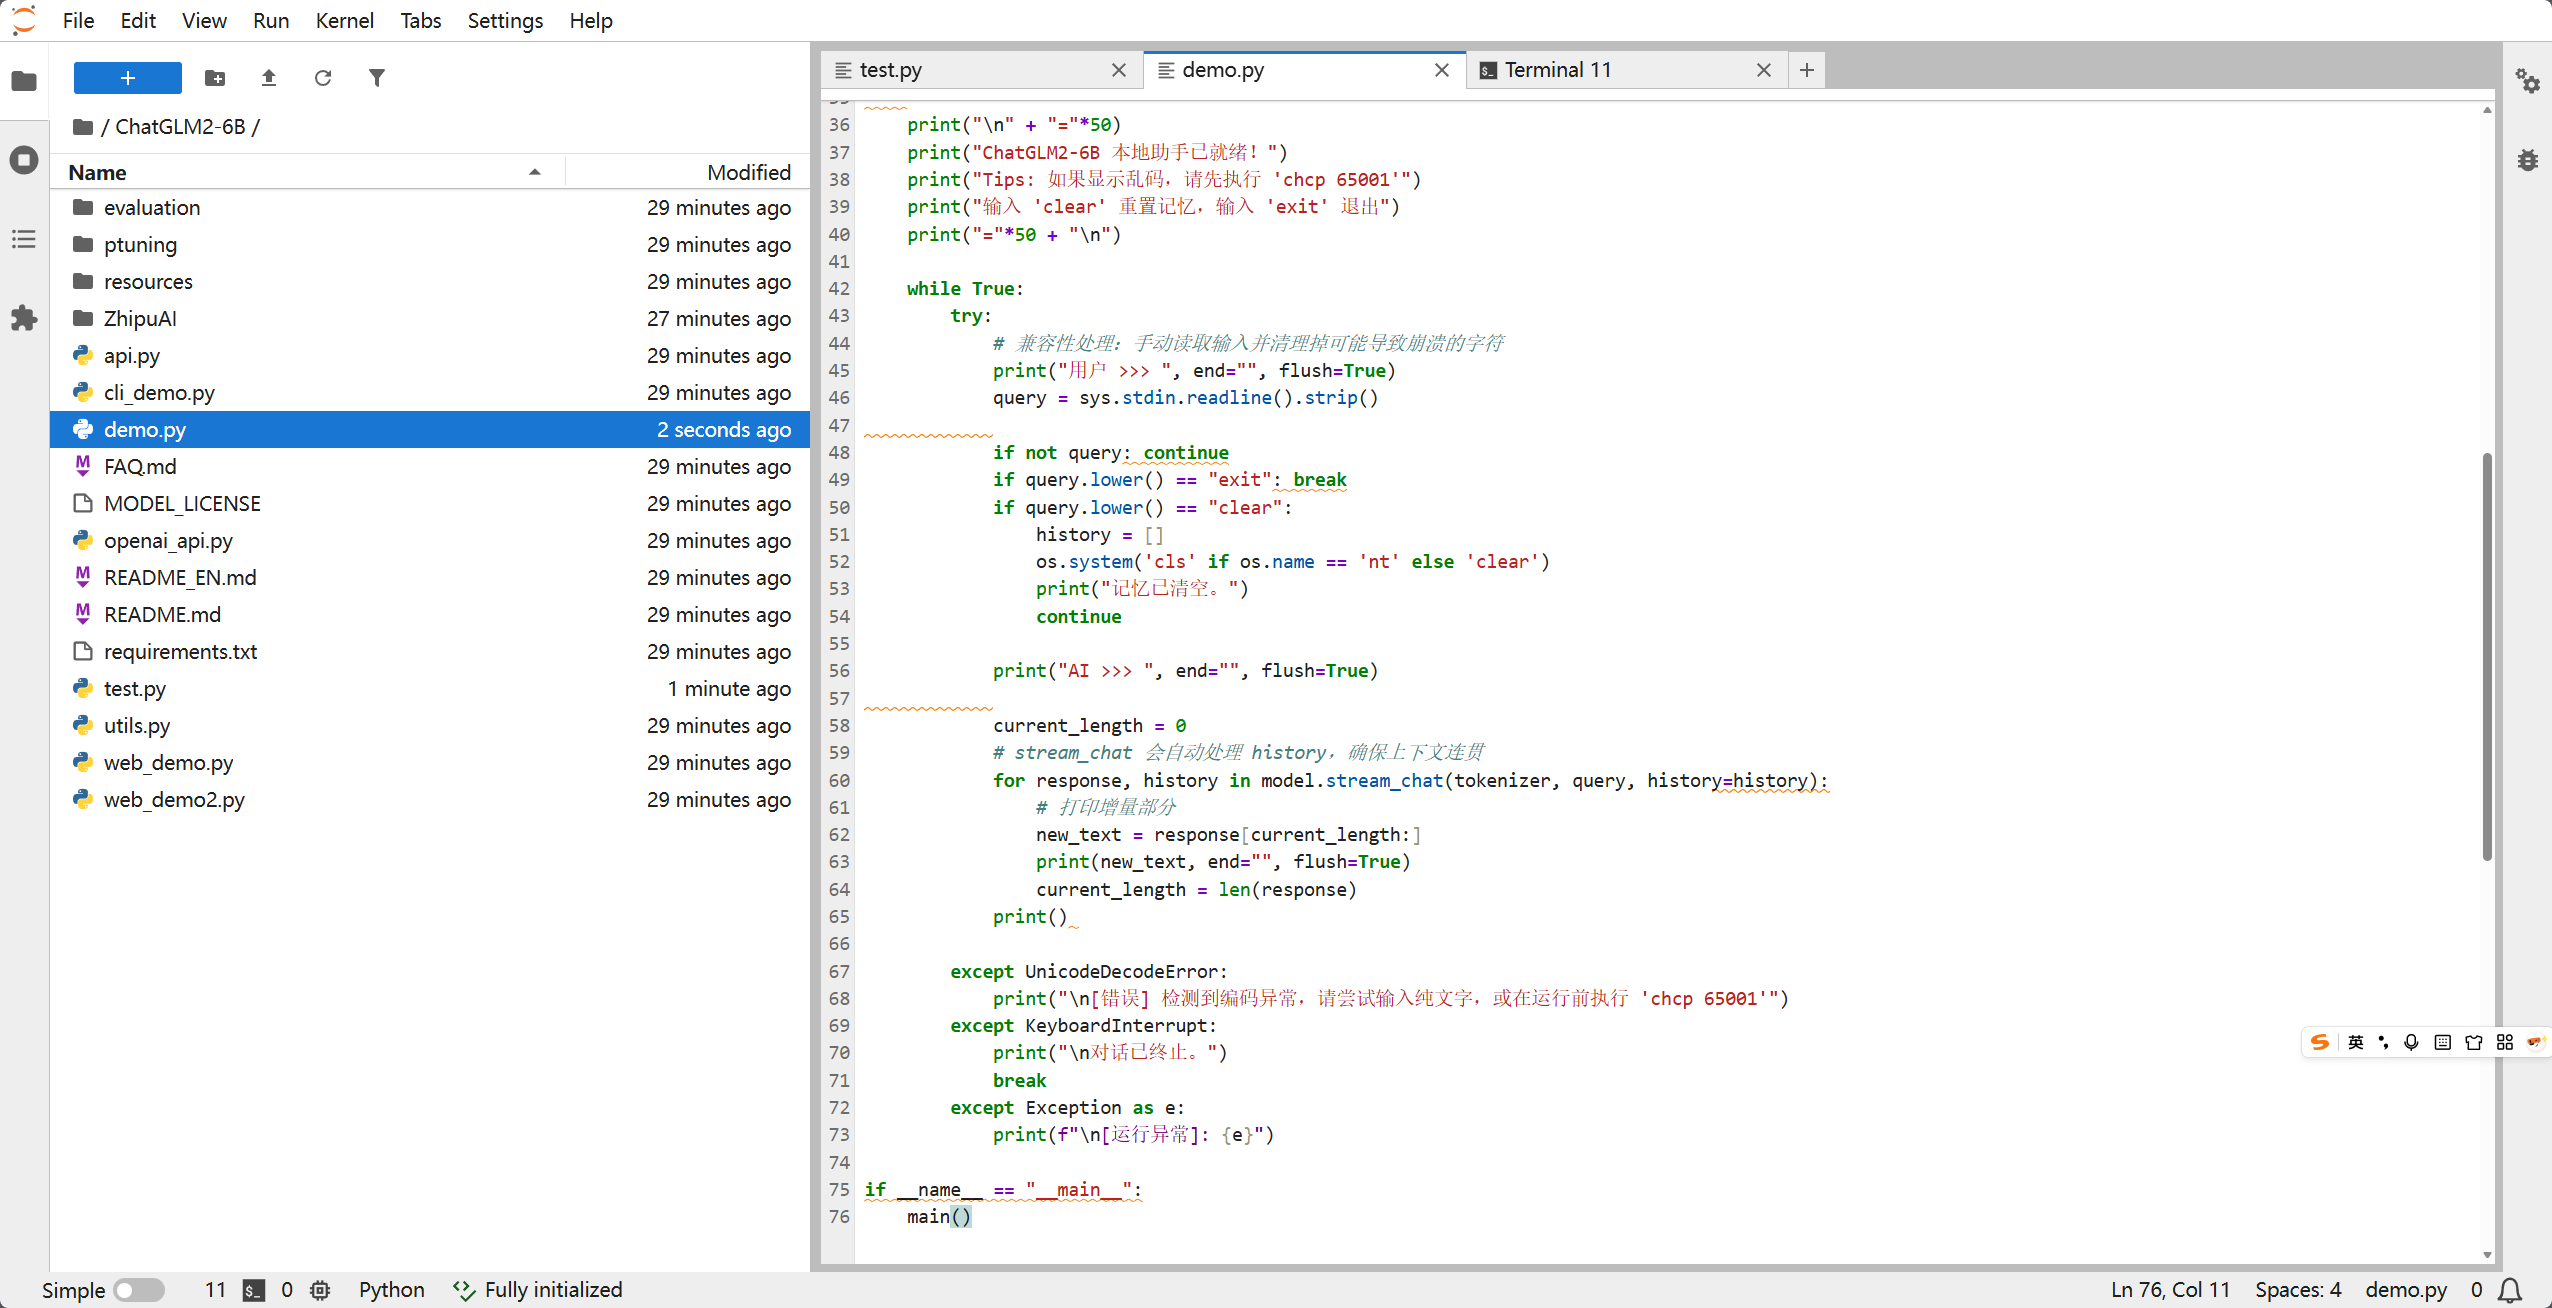
新建文件 demo.py,粘贴以下代码:
import os
import sys
import torch
import warnings
from transformers import AutoTokenizer, AutoModel, logging

# ================= 1. 环境与日志优化 =================
os.environ['TF_CPP_MIN_LOG_LEVEL'] = '3'
os.environ['TF_ENABLE_ONEDNN_OPTS'] = '0'
logging.set_verbosity_error()
warnings.filterwarnings("ignore")

# 强制 Python 的标准输入输出使用 UTF-8 编码,防止 Windows 报错
if sys.platform == "win32":
    import io
    sys.stdout = io.TextIOWrapper(sys.stdout.buffer, encoding='utf-8')
    sys.stdin = io.TextIOWrapper(sys.stdin.buffer, encoding='utf-8')

# ================= 2. 加载模型 =================
model_path = "ZhipuAI/chatglm2-6b"
print("正在启动 AI 引擎,请稍候...", flush=True)

try:
    tokenizer = AutoTokenizer.from_pretrained(model_path, trust_remote_code=True)
    model = AutoModel.from_pretrained(model_path, trust_remote_code=True).quantize(4).cuda()
    model = model.eval()
except Exception as e:
    print(f"模型加载失败,请检查显存或路径: {e}")
    sys.exit(1)

# ================= 3. 对话逻辑 =================
def main():
    history = []
    os.system('cls' if os.name == 'nt' else 'clear')

    print("\n" + "="*50)
    print("ChatGLM2-6B 本地助手已就绪!")
    print("Tips: 如果显示乱码,请先执行 'chcp 65001'")
    print("输入 'clear' 重置记忆,输入 'exit' 退出")
    print("="*50 + "\n")

    while True:
        try:
            # 兼容性处理:手动读取输入并清理掉可能导致崩溃的字符
            print("用户 >>> ", end="", flush=True)
            query = sys.stdin.readline().strip()

            if not query: continue
            if query.lower() == "exit": break
            if query.lower() == "clear":
                history = []
                os.system('cls' if os.name == 'nt' else 'clear')
                print("记忆已清空。")
                continue

            print("AI >>> ", end="", flush=True)

            current_length = 0
            # stream_chat 会自动处理 history,确保上下文连贯
            for response, history in model.stream_chat(tokenizer, query, history=history):
                # 打印增量部分
                new_text = response[current_length:]
                print(new_text, end="", flush=True)
                current_length = len(response)
            print()

        except UnicodeDecodeError:
            print("\n[错误] 检测到编码异常,请尝试输入纯文字,或在运行前执行 'chcp 65001'")
        except KeyboardInterrupt:
            print("\n对话已终止。")
            break
        except Exception as e:
            print(f"\n[运行异常]: {e}")

if __name__ == "__main__":
    main()
四、 运行与对话
在终端中执行:
python my_chat.py
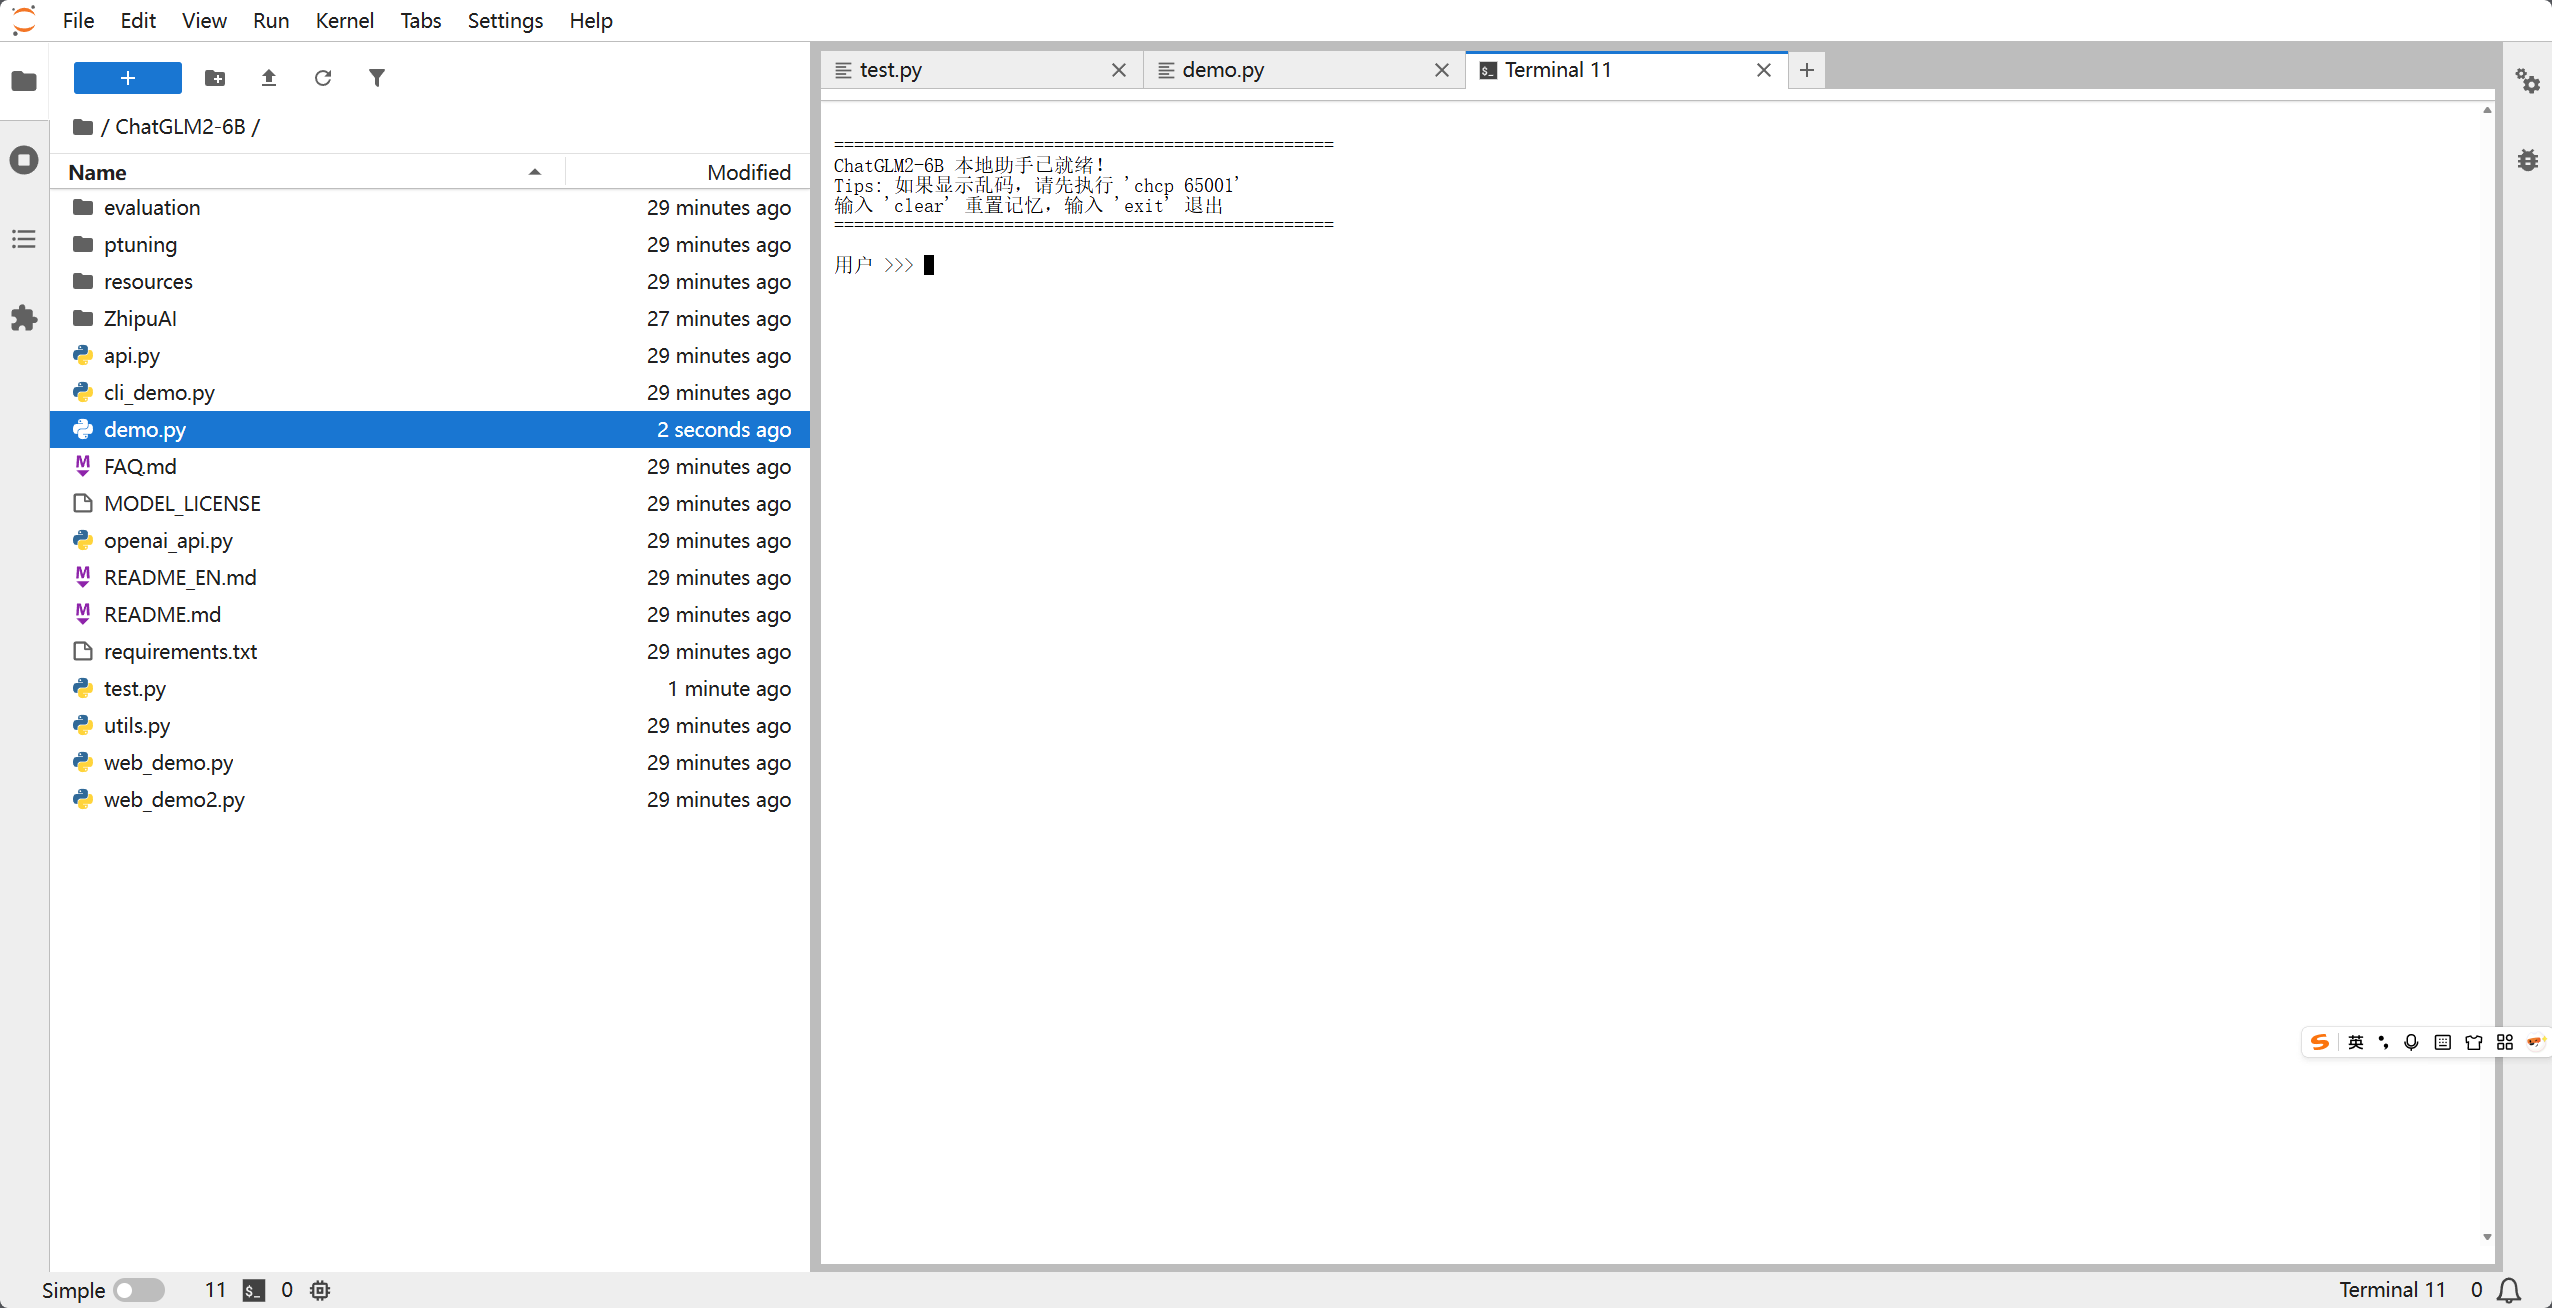
当看到 ChatGLM2-6B 本地助手已就绪! 后,你就可以开始使用它了!
对话示例:
五、 常见坑点与优化
- 显存溢出 (OOM):如果你的显存只有 6G-8G,必须使用
.quantize(4)。如果没有显卡,只能用 CPU 运行(加.float()),但响应时间可能长达数分钟。 - 多轮对话变慢:随着对话轮数增加,
history列表会变长,占用更多内存。建议每隔一段时间输入clear重置。 - Tokenizer 警告:第一次运行如果看到“Migrating old cache”,请耐心等待,这是 Transformers 库在升级缓存结构。
结语
ChatGLM2-6B 是目前个人开发者最值得尝试的模型之一。通过本文的部署,你已经在本地拥有了一个不联网、保护隐私且完全可控的 AI 助手。接下来,你可以尝试接入你的知识库(RAG)或进行 LoRA 微调!
如果你觉得这篇文章有帮助,请点赞并收藏,欢迎在评论区讨论你遇到的问题!

有“AI”的1024 = 2048,欢迎大家加入2048 AI社区
更多推荐

 25
25 0
0- 0


 已为社区贡献40条内容

所有评论(0)