Openstack部署(无脚本直接复制粘贴版)
本文详细介绍了在CentOS 7系统上部署OpenStack Train版本的全过程。主要内容包括:1) 环境准备,包括VMware虚拟机配置、网络设置和系统初始化;2) 基础服务部署,涵盖MariaDB、RabbitMQ、Memcached等服务安装配置;3) 核心组件部署步骤,包括Keystone身份认证、Glance镜像服务、Placement资源管理、Nova计算服务、Neutron网络服
首先声明,我在写的时候可能有些地方复制粘贴多了,复制粘贴少了,会导致命令缺失,请自行配合ai使用,如果有问题欢迎提交至评论区。
首先准备好需要的镜像(可以去阿里云镜像站去下载):
CentOS-7-x86_64-DVD-2009
然后在VM里面新建虚拟机
虚拟机的要求:
4个处理器 4gb内存 50gb的硬盘
选择好需要的镜像就可以开始安装了系统了
在安装系统的时候为了后续方便可以先提前帮网络和主机名设置好

|
主机名 |
IP |
子网掩码 |
网关 |
DNS |
|
controller |
192.168.100.10 |
255.255.255.0 |
192.168.100.2 |
8.8.8.8 |
|
compute |
192.168.100.20 |
255.255.255.0 |
192.168.100.2 |
8.8.8.8 |
弄好一切后等待安装完成,等待安装的过程可以设置好root密码,密码为000000
完成后先别急着重启
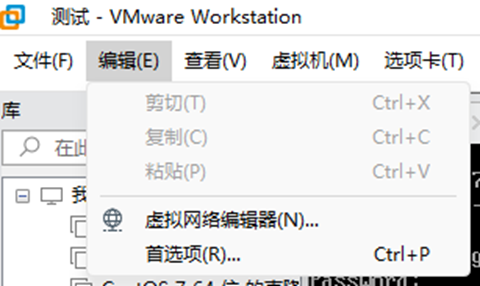
打开虚拟网络编辑器
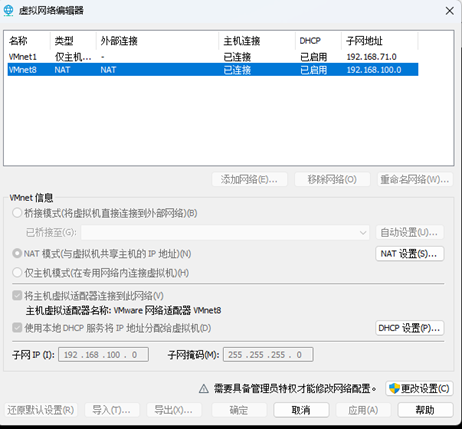
一定要将VMnet8的网段修改为192.168.100.0,修改后网关会自动变成192.168.100.2,不用刻意去修改,这么做方便后续复制粘贴不会出错。
重启虚拟机后进入系统
可以连接Xshell远程终端连接虚拟机方便后续的复制粘贴
系统初始化
关闭selinux 和防火墙
sed -i 's#SELINUX=enforcing#SELINUX=disabled#g' /etc/selinux/config
setenforce 0
systemctl stop firewalld.service
systemctl disable firewalld.service

关闭iptables(如果系统有iptables,就执行以下命令)
没有的执行的情况

systemctl restart iptables
iptables -F
iptables -X
iptables -Z
/usr/sbin/iptables-save systemctl stop iptables systemctl disable iptables
systemctl stop iptables
systemctl disable iptables
换国内yum源
cd /etc/yum.repos.d/
rm -f CentOS*

更换系统yum源为阿里的(可以选择其他的源,如华为云/清华云等等)
curl -o /etc/yum.repos.d/CentOS-Base.repo http://mirrors.aliyun.com/repo/Centos-7.repo

写入openstack国内源
sudo tee /etc/yum.repos.d/openstack-train.repo <<EOF
[openstack-train]
name=train
baseurl=https://mirrors.aliyun.com/centos/7/cloud/x86_64/openstack-train/
enable=1
gpgcheck=0
[train-extras]
name=CentOS-train-extras
baseurl=https://mirrors.aliyun.com/centos/7/extras/x86_64/
enable=1
gpgcheck=0
[Virt]
name=CentOS-$releasever - Base
baseurl=http://mirrors.aliyun.com/centos/7/virt/x86_64/kvm-common/
gpgcheck=0
gpgkey=file:///etc/pki/rpm-gpg/RPM-GPG-KEY-CentOS-7
EOF

完事后cd到本地目录下
建立缓存
yum makecache
yum -y upgrade
安装依赖包
yum install expect lsof net-tools vim expect -y
yum install -y python-openstackclient
yum install -y openstack-selinux
yum install -y openstack-utils
时间同步
sed -i '3,6s/^/#/g' /etc/chrony.conf
sed -i '7s/^/server ntp.aliyun.com iburst/g' /etc/chrony.conf
systemctl restart chronyd
systemctl enable chronyd
配置hosts
echo "192.168.100.10 controller" >> /etc/hosts
echo "192.168.100.20 compute" >> /etc/hosts
更改网络配置(删除UUID)
sed -i -e '/UUID/d' /etc/sysconfig/network-scripts/ifcfg-ens33
虚拟机克隆controller 为 compute克隆完后修改ip
sed -i -e 's/192.168.100.10/192.168.100.20/g' /etc/sysconfig/network-scripts/ifcfg-ens33
重启网络服务
systemctl restart network
修改主机名
hostnamectl set-hostname compute
bash
基础依赖安装(控制节点):
mariadb 部署
安装服务
yum install -y mariadb mariadb-server MySQL-python
配置 mariadb
sudo tee /etc/my.cnf.d/openstack.cnf <<EOF
[mysqld]
bind-address = 0.0.0.0
default-storage-engine = innodb
innodb_file_per_table = on
max_connections = 4096
collation-server = utf8_general_ci
character-set-server = utf8
EOF
启动并设置开机自启mariadb
systemctl restart mariadb.service
systemctl enable mariadb.service
配置数据库服务
mysql_secure_installation
回车
再次输入密码000000
y
n
y
y
登陆验证:
mysql -uroot -p000000
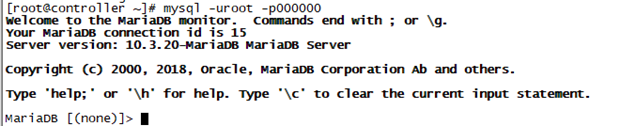
能正常登录就行了,使用quit退出或者\q
rabbitmq 部署
安装服务
yum install rabbitmq-server -y
设置开机自启并启动
systemctl start rabbitmq-server.service
systemctl enable rabbitmq-server.service
在 rabbitmq 中添加一个用户
rabbitmqctl add_user openstack 000000
rabbitmqctl set_permissions openstack ".*" ".*" ".*"
rabbitmqctl set_permissions -p "/" openstack ".*" ".*" ".*"
rabbitmqctl set_user_tags openstack administrator
memcached 部署
安装服务
yum -y install memcached python-memcached
配置 Memcached
sed -i -e 's/OPTIONS.*/OPTIONS="-l 0.0.0.0,::1"/g' /etc/sysconfig/memcached
设置开机自启并启动
systemctl enable memcached.service
systemctl restart memcached.service
核心服务部署(控制节点):
部署keystone
创建 keystone 数据库
mysql -uroot -p000000 -e "create database IF NOT EXISTS keystone ;"
mysql -uroot -p000000 -e "GRANT ALL PRIVILEGES ON keystone.* TO 'keystone'@'localhost' IDENTIFIED BY '000000' ;"
mysql -uroot -p000000 -e "GRANT ALL PRIVILEGES ON keystone.* TO 'keystone'@'%' IDENTIFIED BY '000000' ;"
mysql -uroot -p000000 -e "flush privileges;"
安装 keystone 和必要的依赖
yum install -y openstack-keystone httpd mod_wsgi
配置服务
openstack-config --set /etc/keystone/keystone.conf database connection mysql+pymysql://keystone:000000@192.168.100.10/keystone
openstack-config --set /etc/keystone/keystone.conf token provider fernet
为 keystone 服务创建数据库表
su -s /bin/sh -c "keystone-manage db_sync" keystone
初始化Fernet 密钥存储库
keystone-manage fernet_setup --keystone-user keystone --keystone-group keystone
keystone-manage bootstrap --bootstrap-password 000000 \
--bootstrap-admin-url http://192.168.100.10:5000/v3/ \
--bootstrap-internal-url http://192.168.100.10:5000/v3/ \
--bootstrap-public-url http://192.168.100.10:5000/v3/ \
--bootstrap-region-id RegionOne
配置 apache 配置文件
sed -i "s/#ServerName www.example.com:80/ServerName 192.168.100.10:80/g" /etc/httpd/conf/httpd.conf
添加软链接
ln -s /usr/share/keystone/wsgi-keystone.conf /etc/httpd/conf.d/
启动 httpd 并设置开机自启
systemctl enable httpd.service
systemctl restart httpd.service
标准化重构默认账号
输入登录信息
export OS_USERNAME=admin
export OS_PASSWORD=000000
export OS_PROJECT_NAME=admin
export OS_USER_DOMAIN_NAME=Default
export OS_PROJECT_DOMAIN_NAME=Default
export OS_AUTH_URL=http://192.168.100.10:5000/v3
export OS_IDENTITY_API_VERSION=3
创建一个域Default
openstack domain create --description "Default Domain" Default
创建一个项目myadmin
openstack project create --domain Default --description "Admin project" myadmin
创建一个用户myadmin
openstack user create --domain Default --password 000000 myadmin
设置用户角色
openstack role add --project myadmin --user myadmin admin
输入新的登录信息
export OS_USERNAME=myadmin
export OS_PASSWORD=000000
export OS_PROJECT_NAME=myadmin
export OS_USER_DOMAIN_NAME=Default
export OS_PROJECT_DOMAIN_NAME=Default
export OS_AUTH_URL=http://192.168.100.10:5000/v3
export OS_IDENTITY_API_VERSION=3
删除默认项admin
openstack project delete admin
修改管理员项目
openstack project set --name admin --domain Default --description "Admin Project" --enable myadmin
输入新项目
export OS_PROJECT_NAME=admin
删除用户admin
openstack user delete admin
修改管理员信息
openstack user set --name admin --domain Default --project admin --project-domain Default --password 000000 --enable myadmin
输入新的用户admin
export OS_USERNAME=admin
添加用户为admin
openstack role add --project admin --user admin admin
创建必要项目service
openstack project create --domain Default --description "Service Project" service
添加用户的角色
openstack role create user
创建admin-openrc.sh
cat > /root/admin-openrc.sh <<-EOF
export OS_PROJECT_DOMAIN_NAME=Default
export OS_USER_DOMAIN_NAME=Default
export OS_PROJECT_NAME=admin export OS_USERNAME=admin
export OS_PASSWORD=000000
export OS_AUTH_URL=http://192.168.100.10:5000/v3
export OS_IDENTITY_API_VERSION=3
export OS_IMAGE_API_VERSION=2
EOF
测试
source admin-openrc.sh
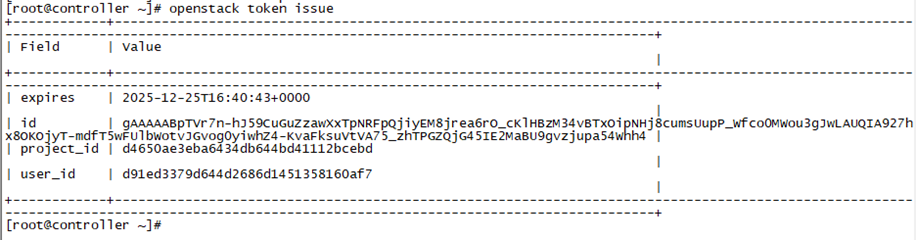
获取新的密钥(能获取就证明没问题)
openstack token issue
部署glance
创建 glance 数据库
mysql -uroot -p000000 -e "create database IF NOT EXISTS glance ;"
mysql -uroot -p000000 -e "GRANT ALL PRIVILEGES ON glance.* TO 'glance'@'localhost' IDENTIFIED BY '000000' ;"
mysql -uroot -p000000 -e "GRANT ALL PRIVILEGES ON glance.* TO 'glance'@'%' IDENTIFIED BY '000000' ;"
创建 glance 角色
openstack user create --domain Default --password 000000 glance
openstack role add --project service --user glance admin
openstack service create --name glance --description "OpenStack Image" image
openstack endpoint create --region RegionOne image public http://192.168.100.10:9292
openstack endpoint create --region RegionOne image internal http://192.168.100.10:9292
openstack endpoint create --region RegionOne image admin http://192.168.100.10:9292
安装 glance
yum install -y openstack-glance
配置服务
#/etc/glance/glance-api.conf
openstack-config --set /etc/glance/glance-api.conf database connection mysql+pymysql://glance:000000@192.168.100.10/glance
openstack-config --set /etc/glance/glance-api.conf keystone_authtoken www_authenticate_uri http://192.168.100.10:5000
openstack-config --set /etc/glance/glance-api.conf keystone_authtoken auth_url http://192.168.100.10:5000
openstack-config --set /etc/glance/glance-api.conf keystone_authtoken memcached_servers 192.168.100.10:11211
openstack-config --set /etc/glance/glance-api.conf keystone_authtoken auth_type password
openstack-config --set /etc/glance/glance-api.conf keystone_authtoken project_domain_name Default
openstack-config --set /etc/glance/glance-api.conf keystone_authtoken user_domain_name Default
openstack-config --set /etc/glance/glance-api.conf keystone_authtoken project_name service
openstack-config --set /etc/glance/glance-api.conf keystone_authtoken username glance
openstack-config --set /etc/glance/glance-api.conf keystone_authtoken password 000000
openstack-config --set /etc/glance/glance-api.conf paste_deploy flavor keystone
openstack-config --set /etc/glance/glance-api.conf glance_store stores file,http
openstack-config --set /etc/glance/glance-api.conf glance_store Default'_store' file
openstack-config --set /etc/glance/glance-api.conf glance_store filesystem_store_datadir /var/lib/glance/images/
#/etc/glance/glance-registry.conf
openstack-config --set /etc/glance/glance-registry.conf database connection mysql+pymysql://glance:000000@192.168.100.10/glance
openstack-config --set /etc/glance/glance-registry.conf keystone_authtoken www_authenticate_uri http://192.168.100.10:5000
openstack-config --set /etc/glance/glance-registry.conf keystone_authtoken auth_url http://192.168.100.10:5000
openstack-config --set /etc/glance/glance-registry.conf keystone_authtoken memcached_servers 192.168.100.10:11211
openstack-config --set /etc/glance/glance-registry.conf keystone_authtoken auth_type password
openstack-config --set /etc/glance/glance-registry.conf keystone_authtoken project_domain_name Default
openstack-config --set /etc/glance/glance-registry.conf keystone_authtoken user_domain_name Default
openstack-config --set /etc/glance/glance-registry.conf keystone_authtoken project_name service
openstack-config --set /etc/glance/glance-registry.conf keystone_authtoken username glance
openstack-config --set /etc/glance/glance-registry.conf keystone_authtoken password 000000
openstack-config --set /etc/glance/glance-registry.conf paste_deploy flavor keystone
同步数据库
su -s /bin/sh -c "glance-manage db_sync" glance
启动和设置开机自启
systemctl enable openstack-glance-api.service openstack-glance-registry.service
systemctl restart openstack-glance-api.service openstack-glance-registry.service
部署placement
创建 placement 数据库
mysql -uroot -p000000 -e "CREATE DATABASE placement;"
mysql -uroot -p000000 -e "GRANT ALL PRIVILEGES ON placement.* TO 'placement'@'localhost' IDENTIFIED BY '000000';"
mysql -uroot -p000000 -e "GRANT ALL PRIVILEGES ON placement.* TO 'placement'@'%' IDENTIFIED BY '000000';"
创建 placement 角色
openstack user create --domain Default --password 000000 placement
openstack role add --project service --user placement admin
openstack service create --name placement --description "Placement API" placement
openstack endpoint create --region RegionOne placement public http://192.168.100.10:8778
openstack endpoint create --region RegionOne placement internal http://192.168.100.10:8778
openstack endpoint create --region RegionOne placement admin http://192.168.100.10:8778
安装 placement 服务
yum install openstack-placement-api -y
配置服务
openstack-config --set /etc/placement/placement.conf api auth_strategy keystone
openstack-config --set /etc/placement/placement.conf keystone_authtoken auth_url http://192.168.100.10:5000/v3
openstack-config --set /etc/placement/placement.conf keystone_authtoken memcached_servers 192.168.100.10:11211
openstack-config --set /etc/placement/placement.conf keystone_authtoken auth_type password
openstack-config --set /etc/placement/placement.conf keystone_authtoken project_domain_name Default
openstack-config --set /etc/placement/placement.conf keystone_authtoken user_domain_name Default
openstack-config --set /etc/placement/placement.conf keystone_authtoken project_name service
openstack-config --set /etc/placement/placement.conf keystone_authtoken username placement
openstack-config --set /etc/placement/placement.conf keystone_authtoken password 000000
openstack-config --set /etc/placement/placement.conf placement_database connection mysql+pymysql://placement:000000@192.168.100.10/placement
同步数据库
su -s /bin/sh -c "placement-manage db sync" placement
添加配置文件
cat >> /etc/httpd/conf.d/00-placement-api.conf <<EOF
<Directory /usr/bin>
<IfVersion >= 2.4>
Require all granted
</IfVersion>
<IfVersion < 2.4>
Order allow,deny
Allow from all
</IfVersion>
</Directory>
EOF
重启 httpd
systemctl restart httpd
部署nova
创建 nova 数据库
mysql -uroot -p000000 -e "create database IF NOT EXISTS nova ;"
mysql -uroot -p000000 -e "create database IF NOT EXISTS nova_api ;"
mysql -uroot -p000000 -e "create database IF NOT EXISTS nova_cell0 ;"
mysql -uroot -p000000 -e "GRANT ALL PRIVILEGES ON nova.* TO 'nova'@'localhost' IDENTIFIED BY '000000' ;"
mysql -uroot -p000000 -e "GRANT ALL PRIVILEGES ON nova.* TO 'nova'@'%' IDENTIFIED BY '000000' ;"
mysql -uroot -p000000 -e "GRANT ALL PRIVILEGES ON nova_api.* TO 'nova'@'localhost' IDENTIFIED BY '000000' ;"
mysql -uroot -p000000 -e "GRANT ALL PRIVILEGES ON nova_api.* TO 'nova'@'%' IDENTIFIED BY '000000' ;"
mysql -uroot -p000000 -e "GRANT ALL PRIVILEGES ON nova_cell0.* TO 'nova'@'localhost' IDENTIFIED BY '000000' ;"
mysql -uroot -p000000 -e "GRANT ALL PRIVILEGES ON nova_cell0.* TO 'nova'@'%' IDENTIFIED BY '000000' ;"
创建 nova 角色
openstack user create --domain Default --password 000000 nova
openstack role add --project service --user nova admin
openstack service create --name nova --description "OpenStack Compute" compute
openstack endpoint create --region RegionOne compute public http://192.168.100.10:8774/v2.1
openstack endpoint create --region RegionOne compute internal http://192.168.100.10:8774/v2.1
openstack endpoint create --region RegionOne compute admin http://192.168.100.10:8774/v2.1
安装 nova 服务
yum install openstack-nova-api openstack-nova-conductor openstack-nova-novncproxy openstack-nova-scheduler -y
配置服务
#/etc/nova/nova.conf
openstack-config --set /etc/nova/nova.conf DEFAULT enabled_apis osapi_compute,metadata
openstack-config --set /etc/nova/nova.conf DEFAULT my_ip 192.168.100.10
openstack-config --set /etc/nova/nova.conf DEFAULT use_neutron true
openstack-config --set /etc/nova/nova.conf DEFAULT firewall_driver nova.virt.firewall.NoopFirewallDriver
openstack-config --set /etc/nova/nova.conf DEFAULT transport_url rabbit://openstack:000000@192.168.100.10
openstack-config --set /etc/nova/nova.conf api_database connection mysql+pymysql://nova:000000@192.168.100.10/nova_api
openstack-config --set /etc/nova/nova.conf database connection mysql+pymysql://nova:000000@192.168.100.10/nova
openstack-config --set /etc/nova/nova.conf api auth_strategy keystone
openstack-config --set /etc/nova/nova.conf keystone_authtoken www_authenticate_uri http://192.168.100.10:5000/
openstack-config --set /etc/nova/nova.conf keystone_authtoken auth_url http://192.168.100.10:5000/
openstack-config --set /etc/nova/nova.conf keystone_authtoken memcached_servers 192.168.100.10:11211
openstack-config --set /etc/nova/nova.conf keystone_authtoken auth_type password
openstack-config --set /etc/nova/nova.conf keystone_authtoken project_domain_name Default
openstack-config --set /etc/nova/nova.conf keystone_authtoken user_domain_name Default
openstack-config --set /etc/nova/nova.conf keystone_authtoken project_name service
openstack-config --set /etc/nova/nova.conf keystone_authtoken username nova
openstack-config --set /etc/nova/nova.conf keystone_authtoken password 000000
openstack-config --set /etc/nova/nova.conf vnc enabled true
openstack-config --set /etc/nova/nova.conf vnc server_listen 192.168.100.10
openstack-config --set /etc/nova/nova.conf vnc server_proxyclient_address 192.168.100.10
openstack-config --set /etc/nova/nova.conf glance api_servers http://192.168.100.10:9292
openstack-config --set /etc/nova/nova.conf oslo_concurrency lock_path /var/lib/nova/tmp
openstack-config --set /etc/nova/nova.conf placement region_name RegionOne
openstack-config --set /etc/nova/nova.conf placement project_domain_name Default
openstack-config --set /etc/nova/nova.conf placement project_name service
openstack-config --set /etc/nova/nova.conf placement auth_type password
openstack-config --set /etc/nova/nova.conf placement user_domain_name Default
openstack-config --set /etc/nova/nova.conf placement auth_url http://192.168.100.10:5000/v3
openstack-config --set /etc/nova/nova.conf placement username placement
openstack-config --set /etc/nova/nova.conf placement password 000000
openstack-config --set /etc/nova/nova.conf scheduler discover_hosts_in_cells_interval 300
同步数据库
su -s /bin/sh -c "nova-manage api_db sync" nova
su -s /bin/sh -c "nova-manage cell_v2 map_cell0" nova
su -s /bin/sh -c "nova-manage cell_v2 create_cell --name=cell1 --verbose" nova
su -s /bin/sh -c "nova-manage db sync" nova
su -s /bin/sh -c "nova-manage cell_v2 list_cells" nova
启动和设置开机自启
systemctl restart openstack-nova-api.service openstack-nova-scheduler.service openstack-nova-conductor.service openstack-nova-novncproxy.service
systemctl enable openstack-nova-api.service openstack-nova-scheduler.service openstack-nova-conductor.service openstack-nova-novncproxy.service
创建实例类型
openstack flavor create --id 1 --vcpus 1 --ram 512 --disk 5 test
openstack flavor create --id 2 --vcpus 1 --ram 512 --disk 10 m1.tiny
openstack flavor create --id 3 --vcpus 1 --ram 1024 --disk 20 m1.small
openstack flavor create --id 4 --vcpus 2 --ram 2048 --disk 40 m1.medium
部署neutron
创建 neutron 数据库
mysql -uroot -p000000 -e "create database IF NOT EXISTS neutron ;"
mysql -uroot -p000000 -e "GRANT ALL PRIVILEGES ON neutron.* TO 'neutron'@'localhost' IDENTIFIED BY '000000' ;"
mysql -uroot -p000000 -e "GRANT ALL PRIVILEGES ON neutron.* TO 'neutron'@'%' IDENTIFIED BY '000000' ;"
创建 neutron 角色
openstack user create --domain Default --password 000000 neutron
openstack role add --project service --user neutron admin
openstack service create --name neutron --description "OpenStack Networking" network
openstack endpoint create --region RegionOne network public http://192.168.100.10:9696
openstack endpoint create --region RegionOne network internal http://192.168.100.10:9696
openstack endpoint create --region RegionOne network admin http://192.168.100.10:9696
安装 neutron 服务
yum install openstack-neutron openstack-neutron-ml2 openstack-neutron-linuxbridge ebtables -y
配置服务
#/etc/neutron/neutron.conf
openstack-config --set /etc/neutron/neutron.conf database connection mysql+pymysql://neutron:000000@192.168.100.10/neutron
openstack-config --set /etc/neutron/neutron.conf DEFAULT core_plugin ml2
openstack-config --set /etc/neutron/neutron.conf DEFAULT service_plugins router
openstack-config --set /etc/neutron/neutron.conf DEFAULT allow_overlapping_ips true
openstack-config --set /etc/neutron/neutron.conf DEFAULT transport_url rabbit://openstack:000000@192.168.100.10
openstack-config --set /etc/neutron/neutron.conf DEFAULT auth_strategy keystone
openstack-config --set /etc/neutron/neutron.conf DEFAULT notify_nova_on_port_status_changes true
openstack-config --set /etc/neutron/neutron.conf DEFAULT notify_nova_on_port_data_changes true
openstack-config --set /etc/neutron/neutron.conf keystone_authtoken connection transport_url www_authenticate_uri http://192.168.100.10:5000
openstack-config --set /etc/neutron/neutron.conf keystone_authtoken auth_url http://192.168.100.10:5000
openstack-config --set /etc/neutron/neutron.conf keystone_authtoken memcached_servers 192.168.100.10:11211
openstack-config --set /etc/neutron/neutron.conf keystone_authtoken auth_type password
openstack-config --set /etc/neutron/neutron.conf keystone_authtoken project_domain_name Default
openstack-config --set /etc/neutron/neutron.conf keystone_authtoken user_domain_name Default
openstack-config --set /etc/neutron/neutron.conf keystone_authtoken project_name service
openstack-config --set /etc/neutron/neutron.conf keystone_authtoken username neutron
openstack-config --set /etc/neutron/neutron.conf keystone_authtoken password 000000
openstack-config --set /etc/neutron/neutron.conf nova auth_url http://192.168.100.10:5000
openstack-config --set /etc/neutron/neutron.conf nova auth_type password
openstack-config --set /etc/neutron/neutron.conf nova project_domain_name Default
openstack-config --set /etc/neutron/neutron.conf nova user_domain_name Default
openstack-config --set /etc/neutron/neutron.conf nova region_name RegionOne
openstack-config --set /etc/neutron/neutron.conf nova project_name service
openstack-config --set /etc/neutron/neutron.conf nova username nova
openstack-config --set /etc/neutron/neutron.conf nova password 000000
openstack-config --set /etc/neutron/neutron.conf oslo_concurrency lock_path /var/lib/neutron/tmp
#/etc/neutron/plugins/ml2/ml2_conf.ini
openstack-config --set /etc/neutron/plugins/ml2/ml2_conf.ini ml2 type_drivers flat,vlan,vxlan,gre,local
openstack-config --set /etc/neutron/plugins/ml2/ml2_conf.ini ml2 tenant_network_types vxlan
openstack-config --set /etc/neutron/plugins/ml2/ml2_conf.ini ml2 mechanism_drivers linuxbridge,l2population
openstack-config --set /etc/neutron/plugins/ml2/ml2_conf.ini ml2 extension_drivers port_security
openstack-config --set /etc/neutron/plugins/ml2/ml2_conf.ini ml2_type_flat flat_networks provider
openstack-config --set /etc/neutron/plugins/ml2/ml2_conf.ini ml2_type_vlan network_vlan_ranges provider:101:1000
openstack-config --set /etc/neutron/plugins/ml2/ml2_conf.ini ml2_type_vxlan vni_ranges 101:1000
openstack-config --set /etc/neutron/plugins/ml2/ml2_conf.ini securitygroup enable_ipset true
#/etc/neutron/plugins/ml2/linuxbridge_agent.ini
openstack-config --set /etc/neutron/plugins/ml2/linuxbridge_agent.ini linux_bridge physical_interface_mappings provider:ens33
openstack-config --set /etc/neutron/plugins/ml2/linuxbridge_agent.ini vxlan enable_vxlan true
openstack-config --set /etc/neutron/plugins/ml2/linuxbridge_agent.ini vxlan local_ip 192.168.100.10
openstack-config --set /etc/neutron/plugins/ml2/linuxbridge_agent.ini vxlan l2_population true
openstack-config --set /etc/neutron/plugins/ml2/linuxbridge_agent.ini securitygroup enable_security_group true
openstack-config --set /etc/neutron/plugins/ml2/linuxbridge_agent.ini securitygroup firewall_driver neutron.agent.linux.iptables_firewall.IptablesFirewallDriver
#/etc/neutron/l3_agent.ini
openstack-config --set /etc/neutron/l3_agent.ini DEFAULT interface_driver linuxbridge
#/etc/neutron/dhcp_agent.ini
openstack-config --set /etc/neutron/dhcp_agent.ini DEFAULT interface_driver linuxbridge
openstack-config --set /etc/neutron/dhcp_agent.ini DEFAULT dhcp_driver neutron.agent.linux.dhcp.Dnsmasq
openstack-config --set /etc/neutron/dhcp_agent.ini DEFAULT enable_isolated_metadata true
#/etc/neutron/metadata_agent.ini
openstack-config --set /etc/neutron/metadata_agent.ini DEFAULT nova_metadata_host 192.168.100.10
openstack-config --set /etc/neutron/metadata_agent.ini DEFAULT metadata_proxy_shared_secret 000000
#/etc/nova/nova.conf
openstack-config --set /etc/nova/nova.conf neutron auth_url http://192.168.100.10:5000
openstack-config --set /etc/nova/nova.conf neutron auth_type password
openstack-config --set /etc/nova/nova.conf neutron project_domain_name Default
openstack-config --set /etc/nova/nova.conf neutron user_domain_name Default
openstack-config --set /etc/nova/nova.conf neutron region_name RegionOne
openstack-config --set /etc/nova/nova.conf neutron project_name service
openstack-config --set /etc/nova/nova.conf neutron username neutron
openstack-config --set /etc/nova/nova.conf neutron password 000000
openstack-config --set /etc/nova/nova.conf neutron service_metadata_proxy true
openstack-config --set /etc/nova/nova.conf neutron metadata_proxy_shared_secret 000000
#br_netfilter
modprobe br_netfilter
echo 'net.bridge.bridge-nf-call-iptables = 1' >> /etc/sysctl.conf
echo 'net.bridge.bridge-nf-call-ip6tables = 1' >> /etc/sysctl.conf
sysctl -p
sysctl net.bridge.bridge-nf-call-iptables
sysctl net.bridge.bridge-nf-call-ip6tables
同步数据库并添加软链接
ln -s /etc/neutron/plugins/ml2/ml2_conf.ini /etc/neutron/plugin.ini
su -s /bin/sh -c "neutron-db-manage --config-file /etc/neutron/neutron.conf --config-file /etc/neutron/plugins/ml2/ml2_conf.ini upgrade head" neutron
启动和设置开机自启
systemctl restart openstack-nova-api.service
systemctl enable neutron-server.service neutron-linuxbridge-agent.service neutron-dhcp-agent.service neutron-metadata-agent neutron-l3-agent
systemctl start neutron-server.service neutron-linuxbridge-agent.service neutron-dhcp-agent.service neutron-metadata-agent neutron-l3-agent
部署dashboard
安装dashboard
yum install openstack-dashboard -y
配置服务
sed -i '/^OPENSTACK_HOST/s#127.0.0.1#'192.168.100.10'#' /etc/openstack-dashboard/local_settings
sed -i "/^ALLOWED_HOSTS/s#\[.*\]#['*']#" /etc/openstack-dashboard/local_settings
sed -i '/TIME_ZONE/s#UTC#Asia/Shanghai#' /etc/openstack-dashboard/local_settings
sed -i '/^#SESSION_ENGINE/s/#//' /etc/openstack-dashboard/local_settings
sed -i "/^SESSION_ENGINE/s#'.*'#'django.contrib.sessions.backends.cache'#" /etc/openstack-dashboard/local_settings
cat >> /etc/openstack-dashboard/local_settings <<EOF
OPENSTACK_API_VERSIONS = {
"identity": 3,
"image": 2,
"volume": 2,
}
OPENSTACK_KEYSTONE_DEFAULT_ROLE = "user"
OPENSTACK_KEYSTONE_MULTIDOMAIN_SUPPORT = True
OPENSTACK_KEYSTONE_DEFAULT_DOMAIN = " Default"
CACHES = {
'default': {
'BACKEND': 'django.core.cache.backends.memcached.MemcachedCache',
'LOCATION': '192.168.100.10:11211',
}
}
WEBROOT = '/dashboard/'
EOF
sed -e '4iWSGIApplicationGroup %{GLOBAL}' /etc/httpd/conf.d/openstack-dashboard.conf
cd /usr/share/openstack-dashboard && python manage.py make_web_conf --apache > /etc/httpd/conf.d/openstack-dashboard.conf
ln -s /etc/openstack-dashboard /usr/share/openstack-dashboard/openstack_dashboard/conf
cd /root/
sed -i "s:WSGIScriptAlias / :WSGIScriptAlias /dashboard :" /etc/httpd/conf.d/openstack-dashboard.conf
sed -i "s:Alias /static:Alias /dashboard/static:" /etc/httpd/conf.d/openstack-dashboard.conf
重启服务
systemctl restart httpd.service memcached.service
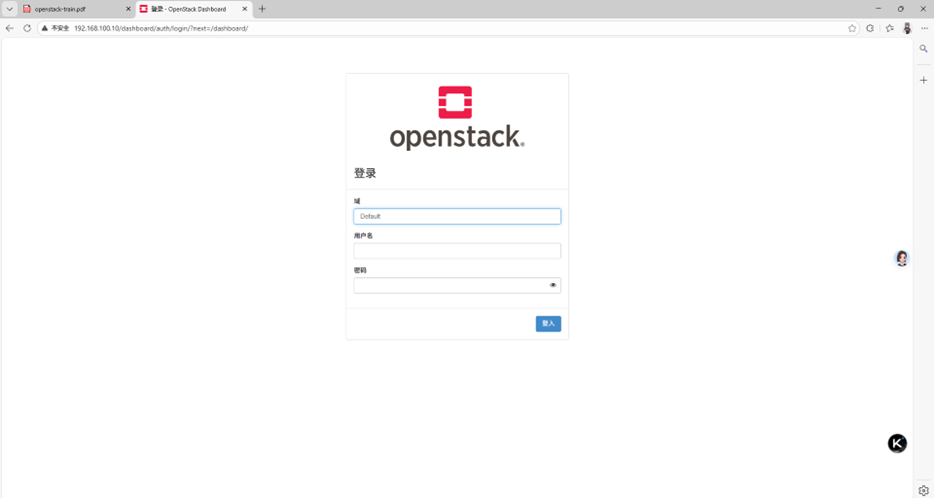
测试
访问dashboard
http://192.168.100.10/dashboard
可以登录测试,但是还创建不了实例(缺少计算节点,完成下面的添加计算节点教程就可以正常使用了)
添加计算节点(计算节点):
启动计算节点
部署nova(计算节点)
安装 nova
yum install openstack-nova-compute -y
配置服务
openstack-config --set /etc/nova/nova.conf DEFAULT my_ip 192.168.100.10
openstack-config --set /etc/nova/nova.conf DEFAULT use_neutron True
openstack-config --set /etc/nova/nova.conf DEFAULT firewall_driver nova.virt.firewall.NoopFirewallDriver
openstack-config --set /etc/nova/nova.conf DEFAULT enabled_apis osapi_compute,metadata
openstack-config --set /etc/nova/nova.conf DEFAULT transport_url rabbit://openstack:000000@192.168.100.10
openstack-config --set /etc/nova/nova.conf api auth_strategy keystone
openstack-config --set /etc/nova/nova.conf keystone_authtoken www_authenticate_uri http://192.168.100.10:5000/
openstack-config --set /etc/nova/nova.conf keystone_authtoken auth_url http://192.168.100.10:5000/
openstack-config --set /etc/nova/nova.conf keystone_authtoken memcached_servers 192.168.100.10:11211
openstack-config --set /etc/nova/nova.conf keystone_authtoken auth_type password
openstack-config --set /etc/nova/nova.conf keystone_authtoken project_domain_name Default
openstack-config --set /etc/nova/nova.conf keystone_authtoken user_domain_name Default
openstack-config --set /etc/nova/nova.conf keystone_authtoken project_name service
openstack-config --set /etc/nova/nova.conf keystone_authtoken username nova
openstack-config --set /etc/nova/nova.conf keystone_authtoken password 000000
openstack-config --set /etc/nova/nova.conf vnc enabled True
openstack-config --set /etc/nova/nova.conf vnc server_listen 0.0.0.0
openstack-config --set /etc/nova/nova.conf vnc server_proxyclient_address 192.168.100.20
openstack-config --set /etc/nova/nova.conf vnc novncproxy_base_url http://192.168.100.10:6080/vnc_auto.html
openstack-config --set /etc/nova/nova.conf glance api_servers http://192.168.100.10:9292
openstack-config --set /etc/nova/nova.conf oslo_concurrency lock_path /var/lib/nova/tmp
openstack-config --set /etc/nova/nova.conf placement region_name RegionOne
openstack-config --set /etc/nova/nova.conf placement project_domain_name Default
openstack-config --set /etc/nova/nova.conf placement project_name service
openstack-config --set /etc/nova/nova.conf placement auth_type password
openstack-config --set /etc/nova/nova.conf placement user_domain_name Default
openstack-config --set /etc/nova/nova.conf placement auth_url http://192.168.100.10:5000/v3
openstack-config --set /etc/nova/nova.conf placement username placement
openstack-config --set /etc/nova/nova.conf placement password 000000
openstack-config --set /etc/nova/nova.conf libvirt virt_type qemu
启动和设置开机自启
systemctl enable libvirtd.service openstack-nova-compute.service
systemctl restart libvirtd.service
systemctl start openstack-nova-compute.service
同步计算节点
ssh root@192.168.100.10 "bash -c 'source /root/admin-openrc.sh && openstack compute service list --service nova-compute'"
ssh root@192.168.100.10 'source /root/admin-openrc.sh && su -s /bin/sh -c "nova-manage cell_v2 discover_hosts --verbose" nova'
部署neutron(计算节点)
安装 neutron
yum install -y openstack-neutron-linuxbridge ebtables ipset
配置服务
#/etc/neutron/neutron.conf
openstack-config --set /etc/neutron/neutron.conf DEFAULT transport_url rabbit://openstack:000000@192.168.100.10
openstack-config --set /etc/neutron/neutron.conf DEFAULT auth_strategy keystone
openstack-config --set /etc/neutron/neutron.conf keystone_authtoken www_authenticate_uri http://192.168.100.10:5000
openstack-config --set /etc/neutron/neutron.conf keystone_authtoken auth_url http://192.168.100.10:5000
openstack-config --set /etc/neutron/neutron.conf keystone_authtoken memcached_servers 192.168.100.10:11211
openstack-config --set /etc/neutron/neutron.conf keystone_authtoken auth_type password
openstack-config --set /etc/neutron/neutron.conf keystone_authtoken project_domain_name Default
openstack-config --set /etc/neutron/neutron.conf keystone_authtoken user_domain_name Default
openstack-config --set /etc/neutron/neutron.conf keystone_authtoken project_name service
openstack-config --set /etc/neutron/neutron.conf keystone_authtoken username neutron
openstack-config --set /etc/neutron/neutron.conf keystone_authtoken password 000000
openstack-config --set /etc/neutron/neutron.conf oslo_concurrency lock_path /var/lib/neutron/tmp
#/etc/neutron/plugins/ml2/linuxbridge_agent.ini
openstack-config --set /etc/neutron/plugins/ml2/linuxbridge_agent.ini linux_bridge physical_interface_mappings provider:ens33
openstack-config --set /etc/neutron/plugins/ml2/linuxbridge_agent.ini vxlan enable_vxlan True
openstack-config --set /etc/neutron/plugins/ml2/linuxbridge_agent.ini vxlan local_ip 192.168.100.20
openstack-config --set /etc/neutron/plugins/ml2/linuxbridge_agent.ini vxlan l2_population true
openstack-config --set /etc/neutron/plugins/ml2/linuxbridge_agent.ini securitygroup enable_security_group True
openstack-config --set /etc/neutron/plugins/ml2/linuxbridge_agent.ini securitygroup firewall_driver neutron.agent.linux.iptables_firewall.IptablesFirewallDriver
#/etc/nova/nova.conf
openstack-config --set /etc/nova/nova.conf neutron url http://192.168.100.10:9696
openstack-config --set /etc/nova/nova.conf neutron auth_url http://192.168.100.10:5000
openstack-config --set /etc/nova/nova.conf neutron auth_type password
openstack-config --set /etc/nova/nova.conf neutron project_domain_name Default
openstack-config --set /etc/nova/nova.conf neutron user_domain_name Default
openstack-config --set /etc/nova/nova.conf neutron region_name RegionOne
openstack-config --set /etc/nova/nova.conf neutron project_name service
openstack-config --set /etc/nova/nova.conf neutron username neutron
openstack-config --set /etc/nova/nova.conf neutron password 000000
#br_netfilter
modprobe br_netfilter
echo 'net.bridge.bridge-nf-call-iptables = 1' >> /etc/sysctl.conf
echo 'net.bridge.bridge-nf-call-ip6tables = 1' >> /etc/sysctl.conf
sysctl -p
sysctl net.bridge.bridge-nf-call-iptables
sysctl net.bridge.bridge-nf-call-ip6tables
启动并设置开机自启
systemctl restart openstack-nova-compute.service
systemctl enable openstack-nova-compute.service
systemctl restart neutron-linuxbridge-agent.service
systemctl enable neutron-linuxbridge-agent.service
完成

有“AI”的1024 = 2048,欢迎大家加入2048 AI社区
更多推荐


 15
15 0
0- 0


 已为社区贡献1条内容

所有评论(0)