Qt-for-HarmonyOS-无边框窗口开发实践
本文档介绍了基于Qt Quick在HarmonyOS平台上开发无边框窗口应用的技术实现。项目实现了自定义标题栏、窗口控制按钮和主题切换等功能,采用QML声明式语法和JavaScript脚本完成界面交互。关键点包括: 必须使用qtmain()作为入口函数,配置OpenGL ES表面格式 通过Qt.FramelessWindowHint实现无边框窗口 自定义标题栏采用渐变背景和动态主题 实现了窗口控制
📋 项目概述
本文档基于一个完整的 Bezel-less-Widget 项目,详细介绍了如何在 HarmonyOS 平台上使用 Qt Quick 开发无边框窗口应用程序。项目实现了自定义标题栏、窗口控制按钮、主题切换等功能,展示了 Qt Quick Controls 2.15 在 HarmonyOS 平台上创建现代化、无边框窗口界面的实际应用。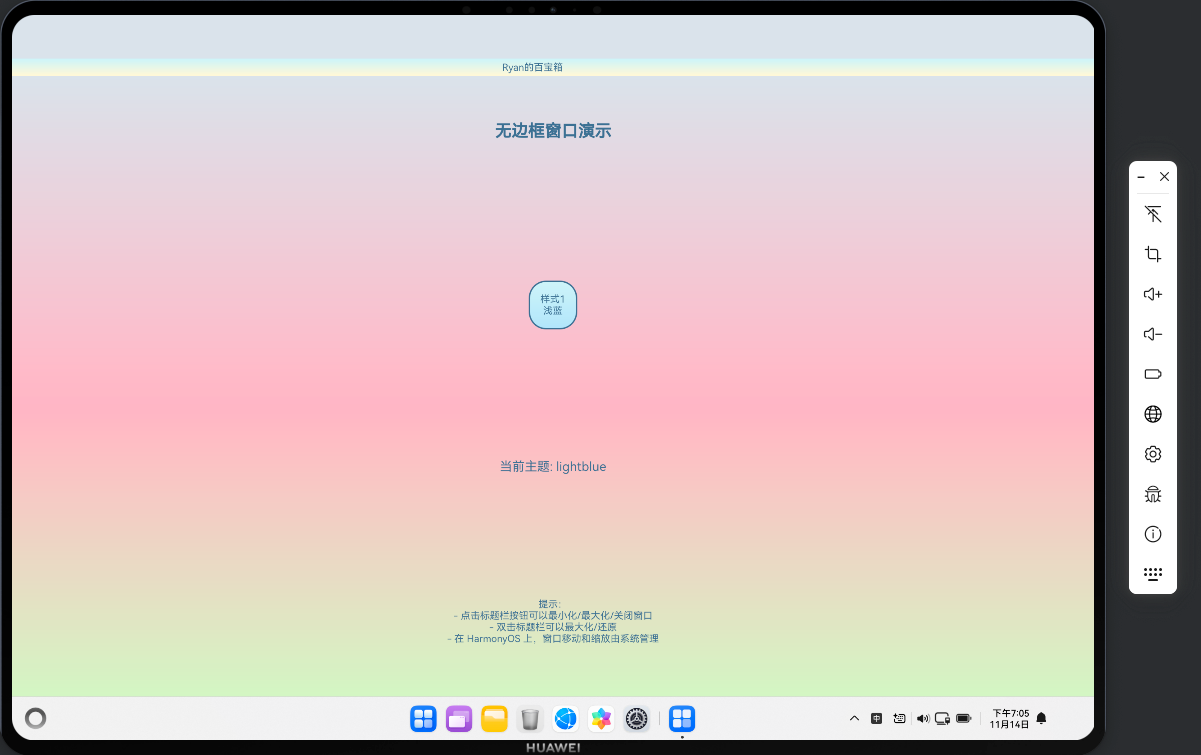
项目地址:https://gitcode.com/szkygc/HarmonyOs_PC-PGC/blob/main
项目功能
- ✅ 无边框窗口(Frameless Window)
- ✅ 自定义标题栏设计
- ✅ 窗口控制按钮(最小化、最大化/还原、关闭)
- ✅ 动态主题切换(支持多种配色方案)
- ✅ 渐变背景效果
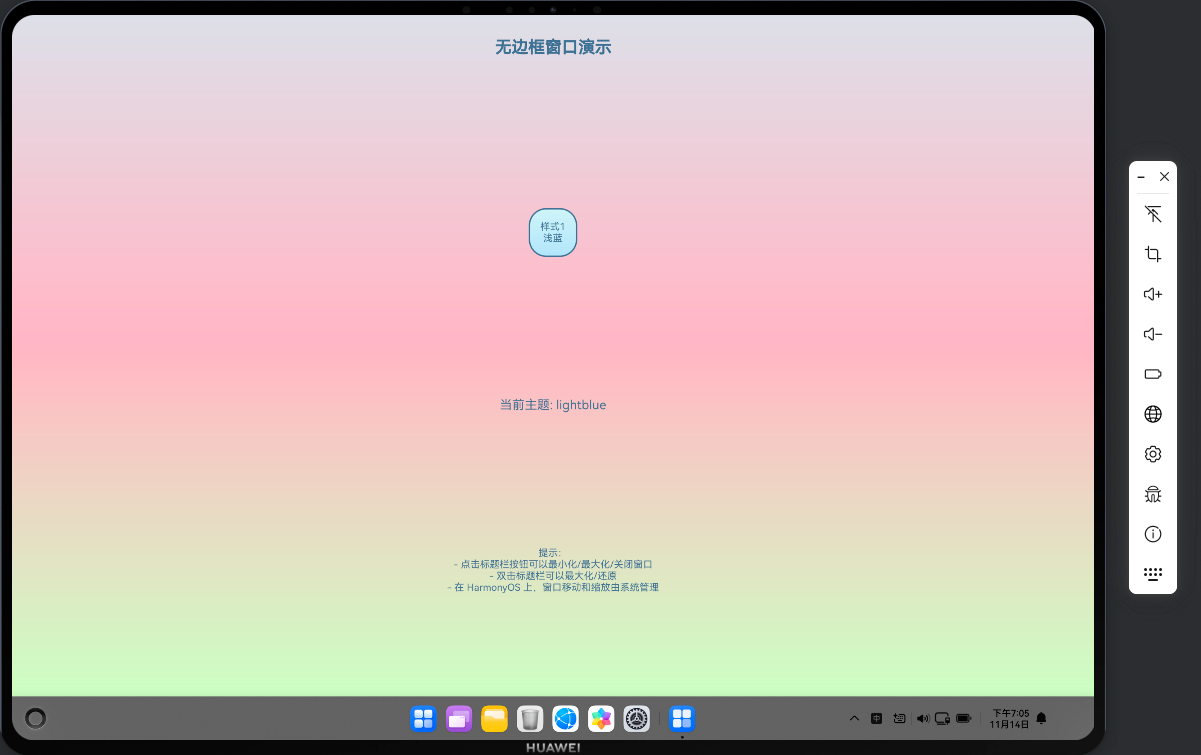
- ✅ 双击标题栏最大化/还原
- ✅ 窗口状态管理(恢复时定位到屏幕顶部)
- ✅ HarmonyOS 平台适配
原始项目对比
原始项目(Qt Widgets):
- 使用
QWidget+FrameWidget(自定义无边框窗口基类) - 使用 C++ 代码实现窗口拖动、缩放、状态管理
- 使用 QSS(Qt Style Sheets)进行样式定制
- 支持 Windows/Linux/macOS 平台
HarmonyOS 适配版本(Qt Quick):
- 使用
ApplicationWindow+ QML 声明式语法 - 使用 QML 的
MouseArea和Button实现交互 - 使用 QML 的
Gradient实现渐变效果 - 使用 JavaScript 函数实现主题切换
- 完全适配 HarmonyOS 平台特性
🎯 核心技术要点
1. HarmonyOS 入口函数:qtmain()
⚠️ 关键要点:HarmonyOS 真机上必须使用 qtmain() 而不是 main()!
// ✅ 正确写法
extern "C" int qtmain(int argc, char **argv)
{
    // Qt 应用作为共享库加载,生命周期由 HarmonyOS 管理
    QGuiApplication app(argc, argv);
    QQmlApplicationEngine engine;
    engine.load(QUrl(QStringLiteral("qrc:/main.qml")));
    return app.exec();  // ⚠️ 重要:必须调用 exec() 启动事件循环
}

// ❌ 错误写法(桌面应用方式)
int main(int argc, char *argv[])
{
    // 这种方式在 HarmonyOS 上会导致应用无法正常启动
}
原因说明:
- HarmonyOS 将 Qt 应用作为共享库(.so)加载
- 应用生命周期由 HarmonyOS 的 Ability 管理
qtmain()是 HarmonyOS Qt 插件的标准入口点
2. OpenGL ES 表面格式配置
⚠️ 关键要点:必须在创建 QGuiApplication 之前配置 QSurfaceFormat!
// Step 1: 配置 OpenGL ES 表面格式(必须在创建应用之前!)
QSurfaceFormat format;

// 设置 Alpha 通道(透明度)
format.setAlphaBufferSize(8);      // 8 位 Alpha 通道

// 设置颜色通道(RGBA 32 位真彩色)
format.setRedBufferSize(8);        // 8 位红色通道
format.setGreenBufferSize(8);      // 8 位绿色通道
format.setBlueBufferSize(8);       // 8 位蓝色通道

// 设置深度和模板缓冲区
format.setDepthBufferSize(24);     // 24 位深度缓冲
format.setStencilBufferSize(8);    // 8 位模板缓冲

// 指定渲染类型为 OpenGL ES(HarmonyOS要求)
format.setRenderableType(QSurfaceFormat::OpenGLES);

// 指定 OpenGL ES 版本为 2.0(推荐,兼容性更好)
format.setVersion(2, 0);
format.setSwapBehavior(QSurfaceFormat::DoubleBuffer);
format.setSamples(0);

// ⚠️ 关键:必须在创建 QGuiApplication 之前设置默认格式!
QSurfaceFormat::setDefaultFormat(format);

// Step 2: 创建 Qt 应用实例(必须在设置格式之后)
QCoreApplication::setAttribute(Qt::AA_UseOpenGLES);
QCoreApplication::setAttribute(Qt::AA_ShareOpenGLContexts);
QGuiApplication app(argc, argv);
配置说明:
setAlphaBufferSize(8):支持窗口透明效果setRenderableType(QSurfaceFormat::OpenGLES):HarmonyOS 要求使用 OpenGL ESsetVersion(2, 0):使用 OpenGL ES 2.0,兼容性最好setSwapBehavior(QSurfaceFormat::DoubleBuffer):双缓冲,减少闪烁
3. 无边框窗口实现
3.1 QML 中设置窗口标志
在 QML 的 ApplicationWindow 中直接设置 flags:
ApplicationWindow {
    id: root
    width: Screen.width > 0 ? Screen.width : 1200
    height: Screen.height > 0 ? Screen.height : 800
    visible: true

    // 无边框窗口标志 - 使用 FramelessWindowHint 移除系统边框
    flags: Qt.Window | Qt.FramelessWindowHint

    // 设置窗口背景为主题背景色,避免恢复窗口时出现白色或黑色
    color: getThemeColor("mainBgStart")
}
3.2 C++ 中程序化设置窗口标志
由于 HarmonyOS 的特殊性,可能需要在 C++ 代码中额外设置窗口标志:
QObject::connect(g_engine, &QQmlApplicationEngine::objectCreated,
                 &app, [url](QObject *obj, const QUrl &objUrl) {
    if (obj && url == objUrl) {
        // 方法1: 通过 window 属性访问
        QVariant windowVariant = obj->property("window");
        if (windowVariant.isValid()) {
            QQuickWindow *window = qvariant_cast<QQuickWindow*>(windowVariant);
            if (window) {
                window->setFlags(Qt::Window | Qt::FramelessWindowHint);
            }
        }

        // 方法2: 直接转换
        QQuickWindow *window = qobject_cast<QQuickWindow*>(obj);
        if (window) {
            window->setFlags(Qt::Window | Qt::FramelessWindowHint);
        }
    }
}, Qt::QueuedConnection);

// 延迟设置窗口标志(确保窗口已完全创建)
QTimer::singleShot(200, [&app]() {
    QList<QObject*> rootObjects = g_engine->rootObjects();
    for (QObject* obj : rootObjects) {
        // 多种方式尝试获取窗口对象并设置标志
        // ...
    }
});
⚠️ 注意事项:
- HarmonyOS 上可能仍然会显示系统边框,这是系统限制
- 窗口移动和缩放由 HarmonyOS 系统管理
- 可以通过设置窗口背景色来避免恢复窗口时的白色/黑色闪烁
4. 自定义标题栏实现
4.1 标题栏结构
Rectangle {
    id: titleBar
    anchors.top: parent.top
    anchors.left: parent.left
    anchors.right: parent.right
    height: titleBarHeight
    z: 100  // 确保标题栏在最上层

    // 渐变背景 - 根据主题动态变化
    gradient: Gradient {
        GradientStop { position: 0.04; color: getThemeColor("titleBarStart") }
        GradientStop { position: 0.96; color: getThemeColor("titleBarEnd") }
    }

    // 标题栏内容
    RowLayout {
        anchors.fill: parent
        anchors.margins: 2
        spacing: 8

        // 图标
        Image {
            Layout.preferredWidth: 30
            Layout.preferredHeight: 30
            source: "qrc:/res/title.svg"
            fillMode: Image.PreserveAspectFit
        }

        // 标题文本
        Text {
            Layout.fillWidth: true
            text: "Ryan的百宝箱"
            font.pixelSize: 28
            color: getThemeColor("textColor")
            horizontalAlignment: Text.AlignHCenter
            verticalAlignment: Text.AlignVCenter
        }

        // 窗口控制按钮...
    }
}
4.2 窗口控制按钮
// 最小化按钮
Button {
    id: minBtn
    Layout.preferredWidth: 44
    Layout.preferredHeight: 44
    background: Rectangle {
        anchors.fill: parent
        color: minBtn.hovered ? "#E0E0E0" : "transparent"
        radius: 4
    }
    Image {
        anchors.centerIn: parent
        width: 28
        height: 28
        source: "qrc:/res/zoom.svg"
        fillMode: Image.PreserveAspectFit
    }
    onClicked: {
        root.showMinimized()
    }
}

// 最大化/还原按钮
Button {
    id: maxBtn
    Layout.preferredWidth: 44
    Layout.preferredHeight: 44
    background: Rectangle {
        anchors.fill: parent
        color: maxBtn.hovered ? "#E0E0E0" : "transparent"
        radius: 4
    }
    Image {
        id: maxIcon
        anchors.centerIn: parent
        width: 28
        height: 28
        source: root.visibility === Window.Maximized ? "qrc:/res/maxmin.svg" : "qrc:/res/max.svg"
        fillMode: Image.PreserveAspectFit
    }
    onClicked: {
        if (root.visibility === Window.Maximized) {
            root.showNormal()
        } else {
            root.showMaximized()
        }
    }
}

// 关闭按钮
Button {
    id: closeBtn
    Layout.preferredWidth: 44
    Layout.preferredHeight: 44
    background: Rectangle {
        anchors.fill: parent
        color: closeBtn.hovered ? "#FF4444" : "transparent"
        radius: 4
    }
    Image {
        anchors.centerIn: parent
        width: 28
        height: 28
        source: "qrc:/res/close.svg"
        fillMode: Image.PreserveAspectFit
    }
    onClicked: {
        root.close()
    }
}
设计要点:
- 使用
Button组件,自定义background实现悬停效果 - 使用
Image显示 SVG 图标 - 根据窗口状态动态切换图标(最大化/还原)
- 关闭按钮悬停时显示红色背景
5. 主题切换系统
5.1 主题颜色定义
// 当前样式主题
property string currentTheme: "lightblue"  // lightblue, flatgray, blacksoft

// 主题颜色定义
property var themeColors: {
    "lightblue": {
        titleBarStart: "#CBF2F7",
        titleBarEnd: "#FFF8D5",
        mainBgStart: "#D5DEE7",
        mainBgMiddle: "#FFAFBD",
        mainBgEnd: "#C9FFBF",
        textColor: "#386487",
        buttonBg: "#EAF7FF"
    },
    "flatgray": {
        titleBarStart: "#667EEA",
        titleBarEnd: "#764BA2",
        mainBgStart: "#667EEA",
        mainBgMiddle: "#764BA2",
        mainBgEnd: "#F093FB",
        textColor: "#FFFFFF",
        buttonBg: "#8B7EC8"
    },
    "blacksoft": {
        titleBarStart: "#2B2B2B",
        titleBarEnd: "#3B3B3B",
        mainBgStart: "#1E1E1E",
        mainBgMiddle: "#2A2A2A",
        mainBgEnd: "#353535",
        textColor: "#E0E0E0",
        buttonBg: "#404040"
    }
}

// 获取当前主题颜色
function getThemeColor(key) {
    return themeColors[currentTheme][key] || themeColors["lightblue"][key]
}

// 加载样式
function loadTheme(themeName) {
    currentTheme = themeName
    console.log("Bezel_less_Widget: 切换到主题:", themeName)
}
5.2 动态应用主题
// 标题栏渐变背景
gradient: Gradient {
    GradientStop { position: 0.04; color: getThemeColor("titleBarStart") }
    GradientStop { position: 0.96; color: getThemeColor("titleBarEnd") }
}

// 主内容区域渐变背景
gradient: Gradient {
    GradientStop { position: 0.0; color: getThemeColor("mainBgStart") }
    GradientStop { position: 0.5; color: getThemeColor("mainBgMiddle") }
    GradientStop { position: 1.0; color: getThemeColor("mainBgEnd") }
}

// 文本颜色
Text {
    color: getThemeColor("textColor")
    // ...
}
实现原理:
- 使用 QML 的
property var定义主题颜色对象 - 通过 JavaScript 函数
getThemeColor()获取当前主题的颜色值 - 所有 UI 元素绑定到主题颜色,切换主题时自动更新
6. 窗口状态管理
6.1 窗口恢复时定位到屏幕顶部
// 窗口状态变化时,恢复窗口时将标题栏固定到屏幕顶部
onVisibilityChanged: {
    if (visibility === Window.Windowed) {
        // 从最大化/全屏恢复时,将窗口定位到屏幕顶部
        y = 0
        // 确保窗口宽度不超过屏幕宽度
        if (width > Screen.width) {
            width = Screen.width
        }
    }
}
6.2 双击标题栏最大化/还原
// 双击标题栏最大化/还原
MouseArea {
    anchors.top: parent.top
    anchors.left: parent.left
    anchors.right: parent.right
    height: titleBarHeight
    anchors.rightMargin: 140  // 为按钮留出空间
    acceptedButtons: Qt.LeftButton
    onDoubleClicked: {
        if (root.visibility === Window.Maximized) {
            root.showNormal()
        } else {
            root.showMaximized()
        }
    }
}
注意事项:
- HarmonyOS 上窗口移动和缩放由系统管理
- 可以通过
onVisibilityChanged监听窗口状态变化 - 双击标题栏是常见的窗口管理交互方式
7. 渐变背景实现
7.1 标题栏水平渐变
gradient: Gradient {
    GradientStop { position: 0.04; color: getThemeColor("titleBarStart") }
    GradientStop { position: 0.96; color: getThemeColor("titleBarEnd") }
}
7.2 主内容区域垂直渐变
gradient: Gradient {
    GradientStop { position: 0.0; color: getThemeColor("mainBgStart") }
    GradientStop { position: 0.5; color: getThemeColor("mainBgMiddle") }
    GradientStop { position: 1.0; color: getThemeColor("mainBgEnd") }
}
渐变效果:
GradientStop的position范围是 0.0 到 1.0- 可以设置多个颜色停止点,实现复杂的渐变效果
- 渐变方向由
Gradient的父元素决定(水平或垂直)
🔧 项目结构
Bezel_less_Widget/
├── entry/
│   └── src/
│       └── main/
│           └── cpp/
│               ├── main.cpp          # HarmonyOS 入口文件
│               ├── main.qml          # QML 主界面文件
│               ├── qml.qrc           # QML 资源文件
│               └── CMakeLists.txt    # CMake 构建配置
└── entry/src/main/resources/
    └── rawfile/
        └── res/                      # SVG 图标资源
            ├── close.svg
            ├── max.svg
            ├── maxmin.svg
            ├── title.svg
            └── zoom.svg
📝 关键代码片段
完整的 main.cpp
#include <QQmlApplicationEngine>
#include <QSurfaceFormat>
#include <QGuiApplication>
#include <QCoreApplication>
#include <QQuickWindow>
#include <QTimer>
#include <QVariant>

static QQmlApplicationEngine *g_engine = nullptr;

extern "C" int qtmain(int argc, char **argv)
{
    if (g_engine != nullptr) {
        return 0;
    }

    // 设置 OpenGL ES 属性
    QCoreApplication::setAttribute(Qt::AA_UseOpenGLES);
    QCoreApplication::setAttribute(Qt::AA_ShareOpenGLContexts);

    QGuiApplication app(argc, argv);
    QCoreApplication::setApplicationName("Bezel_less_Widget");

    // 配置 OpenGL ES 表面格式
    QSurfaceFormat format;
    format.setAlphaBufferSize(8);
    format.setRedBufferSize(8);
    format.setGreenBufferSize(8);
    format.setBlueBufferSize(8);
    format.setDepthBufferSize(24);
    format.setStencilBufferSize(8);
    format.setRenderableType(QSurfaceFormat::OpenGLES);
    format.setVersion(2, 0);
    format.setSwapBehavior(QSurfaceFormat::DoubleBuffer);
    QSurfaceFormat::setDefaultFormat(format);

    // 创建 QML 引擎
    g_engine = new QQmlApplicationEngine();
    g_engine->addImportPath("qrc:/");

    // 加载 QML 文件
    const QUrl url("qrc:/main.qml");
    QObject::connect(g_engine, &QQmlApplicationEngine::objectCreated,
                     &app, [url](QObject *obj, const QUrl &objUrl) {
        if (obj && url == objUrl) {
            // 设置无边框窗口标志
            QVariant windowVariant = obj->property("window");
            if (windowVariant.isValid()) {
                QQuickWindow *window = qvariant_cast<QQuickWindow*>(windowVariant);
                if (window) {
                    window->setFlags(Qt::Window | Qt::FramelessWindowHint);
                }
            }
        }
    }, Qt::QueuedConnection);

    g_engine->load(url);

    // 延迟设置窗口标志(确保窗口已完全创建)
    QTimer::singleShot(200, [&app]() {
        if (!g_engine) return;
        QList<QObject*> rootObjects = g_engine->rootObjects();
        for (QObject* obj : rootObjects) {
            QVariant windowVariant = obj->property("window");
            if (windowVariant.isValid()) {
                QQuickWindow *window = qvariant_cast<QQuickWindow*>(windowVariant);
                if (window) {
                    window->setFlags(Qt::Window | Qt::FramelessWindowHint);
                    break;
                }
            }
        }
    });

    return app.exec();
}

extern "C" int main(int argc, char **argv)
{
    return qtmain(argc, argv);
}
⚠️ 常见问题与解决方案
问题1:窗口仍然显示系统边框
原因:HarmonyOS 系统可能对无边框窗口有限制。
解决方案:
- 在 QML 中设置
flags: Qt.Window | Qt.FramelessWindowHint - 在 C++ 代码中程序化设置窗口标志
- 使用延迟设置(
QTimer::singleShot)确保窗口已创建 - 设置窗口背景色避免白色/黑色闪烁
问题2:窗口恢复时出现白色或黑色背景
原因:ApplicationWindow 的默认背景色是白色,透明时可能显示为黑色。
解决方案:
// 设置窗口背景为主题背景色
color: getThemeColor("mainBgStart")
问题3:按钮点击事件不响应
原因:Text 元素可能阻止 MouseArea 接收点击事件。
解决方案:
- 调整
MouseArea和Text的 z 值 - 确保
MouseArea在最上层 - 使用
propagateComposedEvents: false防止事件传播
问题4:窗口恢复时位置不正确
原因:窗口恢复时没有设置正确的位置。
解决方案:
onVisibilityChanged: {
    if (visibility === Window.Windowed) {
        y = 0  // 定位到屏幕顶部
        if (width > Screen.width) {
            width = Screen.width
        }
    }
}
🎨 UI 设计要点
1. 响应式布局
- 使用
Screen.width和Screen.height获取屏幕尺寸 - 使用
Layout.fillWidth和Layout.fillHeight实现自适应布局 - 设置最小窗口尺寸:
minWidth: 700,minHeight: 500
2. 字体大小适配
- 标题栏文字:
font.pixelSize: 28 - 主标题:
font.pixelSize: 48 - 按钮文字:
font.pixelSize: 28 - 提示文字:
font.pixelSize: 28
3. 颜色方案
- 使用渐变背景提升视觉效果
- 根据主题动态切换颜色
- 确保文字颜色与背景有足够的对比度
📚 参考资料

有“AI”的1024 = 2048,欢迎大家加入2048 AI社区
更多推荐


 16
16 0
0- 0


 已为社区贡献40条内容

所有评论(0)