书生大模型第五期-L1G3-LMDeploy 课程实践过程记录
LMDeploy 是一个高效的大语言模型(LLM)部署工具箱,支持量化、推理和服务等功能。文章详细介绍了 LMDeploy 的安装方法,包括使用 conda 创建虚拟环境、指定版本安装以及源码安装的步骤。同时提供了快速上手教程,展示了如何使用 LMDeploy 进行本地推理(文本模型)和视觉语言模型(VLM)推理的代码示例。其中,文本模型能完成自我介绍等任务,视觉模型则可以准确描述图像内容。此外,
L1G3-LMDeploy 课程
🌟 大家好呀~欢迎来到我的博客小天地!
✨ 这一期主要记录书生大模型第五期:L1G3-LMDeploy 课程实践过程记录
💖 你的支持是我更新的动力! 如果喜欢这篇内容,别忘了 点赞❤️ + 关注🔔,后续还有更多分享~ 也欢迎在评论区聊聊你的想法🎉
💡参考资料:https://aicarrier.feishu.cn/wiki/XhoNw2qzPir8qmkVNYyc5YAunrc
👉 立即报名:https://colearn.intern-ai.org.cn/set?s=883(复制链接并且用微信打开即可报名)
原文链接:https://aicarrier.feishu.cn/wiki/ZW3KwXZn8iDRPlkMKXZcARHunWg
LMDeploy 是一个高效且友好的 LLMs 模型部署工具箱,功能涵盖了**量化、推理和服务**
安装
安装环境
+ conda简单使用 :[Anaconda 教程 | 菜鸟教程](https://www.runoob.com/python-qt/anaconda-tutorial.html)conda create -n lmdeploy python=3.8 -y
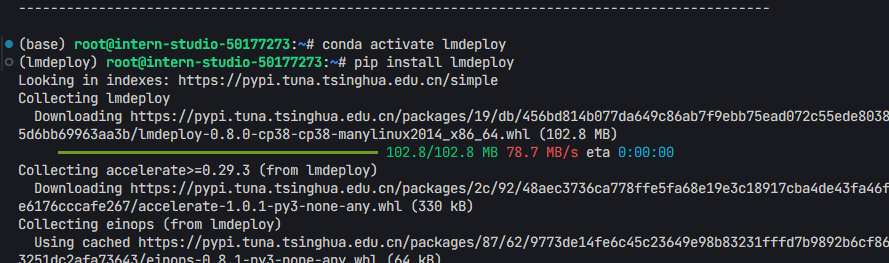
conda activate lmdeploy
pip install lmdeploy
- 如果发生错误/版本冲突,可指定版本安装
export LMDEPLOY_VERSION=0.7.2.post1
export PYTHON_VERSION=38
pip install https://github.com/InternLM/lmdeploy/releases/download/v${LMDEPLOY_VERSION}/lmdeploy-${LMDEPLOY_VERSION}+cu118-cp${PYTHON_VERSION}-cp${PYTHON_VERSION}-manylinux2014_x86_64.whl --extra-index-url https://download.pytorch.org/whl/cu118
源码安装
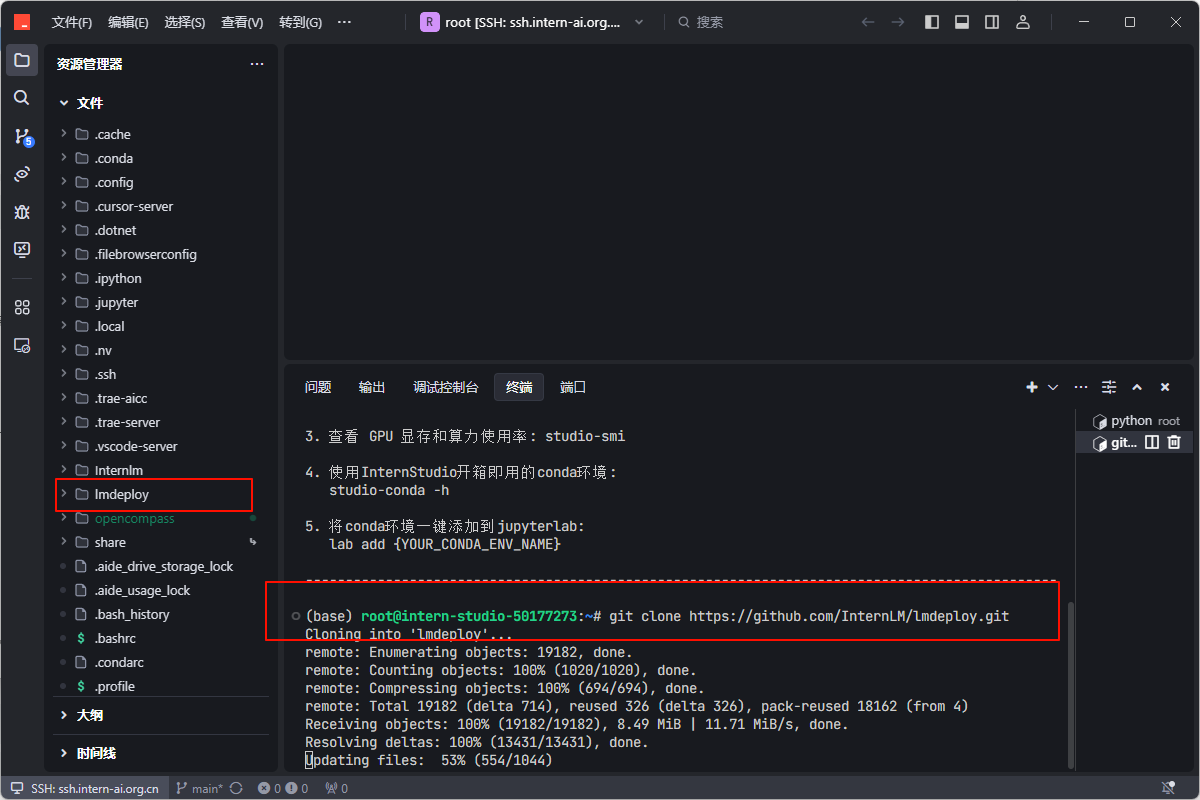
1. 依次运行下列代码git clone https://github.com/InternLM/lmdeploy.git
cd lmdeploy
pip install -e .

快速上手
本地推理(LLMs)
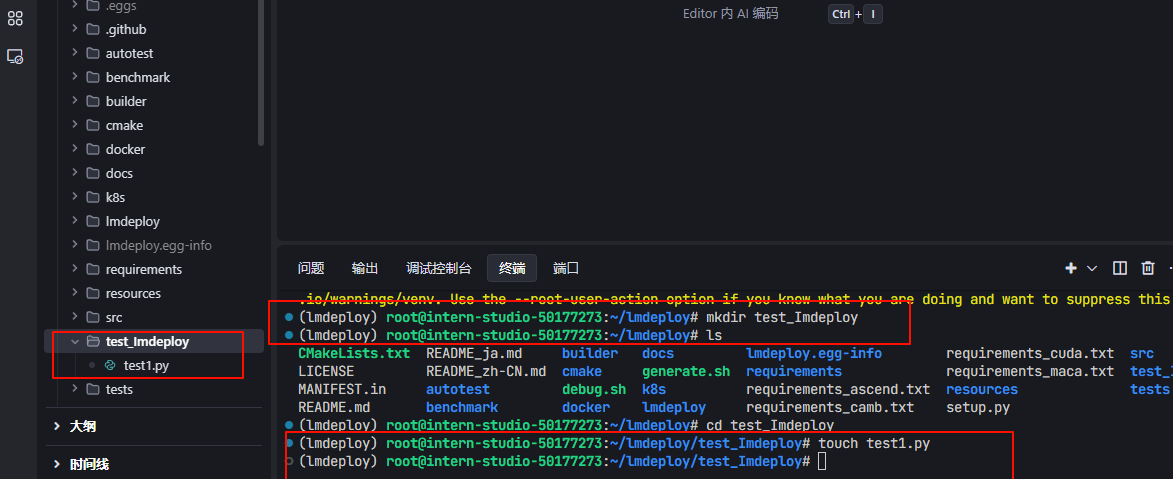
1. 依次运行下列命令:mkdir test_Imdeploy
touch test1.py
- 将下列代码复制到“test1.py”里
import lmdeploy
from lmdeploy import GenerationConfig
pipe = lmdeploy.pipeline("OpenGVLab/InternVL2-1B")
response = pipe(prompts=["Hi, pls intro yourself", "Shanghai is"],
                gen_config=GenerationConfig(max_new_tokens=1024,
                                            top_p=0.8,
                                            top_k=40,
                                            temperature=0.6))
print(response)
- 运行:
python test1.py - 当你使用
lmdeploy.pipeline()加载 HuggingFace 上的模型(比如"OpenGVLab/InternVL2-1B"),系统会自动将模型缓存到你的用户目录下,默认路径如下:~/.cache/huggingface/hub/
具体结构大致是这样的:
~/.cache/huggingface/hub/
└── models--OpenGVLab--InternVL2-1B/
    └── snapshots/
        └── <revision_hash>/
            ├── config.json
            ├── model.safetensors
            ├── tokenizer_config.json
            └── ...
- 我们可以创建一个models文件夹,用于存储模型,并在运行python文件时指定模型下载位置。
touch models
HF_HOME=/root/lmdeploy/models  python test1.py

- 运行结果


- 可以看到成功得到了两个回答:成功得到了两个回答:
- Prompt:
"Hi, pls intro yourself" - 回答:
I am an AI assistant whose name is InternVL, developed jointly by Shanghai AI Lab and SenseTime. - Prompt:
"Shanghai is" - 回答:
The capital of China.
- Prompt:
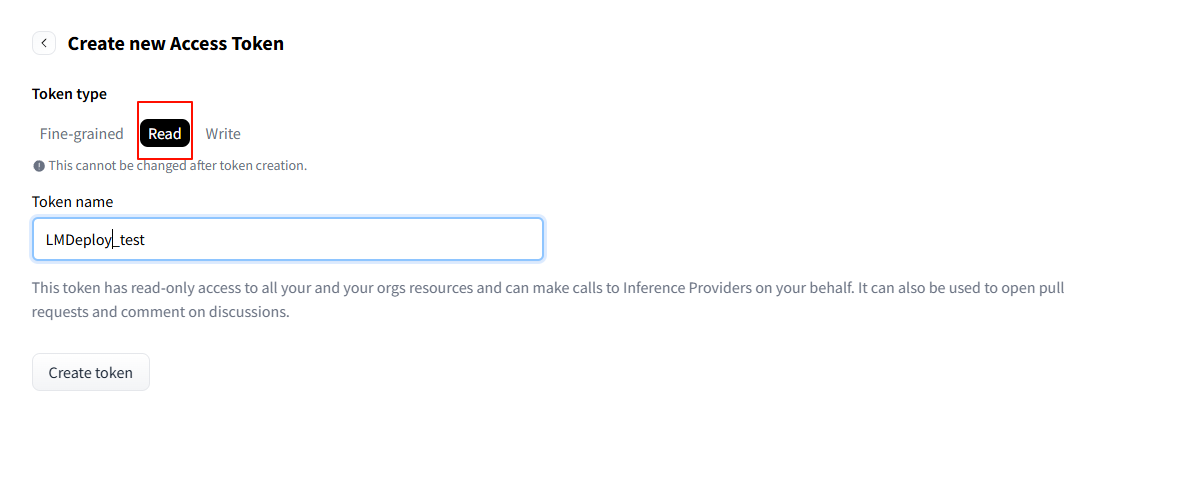
- 如果出现下列报错,则要先去Hugging Face申请 Token 【Token最好保存一下】 :

- 网址:https://huggingface.co/settings/tokens
- 点击”Create new token“
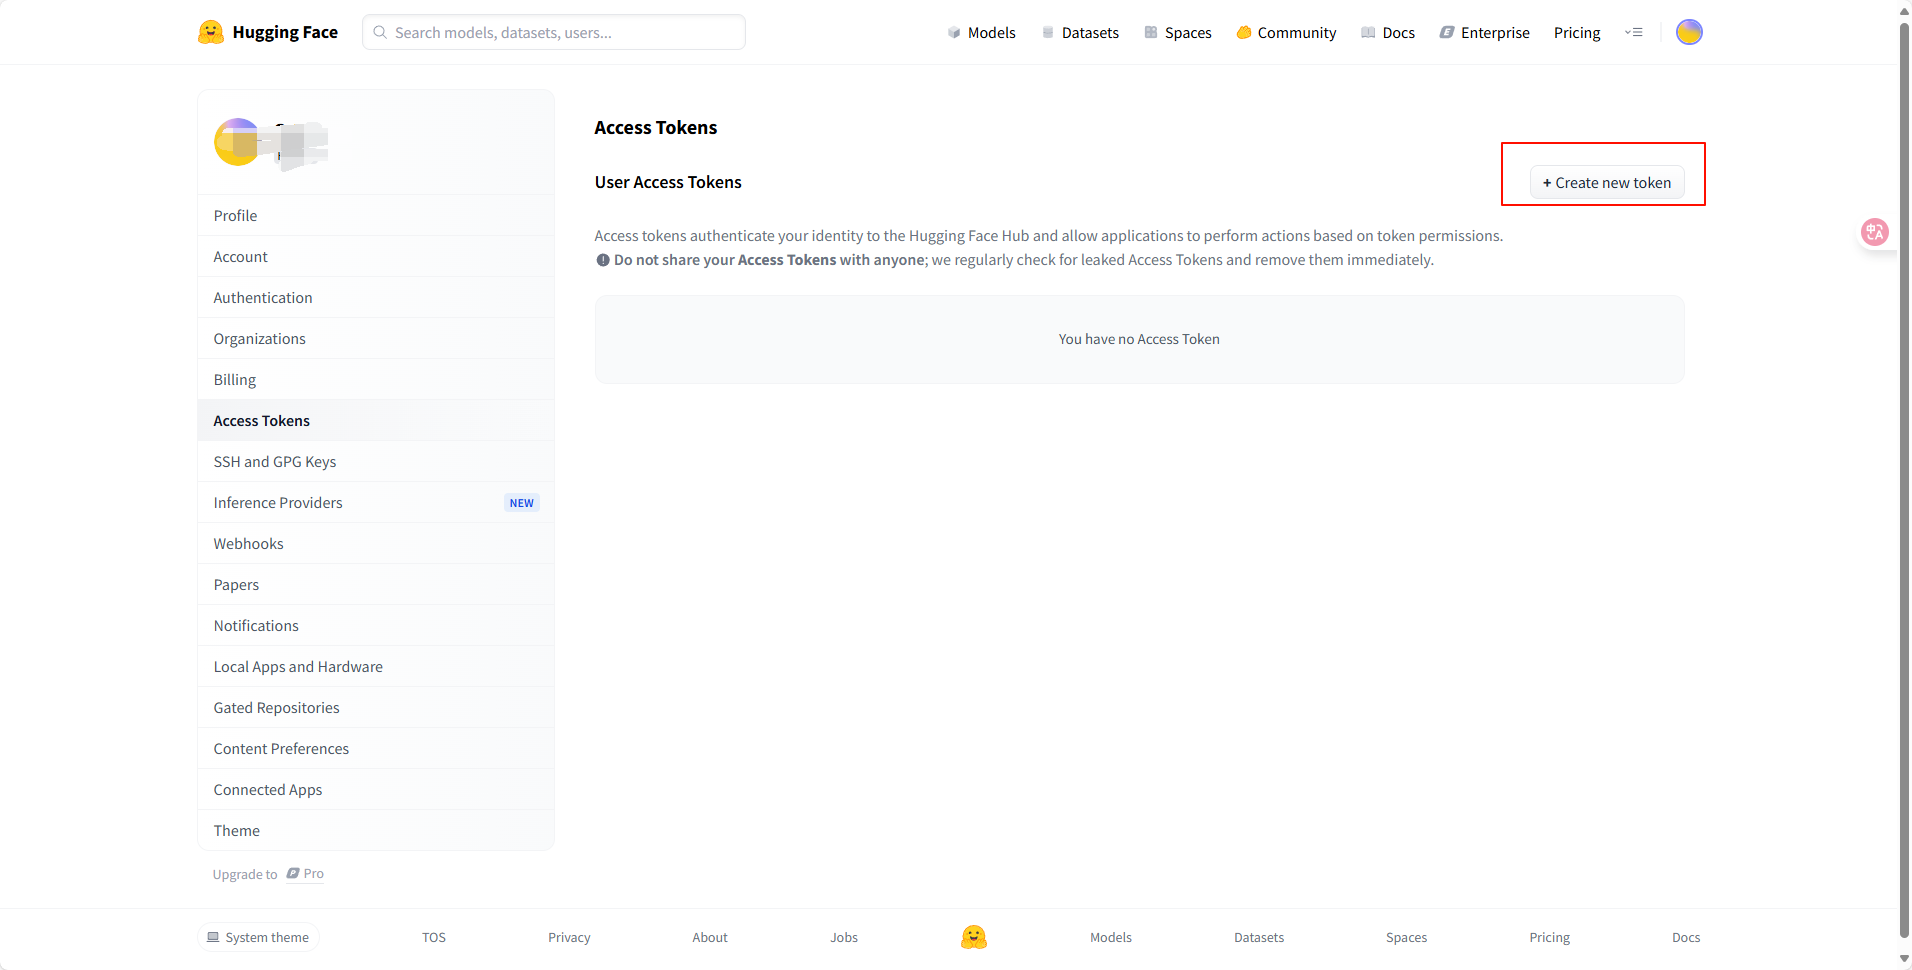
- 注意是”Read“

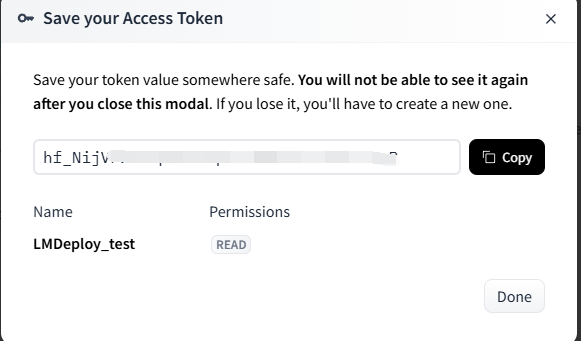
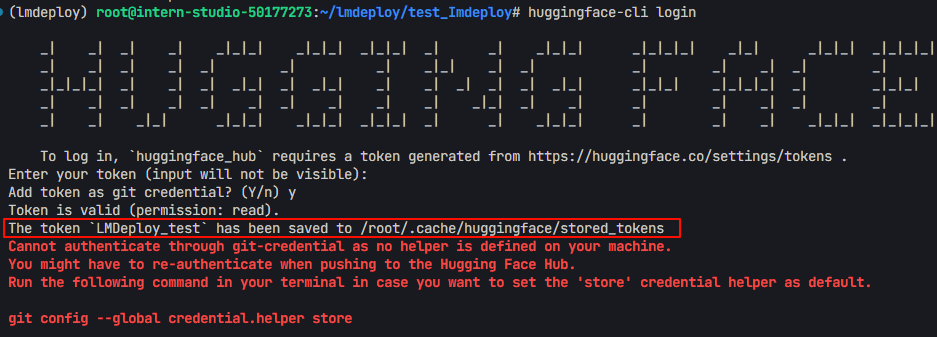
- 复制生成的 token,在终端输入:
huggingface-cli login - 再输入刚刚生成的token
- 输出结果如下,可知token被存储到了 “/root/.cache/huggingface/stored_tokens”
- 然后再次运行:
python test1.py
- 指定推理引擎
在构造 pipeline 时,如果没有指定使用 TurboMind 引擎或 PyTorch 引擎进行推理,默认优先使用 TurboMind 引擎,实际上,LMDeploy 将根据提供的检查点自动确定使用那种引擎。
VLM 推理(Visual Language Models)
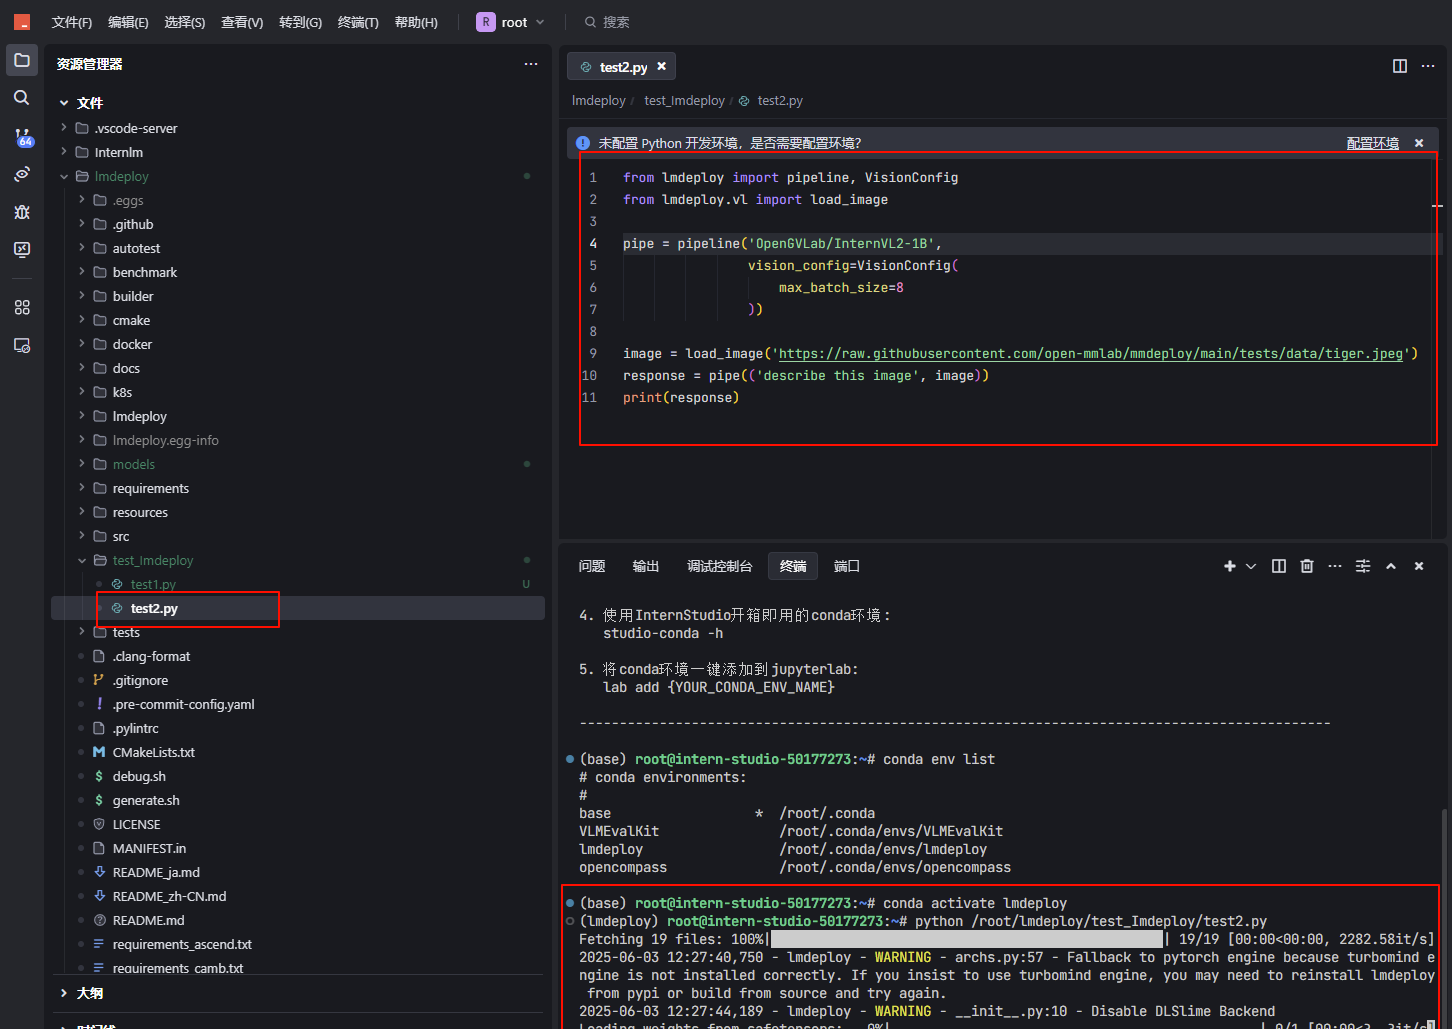
1. 新建一个test2.py文件 2. 将下列代码复制到.py文件中,然后运行一下from lmdeploy import pipeline, VisionConfig
from lmdeploy.vl import load_image
pipe = pipeline('OpenGVLab/InternVL2-1B',
vision_config=VisionConfig(
max_batch_size=8
))
image = load_image('https://raw.githubusercontent.com/open-mmlab/mmdeploy/main/tests/data/tiger.jpeg')
response = pipe(('describe this image', image))
print(response)
- 操作过程
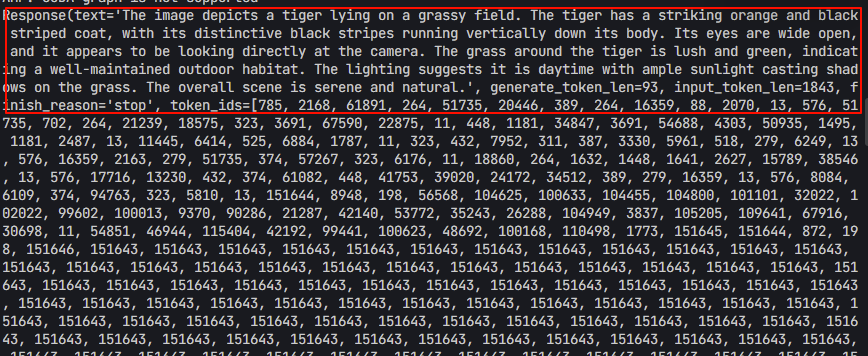
- 这是加载的照片

- 模型的运行结果(可以看到回答还是比较准确的)
大语言模型(LLMs)部署
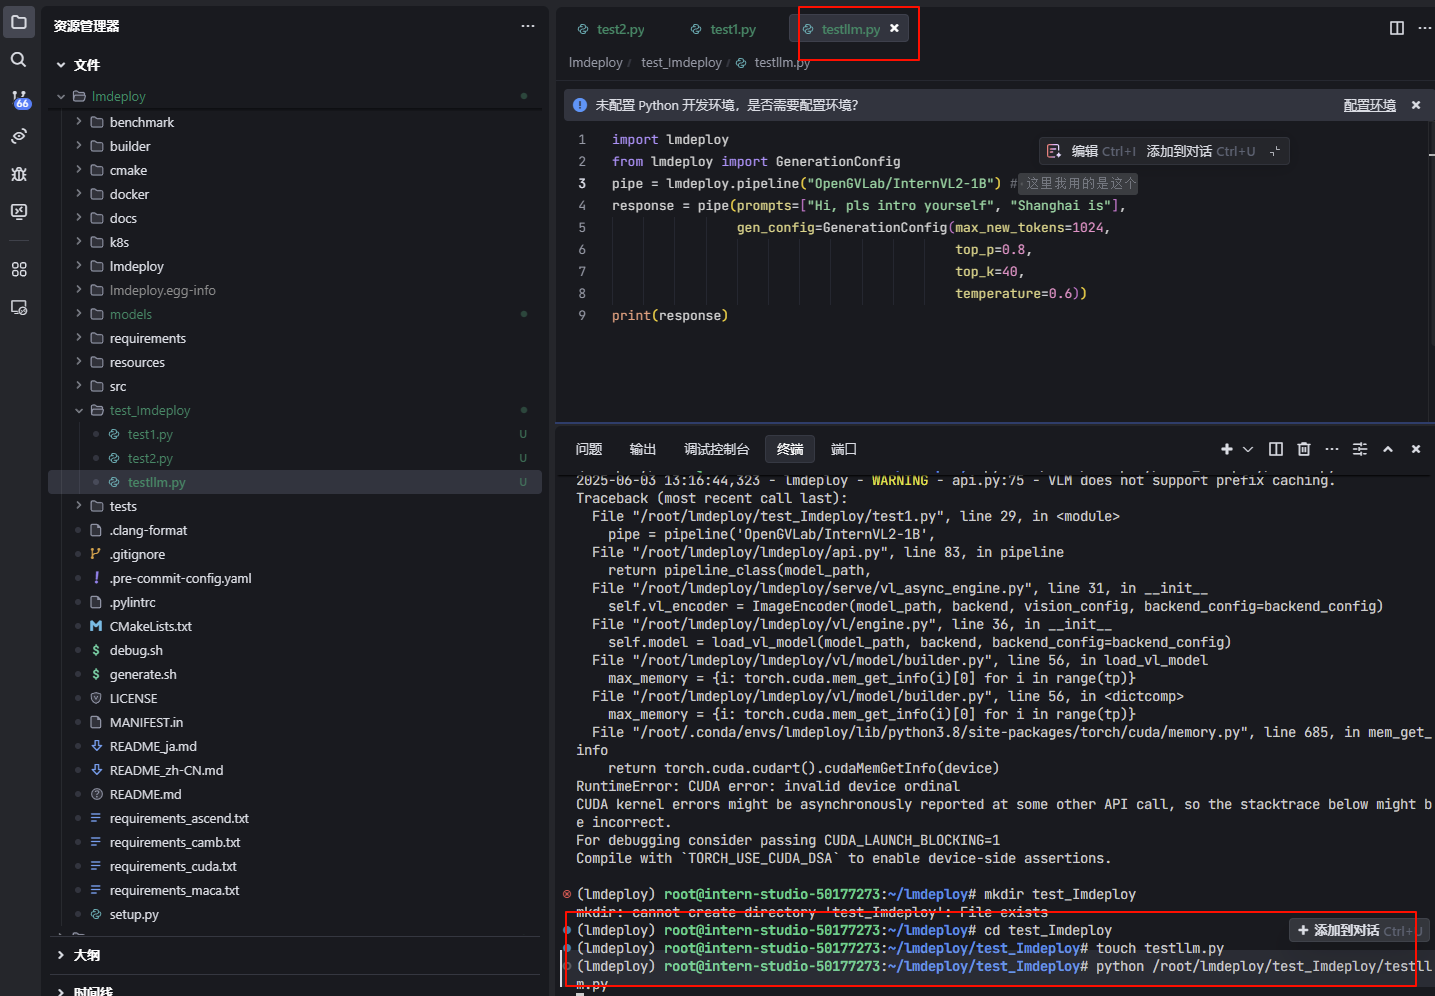
离线部署
1. 依次运行下列命令:mkdir test_Imdeploy
touch testLLM.py
- 将下列代码复制到“testLLM.py”里
import lmdeploy
from lmdeploy import GenerationConfig
# pipe = lmdeploy.pipeline("internlm/InternVL2-1B") # 注意这里的模型位置不太对
pipe = lmdeploy.pipeline("OpenGVLab/InternVL2-1B") # 这里我用的是这个
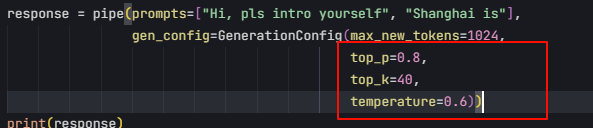
response = pipe(prompts=["Hi, pls intro yourself", "Shanghai is"],
gen_config=GenerationConfig(max_new_tokens=1024,
top_p=0.8,
top_k=40,
temperature=0.6))
print(response)
:::info
注意:
- LMDeploy的KV cache 策略对显存提出了较高的要求;LMDeploy在服务启动时就会预先一次性分配KV cache空间,如果加载模型出现OOM,可能需要考虑降低 cache_max_entry_count 的值,表示加载模型权重后 K/V 缓存占用的空闲 GPU 内存的比例。
- v0.2.0 <= lmdeploy <= v0.2.1,默认比例为 0.5,表示 GPU总显存的 50% 被分配给 k/v cache。lmdeploy > v0.2.1,分配策略改为从空闲显存中按比例为 k/v cache 开辟空间。默认比例值调整为 0.8。
:::
- 运行:
python testLLM.py
- 当你使用
lmdeploy.pipeline()加载 HuggingFace 上的模型(比如"OpenGVLab/InternVL2-1B"),系统会自动将模型缓存到你的用户目录下,默认路径如下:~/.cache/huggingface/hub/
具体结构大致是这样的:
~/.cache/huggingface/hub/
└── models--OpenGVLab--InternVL2-1B/
    └── snapshots/
        └── <revision_hash>/
            ├── config.json
            ├── model.safetensors
            ├── tokenizer_config.json
            └── ...
- 我们可以创建一个models文件夹,用于存储模型,并在运行python文件时指定模型下载位置。
touch models
HF_HOME=/root/lmdeploy/models python test1.py
- 注意使用本地路径时,仍使用HuggingFace Hub名称
pipe = lmdeploy.pipeline("OpenGVLab/InternVL2-1B")

- 运行结果

- 可以看到成功得到了两个回答:成功得到了两个回答:
- Prompt:
"Hi, pls intro yourself" - 回答:
I am an AI assistant whose name is InternVL, developed jointly by Shanghai AI Lab and SenseTime. - Prompt:
"Shanghai is" - 回答:
The capital of China.
- Prompt:
- 如果出现下列报错,则要先去Hugging Face申请 Token 【Token最好保存一下】 :

- 网址:https://huggingface.co/settings/tokens
- 点击”Create new token“
- 注意是”Read“
- 复制生成的 token,在终端输入:
huggingface-cli login - 再输入刚刚生成的token
- 输出结果如下,可知token被存储到了 “/root/.cache/huggingface/stored_tokens”

- 然后再次运行:
python test1.py
- 指定推理引擎
在构造 pipeline 时,如果没有指定使用 TurboMind 引擎或 PyTorch 引擎进行推理,默认优先使用 TurboMind 引擎,实际上,LMDeploy 将根据提供的检查点自动确定使用那种引擎。
- 我们刚刚并没有显示指定引擎

- 但由刚刚的输出可知,实际使用的是“PytorchEngineConfig推理引擎“
- 我们可以显示指定推理引擎
### TurbomindEngineConfig推理引擎

from lmdeploy import pipeline, TurbomindEngineConfig
pipe = pipeline('OpenGVLab/InternVL2-1B',
                backend_config=TurbomindEngineConfig(
                    max_batch_size=32,
                    enable_prefix_caching=True,
                    cache_max_entry_count=0.8,
                    session_len=8192,
                ))


### PytorchEngineConfig推理引擎
from lmdeploy import pipeline, PytorchEngineConfig
pipe = pipeline('OpenGVLab/InternVL2-1B',
                backend_config=PytorchEngineConfig(
                    max_batch_size=32,
                    enable_prefix_caching=True,
                    cache_max_entry_count=0.8,
                    session_len=8192,
                ))

- 安装TurbomindEngineConfig推理引擎的方法
- 注意:
:::info
- LMDeploy的KV cache 策略对显存提出了较高的要求;LMDeploy在服务启动时就会预先一次性分配KV cache空间,如果加载模型出现OOM,可能需要考虑降低 cache_max_entry_count 的值,表示加载模型权重后 K/V 缓存占用的空闲 GPU 内存的比例。
- v0.2.0 <= lmdeploy <= v0.2.1,默认比例为 0.5,表示 GPU总显存的 50% 被分配给 k/v cache。lmdeploy > v0.2.1,分配策略改为从空闲显存中按比例为 k/v cache 开辟空间。默认比例值调整为 0.8。
:::
设置多卡并行
:::info TurbomindEngineConfig和PytorchEngineConfig的参数** tp是**设置GPU并行的,解释如下:tp (int): the number of GPU cards used in tensor parallelism, default to 1
:::
from lmdeploy import pipeline, TurbomindEngineConfig
from lmdeploy import pipeline, PytorchEngineConfig

### TurbomindEngineConfig推理引擎
pipe = pipeline('OpenGVLab/InternVL2-1B',
                backend_config=TurbomindEngineConfig(
                    tp=2,
                    max_batch_size=32,
                    enable_prefix_caching=True,
                    cache_max_entry_count=0.8,
                    session_len=8192,
                ))

### PytorchEngineConfig推理引擎
pipe = pipeline('OpenGVLab/InternVL2-1B',
                backend_config=PytorchEngineConfig(
                    tp=2,
                    max_batch_size=32,
                    enable_prefix_caching=True,
                    cache_max_entry_count=0.8,
                    session_len=8192,
                ))

response = pipe(prompts=["Hi, pls intro yourself", "Shanghai is"],
                gen_config=GenerationConfig(max_new_tokens=1024,
                                            top_p=0.8,
                                            top_k=40,
                                            temperature=0.6))
print(response)
- 由于我只有一张卡,所以这个就不演示了
生成核心参数介绍
:::info 常见解码策略:- 贪心解码(Greedy Decoding):直接选择概率最高的单词。这种方法简单高效,但是可能会导致生成的文本过于单调和重复。
- 随机采样(Random Sampling):按照概率分布随机选择一个单词。这种方法可以增加生成的多样性,但是可能会导致生成的文本不连贯和无意义。
- 集束搜索(Beam Search):维护一个大小为 k 的候选序列集合,每一步从每个候选序列的概率分布中选择概率最高的 k 个单词,然后保留总概率最高的 k 个候选序列。这种方法可以平衡生成的质量和多样性,但是可能会导致生成的文本过于保守和不自然;由于需要维护k个序列,开销比较大。
以上方法都有各自的问题,而** top-k 采样和 top-p **采样是介于贪心解码和随机采样之间的方法,也是目前大模型解码策略中常用的方法。
:::
- 下面将分别介绍** top-k 采样、 top-p 采样和Temperature采样的实现代码**
- 在使用中我们直接通过 直接用
**lmdeploy**的**GenerationConfig**设置 。
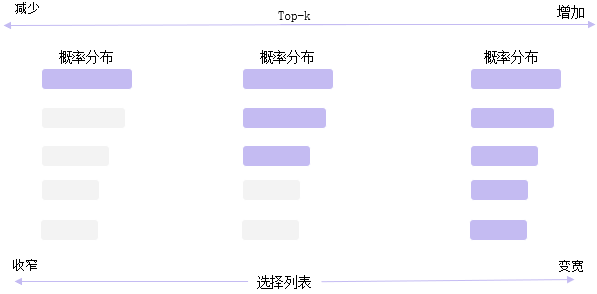
Top-k采样
:::info Top-k: 在每一步,只从概率**最高的 k 个单词中进行随机采样**,而不考虑其他低概率的单词。缺点:
- 结果对K参数比较敏感,生成的结果更关注高频词,多样性丢失,可能会导致生成的回复过于简单,趋同性高;
- 回复可能缺乏个性,更偏向“安全”回复
- 每一步只关注当前概率高的词,可能会导致生成的文本不符合常识或逻辑;
:::
import torch
from labml_nn.sampling import Sampler

# Top-k Sampler
class TopKSampler(Sampler):
    # k is the number of tokens to pick
    # sampler is the sampler to use for the top-k tokens
    # sampler can be any sampler that takes a logits tensor as input and returns a token tensor; e.g. `TemperatureSampler`.
    def __init__(self, k: int, sampler: Sampler):
        self.k = k
        self.sampler = sampler

    # Sample from logits
    def __call__(self, logits: torch.Tensor):
        # New logits filled with −∞; i.e. zero probability
        zeros = logits.new_ones(logits.shape) * float('-inf')
        # Pick the largest k logits and their indices
        values, indices = torch.topk(logits, self.k, dim=-1)
        # Set the values of the top-k selected indices to actual logits.
        # Logits of other tokens remain −∞
        zeros.scatter_(-1, indices, values)
        # Sample from the top-k logits with the specified sampler.
        return self.sampler(zeros)
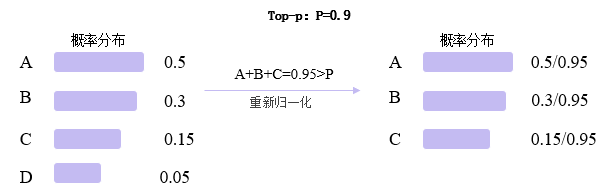
Top-P
:::info Top-p: 在每一步,只从** 累积概率**超过某个阈值 p 的最小单词集合中进行随机采样,而不考虑其它低概率的单词。这种方法也被称为核采样(nucleus sampling),因为它只关注概率分布的核心部分,而忽略了尾部部分。缺点:
- 参数敏感性,p值调优比较难
- Top-p 仅依赖概率分布筛选候选词,但缺乏对已生成内容的显式约束(如重复惩罚机制),可能导致重复片段,倾向于重复高频词
- 生成结果偏向“安全”选项,牺牲个性。
:::
import torch
from torch import nn

from labml_nn.sampling import Sampler


class NucleusSampler(Sampler):
    """
    ## Nucleus Sampler
    """
    def __init__(self, p: float, sampler: Sampler):
        """
        :param p: is the sum of probabilities of tokens to pick $p$
        :param sampler: is the sampler to use for the selected tokens
        """
        self.p = p
        self.sampler = sampler
        # Softmax to compute $P(x_i | x_{1:i-1})$ from the logits
        self.softmax = nn.Softmax(dim=-1)

    def __call__(self, logits: torch.Tensor):
        """
        Sample from logits with Nucleus Sampling
        """

        # Get probabilities $P(x_i | x_{1:i-1})$
        probs = self.softmax(logits)

        # Sort probabilities in descending order
        sorted_probs, indices = torch.sort(probs, dim=-1, descending=True)

        # Get the cumulative sum of probabilities in the sorted order
        cum_sum_probs = torch.cumsum(sorted_probs, dim=-1)

        # Find the cumulative sums less than $p$.
        nucleus = cum_sum_probs < self.p

        # Prepend ones so that we add one token after the minimum number
        # of tokens with cumulative probability less that $p$.
        nucleus = torch.cat([nucleus.new_ones(nucleus.shape[:-1] + (1,)), nucleus[..., :-1]], dim=-1)

        # Get log probabilities and mask out the non-nucleus
        sorted_log_probs = torch.log(sorted_probs)
        sorted_log_probs[~nucleus] = float('-inf')

        # Sample from the sampler
        sampled_sorted_indexes = self.sampler(sorted_log_probs)

        # Get the actual indexes
        res = indices.gather(-1, sampled_sorted_indexes.unsqueeze(-1))

        #
        return res.squeeze(-1)
:::info
如果 top-k 和top-p 同时启用,则top-p在 top-k之后起作用。
:::
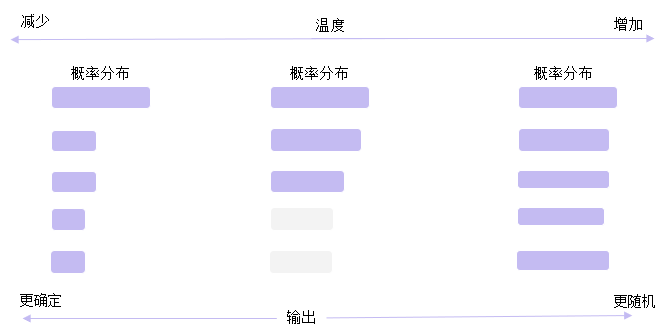
**Temperature采样**
:::info **Temperature采样: 调节输出概率分布的参数**高temperature对差异进行平滑,低temperature对差异进行放大
:::
设模型的原始输出 logits(未归一化的预测值)为$ z={z_1,z_2,…,z_v} , 词 汇 表 大 小 为 , 词汇表大小为 ,词汇表大小为 v $ ,温度参数为 $ \tau $
$ P(z_i)=\frac{e{z_i/\tau}}{\sum_{j=1}ve^{z_j/\tau}} $
$ \tau 控 制 分 布 的 尖 锐 程 度 , 控制分布的尖锐程度, 控制分布的尖锐程度, \tau $接近0,概率分布趋向于贪婪选择(仅最高概率的 token 概率接近 1,其余接近 0)
$ \tau $趋近无穷大,概率分布趋向于均匀分布(所有 token 概率接近相等)
import torch
from torch.distributions import Categorical

from labml_nn.sampling import Sampler


class TemperatureSampler(Sampler):
    """
    ## Sampler with Temperature
    """
    def __init__(self, temperature: float = 1.0):
        """
        :param temperature: is the temperature to sample with
        """
        self.temperature = temperature

    def __call__(self, logits: torch.Tensor):
        """
        Sample from logits
        """

        # Create a categorical distribution with temperature adjusted logits
        dist = Categorical(logits=logits / self.temperature)

        # Sample
        return dist.sample()
部署类OpenAI 服务
使用 lmdeploy cli 工具
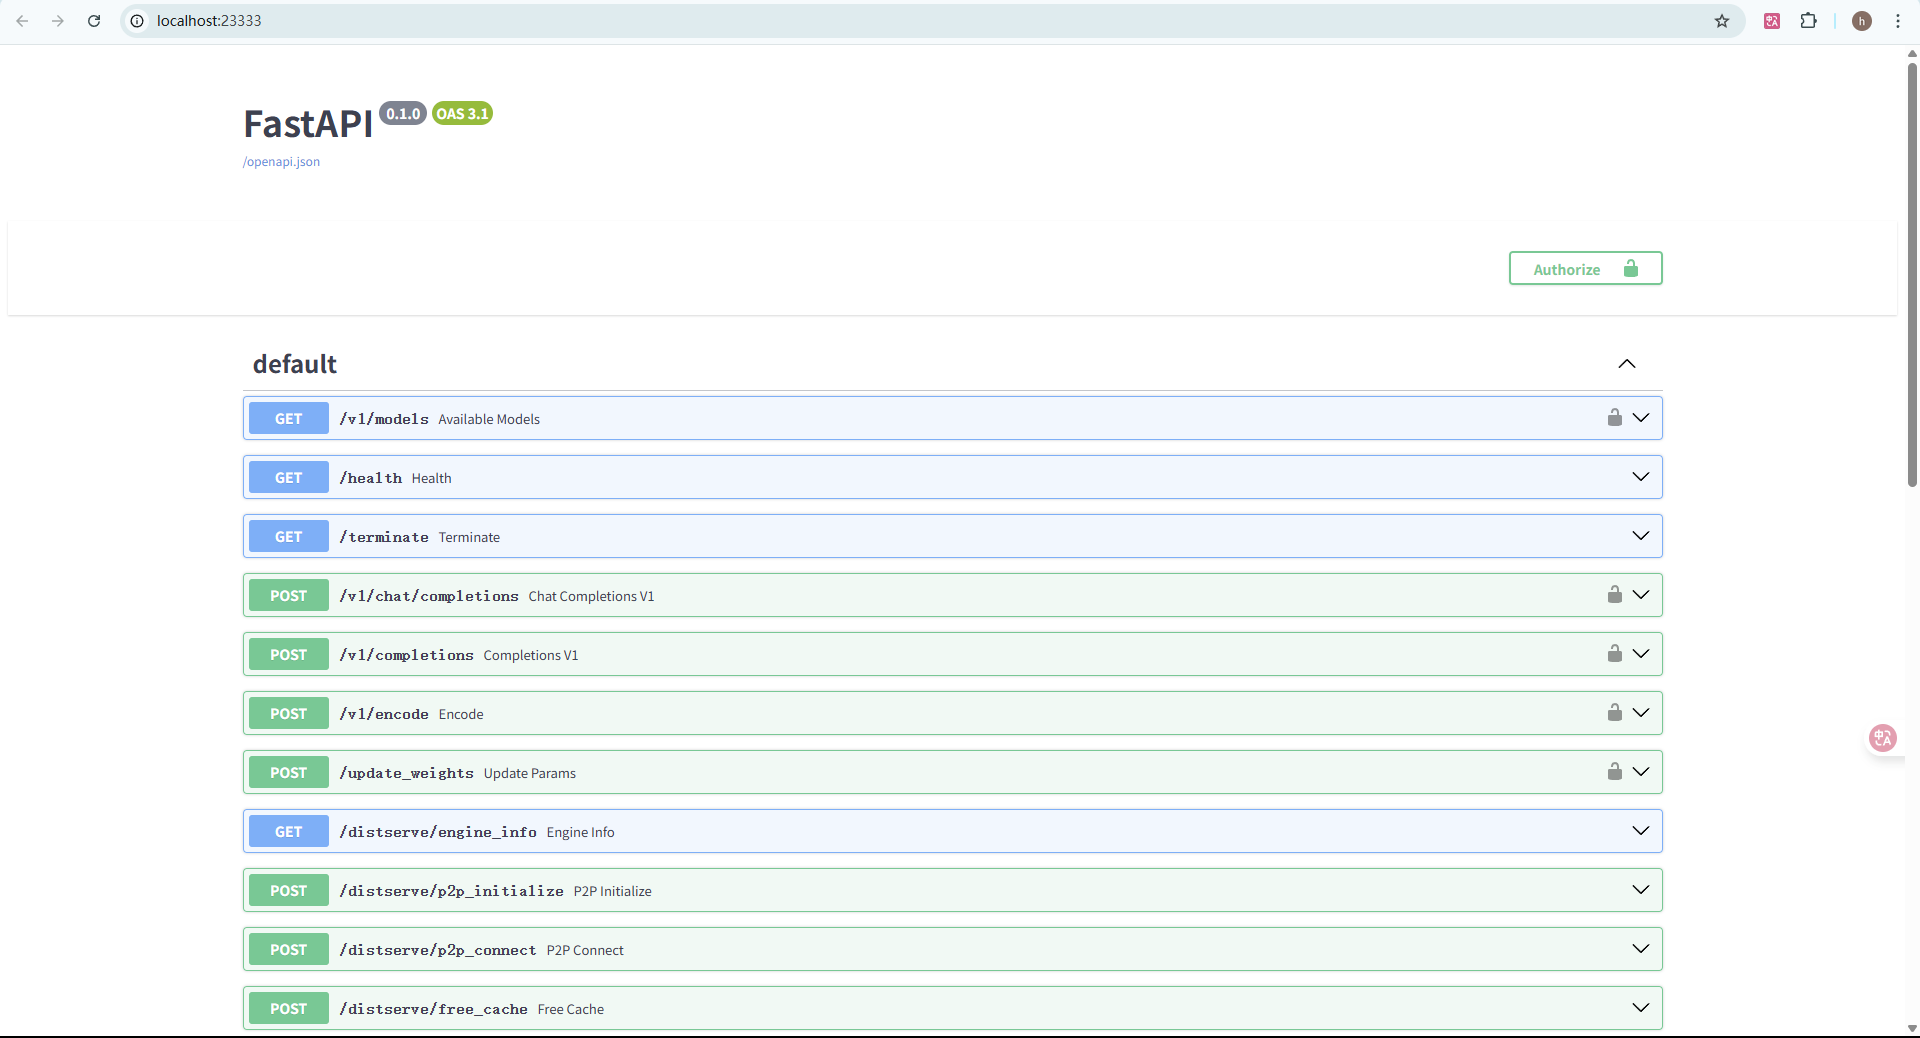
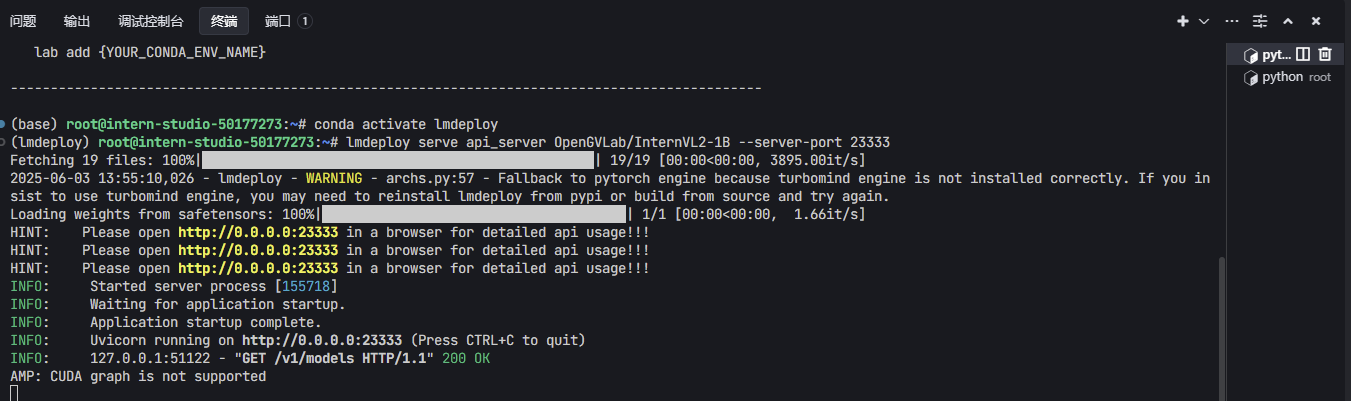
```python lmdeploy serve api_server OpenGVLab/InternVL2-1B --server-port 23333 ```- 在终端运行一下
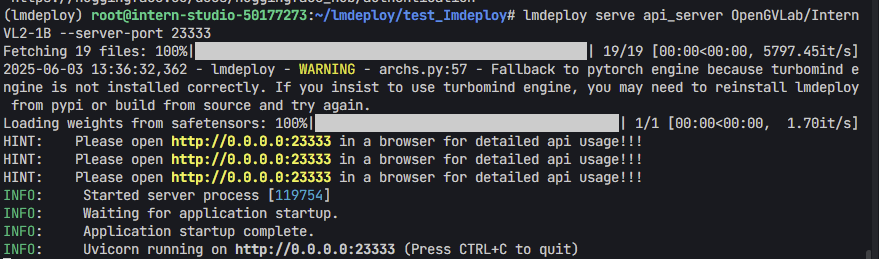
- 点击打开链接查看
使用 docker
1. 安装docker# 更新包管理器
apt update
# 安装 Docker
apt install -y docker.io
# 启动 Docker 服务
which docker
docker --version
- 运行下列命令
docker run --runtime nvidia --gpus all \
    -v ~/.cache/huggingface:/root/.cache/huggingface \
    --env "HUGGING_FACE_HUB_TOKEN=<secret>" \
    -p 23333:23333 \
    --ipc=host \
    openmmlab/lmdeploy:latest \
    lmdeploy serve api_server OpenGVLab/InternVL2-1B
使用类openai方式
不启用权限鉴别(api-key)
```python # 1. 启动服务lmdeploy serve api_server OpenGVLab/InternVL2-1B --server-port 23333 --api-keys “token”
2. 访问
from openai import OpenAI
client = OpenAI(
api_key=‘none’,# 若未启用鉴权,可填任意值(如 “none”)
base_url=“http://0.0.0.0:23333/v1”
)
model_name = client.models.list().data[0].id
response = client.chat.completions.create(
model=model_name,
messages=[
{“role”: “system”, “content”: “You are a helpful assistant.”},
{“role”: “user”, “content”: " provide three suggestions about time management"},
],
temperature=0.8,
top_p=0.8
)
print(response)
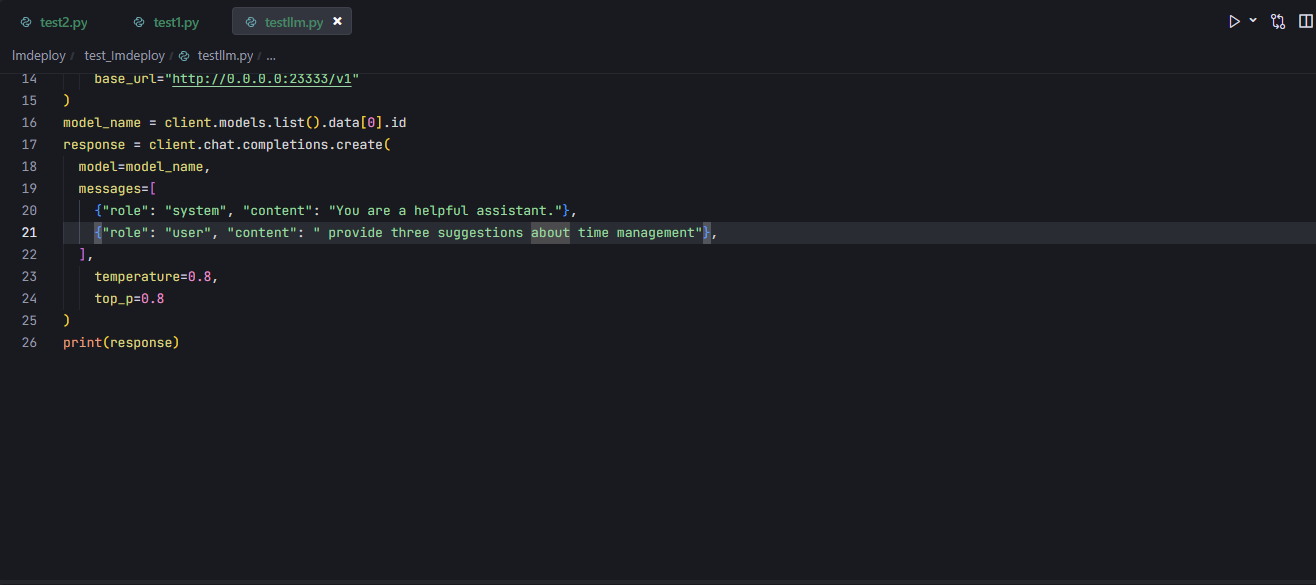
+ 先启动api服务`lmdeploy serve api_server OpenGVLab/InternVL2-1B --server-port 23333`
+ 然后在另一个终端运行上述代码,可以看到返回了内容

<h4 id="Nz74c"> **<font style="background-color:rgba(255,246,122,0.8);">启用权限鉴别(api-key)</font>**</h4>
```python
# 1. 启动服务
# lmdeploy serve api_server OpenGVLab/InternVL2-1B --server-port 23333 --api-keys "token"
# 2. 授权访问
from openai import OpenAI
client = OpenAI(
api_key='token',
base_url="http://0.0.0.0:23333/v1"
)
model_name = client.models.list().data[0].id
response = client.chat.completions.create(
model=model_name,
messages=[
{"role": "system", "content": "You are a helpful assistant."},
{"role": "user", "content": " provide three suggestions about time management"},
],
temperature=0.8,
top_p=0.8
)
print(response)
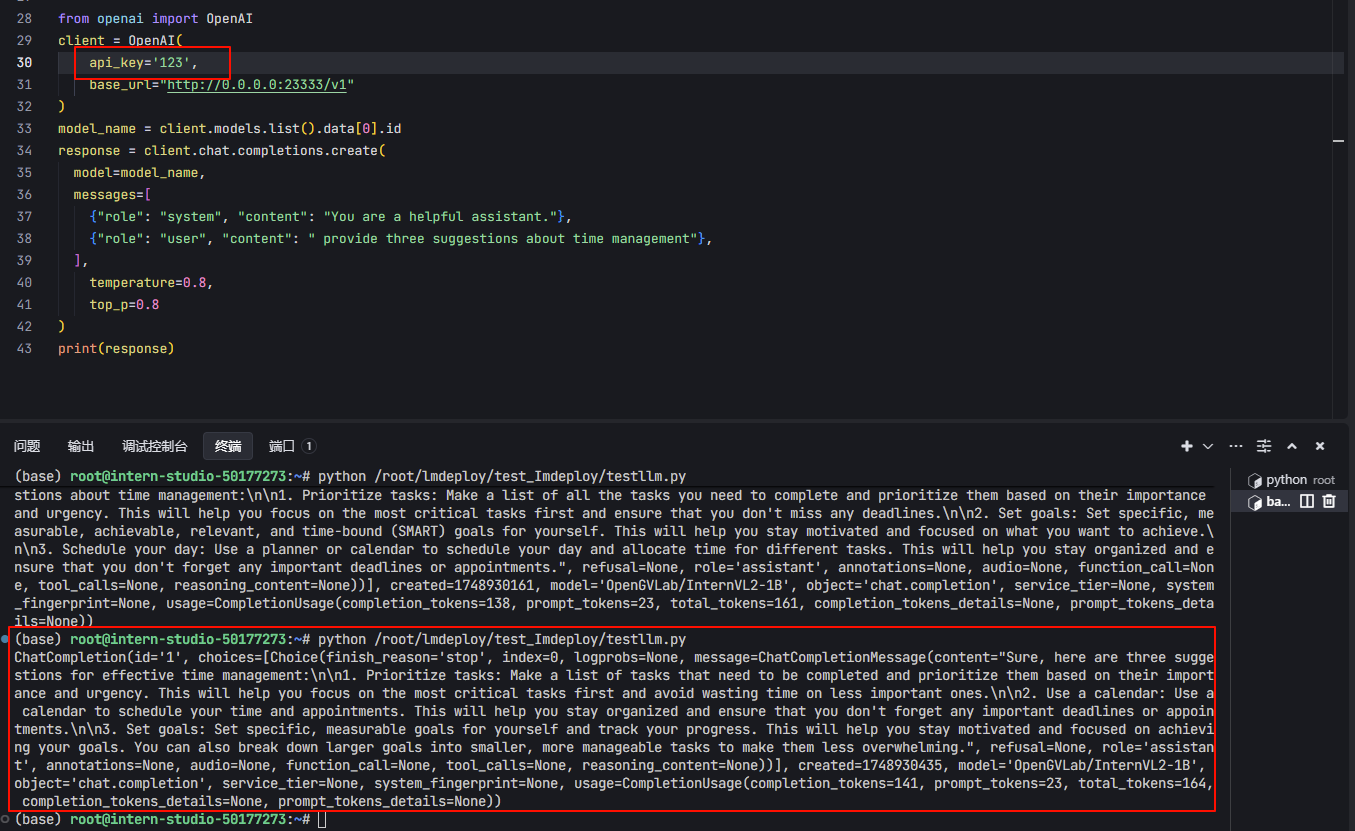
- 如下图,我设置的api-keys为“123”

- 然后代码中字段api_key =“123”。
- 重新运行一下代码,可以看到返回了内容
**异步访问(api-key)**
```python # 1. 启动服务lmdeploy serve api_server OpenGVLab/InternVL2-1B --server-port 23333 --api-keys “token”
2. 授权访问
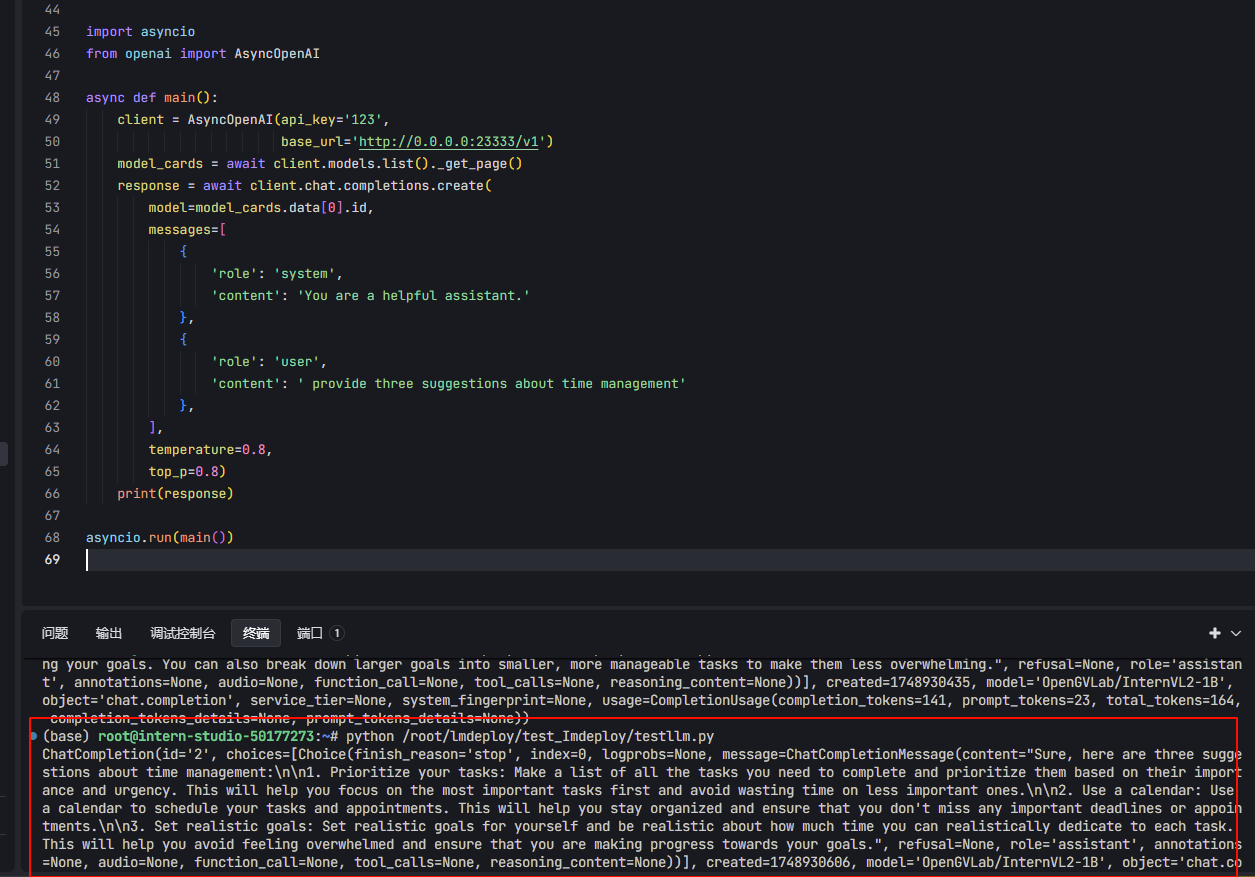
异步访问(api-key)
import asyncio
from openai import AsyncOpenAI
async def main():
client = AsyncOpenAI(api_key=‘token’,
base_url=‘http://0.0.0.0:23333/v1’)
model_cards = await client.models.list()._get_page()
response = await client.chat.completions.create(
model=model_cards.data[0].id,
messages=[
{
‘role’: ‘system’,
‘content’: ‘You are a helpful assistant.’
},
{
‘role’: ‘user’,
‘content’: ’ provide three suggestions about time management’
},
],
temperature=0.8,
top_p=0.8)
print(response)
asyncio.run(main())
+ 可以看到运行成功了
<h2 id="Jdq9Y">APIClient 接口</h2>
:::info
这是 **lmdeploy 自己提供的轻量级客户端**,和官方 OpenAI SDK 不同,它是为 **lmdeploy 内部 OpenAI API 服务做专属优化的工具**,支持**流式输出**、**无需依赖 OpenAI SDK**。
:::
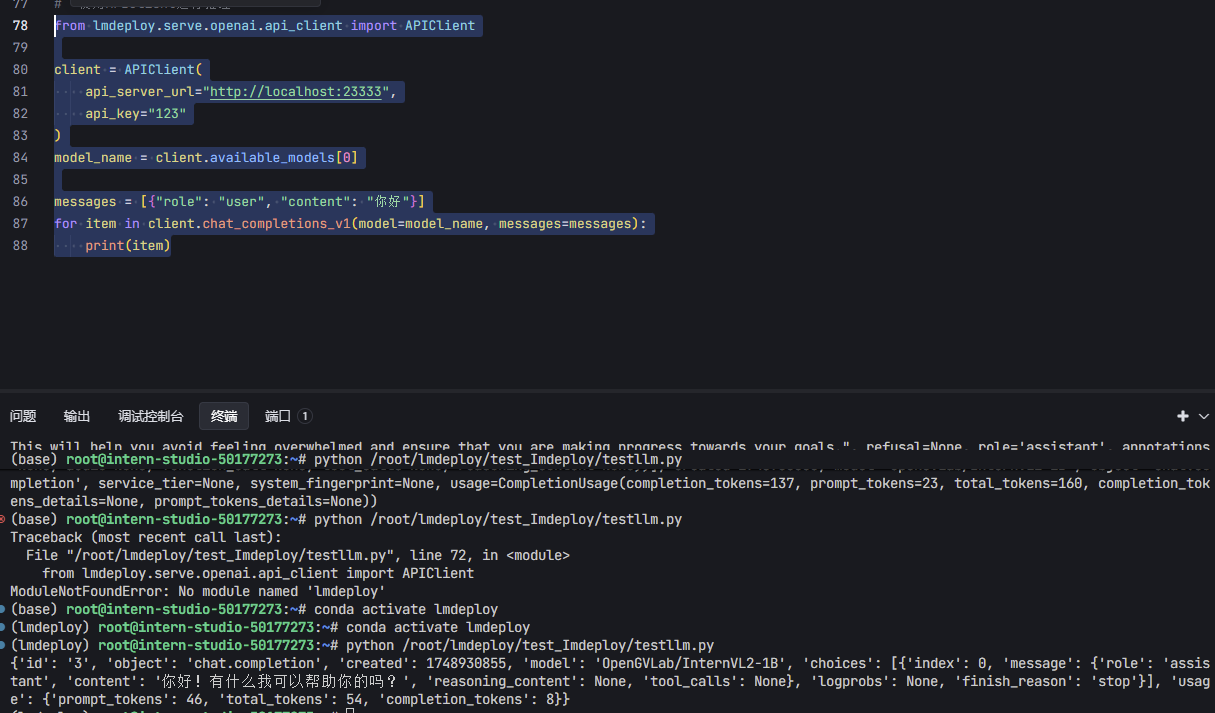
```python
# 1. 启动服务
# lmdeploy serve api_server OpenGVLab/InternVL2-1B --server-port 23333 --api-keys "token"
# 2. 使用APIClient进行推理
from lmdeploy.serve.openai.api_client import APIClient
client = APIClient(
api_server_url="http://localhost:23333",
api_key="token"
)
model_name = client.available_models[0]
messages = [{"role": "user", "content": "你好"}]
for item in client.chat_completions_v1(model=model_name, messages=messages):
print(item)
- 运行结果
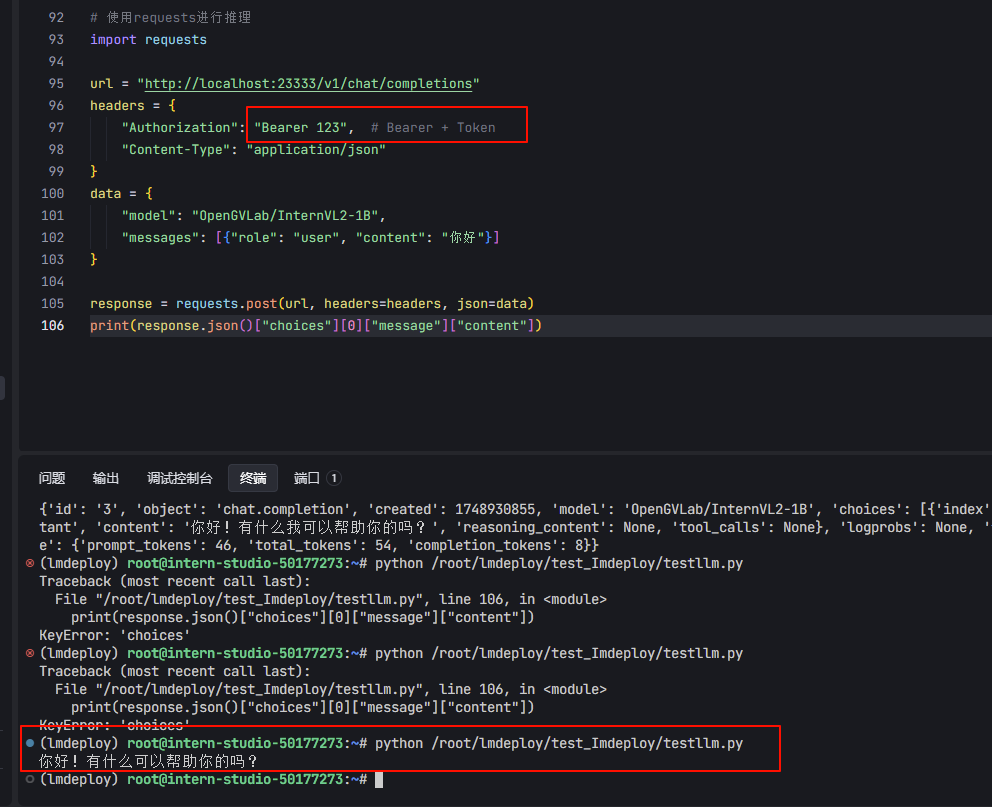
Requests调用
```python # 1. 启动服务lmdeploy serve api_server OpenGVLab/InternVL2-1B --server-port 23333 --api-keys “token”
2. request发送请求
import requests
url = “http://localhost:23333/v1/chat/completions”
headers = {
“Authorization”: “Bearer token”, # Bearer + Token
“Content-Type”: “application/json”
}
data = {
“model”: “InternVL2-1B”,
“messages”: [{“role”: “user”, “content”: “你好”}]
}
response = requests.post(url, headers=headers, json=data)
print(response.json()[“choices”][0][“message”][“content”])
+ 注意` "Authorization": "Bearer token", # Bearer + Token`
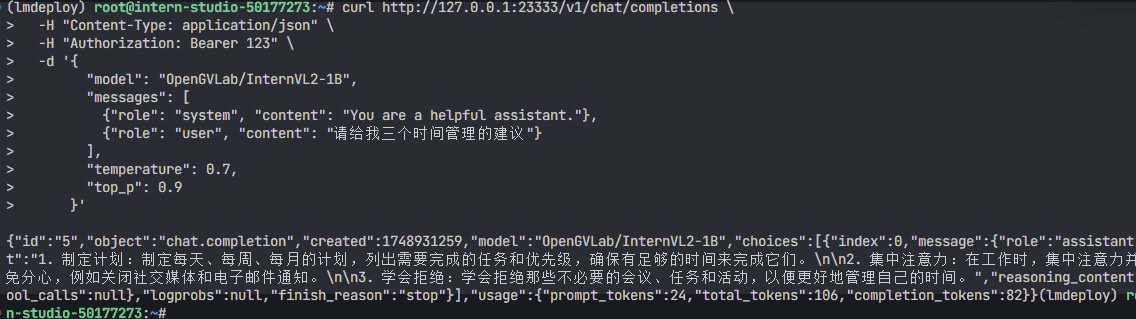
<h2 id="W9abK">使用CURL命令</h2>
```python
curl http://127.0.0.1:23333/v1/chat/completions \
-H "Content-Type: application/json" \
-H "Authorization: Bearer 123" \
-d '{
"model": "OpenGVLab/InternVL2-1B",
"messages": [
{"role": "system", "content": "You are a helpful assistant."},
{"role": "user", "content": "请给我三个时间管理的建议"}
],
"temperature": 0.7,
"top_p": 0.9
}'
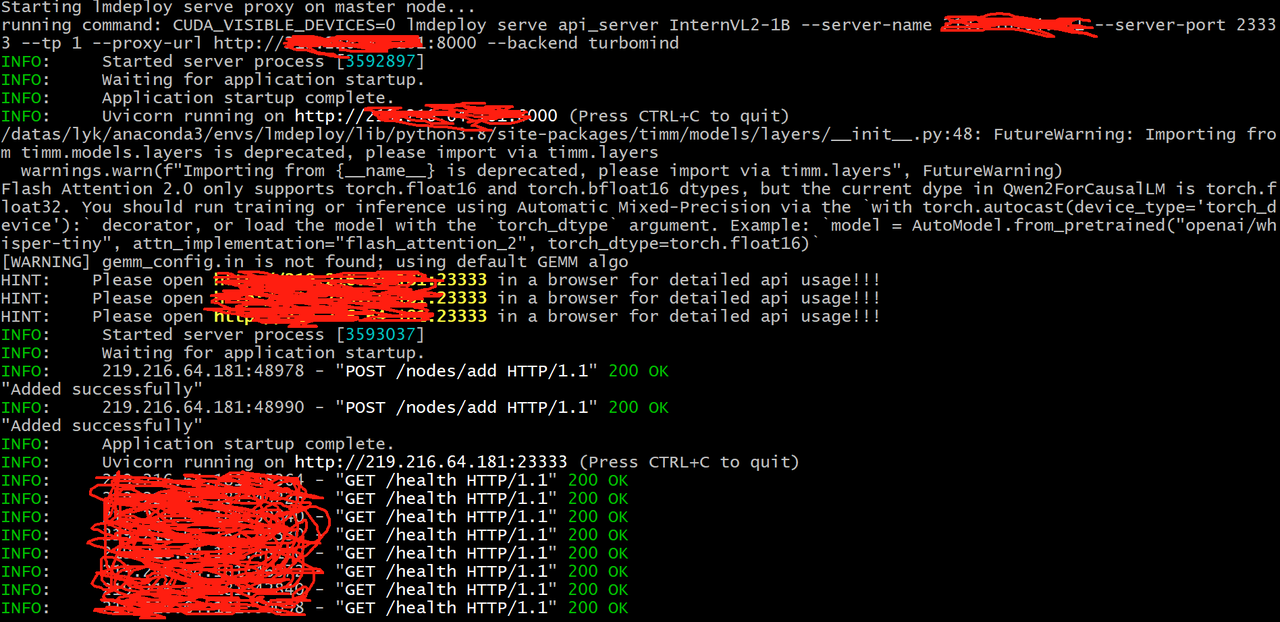
多机多卡部署
:::info 因为不需要子节点间的通信,所以并不需要用户指定 torchrun 的 --nnodes 等参数,只要能保证每个节点执行一次单节点的 torchrun 就行。步骤:
step1:启动服务同时指定代理地址
step2:在所有的节点启动服务
step3:向代理服发送请求进行推理
:::
import os
import socket
from typing import List, Literal

import fire


def get_host_ip():
    try:
        s = socket.socket(socket.AF_INET, socket.SOCK_DGRAM)
        s.connect(('8.8.8.8', 80))
        ip = s.getsockname()[0]
    finally:
        s.close()
    return ip


def main(model_path: str,
         tp: int = 1,
         proxy_url: str = 'http://xxx.xxx.xxxx.xxx:8000',
         port: int = 23333,
         backend: Literal['turbomind', 'pytorch'] = 'pytorch'):
    local_rank = int(os.environ.get('LOCAL_RANK', -1))
    world_size = int(os.environ.get('WORLD_SIZE', -1))
    local_ip = get_host_ip()
    if isinstance(port, List):
        assert len(port) == world_size
        port = port[local_rank]
    else:
        port += local_rank * 10
    if (world_size - local_rank) % tp == 0:
        rank_list = ','.join([str(local_rank + i) for i in range(tp)])
        command = f'CUDA_VISIBLE_DEVICES={rank_list} lmdeploy serve api_server {model_path} '\
                  f'--server-name {local_ip} --server-port {port} --tp {tp} '\
                  f'--proxy-url {proxy_url} --backend {backend}'
        print(f'running command: {command}')
        os.system(command)


if __name__ == '__main__':
    fire.Fire(main)
MASTER_IP="xxx.xxx.xxxx.xxx" ## 换为自己的代理IP
PROXY_PORT=8000

if [ "${MLP_ROLE_INDEX}" -eq 0 ]; then
    echo "Starting lmdeploy serve proxy on master node..."
    lmdeploy serve proxy --server-name ${MASTER_IP} --server-port ${PROXY_PORT} &
else
    echo "Not starting lmdeploy serve proxy on worker node ${MLP_ROLE_INDEX}."
fi

### 根据自己情况指定GPU
CUDA_VISIBLE_DEVICES=5 torchrun --nproc_per_node=1 \
script.py \
InternVL2-1B 1 http://${MASTER_IP}:${PROXY_PORT}

echo "Host IP addresses:"
hostname -I
:::info
以上script.py和bash.sh文件在每个机上都保留一份,在每个机器上执行bash.sh脚本,服务启动后,可以向代理服务发送请求进行推理
:::
MLP_ROLE_INDEX=0 bash bash.sh
MLP_ROLE_INDEX=1 bash bash.sh

:::info
部署成功后,可以向代理IP发送请求进行推理
**指定分发策略**
可通过--strategy 参数指定分发策略lmdeploy serve proxy --server-name ${MASTER_IP} --server-port ${PROXY_PORT} –strategy "min_expected_latency"
**代理服务目前的分发策略如下:**
**random:** 根据用户提供的各个 api_server 节点的处理请求的能力,进行有权重的随机。处理请求的吞吐量越大,就越有可能被分配。部分节点没有提供吞吐量,将按照其他节点的平均吞吐量对待。min_expected_latency: 根据每个节点现有的待处理完的请求,和各个节点吞吐能力,计算预期完成响应所需时间,时间最短的将被分配。未提供吞吐量的节点,同上。
min_observed_latency: 根据每个节点过去一定数量的请求,处理完成所需的平均用时,用时最短的将被分配。
:::
- 没有多卡多机,就不运行了
使用WebUI
启动 API Server(带 TurboMind 引擎)
```bash # 1. 启动 API Server(支持 Turbomind) # ApiServer+Turbomind api_server => AsyncEngine => TurboMind lmdeploy serve api_server InternVL2-1B --server-name 0.0.0.0 --server-port 23333 --tp 1 ```启动 Gradio 可视化界面(连接 API Server)
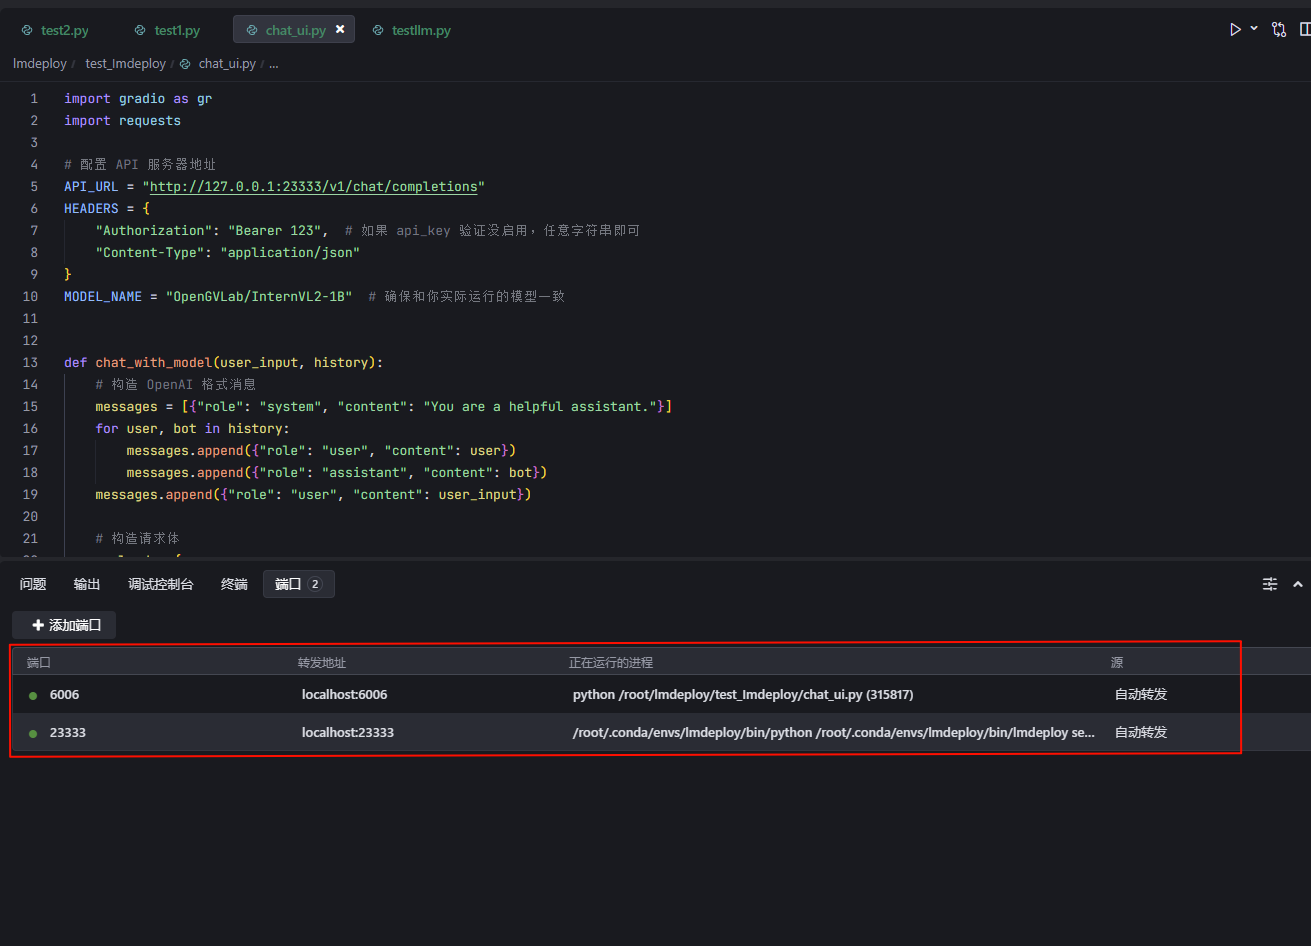
1. 运行`lmdeploy serve api_server OpenGVLab/InternVL2-1B --server-port 23333 --api-keys "123"`,启动LMDeploy API Server ,监听 23333端口 2. 复制下面代码到.py文件import gradio as gr
import requests
# 配置 API 服务器地址
API_URL = "http://127.0.0.1:23333/v1/chat/completions"
HEADERS = {
"Authorization": "Bearer 123", # 如果 api_key 验证没启用,任意字符串即可
"Content-Type": "application/json"
}
MODEL_NAME = "OpenGVLab/InternVL2-1B" # 确保和你实际运行的模型一致
def chat_with_model(user_input, history):
# 构造 OpenAI 格式消息
messages = [{"role": "system", "content": "You are a helpful assistant."}]
for user, bot in history:
messages.append({"role": "user", "content": user})
messages.append({"role": "assistant", "content": bot})
messages.append({"role": "user", "content": user_input})
# 构造请求体
payload = {
"model": MODEL_NAME,
"messages": messages,
"temperature": 0.7,
"top_p": 0.9
}
# 调用 API
try:
response = requests.post(API_URL, headers=HEADERS, json=payload)
result = response.json()
reply = result["choices"][0]["message"]["content"]
except Exception as e:
reply = f"[ERROR] 请求失败:{str(e)}"
return reply
# Gradio UI 构建
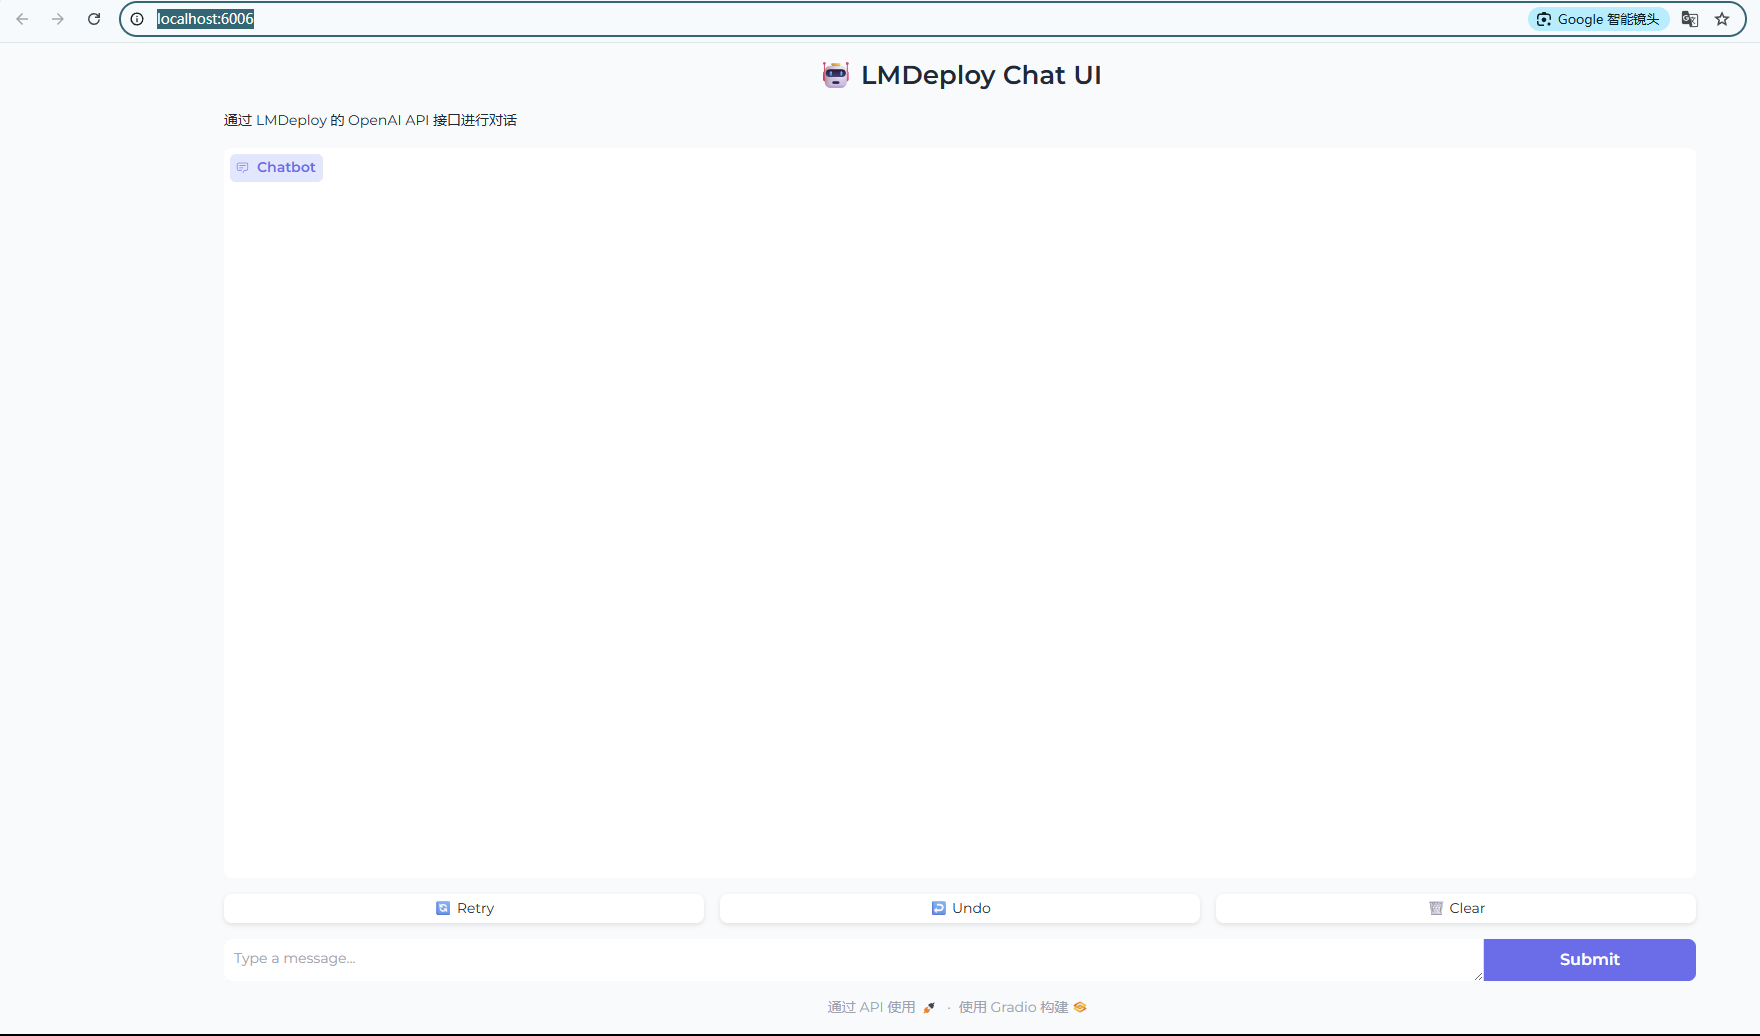
chatbot = gr.ChatInterface(
fn=chat_with_model,
title="🤖 LMDeploy Chat UI",
description="通过 LMDeploy 的 OpenAI API 接口进行对话",
theme="soft",
)
# 启动界面
if __name__ == "__main__":
chatbot.launch(server_name="0.0.0.0", server_port=6006)
- 运行代码
- 查看运行情况
- 打开链接“http://localhost:6006/”,可以看到UI界面
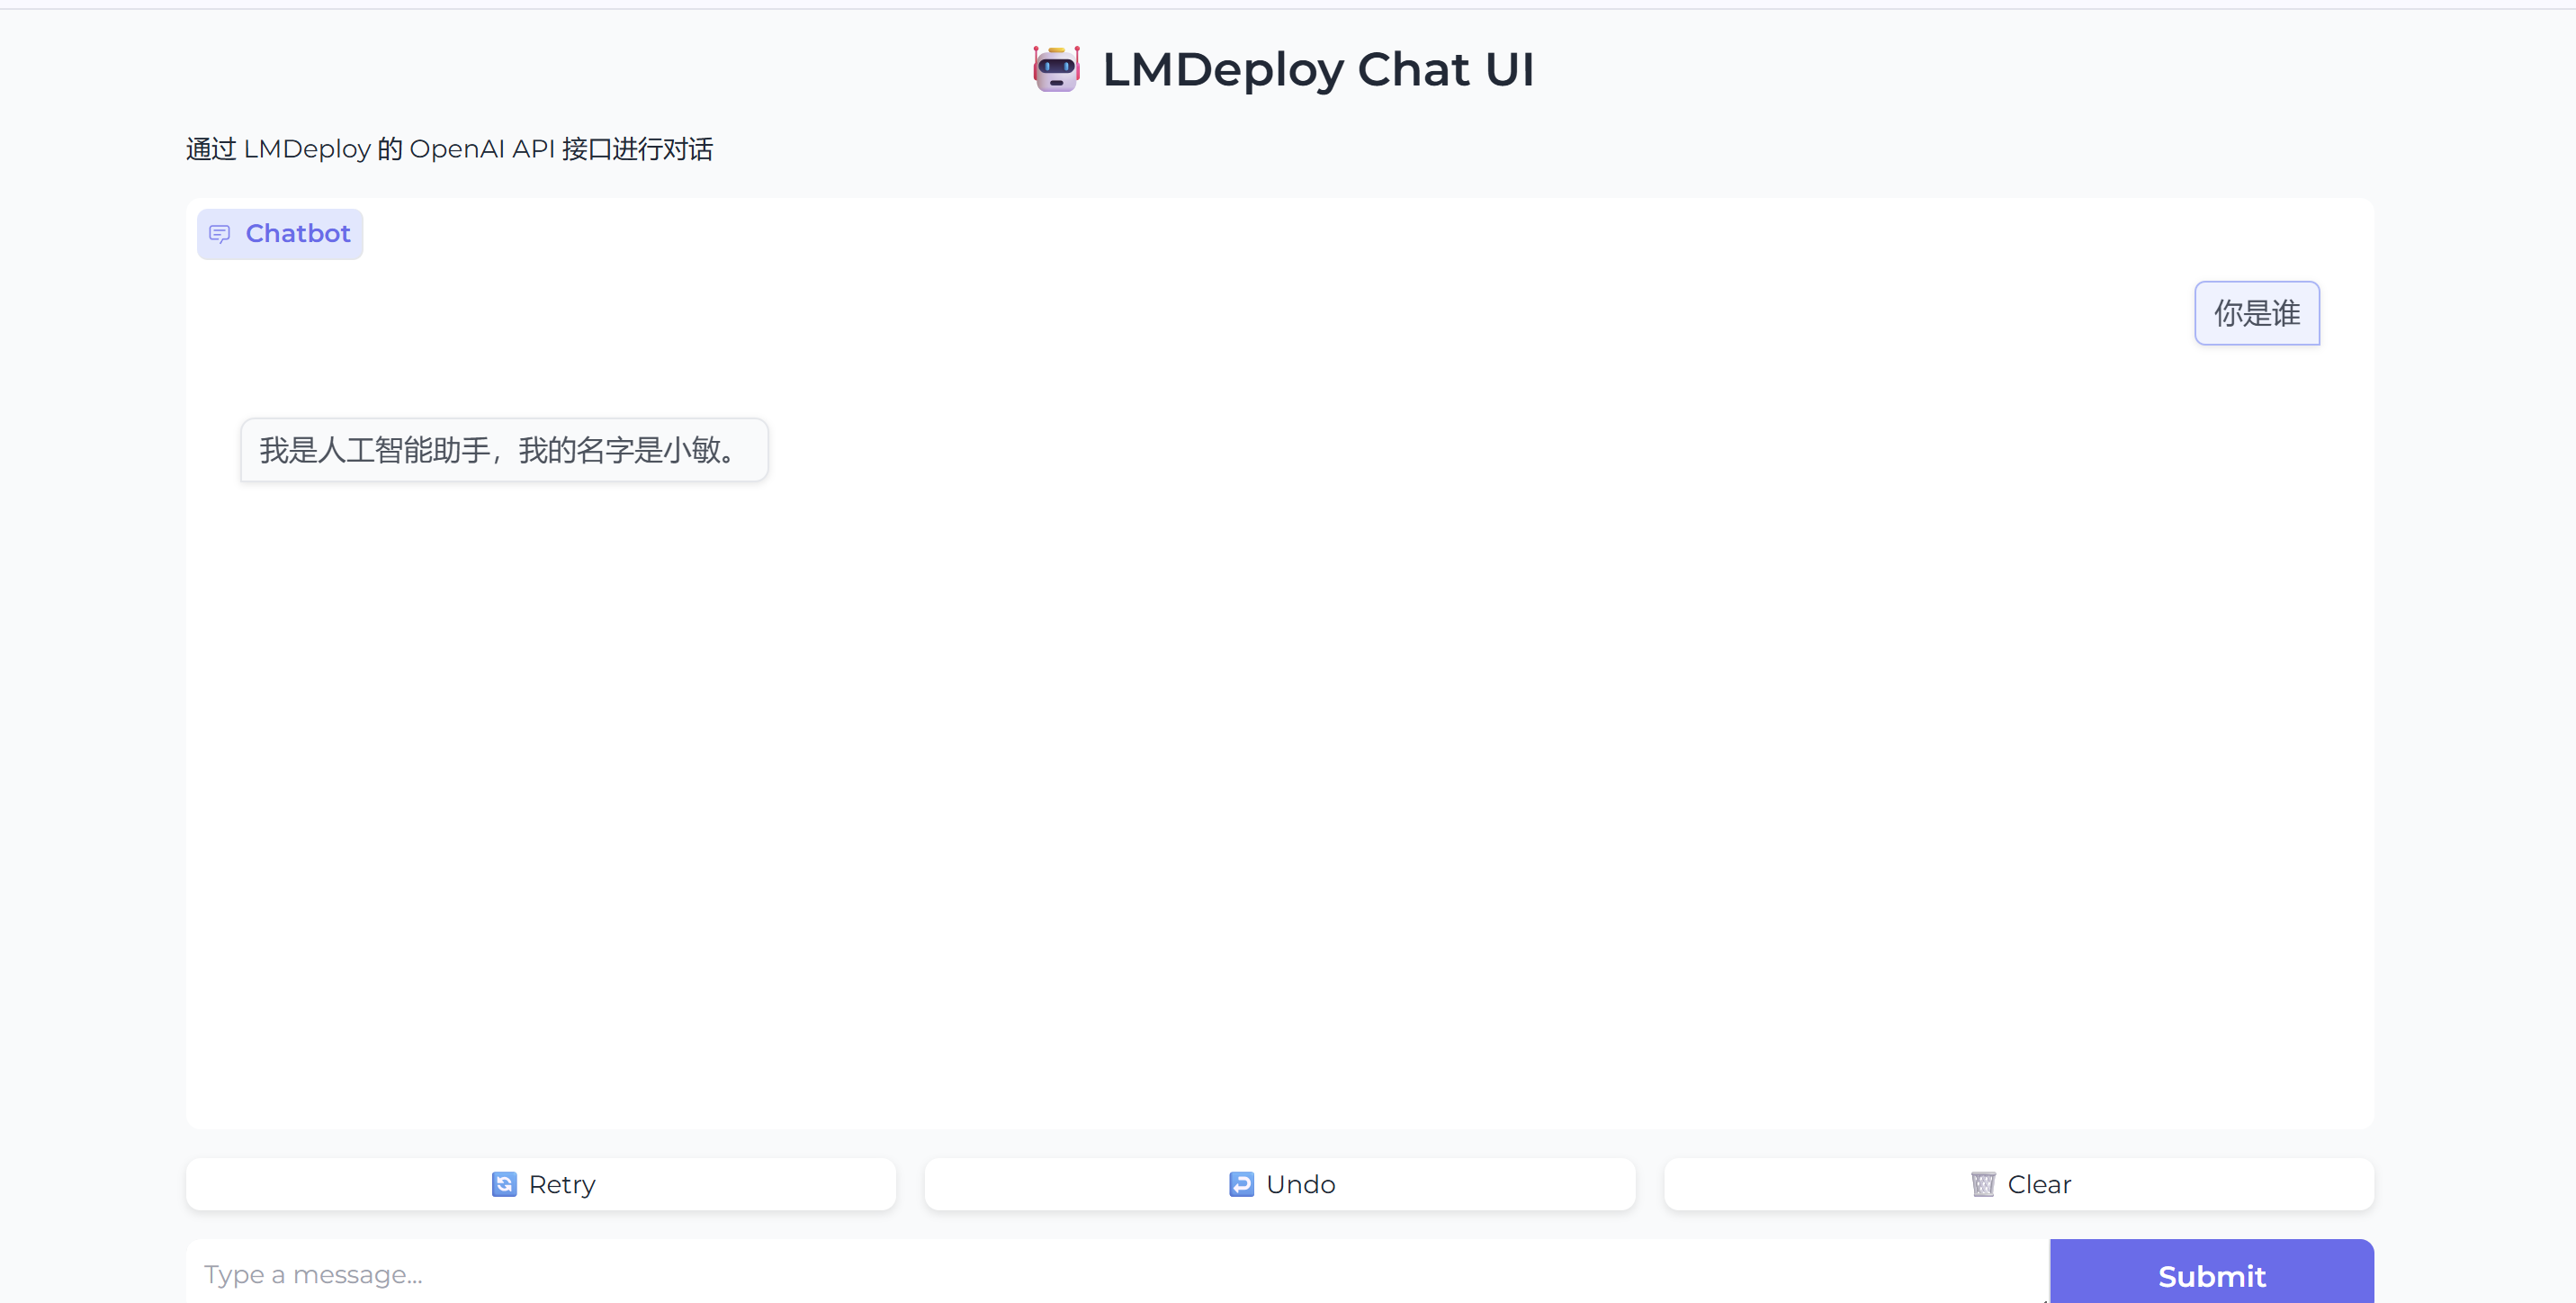
- 测试
视觉-语言模型(VLMs)部署
:::info 部署思路和文本模型相似:::
离线部署
1. 运行下列指令cd /root/lmdeploy/test_Imdeploy
touch testVLMs.py
conda activate lmdeploy
- 复制下列代码到
testVLMs.py
from lmdeploy import pipeline
from lmdeploy.vl import load_image

pipe = pipeline('OpenGVLab/InternVL2-1B')

image = load_image('https://raw.githubusercontent.com/open-mmlab/mmdeploy/main/tests/data/tiger.jpeg')

response = pipe(('describe this image', image))

print(response)
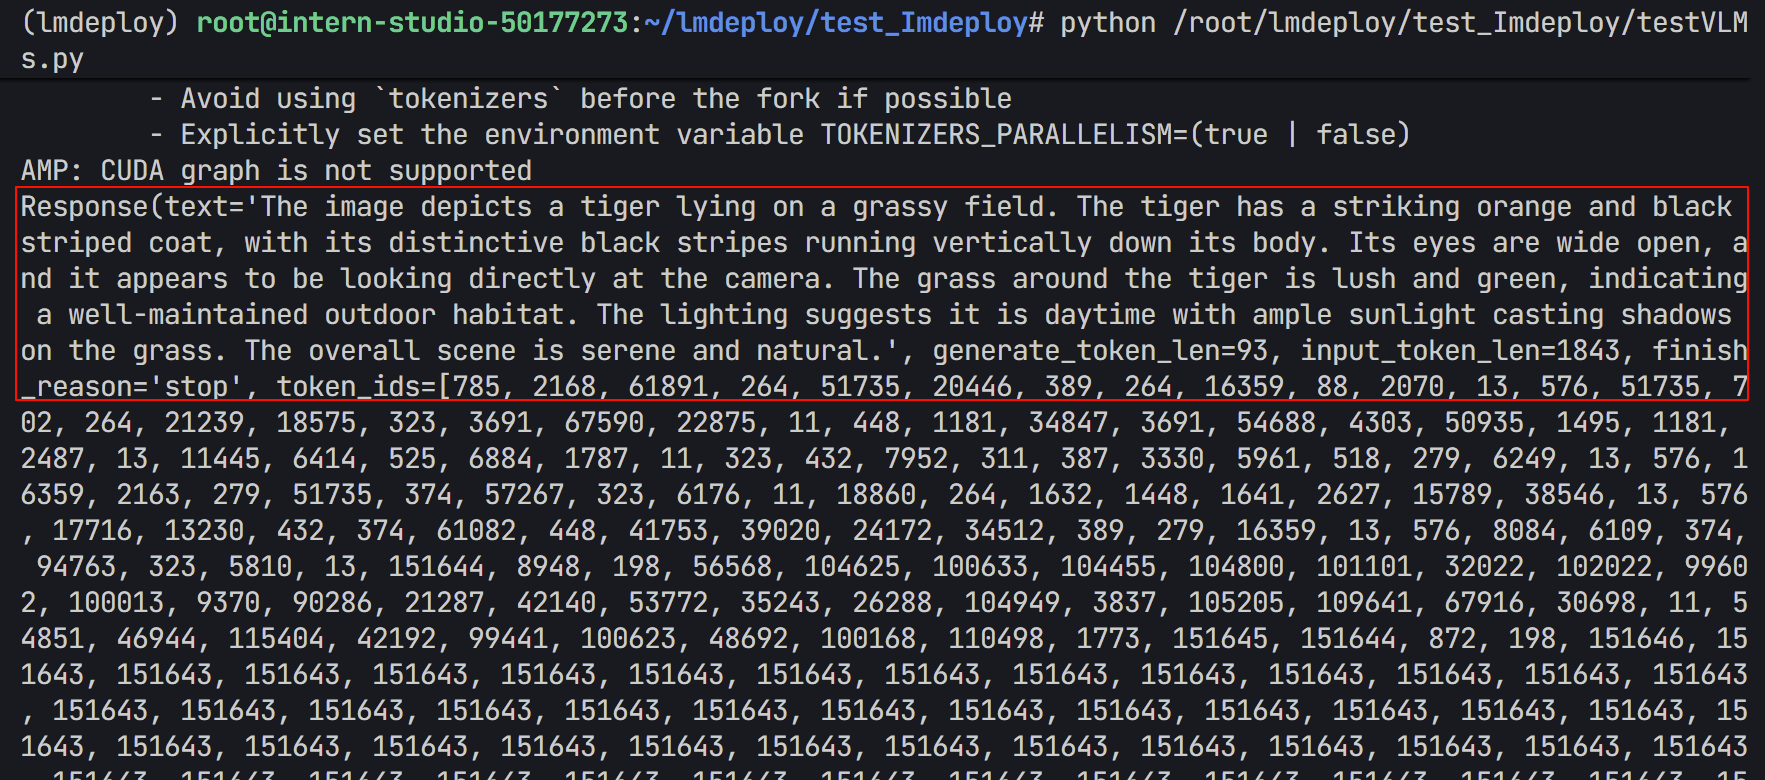
- 是加载的照片
- 输出结果(可以看出来描述比较准确)
多卡并行
```python from lmdeploy import pipeline, TurbomindEngineConfig,PytorchEngineConfig from lmdeploy.vl import load_imagepipe = pipeline(‘OpenGVLab/InternVL2-1B’,
backend_config=PytorchEngineConfig(tp=2))
image = load_image(‘tiger.jpeg’)
response = pipe((‘describe this image’, image))
print(response)
+ 由于我只有一张卡,所以这个就不演示了
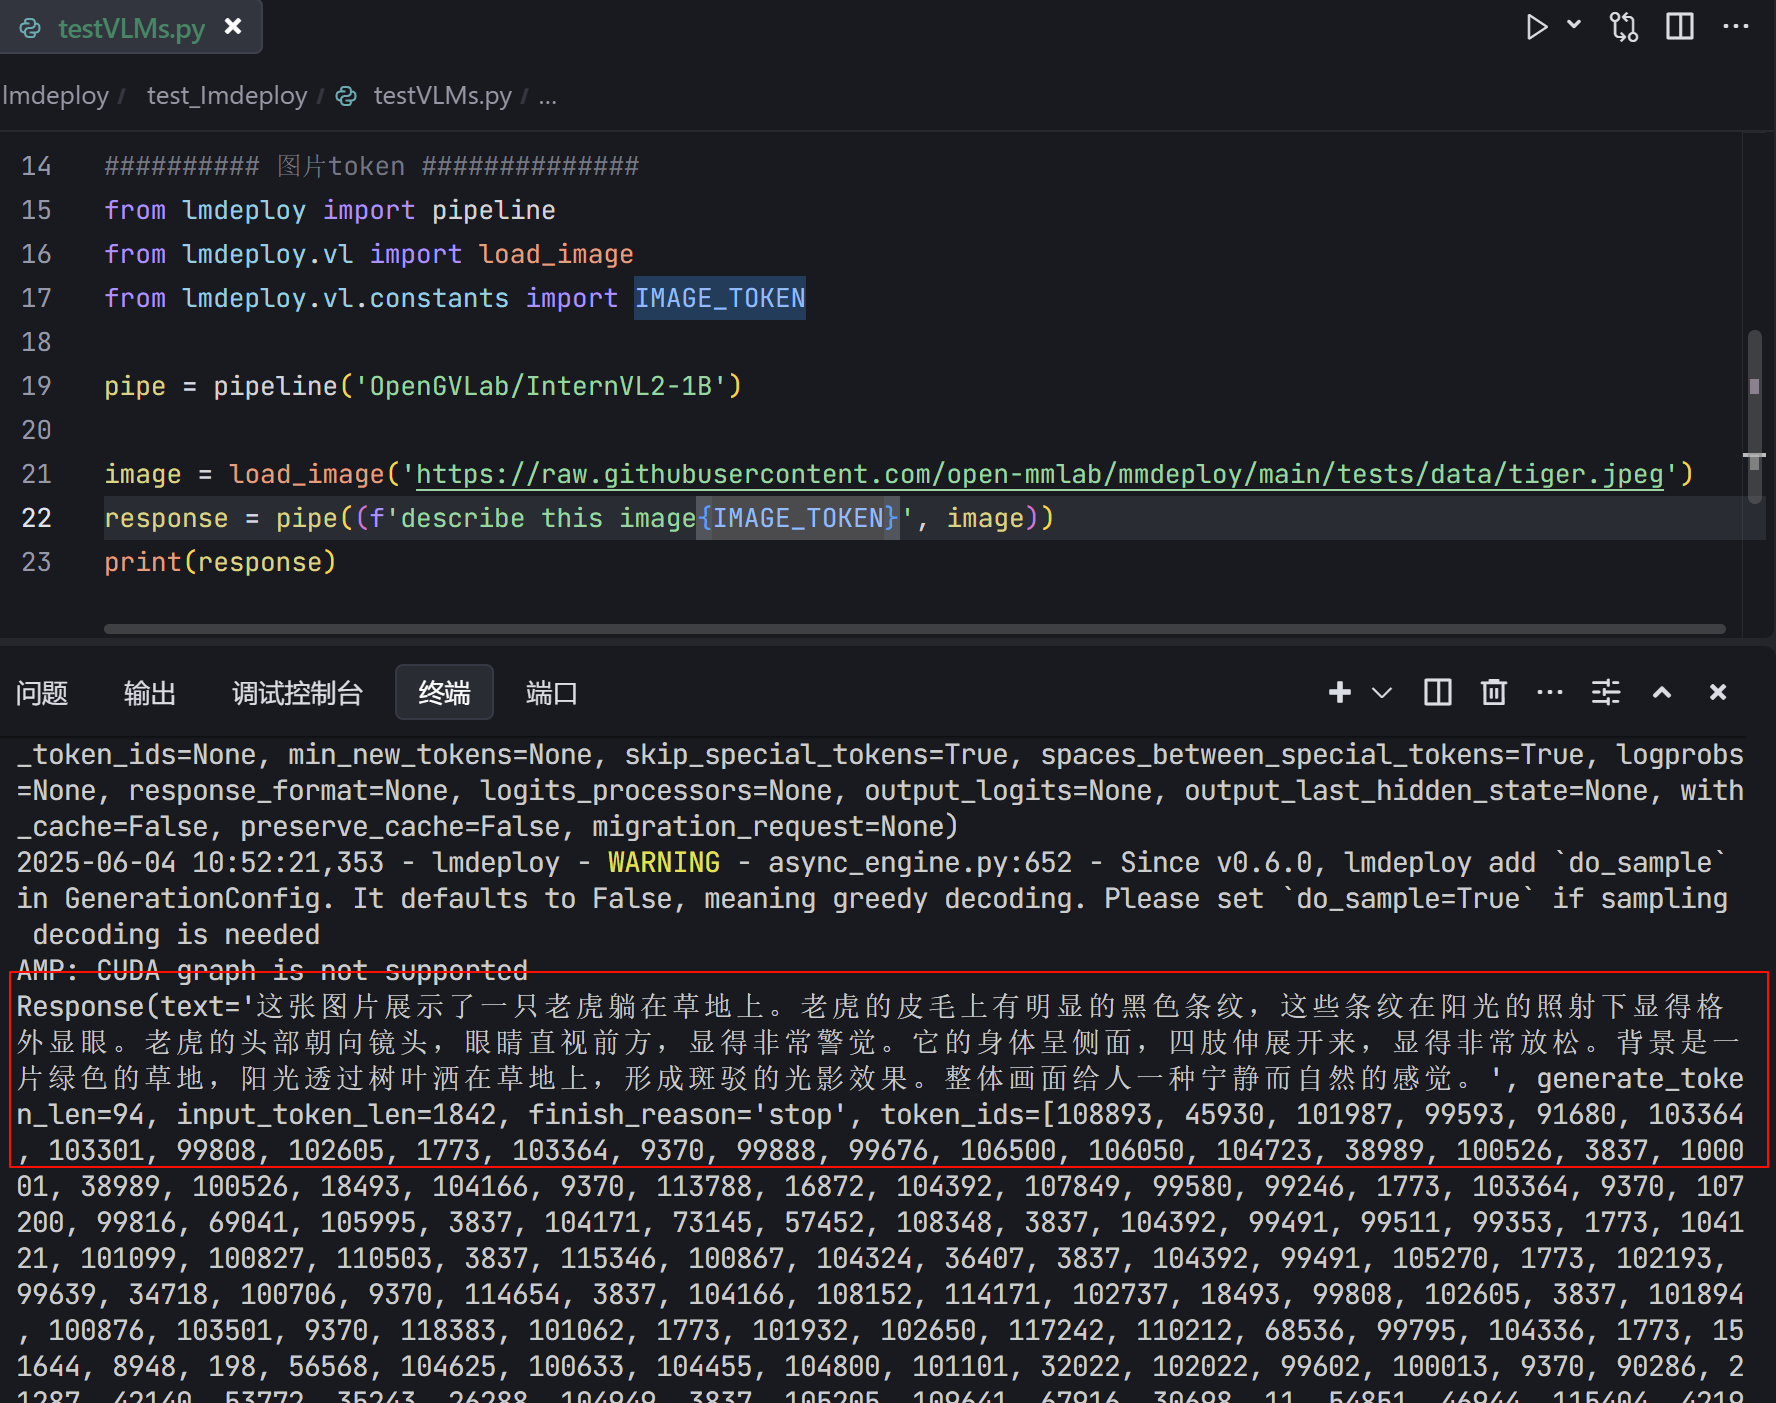
<h2 id="R65Ba">图片 token</h2>
:::info
`<font style="color:rgba(0, 0, 0, 0.9);background-color:rgb(252, 252, 252);">IMAGE_TOKEN</font>`<font style="color:rgba(0, 0, 0, 0.9);background-color:rgb(252, 252, 252);"> 是一个特殊的字符串(如 </font>`<font style="color:rgba(0, 0, 0, 0.9);background-color:rgb(252, 252, 252);"><image></font>`<font style="color:rgba(0, 0, 0, 0.9);background-color:rgb(252, 252, 252);"> 或 </font>`<font style="color:rgba(0, 0, 0, 0.9);background-color:rgb(252, 252, 252);"><IMAGE_TOKEN></font>`<font style="color:rgba(0, 0, 0, 0.9);background-color:rgb(252, 252, 252);">),用于在文本中标记图像的位置</font>
:::
```plain
IMAGE_TOKEN = '<IMAGE_TOKEN>'
- 将下列代码复制到.py文件中
- 运行该.py文件
from lmdeploy import pipeline
from lmdeploy.vl import load_image
from lmdeploy.vl.constants import IMAGE_TOKEN

pipe = pipeline('OpenGVLab/InternVL2-1B')

image = load_image('https://raw.githubusercontent.com/open-mmlab/mmdeploy/main/tests/data/tiger.jpeg')
response = pipe((f'describe this image{IMAGE_TOKEN}', image))
print(response)
- 运行结果(可以看到描述比较准确)
对话模板
:::info 对话模板(Conversation Template)是一种预设的输入输出格式规则,用于规范用户与模型的交互方式。它的核心作用是通过结构化对话内容,提升模型的响应质量、可控性和适用性。推理时,LMDeploy 会根据模型路径匹配内置的对话模板,并把对话模板应用到输入的提示词上。如果用户使用的是本地模型,并且模型文件夹名字与官方模型不一致时,需要手动指定对话模版。
:::
自定义对话模板
########## 对话模板 ##############
# 导入LMDeploy的模型注册器和基础对话模板类
import logging
from lmdeploy.model import MODELS, BaseChatTemplate
# 使用装饰器注册自定义模型模板,命名为'customized_model'
@MODELS.register_module(name='customized_model')
class CustomizedModel(BaseChatTemplate):
"""A customized chat template."""
# 初始化方法,定义对话模板的各项参数
def __init__(self,
system='<|im_start|>system\n', # 系统角色开始标记
meta_instruction='You are a robot developed by LMDeploy.', # 默认系统指令
user='<|im_start|>user\n', # 用户角色开始标记
assistant='<|im_start|>assistant\n', # AI助手角色开始标记
eosys='<|im_end|>\n', # 系统指令结束标记
eoh='<|im_end|>\n', # 用户输入结束标记
eoa='<|im_end|>', # AI回复结束标记
separator='\n', # 各部分之间的分隔符
stop_words=['<|im_end|>', '<|action_end|>']): # 停止生成的关键词列表
# 调用父类初始化方法,传入所有参数
super().__init__(system=system,
meta_instruction=meta_instruction,
eosys=eosys,
user=user,
eoh=eoh,
assistant=assistant,
eoa=eoa,
separator=separator,
stop_words=stop_words)
# 导入对话模板配置类和pipeline功能
from lmdeploy import ChatTemplateConfig, pipeline
# 创建符合对话格式的输入消息(用户角色+内容)
# messages = [{'role': 'user', 'content': 'who are you?'}]
# 正确格式化的消息
messages = [
{"role": "system", "content": "<|im_start|>system\nYou are a robot developed by LMDeploy.<|im_end|>\n"},
{"role": "user", "content": "<|im_start|>user\nwho are you?<|im_end|>\n"}
]
# 创建模型管道:
# 1. 指定模型名称'InternVL2-1B'
# 2. 通过ChatTemplateConfig应用自定义的对话模板'customized_model'
pipe = pipeline('OpenGVLab/InternVL2-1B',
chat_template_config=ChatTemplateConfig('customized_model'))
# 方案1:非流式调用
# response = pipe(messages) # 改用非流式接口
# print("Response:", response.text)
# 方案2:流式调用(修正后)
# 禁用 LMDeploy 的警告日志
logging.getLogger("lmdeploy").setLevel(logging.ERROR)
# 使用流式推理接口处理消息,并逐段打印响应
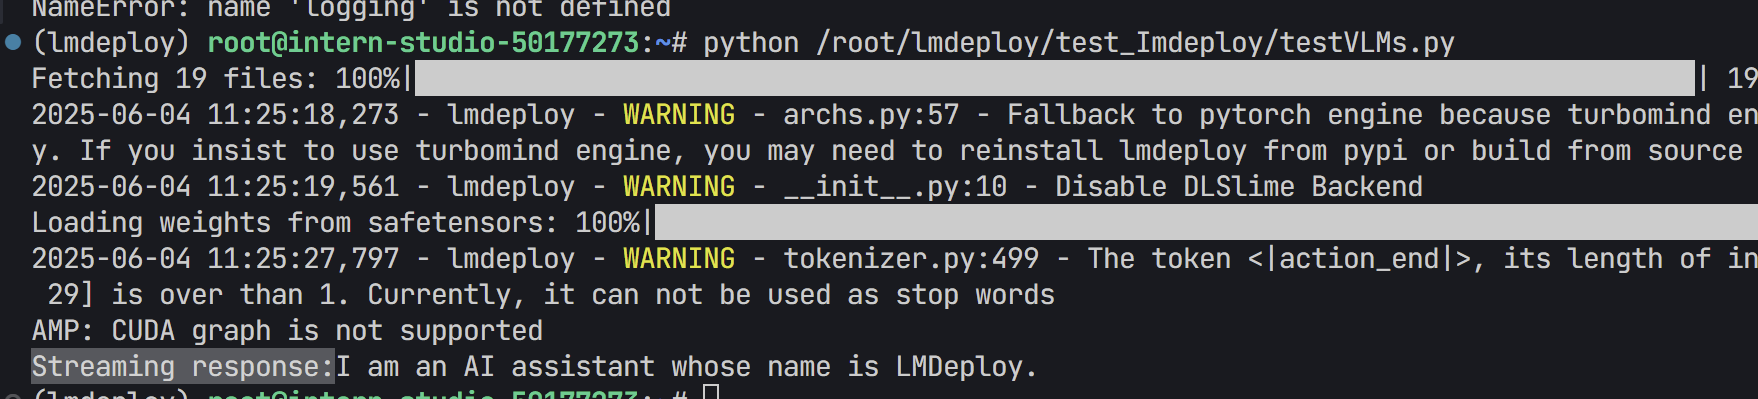
print("Streaming response:", end='')
for chunk in pipe.stream_infer(messages):
if hasattr(chunk, "text"):
print(chunk.text, end='', flush=True) # 刷新输出以立即显示
print()
:::info
- 参数介绍:
- 关键参数: system/user/assistant:定义对话中不同角色的起始标记(类似 ChatGPT 的 role 字段)。
- meta_instruction:系统指令,用于设定模型的行为(如“你是一个由 LMDeploy 开发的机器人”)。
- eosys/eoh/eoa:结束标记(End-of-System/User/Assistant)。 stop_words:模型生成时应停止的标记(避免输出多余内容)。
- @MODELS.register_module(name=‘customized_model’) 将模板注册到 LMDeploy 的全局模型库中,后续可通过名称 ‘customized_model’ 引用
:::
:::info
对话模板的实际应用效果
- 原始输入(未格式化) messages = [{‘role’: ‘user’, ‘content’: ‘who are you?’}] 模板格式化后的输入
- 模型实际接收的文本可能如下(取决于模板定义):
“<|im_start|>system
You are a robot developed by LMDeploy.<|im_end|>
<|im_start|>user
who are you?<|im_end|>
<|im_start|>assistant ”
- 模型会根据该结构化输入生成回复,并在遇到 <|im_end|> 时停止。
:::
- 操作流程:
- 将上述代码复制到.py文件中
- 然后运行一下
- 运行结果
视觉模型参数
:::info 可通过设置 `VisionConfig` 修改视觉模型默认参数:::
- 调用示例
from lmdeploy import pipeline, VisionConfig
from lmdeploy.vl import load_image

# 创建 VisionConfig 实例,修改视觉模型默认参数
vision_config = VisionConfig(max_batch_size=16)

# 初始化多模态管道,传入自定义视觉配置
pipe = pipeline('llava-v1.5-7b', vision_config=vision_config)

# 加载远程图片
image = load_image('https://raw.githubusercontent.com/open-mmlab/mmdeploy/main/tests/data/tiger.jpeg')

# 输入图文混合提示词,获取模型响应
response = pipe(('describe this image', image))

# 打印结果
print(response)
**<font style="color:rgba(0, 0, 0, 0.9);background-color:rgb(252, 252, 252);">VisionConfig</font>**源码解析
###VisionConfig 源码

@dataclass
class VisionConfig:
    """Vison model configs.

    Args:
        max_batch_size (int): the max image size passed to the model, since
            some models will use image patch, the actual running batch could
            be larger than this value.
        thread_safe (bool): Specifies whether the engine instance is
            thread-safe. Please set it to True when using the pipeline
            in a multi-threaded environment.
    """
    max_batch_size: int = 1
    thread_safe: bool = False
多图推理
```python from lmdeploy import pipeline, TurbomindEngineConfig from lmdeploy.vl import load_imagepipe = pipeline(‘OpenGVLab/InternVL2-1B’,
backend_config=TurbomindEngineConfig(session_len=8192))
image_urls=[
‘https://raw.githubusercontent.com/open-mmlab/mmdeploy/main/demo/resources/human-pose.jpg’,
‘https://raw.githubusercontent.com/open-mmlab/mmdeploy/main/demo/resources/det.jpg’
]
images = [load_image(img_url) for img_url in image_urls]
response = pipe((‘describe these images’, images))
print(response)
图1 图2

+ 输出结果(有问题:<font style="color:rgba(0, 0, 0, 0.9);background-color:rgb(252, 252, 252);">模型</font>**<font style="color:rgba(0, 0, 0, 0.9);background-color:rgb(252, 252, 252);">将两张图片合并理解后生成了一段综合描述</font>**)

+ 改成下列代码
```python
########## 多图推理 ##############
from lmdeploy import pipeline, TurbomindEngineConfig
from lmdeploy.vl import load_image
pipe = pipeline('OpenGVLab/InternVL2-1B',
backend_config=TurbomindEngineConfig(session_len=8192))
image_urls=[
'https://raw.githubusercontent.com/open-mmlab/mmdeploy/main/demo/resources/human-pose.jpg',
'https://raw.githubusercontent.com/open-mmlab/mmdeploy/main/demo/resources/det.jpg'
]
# images = [load_image(img_url) for img_url in image_urls]
# response = pipe(('describe these images', images))
# print(response)
for i, img in enumerate(image_urls):
response = pipe((f'Describe image {i+1}', img)) # 每次处理单张图
print(f"Image {i+1} description:", response.text)
- 输出结果(这个看起来比较准确)

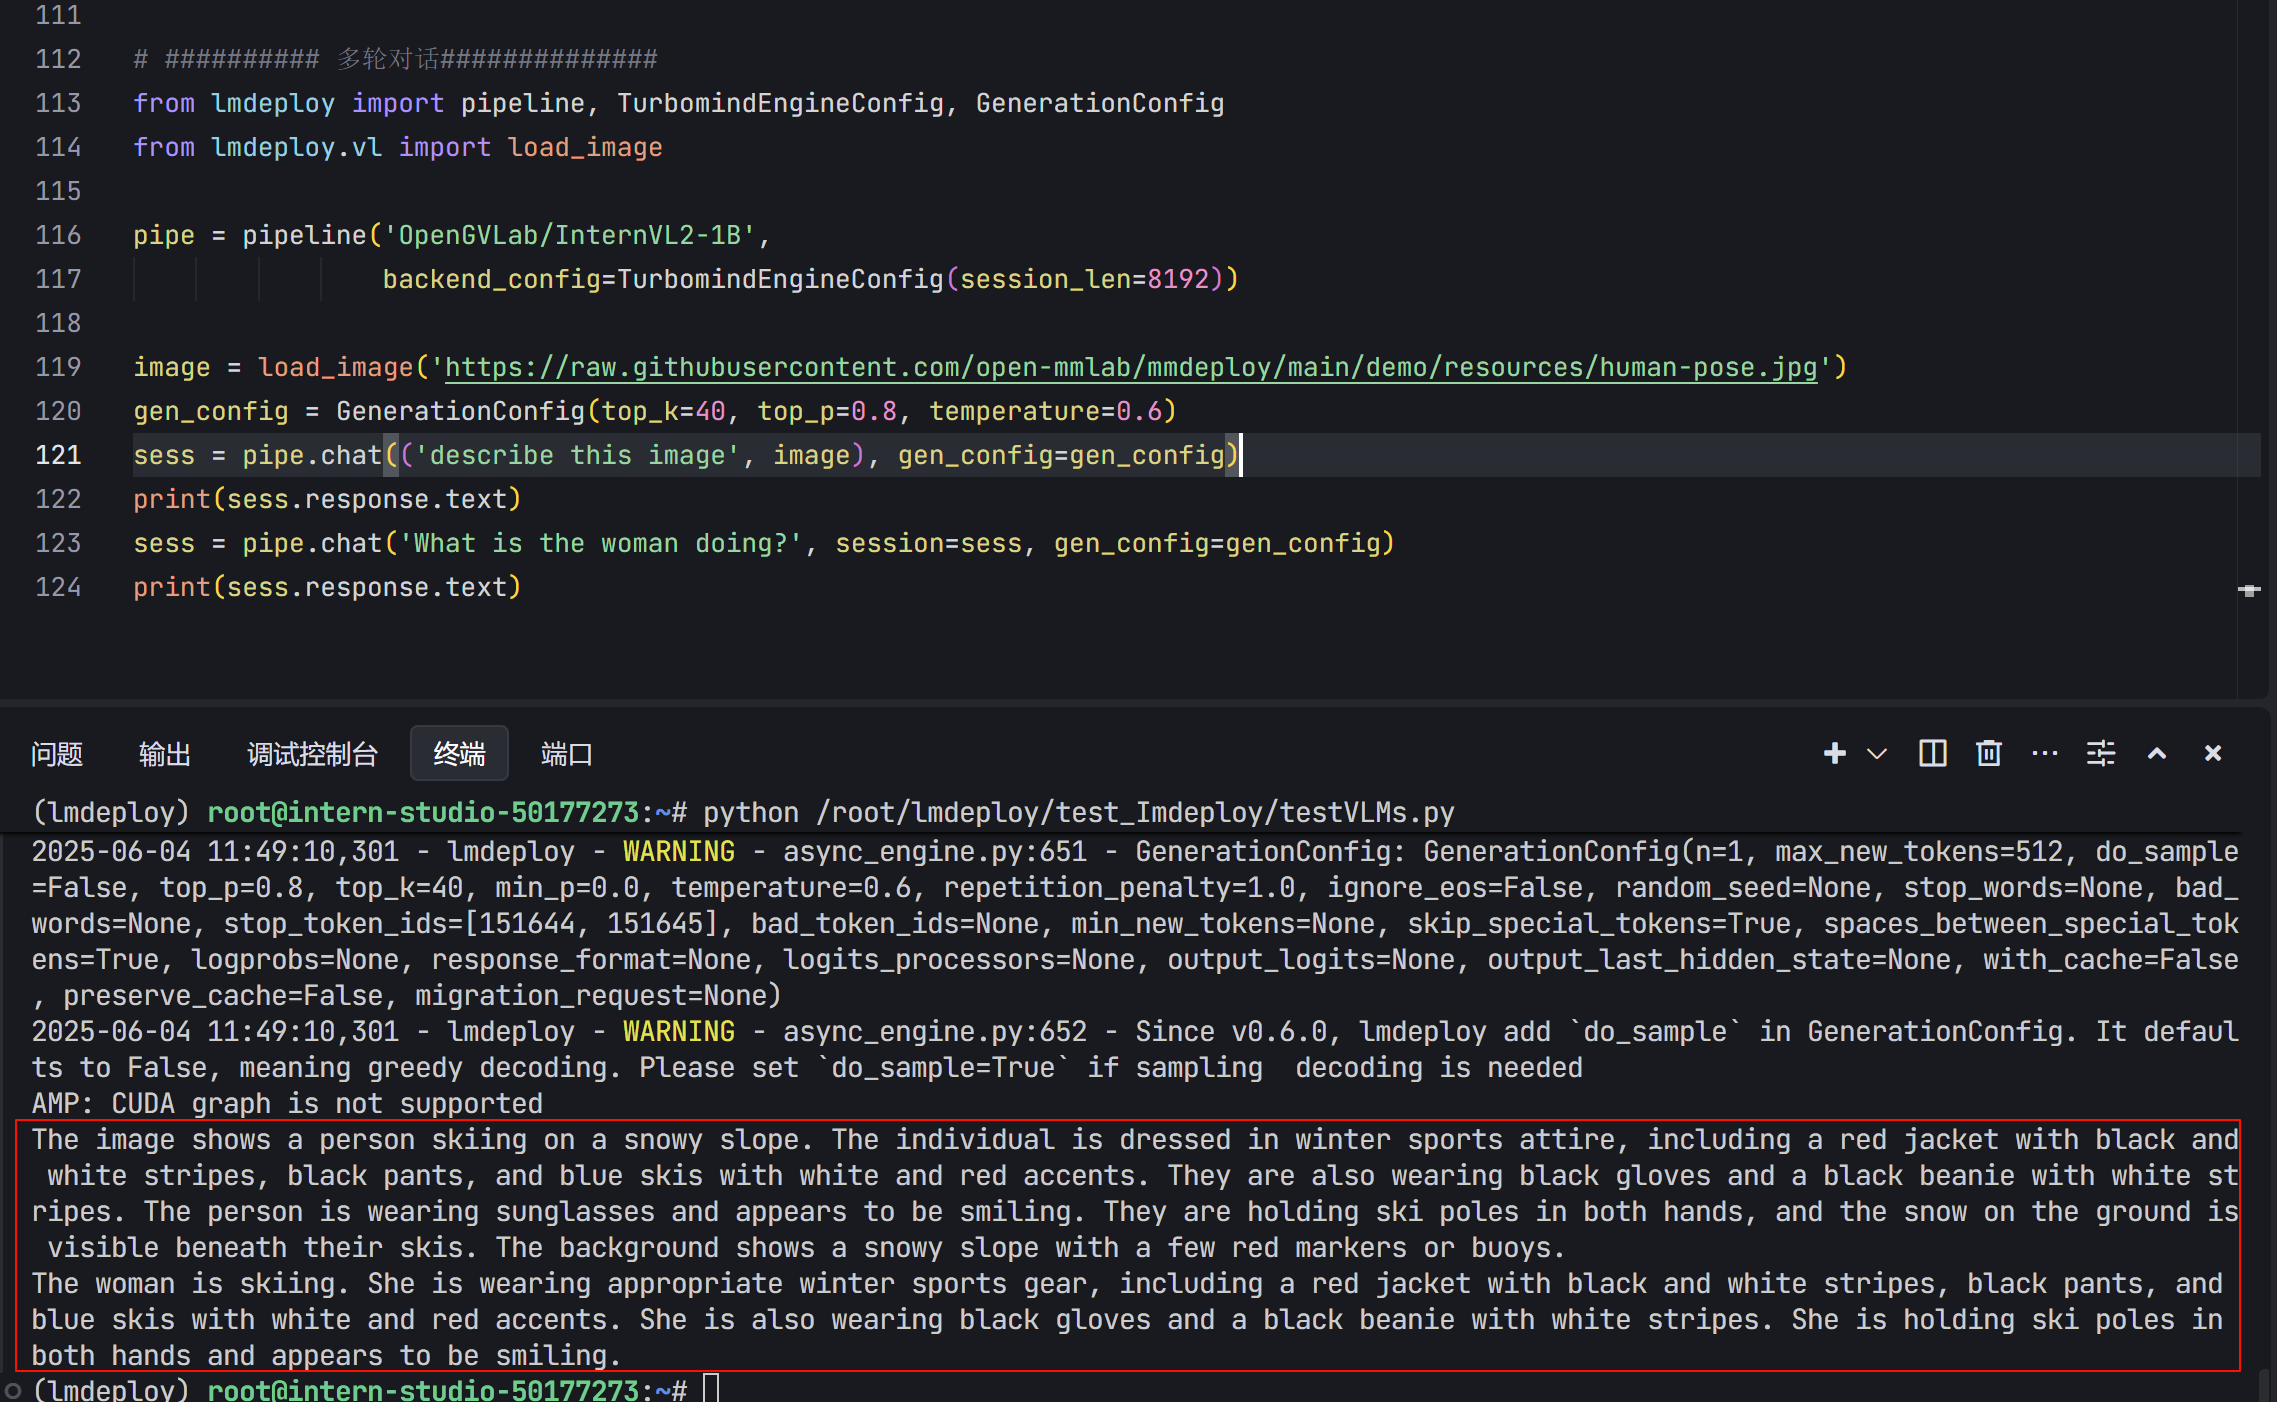
多轮对话
:::info 使用pipeline 进行多轮对话有两种方式,一种是按照 openai 的格式来构造 messages,另外一种是使用 pipeline.chat 接口。:::
from lmdeploy import pipeline, TurbomindEngineConfig, GenerationConfig
from lmdeploy.vl import load_image

pipe = pipeline('OpenGVLab/InternVL2-1B',
                backend_config=TurbomindEngineConfig(session_len=8192))

image = load_image('https://raw.githubusercontent.com/open-mmlab/mmdeploy/main/demo/resources/human-pose.jpg')
gen_config = GenerationConfig(top_k=40, top_p=0.8, temperature=0.6)
sess = pipe.chat(('describe this image', image), gen_config=gen_config)
print(sess.response.text)
sess = pipe.chat('What is the woman doing?', session=sess, gen_config=gen_config)
print(sess.response.text)
- 输出结果
模型量化
:::info **LMDeploy 量化模块目前仅支持 AWQ 量化算法。**量化是指将高精度数字转换为低精度数字。低精度实体可以存储在磁盘上很小的空间内,从而减少内存需求。
:::
AWQ 量化(Activation-aware Weight Quantization)
+ 基本原理AWQ 是一种专门用于大语言模型的 感知激活的权重量化方法,核心在于:
- **仅量化权重(Weight),不量化激活(Activation)**;
- **精细调节每个通道的缩放比例(scale)**,对精度影响小;
- 目标是 **4-bit权重(W4)+ float16激活**,即高压缩率、低精度损失。
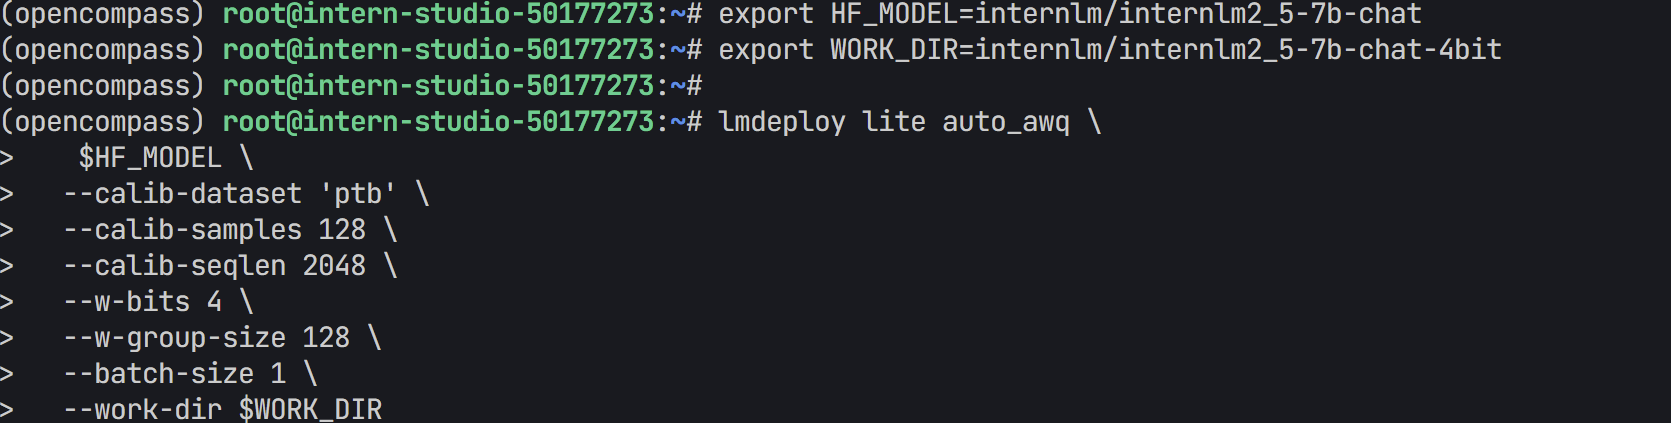
- 在终端执行下列命令
export HF_MODEL=internlm/internlm2_5-7b-chat
export WORK_DIR=internlm/internlm2_5-7b-chat-4bit

lmdeploy lite auto_awq \
   $HF_MODEL \                           # 源模型路径
  --calib-dataset 'ptb' \               # 量化时使用的校准数据集
  --calib-samples 128 \                 # 使用多少样本校准
  --calib-seqlen 2048 \                 # 输入序列最大长度
  --w-bits 4 \                          # 权重量化为4-bit
  --w-group-size 128 \                  # 每多少个通道分组使用一个scale
  --batch-size 1 \                      # 推理批次
  --work-dir $WORK_DIR                  # 输出路径
- 也可以加载本地的,不用下载
export HF_MODEL=/root/share/model_repos/internlm2-chat-7bexport
export WORK_DIR=/root/internlm2-chat-7b-4bit
lmdeploy lite auto_awq \
   $HF_MODEL \                           # 源模型路径
  --calib-dataset 'ptb' \               # 量化时使用的校准数据集
  --calib-samples 128 \                 # 使用多少样本校准
  --calib-seqlen 2048 \                 # 输入序列最大长度
  --w-bits 4 \                          # 权重量化为4-bit
  --w-group-size 128 \                  # 每多少个通道分组使用一个scale
  --batch-size 1 \                      # 推理批次
  --work-dir $WORK_DIR                  # 输出路径
- 将一个 HuggingFace 上的原始模型下载下来,并将其量化为 4-bit 权重模型
| 参数 | 含义 |
|---|---|
lmdeploy lite auto_awq |
调用 LMDeploy 的自动 AWQ 量化模块 |
$HF_MODEL |
源模型路径,这里是 internlm/internlm2_5-7b-chat |
--calib-dataset 'ptb' |
选择用于校准的公开数据集(Penn Treebank) |
--calib-samples 128 |
使用多少个样本进行量化校准 |
--calib-seqlen 2048 |
每个样本的序列最大长度 |
--w-bits 4 |
权重量化为 4-bit |
--w-group-size 128 |
每 128 个通道为一个量化组 |
--batch-size 1 |
推理时用的 batch size |
--work-dir $WORK_DIR |
输出目录,用于保存量化后的模型 |
- 激活环境(装有lmdeploy的环境)
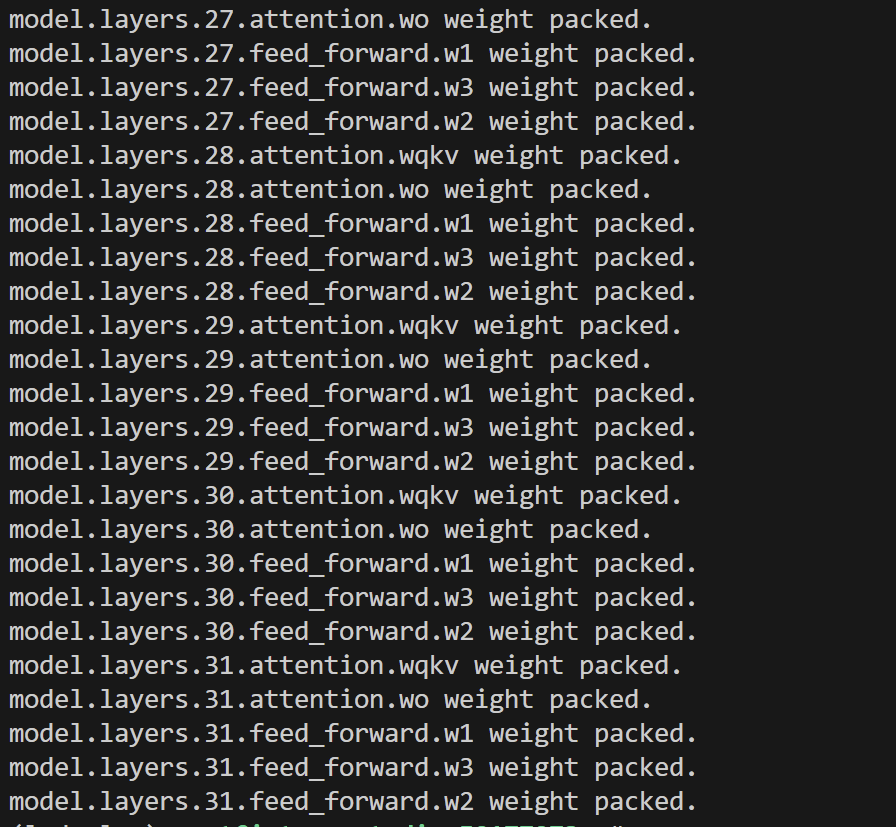
- 运行上述代码
- 运行过程
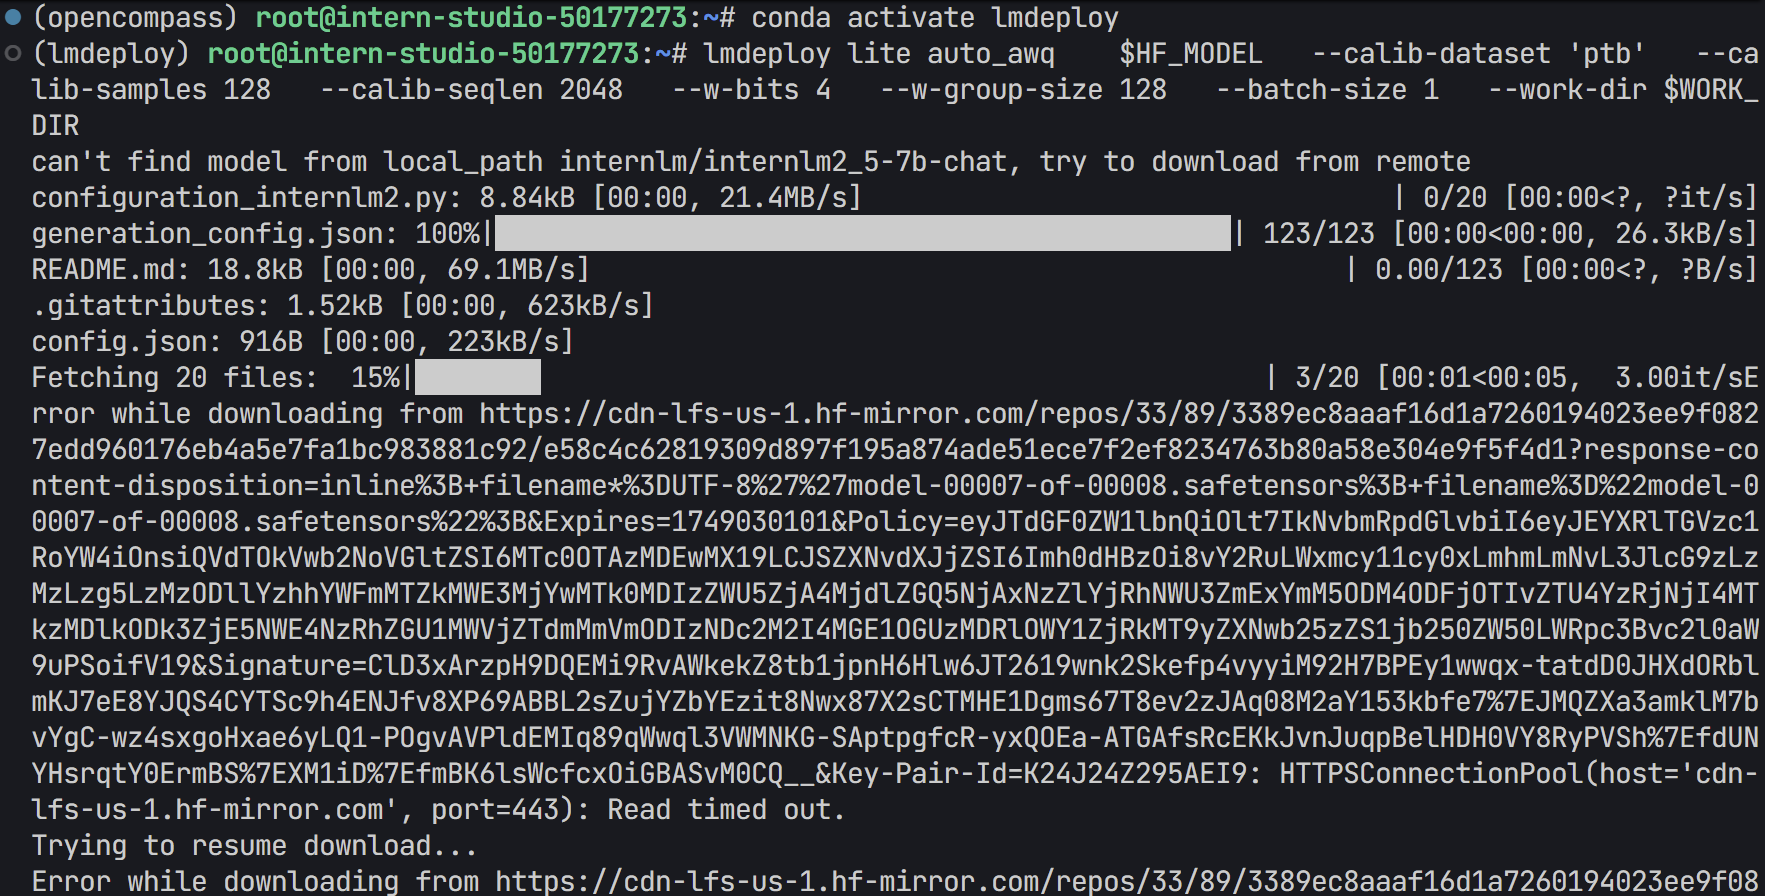
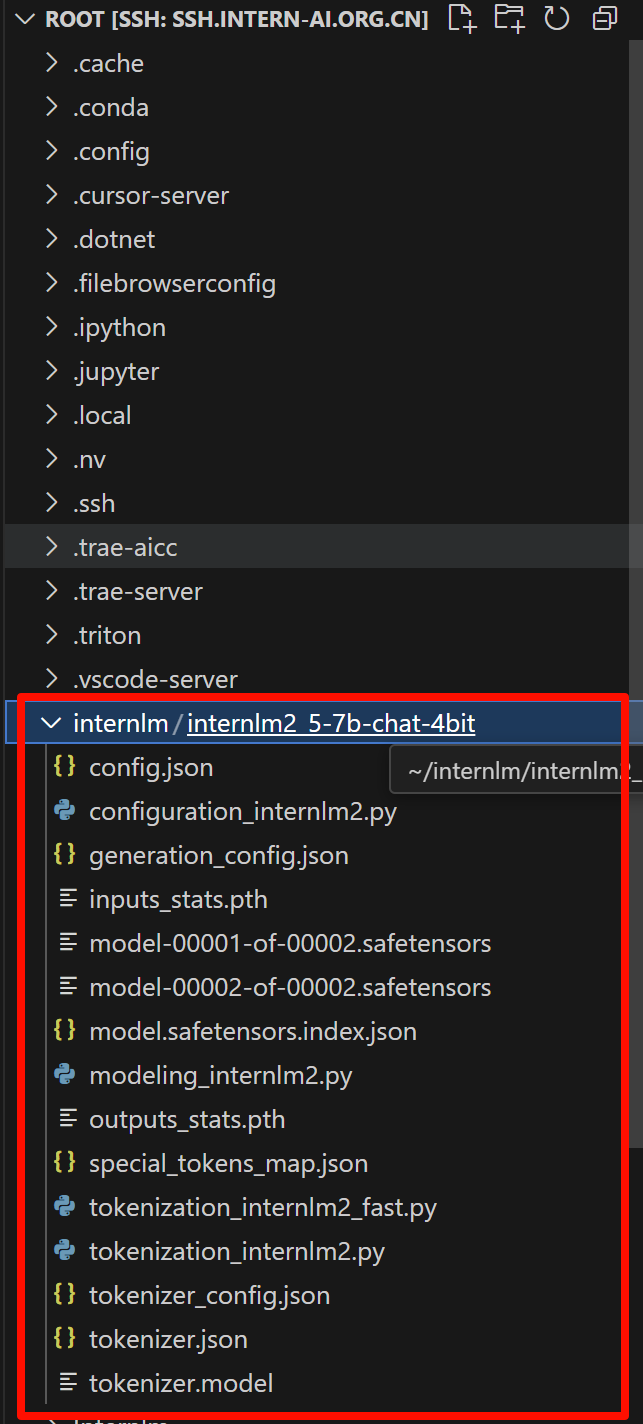
- 执行后会在
WORK_DIR中生成量化模型的文件。 - 如果出现以下报错,说明模型不能成功下载ptb数据集
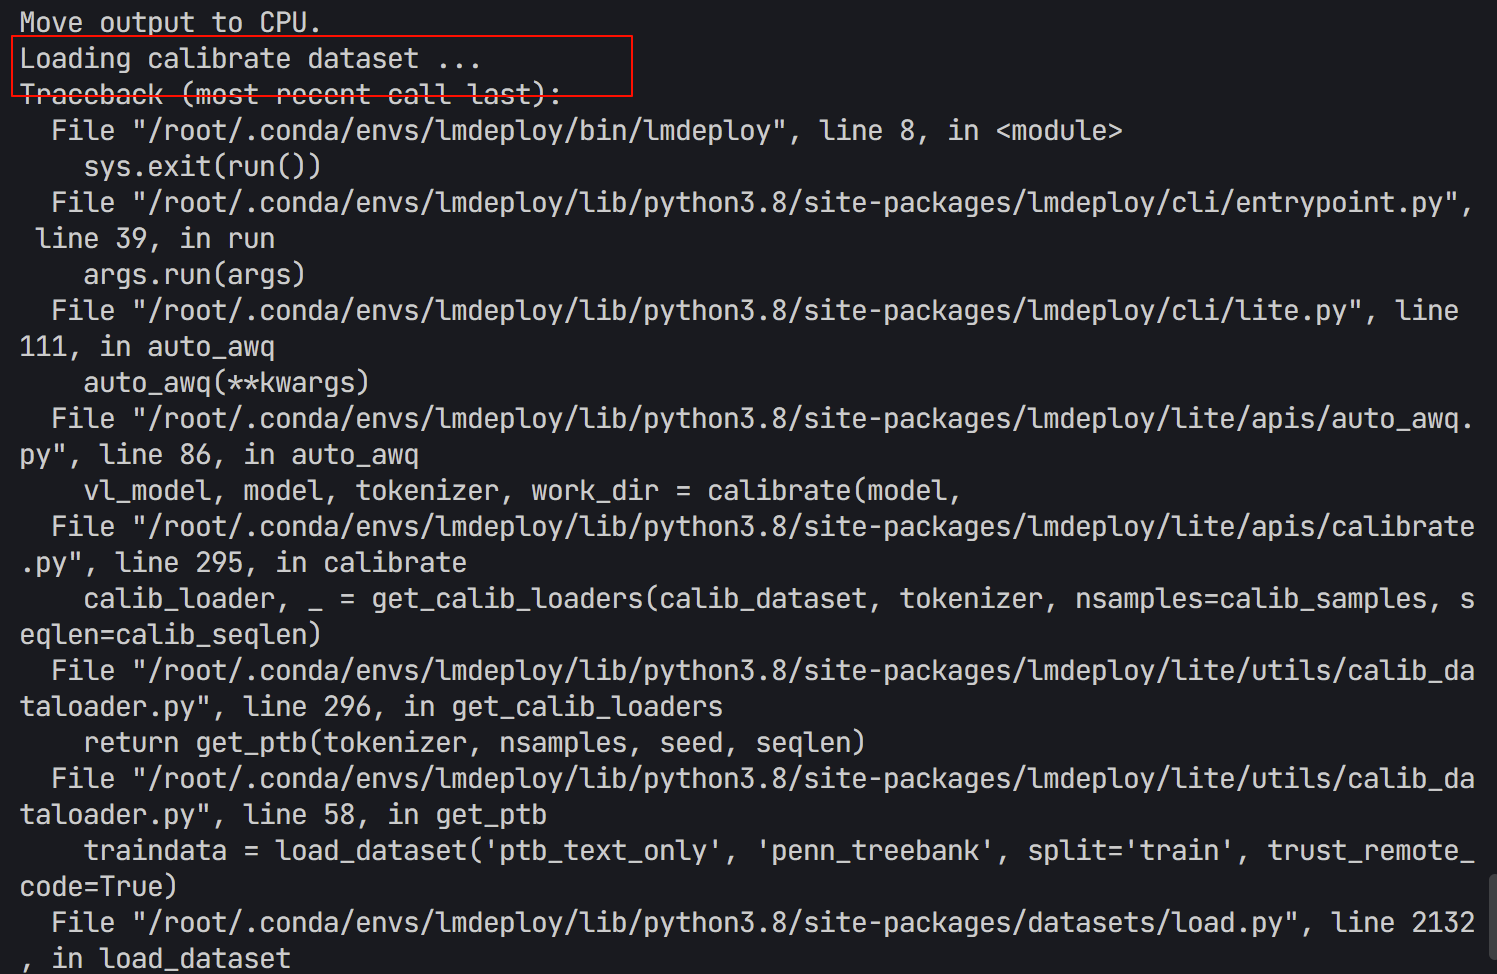
- 运行下列代码,换一个数据集。
export HF_MODEL=internlm/internlm2_5-7b-chat
export WORK_DIR=internlm/internlm2_5-7b-chat-4bit

lmdeploy lite auto_awq "$HF_MODEL" \
  --calib-dataset wikitext2 \
  --calib-samples 128 \
  --calib-seqlen 2048 \
  --w-bits 4 \
  --w-group-size 128 \
  --batch-size 1 \
  --work-dir "$WORK_DIR"
- 输出结果
接下来用OpenCompass 进行评测。
OpenCompass 评测流程
:::info OpenCompass 是一个 **大模型评估平台**,支持多种标准评测集。:::
- 环境安装
这个部分可以看我L1G2的博客,下面直接给出比较简单的操作。
- 依次运行下列命令
conda activate lmdeploy
cd /root
git clone https://github.moeyy.xyz/https://github.com/open-compass/opencompass opencompass
cd opencompass
pip install -e .
- 测试文件
- 先新建一个文件在下列路径:
/root/opencompass/opencompass/configs/eval_internlm2_awq_lmdeploy.py
cd /root/opencompass/opencompass/configs
touch eval_internlm2_awq_lmdeploy.py
- 过程:
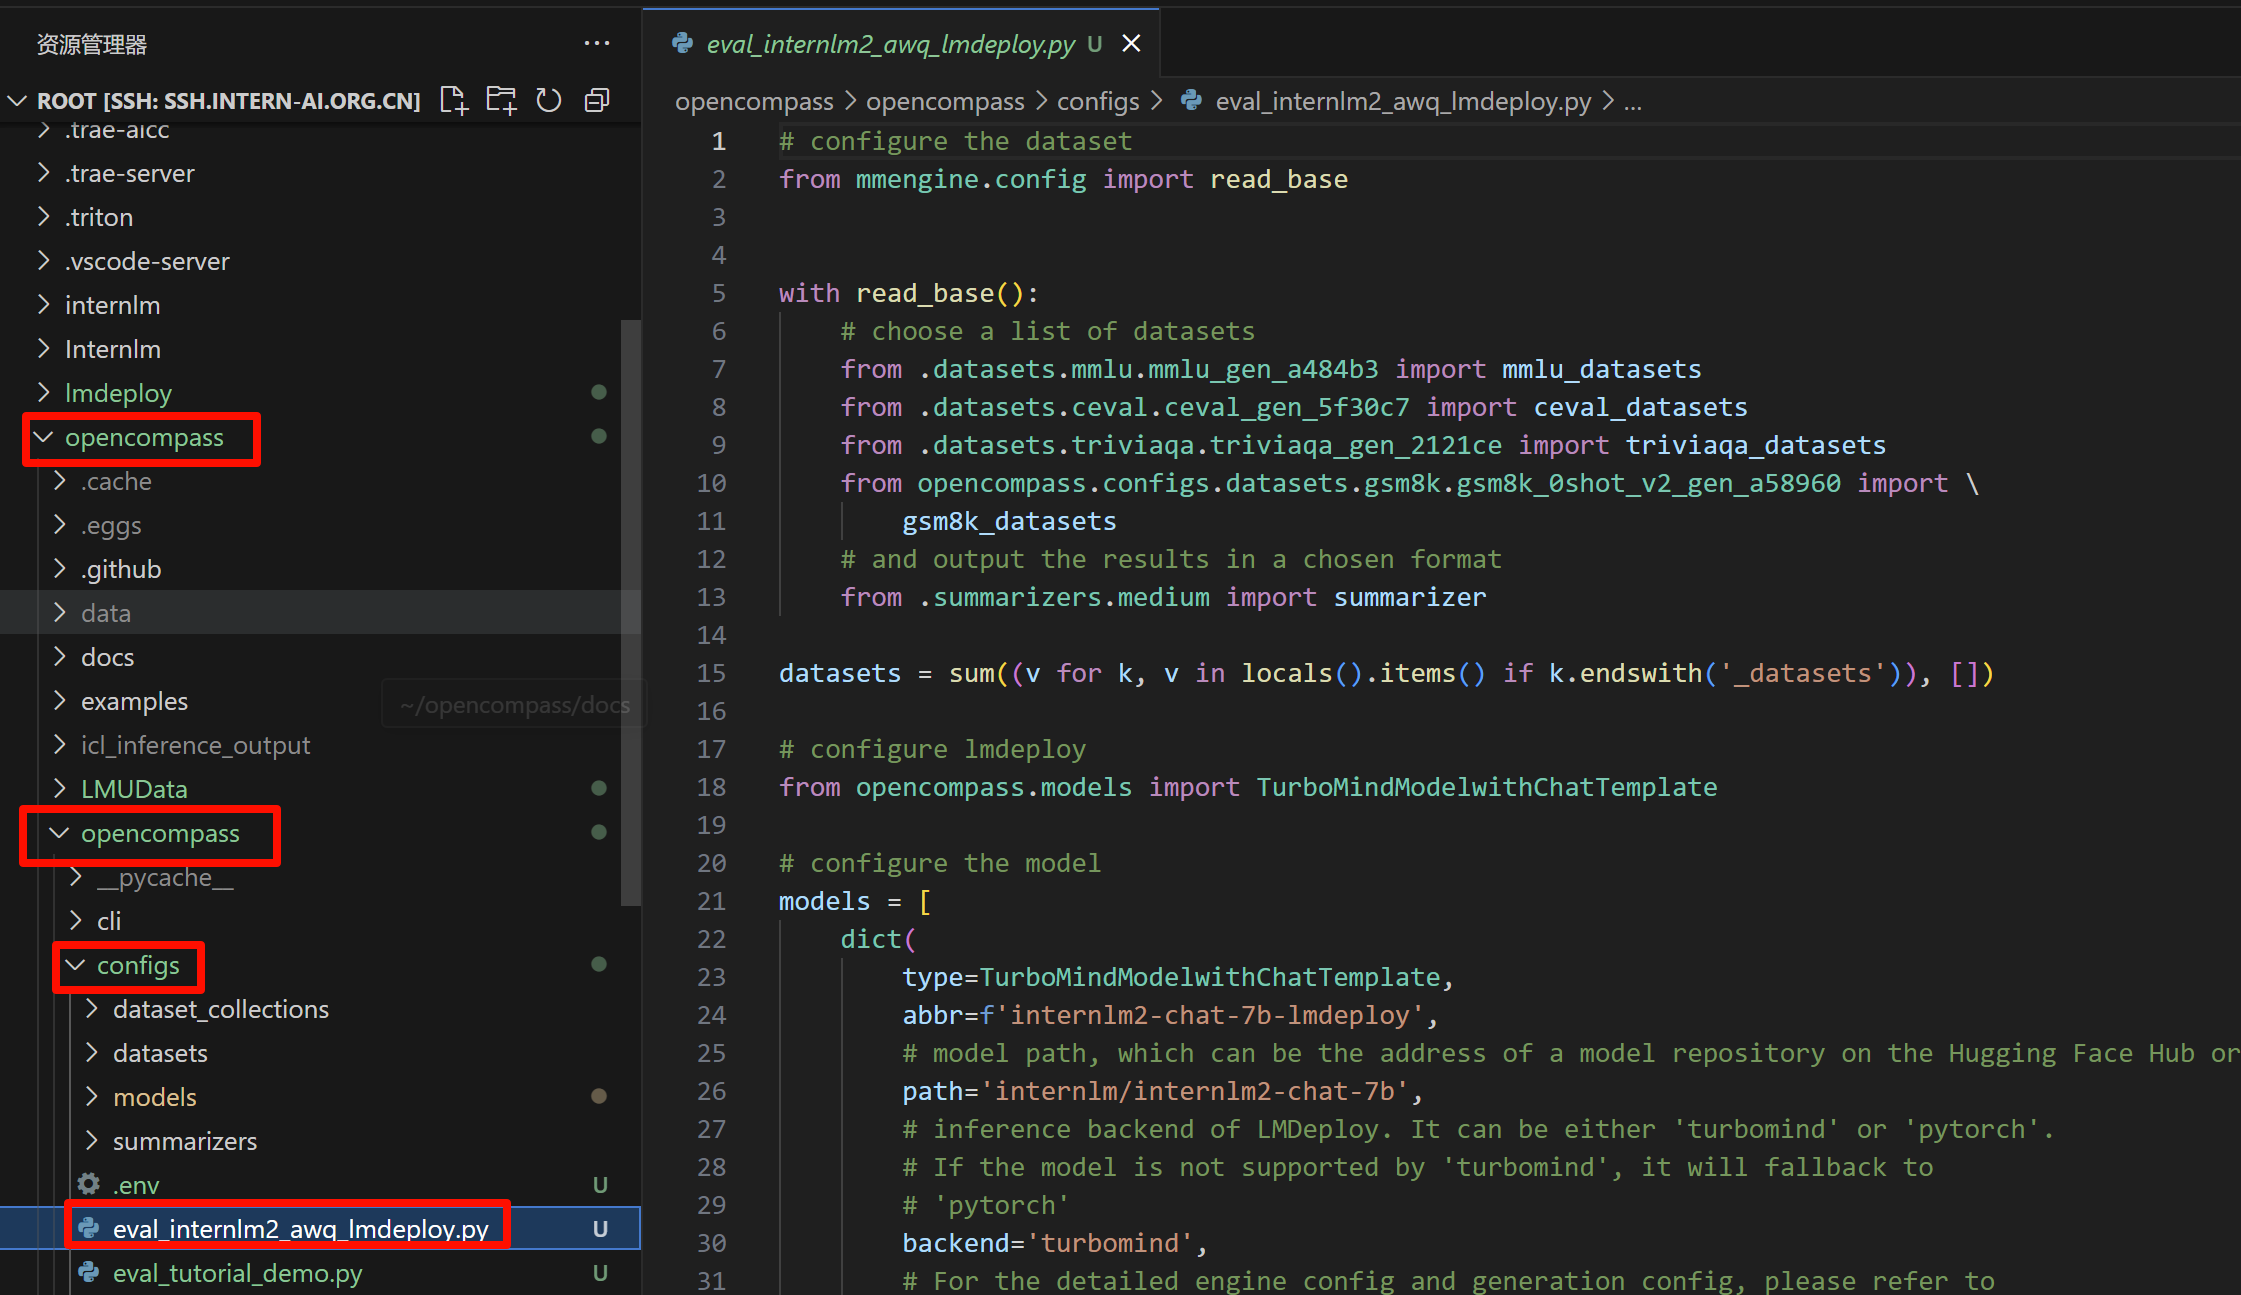
- 将下列代码放到特定文件中:
# configure the dataset
from mmengine.config import read_base


with read_base():
    # choose a list of datasets
    from .datasets.mmlu.mmlu_gen_a484b3 import mmlu_datasets
    from .datasets.ceval.ceval_gen_5f30c7 import ceval_datasets
    from .datasets.triviaqa.triviaqa_gen_2121ce import triviaqa_datasets
    from opencompass.configs.datasets.gsm8k.gsm8k_0shot_v2_gen_a58960 import \
        gsm8k_datasets
    # and output the results in a chosen format
    from .summarizers.medium import summarizer

datasets = sum((v for k, v in locals().items() if k.endswith('_datasets')), [])

# configure lmdeploy
from opencompass.models import TurboMindModelwithChatTemplate

# configure the model
models = [
    dict(
        type=TurboMindModelwithChatTemplate,
        abbr=f'internlm2-chat-7b-lmdeploy',
        # model path, which can be the address of a model repository on the Hugging Face Hub or a local path
        path='internlm/internlm2-chat-7b',
        # inference backend of LMDeploy. It can be either 'turbomind' or 'pytorch'.
        # If the model is not supported by 'turbomind', it will fallback to
        # 'pytorch'
        # backend='turbomind',
        backend='pytorch',
        # For the detailed engine config and generation config, please refer to
        # https://github.com/InternLM/lmdeploy/blob/main/lmdeploy/messages.py
        engine_config=dict(tp=1),
        gen_config=dict(do_sample=False),
        # the max size of the context window
        max_seq_len=7168,
        # the max number of new tokens
        max_out_len=1024,
        # the max number of prompts that LMDeploy receives
        # in `generate` function
        batch_size=5000,
        run_cfg=dict(num_gpus=1),
    )
]
turbomind是 LMDeploy 的高性能推理后端;tp=1表示张量并行大小;batch_size=5000实际上是在使用 TurboMind 的大吞吐能力进行批量生成
- 执行测评
- 执行评测 :
cd /root/opencompass
python run.py opencompass/configs/eval_internlm2_awq_lmdeploy.py -w outputs
python run.py opencompass/configs/eval_internlm2_awq_lmdeploy.py -w outputs- 如果出现scikit-learn版本不兼容的报错,我们重新建一个环境,重新安装lmdeploy和opencompass
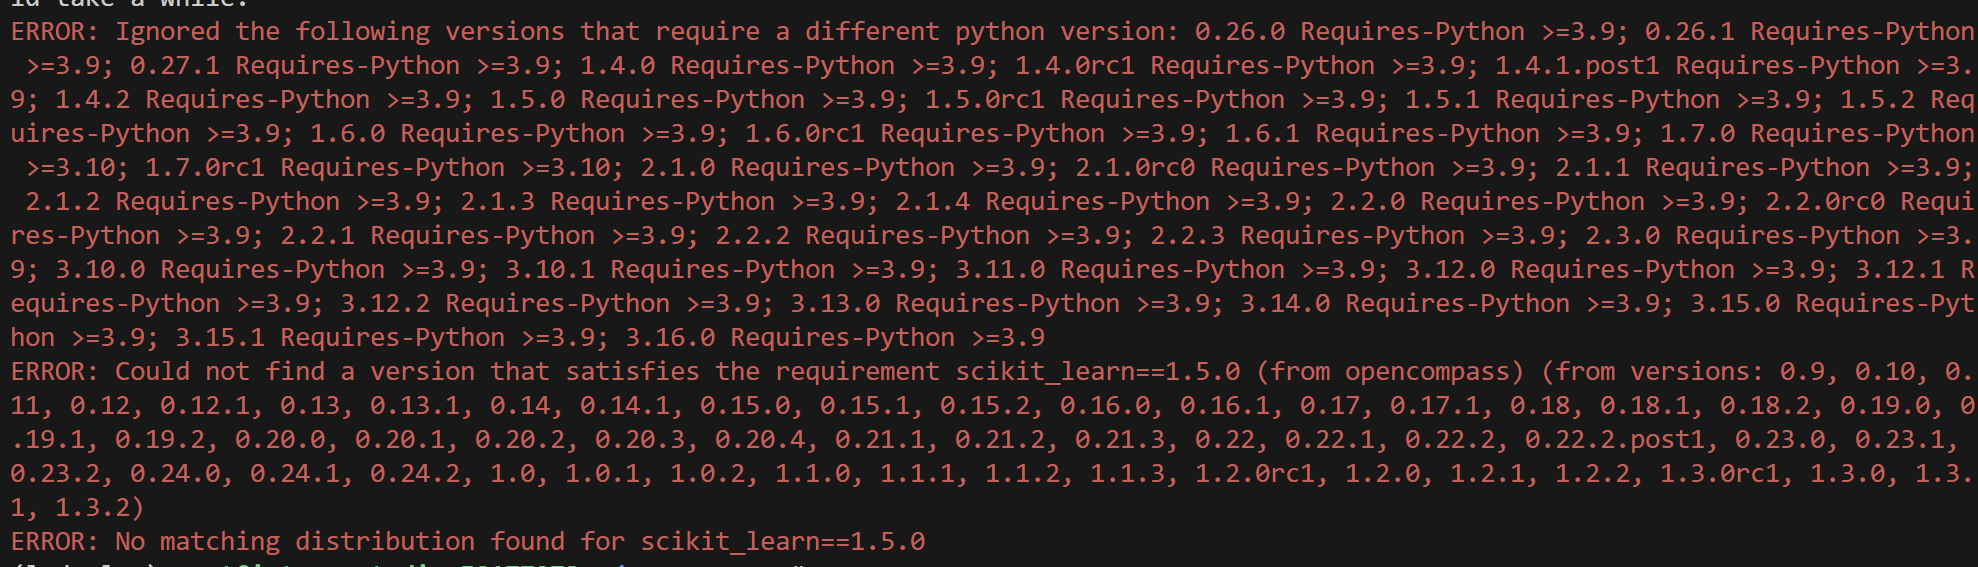
conda create -n eval python=3.10 -y
conda activate eval

pip install lmdeploy
git clone https://github.com/open-compass/opencompass.git
cd opencompass
pip install -e .
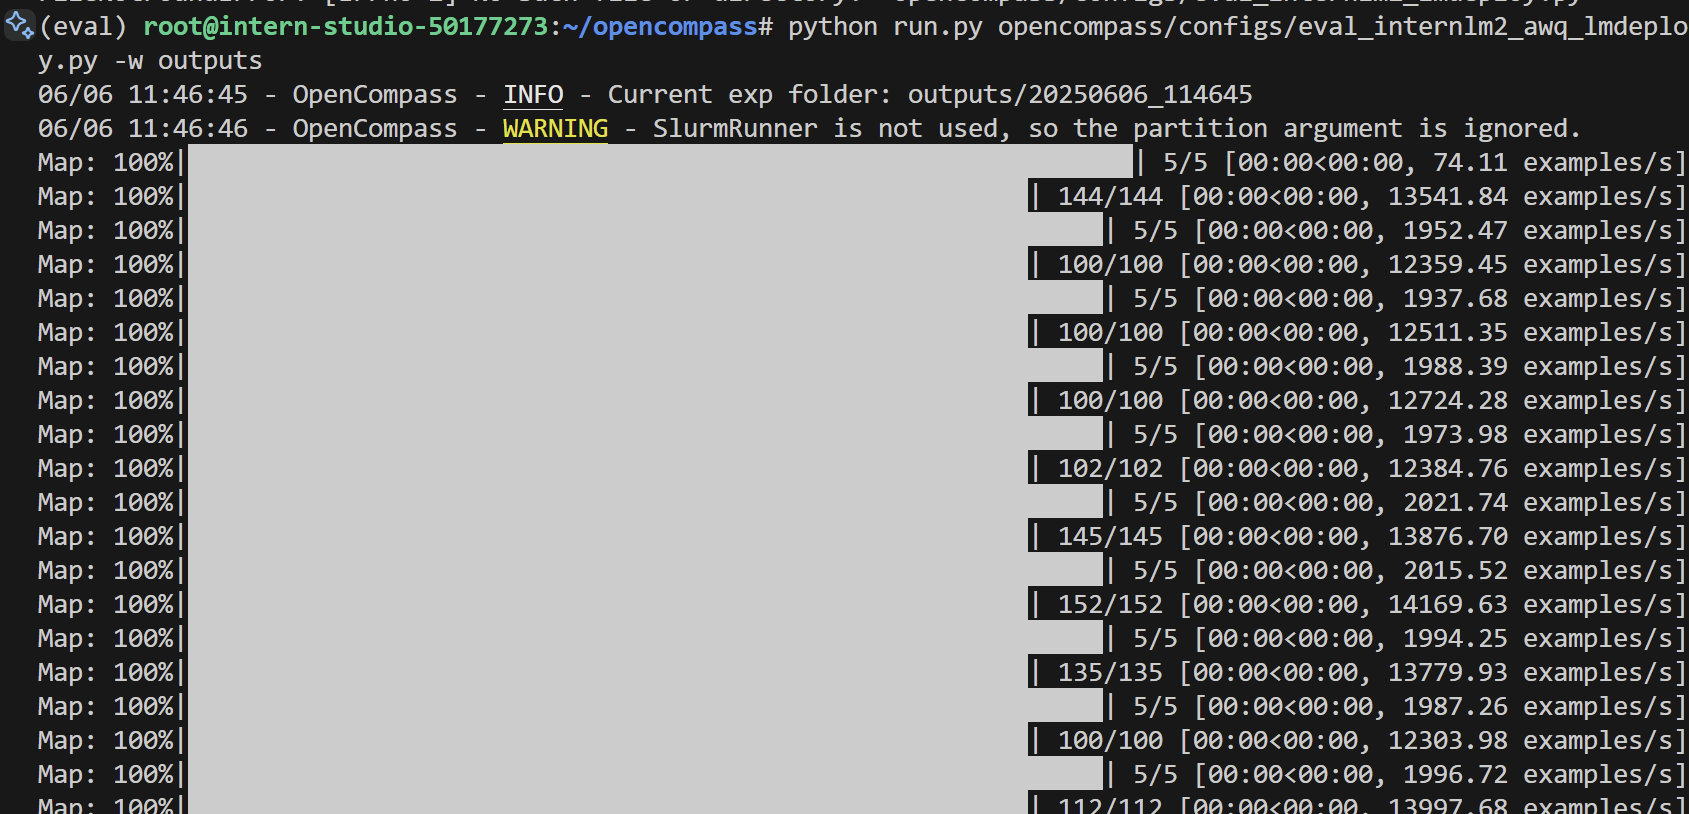
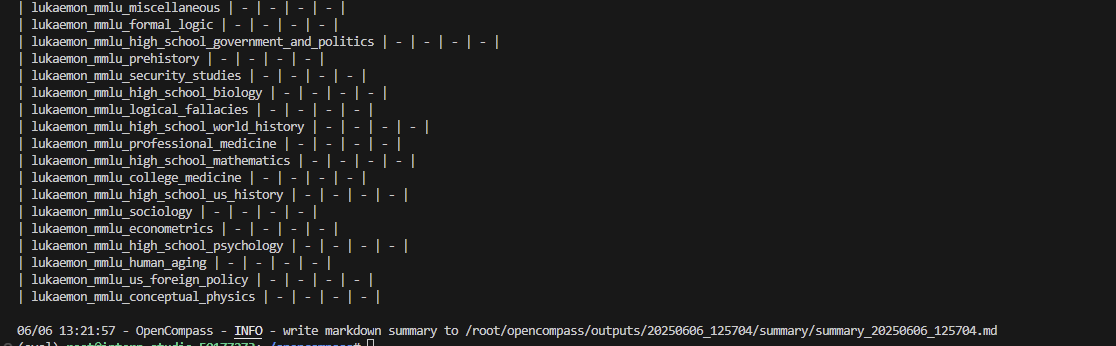
- 装好环境后,再次运行代码:
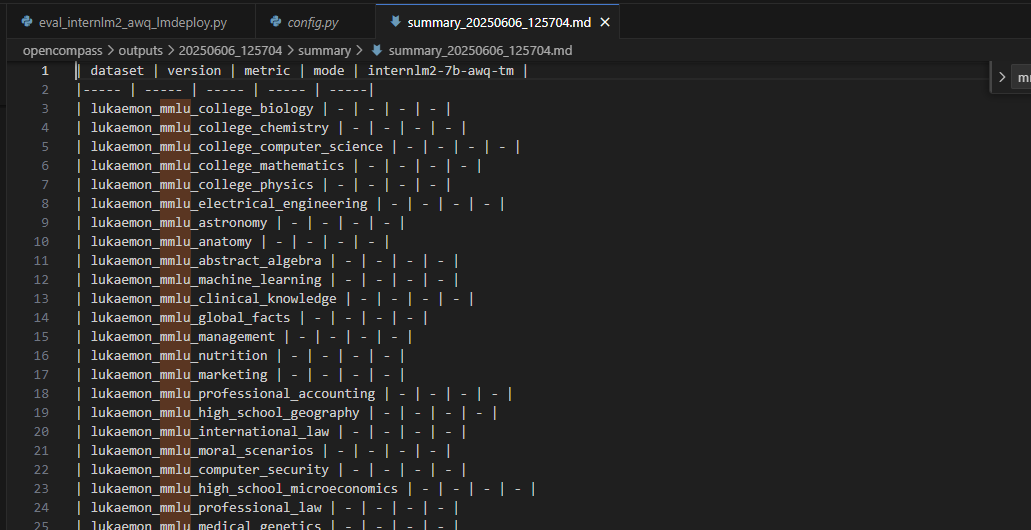
python run.py opencompass/configs/eval_internlm2_awq_lmdeploy.py -w outputs - 过程及输出结果(没跑出来QAQ)
【了解】W8A8(INT8 / FP8)量化 via SmoothQuant
:::info SmoothQuant 是一种 **同时量化激活与权重** 的方法,支持更高压缩率,适合 **边推理边压缩(在线部署)场景**。:::
1. pip install lmdeploy[all]

lmdeploy 提供了命令行工具 lmdeploy lite smooth_quant 实现量化功能。并且其中命令行参数 --quant-dtype 可以用来控制是进行8-bit整数还是浮点数类型的量化。更多命令行工具使用方式,请执行 lmdeploy lite smooth_quant --help 查看。

2. int8量化

lmdeploy lite smooth_quant internlm/internlm2_5-7b-chat --work-dir ./internlm2_5-7b-chat-int8 --quant-dtype int8

2. fp8量化

lmdeploy lite smooth_quant internlm/internlm2_5-7b-chat --work-dir ./internlm2_5-7b-chat-fp8 --quant-dtype fp8
--quant-dtype控制量化精度(int8 或 fp8);smooth_quant会进行校准计算和scale融合操作;- 适合更注重部署效能的场景(如低延迟应用、边缘部署)。
【了解】KV Cache 量化(推理时优化)
:::info 在大语言模型推理时,模型会缓存已生成 token 的 **Key-Value(KV)对**,从而避免重复计算历史上下文。问题在于这些 KV 通常是 float16/float32 格式,占用大量显存。
LMDeploy 的创新点
+ 支持在线(inference runtime)对 KV Cache 进行 **int4 / int8** 量化; + 每个 token 和每个 attention head 使用独立 scale(per-head per-token); + 极大降低显存,适合长上下文推理任务。:::
- 使用方法
from lmdeploy import pipeline, TurbomindEngineConfig

# 设置 quant_policy,4=int4, 8=int8
engine_config = TurbomindEngineConfig(quant_policy=8)

pipe = pipeline("internlm/internlm2_5-7b-chat", backend_config=engine_config)

response = pipe(["Hi, pls intro yourself", "Shanghai is"])
print(response)
无需修改模型本身,只需在配置中指定 quant_policy,非常轻量。

有“AI”的1024 = 2048,欢迎大家加入2048 AI社区
更多推荐


 14
14 0
0- 0


 已为社区贡献2条内容

所有评论(0)