zabbix 监控进程 日志 主从状态和主从延迟
zabbix 监控进程 日志 主从状态和主从延迟
一、自定义监控进程
以httpd服务为例,在agent1中安装httpd
[root@zabbix-agent ~]# yum -y install httpd
[root@zabbix-agent ~]# systemctl restart httpd
[root@zabbix-agent ~]# systemctl enable httpd.service
Created symlink from /etc/systemd/system/multi-user.target.wants/httpd.service to /usr/lib/systemd/system/httpd.service.
[root@zabbix-agent ~]# ps -ef | grep -v grep | grep -c httpd
6
1、新建脚本存放目录
[root@zabbix-agent ~]# mkdir /etc/zabbix/script
[root@zabbix-agent ~]# cd /etc/zabbix/script/
[root@zabbix-agent script]# ls
[root@zabbix-agent script]# vim check_httpd.sh
[root@zabbix-agent script]# chmod +x check_httpd.sh
[root@zabbix-agent script]# chown -R zabbix.zabbix /etc/zabbix/script/check_httpd.sh
[root@zabbix-agent script]# cat check_httpd.sh
#!/bin/bash
count=$(ps -ef | grep -Ev "grep|$0" | grep -c httpd)
if [ $count -eq 0 ];then
echo '1'
else
echo '0'
fi
测试脚本–0是httpd服务开启,1为关闭
[root@zabbix-agent script]# ./check_httpd.sh
0
[root@zabbix-agent script]# systemctl stop httpd
[root@zabbix-agent script]# ./check_httpd.sh
1
2、修改zabbix_agentd.conf文件

[root@zabbix-agent script]# systemctl restart zabbix-agent
3、zabbix server端进行测试脚本
[root@zabbix-sever ~]# zabbix_get -s 192.168.110.30 -k check_httpd
0
0代表httpd服务已启动
4、zabbix web平台配置
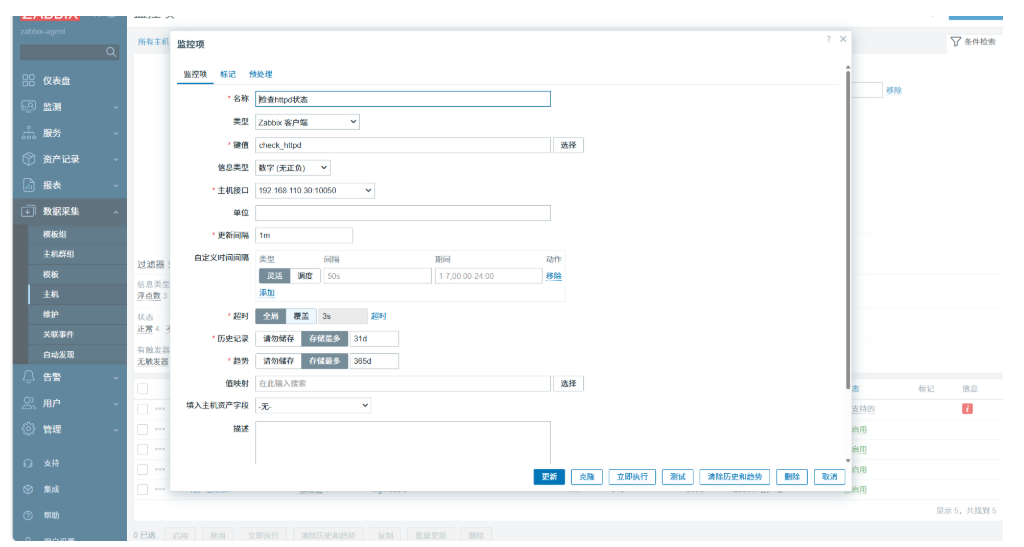
新建监控项
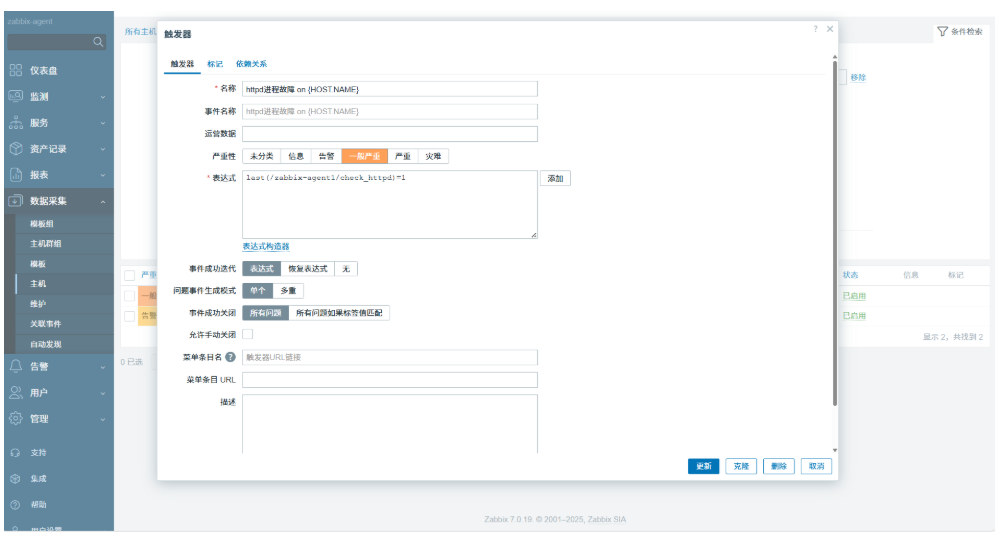
配置触发器
配置动作
外链图片转存失败,源站可能有防盗链机制,建议将图片保存下来直接上传
测试–关闭httpd服务,测试告警信息

二、自定义监控日志
下载log.py来协助我们进行测试,以httpd服务为例
1、将log.py上传到/etc/zabbix/script/目录下,然后给执行权限,修改所有者和所属组为zabbix
# log.py
### 作用:检查日志文件中是否有指定的关键字
#### 第一个参数为日志文件名(必须有,相对路径、绝对路径均可)
#### 第二个参数为seek position文件的路径(可选项,若不设置则默认为/tmp/logseek文件。相对路径、绝对路径均可)
#### 第三个参数为搜索关键字,默认为 Error
[root@zabbix-agent script]# chmod +x log.py
[root@zabbix-agent script]# chown zabbix.zabbix log.py
2、httpd服务的日志文件在/var/log/httpd/目录下,首先我们需要给这个目录设置一个ACL权限,让zabbix用户有权限去访问该目录
[root@zabbix-agent script]# setfacl -m u:zabbix:r-x /var/log/httpd/
3、下载python3来执行log.py脚本
[root@zabbix-agent script]# yum -y install python3
4、修改zabbix_agentd.conf文件,并重启服务

[root@zabbix-agent script]# systemctl restart zabbix-agent.service
5、测试脚本
[root@zabbix-agent script]# python3 log.py /var/log/httpd/error_log
0
[root@zabbix-agent script]#  echo 'Error' >> /var/log/httpd/error_log
[root@zabbix-agent script]# python3 log.py /var/log/httpd/error_log
1
0为没有Error日志信息,1为有Error日志信息
测试完成后将写入的Error内容删除,而且因文件/tmp/logseek属于root账户,在web端写入写不进去,所以删除。
[root@zabbix-agent script]# cd /tmp/
[root@zabbix-agent tmp]# ls
logseek
systemd-private-55b694f3b45a48dc89e3322aa4627322-bolt.service-3Ng3lK
systemd-private-55b694f3b45a48dc89e3322aa4627322-colord.service-Y59esP
systemd-private-55b694f3b45a48dc89e3322aa4627322-cups.service-Dq97gF
systemd-private-55b694f3b45a48dc89e3322aa4627322-rtkit-daemon.service-dZLfMe
systemd-private-577c3ea0d5a44c08a9da75d9ba428940-bolt.service-vxrMId
systemd-private-577c3ea0d5a44c08a9da75d9ba428940-colord.service-q6WzpP
systemd-private-577c3ea0d5a44c08a9da75d9ba428940-cups.service-P73zfY
systemd-private-577c3ea0d5a44c08a9da75d9ba428940-httpd.service-KPspqM
systemd-private-577c3ea0d5a44c08a9da75d9ba428940-rtkit-daemon.service-k4Os6t
vmware-root_8581-1949180925
vmware-root_8594-970178100
vmware-root_8597-1982211565
yum_save_tx.2025-10-15.19-51.C2GW1K.yumtx
[root@zabbix-agent tmp]# rm -rf logseek
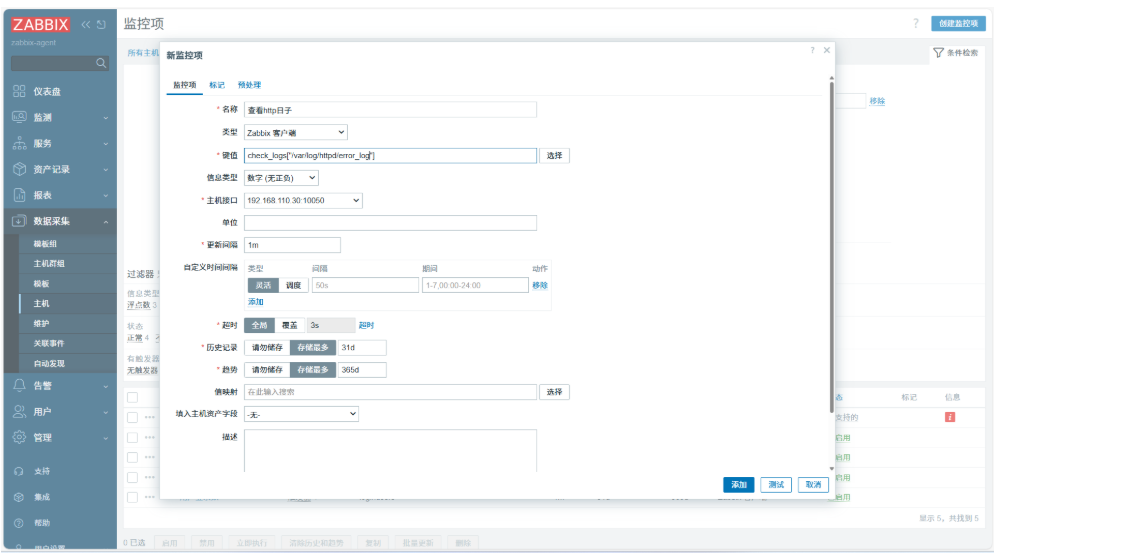
6、配置监控项
7、创建触发器

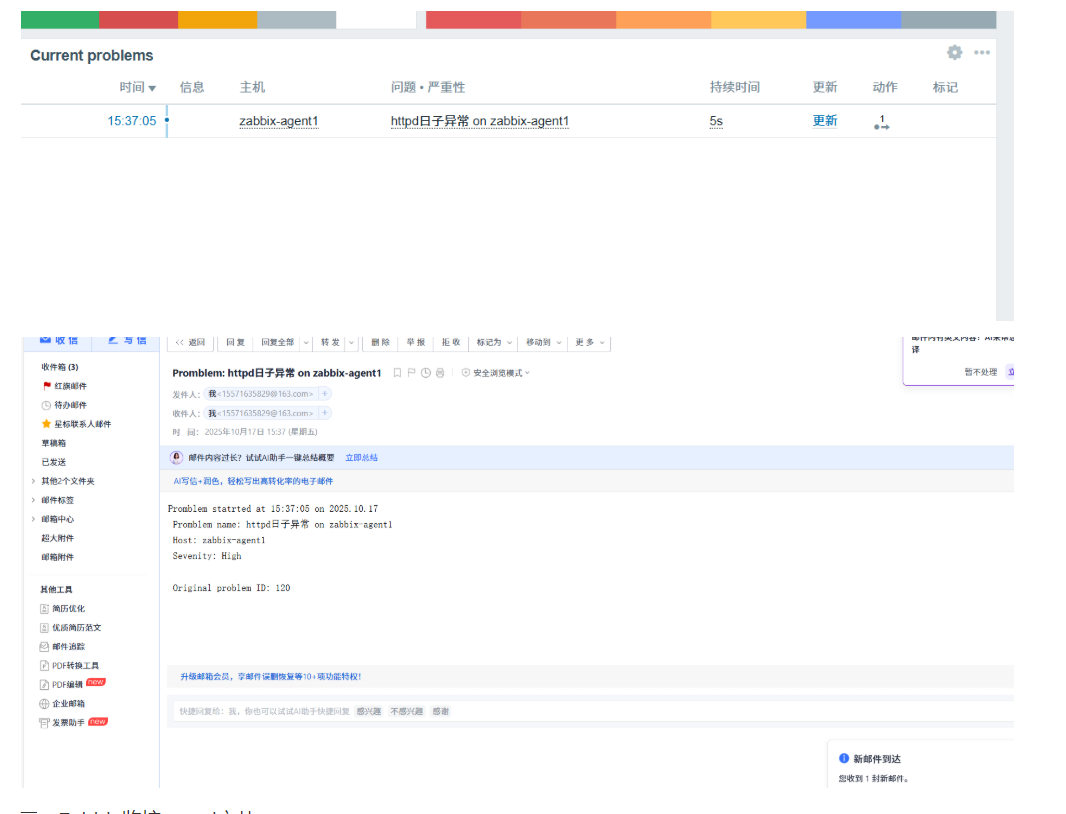
8、测试,echo Error >> /var/log/httpd/error_log
三、Zabbix监控mysql主从
1.部署mysql主从,使用mariadb进行操作
192.168.100.10 master.example.com master
192.168.100.20 slave.example.com slave
2、将server、agent1、master、slave主机的/etc/hosts文件全部设置为
192.168.110.110 zabbix-server.example.com zabbix-server
192.168.110.30 zabbix-agent.example.com zabbix-agent
192.168.110.10 master.example.com master
192.168.110.20 slave.example.com slave
3、master和slave为centos7的操作系统,将centos7的安装源下载下来,然后两台主机都安装mariadb mariadb-server
[root@master yum.repos.d]# yum install -y mariadb mariadb-server
[root@master yum.repos.d]# systemctl restart mariadb;systemctl enable mariadb
Created symlink from /etc/systemd/system/multi-user.target.wants/mariadb.service to /usr/lib/systemd/system/mariadb.service.
[root@slave yum.repos.d]# yum install -y mariadb mariadb-server
[root@slave yum.repos.d]# systemctl restart mariadb;systemctl enable mariadb
Created symlink from /etc/systemd/system/multi-user.target.wants/mariadb.service to /usr/lib/systemd/system/mariadb.service.
4、两台主机都初始化mysql数据库
mysql_secure_installation
5、修改数据库配置文件,然后两台主机都重启mariadb服务
Master:
vim /etc/my.cnf
[mysqld]
#添加两行数据
log_bin=mysql-bin
server_id=20
systemctl restart mariadb
Slave:
vim /etc/my.cnf
[mysqld]
#添加两行数据
log_bin=mysql-bin
server_id=30
systemctl restart mariadb
6、进入数据库配置主从
master
[root@master ~]# mysql -uroot -p123456
Welcome to the MariaDB monitor.  Commands end with ; or \g.
Your MariaDB connection id is 2
Server version: 5.5.68-MariaDB MariaDB Server

Copyright (c) 2000, 2018, Oracle, MariaDB Corporation Ab and others.

Type 'help;' or '\h' for help. Type '\c' to clear the current input statement.

MariaDB [(none)]> grant all privileges  on *.* to root@'%' identified by "123456";
Query OK, 0 rows affected (0.00 sec)

MariaDB [(none)]> grant replication slave on *.* to 'user'@'slave' identified by '123456';
Query OK, 0 rows affected (0.00 sec)
slave
[root@slave ~]# mysql -uroot -p123456
Welcome to the MariaDB monitor.  Commands end with ; or \g.
Your MariaDB connection id is 2
Server version: 5.5.68-MariaDB MariaDB Server

Copyright (c) 2000, 2018, Oracle, MariaDB Corporation Ab and others.

Type 'help;' or '\h' for help. Type '\c' to clear the current input statement.

MariaDB [(none)]> grant all privileges  on *.* to root@'%' identified by "123456";
Query OK, 0 rows affected (0.00 sec)

MariaDB [(none)]> change master to master_host='master',master_user='user',master_password='123456';
Query OK, 0 rows affected (0.01 sec)

MariaDB [(none)]> start slave;
Query OK, 0 rows affected (0.01 sec)

MariaDB [(none)]> show slave status\G
*************************** 1. row ***************************
               Slave_IO_State: Connecting to master
                  Master_Host: master
                  Master_User: user
                  Master_Port: 3306
                Connect_Retry: 60
              Master_Log_File:
          Read_Master_Log_Pos: 4
               Relay_Log_File: mariadb-relay-bin.000001
                Relay_Log_Pos: 4
        Relay_Master_Log_File:
             Slave_IO_Running: Connecting
            Slave_SQL_Running: Yes
              Replicate_Do_DB:
          Replicate_Ignore_DB:
           Replicate_Do_Table:
       Replicate_Ignore_Table:
      Replicate_Wild_Do_Table:
  Replicate_Wild_Ignore_Table:
                   Last_Errno: 0
                   Last_Error:
                 Skip_Counter: 0
          Exec_Master_Log_Pos: 0
              Relay_Log_Space: 245
              Until_Condition: None
               Until_Log_File:
                Until_Log_Pos: 0
           Master_SSL_Allowed: No
           Master_SSL_CA_File:
           Master_SSL_CA_Path:
              Master_SSL_Cert:
            Master_SSL_Cipher:
               Master_SSL_Key:
        Seconds_Behind_Master: NULL
Master_SSL_Verify_Server_Cert: No
                Last_IO_Errno: 2003
                Last_IO_Error: error connecting to master 'user@master:3306' - retry-time: 60  retries: 86400  message: Can't connect to MySQL server on 'master' (113)
               Last_SQL_Errno: 0
               Last_SQL_Error:
  Replicate_Ignore_Server_Ids:
             Master_Server_Id: 0
1 row in set (0.00 sec)
7、在slave主机中安装zabbix-agent软件包
[root@slave ~]#  rpm -Uvh https://repo.zabbix.com/zabbix/7.0/rhel/7/x86_64/zabbix-release-latest-7.0.el7.noarch.rpm
[root@slave yum.repos.d]# yum -y install zabbix-agent
8.修改/etc/zabbix/zabbix_agentd.conf,重启服务
[root@slave yum.repos.d]# vim /etc/zabbix/zabbix_agentd.conf
Server=192.168.100.110
ServerActive=192.168.100.110
Hostname=slave
[root@slave yum.repos.d]# systemctl restart zabbix-agent
[root@slave yum.repos.d]# systemctl restart zabbix-agent
9、进入zabbix web监控平台,添加主机
gent
8.修改/etc/zabbix/zabbix_agentd.conf,重启服务
[root@slave yum.repos.d]# vim /etc/zabbix/zabbix_agentd.conf
Server=192.168.100.110
ServerActive=192.168.100.110
Hostname=slave
[root@slave yum.repos.d]# systemctl restart zabbix-agent
[root@slave yum.repos.d]# systemctl restart zabbix-agent
9、进入zabbix web监控平台,添加主机

有“AI”的1024 = 2048,欢迎大家加入2048 AI社区
更多推荐


 7
7 0
0- 0


 已为社区贡献3条内容

所有评论(0)