Arduino 渐变LED灯实验
本文介绍了使用Arduino实现LED渐变效果的实验过程。通过连接Arduino Uno、LED、电阻等元件,编写PWM控制代码实现LED亮度渐变。实验中遇到代码错误、引脚接错、电路不通等问题,通过AI辅助和同学讨论逐一解决。最终理解了brightness(0-255亮度值)和fadeAmount(渐变步长)的作用原理,成功实现LED呼吸灯效果。该实验不仅让作者掌握了PWM控制技术,更培养了问题解
前提:已安装好Arduino IDE软件,并在tools上选择主板(Uno)选择串行端口(COM3)
一.需要组件:
面包板,Arduino Uno R3,LED,330Ω电阻,跳线(两条)
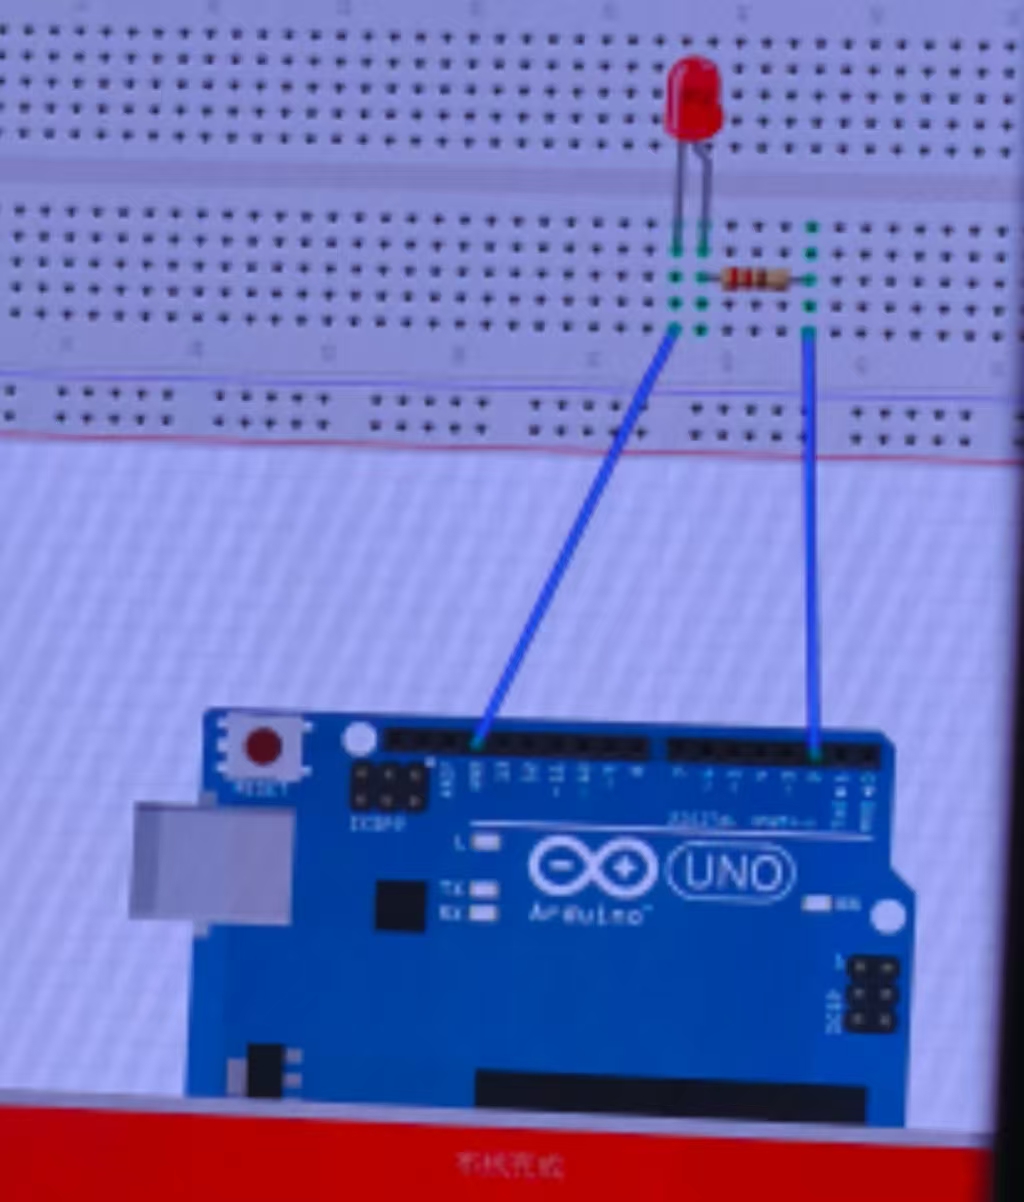
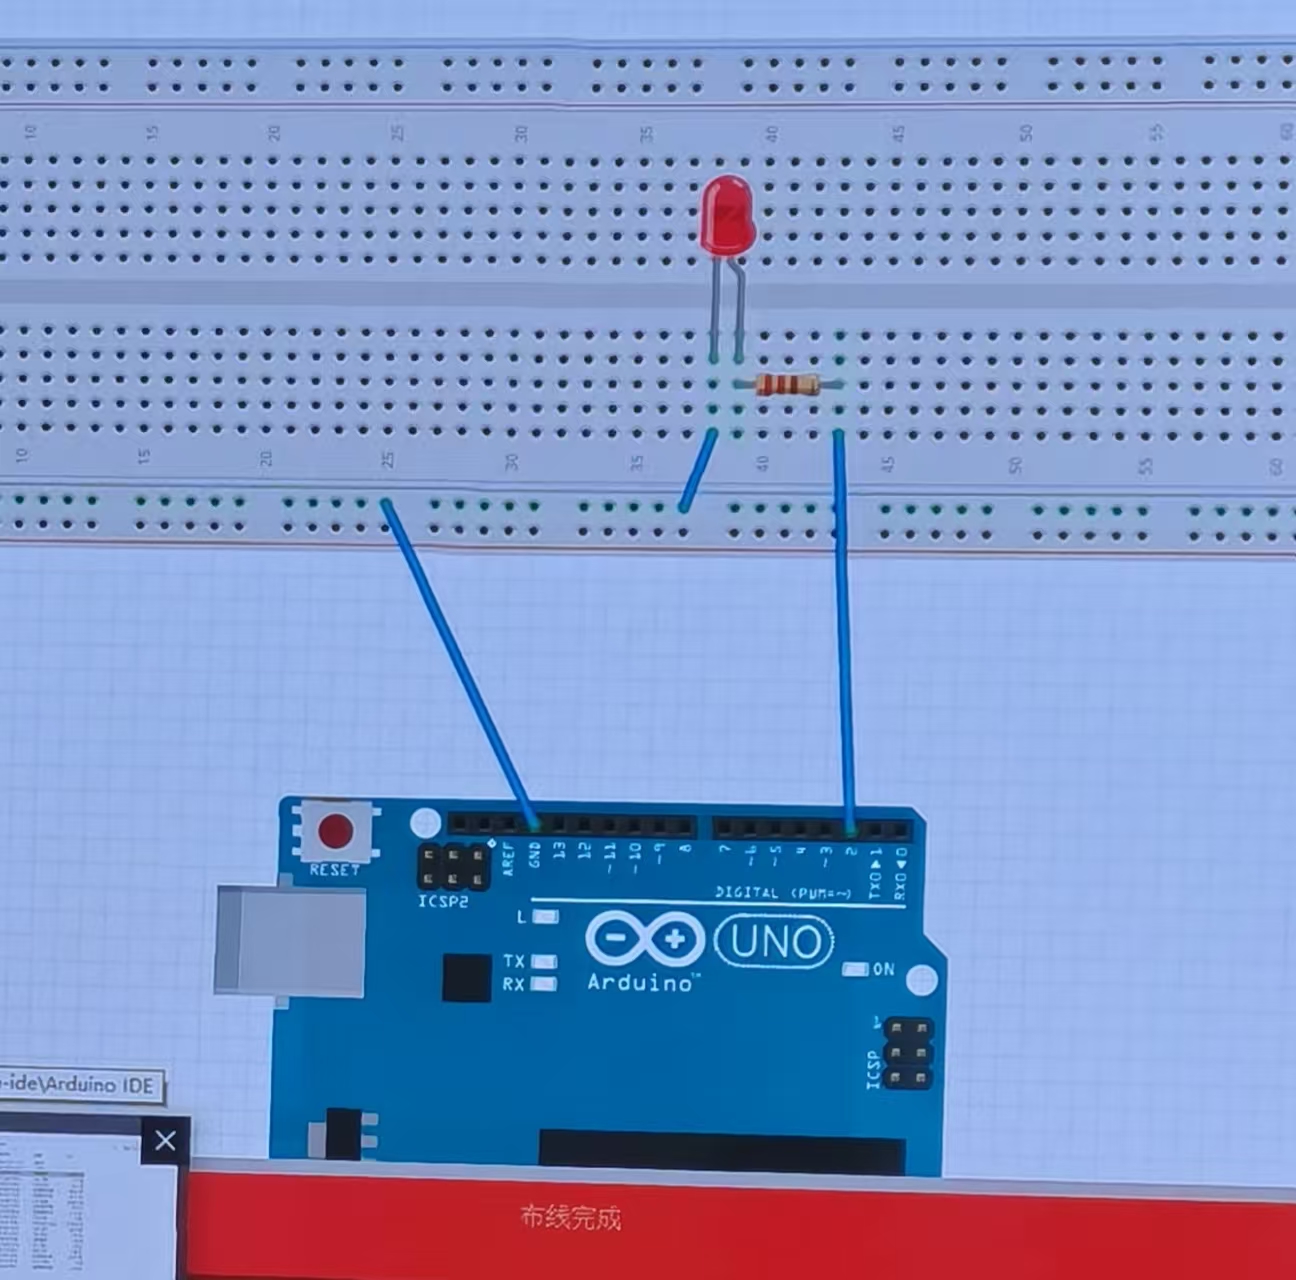
二.按照电路图连接(如下0)
三.在计算机上打开Arduino软件,输入代码:
/*
  Fade
  This example shows how to fade an LED on pin 9using the analogwrite() function.
  The analogwrite() function uses PwM, so if you want to change the pin you're using, be
  sure to use another PWM capable pin. On most Arduino, the PWM pins are identified with
  a "~" sign, 1ike ~3,~5,~6, ~9,~10 and ~11.
*/

  int led = 2; // the PwM pin the LED is attached to
  int brightness = 0; // how bright the LED is
  int fadeAmount = 5; // how many points to fade the LED by
// the setup routine runs once when you press reset:

void setup()
  // declare pin 9 to be an output:
  pinmode(1ed, OUTPUT);
}
// the loop routine runs over and over again forever:

void Toop()
  // set the brightness of pin 9:
  analogwrite(led, brightness);
  // change the brightness for next time through the loop:
  brightness = brightness + fadeAmount;
  // reverse the direction of the fading at the ends of the fade:
  if (brightness == 0 1l brightness 255) {
             fadeAmount = -fadeAmount ;
  }
  // wait for 30 milliseconds to see the dimming effect
  delay(300);
}
注意:引脚(Pin)是板载的物理连接点,可以通过导线连接到其他元件(如LED)。这些引脚是微控制器与外界交互的接口。当不接2接9时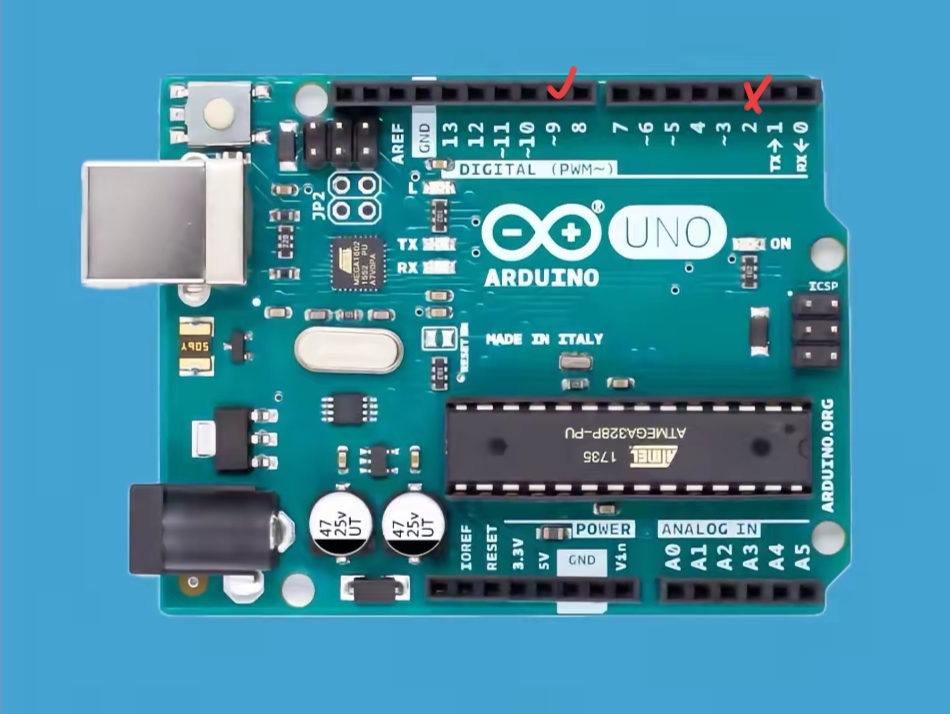
代码也需修改(如右图)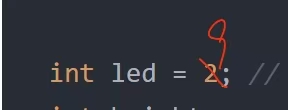
四.成果:
渐变
这一过程遇到的问题:
1.代码错误(一开始我是复制粘贴的,所以这一过程中会出现串行等问题)随后将自己的代码拍给DeepSeek,DS点出位置错误,并给出修正后的代码,我对照后发现代码串行,就纠正过来。
2.引脚接的数与代码写的不一致(如上面“注意”提到),与同学讨论检查后发现并改正。
3.用另一种接法接电路,LED灯却不亮,后面是在其他组同学上去总结他们遇到的问题时,才知道面包板正负极间隔大块的两边是不通电的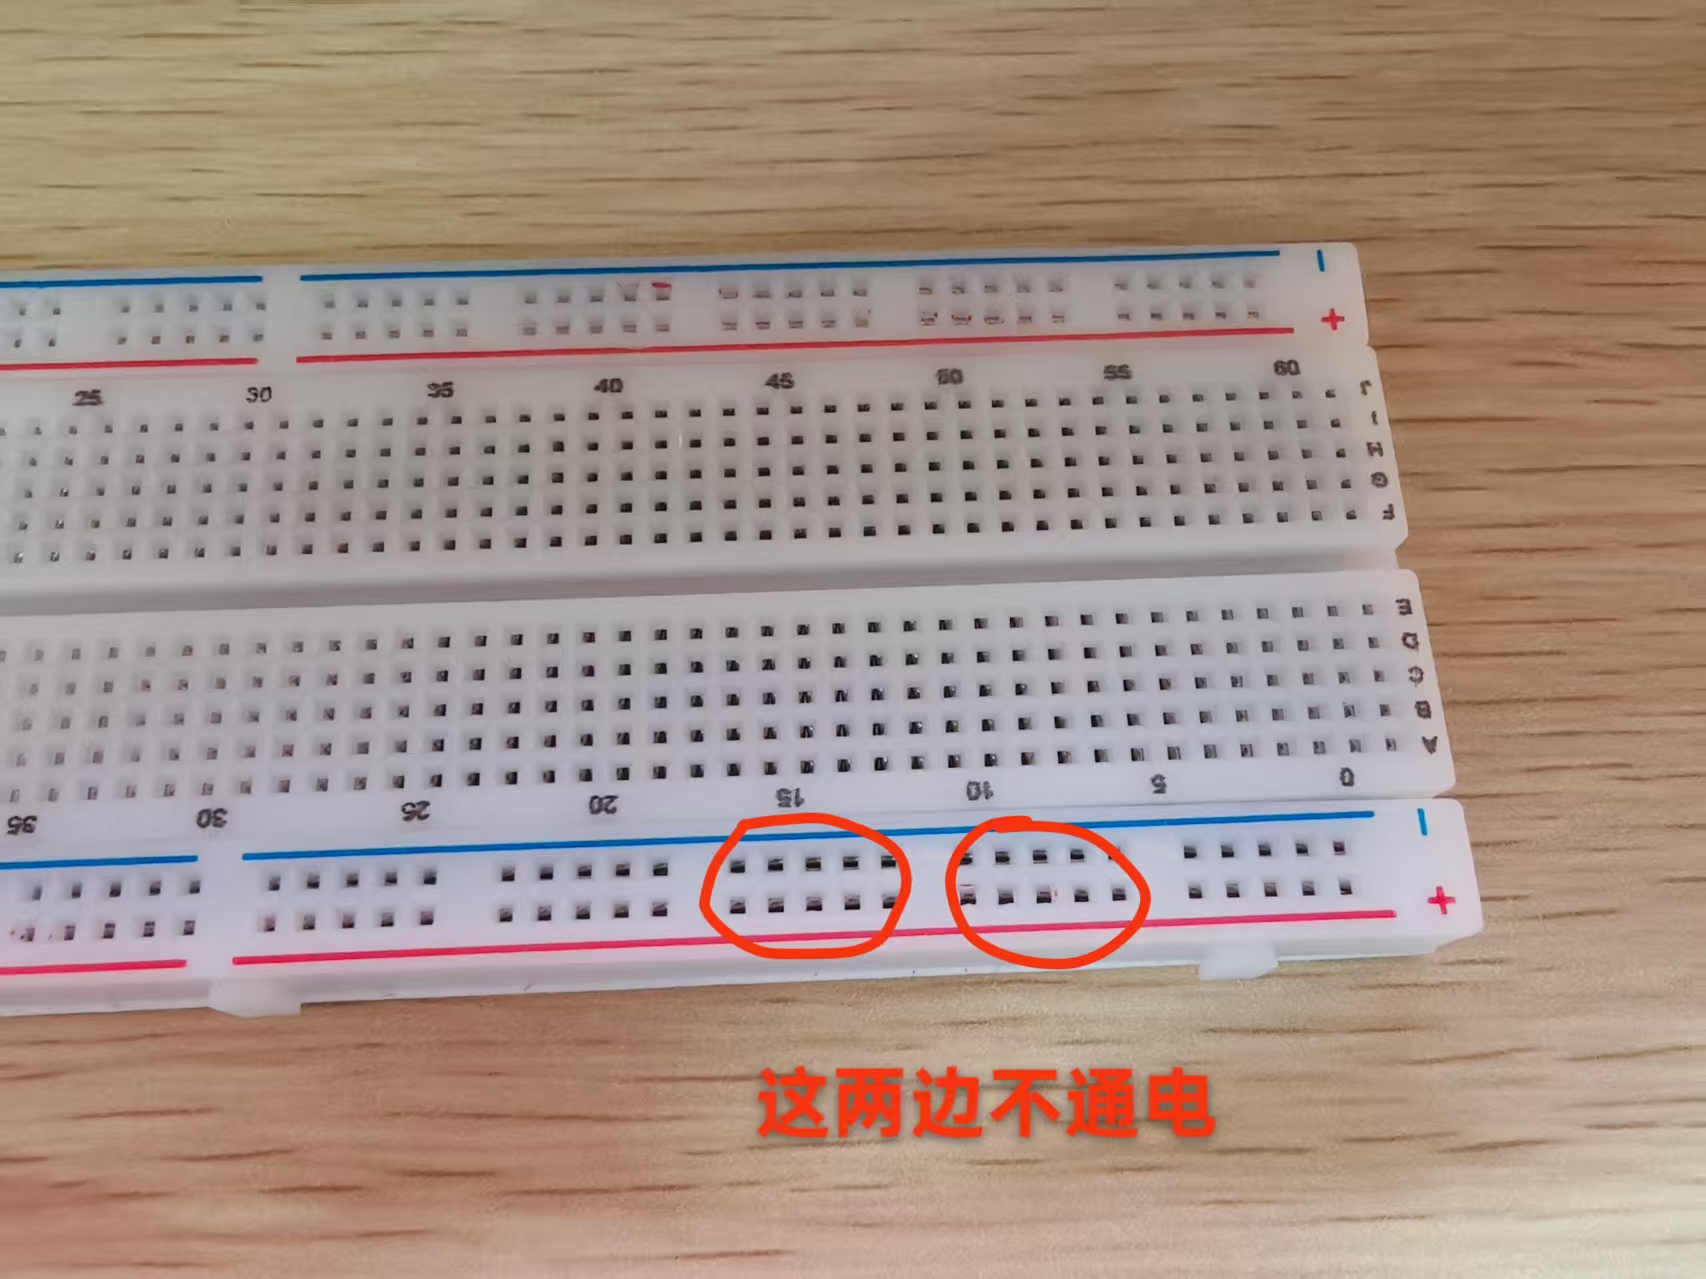
而我当时是这样接的
并没有形成一个回路,所以LED灯不亮。
补充:
1.brightness是一个整数变量,用于存储当前LED灯的亮度值。在Arduino中,使用PWM控制LED亮度时,brightness的取值范围是0到255.0表示完全关闭(LED灯不亮)255表示最大亮度(LED灯最亮)。(问AI得出)
2.fadeAmunt是一个变量,它控制了亮度变化的步长,当fadeAmount的值越大,LED灯的渐变速度就越快,反之 则越慢。(改代码中的数值得出)
3.brightness的变化过程:程序开始时,brightness初始值为0(LED灯熄灭)。在每次循环中,在每次循环中增加fadeAmount(如上面代码中的5)直到增加到255(LED灯最亮)。当brightness达到255后,fadeAmount变为负值(-5),brightness开始递减,直到0。如此循环,形成LED灯渐变的效果(呼吸效果)。
心得:制作Arduino渐变LED灯,完成让一个灯从暗到亮,又从亮到暗这一过程,不仅使我很有成就感,更让我掌握PWM信号控制LED灯亮度的核心原理,体会到编程与硬件结合的实践乐趣。这次实验也培养了我的排查能力和动手思维,激发了我探索更多Arduino应用的兴趣。

有“AI”的1024 = 2048,欢迎大家加入2048 AI社区
更多推荐


 4
4 0
0- 0


 已为社区贡献1条内容

所有评论(0)