Zabbix安装与配置全攻略
Zabbix是一款开源的监控系统,用于实时监控服务器和网络设备状态。本文档详细介绍了Zabbix的安装步骤:首先配置本地Yum仓库并安装必要工具包;然后安装Zabbix源及相关组件;接着配置MariaDB数据库并创建Zabbix专用数据库;最后导入表结构。Zabbix具有数据采集、触发告警、数据存储和可视化展示等功能,采用Server-Agent架构,支持通过Web界面进行管理。安装过程包括关闭防
Zabbix 安装文档
一、Zabbix 简介
Zabbix 是一款开源的监控系统,用于实时监控服务器、网络设备等基础设施的状态。当设备出现异常时,Zabbix 能够及时发出告警通知,帮助管理员快速响应。此外,Zabbix 还提供丰富的数据可视化功能,将监控数据转化为图表和报告,便于分析和趋势判断。
Zabbix 特性
- 数据采集:通过 Zabbix Agent 定期收集设备的 CPU、内存、网络流量等指标数据,并由 Zabbix Server 主动获取。
- 触发检测与告警:根据预设的阈值和触发条件检测数据,一旦超出范围即触发告警,并通过邮件、短信等方式通知相关人员。
- 数据存储:所有监控数据和配置信息均存储在数据库中。
- 数据展示:提供丰富的图表和报表功能,直观展示设备运行状态和趋势。
Zabbix 架构
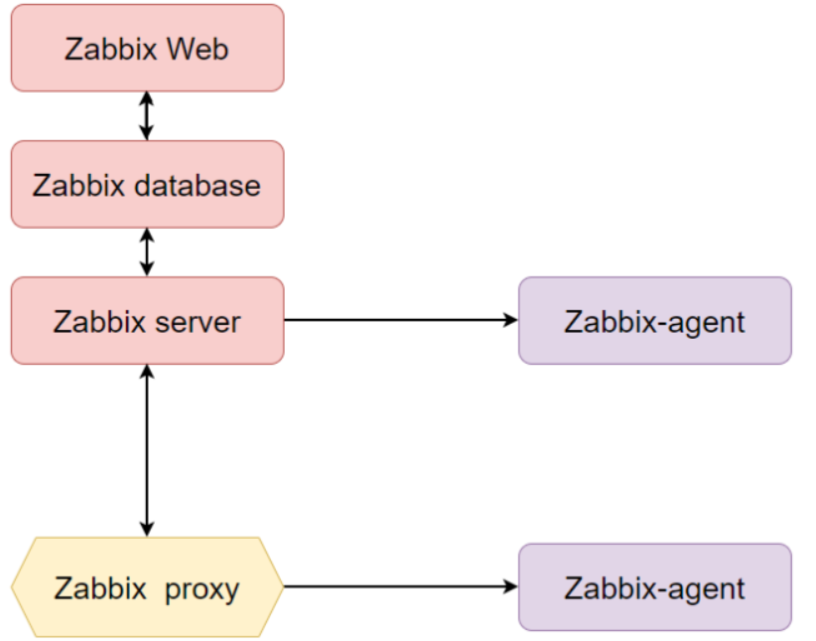
- Zabbix Server:负责收集数据、触发告警、发送通知。
- Zabbix Database:存储所有配置信息和监控数据。
- Zabbix Web:提供基于 Web 的管理界面,通常与 Server 部署在同一台机器。
- Zabbix Proxy:可选组件,用于分担 Server 的数据收集压力。
- Zabbix Agent:部署在被监控设备上,负责采集本地资源数据。
二、安装 Zabbix
1. 配置本地 Yum 仓库(如适用)
[root@zabbix-server ~] vim /etc/yum.repos.d/server.repo
[baseos]
name=CentOS Stream $releasever - BaseOS
baseurl=file:///mnt/BaseOS
gpgcheck=0
enabled=1

[appstream]
name=CentOS Stream $releasever - AppStream
baseurl=file:///mnt/AppStream
gpgcheck=0
enabled=1
2.关闭防火墙、selinux、设置时钟同步,安装工具包
[root@zabbix-server ~] yum -y install lrzsz tar net-tools chrony
[root@zabbix-server ~] systemctl restart chronyd
[root@zabbix-server ~] systemctl enable chronyd
[root@zabbix-server ~] hwclock -w
3. 系统初始化
[root@zabbix-server ~] yum -y install lrzsz tar net-tools chrony
[root@zabbix-server ~] systemctl restart chronyd
[root@zabbix-server ~] systemctl enable chronyd
[root@zabbix-server ~] hwclock -w
4. 安装 Zabbix 源
[root@zabbix-server ~] rpm -Uvh zabbix-release-7.0-2.el9.noarch.rpm
替换为阿里源:
cat > /etc/yum.repos.d/zabbix.repo <<EOF
[zabbix]
name=Zabbix Official Repository - \$basearch
baseurl=https://mirrors.aliyun.com/zabbix/zabbix/7.0/rocky/9/\$basearch/
enabled=1
gpgcheck=0

[zabbix-non-supported]
name=Zabbix Official Repository non-supported - \$basearch
baseurl=https://mirrors.aliyun.com/zabbix/non-supported/rhel/9/\$basearch/
enabled=1
gpgcheck=0
EOF
屏蔽 EPEL 源中的 Zabbix 包:
echo "excludepkgs=zabbix*" >> /etc/yum.repos.d/epel.repo
5. 安装 Zabbix 组件
[root@zabbix-server ~] yum install zabbix-server-mysql zabbix-web-mysql zabbix-nginx-conf zabbix-sql-scripts zabbix-selinux-policy zabbix-agent -y
6. 安装并配置数据库(MariaDB)
[root@zabbix-server ~] yum -y install mariadb-server mariadb
[root@zabbix-server ~] systemctl restart mariadb
[root@zabbix-server ~] systemctl enable mariadb
[root@zabbix-server ~] mysql_secure_installation
NOTE: RUNNING ALL PARTS OF THIS SCRIPT IS RECOMMENDED FOR ALL MariaDB
      SERVERS IN PRODUCTION USE!  PLEASE READ EACH STEP CAREFULLY!

In order to log into MariaDB to secure it, we'll need the current
password for the root user. If you've just installed MariaDB, and
haven't set the root password yet, you should just press enter here.

Enter current password for root (enter for none):
OK, successfully used password, moving on...

Setting the root password or using the unix_socket ensures that nobody
can log into the MariaDB root user without the proper authorisation.

You already have your root account protected, so you can safely answer 'n'.

Switch to unix_socket authentication [Y/n] y
Enabled successfully!
Reloading privilege tables..
 ... Success!


You already have your root account protected, so you can safely answer 'n'.

Change the root password? [Y/n] y
New password: 输入密码
Re-enter new password: 再次输入密码
Password updated successfully!
Reloading privilege tables..
 ... Success!


By default, a MariaDB installation has an anonymous user, allowing anyone
to log into MariaDB without having to have a user account created for
them.  This is intended only for testing, and to make the installation
go a bit smoother.  You should remove them before moving into a
production environment.

Remove anonymous users? [Y/n] y
 ... Success!

Normally, root should only be allowed to connect from 'localhost'.  This
ensures that someone cannot guess at the root password from the network.

Disallow root login remotely? [Y/n] n
 ... skipping.

By default, MariaDB comes with a database named 'test' that anyone can
access.  This is also intended only for testing, and should be removed
before moving into a production environment.

Remove test database and access to it? [Y/n] y
 - Dropping test database...
 ... Success!
 - Removing privileges on test database...
 ... Success!

Reloading the privilege tables will ensure that all changes made so far
will take effect immediately.

Reload privilege tables now? [Y/n] y
 ... Success!

Cleaning up...

All done!  If you've completed all of the above steps, your MariaDB
installation should now be secure.

Thanks for using MariaDB!
7. 创建 Zabbix 数据库并导入表结构
[root@zabbix-server ~] mysql -uroot -p
Enter password:
Welcome to the MariaDB monitor.  Commands end with ; or \g.
Your MariaDB connection id is 12
Server version: 10.5.22-MariaDB MariaDB Server

Copyright (c) 2000, 2018, Oracle, MariaDB Corporation Ab and others.

Type 'help;' or '\h' for help. Type '\c' to clear the current input statement.
MariaDB [(none)]> CREATE DATABASE zabbix CHARACTER SET utf8mb4 COLLATE utf8mb4_bin;
MariaDB [(none)]> CREATE USER zabbix@localhost IDENTIFIED BY 'redhat';
MariaDB [(none)]> GRANT ALL PRIVILEGES ON zabbix.* TO zabbix@localhost;
MariaDB [(none)]> SET GLOBAL log_bin_trust_function_creators = 1;
MariaDB [(none)]> FLUSH PRIVILEGES;
MariaDB [(none)]> EXIT;
导入数据:
[root@zabbix-server ~] zcat /usr/share/zabbix-sql-scripts/mysql/server.sql.gz | mysql --default-character-set=utf8mb4 -uzabbix -predhat zabbix
导入后禁用函数创建器选项:
[root@zabbix-server ~] mysql -uroot -p
Enter password:
Welcome to the MariaDB monitor.  Commands end with ; or \g.
Your MariaDB connection id is 14
Server version: 10.5.22-MariaDB MariaDB Server

Copyright (c) 2000, 2018, Oracle, MariaDB Corporation Ab and others.

Type 'help;' or '\h' for help. Type '\c' to clear the current input statement.
MariaDB [(none)]> SET GLOBAL log_bin_trust_function_creators = 0;
MariaDB [(none)]> FLUSH PRIVILEGES;
MariaDB [(none)]> EXIT;
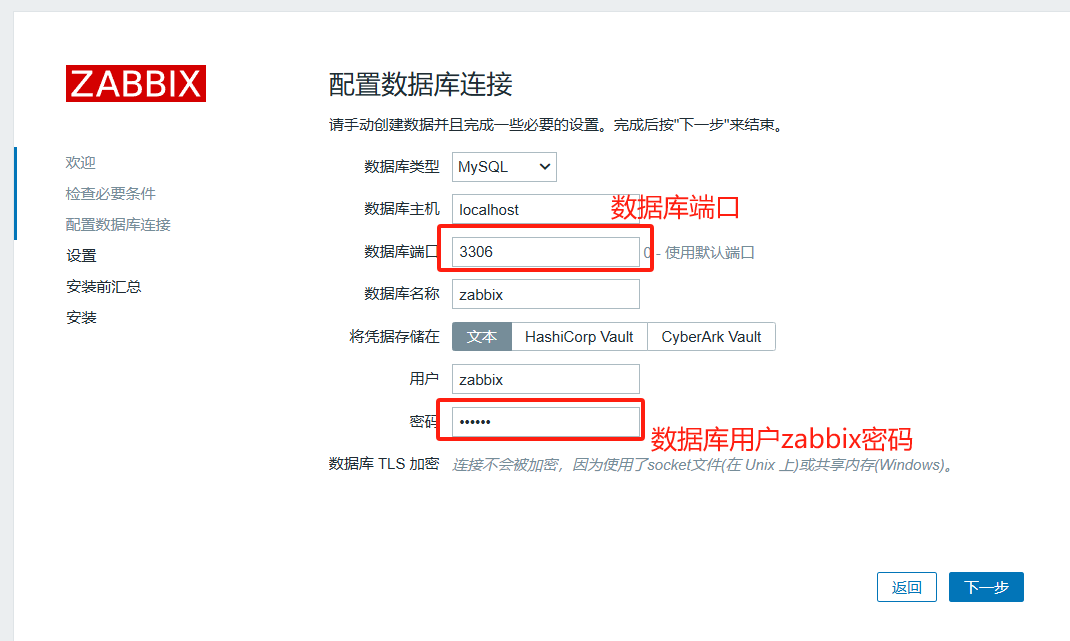
8. 配置 Zabbix Server
编辑 /etc/zabbix/zabbix_server.conf:
ListenPort=10051
DBHost=localhost
DBName=zabbix
DBUser=zabbix
DBPassword=redhat
DBSocket=/var/lib/mysql/mysql.sock
ListenIP=0.0.0.0
9. 配置 Nginx 与 PHP
编辑 /etc/nginx/conf.d/zabbix.conf:
listen 8080;
server_name example.com;
10. 启动服务
[root@zabbix-server ~] systemctl restart zabbix-server zabbix-agent nginx php-fpm
[root@zabbix-server ~] systemctl enable zabbix-server zabbix-agent nginx php-fpm
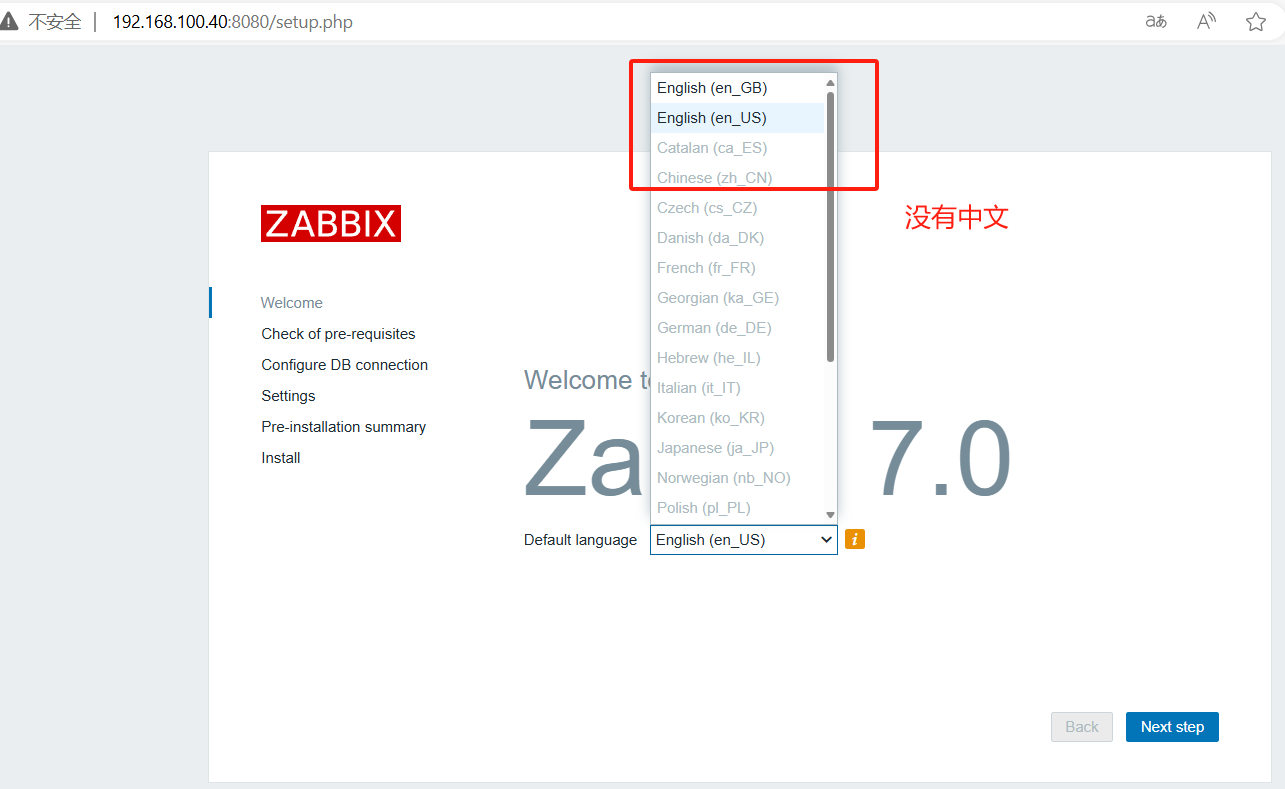
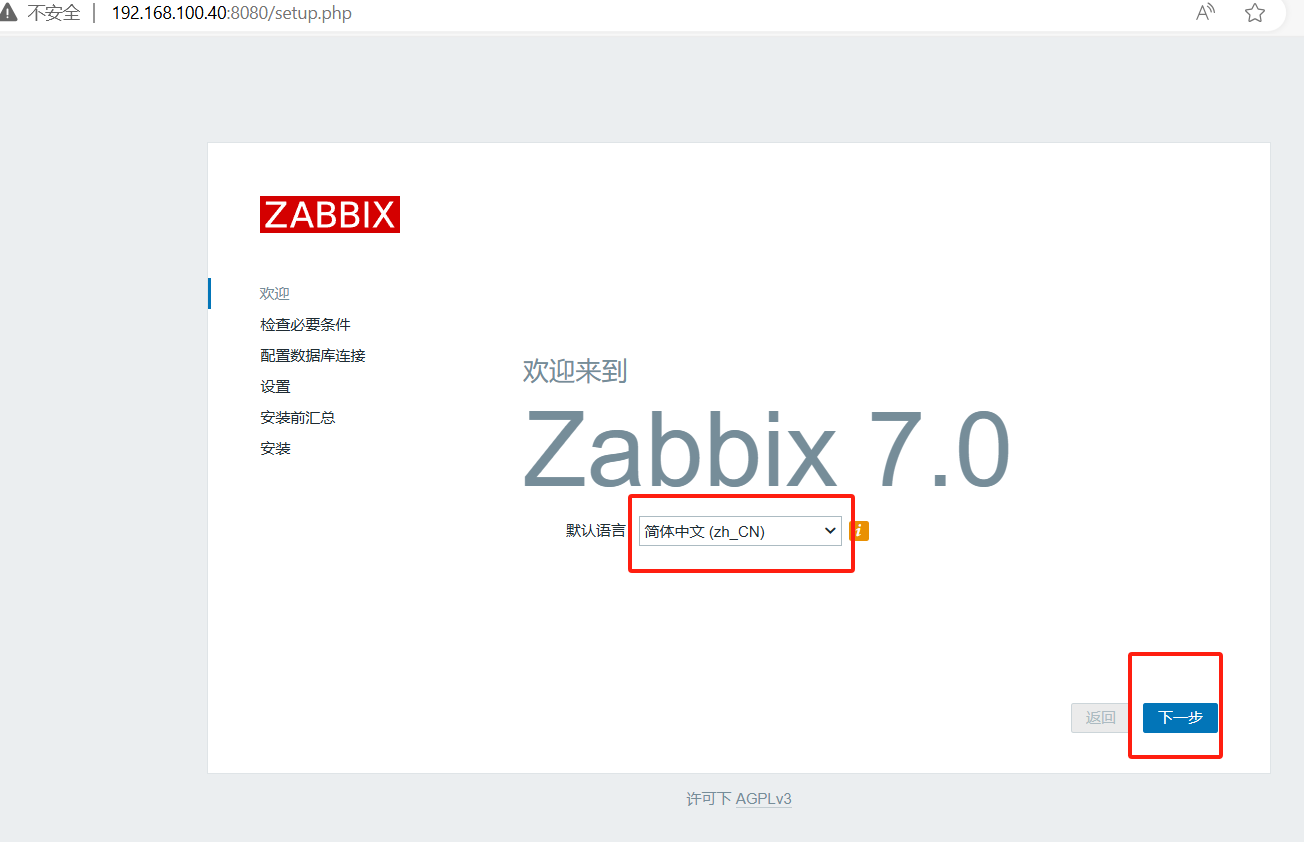
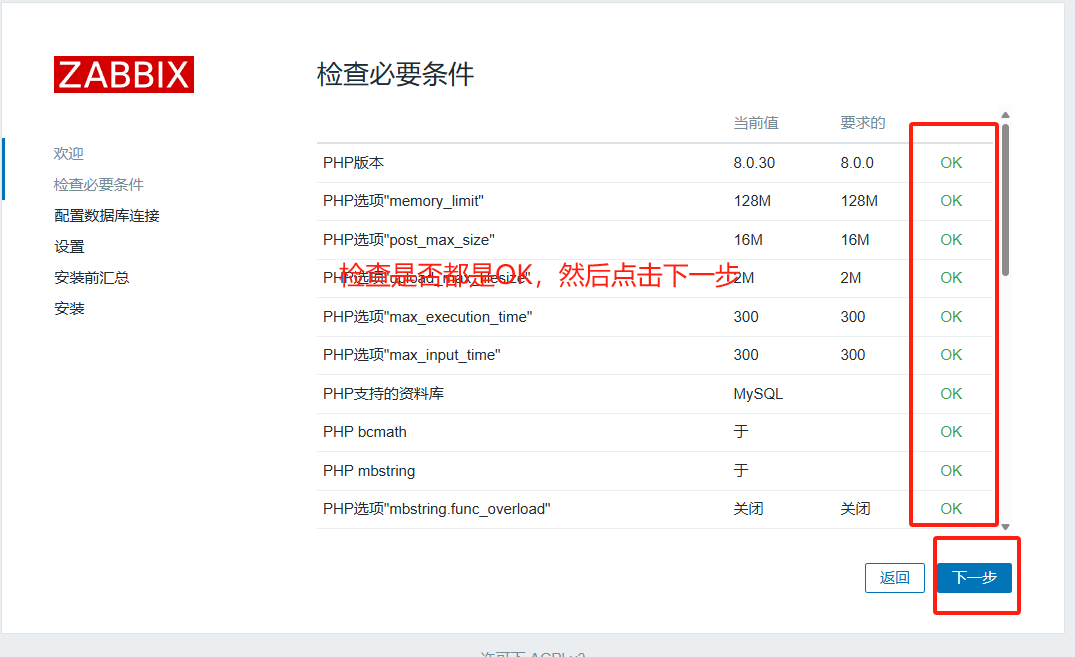
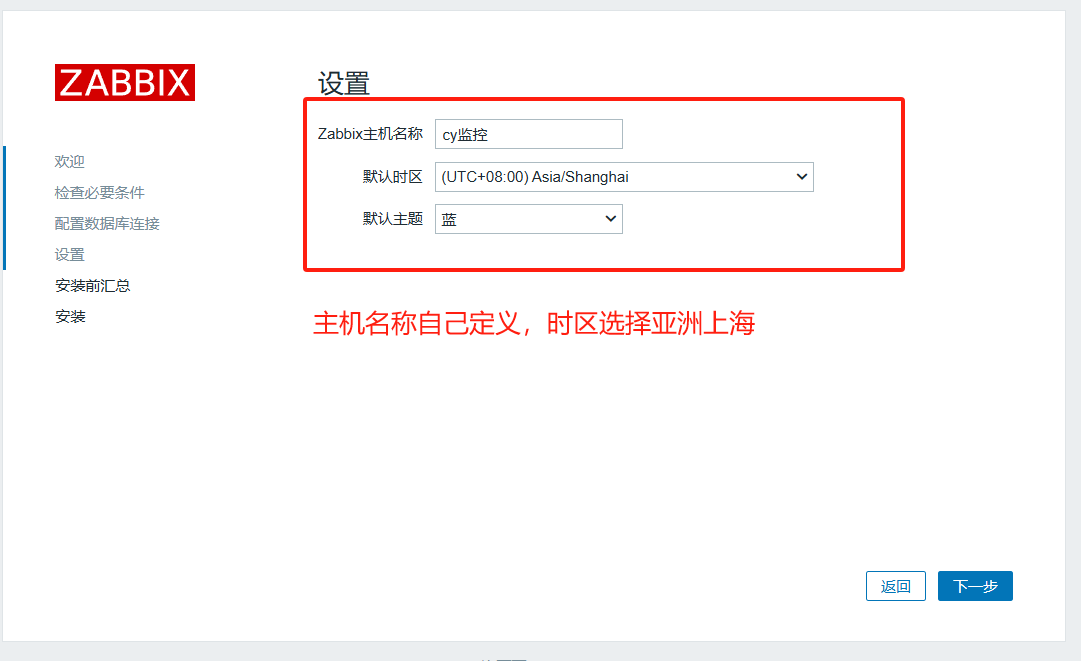
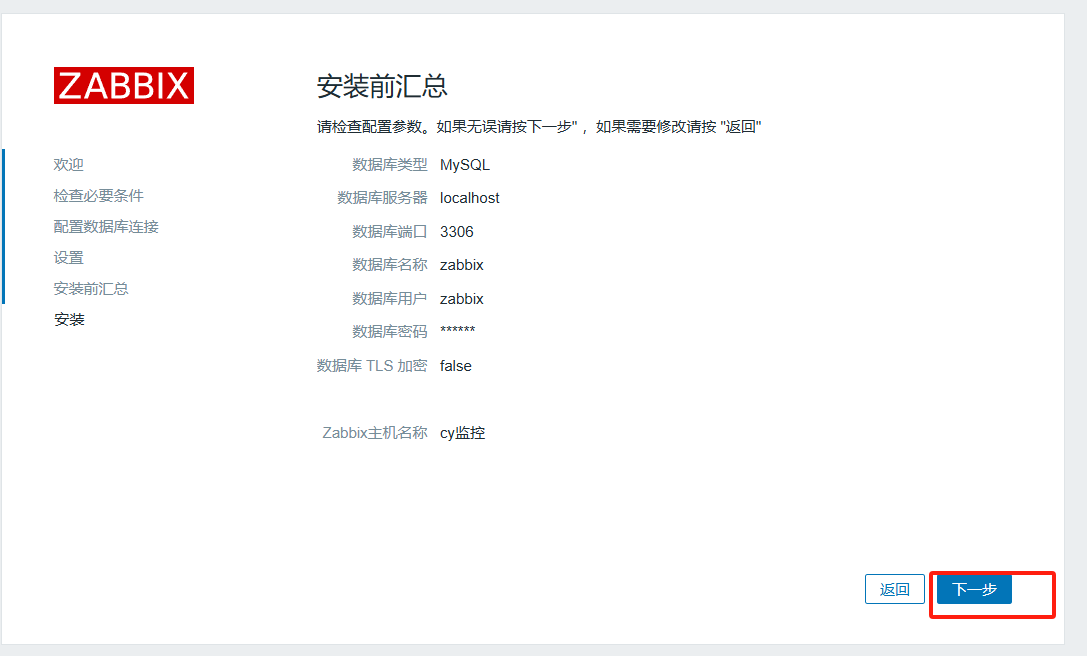
11. 访问 Zabbix Web 界面
浏览器打开:http://192.168.100.40:8080/setup.php
12. 配置中文字体支持
[root@zabbix-server ~] yum -y install langpacks-zh_CN glibc-common
[root@zabbix-server ~] locale -a | grep zh_CN
zh_CN
zh_CN.gb18030
zh_CN.gbk
zh_CN.utf8
将 Windows 下的 simkai.ttf 上传至:
解决中文乱码问题
-
找到windows下的简体 楷体 常规字体
C:\Windows\Fonts
-
将简体 楷体 常规字体文件复制出来
-
上传到Linux系统中的/usr/share/zabbix/assets/fonts
-
替换原先的字体文件即可
/usr/share/zabbix/assets/fonts/
并替换默认字体:
mv simkai.ttf graphfont.ttf

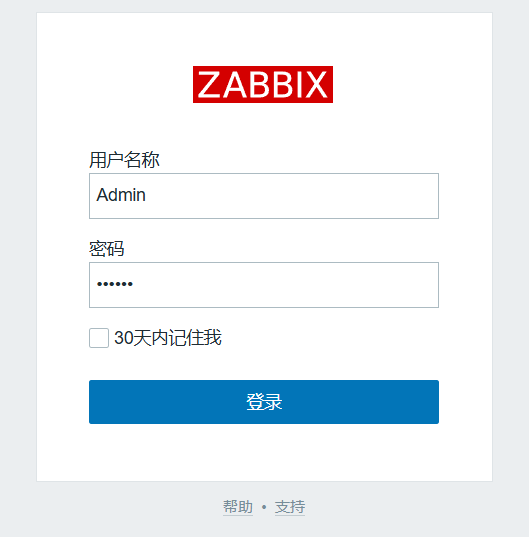
默认账号为Admin,密码为zabbix
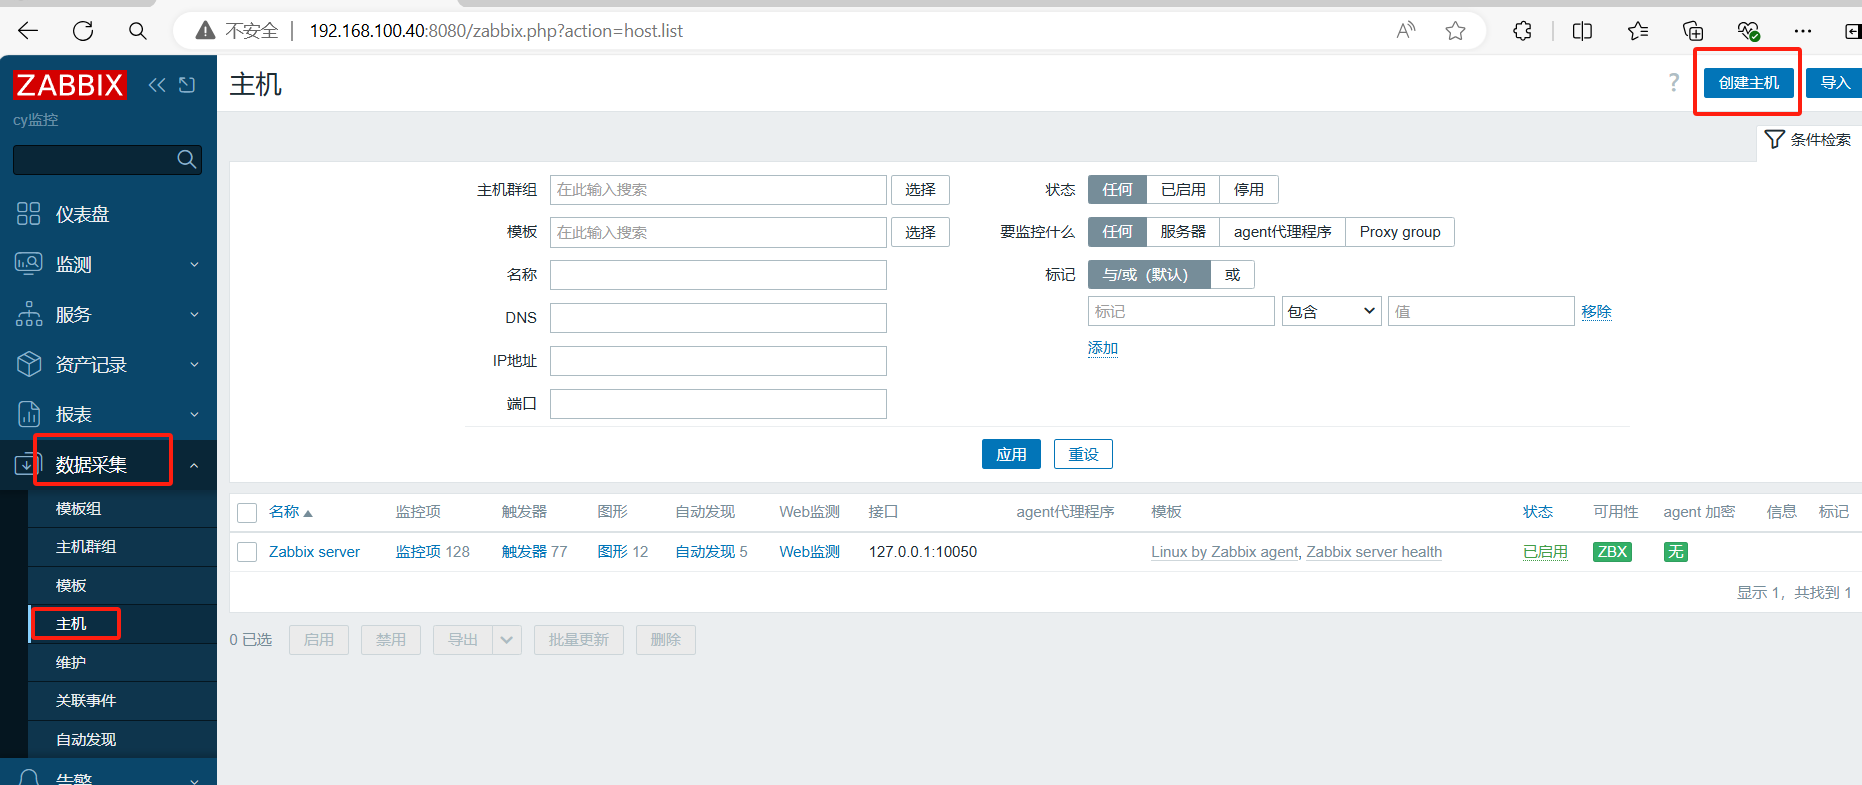
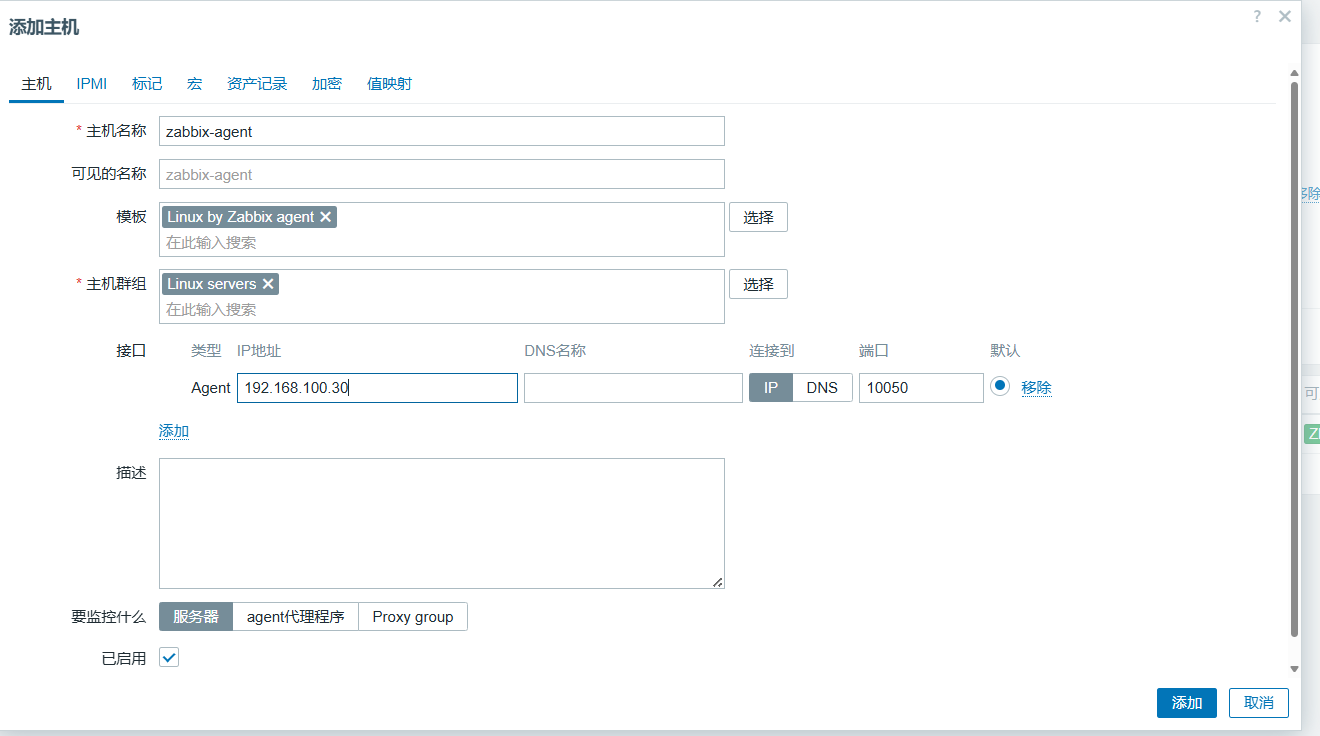
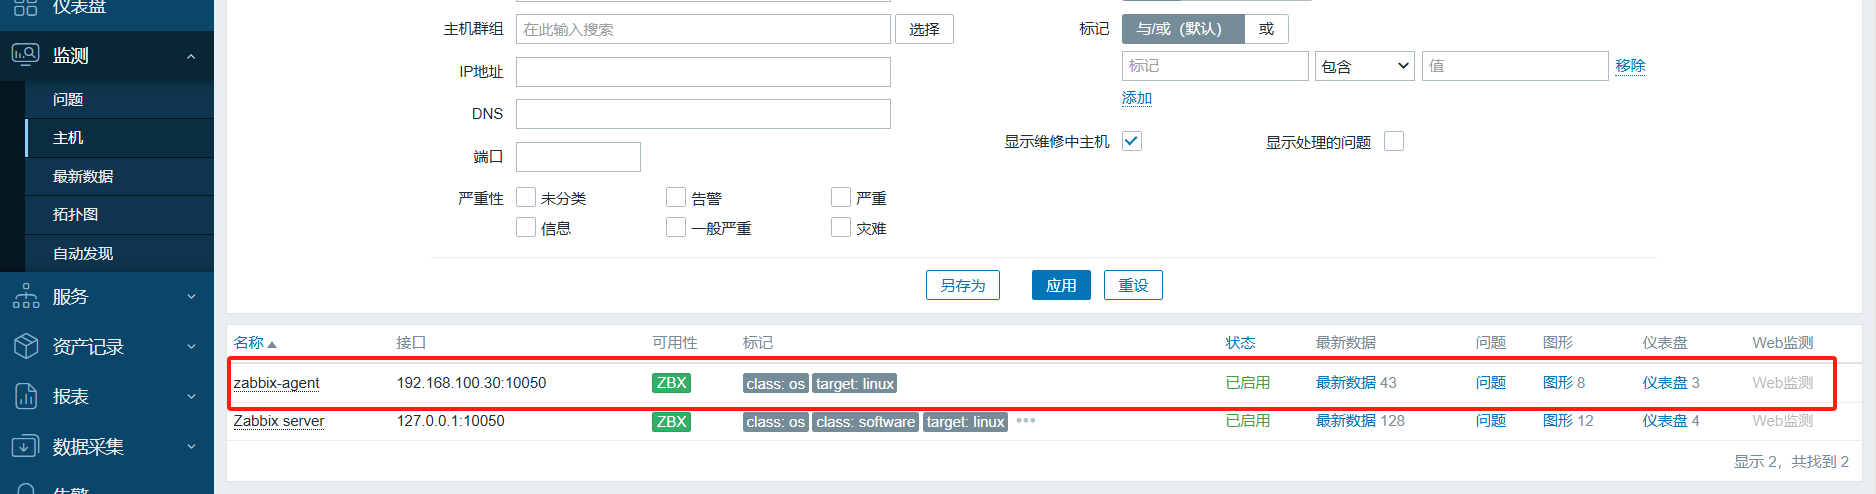
三、监控远程 Linux 主机
1. 安装 Zabbix Agent
[root@zabbix-agent ~] rpm -Uvh https://repo.zabbix.com/zabbix/7.0/rhel/7/x86_64/zabbix-release-latest-7.0.el7.noarch.rpm
[root@zabbix-agent ~] yum -y install zabbix-agent
2. 配置 Agent
编辑 /etc/zabbix/zabbix_agentd.conf:
Server=192.168.100.40    # Zabbix Server IP(被动模式)
ServerActive=192.168.100.40  # Zabbix Server IP(主动模式)
Hostname=zabbix-agent
3. 启动 Agent
systemctl restart zabbix-agent
systemctl enable zabbix-agent
四、登录 Zabbix
- 默认用户名:
Admin - 默认密码:
zabbix

有“AI”的1024 = 2048,欢迎大家加入2048 AI社区
更多推荐


 22
22 0
0- 0


 已为社区贡献2条内容

所有评论(0)