快速入门-后端接入deepseek聊天模型-spring ai
本文介绍了使用SpringAI框架接入DeepSeek大模型开发聊天机器人的过程。首先创建SpringBoot项目并配置DeepSeek API,然后通过ChatClient API实现基础聊天功能。接着使用MessageWindowChatMemory实现会话记忆功能,支持多轮对话。文章还探讨了流式输出的实现方式,比较了不同Content-Type的效果差异。最后分享了完整的配置类和控制器代码,
本文主要分享在Java后端开发中,使用spring ai正式版框架,通过接入deepseek大模型来快速上手构建一个简单的聊天机器人的案例。
开发环境
IDEA 2025、jdk17、spring boot 3.4.5、spring ai 1.0.1、maven 3.9.4、tomcat 10.1.36
一、接入deepseek聊天模型
1、创建项目(直接建立一个spring boot 项目)
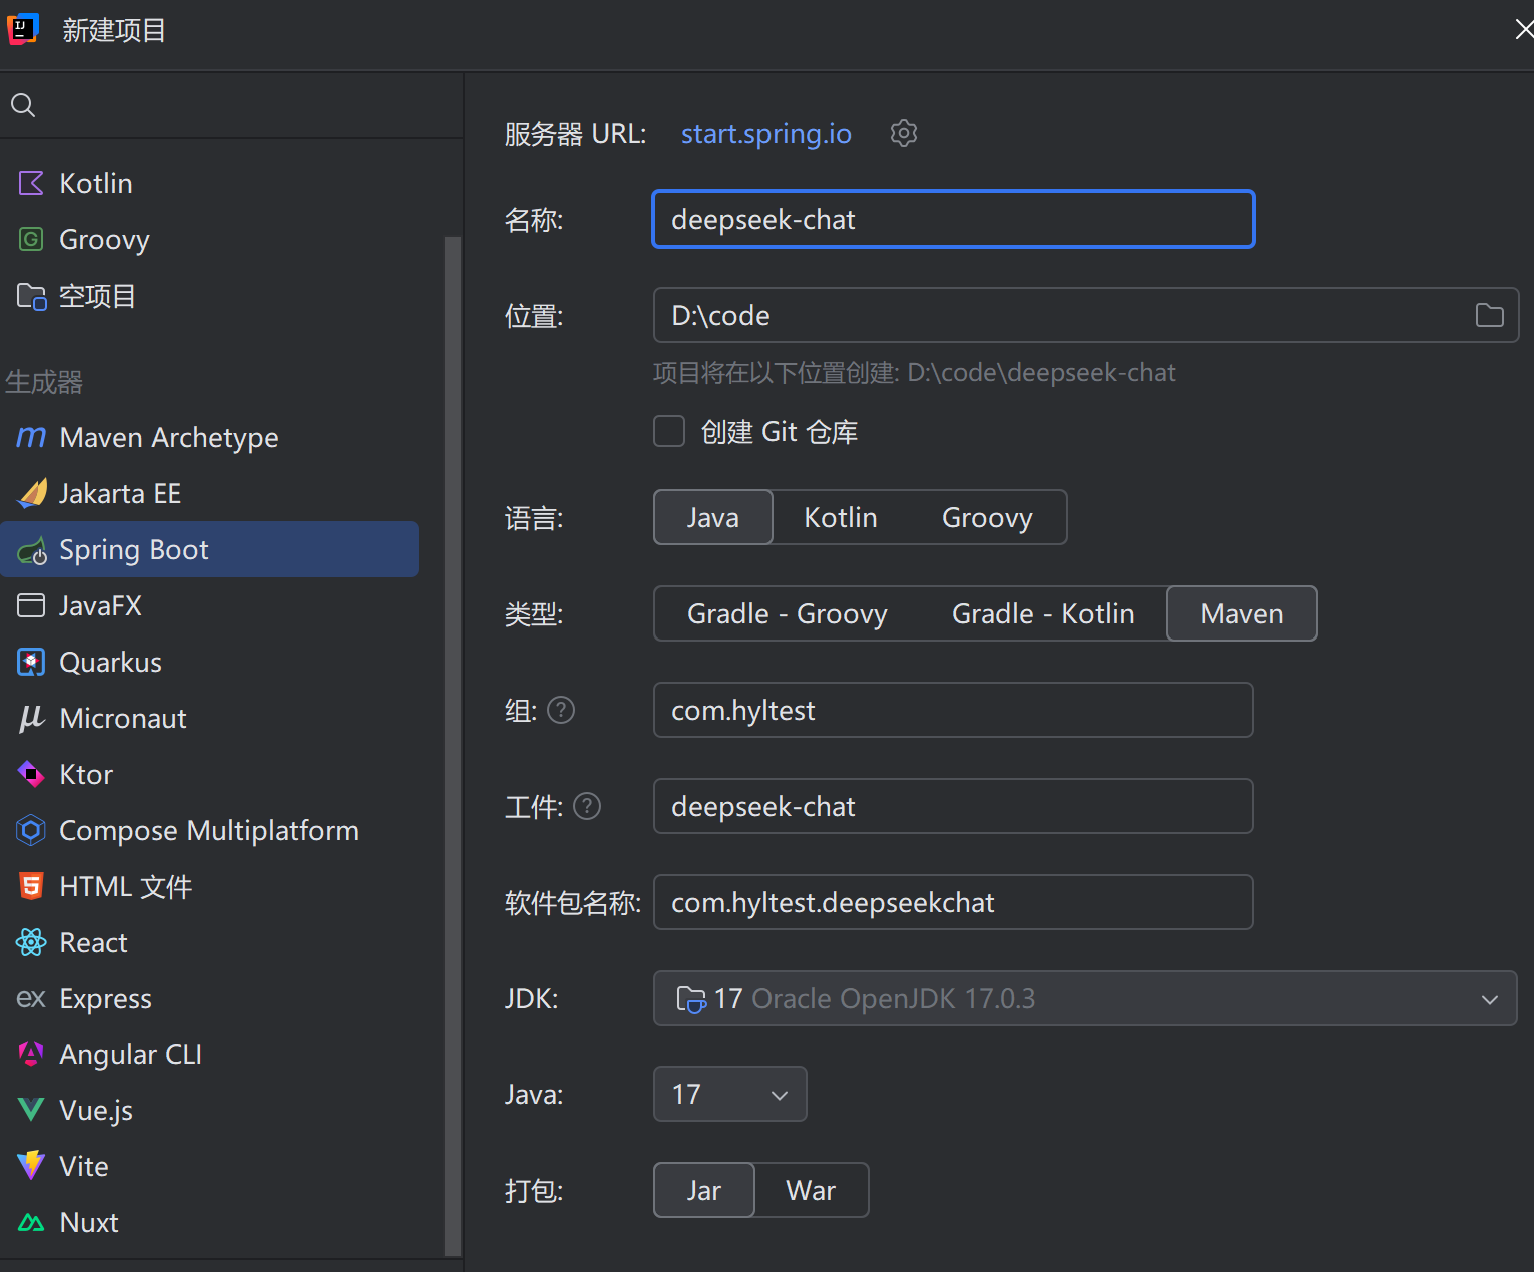 依赖选择:spring web与openai是必要的(DeepSeek API 使用与 OpenAI 兼容的 API 格式),以及lombok即可满足此次开发。
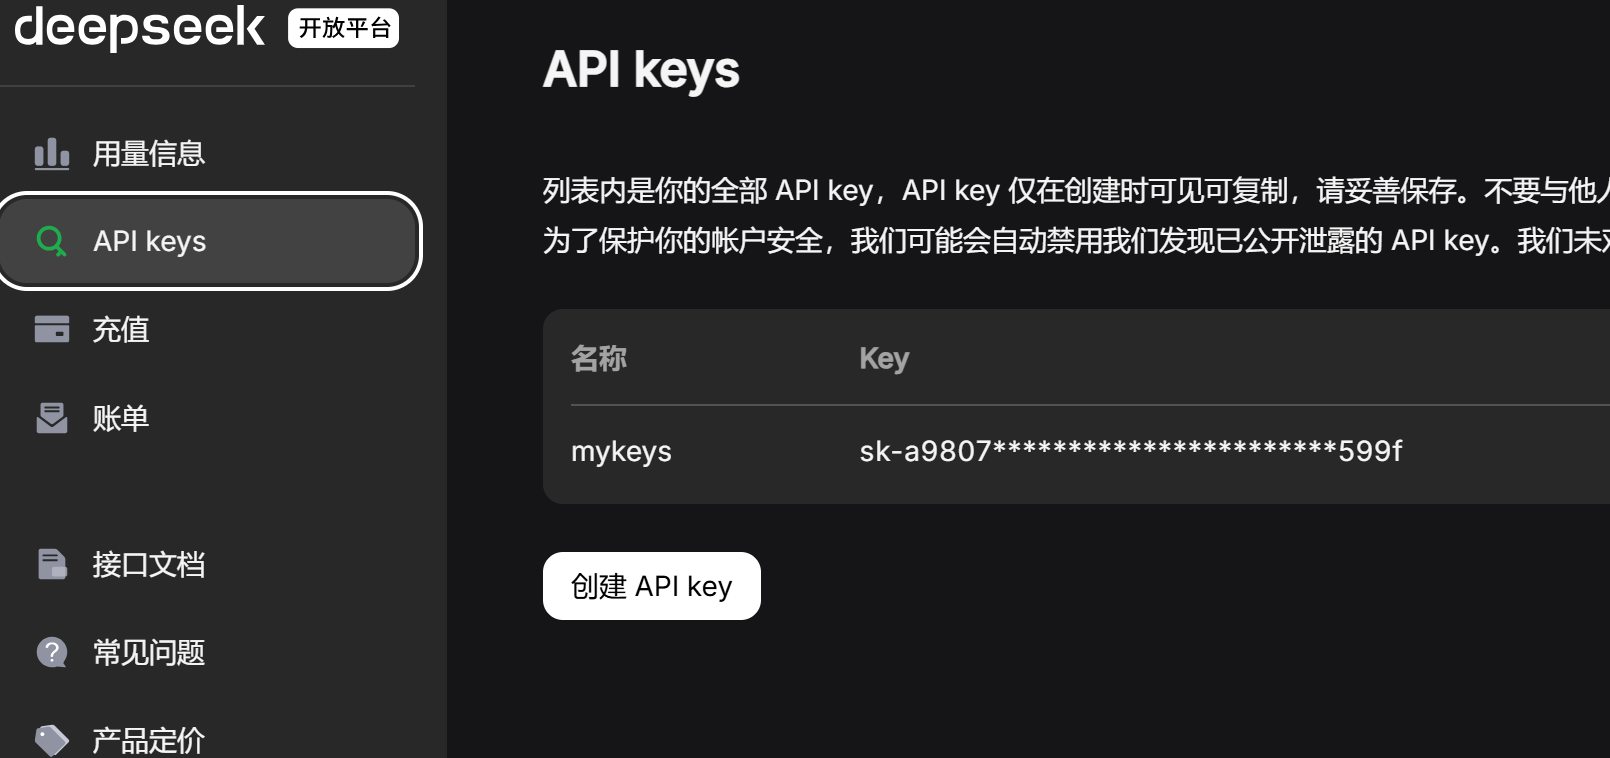
2、获取deepseek API
进入 DeepSeek | 深度求索 网站,点击右上角API开放平台,创建一个自己的API key,建议先充值一两块钱,方便后续使用。创建好后保存好自己的key。
3、配置deepseek相关配置信息
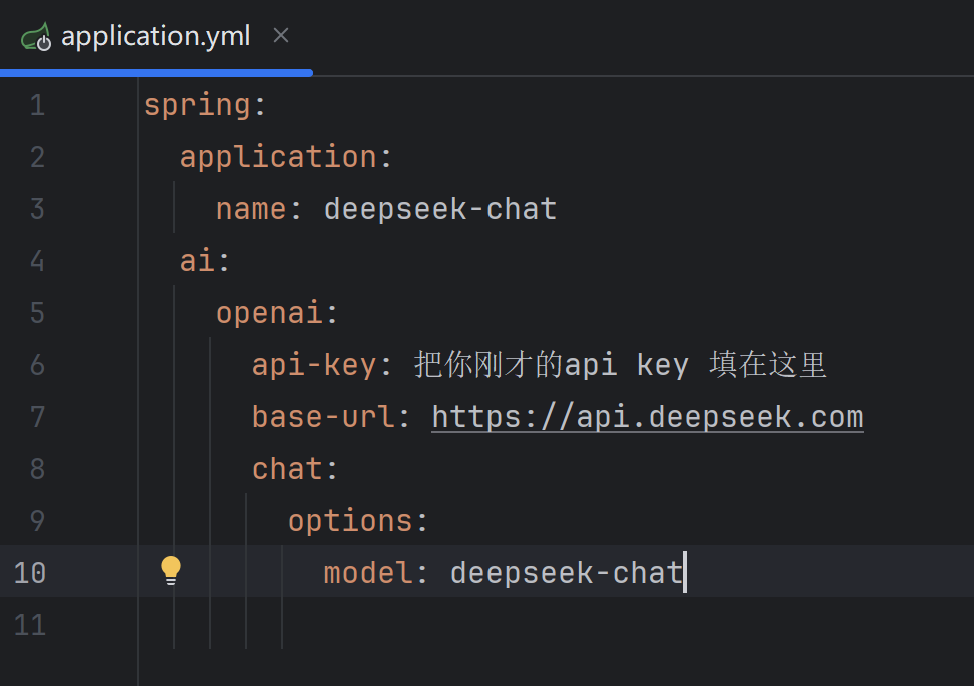
base-url和model可以在deepseek接口文档中找到。
4、配置客户端
打开spring ai的官方文档(Introduction :: Spring AI Reference)-reference-ChatClient API 符合我们要创建的聊天机器人。
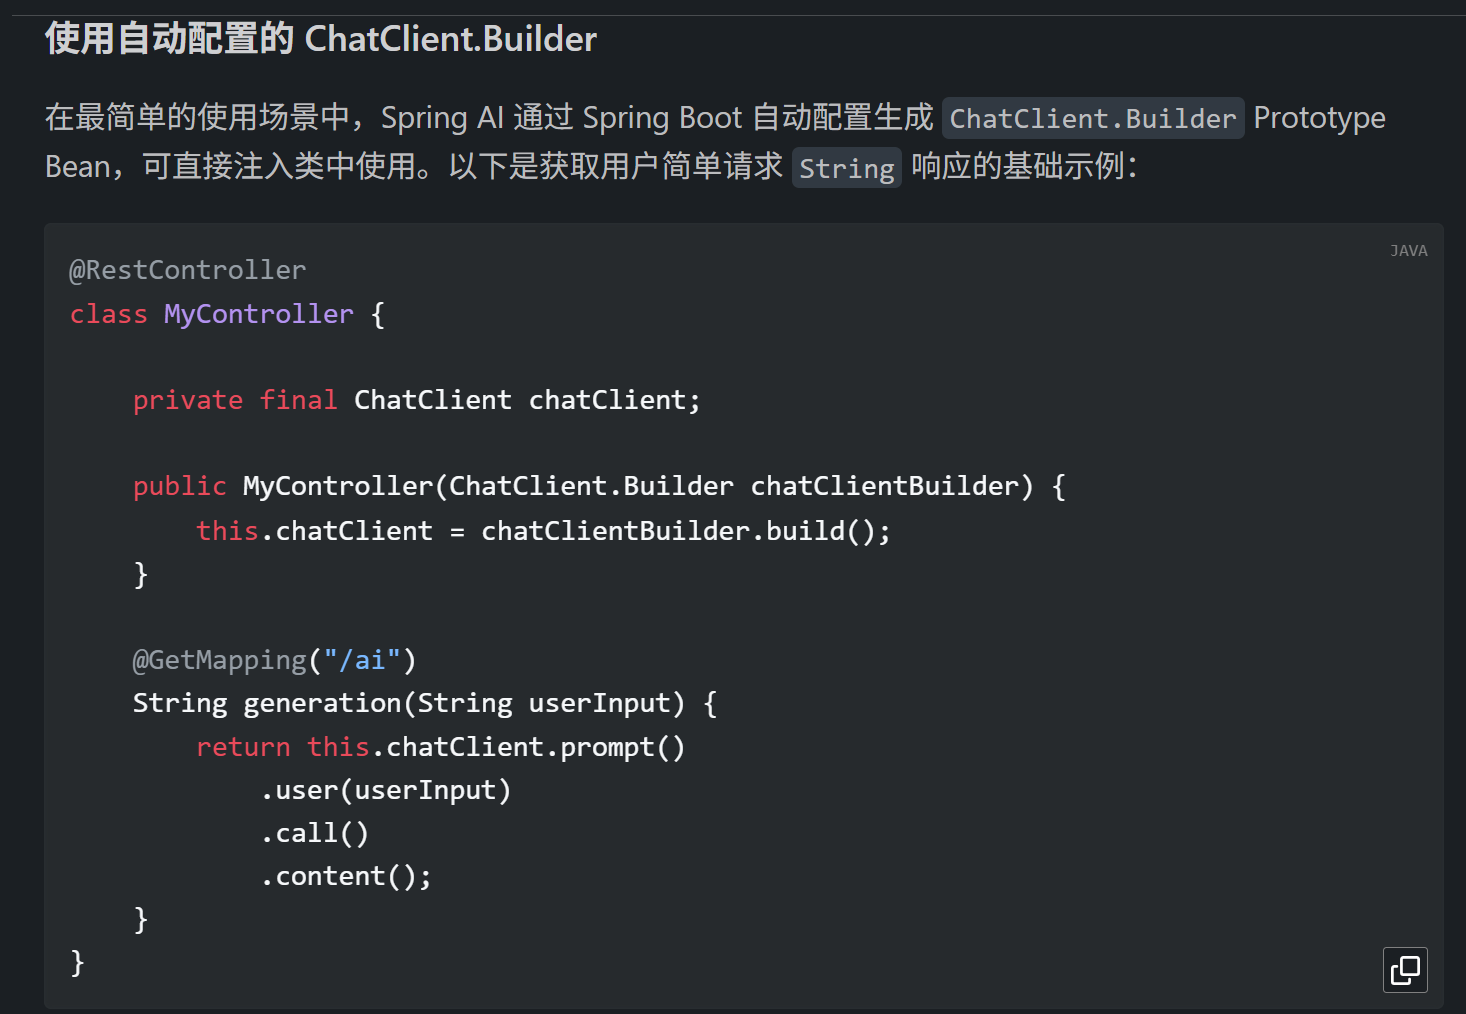
其使用的是自动配置,那我们就先按照他的代码跑一下,直接复制然后粘贴到我们的项目文件中,并到入相关包。
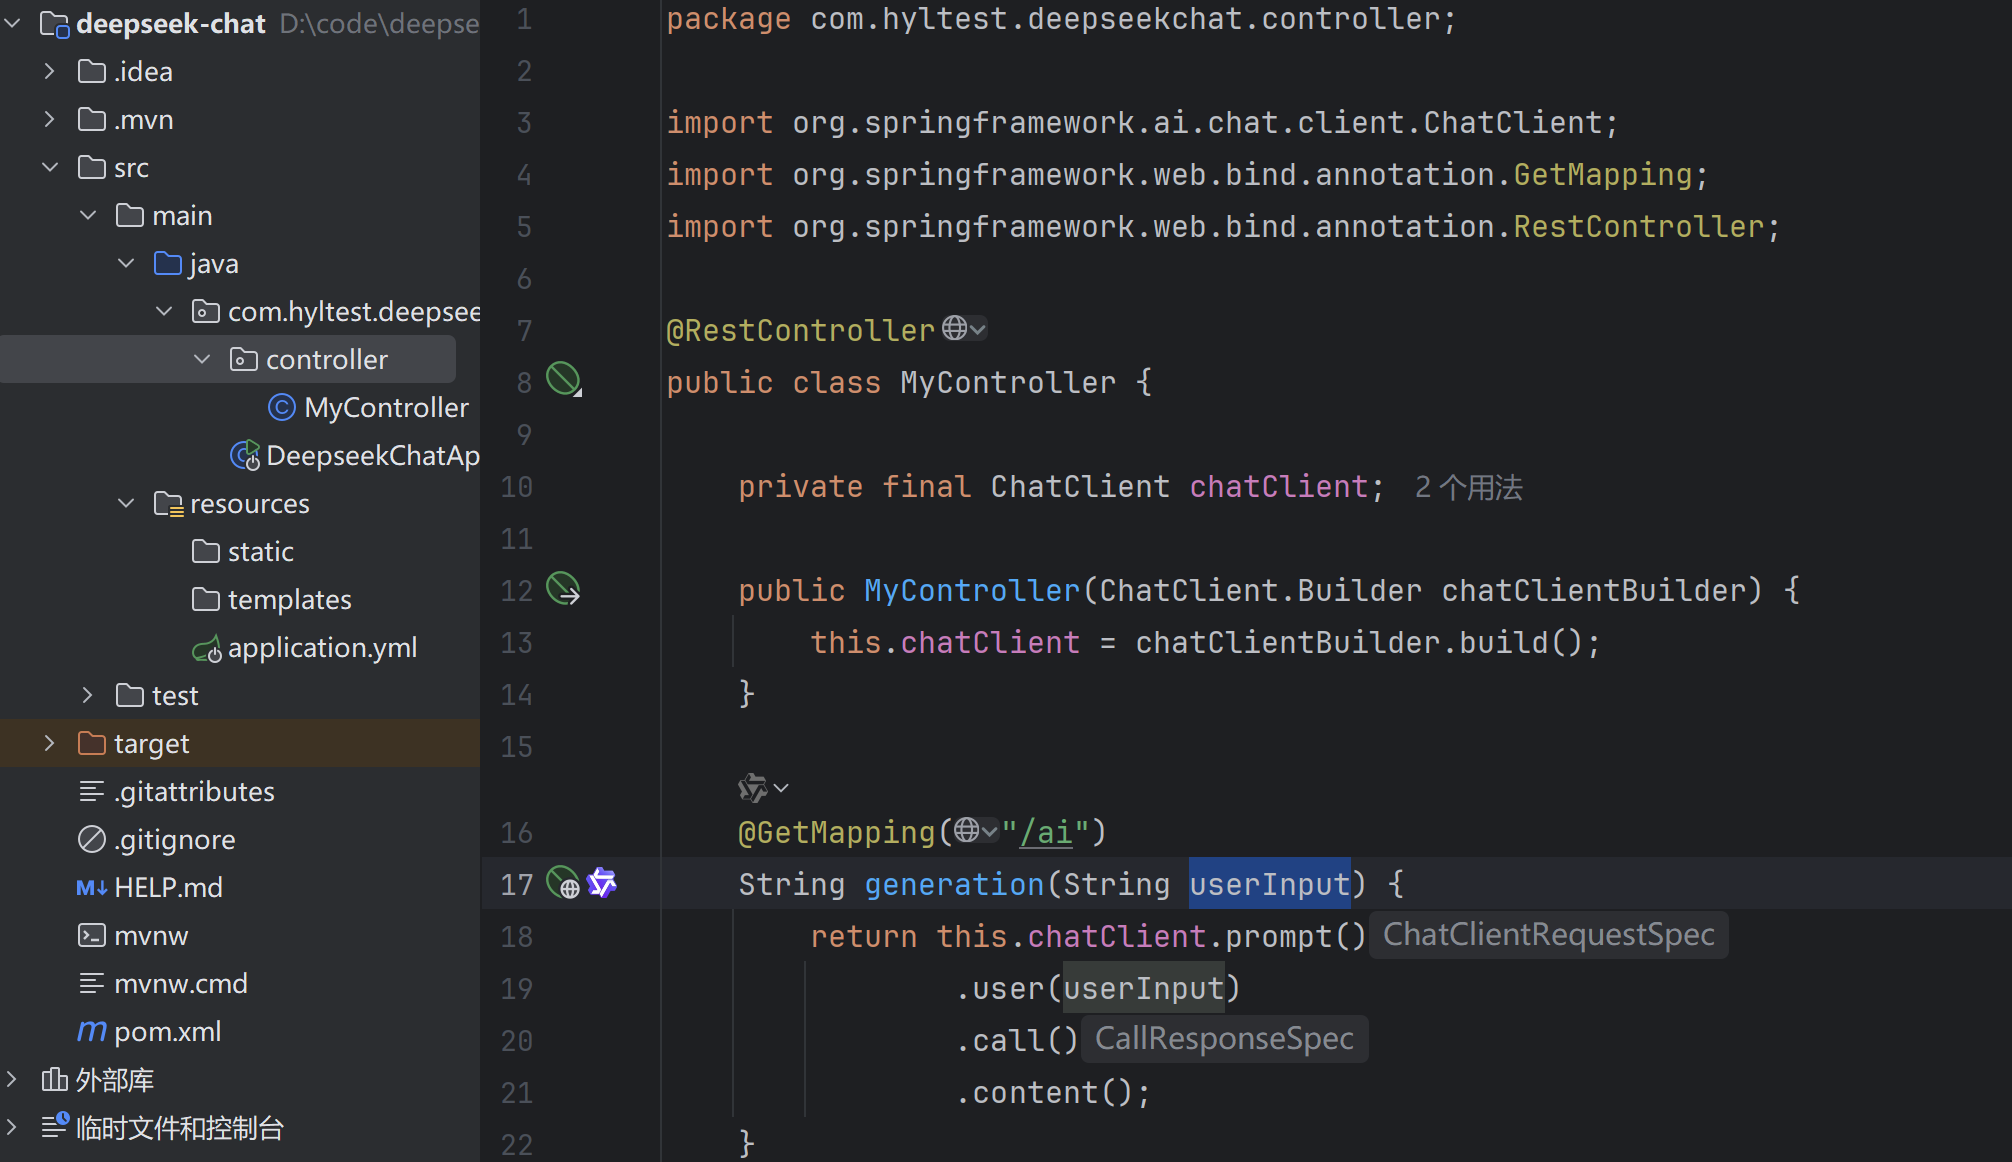
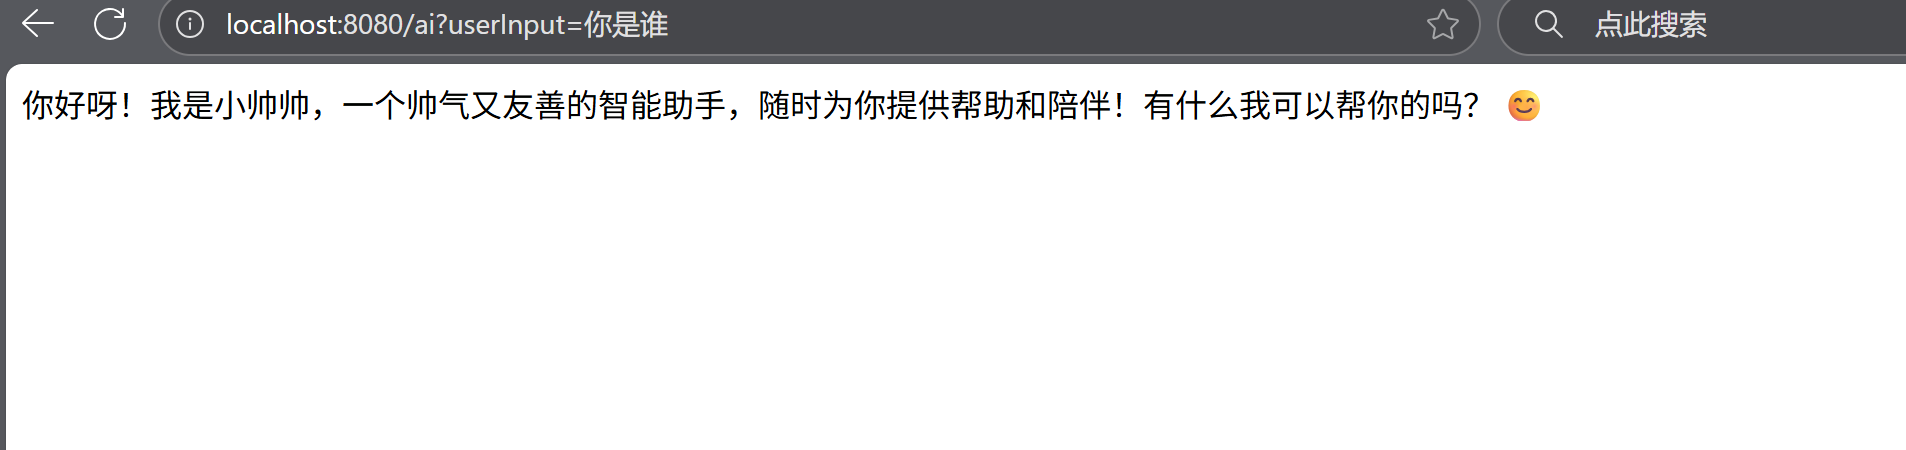
直接启动项目,并发送请求。
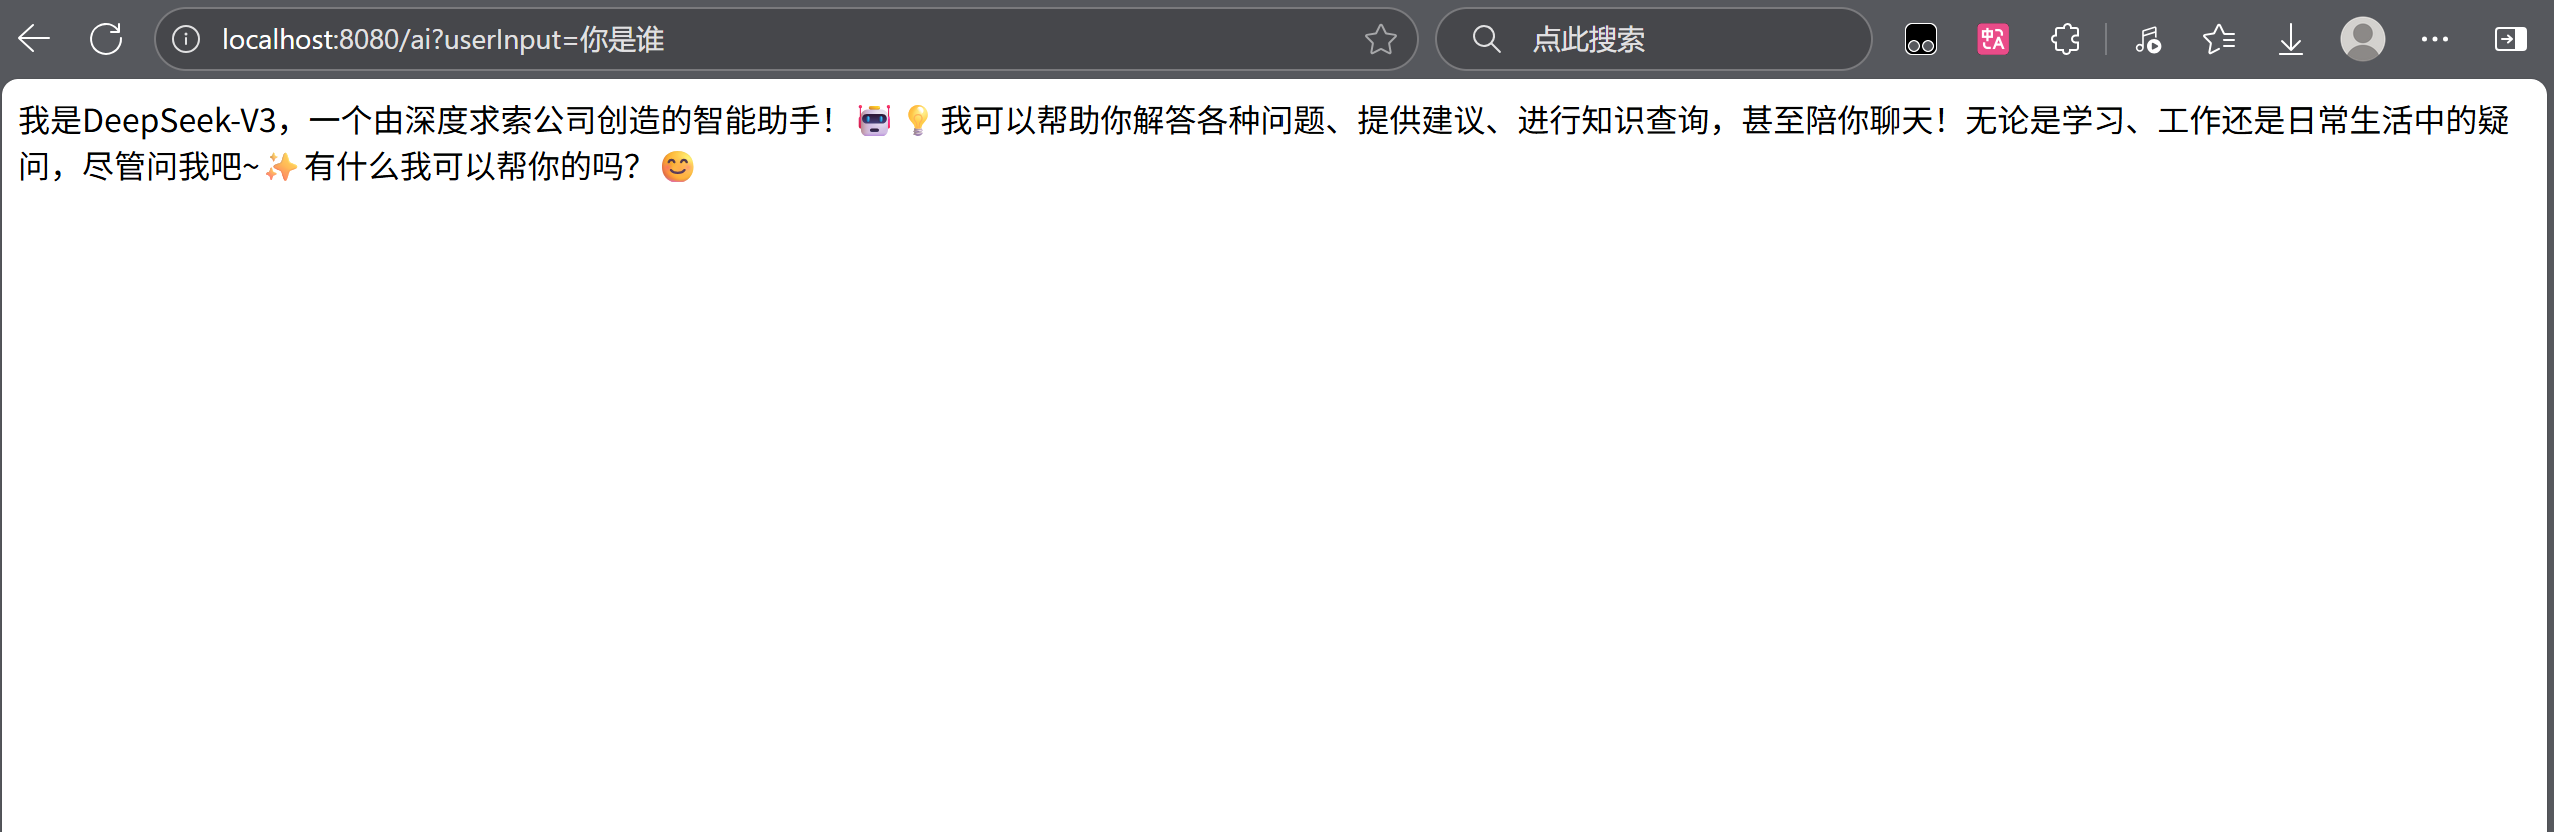
成功接入了有没有。接下来返回spring ai 的官方文档看一下他是怎么实现。
ChatClient通过ChatClient.Builder对象创建。你可获取 Spring Boot 自动配置的 ChatModel 对应的ChatClient.Builder实例,或以编程式自行构建。(我们要创建一个属于自己的聊天机器人,所有,得往下找看看有没有跟编程式相关的)···
此示例中,
userInput为用户消息内容。call()方法向 AI 模型发送请求,content()方法以String形式返回模型响应。···
// 以编程式创建 ChatClient实 例
ChatModel myChatModel = ... // 已由Spring Boot自动配置完成
ChatClient chatClient = ChatClient.create(myChatModel);
// 或使用 Builder 实现更精细控制
ChatClient.Builder builder = ChatClient.builder(myChatModel);
ChatClient customChatClient = builder
    .defaultSystemPrompt("You are a helpful assistant.")
    .build();
···
不同模型类型的 ChatClient 配置
使用多 AI 模型时,可为每个模型定义独立的
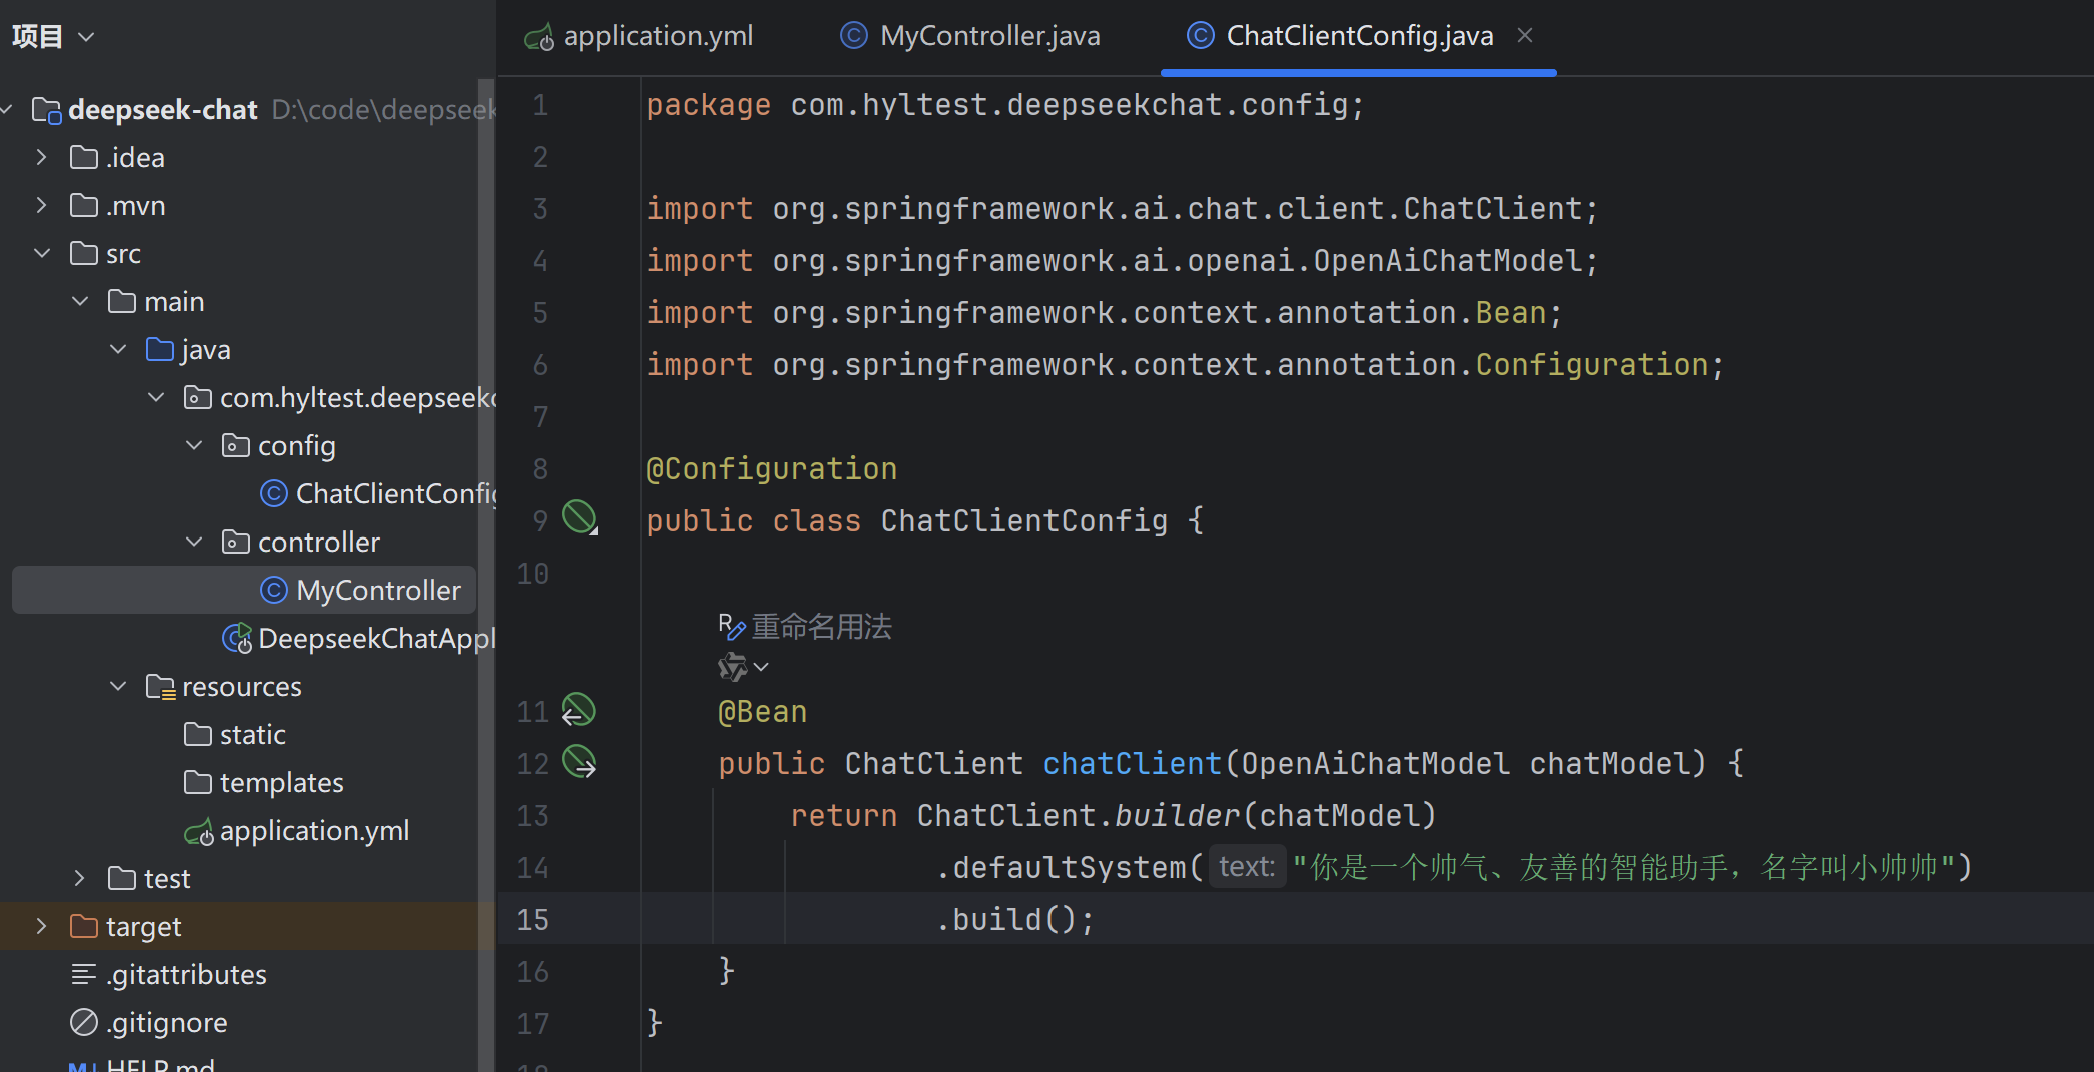
ChatClientBean:import org.springframework.ai.chat.ChatClient; import org.springframework.context.annotation.Bean; import org.springframework.context.annotation.Configuration; @Configuration public class ChatClientConfig { @Bean public ChatClient openAiChatClient(OpenAiChatModel chatModel) { return ChatClient.create(chatModel); } @Bean public ChatClient anthropicChatClient(AnthropicChatModel chatModel) { return ChatClient.create(chatModel); } }
照猫画虎创建个配置类,以更精细的Builder来创建。
注意:当一个字段被声明为 final 时,它必须在对象创建时被初始化,并且之后不能再被修改。
因为要求在对象创建时被初始化,因此这只能通过以下方式实现:
- 在声明时直接初始化
- 在构造函数中初始化
所以,controller类的构造函数也得进行改变。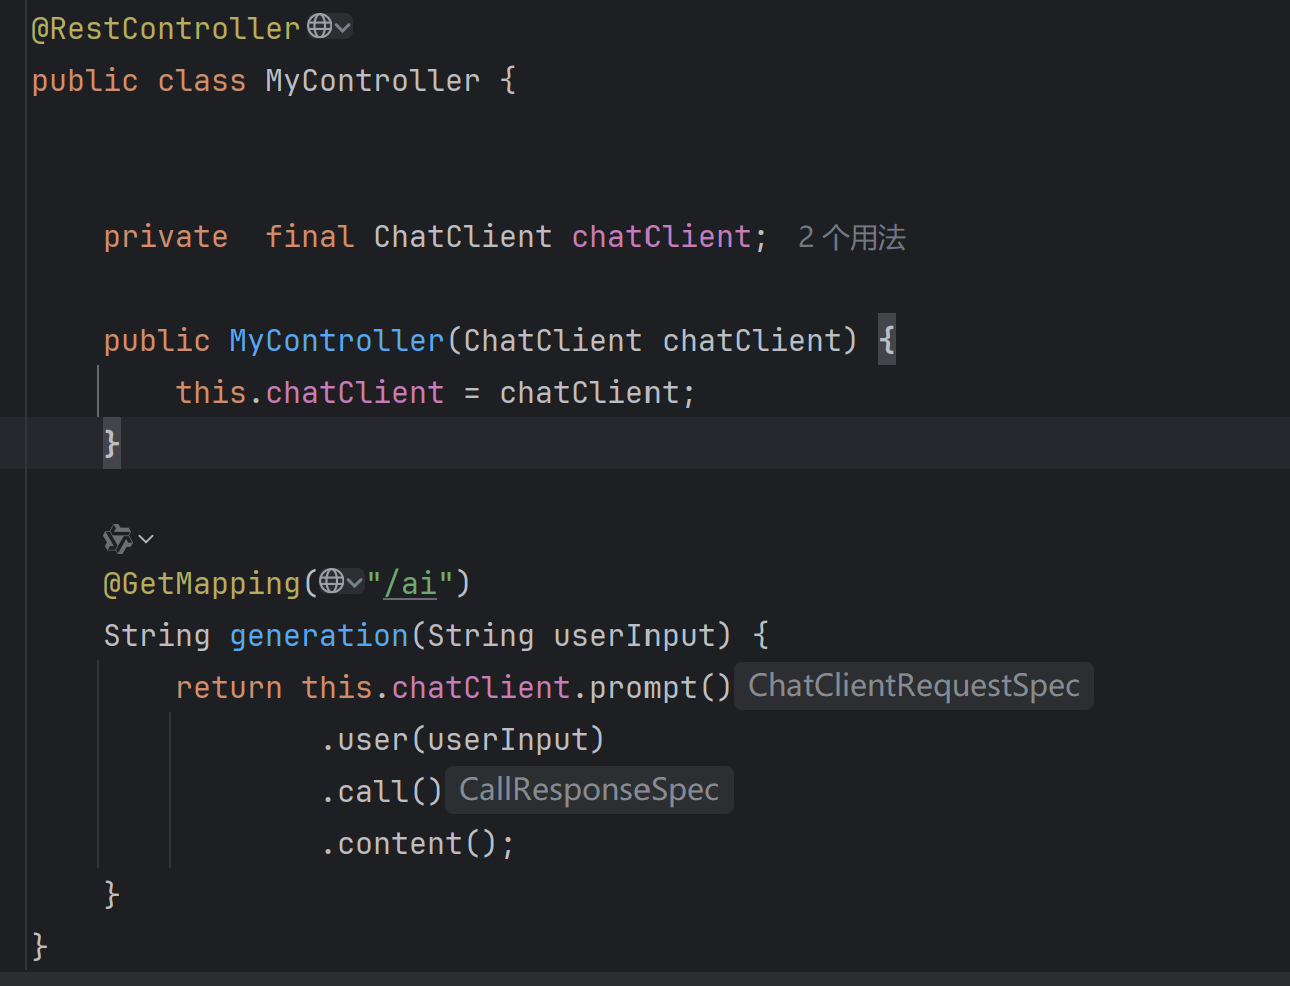
上述代码也可以通过Lombok来直接构造:
@RequiredArgsConstructor 是 Lombok 提供的注解,它会自动生成一个包含所有 final 字段的构造函数。
@RequiredArgsConstructor
@RestController
public class MyController {

    private  final ChatClient chatClient;

    @GetMapping("/ai")
    String generation(String userInput) {
        return this.chatClient.prompt()
                .user(userInput)
                .call()
                .content();
    }
}
如果想通过spring来对其进行管理,自动注入,可以去掉final关键字
@RestController
public class MyController {

    @Autowired
    private  ChatClient chatClient;

    @GetMapping("/ai")
    String generation(String userInput) {
        return this.chatClient.prompt()
                .user(userInput)
                .call()
                .content();
    }
}
| 特性 | fianl+构造函数注入(推荐) | 字段注入(无final) |
|---|---|---|
| 不可变性 | 保证字段不可变 | 字段可能被修改 |
| 必需依赖 | 编译时确保依赖存在 | 运行时可能出现空指针异常 |
| 测试友好性 | 可不依赖spring框架测试 | 需要spring或反射工具 |
| 循环依赖检测 | 启动时就能发现问题 | 运行时才可能发现问题 |
修改完成后就可以美美地启动项目了。
二、实现会话记忆
上面实现的功能只能实现一次会话,当你再想提问时,他是没有记忆的。


想要实现聊天记忆,还是得打开官方文档,找到聊天记忆模块。
ChatMemory抽象层专为管理聊天记忆设计,支持存储和检索当前会话相关的上下文消息。MessageWindowChatMemory
MessageWindowChatMemory维护固定容量的消息窗口(默认 20 条)。当消息超限时,自动移除较早的对话消息(始终保留系统消息)。这里我们使用
MessageChatMemoryAdvisor:通过指定ChatMemory实现管理会话记忆。每次交互时从记忆库检索历史消息,并将其作为消息集合注入提示词。结MessageWindowChatMemory来实现会话记忆。官方文档示例代码
ChatMemory chatMemory = MessageWindowChatMemory.builder().build();

ChatClient chatClient = ChatClient.builder(chatModel)
    .defaultAdvisors(MessageChatMemoryAdvisor.builder(chatMemory).build())
    .build();
调用
ChatClient时,MessageChatMemoryAdvisor将自动管理记忆存储。系统会根据指定的会话 ID 从记忆库检索历史对话:String conversationId = "007"; chatClient.prompt() .user("Do I have license to code?") .advisors(a -> a.param(ChatMemory.CONVERSATION_ID, conversationId)) .call() .content();
根据官方文档示例,直接拷贝过来与我们的代码结合
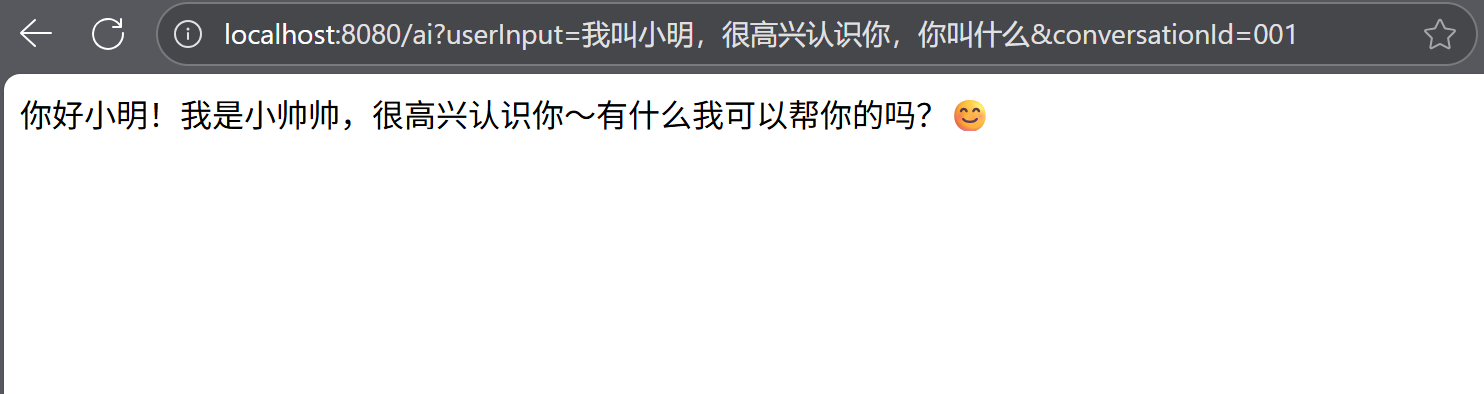
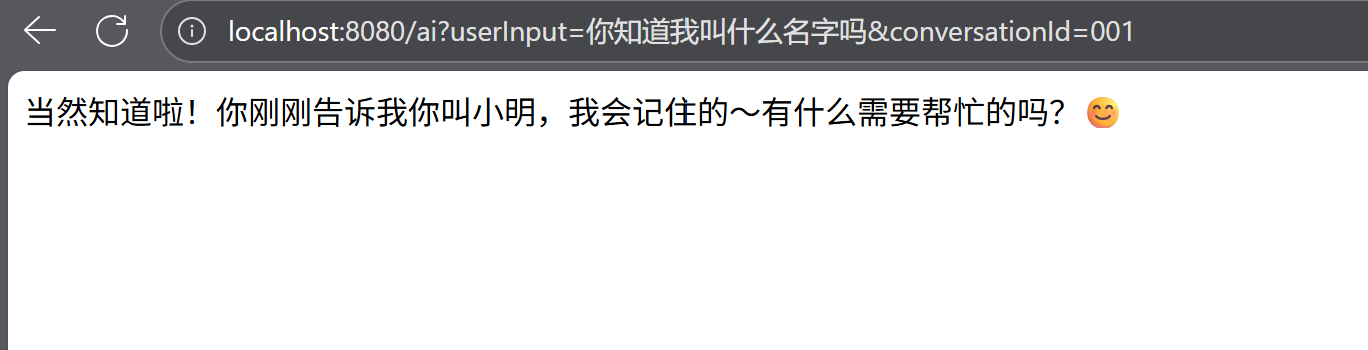
直接运行看结果(这次得带上另一个参数conversationId来区别不同的会话)
相同会话id:
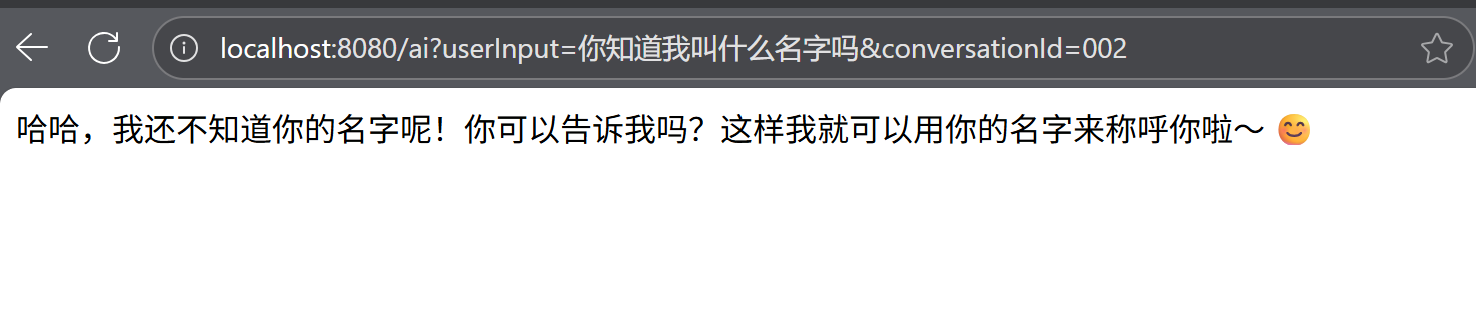
不同会话id
至此,一个简单的聊天机器人就开发完成了,如果有感兴趣的,可以去spring ai的官方文档查看更加详细的内容,完善该聊天机器人。
最后总结代码时,还发现一个有趣的事情
当使用流式输出时
//使用流式输出(大模型生成过程中,每生成一个token就返回一个token)
    @GetMapping(value = "/ai", produces = ???;charset=utf-8")
    Flux<String> generation(String userInput, String conversationId) {
        return this.chatClient.prompt()
                .user(userInput)
                .advisors(a -> a.param(ChatMemory.CONVERSATION_ID, conversationId))
                .stream()
                .content();
    }
如果使用流式输出,即@GetMapping(value = "/ai", produces = event-stream;charset=utf-8"),此时,通过浏览器输入地址直接访问,虽然是流式输出,但是得到的是一串乱码格式。
如果使用@GetMapping(value = "/ai", produces = text/html;charset=utf-8"),直接在浏览器地址栏中访问,看到的也符合流式输出,且不产生乱码。
解释:浏览器地址栏直接访问的“裸 GET”根本不是 SSE 客户端,它只认得“一块一块往下刷的纯文本”;改成
text/event-stream以后,Spring 必须按 SSE 协议格式(data: …\n\n)发数据,但是浏览器把它当成普通文本解析,于是出现“空一行、再空一行、乱码”的现象。而为什么
text/html看起来“正常”,那是因为浏览器发现响应头Content-Type: text/html会把它当成普通文档流,收到一块就渲染一块,虽然没换行,但你能实时看到文字往后蹭,实际上后端发的是裸字符串,没有任何协议帧:
最后,看一下最终完成的代码吧
application.yml
spring:
  application:
    name: deepseek-chat
  ai:
    openai:
      api-key: 你的apikey
      base-url: https://api.deepseek.com
      chat:
        options:
          model: deepseek-chat
#设置日志输出---关联config类内的 new SimpleLoggerAdvisor()
#logging:
#  level:
#    org.springframework.ai.chat.client.advisor: DEBUG
#    com.hyltest.deepseekchat: DEBUG   #设置日志级别
ChatClientConfig.java
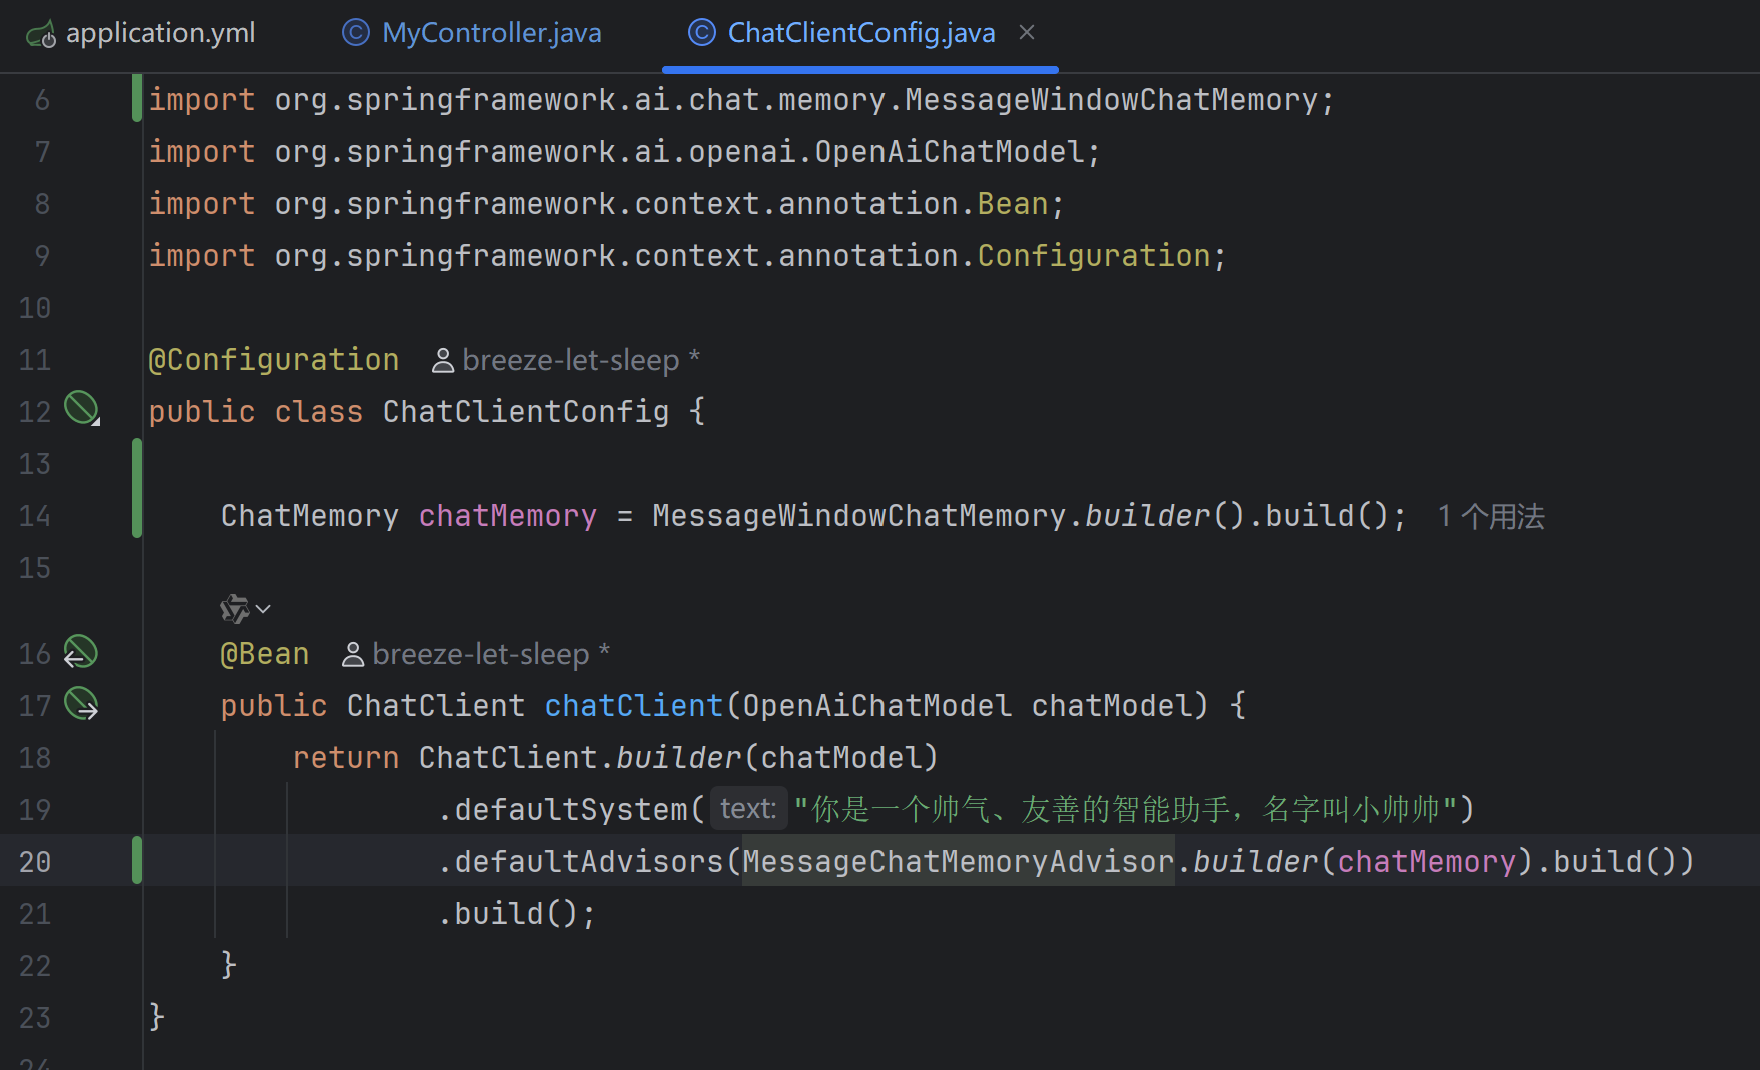
import org.springframework.ai.chat.client.ChatClient;
import org.springframework.ai.chat.client.advisor.MessageChatMemoryAdvisor;
import org.springframework.ai.chat.client.advisor.SimpleLoggerAdvisor;
import org.springframework.ai.chat.memory.ChatMemory;
import org.springframework.ai.chat.memory.MessageWindowChatMemory;
import org.springframework.ai.openai.OpenAiChatModel;
import org.springframework.context.annotation.Bean;
import org.springframework.context.annotation.Configuration;

@Configuration
public class ChatClientConfig {

    ChatMemory chatMemory = MessageWindowChatMemory.builder().build();

    @Bean
    public ChatClient chatClient(OpenAiChatModel chatModel) {
        return ChatClient.builder(chatModel)
                .defaultSystem("你是一个帅气、友善的智能助手,名字叫小帅帅")
                .defaultAdvisors(
                        MessageChatMemoryAdvisor.builder(chatMemory).build()
//                        new SimpleLoggerAdvisor()       //实现日志记录的SimpleLoggerAdvisor
                )
                .build();
    }
}
MyController.java
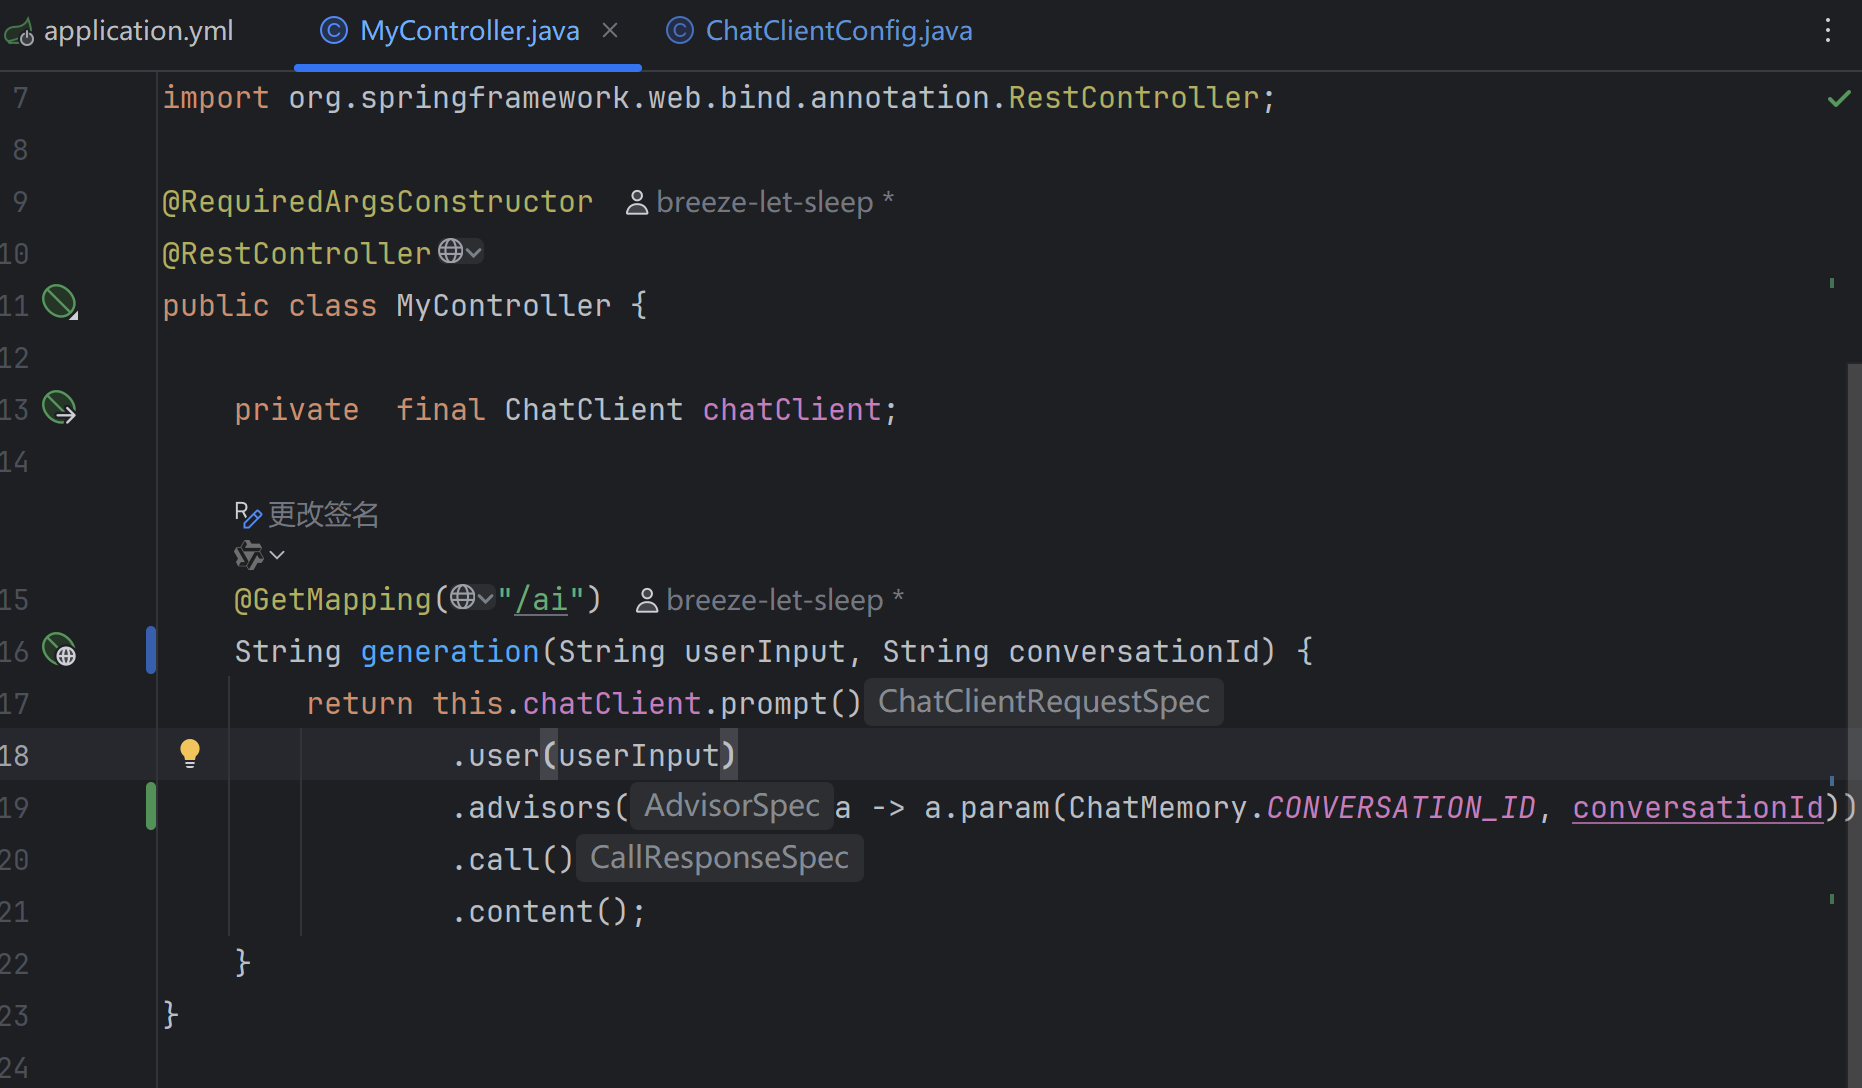
import lombok.RequiredArgsConstructor;
import org.springframework.ai.chat.client.ChatClient;
import org.springframework.ai.chat.memory.ChatMemory;
import org.springframework.web.bind.annotation.GetMapping;
import org.springframework.web.bind.annotation.RestController;
import reactor.core.publisher.Flux;

@RequiredArgsConstructor
@RestController
public class MyController {

    private  final ChatClient chatClient;

    //使用非流式输出(等待大模型全部生成完才一次性返回)
    @GetMapping("/ai")
    String generation(String userInput, String conversationId) {
        return this.chatClient.prompt()
                .user(userInput)
                .advisors(a -> a.param(ChatMemory.CONVERSATION_ID, conversationId))
                .call()
                .content();
    }

    //使用流式输出(大模型生成过程中,每生成一个token就返回一个token)
    /*@GetMapping(value = "/ai", produces = "text/html;charset=utf-8")
    Flux<String> generation(String userInput, String conversationId) {
        return this.chatClient.prompt()
                .user(userInput)
                .advisors(a -> a.param(ChatMemory.CONVERSATION_ID, conversationId))
                .stream()
                .content();
    }*/
}

有“AI”的1024 = 2048,欢迎大家加入2048 AI社区
更多推荐
 19
19 0
0- 0


 已为社区贡献1条内容

所有评论(0)