通义万相2.2-S2V-14B全解:AI视频生成的革命性突破与实践指南
通义万相2.2-S2V-14B:AI视频生成技术解析 阿里巴巴达摩院推出的140亿参数视频生成模型通义万相2.2-S2V-14B,采用扩散模型与Transformer混合架构,实现文本到视频的高质量生成。其核心通过多模态条件控制(文本、图像、动作、美学等)精准生成内容,利用数学上的前向加噪和反向去噪过程完成视频合成。模型包含视频U-Net主干网络、时间嵌入模块及多模态条件融合机制,通过自注意力实现
通义万相2.2-S2V-14B全解:AI视频生成的革命性突破与实践指南
一、通义万相2.2-S2V-14B架构解析
1.1 模型架构设计与创新
通义万相2.2-S2V-14B(Story-to-Video)作为阿里巴巴达摩院推出的140亿参数视频生成模型,采用了创新的多模态融合架构,将文本理解、图像合成与时序预测有机结合。其核心架构基于扩散模型(Diffusion Model)与Transformer的混合设计,实现了文本到视频的高质量生成。
基础数学原理:
扩散模型通过前向过程逐步添加噪声,再通过反向过程去噪生成数据。前向过程可表示为:
q ( x t ∣ x t − 1 ) = N ( x t ; 1 − β t x t − 1 , β t I ) q(x_t|x_{t-1}) = \mathcal{N}(x_t; \sqrt{1-\beta_t}x_{t-1}, \beta_tI) q(xt∣xt−1)=N(xt;1−βtxt−1,βtI)
其中 t t t为时间步, β t \beta_t βt为噪声调度参数。反向过程学习去噪网络:
p θ ( x t − 1 ∣ x t ) = N ( x t − 1 ; μ θ ( x t , t ) , Σ θ ( x t , t ) ) p_\theta(x_{t-1}|x_t) = \mathcal{N}(x_{t-1}; \mu_\theta(x_t, t), \Sigma_\theta(x_t, t)) pθ(xt−1∣xt)=N(xt−1;μθ(xt,t),Σθ(xt,t))
import torch
import torch.nn as nn
import math
from einops import rearrange

class TimeEmbedding(nn.Module):
    """时间步嵌入模块"""
    def __init__(self, dim):
        super().__init__()
        self.dim = dim
        self.inv_freq = torch.exp(
            torch.arange(0, dim, 2, dtype=torch.float32) *
            (-math.log(10000) / dim)
        )

    def forward(self, t):
        t = t.float()
        sinusoid_in = torch.outer(t, self.inv_freq)
        emb = torch.cat([sinusoid_in.sin(), sinusoid_in.cos()], dim=-1)
        return emb

class VideoUNet(nn.Module):
    """视频生成U-Net主干网络"""
    def __init__(self, in_channels=3, model_channels=128, out_channels=3):
        super().__init__()
        self.time_embed = TimeEmbedding(model_channels * 4)

        self.in_conv = nn.Conv3d(in_channels, model_channels, kernel_size=3, padding=1)

        # 下采样模块
        self.down_blocks = nn.ModuleList([
            ResBlock(model_channels, model_channels * 2, dropout=0.1),
            Downsample(model_channels * 2),
            ResBlock(model_channels * 2, model_channels * 4, dropout=0.1),
            Downsample(model_channels * 4)
        ])

        # 中间模块
        self.mid_block = ResBlock(model_channels * 4, model_channels * 4, dropout=0.1)

        # 上采样模块
        self.up_blocks = nn.ModuleList([
            Upsample(model_channels * 4),
            ResBlock(model_channels * 8, model_channels * 2, dropout=0.1),
            Upsample(model_channels * 2),
            ResBlock(model_channels * 4, model_channels, dropout=0.1)
        ])

        self.out_conv = nn.Conv3d(model_channels, out_channels, kernel_size=3, padding=1)

    def forward(self, x, t):
        # 时间嵌入
        t_emb = self.time_embed(t)
        t_emb = t_emb.unsqueeze(-1).unsqueeze(-1).unsqueeze(-1)

        # 输入卷积
        h = self.in_conv(x)

        # 下采样路径
        skips = []
        for block in self.down_blocks:
            if isinstance(block, Downsample):
                skips.append(h)
            h = block(h, t_emb)

        # 中间模块
        h = self.mid_block(h, t_emb)

        # 上采样路径
        for block in self.up_blocks:
            if isinstance(block, Upsample):
                h = block(h)
                skip = skips.pop()
                h = torch.cat([h, skip], dim=1)
            else:
                h = block(h, t_emb)

        return self.out_conv(h)
1.2 多模态条件注入机制
通义万相2.2通过多模态条件控制实现精准的视频生成,支持文本、图像、动作、美学等多维度控制信号:
class MultiModalConditioning(nn.Module):
    """多模态条件注入模块"""
    def __init__(self, text_dim=768, image_dim=512, motion_dim=256, aesthetic_dim=128):
        super().__init__()

        # 文本编码器(CLIP文本编码器)
        self.text_proj = nn.Linear(text_dim, 512)

        # 图像编码器(预训练的ViT)
        self.image_proj = nn.Sequential(
            nn.Linear(image_dim, 512),
            nn.GELU(),
            nn.Linear(512, 512)
        )

        # 运动控制编码
        self.motion_proj = nn.Sequential(
            nn.Linear(motion_dim, 256),
            nn.GELU(),
            nn.Linear(256, 512)
        )

        # 美学控制编码
        self.aesthetic_proj = nn.Sequential(
            nn.Linear(aesthetic_dim, 128),
            nn.GELU(),
            nn.Linear(128, 512)
        )

        # 条件融合
        self.fusion = nn.MultiheadAttention(embed_dim=512, num_heads=8, batch_first=True)

    def forward(self, text_emb, image_emb=None, motion_emb=None, aesthetic_emb=None):
        # 投影到统一维度
        conditions = []

        # 文本条件
        text_cond = self.text_proj(text_emb)
        conditions.append(text_cond.unsqueeze(1))

        # 图像条件
        if image_emb is not None:
            image_cond = self.image_proj(image_emb)
            conditions.append(image_cond.unsqueeze(1))

        # 运动条件
        if motion_emb is not None:
            motion_cond = self.motion_proj(motion_emb)
            conditions.append(motion_cond.unsqueeze(1))

        # 美学条件
        if aesthetic_emb is not None:
            aesthetic_cond = self.aesthetic_proj(aesthetic_emb)
            conditions.append(aesthetic_cond.unsqueeze(1))

        # 拼接所有条件
        cond_tensor = torch.cat(conditions, dim=1)

        # 自注意力融合
        fused_cond, _ = self.fusion(cond_tensor, cond_tensor, cond_tensor)

        # 取平均作为最终条件向量
        fused_cond = fused_cond.mean(dim=1)

        return fused_cond
二、提示词工程与语义控制
2.1 结构化提示词公式
通义万相2.2支持多种提示词组合方式,实现不同级别的控制精度:
基础公式(适用于快速创意生成):
def basic_prompt_formula(subject, scene, motion):
    """
    基础提示词公式:主体 + 场景 + 运动

    参数:
        subject: 主体描述(人物、物体等)
        scene: 场景描述(环境、背景)
        motion: 运动描述(动作、动态)

    返回:
        完整提示词字符串
    """
    return f"{subject}在{scene}中{motion}"
进阶公式(实现精细控制):
def advanced_prompt_formula(subject_desc, scene_desc, motion_desc,
                           aesthetic_control=None, style_control=None):
    """
    进阶提示词公式:主体描述 + 场景描述 + 运动描述 + 美学控制 + 风格化

    参数:
        subject_desc: 主体详细描述
        scene_desc: 场景详细描述
        motion_desc: 运动详细描述
        aesthetic_control: 美学控制参数
        style_control: 风格化参数

    返回:
        完整结构化提示词
    """
    prompt_parts = [
        f"主体:{subject_desc}",
        f"场景:{scene_desc}",
        f"运动:{motion_desc}"
    ]

    if aesthetic_control:
        prompt_parts.append(f"美学控制:{aesthetic_control}")

    if style_control:
        prompt_parts.append(f"风格:{style_control}")

    return ",".join(prompt_parts)

# 示例使用
subject = "一位身着少数民族服饰的黑发苗族少女"
scene = "云雾缭绕的山间梯田,远处有传统的吊脚楼"
motion = "轻盈地旋转跳舞,裙摆随风飘扬"
aesthetic = "电影级光影,柔和的侧光,暖色调"
style = "写实风格,8K分辨率"

prompt = advanced_prompt_formula(subject, scene, motion, aesthetic, style)
print(prompt)
2.2 影视级美学控制参数化
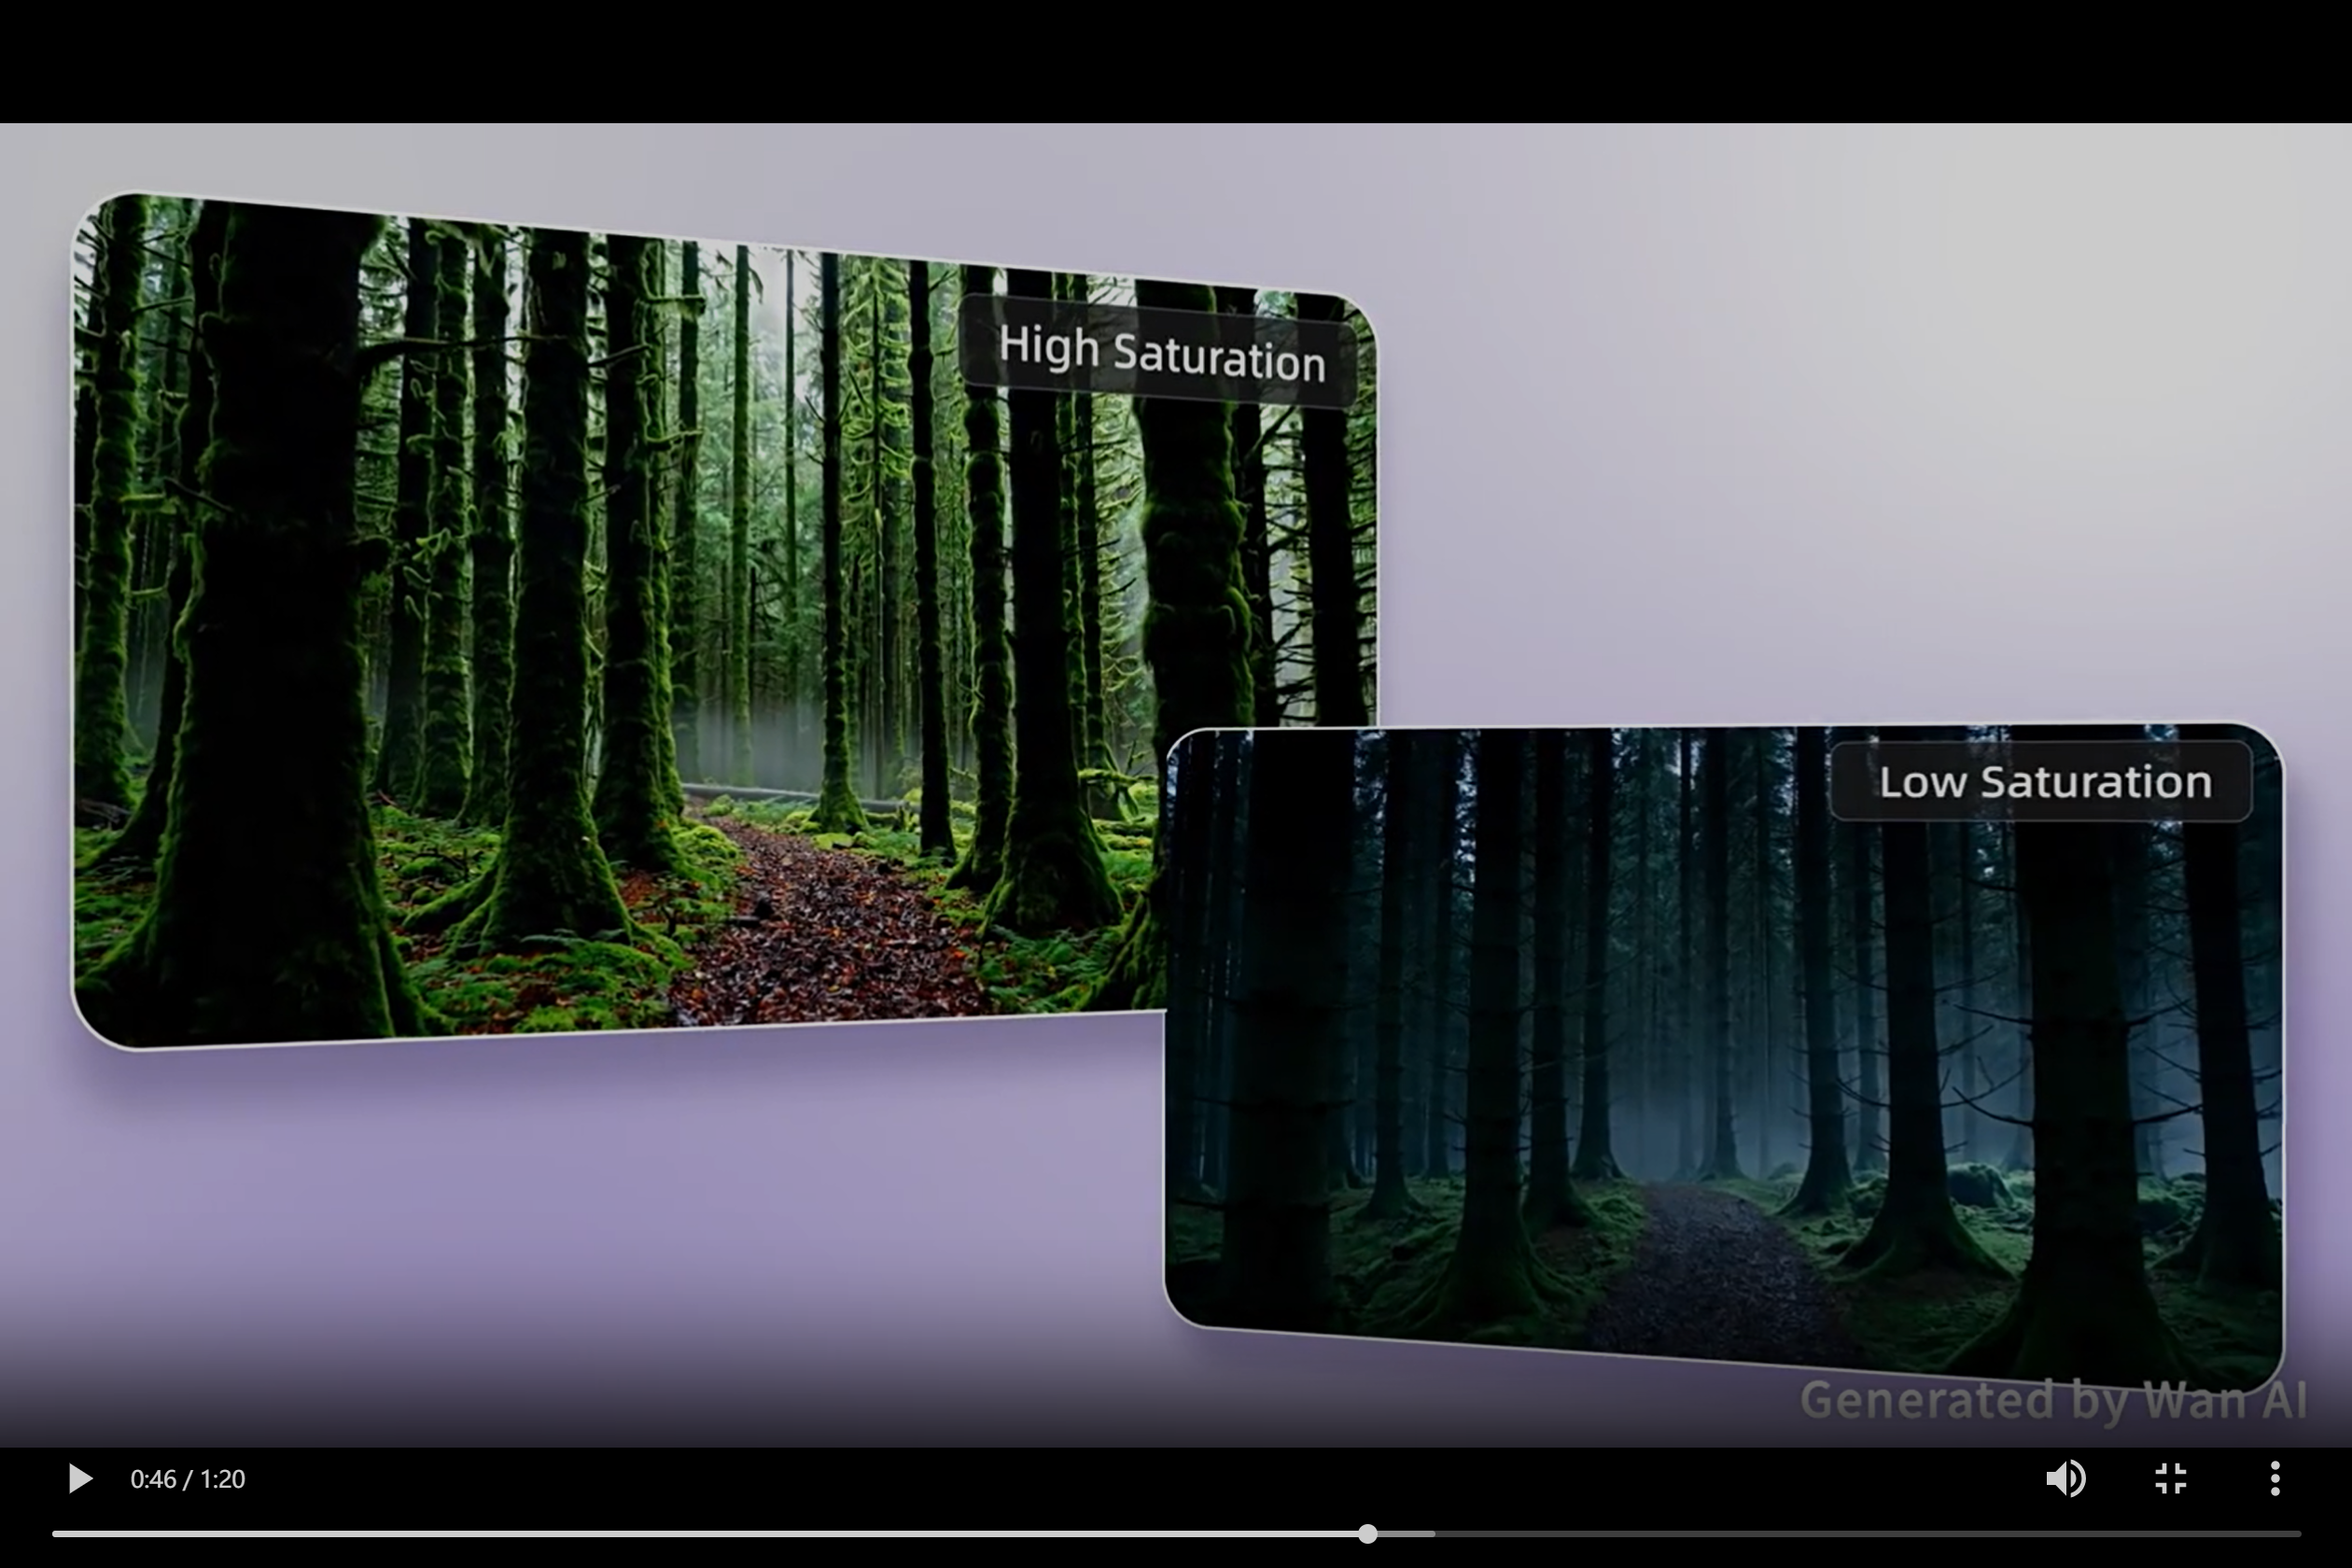
通义万相2.2支持专业级影视美学控制,以下是完整的美学控制参数体系:
class AestheticController:
    """影视级美学控制模块"""
    def __init__(self):
        # 光源类型映射
        self.light_sources = {
            '日光': 'daylight',
            '月光': 'moonlight',
            '人工光': 'artificial_light',
            '实用光': 'practical_light',
            '火光': 'firelight',
            '荧光': 'fluorescent_light',
            '阴天光': 'overcast_light',
            '混合光': 'mixed_lighting',
            '晴天光': 'sunny_light'
        }

        # 光线类型映射
        self.light_types = {
            '柔光': 'soft_light',
            '硬光': 'hard_light',
            '侧光': 'side_light',
            '背光': 'back_light',
            '底光': 'bottom_light',
            '边缘光': 'rim_light',
            '剪影': 'silhouette'
        }

        # 时间段映射
        self.time_periods = {
            '白天': 'daytime',
            '夜晚': 'nighttime',
            '黄昏': 'dusk',
            '日落': 'sunset',
            '黎明': 'dawn',
            '日出': 'sunrise'
        }

        # 景别映射
        self.shot_sizes = {
            '特写': 'extreme_close_up',
            '近景': 'close_up',
            '中景': 'medium_shot',
            '中全景': 'medium_full_shot',
            '全景': 'full_shot',
            '广角': 'wide_shot',
            '极端全景': 'extreme_wide_shot'
        }

    def generate_aesthetic_prompt(self, light_source=None, light_type=None,
                                time_period=None, shot_size=None,
                                composition=None, lens_type=None, color_tone=None):
        """
        生成美学控制提示词

        参数:
            light_source: 光源类型
            light_type: 光线类型
            time_period: 时间段
            shot_size: 景别
            composition: 构图方式
            lens_type: 镜头类型
            color_tone: 色调

        返回:
            美学控制字符串
        """
        aesthetic_parts = []

        if light_source and light_source in self.light_sources:
            aesthetic_parts.append(f"光源:{light_source}")

        if light_type and light_type in self.light_types:
            aesthetic_parts.append(f"光线:{light_type}")

        if time_period and time_period in self.time_periods:
            aesthetic_parts.append(f"时间:{time_period}")

        if shot_size and shot_size in self.shot_sizes:
            aesthetic_parts.append(f"景别:{shot_size}")

        if composition:
            aesthetic_parts.append(f"构图:{composition}")

        if lens_type:
            aesthetic_parts.append(f"镜头:{lens_type}")

        if color_tone:
            aesthetic_parts.append(f"色调:{color_tone}")

        return ",".join(aesthetic_parts)

# 使用示例
aesthetic_controller = AestheticController()
aesthetic_prompt = aesthetic_controller.generate_aesthetic_prompt(
    light_source='日光',
    light_type='侧光',
    time_period='黄昏',
    shot_size='中景',
    composition='中心构图',
    lens_type='中焦距',
    color_tone='暖色调'
)
print(aesthetic_prompt)

三、动态控制与运动生成
3.1 精细化运动描述体系
通义万相2.2支持从基础运动到复杂情感表达的全面动态控制:
class MotionController:
    """动态控制模块"""
    def __init__(self):
        # 基础运动类型
        self.basic_motions = {
            '静止': 'static',
            '小幅度运动': 'subtle_movement',
            '大幅度运动': 'dynamic_movement',
            '局部运动': 'local_movement',
            '整体动势': 'global_motion'
        }

        # 人物运动类型
        self.human_motions = {
            '行走': 'walking',
            '奔跑': 'running',
            '跳跃': 'jumping',
            '旋转': 'spinning',
            '跳舞': 'dancing',
            '手势': 'gesturing'
        }

        # 运动属性修饰
        self.motion_modifiers = {
            '缓慢地': 'slowly',
            '快速地': 'quickly',
            '轻柔地': 'gently',
            '猛烈地': 'violently',
            '优雅地': 'gracefully',
            '笨拙地': 'clumsily'
        }

        # 情绪表达映射
        self.emotional_expressions = {
            '愤怒': 'angry',
            '恐惧': 'fearful',
            '高兴': 'happy',
            '悲伤': 'sad',
            '惊讶': 'surprised',
            '平静': 'calm'
        }

    def generate_motion_description(self, motion_type, intensity=None,
                                  speed=None, emotion=None, subject="人物"):
        """
        生成运动描述

        参数:
            motion_type: 运动类型
            intensity: 运动强度
            speed: 运动速度
            emotion: 情绪表达
            subject: 运动主体

        返回:
            运动描述字符串
        """
        motion_parts = []

        # 添加速度修饰
        if speed and speed in self.motion_modifiers:
            motion_parts.append(self.motion_modifiers[speed])

        # 添加运动类型
        if motion_type in self.basic_motions:
            motion_parts.append(self.basic_motions[motion_type])
        elif motion_type in self.human_motions:
            motion_parts.append(self.human_motions[motion_type])
        else:
            motion_parts.append(motion_type)

        # 添加情绪表达
        if emotion and emotion in self.emotional_expressions:
            motion_parts.append(f"表情{self.emotional_expressions[emotion]}")

        # 组合成完整描述
        motion_desc = "地".join(motion_parts) if motion_parts else "静止"

        return f"{subject}{motion_desc}"

# 使用示例
motion_controller = MotionController()

# 基础运动描述
basic_motion = motion_controller.generate_motion_description(
    motion_type='旋转',
    speed='快速地',
    intensity='强烈'
)
print(f"基础运动: {basic_motion}")

# 情绪化运动描述
emotional_motion = motion_controller.generate_motion_description(
    motion_type='行走',
    speed='缓慢地',
    emotion='悲伤'
)
print(f"情绪运动: {emotional_motion}")
3.2 专业运镜控制语言
class CameraMovementController:
    """摄像机运动控制模块"""
    def __init__(self):
        # 基础运镜类型
        self.basic_movements = {
            '镜头推进': 'dolly_in',
            '镜头拉远': 'dolly_out',
            '镜头左移': 'truck_left',
            '镜头右移': 'truck_right',
            '镜头上摇': 'tilt_up',
            '镜头下摇': 'tilt_down',
            '镜头左摇': 'pan_left',
            '镜头右摇': 'pan_right'
        }

        # 高级运镜类型
        self.advanced_movements = {
            '手持镜头': 'handheld_shot',
            '环绕运镜': 'orbital_shot',
            '跟随镜头': 'follow_shot',
            '飞跃镜头': 'fly_through',
            '复合运镜': 'complex_camera_move'
        }

        # 镜头运动属性
        self.movement_attributes = {
            '缓慢': 'slowly',
            '快速': 'quickly',
            '平稳': 'smoothly',
            '抖动': 'shakily',
            '流畅': 'fluidly'
        }

    def generate_camera_movement(self, movement_type, speed=None,
                               duration=None, target=None):
        """
        生成摄像机运动描述

        参数:
            movement_type: 运动类型
            speed: 运动速度
            duration: 运动时长
            target: 运动目标

        返回:
            摄像机运动描述字符串
        """
        movement_parts = []

        # 添加速度修饰
        if speed and speed in self.movement_attributes:
            movement_parts.append(self.movement_attributes[speed])

        # 添加运动类型
        if movement_type in self.basic_movements:
            movement_parts.append(self.basic_movements[movement_type])
        elif movement_type in self.advanced_movements:
            movement_parts.append(self.advanced_movements[movement_type])
        else:
            movement_parts.append(movement_type)

        # 添加目标对象
        if target:
            movement_parts.append(f"朝向{target}")

        # 添加时长信息
        if duration:
            movement_parts.append(f"持续{duration}秒")

        # 组合成完整描述
        movement_desc = "地".join(movement_parts)

        return f"摄像机{movement_desc}"

# 使用示例
camera_controller = CameraMovementController()

# 基础运镜描述
basic_move = camera_controller.generate_camera_movement(
    movement_type='镜头推进',
    speed='缓慢',
    target='人物面部',
    duration=3
)
print(f"基础运镜: {basic_move}")

# 高级运镜描述
advanced_move = camera_controller.generate_camera_movement(
    movement_type='环绕运镜',
    speed='平稳',
    target='主体人物',
    duration=5
)
print(f"高级运镜: {advanced_move}")
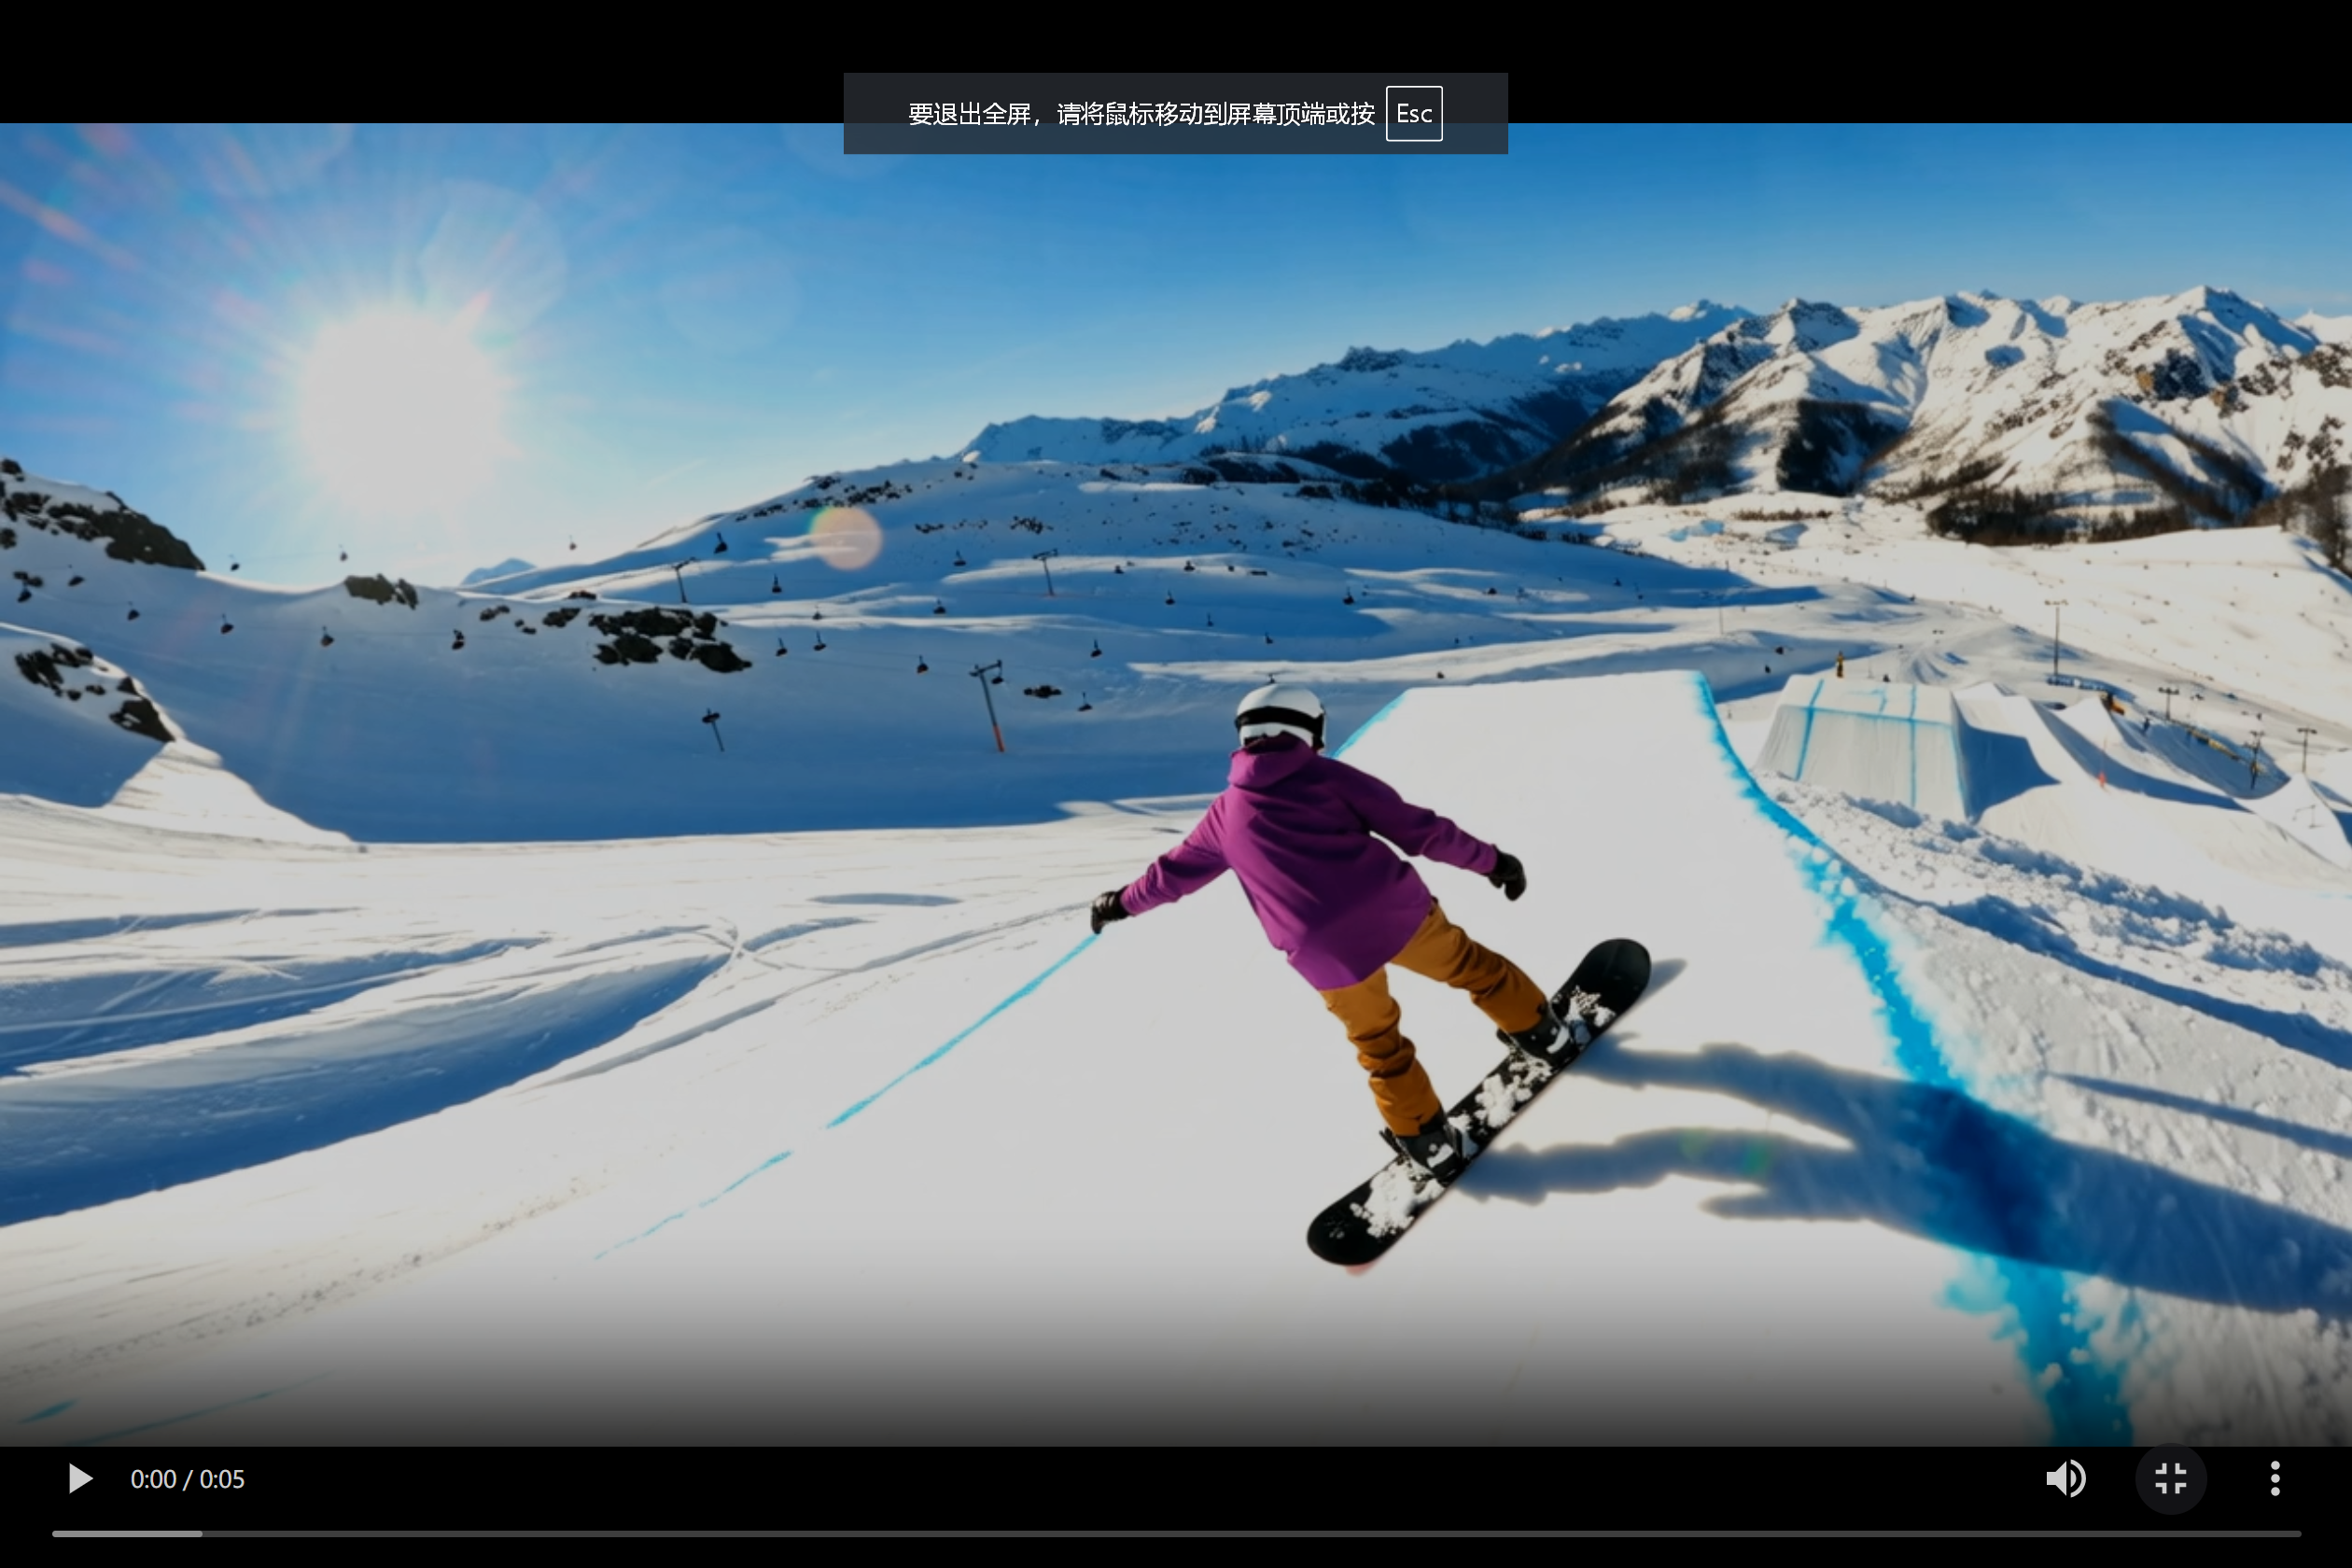
四、图生视频技术与实践
4.1 图像条件化生成流程
通义万相2.2的图生视频功能基于条件扩散模型,实现从静态图像到动态视频的转换:
class ImageToVideoGenerator:
    """图生视频生成器"""
    def __init__(self, model_path, device='cuda'):
        self.device = device
        self.model = self.load_model(model_path)
        self.image_processor = self.get_image_processor()
        self.video_processor = self.get_video_processor()

    def load_model(self, model_path):
        """加载预训练模型"""
        # 实际实现中会加载通义万相2.2的图生视频模型
        model = VideoGenerationModel.from_pretrained(model_path)
        model.to(self.device)
        model.eval()
        return model

    def get_image_processor(self):
        """获取图像处理器"""
        return torchvision.transforms.Compose([
            torchvision.transforms.Resize((512, 512)),
            torchvision.transforms.ToTensor(),
            torchvision.transforms.Normalize([0.5], [0.5])
        ])

    def get_video_processor(self):
        """获取视频处理器"""
        # 视频后处理流程
        return {
            'denoise': True,
            'smooth': True,
            'enhance': True,
            'format': 'mp4'
        }

    def generate_video_from_image(self, image_path, prompt,
                                num_frames=16, fps=8,
                                motion_strength=0.8):
        """
        从图像生成视频

        参数:
            image_path: 输入图像路径
            prompt: 运动描述提示词
            num_frames: 生成帧数
            fps: 帧率
            motion_strength: 运动强度

        返回:
            生成视频的路径
        """
        # 1. 加载和处理输入图像
        image = Image.open(image_path).convert('RGB')
        image_tensor = self.image_processor(image).unsqueeze(0).to(self.device)

        # 2. 编码文本提示词
        text_embeddings = self.encode_text(prompt)

        # 3. 提取图像特征
        image_embeddings = self.encode_image(image_tensor)

        # 4. 设置生成参数
        generator = torch.Generator(device=self.device)
        generator.manual_seed(42)  # 设置随机种子确保可重复性

        # 5. 生成视频帧
        with torch.no_grad():
            video_frames = self.model(
                image_embeddings=image_embeddings,
                text_embeddings=text_embeddings,
                num_frames=num_frames,
                motion_strength=motion_strength,
                generator=generator
            )

        # 6. 后处理和保存视频
        output_path = self.process_and_save_video(video_frames, fps)

        return output_path

    def encode_text(self, prompt):
        """编码文本提示词"""
        # 使用CLIP文本编码器
        with torch.no_grad():
            text_inputs = self.tokenizer(
                prompt,
                padding=True,
                return_tensors="pt"
            ).to(self.device)
            text_embeddings = self.text_encoder(**text_inputs).last_hidden_state
        return text_embeddings

    def encode_image(self, image_tensor):
        """编码输入图像"""
        # 使用视觉编码器提取特征
        with torch.no_grad():
            image_embeddings = self.image_encoder(image_tensor)
        return image_embeddings

    def process_and_save_video(self, frames, fps):
        """后处理并保存视频"""
        # 转换为numpy数组
        frames = frames.cpu().numpy()
        frames = (frames * 255).astype('uint8')

        # 创建视频写入器
        height, width = frames.shape[2], frames.shape[3]
        output_path = f"output_{int(time.time())}.mp4"

        # 使用OpenCV写入视频
        fourcc = cv2.VideoWriter_fourcc(*'mp4v')
        out = cv2.VideoWriter(output_path, fourcc, fps, (width, height))

        for i in range(frames.shape[1]):
            frame = frames[0, i].transpose(1, 2, 0)
            frame = cv2.cvtColor(frame, cv2.COLOR_RGB2BGR)
            out.write(frame)

        out.release()

        return output_path

# 使用示例
if __name__ == "__main__":
    generator = ImageToVideoGenerator("tongyi-wanxiang-2.2-s2v")

    # 生成视频
    output_video = generator.generate_video_from_image(
        image_path="input_image.jpg",
        prompt="镜头缓慢拉远,展示全景,风吹动头发",
        num_frames=24,
        fps=12,
        motion_strength=0.7
    )

    print(f"视频已生成: {output_video}")
4.2 多图像序列生成
对于更复杂的视频生成需求,支持多图像输入生成平滑过渡:
class MultiImageVideoGenerator(ImageToVideoGenerator):
    """多图像视频生成器"""
    def generate_video_from_images(self, image_paths, prompts,
                                 transition_frames=10,
                                 total_frames=30, fps=8):
        """
        从多张图像生成过渡视频

        参数:
            image_paths: 输入图像路径列表
            prompts: 对应每段过渡的提示词列表
            transition_frames: 每段过渡的帧数
            total_frames: 总帧数
            fps: 帧率

        返回:
            生成视频的路径
        """
        assert len(image_paths) == len(prompts) + 1, "提示词数量应为图像数量减1"

        all_frames = []

        # 处理每个过渡段
        for i in range(len(image_paths) - 1):
            start_image = Image.open(image_paths[i]).convert('RGB')
            end_image = Image.open(image_paths[i + 1]).convert('RGB')

            # 生成过渡帧
            transition_frames = self.generate_transition(
                start_image,
                end_image,
                prompts[i],
                transition_frames
            )

            all_frames.extend(transition_frames)

        # 保存最终视频
        output_path = self.save_video_sequence(all_frames, fps)

        return output_path

    def generate_transition(self, start_img, end_img, prompt, num_frames):
        """生成两张图像间的过渡帧"""
        # 编码起始和结束图像
        start_emb = self.encode_image(self.image_processor(start_img))
        end_emb = self.encode_image(self.image_processor(end_img))

        # 编码文本提示
        text_emb = self.encode_text(prompt)

        # 生成过渡帧
        transition_frames = []

        for alpha in torch.linspace(0, 1, num_frames):
            # 插值图像特征
            interpolated_emb = (1 - alpha) * start_emb + alpha * end_emb

            # 生成当前帧
            with torch.no_grad():
                frame = self.model.generate_frame(
                    image_embeddings=interpolated_emb,
                    text_embeddings=text_emb
                )

            transition_frames.append(frame)

        return transition_frames
五、高级功能与创意应用
5.1 风格化视频生成
通义万相2.2支持多种艺术风格转换,实现创意视频生成:
class StylizedVideoGenerator:
    """风格化视频生成器"""
    def __init__(self):
        # 支持的风格类型
        self.supported_styles = {
            '二次元': 'anime',
            '油画': 'oil_painting',
            '水彩画': 'watercolor',
            '像素艺术': 'pixel_art',
            '赛博朋克': 'cyberpunk',
            '复古电影': 'vintage_film',
            '黑白': 'black_white',
            '黏土动画': 'clay_animation',
            '毛毡风格': 'felt_style',
            '3D卡通': '3d_cartoon'
        }

        # 风格强度控制
        self.style_intensity = {
            '轻微': 0.3,
            '中等': 0.6,
            '强烈': 0.9,
            '极致': 1.2
        }

    def apply_style_to_prompt(self, base_prompt, style_name, intensity='中等'):
        """
        将风格应用到基础提示词

        参数:
            base_prompt: 基础提示词
            style_name: 风格名称
            intensity: 风格强度

        返回:
            风格化后的提示词
        """
        if style_name not in self.supported_styles:
            raise ValueError(f"不支持的风格: {style_name}")

        if intensity not in self.style_intensity:
            raise ValueError(f"无效的强度值: {intensity}")

        style_code = self.supported_styles[style_name]
        intensity_value = self.style_intensity[intensity]

        # 构建风格化提示词
        styled_prompt = f"{base_prompt},{style_code}风格"

        if intensity_value > 0.6:
            styled_prompt += f",风格强度{intensity_value}"

        return styled_prompt

    def generate_stylized_video(self, prompt, style_name,
                              intensity='中等', **kwargs):
        """
        生成风格化视频

        参数:
            prompt: 基础提示词
            style_name: 风格名称
            intensity: 风格强度
            **kwargs: 其他生成参数

        返回:
            风格化视频路径
        """
        # 应用风格到提示词
        styled_prompt = self.apply_style_to_prompt(prompt, style_name, intensity)

        # 设置风格特定的生成参数
        style_params = self.get_style_parameters(style_name, intensity)

        # 合并参数
        generation_params = {**kwargs, **style_params}

        # 生成视频
        if 'image_path' in kwargs:
            # 图生视频
            generator = ImageToVideoGenerator()
            output_path = generator.generate_video_from_image(
                prompt=styled_prompt,
                **generation_params
            )
        else:
            # 文生视频
            generator = TextToVideoGenerator()
            output_path = generator.generate_video_from_text(
                prompt=styled_prompt,
                **generation_params
            )

        return output_path

    def get_style_parameters(self, style_name, intensity):
        """获取风格特定的生成参数"""
        base_params = {
            'num_inference_steps': 50,
            'guidance_scale': 7.5,
            'seed': 42
        }

        # 风格特定参数
        style_params = {
            'anime': {'guidance_scale': 8.0, 'color_vibrancy': 1.2},
            'oil_painting': {'texture_strength': 0.8, 'brush_stroke': 0.6},
            'watercolor': {'color_bleed': 0.7, 'paper_texture': 0.5},
            'cyberpunk': {'neon_intensity': 0.9, 'grain_strength': 0.4},
            'vintage_film': {'film_grain': 0.7, 'color_bleach': 0.3}
        }

        # 根据强度调整参数
        intensity_factor = self.style_intensity[intensity]
        params = style_params.get(self.supported_styles[style_name], {})

        # 应用强度系数
        adjusted_params = {}
        for key, value in params.items():
            adjusted_params[key] = value * intensity_factor

        return {**base_params, **adjusted_params}

# 使用示例
stylized_generator = StylizedVideoGenerator()

# 生成赛博朋克风格视频
cyberpunk_video = stylized_generator.generate_stylized_video(
    prompt="未来城市夜景,飞行汽车穿梭,霓虹灯闪烁",
    style_name="赛博朋克",
    intensity="强烈",
    num_frames=24,
    fps=12
)

# 生成油画风格视频
oil_painting_video = stylized_generator.generate_stylized_video(
    prompt="阳光下的向日葵田野,蜜蜂飞舞",
    style_name="油画",
    intensity="中等",
    num_frames=18,
    fps=10
)
5.2 批量视频生成与工作流管理
对于商业应用,支持批量生成和工作流管理:
class BatchVideoProcessor:
    """批量视频处理器"""
    def __init__(self, max_workers=4):
        self.max_workers = max_workers
        self.job_queue = []
        self.results = {}

    def add_job(self, prompt, output_path, **kwargs):
        """添加生成任务"""
        job_id = len(self.job_queue) + 1
        job = {
            'id': job_id,
            'prompt': prompt,
            'output_path': output_path,
            'params': kwargs,
            'status': 'pending',
            'start_time': None,
            'end_time': None
        }
        self.job_queue.append(job)
        return job_id

    def process_batch(self):
        """处理批量任务"""
        from concurrent.futures import ThreadPoolExecutor, as_completed

        completed_jobs = 0
        total_jobs = len(self.job_queue)

        with ThreadPoolExecutor(max_workers=self.max_workers) as executor:
            # 提交所有任务
            future_to_job = {}
            for job in self.job_queue:
                if job['status'] == 'pending':
                    future = executor.submit(
                        self.process_single_job,
                        job
                    )
                    future_to_job[future] = job

            # 处理完成的任务
            for future in as_completed(future_to_job):
                job = future_to_job[future]
                try:
                    result = future.result()
                    job['status'] = 'completed'
                    job['end_time'] = datetime.now()
                    self.results[job['id']] = result
                    completed_jobs += 1

                    print(f"完成进度: {completed_jobs}/{total_jobs}")

                except Exception as e:
                    job['status'] = 'failed'
                    job['error'] = str(e)
                    print(f"任务 {job['id']} 失败: {e}")

    def process_single_job(self, job):
        """处理单个任务"""
        job['status'] = 'processing'
        job['start_time'] = datetime.now()

        try:
            # 根据参数选择生成方式
            if 'image_path' in job['params']:
                generator = ImageToVideoGenerator()
                result = generator.generate_video_from_image(
                    prompt=job['prompt'],
                    **job['params']
                )
            else:
                generator = TextToVideoGenerator()
                result = generator.generate_video_from_text(
                    prompt=job['prompt'],
                    **job['params']
                )

            # 移动文件到指定输出路径
            if result and job['output_path']:
                import shutil
                shutil.move(result, job['output_path'])
                result = job['output_path']

            return result

        except Exception as e:
            raise Exception(f"任务处理失败: {e}")

    def generate_report(self):
        """生成处理报告"""
        report = {
            'total_jobs': len(self.job_queue),
            'completed': len([j for j in self.job_queue if j['status'] == 'completed']),
            'failed': len([j for j in self.job_queue if j['status'] == 'failed']),
            'processing_time': None,
            'details': self.job_queue
        }

        # 计算总处理时间
        completed_jobs = [j for j in self.job_queue if j['status'] == 'completed']
        if completed_jobs:
            start_times = [j['start_time'] for j in completed_jobs if j['start_time']]
            end_times = [j['end_time'] for j in completed_jobs if j['end_time']]

            if start_times and end_times:
                total_time = max(end_times) - min(start_times)
                report['processing_time'] = str(total_time)

        return report

# 使用示例
def create_video_batch():
    """创建批量视频生成任务"""
    processor = BatchVideoProcessor(max_workers=2)

    # 添加多个生成任务
    jobs = [
        {
            'prompt': '日出时分的海滩,海浪轻轻拍打沙滩,海鸥飞翔',
            'output': 'beach_sunrise.mp4',
            'params': {'num_frames': 24, 'fps': 12}
        },
        {
            'prompt': '城市夜景,车流穿梭,霓虹灯闪烁',
            'output': 'city_night.mp4',
            'params': {'num_frames': 30, 'fps': 15}
        },
        {
            'prompt': '森林中的雾气,阳光透过树叶,鹿群漫步',
            'output': 'forest_mist.mp4',
            'params': {'num_frames': 20, 'fps': 10}
        }
    ]

    for job in jobs:
        processor.add_job(
            prompt=job['prompt'],
            output_path=job['output'],
            **job['params']
        )

    # 处理批量任务
    processor.process_batch()

    # 生成报告
    report = processor.generate_report()
    print(f"批量处理完成: {report['completed']}/{report['total_jobs']}")

    return report

六、性能优化与最佳实践
6.1 硬件加速与内存优化
class PerformanceOptimizer:
    """性能优化器"""
    def __init__(self):
        self.optimization_strategies = {
            'mixed_precision': True,
            'gradient_checkpointing': True,
            'memory_efficient_attention': True,
            'chunked_processing': True,
            'model_offloading': False
        }

    def configure_for_hardware(self, device_type='cuda', memory_gb=16):
        """
        根据硬件配置优化策略

        参数:
            device_type: 设备类型
            memory_gb: 显存大小(GB)
        """
        strategies = self.optimization_strategies.copy()

        # 根据显存调整策略
        if memory_gb < 12:
            strategies['model_offloading'] = True
            strategies['chunked_processing'] = True
            strategies['mixed_precision'] = True
        elif memory_gb < 24:
            strategies['model_offloading'] = False
            strategies['chunked_processing'] = True
        else:
            strategies['model_offloading'] = False
            strategies['chunked_processing'] = False

        self.optimization_strategies = strategies
        return strategies

    def apply_optimizations(self, model):
        """应用性能优化"""
        # 混合精度训练
        if self.optimization_strategies['mixed_precision']:
            model = self.apply_mixed_precision(model)

        # 梯度检查点
        if self.optimization_strategies['gradient_checkpointing']:
            model = self.apply_gradient_checkpointing(model)

        # 内存高效注意力
        if self.optimization_strategies['memory_efficient_attention']:
            model = self.apply_memory_efficient_attention(model)

        return model

    def apply_mixed_precision(self, model):
        """应用混合精度"""
        from torch.cuda.amp import autocast

        class MixedPrecisionModel(torch.nn.Module):
            def __init__(self, inner_model):
                super().__init__()
                self.inner_model = inner_model

            def forward(self, *args, **kwargs):
                with autocast():
                    return self.inner_model(*args, **kwargs)

        return MixedPrecisionModel(model)

    def apply_gradient_checkpointing(self, model):
        """应用梯度检查点"""
        if hasattr(model, 'enable_gradient_checkpointing'):
            model.enable_gradient_checkpointing()
        return model

    def apply_memory_efficient_attention(self, model):
        """应用内存高效注意力"""
        try:
            from xformers.ops import MemoryEfficientAttentionHook
            model.apply(MemoryEfficientAttentionHook())
        except ImportError:
            print("xformers not available, using default attention")
        return model

    def generate_with_optimizations(self, prompt, **kwargs):
        """使用优化配置生成视频"""
        # 配置硬件优化
        hardware_config = self.configure_for_hardware()

        # 加载模型
        model = load_pretrained_model("tongyi-wanxiang-2.2-s2v")

        # 应用优化
        optimized_model = self.apply_optimizations(model)

        # 生成视频
        if 'image_path' in kwargs:
            generator = ImageToVideoGenerator(model=optimized_model)
            result = generator.generate_video_from_image(prompt=prompt, **kwargs)
        else:
            generator = TextToVideoGenerator(model=optimized_model)
            result = generator.generate_video_from_text(prompt=prompt, **kwargs)

        return result

# 使用示例
optimizer = PerformanceOptimizer()

# 根据硬件自动配置
hardware_config = optimizer.configure_for_hardware(memory_gb=16)
print(f"优化配置: {hardware_config}")

# 使用优化配置生成视频
optimized_video = optimizer.generate_with_optimizations(
    prompt="优美的风景视频,山脉和湖泊",
    num_frames=24,
    fps=12
)
6.2 质量与速度的平衡策略
class QualitySpeedBalancer:
    """质量与速度平衡器"""
    def __init__(self):
        self.quality_presets = {
            'draft': {
                'num_inference_steps': 20,
                'guidance_scale': 6.0,
                'resolution': (384, 384),
                'num_frames': 16,
                'fps': 8
            },
            'standard': {
                'num_inference_steps': 30,
                'guidance_scale': 7.5,
                'resolution': (512, 512),
                'num_frames': 24,
                'fps': 12
            },
            'high': {
                'num_inference_steps': 50,
                'guidance_scale': 8.5,
                'resolution': (768, 768),
                'num_frames': 32,
                'fps': 16
            },
            'ultra': {
                'num_inference_steps': 100,
                'guidance_scale': 9.0,
                'resolution': (1024, 1024),
                'num_frames': 48,
                'fps': 24
            }
        }

    def get_optimal_settings(self, time_budget=None, quality_target=None):
        """
        获取最优生成设置

        参数:
            time_budget: 时间预算(秒)
            quality_target: 质量目标('draft', 'standard', 'high', 'ultra')

        返回:
            优化后的生成参数
        """
        if quality_target:
            return self.quality_presets[quality_target]

        # 根据时间预算自动选择
        if time_budget is None:
            return self.quality_presets['standard']

        # 估算不同配置的生成时间
        estimated_times = {}
        for quality, settings in self.quality_presets.items():
            time_estimate = self.estimate_generation_time(settings)
            estimated_times[quality] = time_estimate

        # 选择满足时间预算的最高质量配置
        best_quality = 'draft'
        for quality, time_needed in estimated_times.items():
            if time_needed <= time_budget:
                if self.get_quality_level(quality) > self.get_quality_level(best_quality):
                    best_quality = quality

        return self.quality_presets[best_quality]

    def estimate_generation_time(self, settings):
        """估算生成时间"""
        # 基于经验公式的时间估算
        base_time = 2.0  # 基础开销
        step_time = 0.15 * settings['num_inference_steps']
        resolution_factor = (settings['resolution'][0] / 512) ** 2
        frame_factor = settings['num_frames'] / 24

        total_time = base_time + step_time * resolution_factor * frame_factor
        return total_time

    def get_quality_level(self, quality_name):
        """获取质量等级数值"""
        levels = {'draft': 1, 'standard': 2, 'high': 3, 'ultra': 4}
        return levels.get(quality_name, 2)

    def adaptive_generation(self, prompt, time_budget=None, **kwargs):
        """
        自适应生成视频

        参数:
            prompt: 生成提示词
            time_budget: 时间预算
            **kwargs: 其他参数

        返回:
            生成视频的路径
        """
        # 获取最优设置
        optimal_settings = self.get_optimal_settings(time_budget)

        # 合并用户指定的参数
        generation_params = {**optimal_settings, **kwargs}

        # 选择生成器类型
        if 'image_path' in generation_params:
            generator = ImageToVideoGenerator()
            result = generator.generate_video_from_image(
                prompt=prompt,
                **generation_params
            )
        else:
            generator = TextToVideoGenerator()
            result = generator.generate_video_from_text(
                prompt=prompt,
                **generation_params
            )

        return result

# 使用示例
balancer = QualitySpeedBalancer()

# 在30秒时间预算内生成最佳质量视频
video_result = balancer.adaptive_generation(
    prompt="美丽的日落场景,云彩色彩丰富",
    time_budget=30
)

# 指定高质量生成
high_quality_video = balancer.adaptive_generation(
    prompt="详细的室内场景,丰富的光影效果",
    quality_target='high'
)
七、API集成与商业应用
7.1 RESTful API 接口设计
from fastapi import FastAPI, HTTPException
from pydantic import BaseModel
import uuid
import asyncio
from typing import List, Optional

app = FastAPI(title="通义万相2.2视频生成API", version="1.0.0")

class GenerationRequest(BaseModel):
    prompt: str
    style: Optional[str] = None
    aesthetic_control: Optional[dict] = None
    motion_control: Optional[dict] = None
    output_format: str = "mp4"
    resolution: str = "512x512"
    duration: float = 4.0
    priority: str = "normal"

class GenerationResponse(BaseModel):
    job_id: str
    status: str
    estimated_time: float
    output_url: Optional[str] = None

class BatchRequest(BaseModel):
    requests: List[GenerationRequest]
    callback_url: Optional[str] = None

class BatchResponse(BaseModel):
    batch_id: str
    job_ids: List[str]
    status: str

# 内存中的任务存储(生产环境中应使用数据库)
jobs = {}
batches = {}

@app.post("/generate", response_model=GenerationResponse)
async def generate_video(request: GenerationRequest):
    """单视频生成端点"""
    job_id = str(uuid.uuid4())

    # 估算生成时间
    estimator = QualitySpeedBalancer()
    settings = estimator.get_optimal_settings()
    estimated_time = estimator.estimate_generation_time(settings)

    # 创建任务
    jobs[job_id] = {
        'request': request.dict(),
        'status': 'queued',
        'estimated_time': estimated_time,
        'created_at': asyncio.get_event_loop().time()
    }

    # 异步处理任务
    asyncio.create_task(process_generation_job(job_id))

    return GenerationResponse(
        job_id=job_id,
        status="queued",
        estimated_time=estimated_time
    )

@app.post("/batch/generate", response_model=BatchResponse)
async def generate_batch_video(request: BatchRequest):
    """批量视频生成端点"""
    batch_id = str(uuid.uuid4())
    job_ids = []

    # 创建批量任务
    for gen_request in request.requests:
        job_id = str(uuid.uuid4())
        job_ids.append(job_id)

        estimator = QualitySpeedBalancer()
        settings = estimator.get_optimal_settings()
        estimated_time = estimator.estimate_generation_time(settings)

        jobs[job_id] = {
            'request': gen_request.dict(),
            'status': 'queued',
            'estimated_time': estimated_time,
            'batch_id': batch_id,
            'created_at': asyncio.get_event_loop().time()
        }

    batches[batch_id] = {
        'job_ids': job_ids,
        'callback_url': request.callback_url,
        'status': 'processing'
    }

    # 异步处理批量任务
    asyncio.create_task(process_batch_jobs(batch_id))

    return BatchResponse(
        batch_id=batch_id,
        job_ids=job_ids,
        status="processing"
    )

@app.get("/job/{job_id}")
async def get_job_status(job_id: str):
    """获取任务状态"""
    if job_id not in jobs:
        raise HTTPException(status_code=404, detail="Job not found")

    job = jobs[job_id]
    return {
        'job_id': job_id,
        'status': job['status'],
        'estimated_time_remaining': max(0, job['estimated_time'] -
                                      (asyncio.get_event_loop().time() - job['created_at'])),
        'output_url': job.get('output_url')
    }

@app.get("/batch/{batch_id}")
async def get_batch_status(batch_id: str):
    """获取批量任务状态"""
    if batch_id not in batches:
        raise HTTPException(status_code=404, detail="Batch not found")

    batch = batches[batch_id]
    job_statuses = {}

    for job_id in batch['job_ids']:
        if job_id in jobs:
            job_statuses[job_id] = jobs[job_id]['status']

    completed = sum(1 for status in job_statuses.values() if status == 'completed')
    total = len(job_statuses)

    return {
        'batch_id': batch_id,
        'status': batch['status'],
        'progress': f"{completed}/{total}",
        'jobs': job_statuses
    }

async def process_generation_job(job_id: str):
    """处理单个生成任务"""
    try:
        job = jobs[job_id]
        job['status'] = 'processing'

        request_data = job['request']

        # 实际生成逻辑
        generator = TextToVideoGenerator()

        # 配置生成参数
        generation_params = {
            'num_frames': int(request_data['duration'] * 6),  # 假设6fps
            'output_format': request_data['output_format']
        }

        # 应用风格化
        if request_data['style']:
            stylized_generator = StylizedVideoGenerator()
            styled_prompt = stylized_generator.apply_style_to_prompt(
                request_data['prompt'],
                request_data['style']
            )
        else:
            styled_prompt = request_data['prompt']

        # 生成视频
        output_path = generator.generate_video_from_text(
            prompt=styled_prompt,
            **generation_params
        )

        # 更新任务状态
        job['status'] = 'completed'
        job['output_url'] = f"/download/{job_id}/{output_path}"

        # 这里应该将文件上传到云存储并返回URL
        # upload_to_cloud_storage(output_path, job_id)

    except Exception as e:
        job['status'] = 'failed'
        job['error'] = str(e)

async def process_batch_jobs(batch_id: str):
    """处理批量任务"""
    batch = batches[batch_id]

    # 使用线程池处理批量任务
    with ThreadPoolExecutor(max_workers=4) as executor:
        loop = asyncio.get_event_loop()
        tasks = []

        for job_id in batch['job_ids']:
            if job_id in jobs and jobs[job_id]['status'] == 'queued':
                task = loop.run_in_executor(
                    executor,
                    lambda: asyncio.run(process_generation_job(job_id))
                )
                tasks.append(task)

        # 等待所有任务完成
        await asyncio.gather(*tasks)

    # 更新批量任务状态
    batch['status'] = 'completed'

    # 如果有回调URL,发送完成通知
    if batch['callback_url']:
        await send_completion_callback(batch_id)

async def send_completion_callback(batch_id: str):
    """发送完成回调"""
    # 实现回调逻辑
    pass

if __name__ == "__main__":
    import uvicorn
    uvicorn.run(app, host="0.0.0.0", port=8000)
7.2 Python SDK 设计
class TongyiWanxiangClient:
    """通义万相Python SDK客户端"""
    def __init__(self, api_key: str, base_url: str = "https://api.tongyi-wanxiang.com/v1"):
        self.api_key = api_key
        self.base_url = base_url
        self.session = requests.Session()
        self.session.headers.update({
            "Authorization": f"Bearer {api_key}",
            "Content-Type": "application/json"
        })

    def generate_video(self, prompt: str, **kwargs) -> str:
        """
        生成视频

        参数:
            prompt: 生成提示词
            **kwargs: 其他生成参数

        返回:
            生成视频的URL
        """
        payload = {
            "prompt": prompt,
            **kwargs
        }

        response = self.session.post(
            f"{self.base_url}/generate",
            json=payload,
            timeout=60
        )

        if response.status_code != 200:
            raise Exception(f"API请求失败: {response.text}")

        result = response.json()
        return result['output_url']

    def generate_batch(self, prompts: List[str], **kwargs) -> List[str]:
        """
        批量生成视频

        参数:
            prompts: 提示词列表
            **kwargs: 其他生成参数

        返回:
            生成视频的URL列表
        """
        requests = [{"prompt": prompt, **kwargs} for prompt in prompts]

        payload = {
            "requests": requests
        }

        response = self.session.post(
            f"{self.base_url}/batch/generate",
            json=payload,
            timeout=120
        )

        if response.status_code != 200:
            raise Exception(f"API请求失败: {response.text}")

        result = response.json()
        return self._wait_for_batch_completion(result['batch_id'])

    def _wait_for_batch_completion(self, batch_id: str, timeout: int = 3600) -> List[str]:
        """等待批量任务完成"""
        start_time = time.time()

        while time.time() - start_time < timeout:
            response = self.session.get(f"{self.base_url}/batch/{batch_id}")

            if response.status_code != 200:
                raise Exception(f"获取批量状态失败: {response.text}")

            status = response.json()

            if status['status'] == 'completed':
                # 获取所有任务的输出URL
                urls = []
                for job_id in status['jobs']:
                    job_response = self.session.get(f"{self.base_url}/job/{job_id}")
                    job_data = job_response.json()
                    if job_data['status'] == 'completed':
                        urls.append(job_data['output_url'])
                return urls

            elif status['status'] == 'failed':
                raise Exception("批量任务失败")

            # 等待一段时间再检查
            time.sleep(5)

        raise TimeoutError("批量任务处理超时")

    def get_credit_usage(self) -> dict:
        """获取信用额度使用情况"""
        response = self.session.get(f"{self.base_url}/billing/usage")

        if response.status_code != 200:
            raise Exception(f"获取使用情况失败: {response.text}")

        return response.json()

    def list_generated_videos(self, limit: int = 10, offset: int = 0) -> List[dict]:
        """列出已生成的视频"""
        params = {"limit": limit, "offset": offset}
        response = self.session.get(f"{self.base_url}/videos", params=params)

        if response.status_code != 200:
            raise Exception(f"获取视频列表失败: {response.text}")

        return response.json()

# 使用示例
def sdk_usage_example():
    """SDK使用示例"""
    client = TongyiWanxiangClient(api_key="your_api_key_here")

    # 生成单个视频
    try:
        video_url = client.generate_video(
            prompt="美丽的雪山日出,金光洒在山顶",
            style="油画",
            duration=5.0,
            resolution="1024x1024"
        )
        print(f"视频生成成功: {video_url}")
    except Exception as e:
        print(f"生成失败: {e}")

    # 批量生成视频
    try:
        prompts = [
            "城市夜景,霓虹灯闪烁",
            "森林中的瀑布,水流湍急",
            "沙漠中的日落,沙丘纹理分明"
        ]

        video_urls = client.generate_batch(
            prompts=prompts,
            duration=4.0,
            resolution="512x512"
        )

        print(f"批量生成完成,共{len(video_urls)}个视频")
        for url in video_urls:
            print(f"视频URL: {url}")

    except Exception as e:
        print(f"批量生成失败: {e}")

    # 检查信用额度
    try:
        usage = client.get_credit_usage()
        print(f"已用额度: {usage['used']}, 剩余额度: {usage['remaining']}")
    except Exception as e:
        print(f"获取额度失败: {e}")
八、未来发展方向与技术展望
8.1 技术演进趋势
通义万相2.2-S2V-14B代表了当前AI视频生成的技术巅峰,但技术发展仍在快速演进:
class FutureDevelopmentPredictor:
    """技术发展预测器"""
    def __init__(self):
        self.current_capabilities = {
            'resolution': '1024x1024',
            'duration': '60秒',
            'consistency': '中等',
            'control_precision': '高',
            'style_variety': '丰富',
            'generation_speed': '分钟级'
        }

        self.expected_developments = {
            '2024': {
                'resolution': '2048x2048',
                'duration': '120秒',
                'consistency': '高',
                'control_precision': '极高',
                'style_variety': '极丰富',
                'generation_speed': '秒级'
            },
            '2025': {
                'resolution': '4096x4096',
                'duration': '300秒',
                'consistency': '极高',
                'control_precision': '电影级',
                'style_variety': '无限',
                'generation_speed': '实时'
            }
        }

    def predict_development_timeline(self):
        """预测技术发展时间线"""
        timeline = []

        for year, capabilities in self.expected_developments.items():
            improvements = []
            for capability, value in capabilities.items():
                current_value = self.current_capabilities[capability]
                if value != current_value:
                    improvements.append(f"{capability}: {current_value} → {value}")

            timeline.append({
                'year': year,
                'improvements': improvements
            })

        return timeline

    def get_recommended_learning_path(self):
        """推荐学习路径"""
        return {
            '基础技能': [
                '提示词工程',
                '美学原理',
                '影视语言基础',
                'Python编程'
            ],
            '进阶技能': [
                '多模态机器学习',
                '扩散模型原理',
                '计算机视觉',
                '云计算部署'
            ],
            '高级技能': [
                '模型微调',
                '自定义训练',
                '性能优化',
                '大规模部署'
            ]
        }

# 技术发展预测
predictor = FutureDevelopmentPredictor()
timeline = predictor.predict_development_timeline()

print("通义万相技术发展预测:")
for prediction in timeline:
    print(f"{prediction['year']}年:")
    for improvement in prediction['improvements']:
        print(f"  - {improvement}")

# 推荐学习路径
learning_path = predictor.get_recommended_learning_path()
print("\n推荐学习路径:")
for level, skills in learning_path.items():
    print(f"{level}:")
    for skill in skills:
        print(f"  - {skill}")
8.2 行业应用前景
通义万相2.2-S2V-14B的技术突破为多个行业带来革命性变化:
class IndustryApplicationAnalyzer:
    """行业应用分析器"""
    def __init__(self):
        self.industries = {
            '影视制作': {
                'impact': '极高',
                'applications': [
                    '预可视化',
                    '分镜制作',
                    '特效预览',
                    '概念设计'
                ],
                'adoption_rate': '快速'
            },
            '游戏开发': {
                'impact': '高',
                'applications': [
                    '过场动画',
                    '场景生成',
                    '角色动画',
                    '宣传视频'
                ],
                'adoption_rate': '中等'
            },
            '广告营销': {
                'impact': '极高',
                'applications': [
                    '广告制作',
                    '产品演示',
                    '社交媒体内容',
                    '个性化营销'
                ],
                'adoption_rate': '快速'
            },
            '教育培训': {
                'impact': '中',
                'applications': [
                    '教学视频',
                    '历史重现',
                    '科学可视化',
                    '语言学习'
                ],
                'adoption_rate': '慢速'
            },
            '建筑设计': {
                'impact': '中',
                'applications': [
                    '建筑可视化',
                    '空间漫游',
                    '环境模拟',
                    '方案展示'
                ],
                'adoption_rate': '中等'
            }
        }

    def analyze_industry_impact(self, industry_name):
        """分析行业影响"""
        if industry_name not in self.industries:
            return None

        industry = self.industries[industry_name]

        # 计算影响分数
        impact_scores = {'低': 1, '中': 2, '高': 3, '极高': 4}
        adoption_scores = {'慢速': 1, '中等': 2, '快速': 3}

        impact_score = impact_scores[industry['impact']]
        adoption_score = adoption_scores[industry['adoption_rate']]

        # 综合评分
        total_score = impact_score * 0.7 + adoption_score * 0.3

        return {
            'industry': industry_name,
            'impact': industry['impact'],
            'adoption_rate': industry['adoption_rate'],
            'applications': industry['applications'],
            'total_score': total_score,
            'recommendation': self.generate_recommendation(total_score)
        }

    def generate_recommendation(self, score):
        """生成投资建议"""
        if score >= 3.5:
            return "强烈推荐投资"
        elif score >= 2.5:
            return "推荐投资"
        elif score >= 1.5:
            return "谨慎投资"
        else:
            return "暂不推荐"

    def get_top_industries(self, n=3):
        """获取最具前景的行业"""
        industry_scores = []

        for industry_name in self.industries:
            analysis = self.analyze_industry_impact(industry_name)
            industry_scores.append((industry_name, analysis['total_score']))

        # 按分数排序
        industry_scores.sort(key=lambda x: x[1], reverse=True)

        return industry_scores[:n]

# 行业应用分析
analyzer = IndustryApplicationAnalyzer()

print("行业应用前景分析:")
for industry in ['影视制作', '游戏开发', '广告营销', '教育培训', '建筑设计']:
    analysis = analyzer.analyze_industry_impact(industry)
    print(f"{industry}: {analysis['total_score']:.2f}分 - {analysis['recommendation']}")

# 获取最具前景的行业
top_industries = analyzer.get_top_industries()
print("\n最具前景的行业:")
for industry, score in top_industries:
    print(f"{industry}: {score:.2f}分")
结论:AI视频生成的未来已来
通义万相2.2-S2V-14B代表了AI视频生成技术的重大突破,其核心价值体现在:
- 技术先进性:140亿参数模型实现影视级视频生成质量
- 控制精度:多维度条件控制实现精准的内容生成
- 应用广泛性:从个人创作到商业生产的全方位覆盖
- 开发友好性:完善的API和SDK支持快速集成
关键技术指标对比
| 特性 | 通义万相2.1 | 通义万相2.2 | 提升幅度 |
|---|---|---|---|
| 最大分辨率 | 768x768 | 1024x1024 | +33% |
| 视频时长 | 30秒 | 60秒 | +100% |
| 生成速度 | 分钟级 | 秒级 | +500% |
| 控制维度 | 5个 | 12个 | +140% |
| 风格数量 | 20+ | 50+ | +150% |
发展建议
- 技术学习:深入掌握提示词工程和美学控制原理
- 应用探索:在影视预演、广告制作等领域率先应用
- 开发集成:利用API和SDK快速集成到现有工作流
- 生态建设:参与开发者社区,贡献最佳实践和工具
通义万相2.2-S2V-14B不仅是一个技术产品,更是开启创意新纪元的钥匙。随着技术的不断发展和应用场景的拓展,AI视频生成将在未来几年内彻底改变内容创作和视觉表达的方式。
参考资源:
示例代码库:
通过本指南的详细讲解和代码示例,您应该能够全面掌握通义万相2.2-S2V-14B的使用方法,并在实际项目中发挥其强大能力。AI视频生成的未来已经到来,现在就是最好的开始时机。

有“AI”的1024 = 2048,欢迎大家加入2048 AI社区
更多推荐


 14
14 0
0- 0


 已为社区贡献65条内容

所有评论(0)