10分钟搞定miniconda-python环境安装
每次到一个新电脑就要安装环境,很多包安装起来很麻烦,下面对安装地址和常规使用包做了总结,一键安装所有包不用再一个一个找了!所有问题10分钟搞定!
windows配置python环境
每次到一个新电脑就要安装环境,很多包安装起来很麻烦,下面对安装地址和常规使用包做了总结,一键安装所有包不用再一个一个找了!所有问题10分钟搞定!
1. 安装Miniconda
可在清华大学开源软件镜像站下载安装包
https://mirrors.tuna.tsinghua.edu.cn/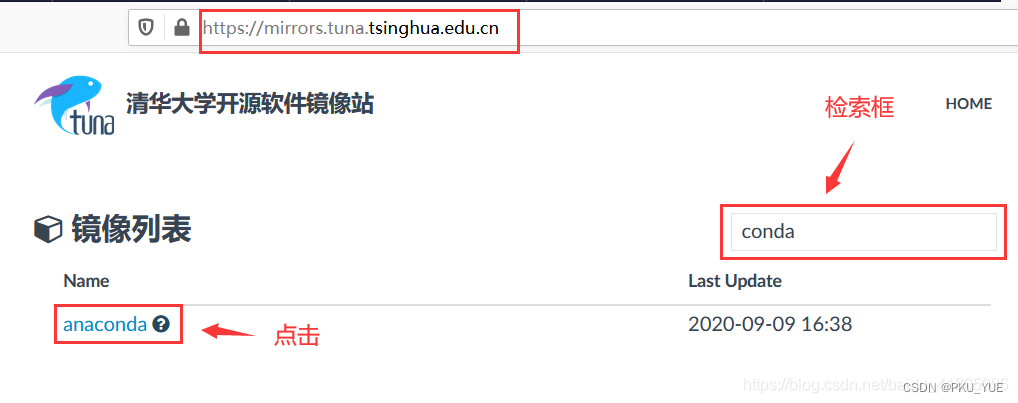
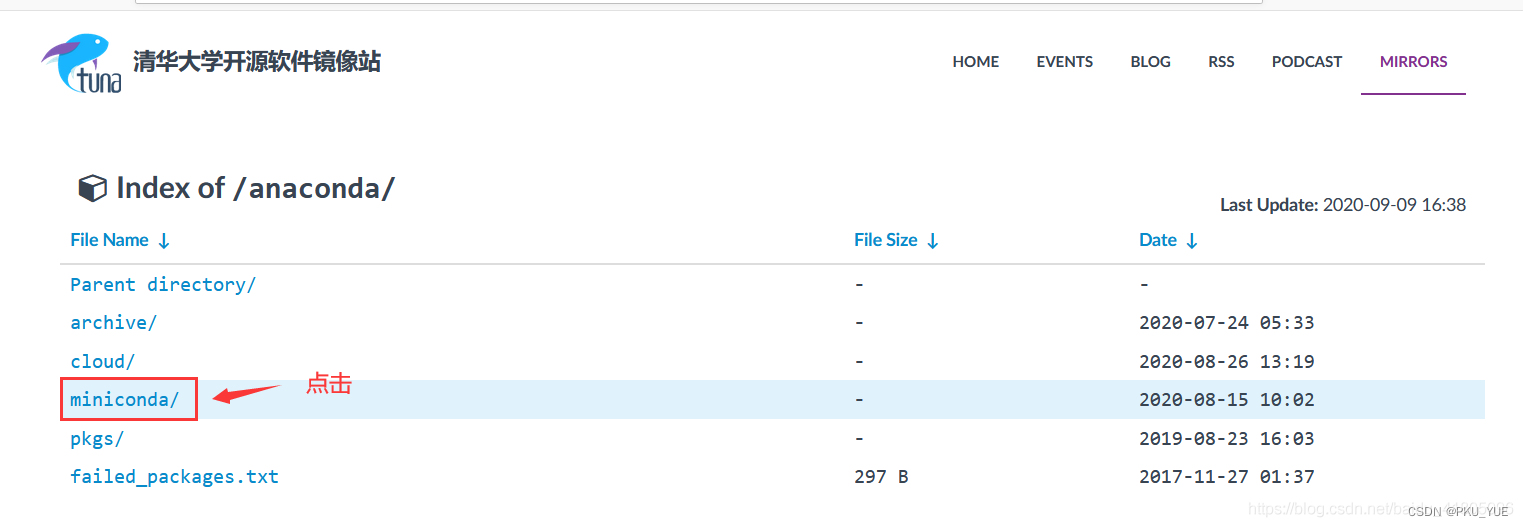

下载完成后,正常安装即可。
2. 添加镜像地址
查看源
conda config --show-sources
添加清华镜像仓库
conda config --add channels https://mirrors.tuna.tsinghua.edu.cn/anaconda/pkgs/free/
conda config --add channels https://mirrors.tuna.tsinghua.edu.cn/anaconda/pkgs/main/
conda config --set show_channel_urls yes
第三方源(有需要再使用)
conda config --add channels https://mirrors.tuna.tsinghua.edu.cn/anaconda/cloud/conda-forge/
conda config --add channels https://mirrors.tuna.tsinghua.edu.cn/anaconda/cloud/msys2/
conda config --add channels https://mirrors.tuna.tsinghua.edu.cn/anaconda/cloud/bioconda/
conda config --add channels https://mirrors.tuna.tsinghua.edu.cn/anaconda/cloud/menpo/
conda config --add channels https://mirrors.tuna.tsinghua.edu.cn/anaconda/cloud/pytorch/
3. 管理包
创建新环境
conda create -n py36 python==3.6
安装常用包
一直y搞定所有包
conda install -y numpy & conda install -y pandas & conda install -y xlrd & conda install -y matplotlib & conda install -y scikit-learn & conda install -y seaborn & conda install -y statsmodels & conda install -y yapf
安装jupyter
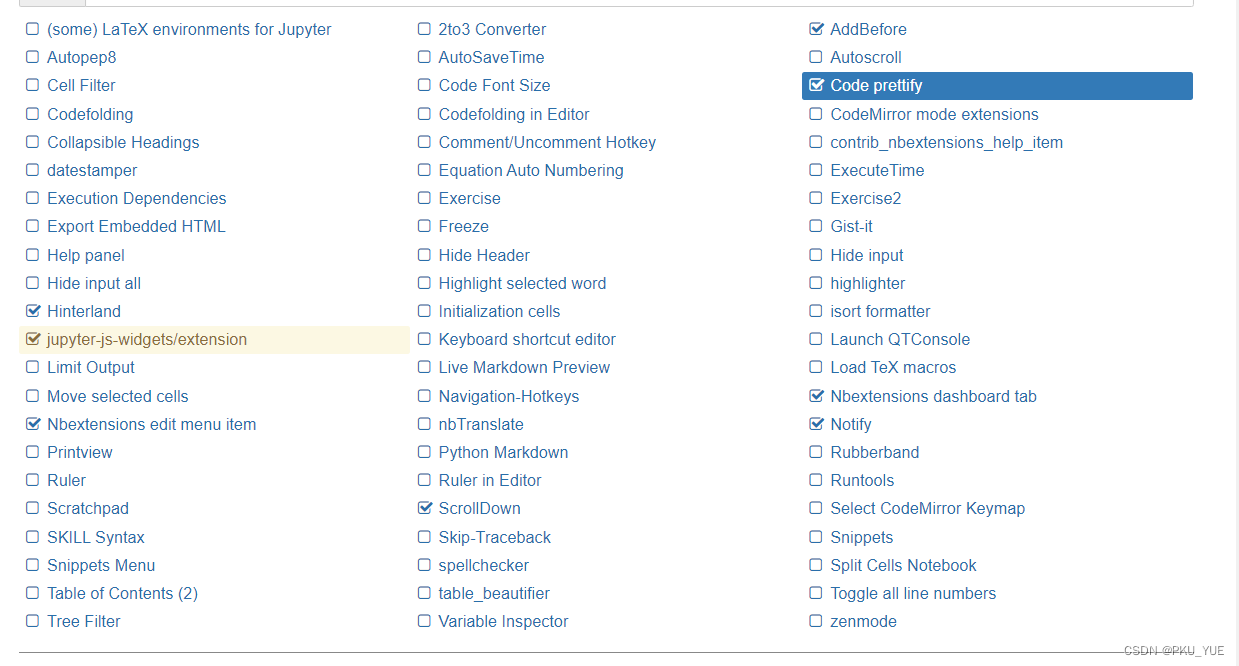
搞定jupyter 和 nbextensions插件
conda install -y jupyter & conda install -c conda-forge jupyter_contrib_nbextensions & conda install -c conda-forge jupyter_nbextensions_configurator & jupyter contrib nbextension install --user & jupyter nbextensions_configurator enable --user
-
解决windows用户名有中文,jupyter运行报错
pip uninstall pyzmq pip install pyzmq==19.0.2 --user -
打开.ipybn文件报错 template_path error
conda install "nbconvert=5.6.1" -
jupyter 修改启动路径
在生成的配置文件下(最下面会有路径,没找到就在用户下面.jupyter),找到下面这句,去掉注释并将其修改为你的常用文件夹
c.NotebookApp.notebook_dir = '' -
使用nbextensions
此时可以使用jupyter了,打开jupyter勾选常用nbextensions功能。
-
jupyter 不自动打开网页
在配置文件内搜索“NotebookApp.browser”,替换下列语句。
import webbrowser
webbrowser.register("edge", None, webbrowser.GenericBrowser("C:\Program Files (x86)\Microsoft\Edge\Application\msedge.exe"))
c.NotebookApp.browser = 'edge'
安装 tensorflow与keras cpu
conda install -y tensorflow==1.2.1 & conda install keras==2.1.2 -y
只在base安装jupyter,其余虚拟环境不装
为了让Jupyter Notebook支持虚拟运行环境,需要在Anaconda prompt里安装一个插件:
conda install nb_conda
#然后在prompt里继续安装:
#1、安装ipykernel:
conda install ipykernel

#2、为虚拟环境下创建kernel文件:
conda install -n 环境名称 ipykernel

#3、将环境写入notebook的kernel中:
python -m ipykernel install --user --name 环境名称 --display-name "显示的名称"
再重新打开jupyter notebook在kernel-change kernel里就能看到自己创建的虚拟环境了。

有“AI”的1024 = 2048,欢迎大家加入2048 AI社区
更多推荐


 10
10 0
0- 0


 已为社区贡献1条内容

所有评论(0)