解决Ruoyi框架面对联合主键时,无法正常修改和添加操作的问题---保姆级教程
情景描述:Ruoyi框架自动生成的代码,对应的只按照一个主键来进行操作,在面临多个或联合主键时,会出现操作上的误解。
推荐解决方法:调整后端接口逻辑。
问题阐述:
1、打开管理员后台,在页面内进行新增操作。(假设对应的联合主键表为:A)
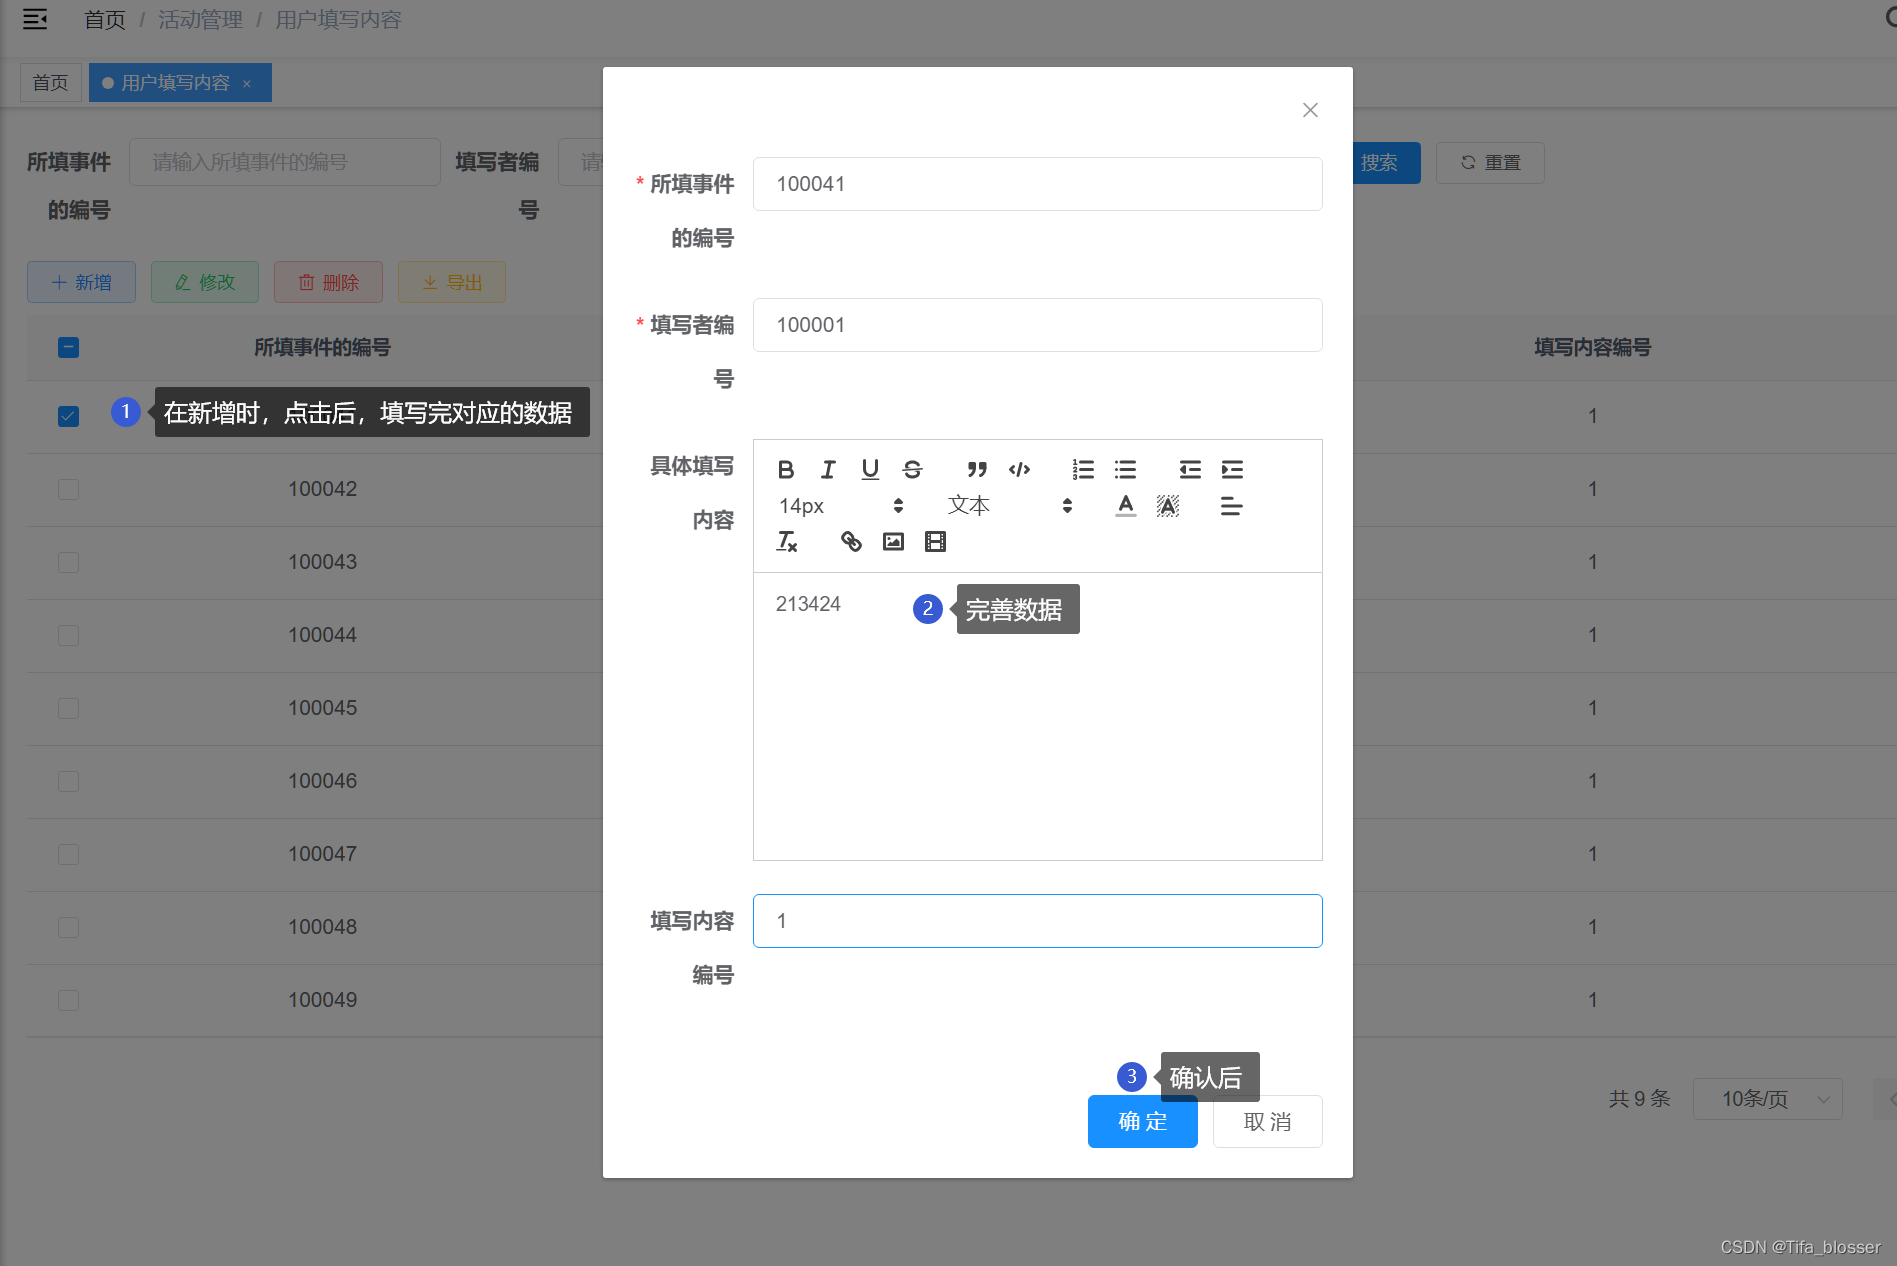
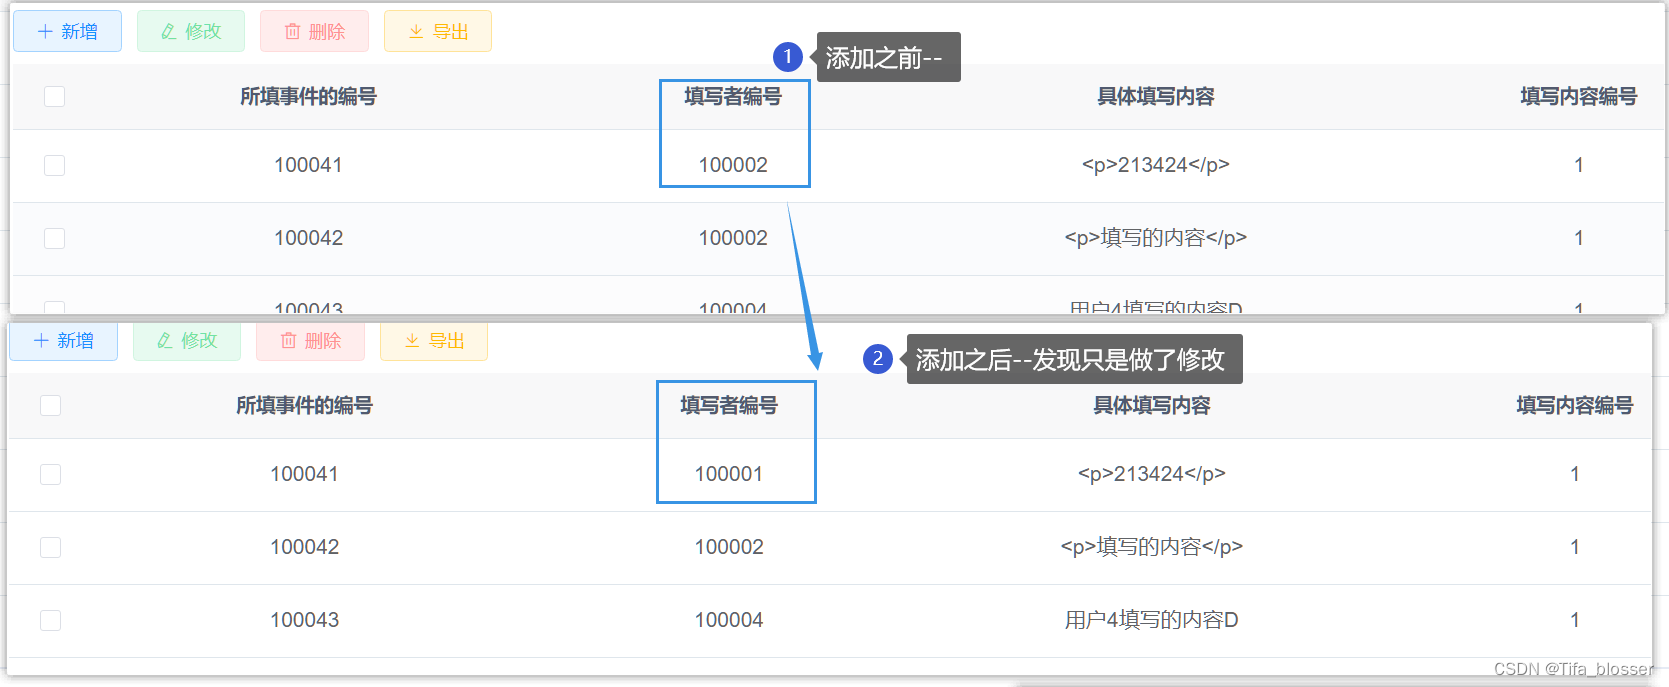
发现只是将对应的修改。
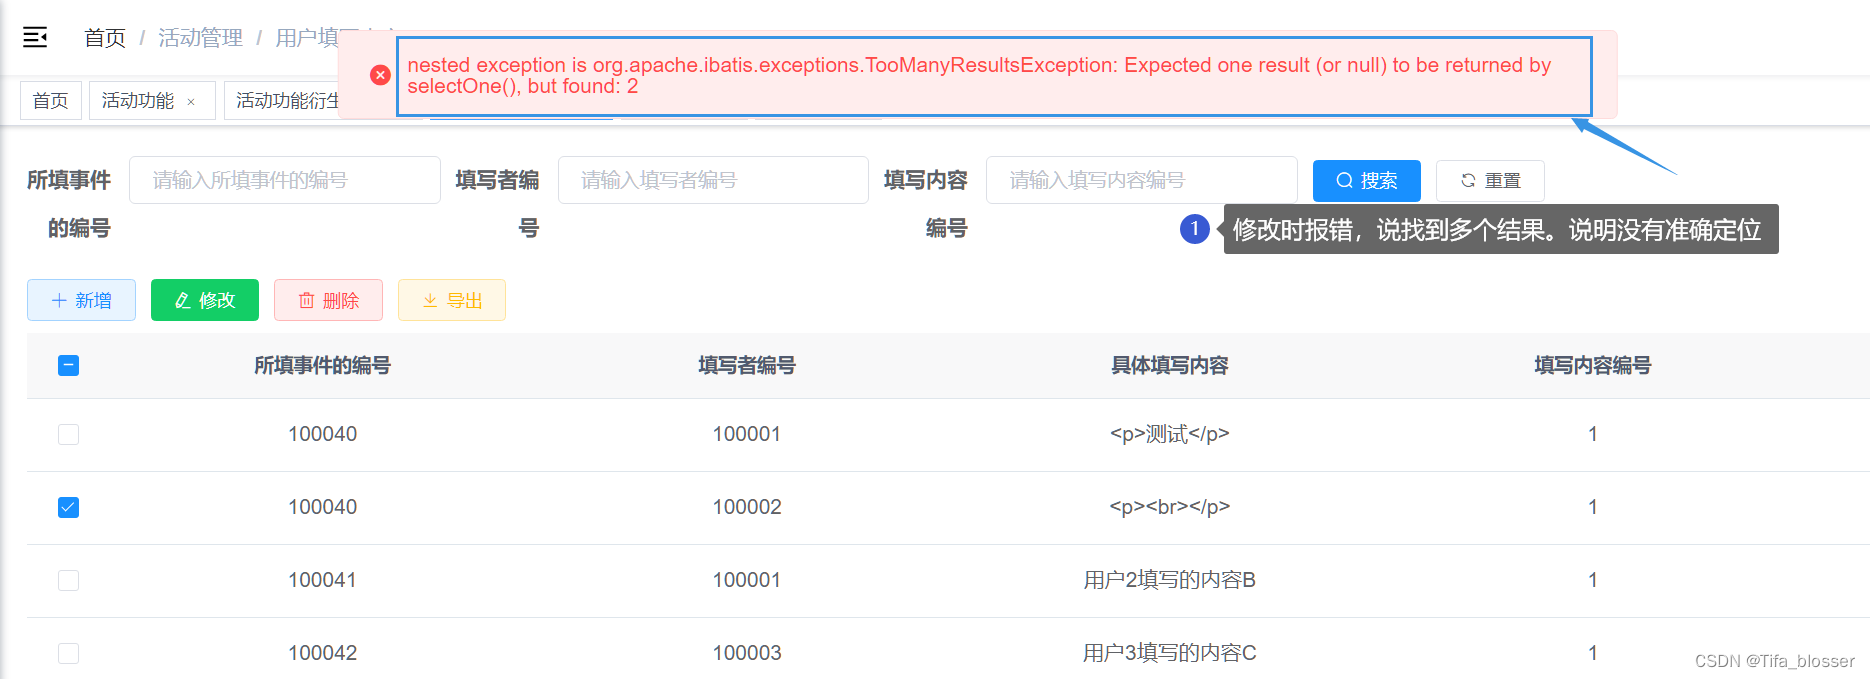
2、直接在数据库中添加2条数据。选择修改,报错。
3、删除时,会直接将同id下的数据全部删除
问题定位
1、查看前端页面:(此处以一般生成的代码为例)
(1)定位到对应的.vue文件,一般在ruoyi-ui模块的src目录,views下
比如我的:ruoyi-ui/src/views/user_fill_content/user_content/index.vue
(2)找到对应的修改和增加代码区域:定位到JS逻辑处理区


(3)定位到submitForm()函数,发现是form的值来进行操作的,而form的获取由按钮处理操作来获取。
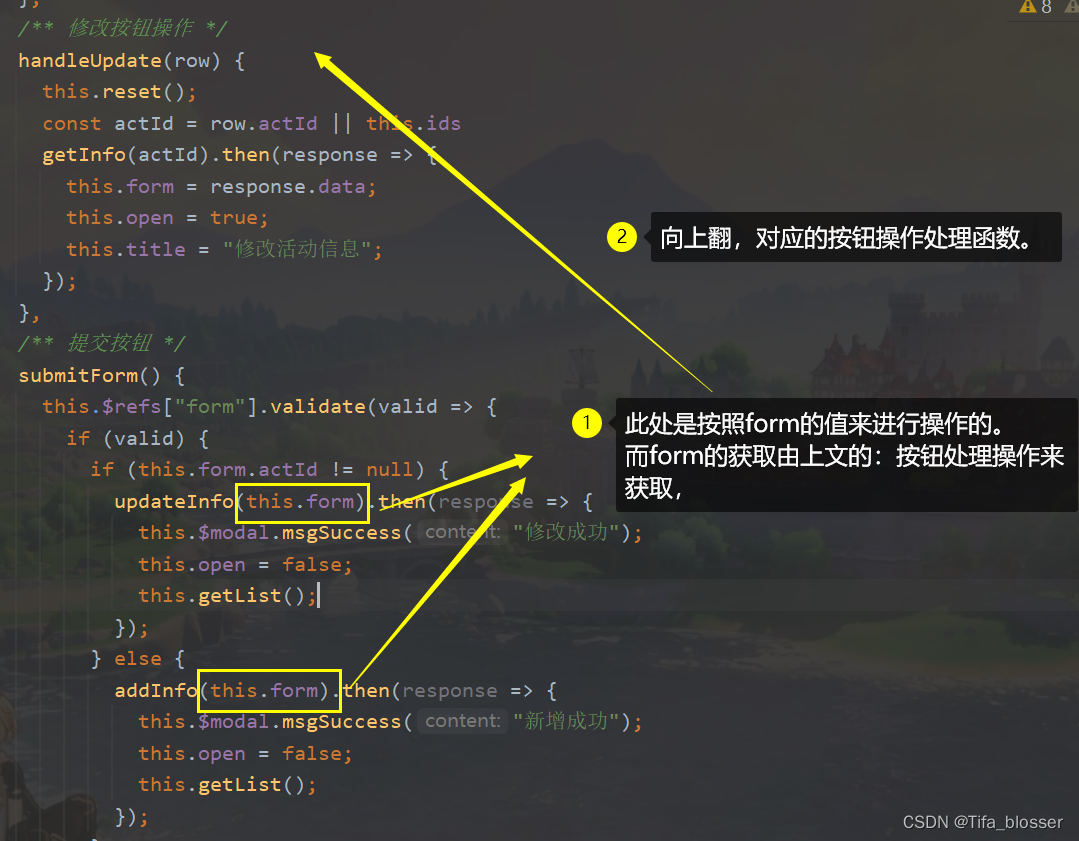
(4)我们发现,按钮处理操作是按照一个单独的id来判断,并非是双主键,问题所在。
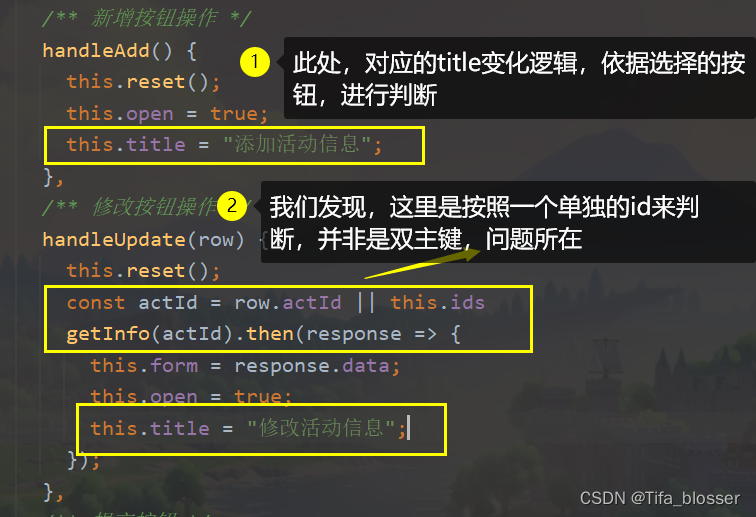
(5)删除同理:
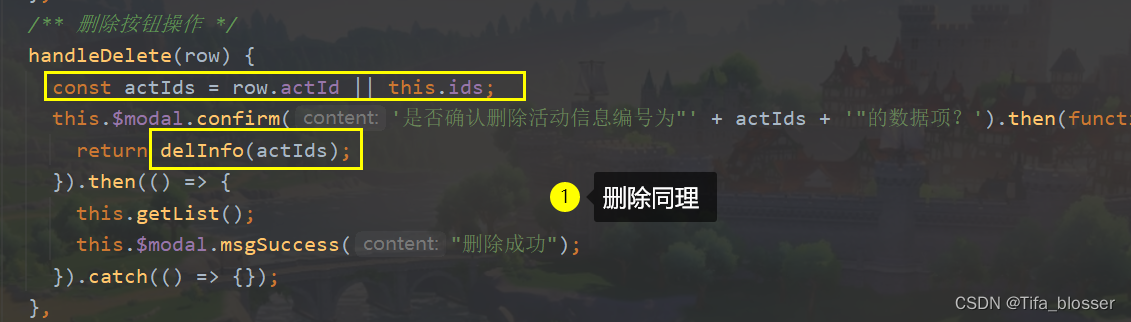
2、定位后端接口:
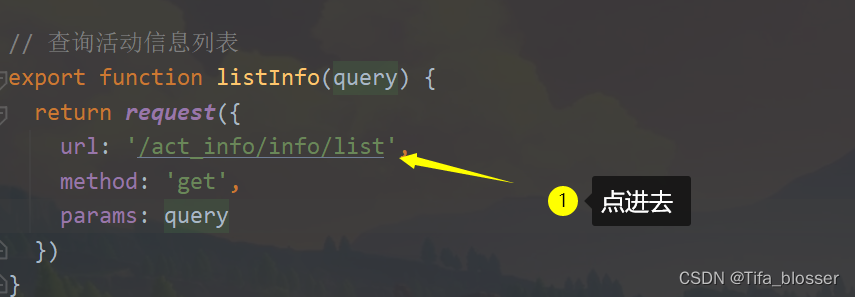
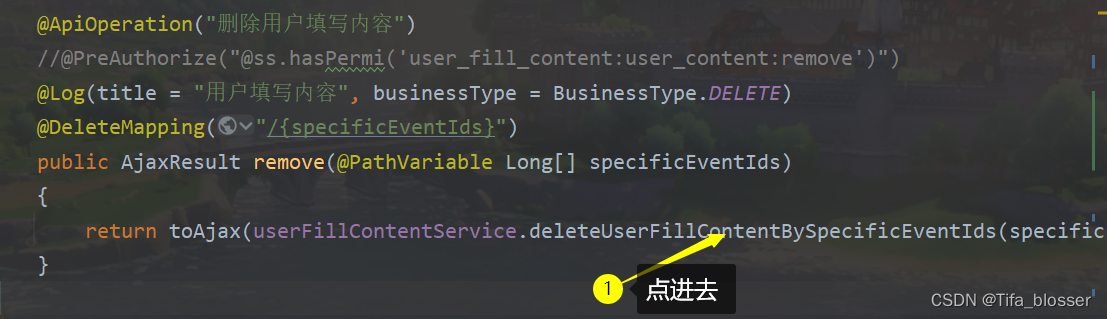
(1)找到<script>开头的import,crtl+左键,点进去。找url,选中末尾,crtl+左键

(2)下面以删除为例:查看对应的mapper.xml



(3)定位到删除:发现如猜测一样,单主键进行操作。比如我的:
<delete id="deleteUserFillContentBySpecificEventId" parameterType="Long">
   delete from user_fill_content where specific_event_id = #{specificEventId}
</delete>
<!--我的表中,还有个user_id,联合做主键-->
解决步骤
1、在Mapper.xml文件中:
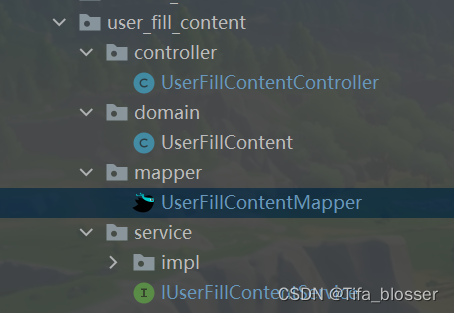 (这是各层示意图)
重写sql(建议重命名,以便区分):完成查找和删除的操作。
<!--查找:id可以随便起,需要和mapper.java类中方法一致,-->
<!--这里我parameterType用的Map,方便接口传递多个主键,且更直观。-->
<!--在where 语句里把主键属性补上即可,比如我这两个属性:specificEventId与userId-->
<select id="selectUserFillContentBySpecificEventIdAndUserId" parameterType="java.util.Map"
      resultMap="UserFillContentResult">
        <include refid="selectUserFillContentVo"/>
        where specific_event_id = #{specificEventId} and user_id = #{userId}
</select>

<delete id="deleteUserFillContentBySpecificEventIdAndUserId" parameterType="java.util.Map"
    delete from user_fill_content
    where specific_event_id = #{specificEventId} and user_id = #{userId}
</delete>限制修改操作的属性,注意此处。业务规则:主键部分不让修改
    <update id="updateUserFillContent" parameterType="com.ruoyi.act.user_fill_content.domain.UserFillContent">
        update user_fill_content
        <trim prefix="SET" suffixOverrides=",">
            <if test="specificFillContent != null and specificFillContent != ''">specific_fill_content = #{specificFillContent},</if>
<!--  注释掉这个主键   <if test="userId != null">user_id = #{userId},</if>-->
            <if test="formId != null">form_id = #{formId},</if>
        </trim>
        where specific_event_id = #{specificEventId} and user_id=#{userId}
<!-- 依据联合主键来定位-->
    </update>
2、修改mapper.java文件:
public int deleteUserFillContentBySpecificEventIdAndUserId(Map usermap);
//把方法名称换为你在xml写的id
public UserFillContent selectUserFillContentBySpecificEventIdAndUserId(Map userMap);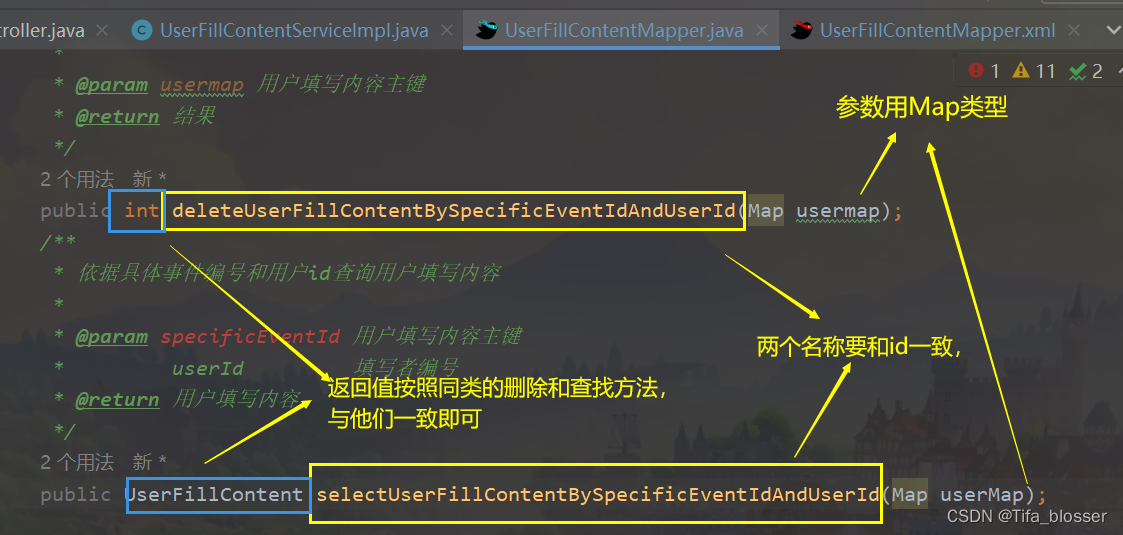
3、返回service层,在接口中新增方法:
比如我的:IUserFillContentService
直接把上文添加的复制过来就可以。名称可以自定义,但建议保持和上文一致,注释可以不写。
    /**
     * 依据具体事件编号和用户id查询用户填写内容
     *
     * @param specificEventId 用户填写内容主键
     *         userId         填写者编号
     * @return 用户填写内容
     */
public UserFillContent selectUserFillContentBySpecificEventIdAndUserId(Map userMap);

    /**
     * 依据具体事件编号和用户id删除用户填写内容
     *
     * @param usermap 用户填写内容主键
     * @return 结果
     */
public int deleteUserFillContentBySpecificEventIdAndUserId(Map usermap);
4、在impl中实现方法
比如我的:UserFillContentServiceImpl文件
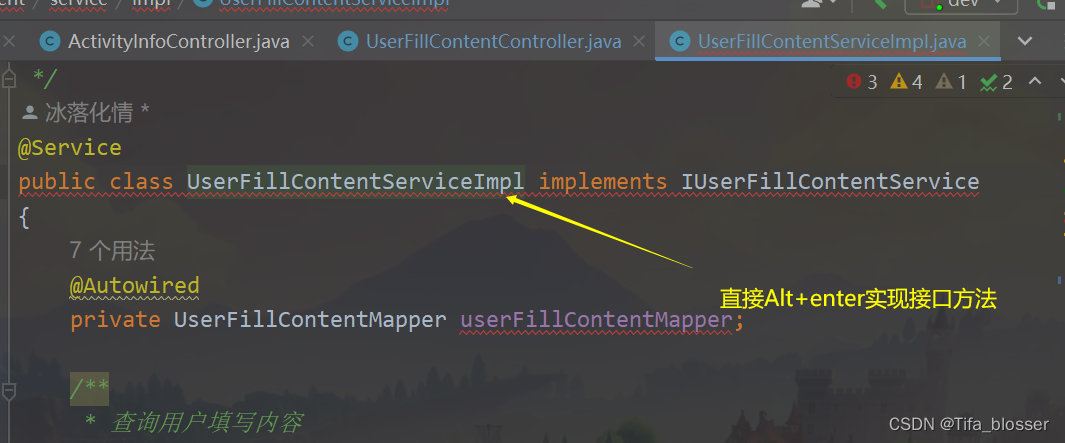
//方法的返回值,就是对应的Mapper文件中,我们新增的方法的返回值。直接xxMapper.就行
//注意;方法返回值要保持一致。方法参数一直是Map

@Override
    public int deleteUserFillContentBySpecificEventIdAndUserId(Map usermap) {
        return userFillContentMapper.deleteUserFillContentBySpecificEventIdAndUserId(usermap);
    }
}

    @Override
    public UserFillContent selectUserFillContentBySpecificEventIdAndUserId(Map userMap) {
        return userFillContentMapper.selectUserFillContentBySpecificEventIdAndUserId(userMap);
    }
5、返回Controller层,添加接口
比如我的:UserFillContentController文件
    @ApiOperation("依据具体事件编号和用户id删除用户填写内容")
    //这是权限验证,可以注释掉不管@PreAuthorize("@ss.hasPermi('user_fill_content:user_content:remove')")
    @Log(title = "用户填写内容", businessType = BusinessType.DELETE)
    //日志相关
    @DeleteMapping("/{specificEventId}/{userId}")
    //写你的接口使用形式,这里直接对应的传递所有主键即可,比如我的specificEventId、userId
    //removeBySpeId_UserId为自定义名称
    public AjaxResult removeBySpeId_UserId(@PathVariable Long specificEventId,@PathVariable Long userId)
//@PathVariable说明需要的参数,一共两个
    {
        HashMap<String, Object> userMap = new HashMap<>();
        userMap.put("specificEventId",specificEventId);
        userMap.put("userId",userId);
//以map的形式存储,从而接收所有主键。
        return toAjax(userFillContentService.deleteUserFillContentBySpecificEventIdAndUserId(userMap));
    }


    @ApiOperation("依据具体事件编号和用户id获取用户填写内容详细信息")
    //@PreAuthorize("@ss.hasPermi('user_fill_content:user_content:query')")
    @GetMapping(value = "/{specificEventId}/{userId}")
    public AjaxResult getInfoBySpeId_UserId(@PathVariable("specificEventId") Long specificEventId,@PathVariable("userId") Long userId)
    {
        HashMap<String, Object> userMap = new HashMap<>();
        userMap.put("specificEventId",specificEventId);
        userMap.put("userId",userId);
        return success(userFillContentService.selectUserFillContentBySpecificEventIdAndUserId(userMap));
    }
6、在前端的src/api文件夹中,新增我们添加的接口
比如我的:user_content.js文件
//依据具体事件编号和用户id获取用户填写内容详细信息
export function getInfoBySpeId_UserId(specificEventId,userId) {
  return request({
    url: '/user_fill_content/user_content/' + specificEventId + '/' +userId,
    method: 'get'
  })
}
//这一步就是把上一步写的复制下

//把名字和参数替换为你的即可

// 依据具体事件编号和用户id删除用户填写内容
export function removeBySpeId_UserId(specificEventId,userId) {
  return request({
    url: '/user_fill_content/user_content/' + specificEventId+ '/' +userId,
    method: 'delete'
  })
}
7、返回前端vue文件中,修改相关逻辑
(1)引入新添加的接口,import导入:
import {removeBySpeId_UserId, getInfoBySpeId_UserId} from "@/api/user_fill_content/user_content";(2)修改按钮操作的处理逻辑:
在data内定义一个数组,存储选择的id
//在data内定义一个数组,用于选中时定位id
data() {
    return {
        userIds: [], //定义的id
    }
}
找到:handleSelectionChange()方法:进行userIds的数据获取
// 多选框选中数据
    handleSelectionChange(selection) {
      this.ids = selection.map(item => item.specificEventId)
      this.userIds = selection.map(item => item.userId) //新增方法,和上一行类似
      this.single = selection.length !== 1
      this.multiple = !selection.length
    },
声明一个对象,用于存储另一个主键。同时更改接口的使用。
    /** 修改按钮操作 */
    handleUpdate(row) {
      this.reset();
      const specificEventId = row.specificEventId || this.ids
      const userId = row.userId || this.userIds //这是新添加的
      //将接口换为你写的get,比如我的为:getInfoBySpeId_UserId,获取准确的内容
      getInfoBySpeId_UserId(specificEventId, userId).then(res => {
        this.form = res.data;
        this.open = true;
        this.title = "修改用户填写内容";
      });
(3)修改删除逻辑:
   /** 删除按钮操作 */
    handleDelete(row) {
      const specificEventId = row.specificEventId || this.ids;
      const userId = row.userId || this.userIds;//这是新添加的
      this.$modal.confirm('是否确认删除用户填写内容编号为"' + specificEventId +'用户编号为:'+ userId +  '"的数据项?').then(function () {
         //将接口换为你写的delete,比如我的为:removeBySpeId_UserId,定位准确的内容
        return removeBySpeId_UserId(specificEventId,userId);
      }).then(() => {
        this.getList();
        this.$modal.msgSuccess("删除成功");
      }).catch(() => {
      });
    },
(4)建议分开添加或修改用户填写内容对话框:
v-if="title==='修改用户填写内容'"
//在<el-dialog>标签内,替换为你的对应的操作title
对应的@click也更改下,一个添加、一个修改。

(5)完善添加、修改逻辑
    /** 添加按钮 */

    submitForm_add() {
      this.$refs["form"].validate(valid => {
        if (valid) {
          addUser_content(this.form).then(response => {
            this.$modal.msgSuccess("新增成功");
            this.open = false;
            this.getList();
          });
        }
      });
    },
    /** 修改按钮 */
    submitForm_update() {
      this.$refs["form"].validate(valid => {
            if (valid)) {
              updateUser_content(this.form).then(response => {
                this.$modal.msgSuccess("修改成功");
                this.open = false;
                this.getList();
              });
            }
          });
    },
8、保存后,刷新前后端,重新运行。
验证:
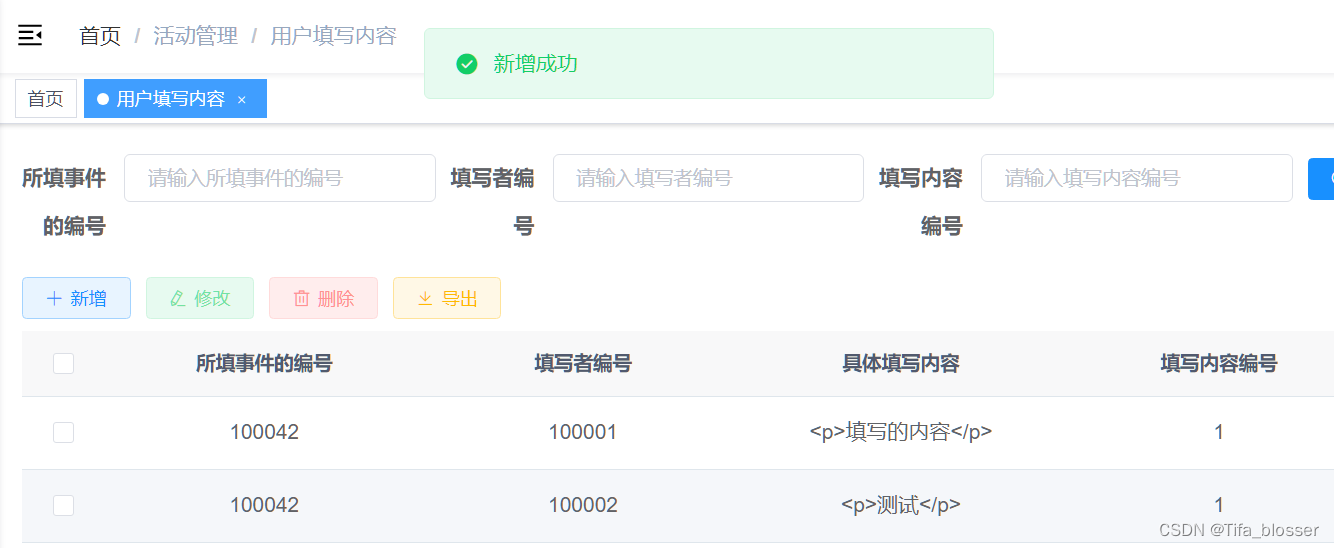
1、新增:
(1)添加前:
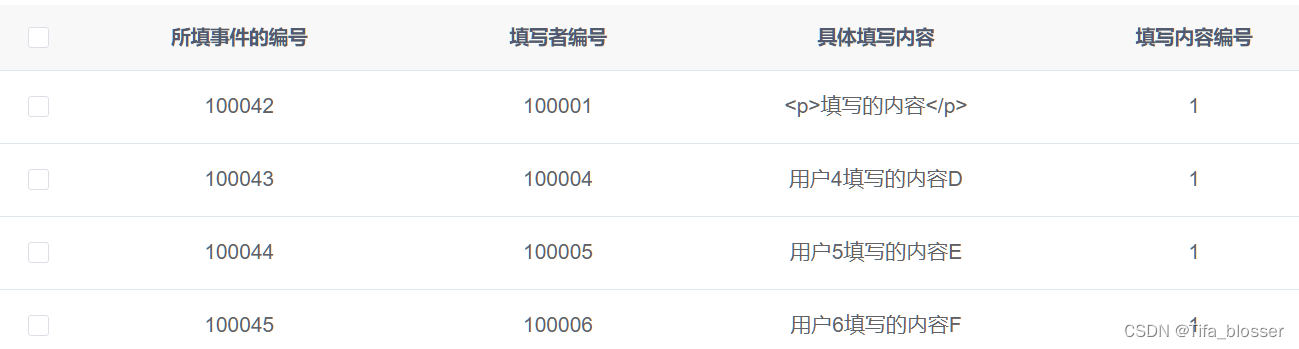
(2)添加后:
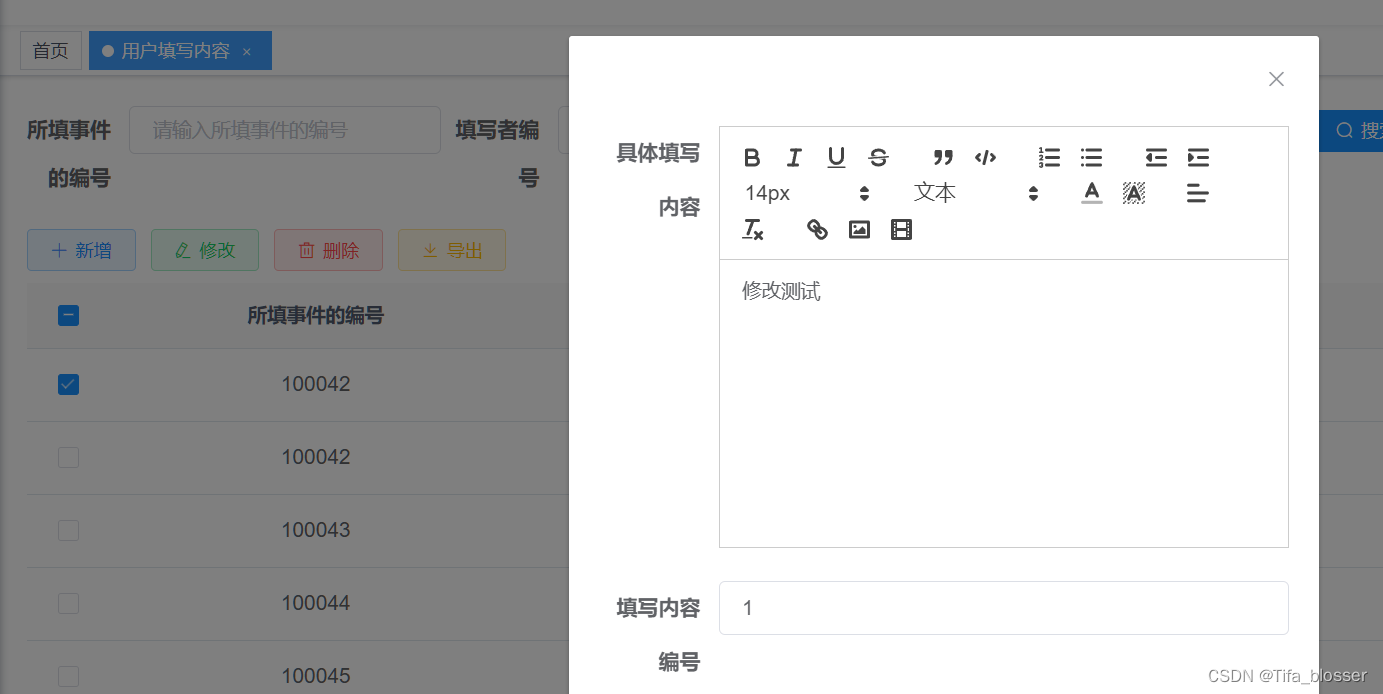
2、修改:
(1)选择修改
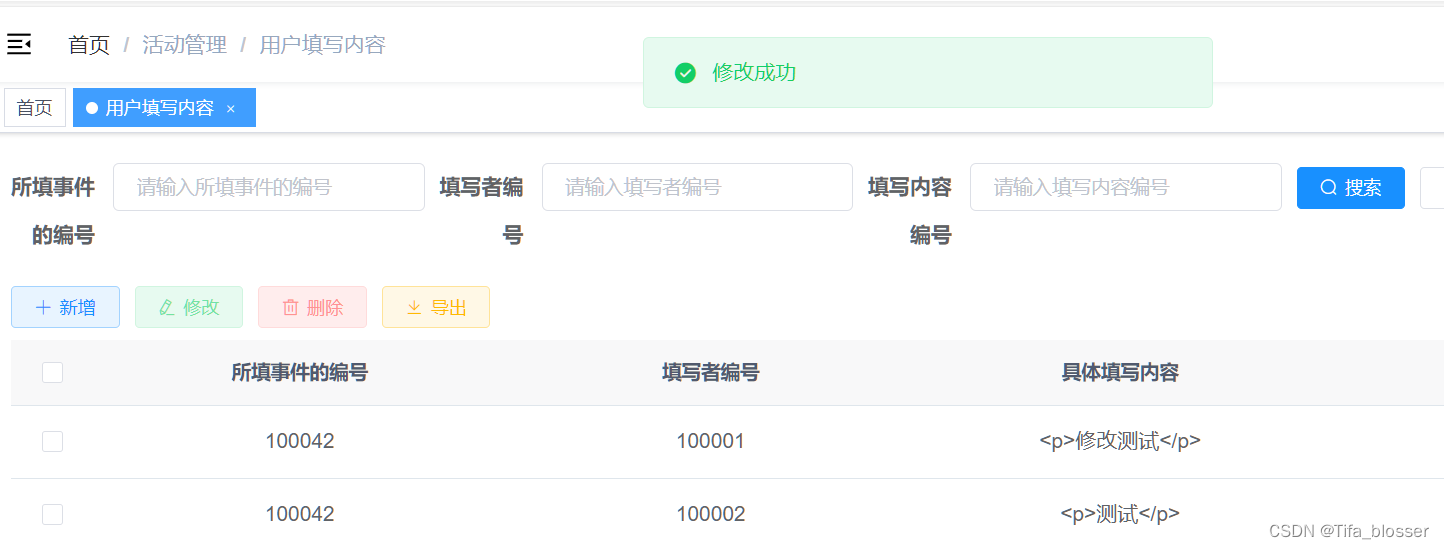
(2)修改之后
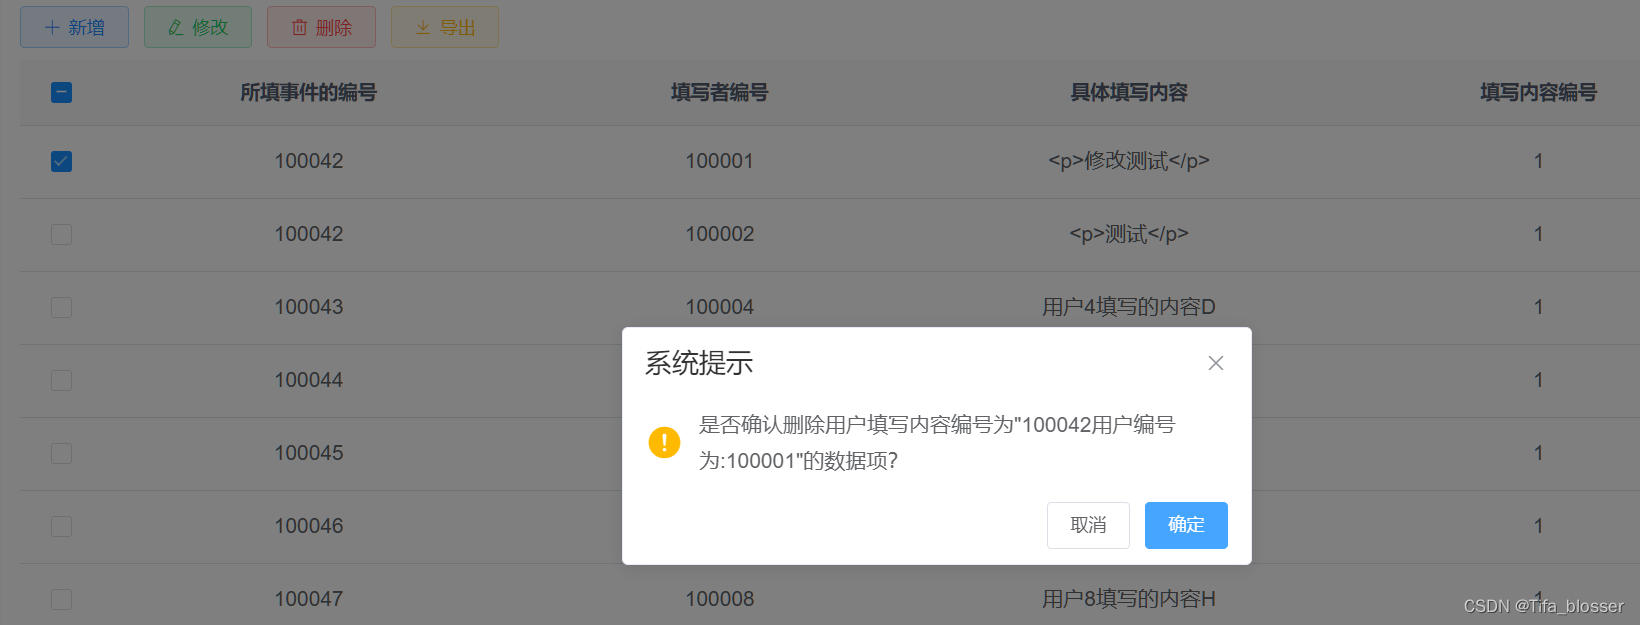
3、删除:
(1)选择删除
(2)删除后
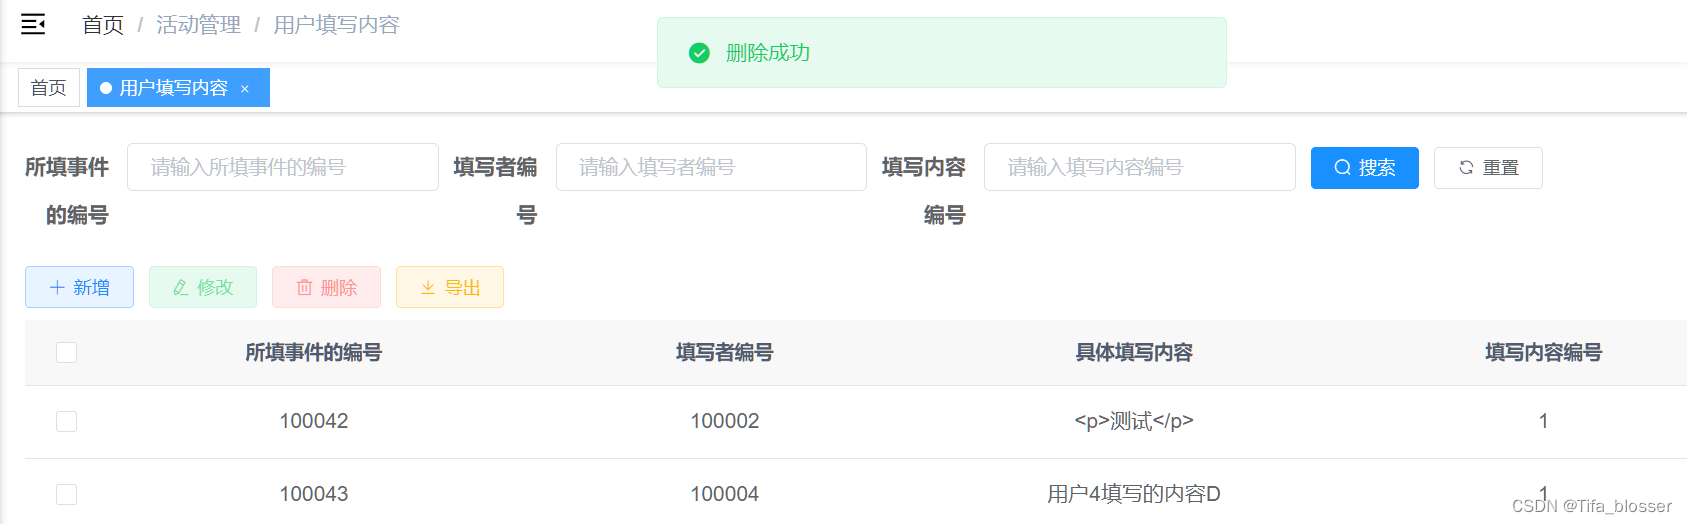
验证完毕,整体符合正常使用的逻辑。因为整体书写花费时间比较长,可能有些地方存在遗漏,欢迎补充。

有“AI”的1024 = 2048,欢迎大家加入2048 AI社区
更多推荐

 36
36 0
0- 0


 已为社区贡献1条内容

所有评论(0)