qml 图像image
image只能显示静态图片 image继承于item,所以无需导入控件库即可使用属性currentFrame: 保存当前可见帧,默认值为0,如果图像包含多个帧,则可以将其设置为介于0和frameCount-1之间的数字来显示不同的帧(Qt5.14引入的)frameCount: 保存图像中的帧数。大多数图像只有一帧(Qt5.14引入的)horizontalAlignment/verticalAlig
·
- image只能显示静态图片 image继承于item,所以无需导入控件库即可使用
- 属性
currentFrame: 保存当前可见帧,默认值为0,如果图像包含多个帧,则可以将其设置为介于0和frameCount-1之间的数字来显示不同的帧(Qt5.14引入的)
frameCount: 保存图像中的帧数。大多数图像只有一帧(Qt5.14引入的)
horizontalAlignment/verticalAlignment:设置图像的水平和垂直对齐方式
paintedHeight/paintedHeight:(只读),获取实际绘制的图像的大小
asynchronous : 指定在单独的线程中异步加载本地文件系统上的图像。默认值为false
autoTransform : 指定图像是否自动转换图像
cache : 指定图像是否缓存。默认为true
mipmap : 指定图像在缩放或转换时是否使用mipmap过滤
mirror : 指定图像水平翻转
progress : (只读),获取图像加载的进度
smooth : 指定图像在缩放和变换时是否平滑过滤
source : 需要加载的图像路径
sourceClipRect : 保存要加载的图像的矩形区域(Qt5.15引入的)
sourceSize : 指定了图像在内存中的大小
status : 获取加载图像的状态
fillMode : 定义当源图像大小和ui对象大小不同时将发生的情况 - Image.Stretch - 图像自动缩放至ui对象大小
Image.PreserveAspectFit - 图像按照比例缩放,不裁剪
Image.PreserveAspectCrop - 图像按照比例缩放填充,必要时裁剪
Image.Tile - 图像水平和垂直方向平铺
Image.TileVertically - 图像水平拉伸并垂直平铺
Image.TileHorizontally - 图像垂直拉伸并水平平铺
Image.Pad - 图像不变形
例1
- 第一步 要添加qrc文件 在当前项目右键添加新文件,选择qt下的Qt Resource File,然后再导入图片

import QtQuick 2.9
import QtQuick.Window 2.2

Window {
    visible: true
    width: 640
    height: 480
    title: qsTr("test")

    Image {
            id: image
            anchors.centerIn: parent
            source: "/Desktop/2.jpg"
        }
}
例2 填充模式 fillMode

import QtQuick 2.9
import QtQuick.Window 2.2
//import QtQuick.Controls 2.2

Window {
    visible: true
    width: 480
    height: 480
    title: qsTr("test")

    Column{
        anchors.centerIn: parent
        spacing: 10

        Image {
            height: 50
            width: 50
            source: "/Desktop/3.jpg"
            fillMode: Image.Pad  //图像的填充方式-不变形
        }

        Image {
            height: 50
            width: 50
            source: "/Desktop/3.jpg"
            fillMode: Image.PreserveAspectFit  //图像的填充方式-按照比例缩放填充,不裁剪
        }

        Image {
            height: 50
            width: 50
            source: "/Desktop/3.jpg"
            fillMode: Image.PreserveAspectCrop  //图像的填充方式-按照比例缩放填充,必要时裁剪
        }

        Image {
             width: 100
             height: 100
             source: "/Desktop/3.jpg"
             fillMode: Image.Tile //图像的填充方式-水平垂直复制
        }

        Image {
             width: 100
             height: 100
             source: "/Desktop/3.jpg"
             fillMode: Image.TileVertically //图像的填充方式-水平填充,垂直复制
        }

        Image {
             width: 100
             height: 100
             source: "/Desktop/3.jpg"
             fillMode: Image.TileHorizontally  //图像的填充方式-水平填充,垂直复制
        }
    }
}
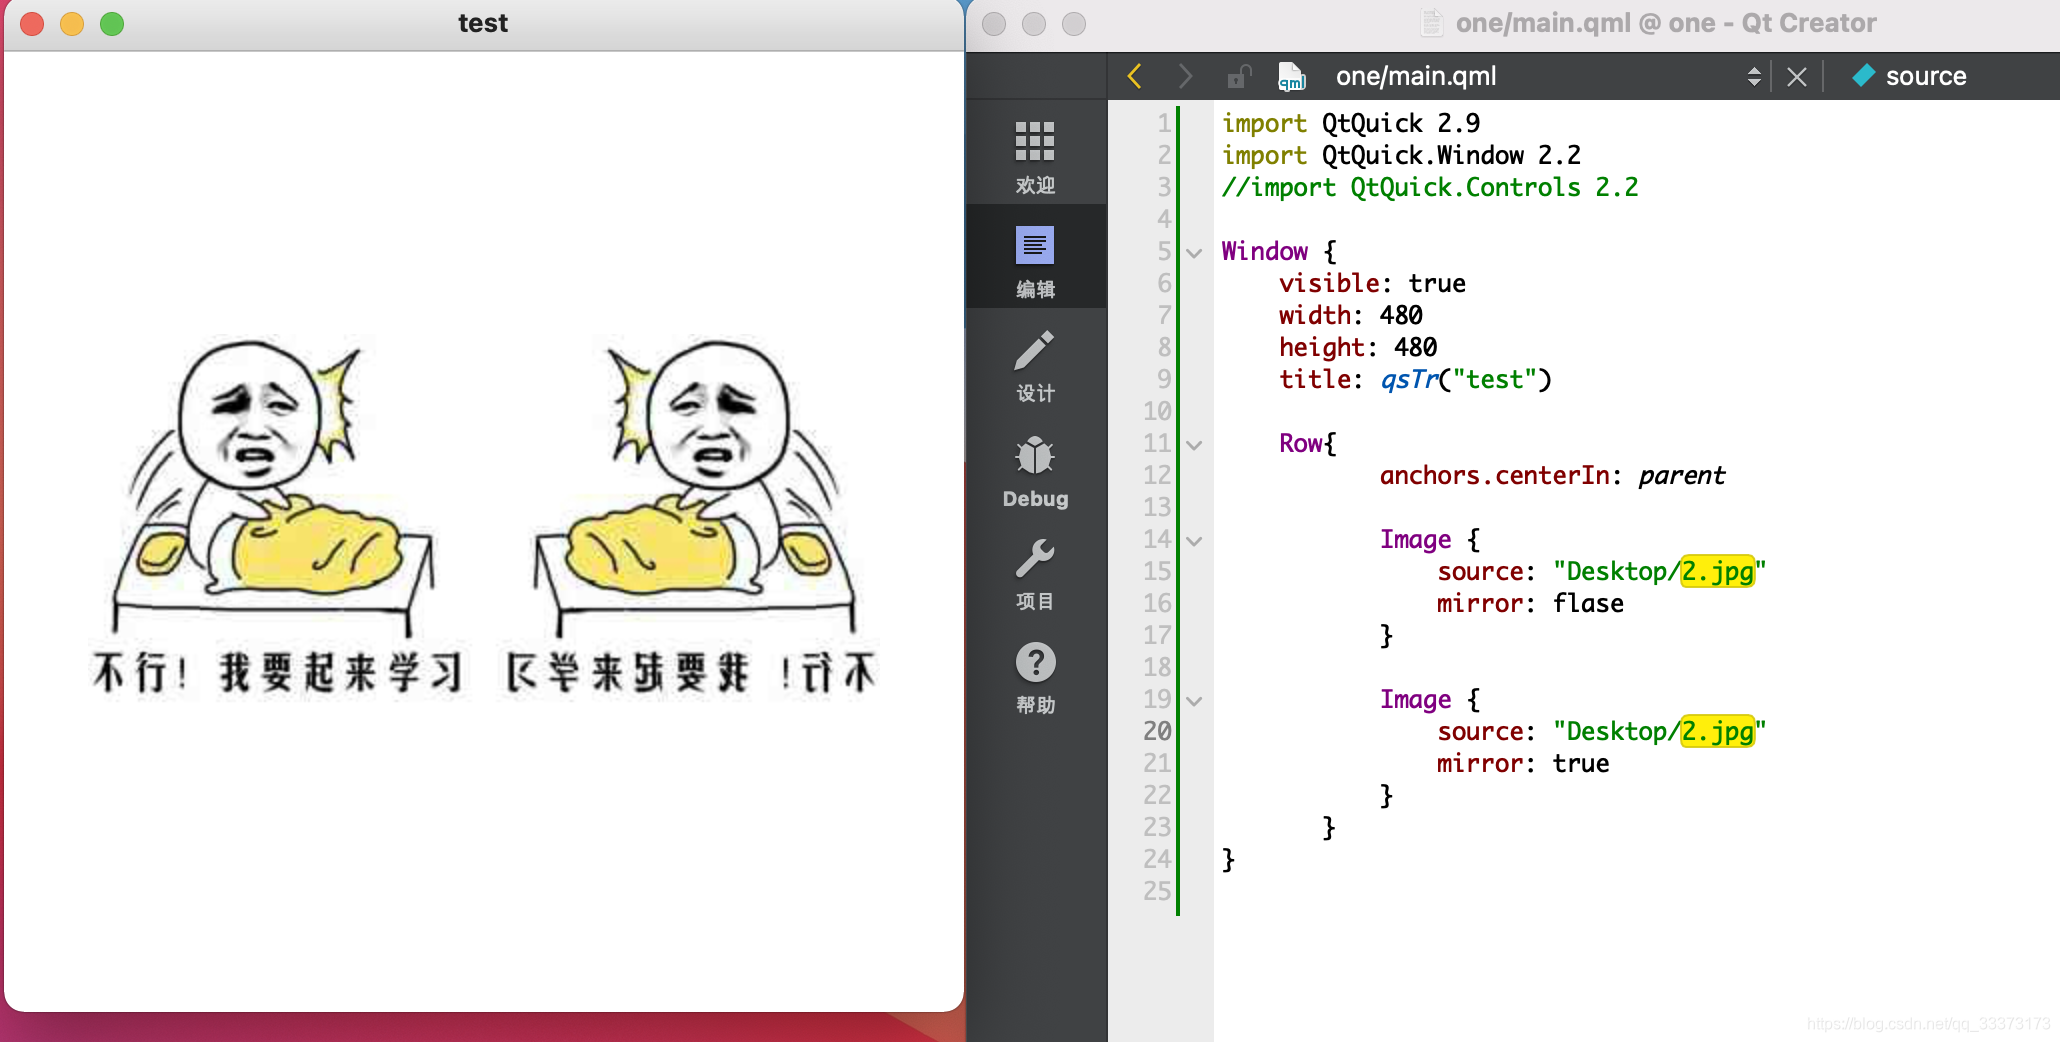
例3 属性mirror
- mirror属性指定图像水平翻转,例如方便呈现镜像
import QtQuick 2.9
import QtQuick.Window 2.2
//import QtQuick.Controls 2.2

Window {
    visible: true
    width: 480
    height: 480
    title: qsTr("test")

    Row{
           anchors.centerIn: parent

           Image {
               source: "Desktop/2.jpg"
               mirror: flase
           }

           Image {
               source: "Desktop/2.jpg"
               mirror: true
           }
       }
}
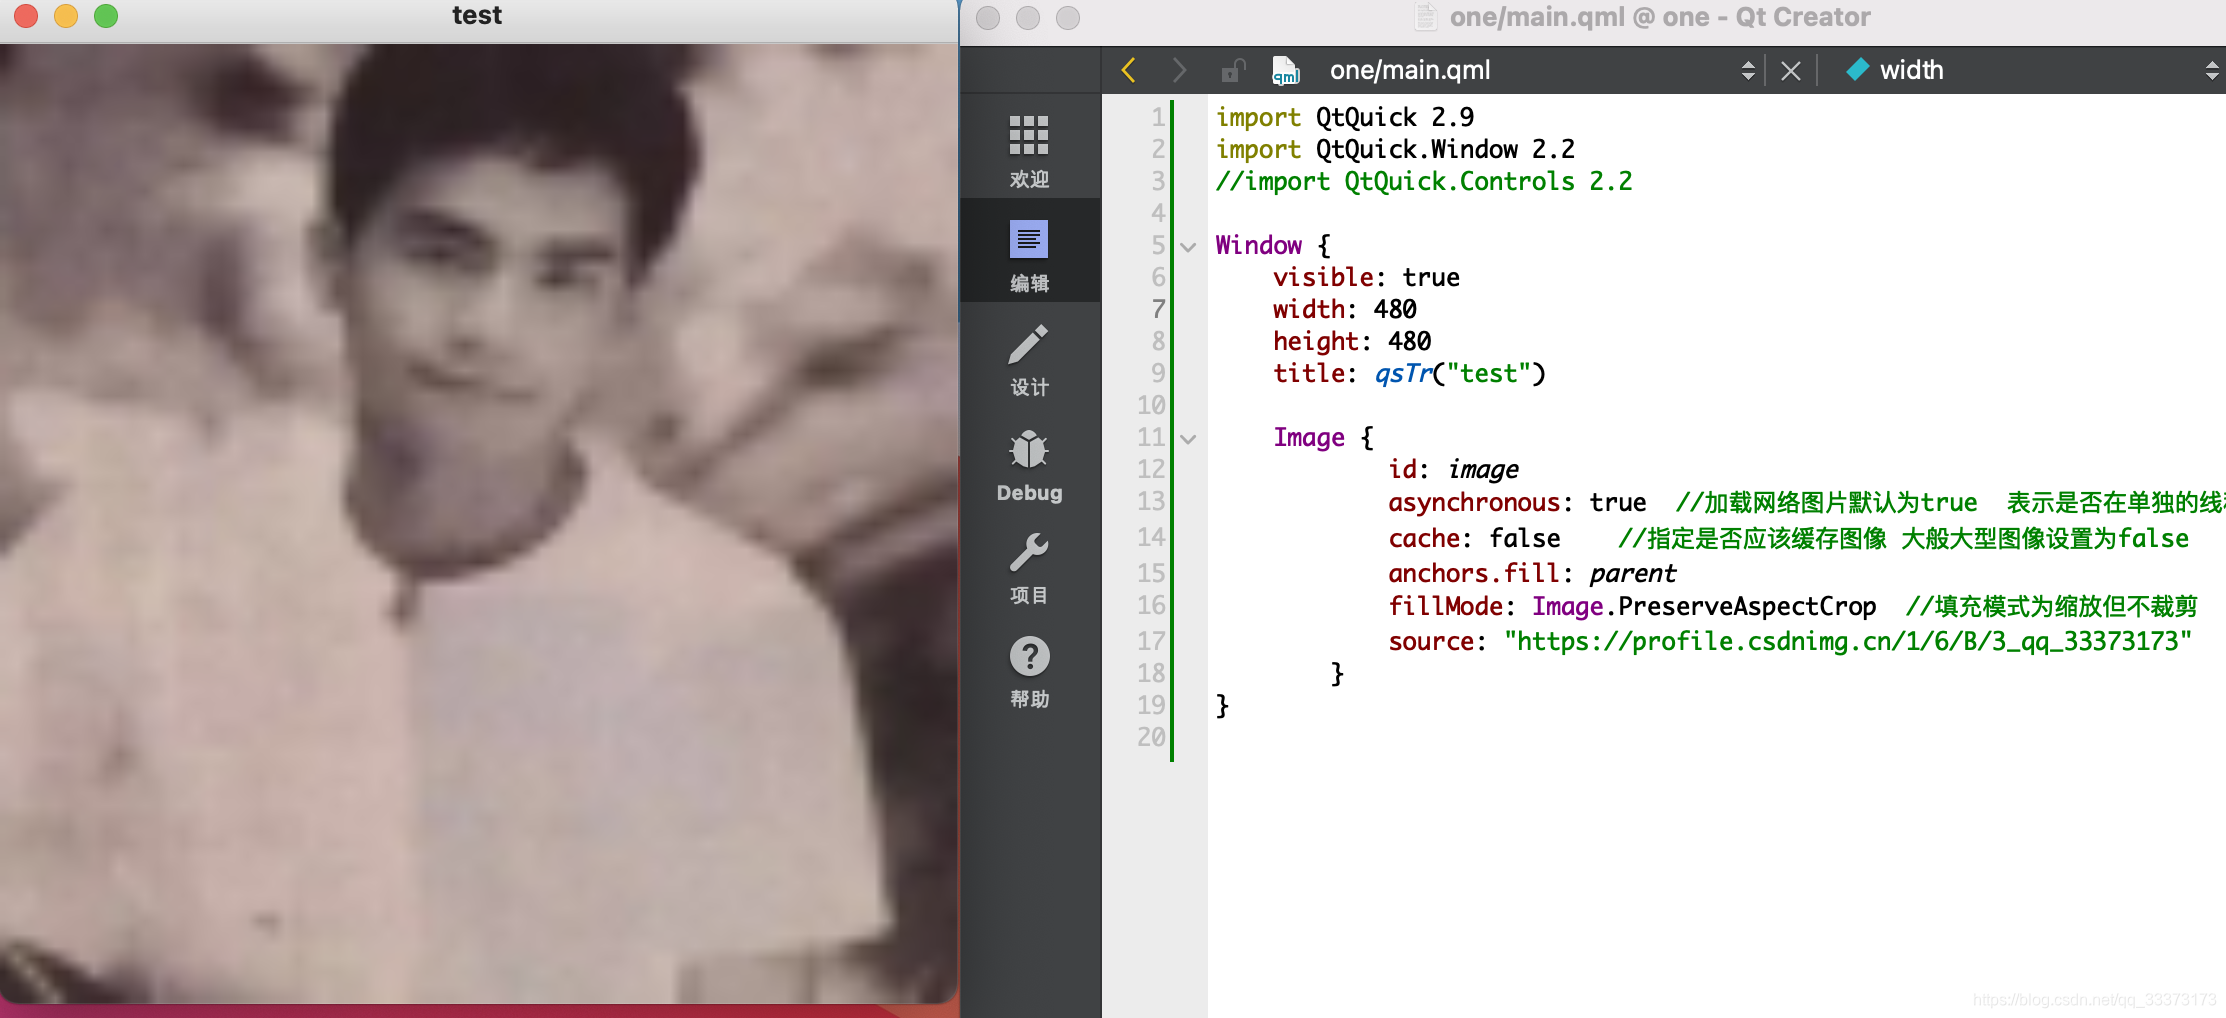
例4 网络图片
import QtQuick 2.9
import QtQuick.Window 2.2

Window {
    visible: true
    width: 480
    height: 480
    title: qsTr("test")

    Image {
            id: image
            asynchronous: true  //加载网络图片默认为true  表示是否在单独的线程中异步加载本地文件系统上的图像
            cache: false    //指定是否应该缓存图像 大般大型图像设置为false
            anchors.fill: parent
            fillMode: Image.PreserveAspectCrop  //填充模式为缩放但不裁剪
            source: "https://profile.csdnimg.cn/1/6/B/3_qq_33373173"
        }
}
例5 裁剪圆形头像
- 用
import QtGraphicalEffects 1.0模块种的效果OpacityMask

import QtQuick 2.9
import QtQuick.Window 2.2
import QtGraphicalEffects 1.0   //图形效果模块

Window {
    visible: true
    width: 360
    height: 360
    title: qsTr("Image")
    color: "lightyellow"

    Image {
            id: ima
            anchors.centerIn: parent
            source: "/Desktop/2.jpg"
            smooth: true
            visible: false
        }

        Rectangle { //矩形
            id: rect
            width: parent.width
            height: parent.height
            radius: height
            color: "red"
            visible: false  //不可见
        }

        OpacityMask {
            anchors.fill: ima
            source: ima
            maskSource: rect    //用作遮罩的项目
        }
}

有“AI”的1024 = 2048,欢迎大家加入2048 AI社区
更多推荐

 2
2 0
0- 0


 已为社区贡献3条内容

所有评论(0)