Raspberry-Pi-PICO系列--第八篇 高级篇使用SWD接口下载和调试(第二章)
一、目的在上一篇《Raspberry-Pi-PICO系列--第八篇 高级篇使用SWD接口下载和调试(第一章)》 我们已经介绍了如何准备openocd、如何编译picoprobe、如何进行接线,本篇将继续介绍openocd命令如何使用,如何进行下载调试。二、准备首先准备好两块raspberry_pi_pico开发板,其中一块已经烧写好picoprobe.uf2固件,我们称之为pico A;另外一块我
一、目的

在上一篇《Raspberry-Pi-PICO系列--第八篇 高级篇使用SWD接口下载和调试(第一章)》 我们已经介绍了如何准备openocd、如何编译picoprobe、如何进行接线,本篇将继续介绍openocd命令如何使用,如何进行下载调试。
二、准备
首先准备好两块raspberry_pi_pico开发板,其中一块已经烧写好picoprobe.uf2固件,我们称之为pico A;另外一块我们称之为pico B。
三、实战
SWD接口烧写程序
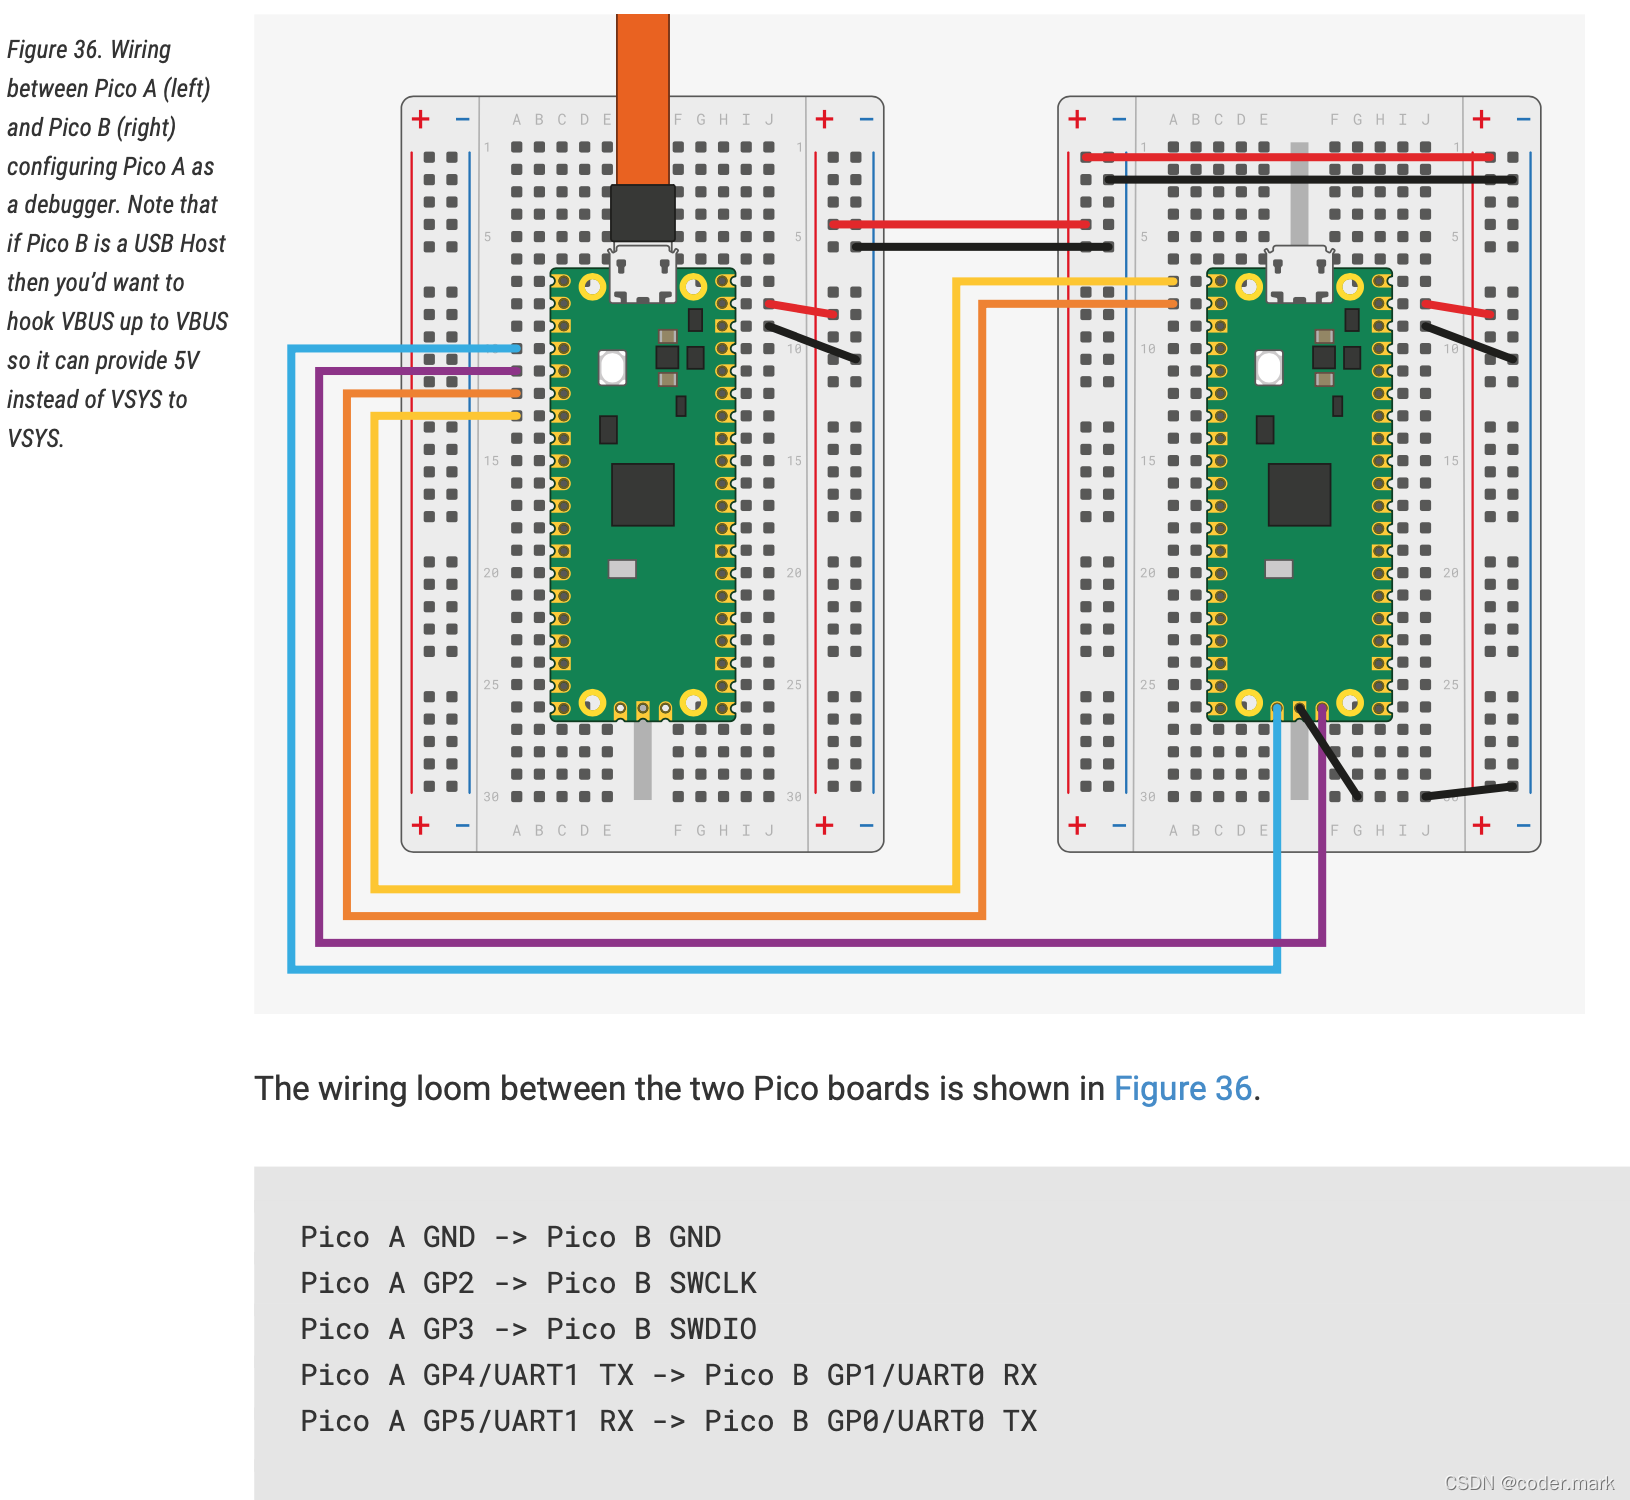
1、首先我们将PICO A通过USB烧写picoprobe.uf2固件;然后按照下面的连线将PICO A和PICO B连接起来,两块PICO都各自通过USB供电
                        Pico A GND -> Pico B GND
                        Pico A GP2 -> Pico B SWCLK
                        Pico A GP3 -> Pico B SWDIO
2、修改pico-examples/blink/blink.c 里面的sleep_ms(250); 都改成sleep_ms(500); (主要是为了验证通过SWD下载的的确是新的固件,确定SWD下载成功),并且重新编译
$ cd ~/workspace/third/raspberry_pi_pico/pico-examples/
$ rm -rf build
$ mkdir build
$ cd build/
$ cmake -DCMAKE_BUILD_TYPE=Debug ..
$ cd blink/
$ make
上述命令-DCMAKE_BUILD_TYPE=Debug是为了编译可调试的固件,主要是为了后面的GDB使用。
3、烧写PICO B固件blink
$ cd ~/workspace/third/raspberry_pi_pico/openocd/
$ sudo src/openocd -f interface/picoprobe.cfg -f target/rp2040.cfg -s ~/workspace/third/raspberry_pi_pico/openocd/tcl -c "program /home/$USER/workspace/third/raspberry_pi_pico/pico-examples/build/blink/blink.elf verify reset exit"
Open On-Chip Debugger 0.11.0-g4f2ae61-dirty (2022-02-20-17:41)
Licensed under GNU GPL v2
For bug reports, read
http://openocd.org/doc/doxygen/bugs.html
Info : only one transport option; autoselect 'swd'
adapter speed: 5000 kHz
Info : Hardware thread awareness created
Info : Hardware thread awareness created
Info : RP2040 Flash Bank Command
Info : clock speed 5000 kHz
Info : SWD DPIDR 0x0bc12477
Info : SWD DLPIDR 0x00000001
Info : SWD DPIDR 0x0bc12477
Info : SWD DLPIDR 0x10000001
Info : rp2040.core0: hardware has 4 breakpoints, 2 watchpoints
Info : rp2040.core1: hardware has 4 breakpoints, 2 watchpoints
Info : starting gdb server for rp2040.core0 on 3333
Info : Listening on port 3333 for gdb connections
target halted due to debug-request, current mode: Thread
xPSR: 0xf1000000 pc: 0x000000ee msp: 0x20041f00
target halted due to debug-request, current mode: Thread
xPSR: 0xf1000000 pc: 0x000000ee msp: 0x20041f00
** Programming Started **
Info : RP2040 B0 Flash Probe: 2097152 bytes @10000000, in 512 sectors
target halted due to debug-request, current mode: Thread
xPSR: 0x01000000 pc: 0x00000178 msp: 0x20041f00
target halted due to debug-request, current mode: Thread
xPSR: 0x01000000 pc: 0x00000178 msp: 0x20041f00
target halted due to debug-request, current mode: Thread
xPSR: 0x01000000 pc: 0x00000178 msp: 0x20041f00
target halted due to debug-request, current mode: Thread
xPSR: 0x01000000 pc: 0x00000178 msp: 0x20041f00
target halted due to debug-request, current mode: Thread
xPSR: 0x01000000 pc: 0x00000178 msp: 0x20041f00
Info : Writing 24576 bytes starting at 0x0
target halted due to debug-request, current mode: Thread
xPSR: 0x01000000 pc: 0x00000178 msp: 0x20041f00
target halted due to debug-request, current mode: Thread
xPSR: 0x01000000 pc: 0x00000178 msp: 0x20041f00
target halted due to debug-request, current mode: Thread
xPSR: 0x01000000 pc: 0x00000178 msp: 0x20041f00
target halted due to debug-request, current mode: Thread
xPSR: 0x01000000 pc: 0x00000178 msp: 0x20041f00
target halted due to debug-request, current mode: Thread
xPSR: 0x01000000 pc: 0x00000178 msp: 0x20041f00
target halted due to debug-request, current mode: Thread
xPSR: 0x01000000 pc: 0x00000178 msp: 0x20041f00
target halted due to debug-request, current mode: Thread
xPSR: 0x01000000 pc: 0x00000178 msp: 0x20041f00
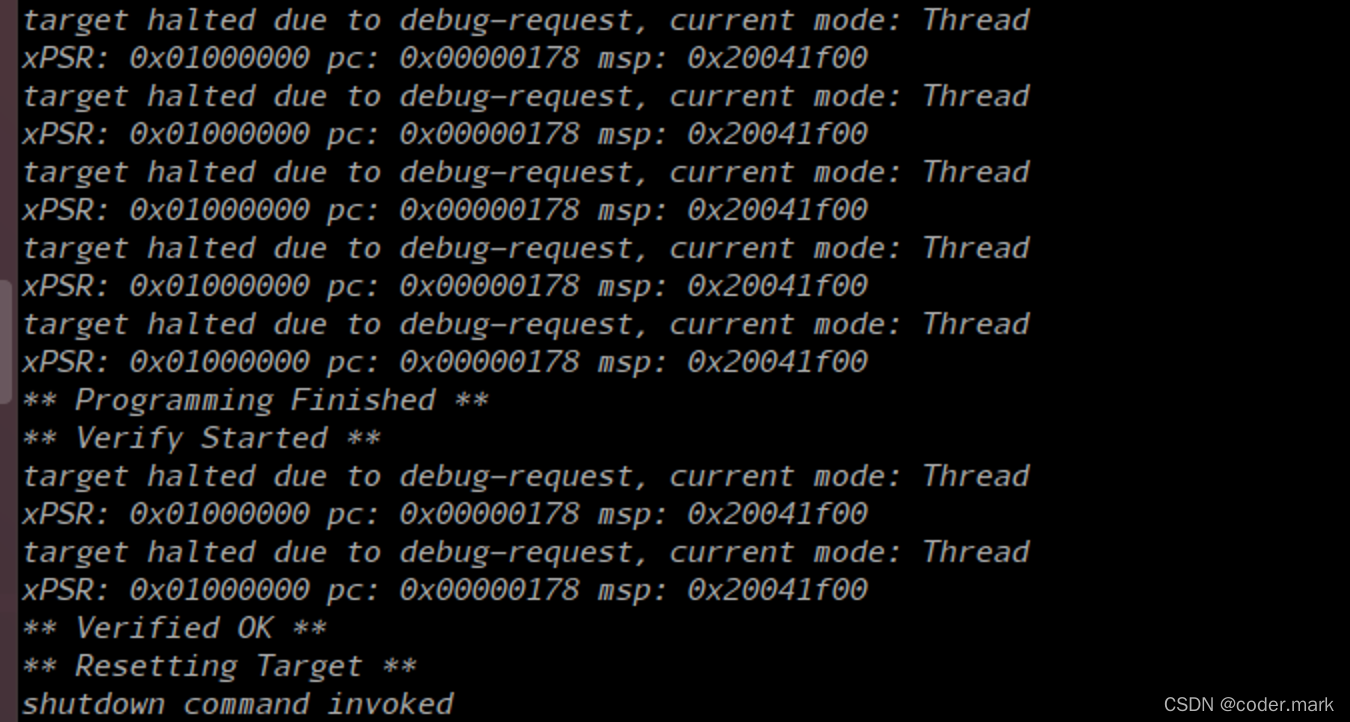
** Programming Finished **
** Verify Started **
target halted due to debug-request, current mode: Thread
xPSR: 0x01000000 pc: 0x00000178 msp: 0x20041f00
target halted due to debug-request, current mode: Thread
xPSR: 0x01000000 pc: 0x00000178 msp: 0x20041f00
** Verified OK **
** Resetting Target **
shutdown command invoked
$ sudo src/openocd -f interface/picoprobe.cfg -f target/rp2040.cfg -s ~/workspace/third/raspberry_pi_pico/openocd/tcl -c "program /home/$USER/workspace/third/raspberry_pi_pico/pico-examples/build/blink/blink.elf verify reset exit"注意当前使用的openocd是我们通过源码编译的版本,编译后的openocd在src目录下,所以我们在openocd源码目录下执行
-f interface/picoprobe.cfg 告诉openocd使用picoprobe的配置来访问SWD接口
-f target/rp2040.cfg 告诉openocd我们要访问基于RP2040的芯片的板子
-s ~/workspace/third/raspberry_pi_pico/openocd/tcl 告诉openocd去~/workspace/third/raspberry_pi_pico/openocd/tcl目录下找上面的两个配置
-c "program /home/$USER/workspace/third/raspberry_pi_pico/pico-examples/build/blink/blink.elf verify reset exit" 告诉openocd执行命令,分别为编程(烧写)elf固件,路径必须是绝对路径或者相对路径、验证、复位、退出。
当看到一下内容时说明执行成功
SWD调试程序
1、安装GDB
$ sudo apt install gdb-multiarch2、执行openocd命令
$ sudo src/openocd -f interface/picoprobe.cfg -f target/rp2040.cfg -s ~/workspace/third/raspberry_pi_pico/openocd/tcl
屏幕输出一下内容
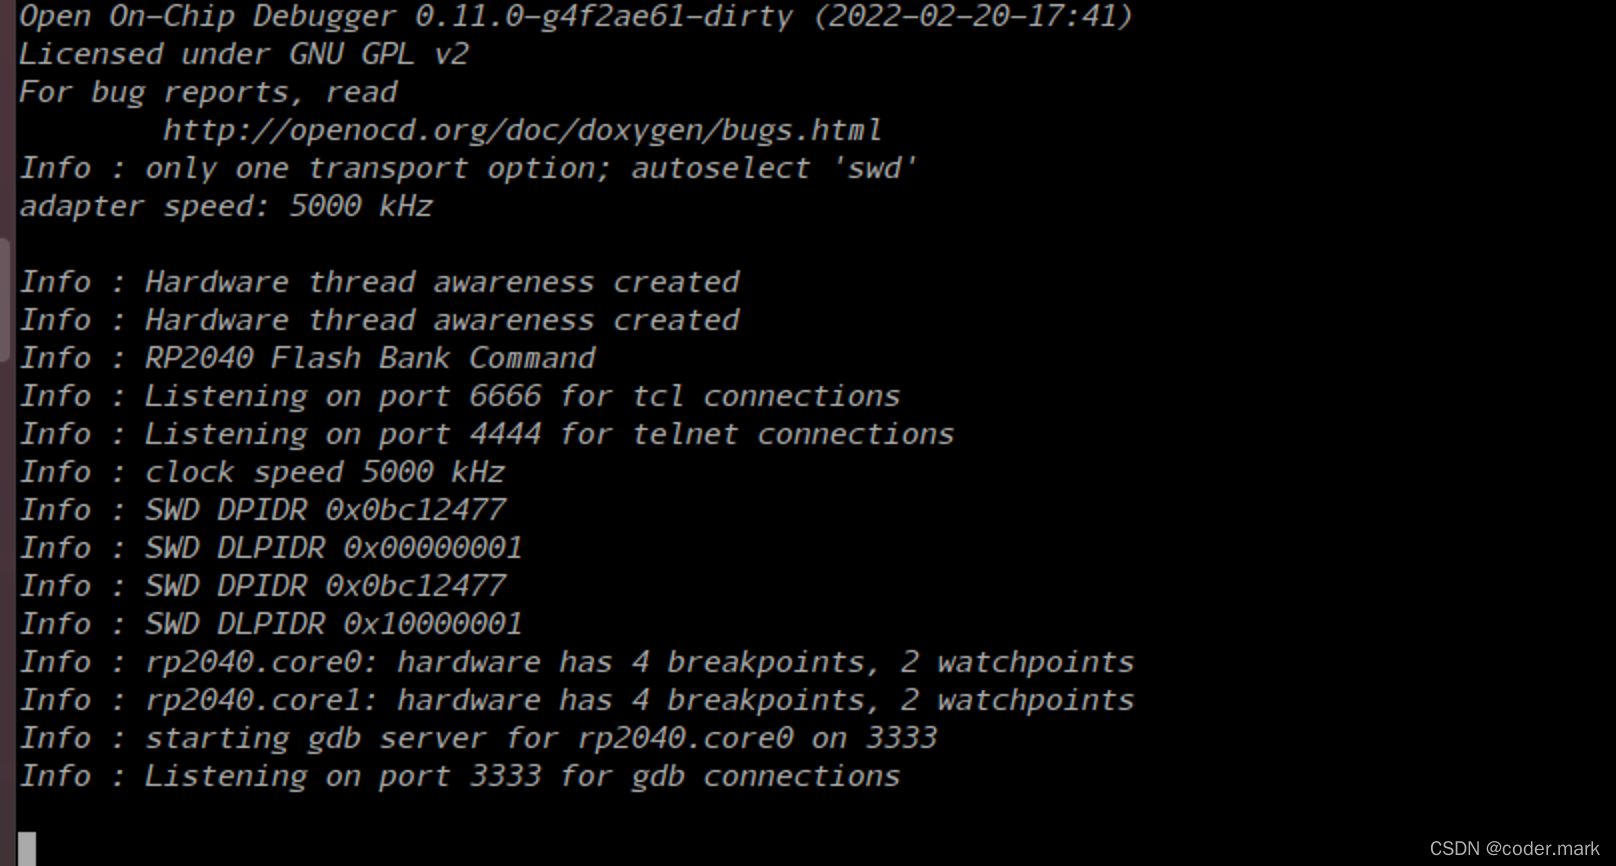
从图中我们可以看到gdb server在localhost:3333端口上监听
3、开始调试
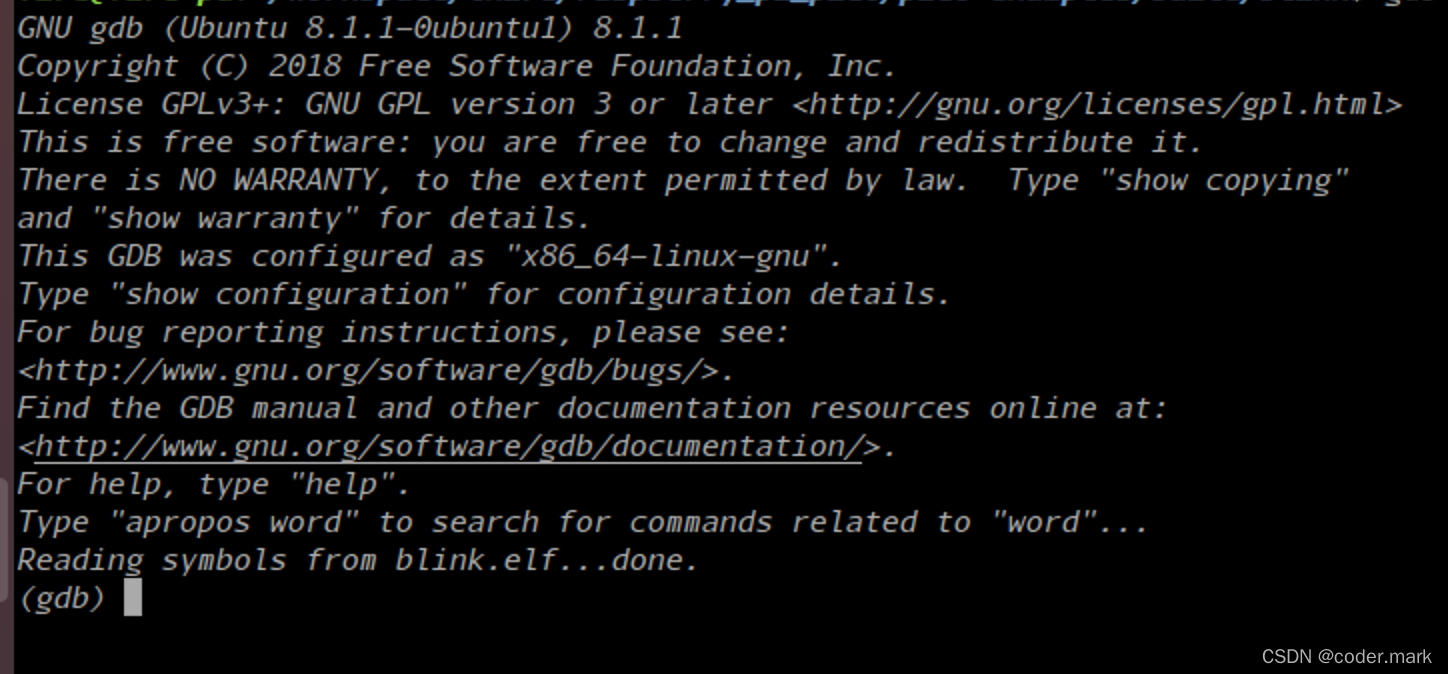
新开一个terminal,进入到目录~/workspace/third/raspberry_pi_pico/pico-examples/build/blink下并输入gdb命令
$ cd workspace/third/raspberry_pi_pico/pico-examples/build/blink/
$ gdb-multiarch blink.elf
然后可以看到
4、开启GDB调试需要输入命令
target remote localhost:3333
5、输入load命令加载blink.elf到flash中
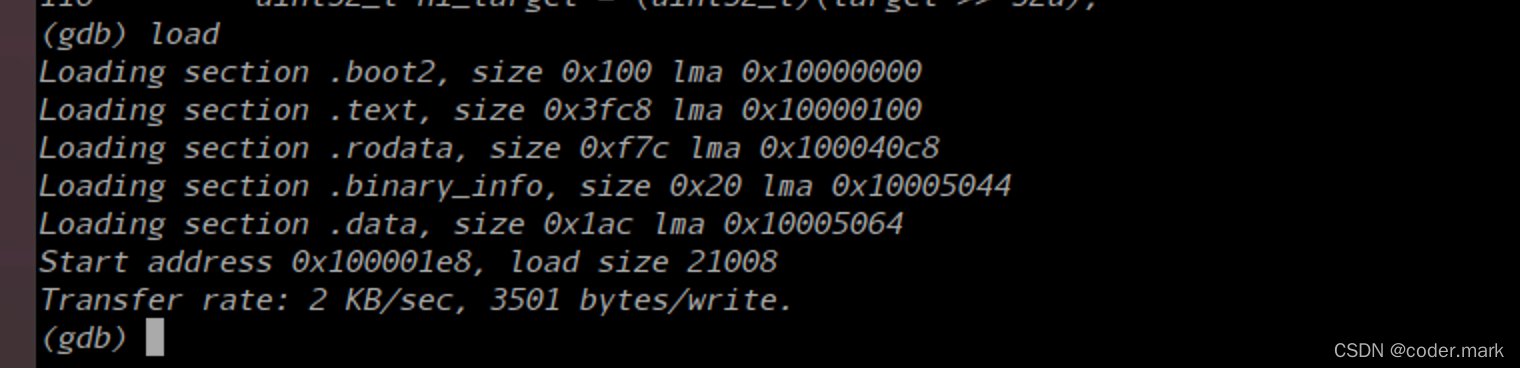
6、输入一下命令后程序就已经在运行
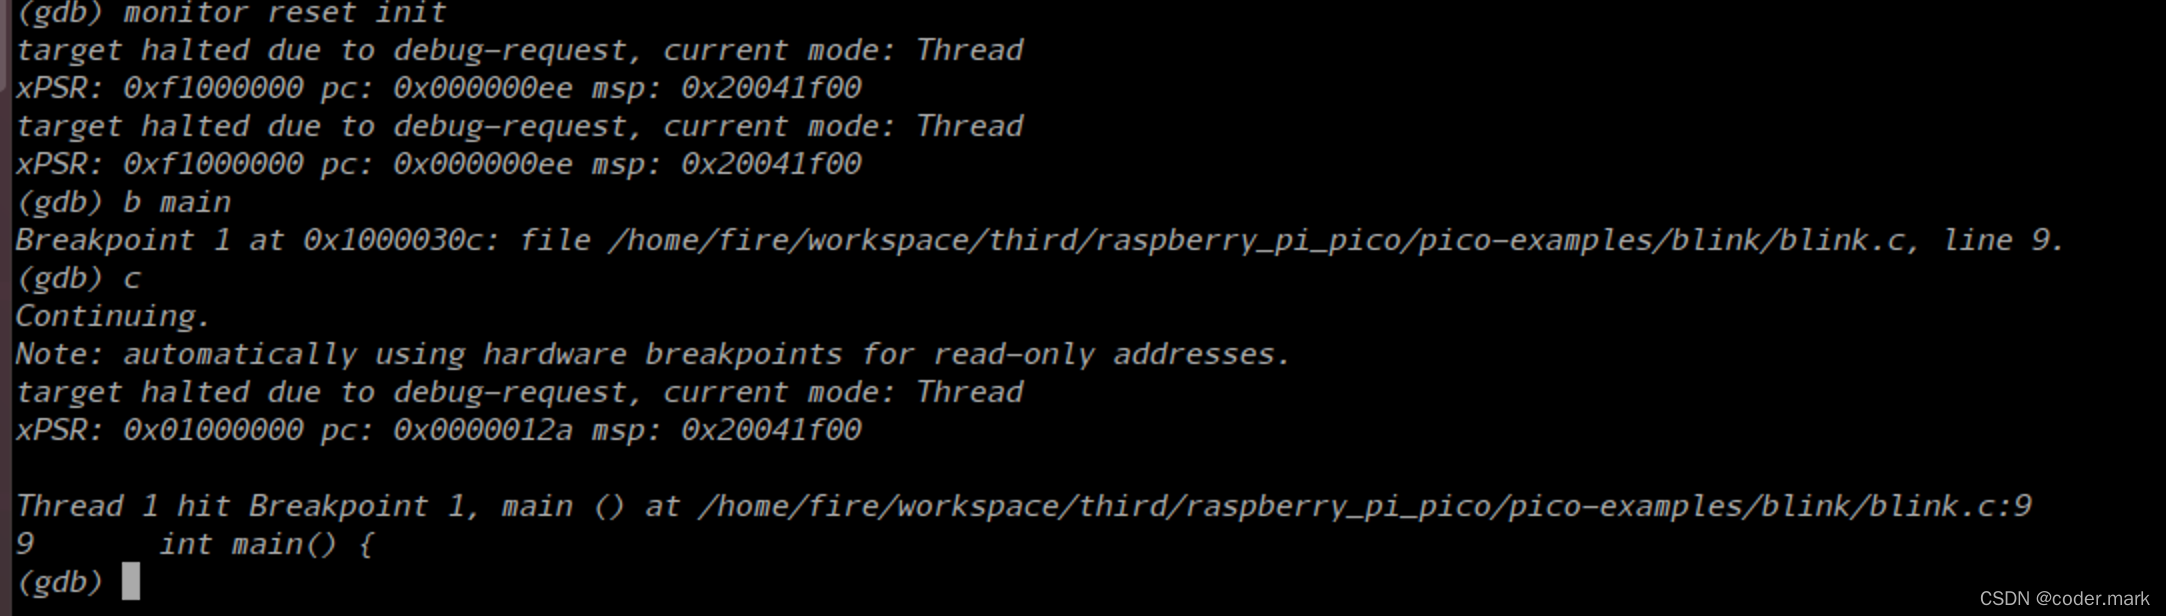
monitor reset init
continue 
7、设置断点
8、单步调试命令

关于GDB的使用细节,感兴趣的同学可以自行google;后续我也会出GDB调试详细教程。
至此,我们就完成了通过SWD下载、复位、调试程序的过程。
下一篇将介绍如何通过Visual Studio Code来进行开发以及调试。

有“AI”的1024 = 2048,欢迎大家加入2048 AI社区
更多推荐

 1
1 0
0- 0


 已为社区贡献17条内容

所有评论(0)