在Django上用Nginx + Waitress进行项目部署,并设计ai进行需求分析/写PRD
一、下载Nginx,启动Django
1.打开浏览器官网下载Nginx(nginx.org/en/doenload.html)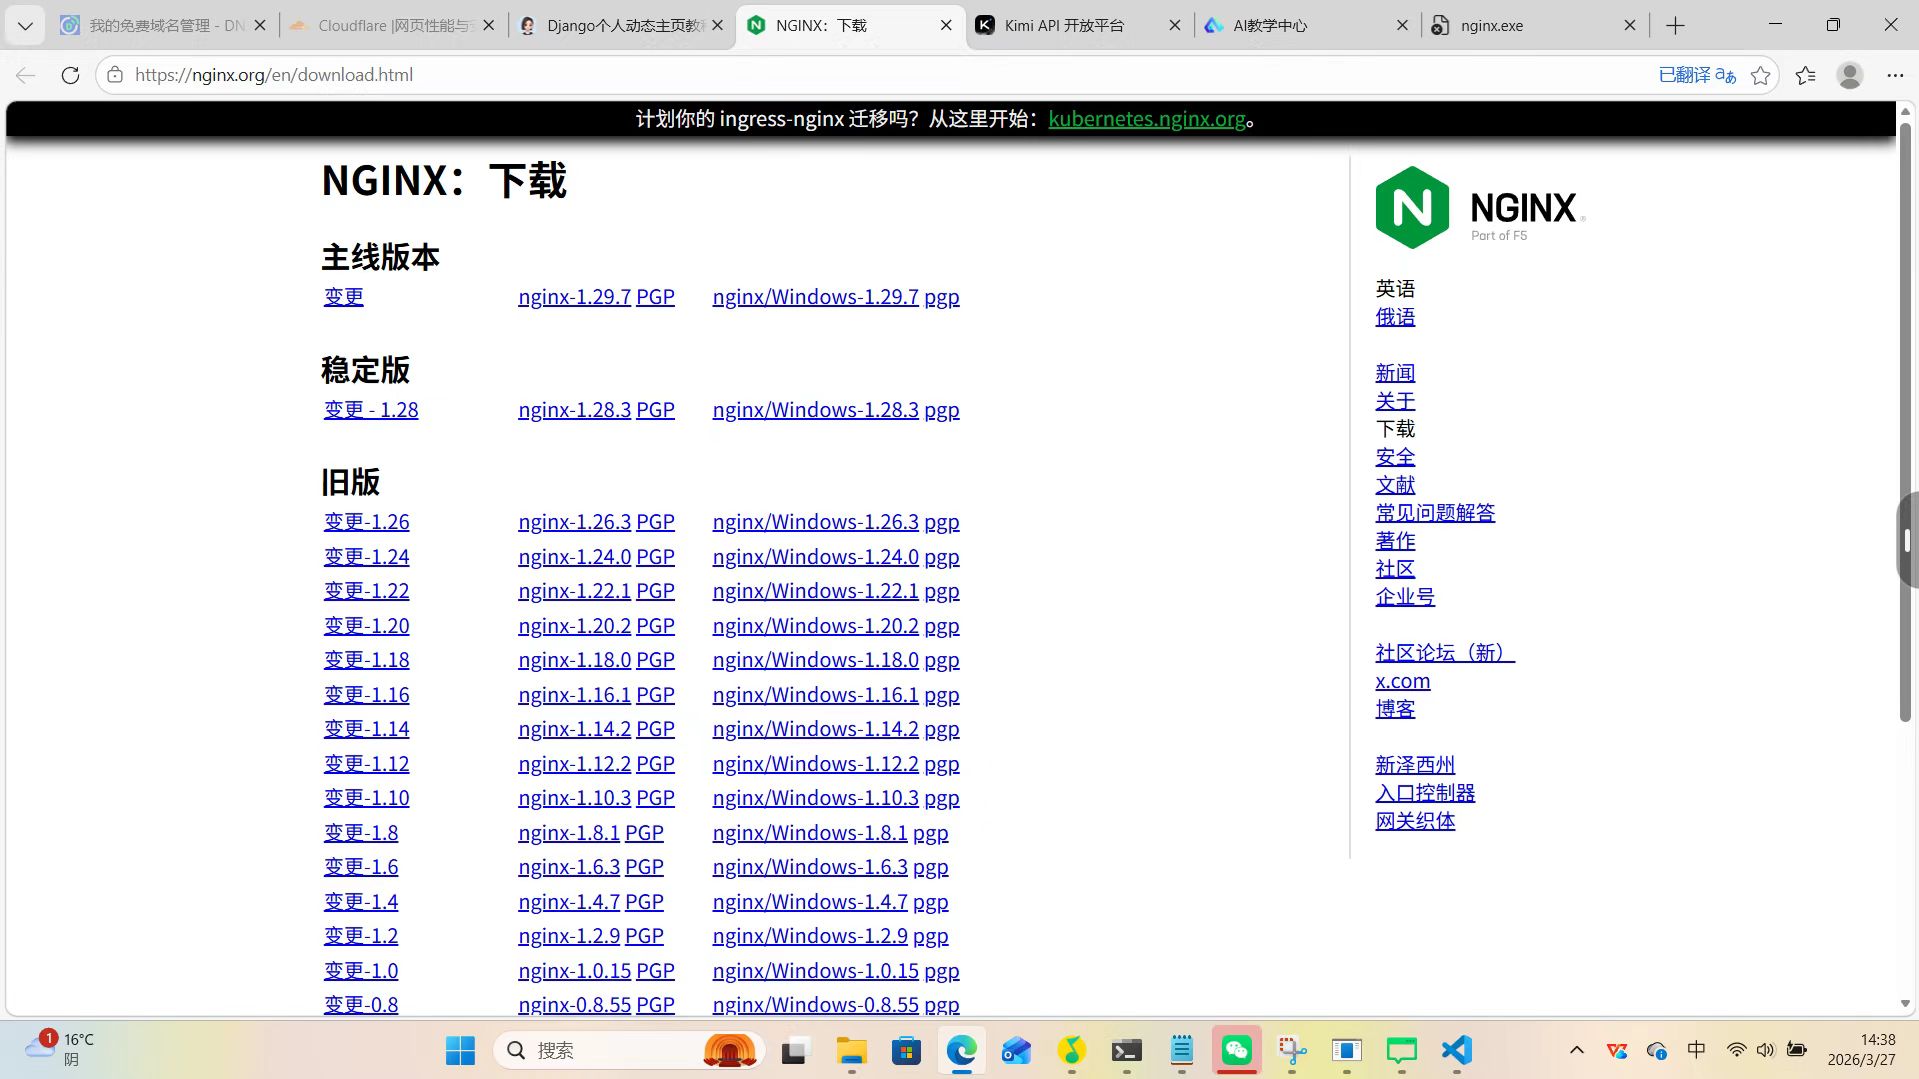
解压到指定目录,我这里是d盘根目录
2.打开powershell,进入解压后的目录 cd D:\nignx-1.28.3
3.运行Nginx 输入nginx.exe
4.执行验证 netstat -ano | findstr :80
5.输入命令
cd D:\mysite
python -m waitress --listen=127.0.0.1:8000 mysite.wsgi:application
访问网址http://127.0.0.1:8000
,看到欢迎界面就说明安装成功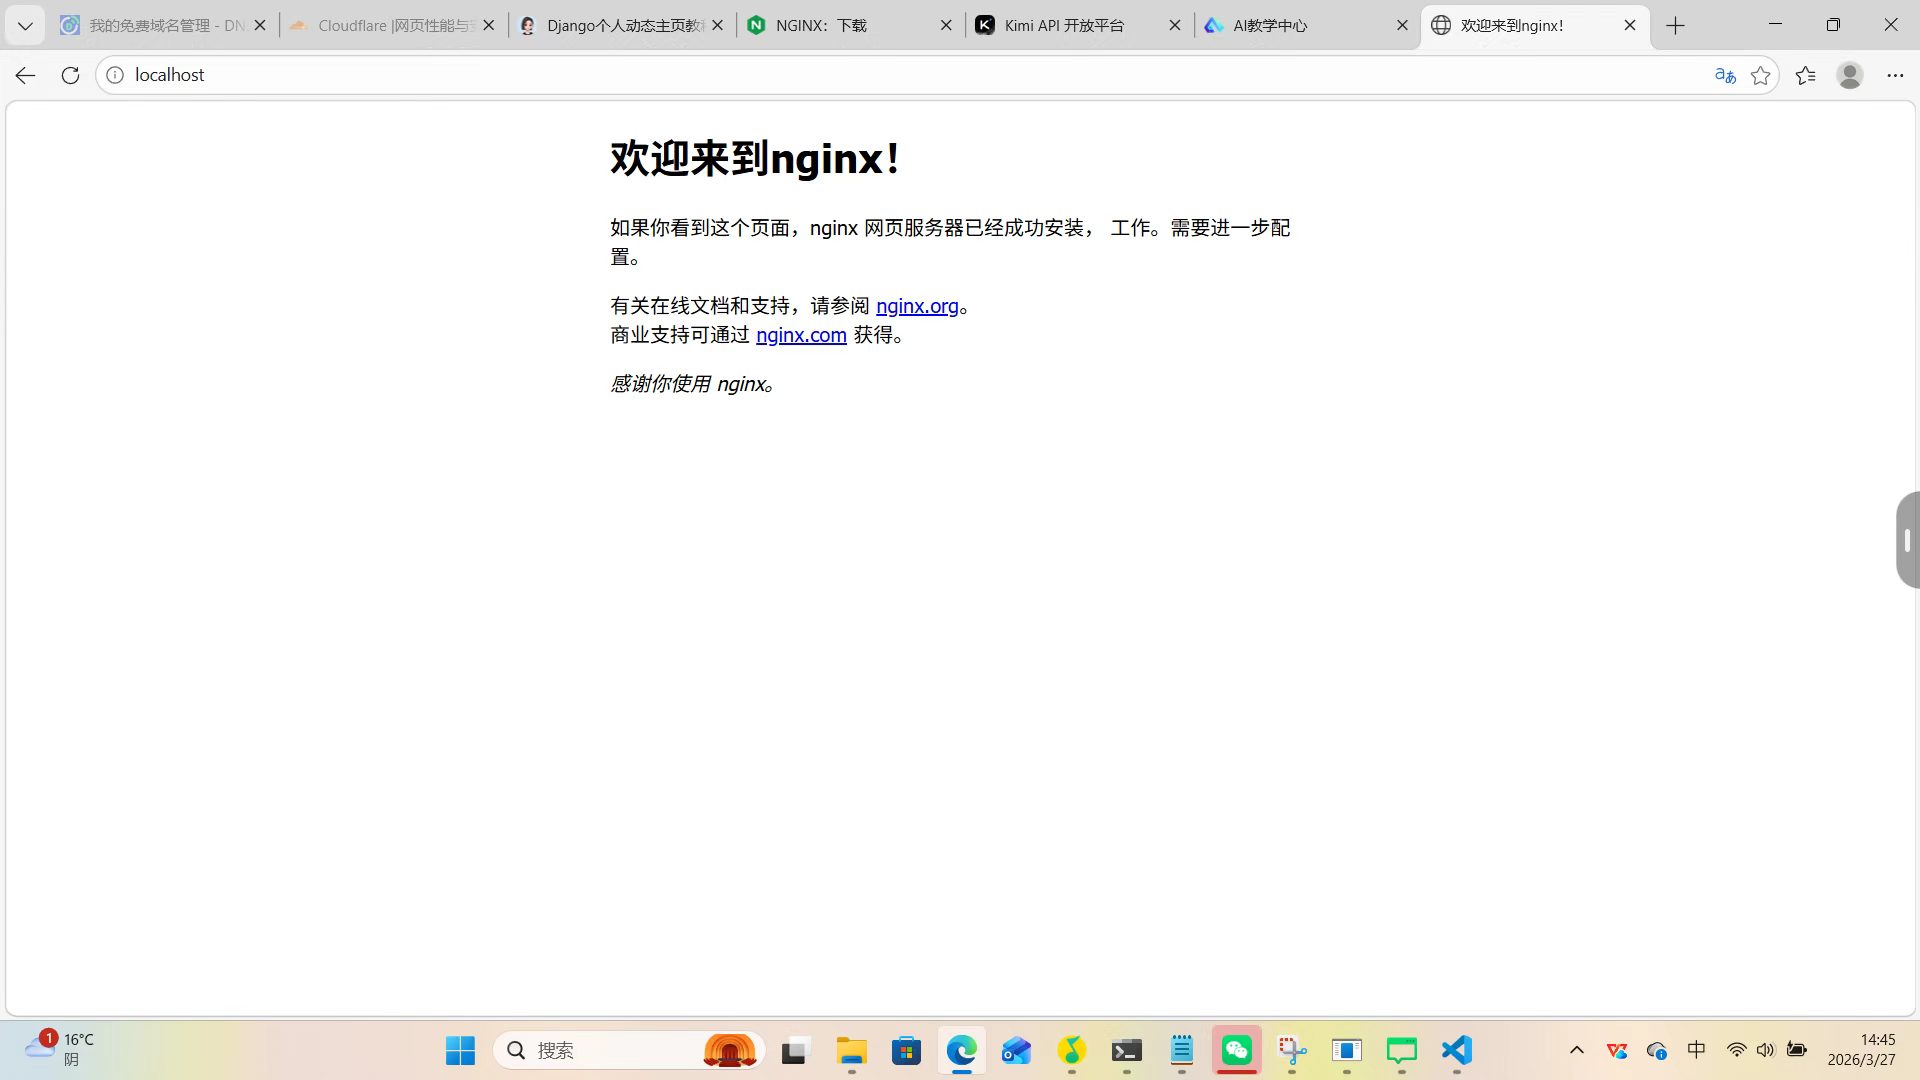
二,配置nginx文件
打开 D:\nginx-1.28.3\conf\nginx.conf ,找到 server 块,替换成下面这段配置
worker_processes 1;

events {
    worker_connections 1024;
}

http {
    include       mime.types;
    default_type  application/octet-stream;

    sendfile        on;
    keepalive_timeout 65;

    # Django 网站配置
    server {
        listen      80;
        server_name localhost;

        # 静态文件处理
        location /static/ {
            alias D:/mysite/static/;
            expires 30d;
        }

        # 请求转发配置
        location / {
            proxy_pass http://127.0.0.1:8000;
            proxy_set_header Host $host;
            proxy_set_header X-Real-IP $remote_addr;
            proxy_set_header X-Forwarded-For $proxy_add_x_forwarded_for;
            proxy_set_header X-Forwarded-Proto $scheme;
        }
    }
}
三、重载nginx配置
1.在 D:\nginx-1.28.3 目录下执行:
.\nginx.exe -s reload
2.启动Djano
cd D:\mysite
python -m waitress --listen=127.0.0.1:8000 mysite.wsgi:application
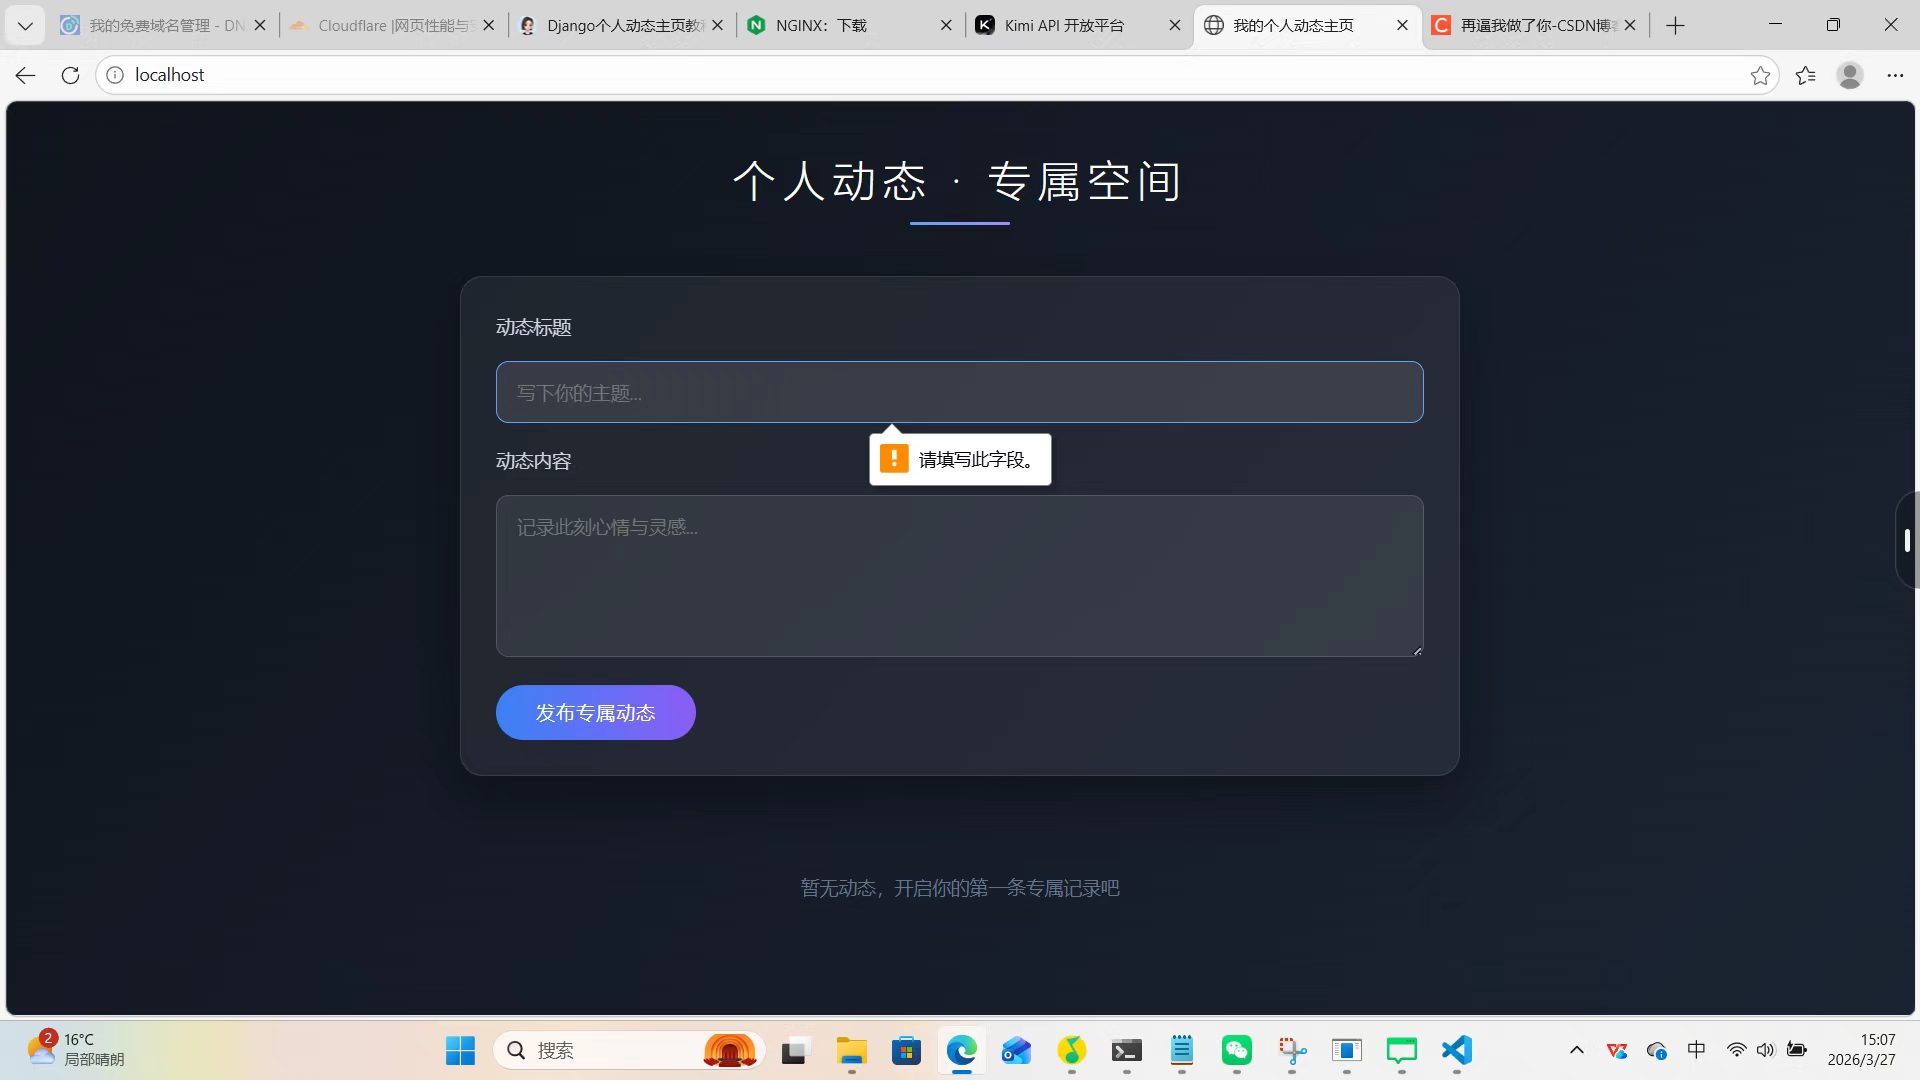
访问网址http://127.0.0.1:8000,如图所示能看见个人动态主页就成功
五.设置按钮跳转方便至自己的博客
1.找到你显示个人主页的模板文件(比如 home.html 或 index.html),在合适的位置(比如页面底部或导航栏)添加以下代码:
<a href="https://blog.csdn.net/2503_93594374?spm=1000.2115.3001.5343" target="_blank" style="display: inline-block; padding: 12px 24px; background: linear-gradient(135deg, #0088cc, #00aaff); color: white; text-decoration: none; border-radius: 8px; font-size: 16px; font-weight: 500; box-shadow: 0 2px 4px rgba(0,136,204,0.3); transition: all 0.3s ease; margin: 10px 0;"> <span style="margin-right: 8px;"></span>访问我的 CSDN 博客 </a> <style> a:hover { transform: translateY(-2px); box-shadow: 0 4px 8px rgba(0,136,204,0.4); } </style>
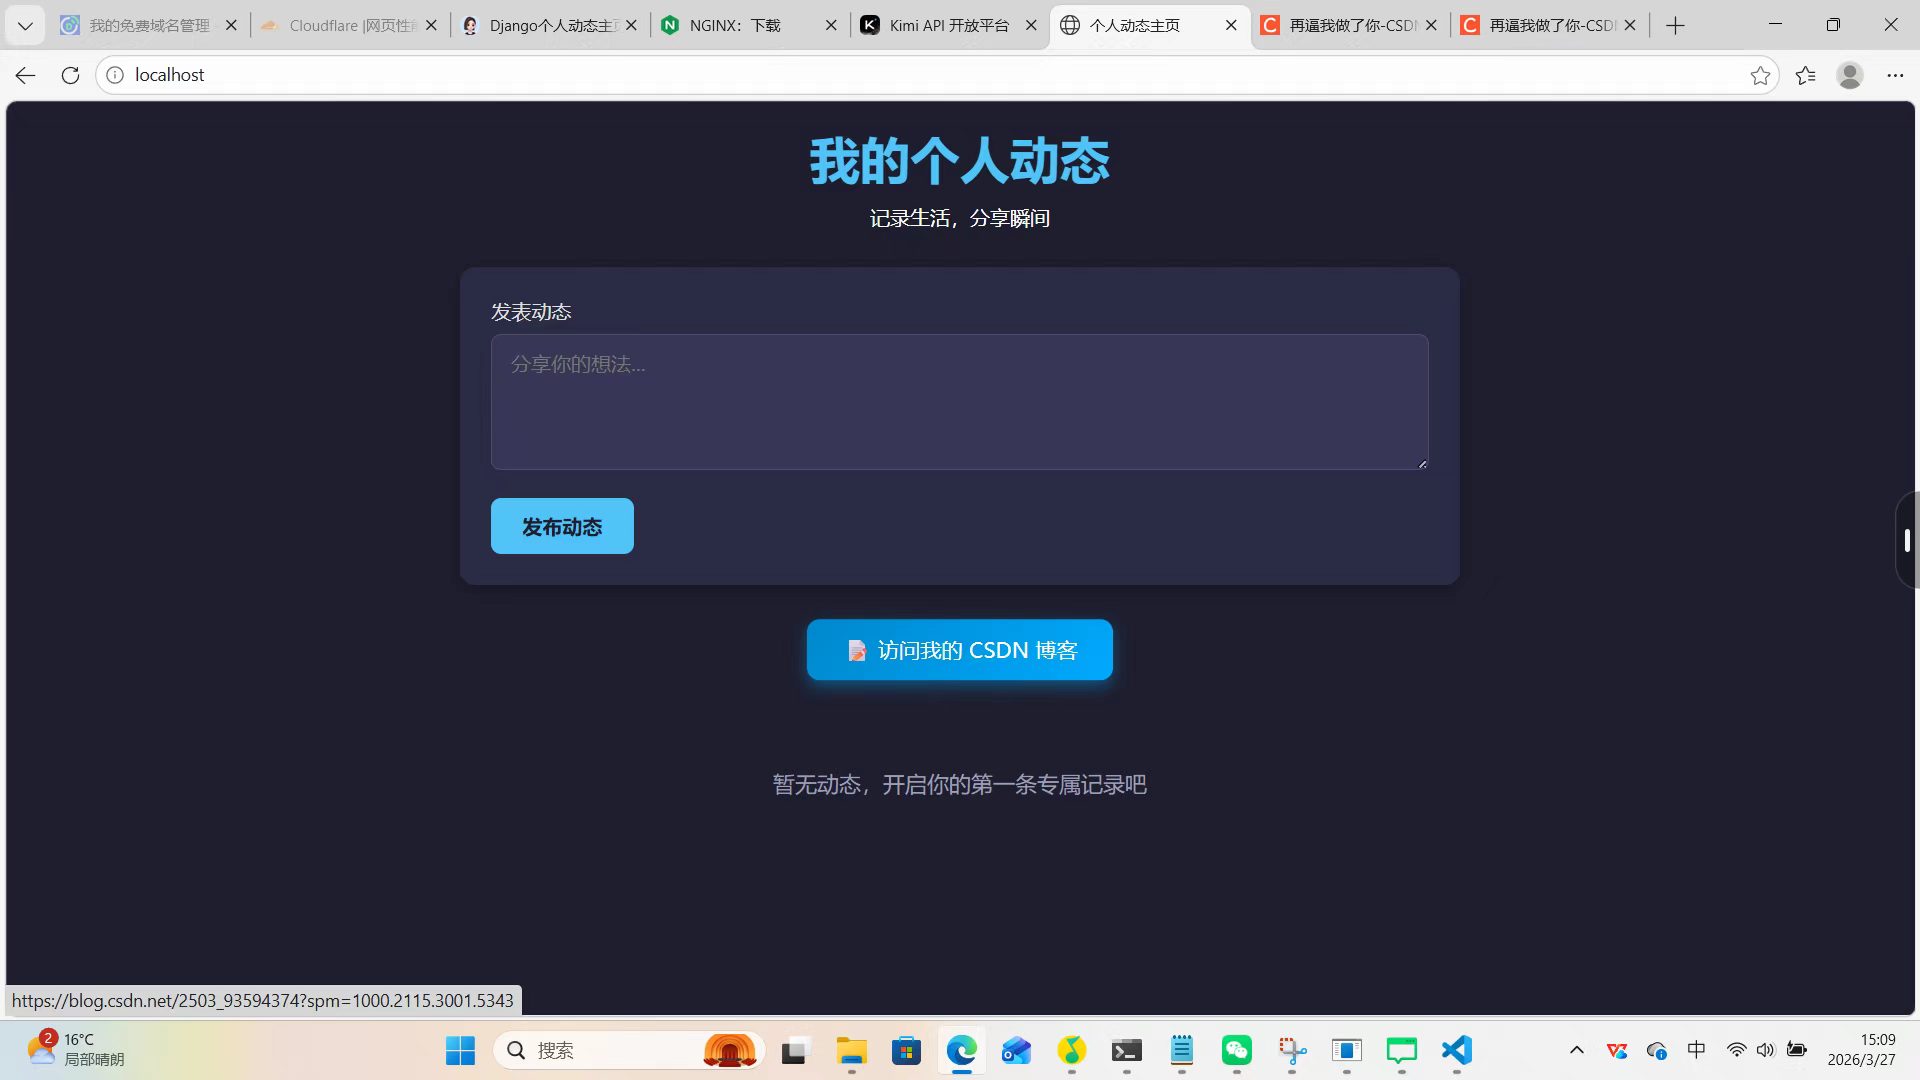
成功后会出现如图按钮
六、部署个ai用于项目需求分析,写PRD
1.打开 D:\mysite\posts\views.py,在末尾添加:
from django.shortcuts import render
from django.http import JsonResponse
from django.views.decorators.http import require_POST
from django.views.decorators.csrf import csrf_exempt

# 主页视图
def post_list(request):
    return render(request, 'posts/post_list.html')

# ========================
# 免费 AI PRD 生成(本地版)
# ========================
@require_POST
@csrf_exempt
def ai_prd_generator(request):
    demand = request.POST.get("demand", "").strip()
    if not demand:
        return JsonResponse({"error": "请输入需求描述"}, status=400)

    # 本地规则型 AI(免费、离线、永久可用)
    prd = f"""
# 产品需求文档(PRD)

## 项目需求描述
{demand}

---

## 1. 产品目标
• 实现用户核心需求功能
• 提供稳定易用的操作体验
• 满足日常使用场景,提升效率

## 2. 核心用户场景
• 用户通过系统完成目标操作
• 支持快速操作与数据展示
• 提供便捷的管理功能

## 3. 功能模块
• 基础信息展示
• 核心功能操作
• 数据存储与展示
• 界面交互与反馈

## 4. 业务流程
1. 用户登录系统
2. 执行核心操作
3. 系统处理数据
4. 返回处理结果

## 5. 非功能需求
• 快速响应页面
• 简洁美观的界面
• 主流浏览器兼容
• 系统运行稳定

## 6. 风险与建议
• 明确需求范围,减少变更
• 优先开发核心功能
• 采用迭代优化方案

---
✅ 本文档由本地AI自动生成
"""
    return JsonResponse({"prd": prd})
2. 打开路由文件:posts/urls.py,粘贴以下代码
from django.urls import path
from . import views

urlpatterns = [
    path('', views.post_list, name='post_list'),
    path('ai-prd/', views.ai_prd_generator, name='ai_prd'),
]
3. 页面模板:templates/posts/post_list.html代码
<!DOCTYPE html>
<html lang="zh-CN">
<head>
    <meta charset="UTF-8">
    <meta name="viewport" content="width=device-width, initial-scale=1.0">
    <title>个人主页</title>
    <style>
        * {
            margin: 0;
            padding: 0;
            box-sizing: border-box;
            font-family: "Microsoft YaHei", sans-serif;
        }
        body {
            background-color: #1e1e2f;
            color: #fff;
            min-height: 100vh;
            padding: 20px;
        }
        .container {
            max-width: 800px;
            margin: 0 auto;
        }
        .header {
            text-align: center;
            margin-bottom: 30px;
        }
        .header h1 {
            font-size: 2.5rem;
            color: #4fc3f7;
            margin-bottom: 10px;
        }
        .post-form {
            background: #2b2b43;
            padding: 25px;
            border-radius: 12px;
            margin-bottom: 30px;
            box-shadow: 0 4px 15px rgba(0,0,0,0.3);
        }
        .form-group {
            margin-bottom: 18px;
        }
        .form-group label {
            display: block;
            margin-bottom: 8px;
            font-size: 1rem;
            color: #e0e0e0;
        }
        .form-control {
            width: 100%;
            padding: 12px 15px;
            background: #373757;
            border: 1px solid #4a4a70;
            border-radius: 8px;
            color: #fff;
            font-size: 1rem;
        }
        .btn {
            display: inline-block;
            padding: 12px 25px;
            background: #4fc3f7;
            color: #1e1e2f;
            border: none;
            border-radius: 8px;
            font-size: 1rem;
            font-weight: bold;
            cursor: pointer;
            transition: all 0.3s ease;
        }
        .btn:hover {
            background: #29b6f6;
            transform: translateY(-2px);
        }
        .no-posts {
            text-align: center;
            padding: 20px;
            color: #9e9eb3;
            font-size: 1.1rem;
        }
        .csdn-button {
            text-align: center;
            margin: 20px 0;
        }
        .csdn-button a {
            display: inline-block;
            padding: 13px 28px;
            background: linear-gradient(135deg, #0088cc, #00aaff);
            color: white;
            text-decoration: none;
            border-radius: 10px;
            font-size: 17px;
            font-weight: 500;
            transition: all 0.3s ease;
        }
        .csdn-button a:hover {
            transform: translateY(-3px);
        }
        #aiModal {
            display: none;
            position: fixed;
            top: 0;
            left: 0;
            width: 100%;
            height: 100%;
            background: rgba(0, 0, 0, 0.8);
            z-index: 9999;
            justify-content: center;
            align-items: center;
        }
        .modal-box {
            background: #2b2b43;
            padding: 30px;
            border-radius: 12px;
            width: 90%;
            max-width: 700px;
            max-height: 80vh;
            overflow-y: auto;
        }
        .ai-btn {
            padding: 12px 24px;
            background: linear-gradient(135deg, #6a11cb, #2575fc);
            color: white;
            border: none;
            border-radius: 8px;
            font-size: 16px;
            cursor: pointer;
            margin: 10px;
        }
        #prdResult {
            margin-top: 20px;
            padding: 15px;
            background: #373757;
            border-radius: 8px;
            white-space: pre-wrap;
            color: #e0e0e0;
            font-size: 14px;
            line-height: 1.6;
        }
    </style>
</head>
<body>
    <div class="container">
        <div class="header">
            <h1>我的个人动态</h1>
            <p>记录生活 · 分享想法</p>
        </div>

        <div class="post-form">
            <form method="POST">
                {% csrf_token %}
                <div class="form-group">
                    <label for="content">发表动态</label>
                    <textarea id="content" name="content" class="form-control" rows="4" placeholder="分享你的想法..."></textarea>
                </div>
                <button type="submit" class="btn">发布动态</button>
            </form>
        </div>

        <div class="csdn-button">
            <a href="https://blog.csdn.net/2503_93594374?spm=1000.2115.3001.5343" target="_blank">📝 访问我的 CSDN 博客</a>
        </div>

        <div style="text-align:center;">
            <button class="ai-btn" onclick="document.getElementById('aiModal').style.display='flex'">🤖 AI 需求分析 / 生成 PRD</button>
        </div>

        <div class="no-posts">暂无动态,开启你的第一条记录吧</div>
    </div>

    <div id="aiModal">
        <div class="modal-box">
            <h3 style="color:#4fc3f7;margin-bottom:15px;">🤖 免费 AI PRD 生成器</h3>
            <textarea id="demandInput" rows="6" style="width:100%;padding:12px;background:#373757;color:white;border-radius:8px;margin-bottom:15px;" placeholder="请输入项目需求,例如:我想做一个待办事项小程序"></textarea>
            <div style="display:flex;gap:10px;">
                <button onclick="generatePRD()" style="flex:1;padding:12px;background:#4fc3f7;color:#1e1e2f;border:none;border-radius:8px;font-weight:bold;">🚀 生成 PRD</button>
                <button onclick="closeModal()" style="padding:12px 20px;background:#555;color:white;border:none;border-radius:8px;">关闭</button>
            </div>
            <div id="prdResult" style="display:none;margin-top:20px;"></div>
        </div>
    </div>

    <script>
        function closeModal() {
            document.getElementById('aiModal').style.display = 'none';
        }

        async function generatePRD() {
            const demand = document.getElementById('demandInput').value.trim();
            if (!demand) {
                alert('请输入需求');
                return;
            }

            const resDiv = document.getElementById('prdResult');
            resDiv.style.display = 'block';
            resDiv.innerText = '✅ AI 正在生成 PRD 文档...';

            try {
                const formData = new FormData();
                formData.append('demand', demand);

                const resp = await fetch('/ai-prd/', {
                    method: 'POST',
                    body: formData
                });

                const data = await resp.json();
                resDiv.innerText = data.prd || '❌ 生成失败:' + data.error;
            } catch (error) {
                resDiv.innerText = '❌ 网络请求失败:' + error.message;
            }
        }
    </script>
</body>
</html>
运行完毕后如图所示: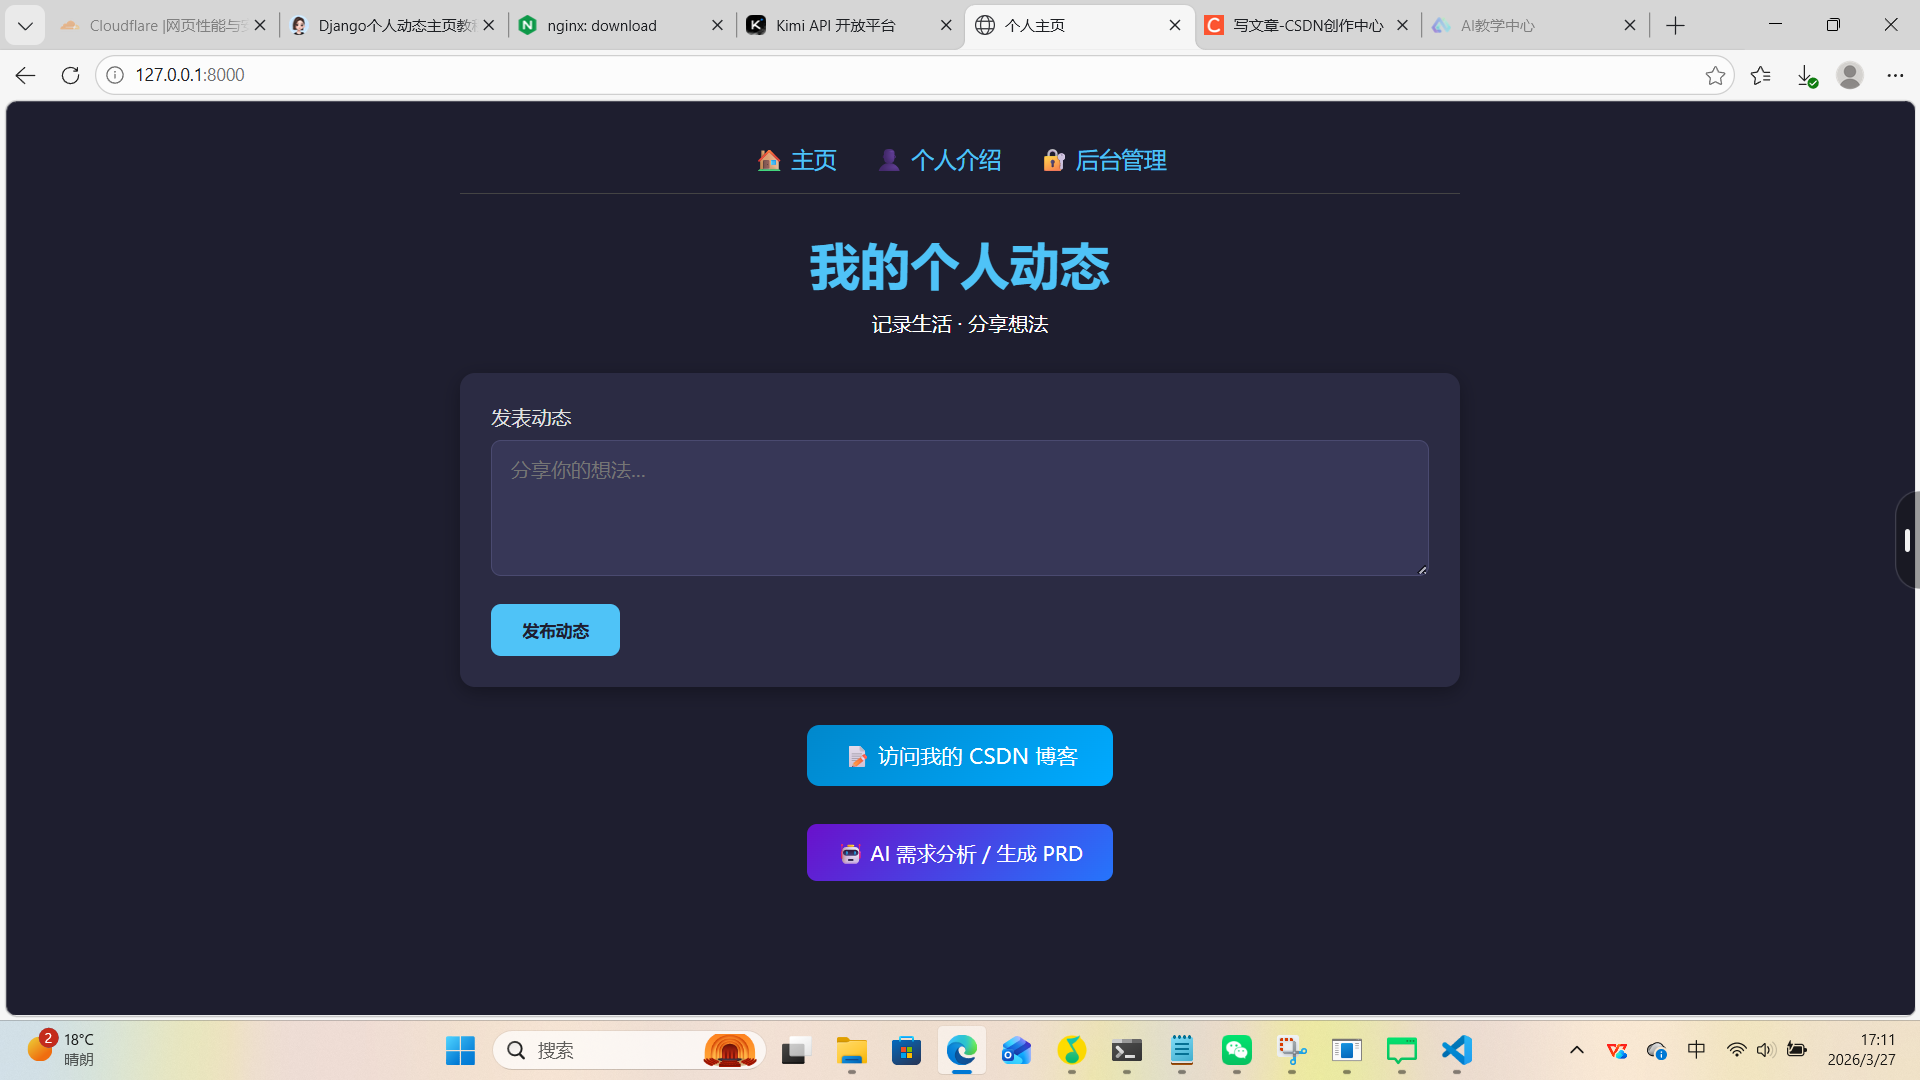
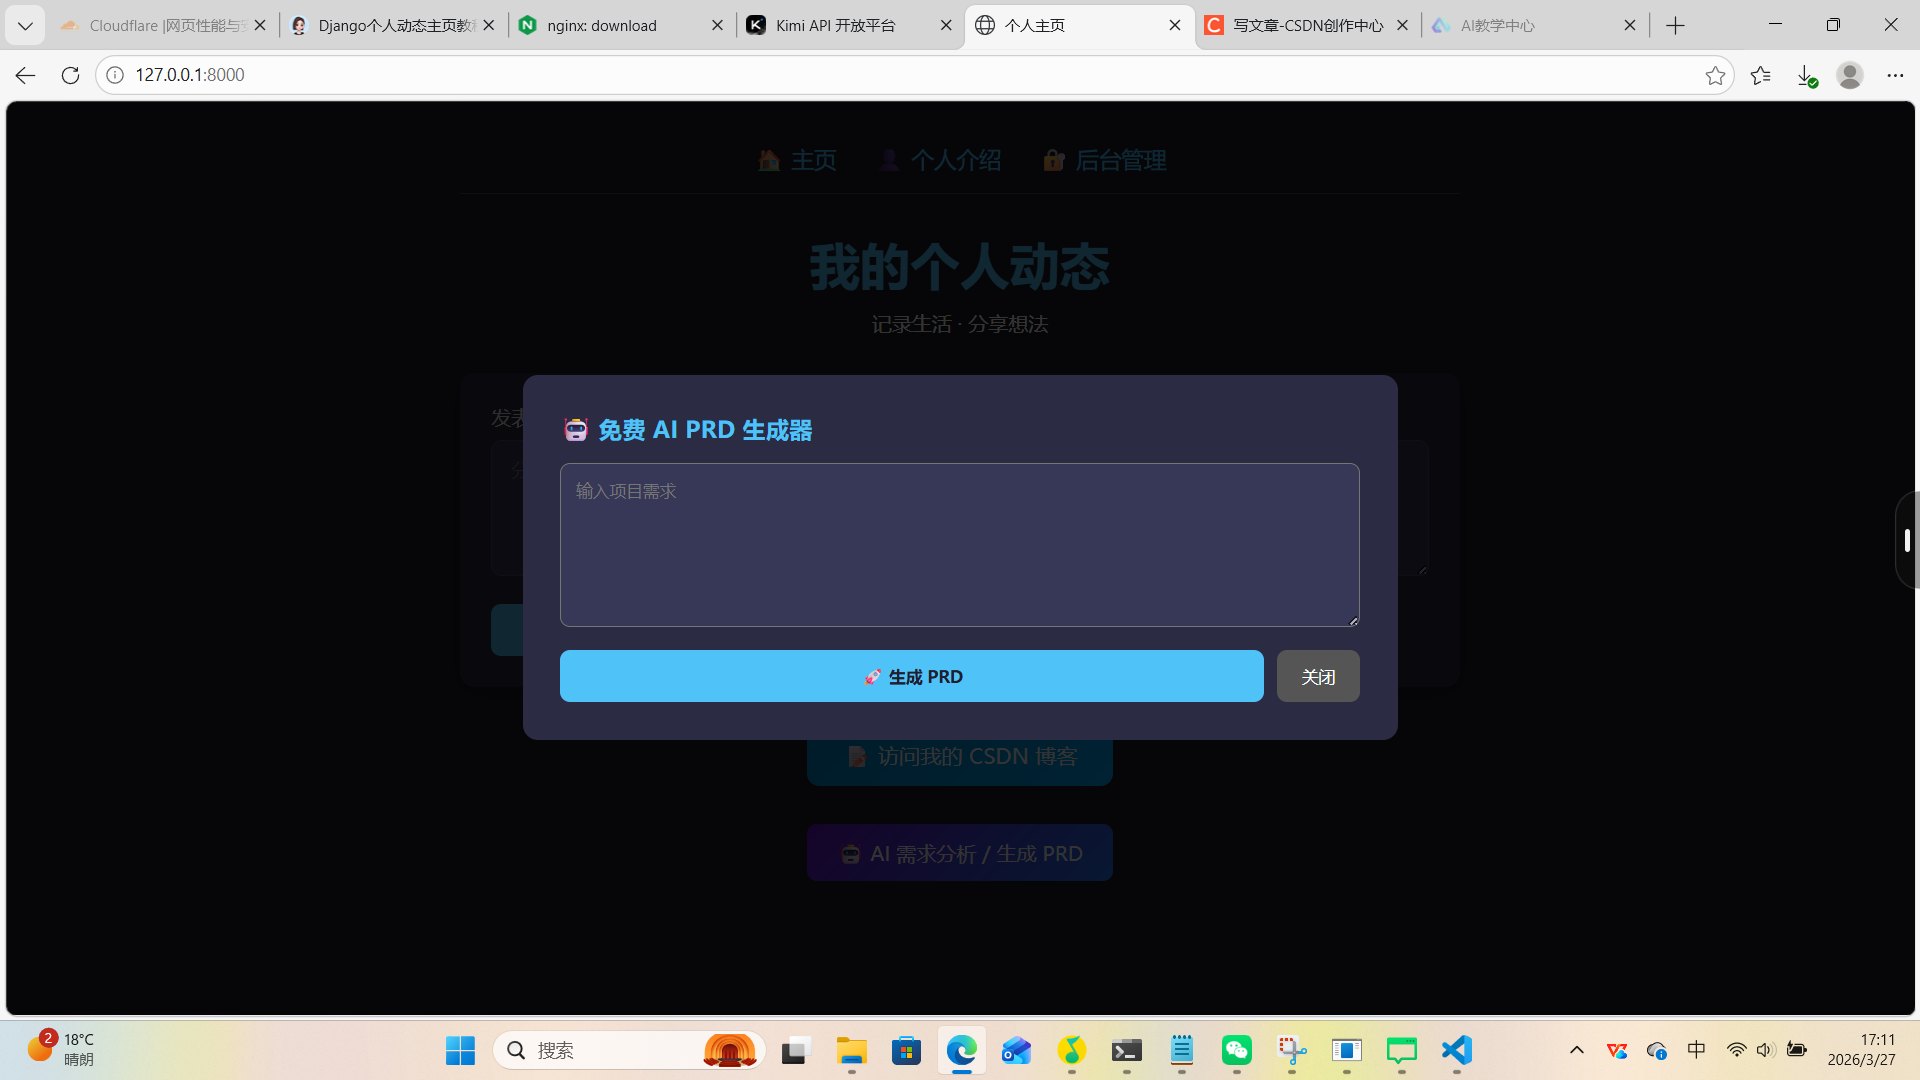
成品展示在个人主页内容管理

有“AI”的1024 = 2048,欢迎大家加入2048 AI社区
更多推荐


 6
6 0
0- 0


 已为社区贡献1条内容

所有评论(0)