搭建3D 宇宙风个人网站:从Vibe Coding开发到 GitHub Pages 部署全流程
作为一名 AI 产品工程师,我基于Kimi Cursor和GitHub 完成了个人作品集网站的开发与部署,网站融合深空科技风 + 3D 视觉效果,核心包含主页(index.html)和学习笔记页(notes.html)。本文完整梳理从本地文件准备到 GitHub Pages 上线的全流程,步骤可直接复刻。
作为一名 AI 产品工程师,我基于Kimi Cursor和GitHub 完成了个人作品集网站的开发与部署,网站融合深空科技风 + 3D 视觉效果,核心包含主页(index.html)和学习笔记页(notes.html)。本文完整梳理从本地文件准备到 GitHub Pages 上线的全流程,步骤可直接复刻。
成果展示:
个人网站链接:
https://vienne53.github.io/vienne-ai-site/![]() https://vienne53.github.io/vienne-ai-site/
https://vienne53.github.io/vienne-ai-site/
GitHub项目链接:
一、项目背景与目标
1. 核心定位
打造融合工程背景与 AI Agent 落地实践的个人品牌网站,包含:
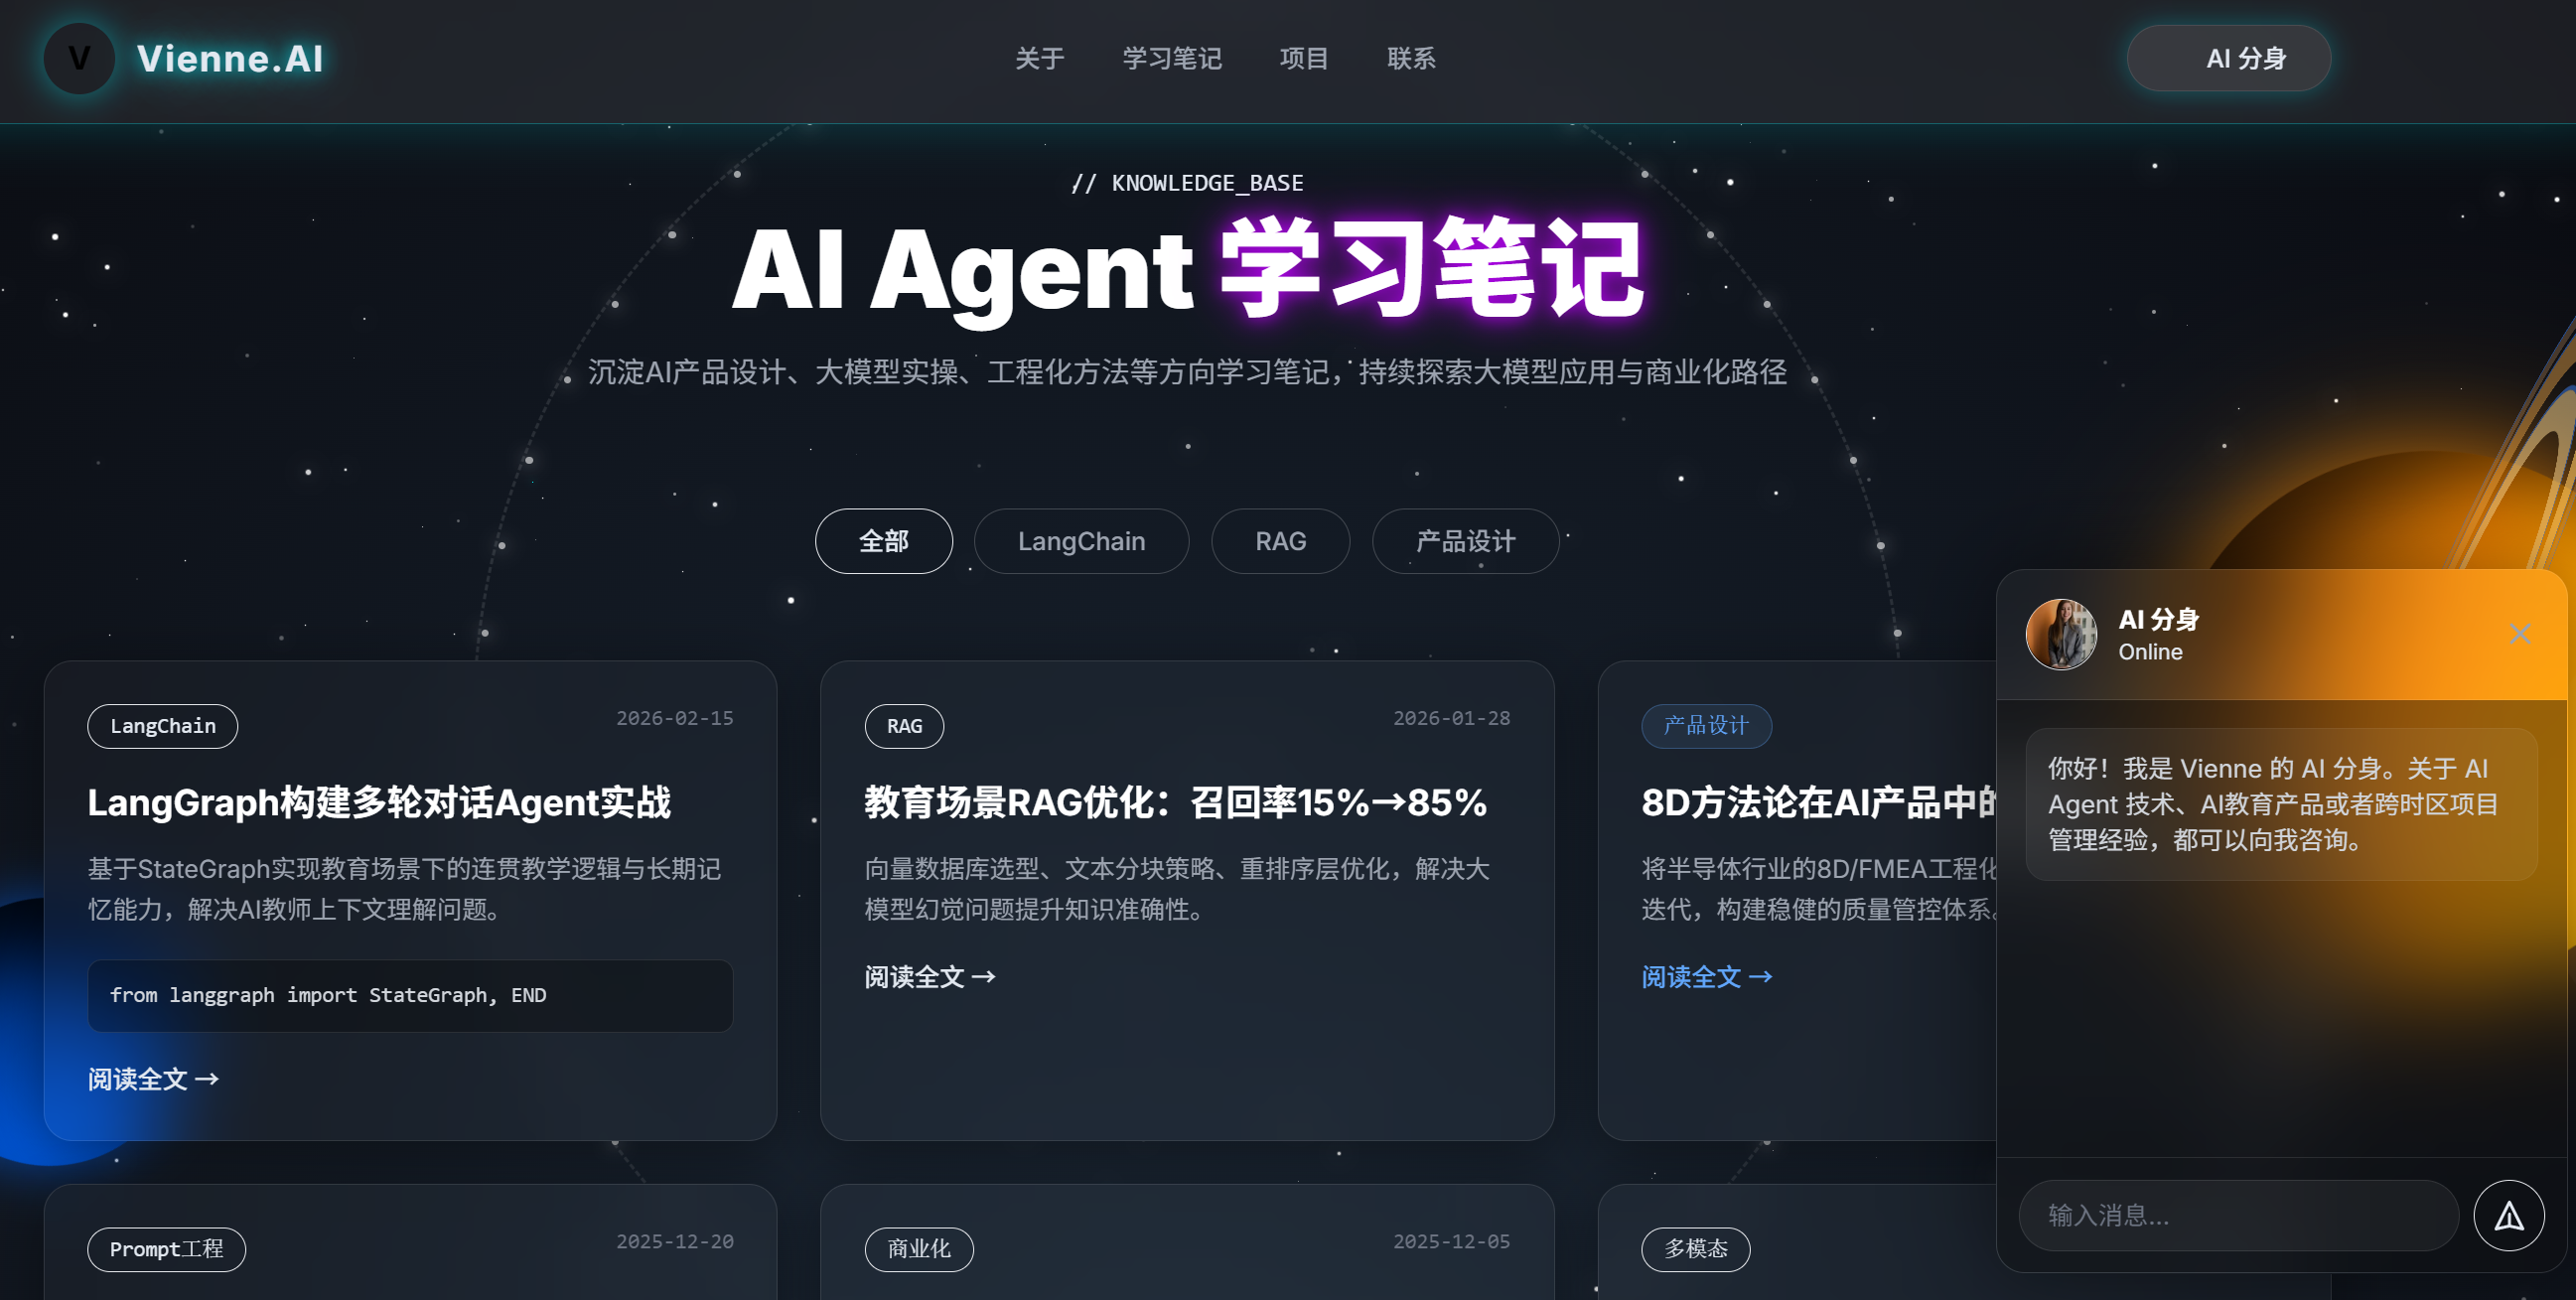
- 3D 沉浸式宇宙风视觉设计(土星旋转效果 + 霓虹光效 + 玻璃拟态)
- 个人作品集展示(AI Agent 项目)
- 可跳转的技术学习笔记页面
- 全链路可点击的联系方式(电话、微信、GitHub 等)
2. 技术栈
- HTML5 + Tailwind CSS(响应式布局 / 视觉风格)
- JavaScript(3D 动画 / 交互效果)
- GitHub Pages(静态部署)
二、完整部署流程
步骤 1:准备本地文件
1.1 建立本地目录结构
创建本地文件夹:D:\vienne-site,确保包含以下两个核心文件:
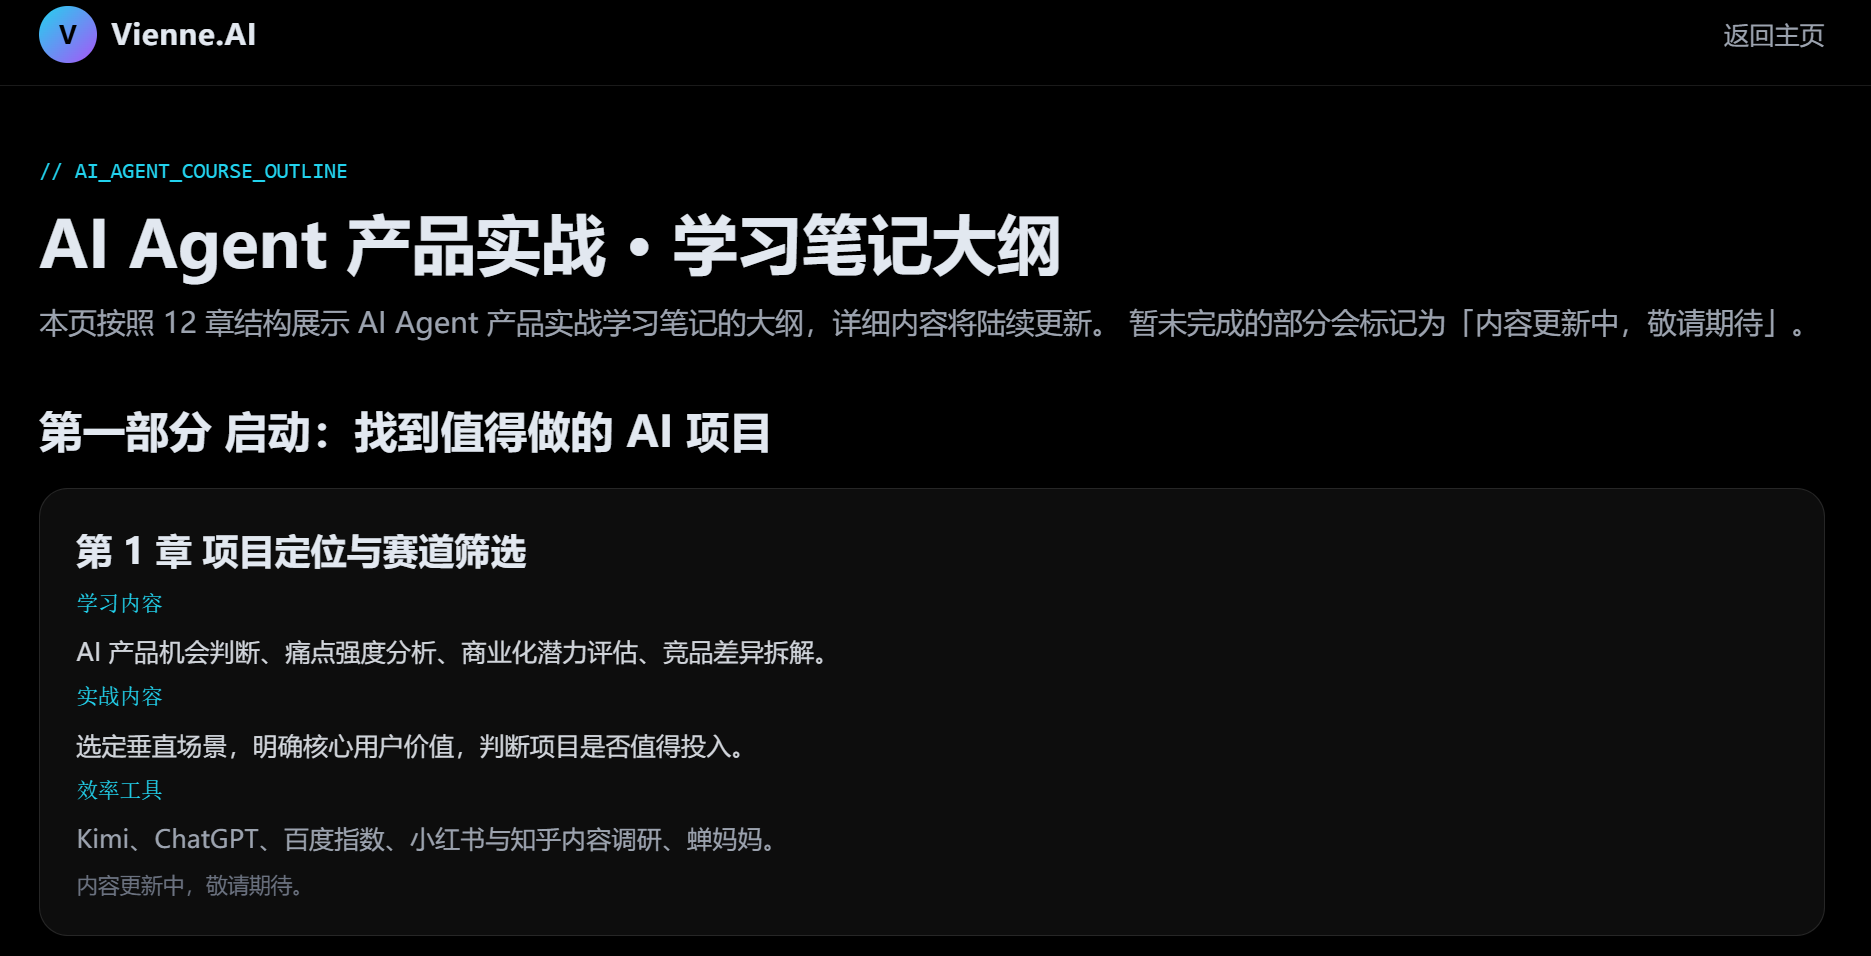
index.html:3D 宇宙风主页(含导航、作品集、联系方式)notes.html:AI Agent 学习笔记大纲页
1.2 核心文件基础规范
index.html:已集成 3D 土星旋转、霓虹光效、玻璃拟态导航栏notes.html:基础结构见步骤 5,后续可填充 AI Agent 教程内容
步骤 2:上传文件到 GitHub 仓库
2.1 进入目标仓库
打开仓库地址:https://github.com/vienne53/vienne-ai-site
2.2 上传本地文件
- 点击仓库右上角绿色按钮
Add file→ 选择Upload files; - 从
D:\vienne-site选中index.html和notes.html上传; - 页面底部「Commit changes」区域配置:
- 提交描述:
upload index & notes - 保持「Commit directly to the main branch」选中
- 点击
Commit changes完成上传
- 提交描述:
2.3 验证上传结果
回到仓库首页,确认文件列表包含:README.md、index.html、notes.html。
步骤 3:配置 GitHub Pages
3.1 进入 Pages 设置
仓库页面顶部点击 Settings → 左侧菜单选择 Pages。
3.2 部署参数配置
在「Build and deployment」区域设置:
Source:选择Deploy from a branchBranch:选择main,Folder:选择/(root)
若已为该配置,无需操作(无 Save 按钮属正常)
3.3 确认访问地址
GitHub Pages 访问地址:https://vienne53.github.io/vienne-ai-site/
步骤 4:配置页面跳转链接
4.1 编辑 index.html 文件
- 仓库首页点击进入
index.html→ 右上角铅笔图标Edit this file;
4.2 修改导航栏跳转
找到导航栏代码段,将「学习笔记」的href改为 notes.html:
<div class="hidden md:flex gap-8 font-medium text-sm text-gray-400">
    <a href="#about" class="hover:text-neon-cyan transition-colors duration-300">关于</a>
    <a href="notes.html" class="hover:text-neon-cyan transition-colors duration-300 text-neon-cyan">学习笔记</a>
    <a href="#projects" class="hover:text-neon-cyan transition-colors duration-300">项目</a>
    <a href="#contact" class="hover:text-neon-cyan transition-colors duration-300">联系</a>
</div>
4.3 修改按钮跳转
找到主页按钮区域代码,将「学习笔记」按钮href改为 notes.html:
<div class="flex gap-4 pt-4">
    <a href="notes.html" class="group px-8 py-4 rounded-full bg-gradient-to-r from-neon-cyan to-neon-blue text-white font-bold drop-shadow-[0_0_6px_rgba(0,0,0,0.8)] hover:shadow-[0_0_30px_rgba(0,243,255,0.5)] transition-all hover:scale-105 flex items-center gap-2">
        <span>🚀</span>
        学习笔记
    </a>
    <a href="#projects" class="px-8 py-4 rounded-full glass border border-white/20 text-white font-medium hover:border-neon-cyan/50 transition-all hover:shadow-[0_0_20px_rgba(0,243,255,0.3)]">
        查看项目
    </a>
</div>
4.4 提交修改
页面底部「Commit changes」区域填写描述:fix notes link → 点击 Commit changes。
步骤 5:完善 notes.html 基础结构
若仓库中notes.html内容不全,补充以下基础结构(保证文件可独立访问):
<!DOCTYPE html>
<html lang="zh-CN">
<head>
  <meta charset="UTF-8" />
  <title>AI Agent 实战 · 学习笔记大纲</title>
  <meta name="viewport" content="width=device-width, initial-scale=1.0" />
  <script src="https://cdn.tailwindcss.com"></script>
</head>
<body class="bg-black text-slate-200 font-sans antialiased">
  <!-- 顶部导航:匹配主页视觉风格 -->
  <nav class="w-full border-b border-white/10 bg-black/70 backdrop-blur fixed top-0 z-40">
    <div class="max-w-5xl mx-auto px-4 py-3 flex items-center justify-between">
      <a href="index.html#about" class="flex items-center gap-2">
        <div class="w-8 h-8 rounded-full bg-gradient-to-br from-cyan-400 to-purple-500 flex items-center justify-center font-bold text-black text-sm">
          V
        </div>
        <span class="font-bold tracking-wide">Vienne.AI</span>
      </a>
      <a href="index.html#learning" class="text-sm text-gray-400 hover:text-cyan-400 transition">
        返回主页
      </a>
    </div>
  </nav>

  <!-- 笔记内容区:后续填充AI Agent教程 -->
  <main class="max-w-5xl mx-auto px-4 pt-24 pb-16 space-y-8">
    <!-- 标题区 -->
    <div class="text-center space-y-4">
      <h1 class="text-4xl font-bold bg-clip-text text-transparent bg-gradient-to-r from-cyan-400 to-blue-500">AI Agent 实战学习笔记</h1>
      <p class="text-gray-400">从0到1掌握AI Agent搭建与落地</p>
    </div>

    <!-- 章节大纲(示例) -->
    <section class="space-y-4 border-l-4 border-cyan-400 pl-4">
      <h2 class="text-2xl font-semibold">一、AI Agent基础认知</h2>
      <p>核心概念、技术架构、应用场景梳理</p>
      <p class="text-gray-500 italic">内容更新中,敬请期待。</p>
    </section>

    <section class="space-y-4 border-l-4 border-cyan-400 pl-4">
      <h2 class="text-2xl font-semibold">二、实战项目:智能问答Agent</h2>
      <p>环境搭建、核心代码、部署上线全流程</p>
      <p class="text-gray-500 italic">内容更新中,敬请期待。</p>
    </section>
  </main>
</body>
</html>
步骤 6:解决 404 问题(手动触发重新部署)
若修改后notes.html仍显示 404,强制触发 Pages 重建:
- 再次编辑
index.html,任意位置添加注释:<!-- trigger github pages rebuild -->; - 提交修改(Commit changes);
- 等待 1-2 分钟,访问以下地址验证:
三、验证成功标准
- 主页正常显示 3D 宇宙风视觉效果,导航栏 / 按钮交互正常;
- 点击「学习笔记」可无缝跳转到 notes.html;
- 直接访问 notes.html 地址可打开,顶部导航可返回主页;
- 全页面适配移动端 / PC 端,无样式错乱。
四、后续迭代计划
- 在
notes.html中填充 AI Agent 实战教程(代码 + 图文 + 案例); - 优化 3D 土星旋转动画的流畅度,增加星空背景动态效果;
- 补充作品集模块,上线 AI Agent 落地案例展示;
- 完善联系方式的一键交互(微信复制、电话拨号、邮箱跳转)。


有“AI”的1024 = 2048,欢迎大家加入2048 AI社区
更多推荐

 8
8 0
0- 0


 已为社区贡献2条内容

所有评论(0)