SpringAi快速使用
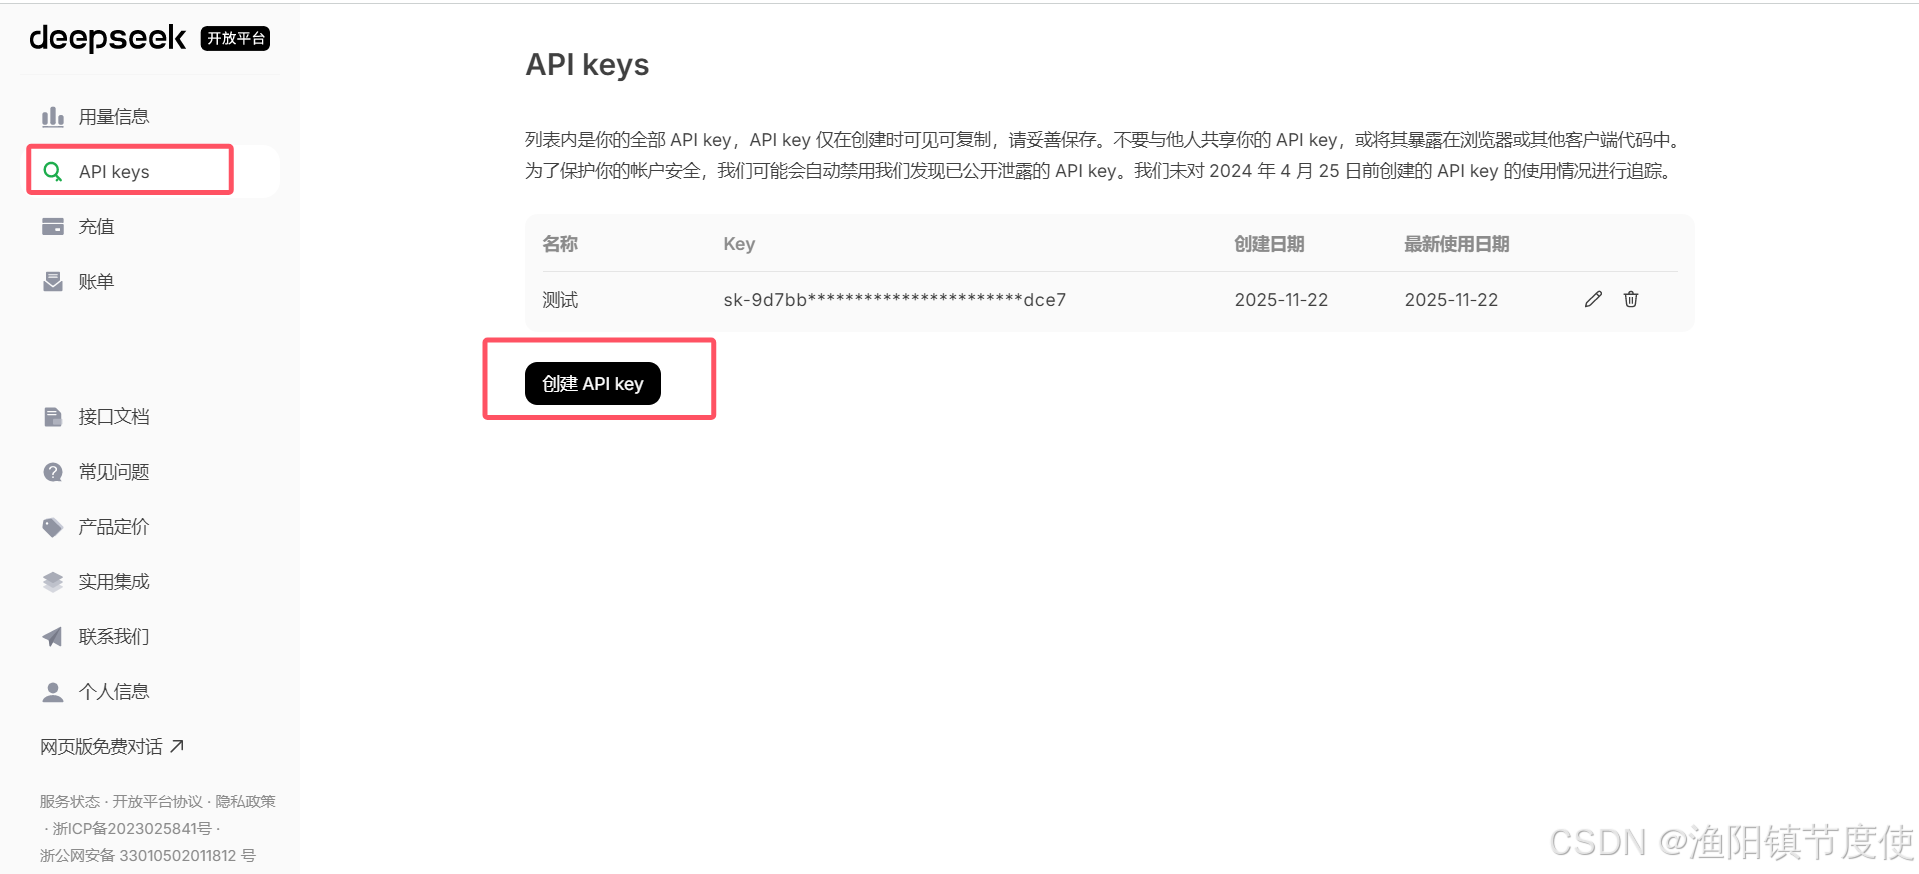
接入deepseek1.依赖获取deepseek api-key● API Key:需从 DeepSeek 创建并获取 API 密钥:https://platform.deepseek.com/api_keys3.配置4.4. 测试spring-ai-starter-model-deepseek 会为你增加自动配置类, 其中DeepSeekChatModel这个就是专门负责智能对话的。option
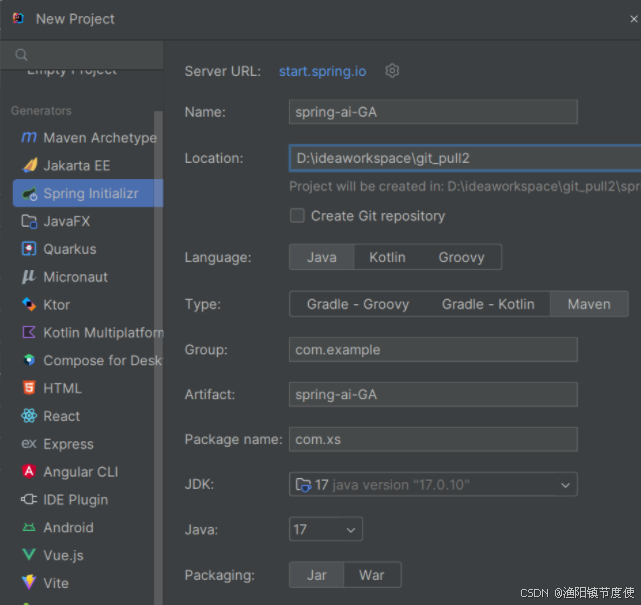
- 创建项目
<?xml version="1.0" encoding="UTF-8"?>
<project xmlns="http://maven.apache.org/POM/4.0.0" xmlns:xsi="http://www.w3.org/2001/XMLSchema-instance"
         xsi:schemaLocation="http://maven.apache.org/POM/4.0.0 https://maven.apache.org/xsd/maven-4.0.0.xsd">
    <modelVersion>4.0.0</modelVersion>
    <parent>
        <groupId>org.springframework.boot</groupId>
        <artifactId>spring-boot-starter-parent</artifactId>
        <version>3.4.5</version>
        <relativePath/> <!-- lookup parent from repository -->
    </parent>
    <groupId>com.xs</groupId>
    <artifactId>spring-ai-GA</artifactId>
    <version>0.0.1-SNAPSHOT</version>
    <name>spring-ai-GA</name>
    <description>公众号:程序员徐庶</description>
    <properties>
        <java.version>17</java.version>
        <spring-ai.version>1.0.0</spring-ai.version>
    </properties>
    <dependencies>
        <dependency>
            <groupId>org.springframework.boot</groupId>
            <artifactId>spring-boot-starter-web</artifactId>
        </dependency>

        <dependency>
            <groupId>org.springframework.boot</groupId>
            <artifactId>spring-boot-starter-test</artifactId>
            <scope>test</scope>
        </dependency>
    </dependencies>
    <dependencyManagement>
        <dependencies>
            <dependency>
                <groupId>org.springframework.ai</groupId>
                <artifactId>spring-ai-bom</artifactId>
                <version>${spring-ai.version}</version>
                <type>pom</type>
                <scope>import</scope>
            </dependency>
        </dependencies>
    </dependencyManagement>

    <build>
        <plugins>
            <plugin>
                <groupId>org.springframework.boot</groupId>
                <artifactId>spring-boot-maven-plugin</artifactId>
            </plugin>
        </plugins>
    </build>

</project>
接入deepseek
1.依赖
        <dependency>
            <groupId>org.springframework.ai</groupId>
            <artifactId>spring-ai-starter-model-deepseek</artifactId>
        </dependency>
- 获取deepseek api-key
● API Key:需从 DeepSeek 创建并获取 API 密钥:https://platform.deepseek.com/api_keys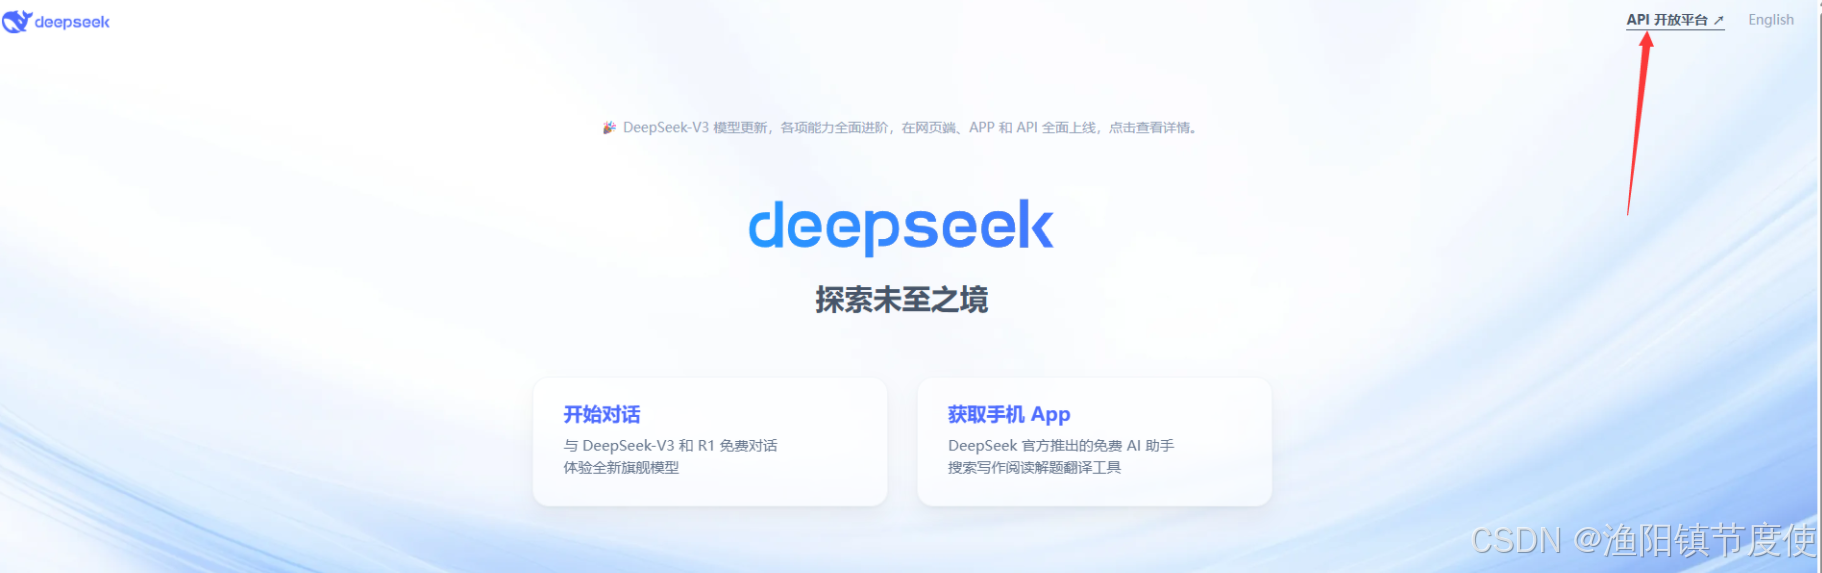
3.配置
spring:
  ai:
    deepseek:
      api-key: ${DEEP_SEEK_KEY}
      chat:
        options:
          model: deepseek-chat
4.4. 测试
spring-ai-starter-model-deepseek 会为你增加自动配置类, 其中DeepSeekChatModel这个就是专门负责智能对话的。
package com.xs.springaiga;

import org.junit.jupiter.api.Test;
import org.springframework.ai.deepseek.DeepSeekChatModel;
import org.springframework.beans.factory.annotation.Autowired;
import org.springframework.boot.test.context.SpringBootTest;

@SpringBootTest
public class DeepseelTest {


    @Test
    public void testChat(@Autowired
                         DeepSeekChatModel chatModel) {
        String call = chatModel.call("你是谁");
        System.out.println(call);
    }
}

流式对话
 @Test
    public void testChatStream (@Autowired DeepSeekChatModel chatModel){
        Flux<String> stream = chatModel.stream("你是谁");
        //阻塞输出
        stream.toIterable().forEach(System.out::println);
    }
options配置选项
temperature(温度)
0-2 浮点数值数值越高 更有创造性 热情数值越低 保守
@Test
public void testChatOptions(@Autowired
                            DeepSeekChatModel chatModel) {
    DeepSeekChatOptions options = DeepSeekChatOptions.builder().temperature(1.9d).build();
    ChatResponse res = chatModel.call(new Prompt("请写一句诗描述清晨。", options));
    System.out.println(res.getResult().getOutput().getText());
}
也可以通过配置文件配置
spring.ai.deepseek.chat.options.temperature=0.8
temperature:0.2 规规矩矩,像是被应试教育出来的老实学生没有创造力
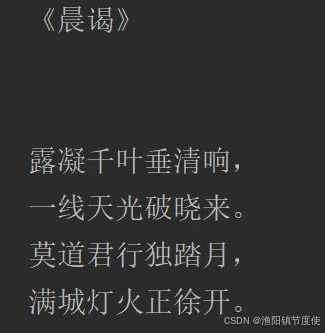
temperature:1.9 可以看出来表现欲更强, 像是一个在领导面前想要表现的你。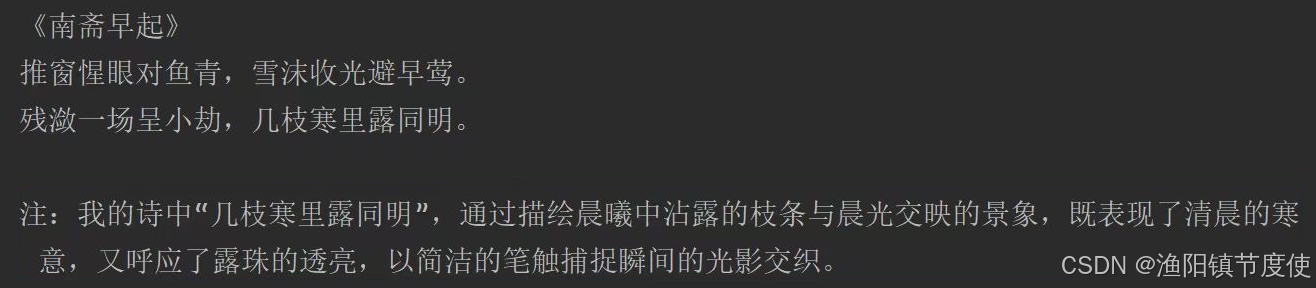
也可以通过提示词降低他的主观臆想:
● 只引用可靠来源中的信息,不做任何假设或扩展描述。
● 请只基于已知事实回答,不要主观臆想或添加额外内容。
● 请简明、客观地给出答案,不要进行修饰或补充未经请求的信息。
建议
| temperature范围 | 建议业务场景 | 输出风格 | 说明/应用举例 |
|---|---|---|---|
| 0.0 ~ 0.2 | 严谨问答、代码补全、数学答题 | 严格、确定、标准 | 法律/金融答题、接口返回模板、考试答卷等 |
| 0.3 ~ 0.6 | 聊天机器人、日常摘要、辅助写作 | 稍有变化、较稳妥 | 公众号摘要、普通对话、邮件生成等 |
| 0.7 ~ 1.0 | 创作内容、广告文案、标题生成 | 丰富、有创意、灵活 | 诗歌、短文案、趣味对话、产品描述等 |
| 1.1 ~ 1.5 | 脑洞风格、头脑风暴、灵感碰撞场景 | 大开脑洞、变化极强 | 故事创作、异想天开的推荐语、多样化内容 |
说明:
● 温度越低,输出越收敛和中规中矩;
● 温度越高,输出越多变、富有惊喜但有风险;
● 实战用法一般建议选 0.5~0.8 作为日常生产起点,需要根据业务不断测试调整。
maxTokens
默认低 tokenmaxTokens:限制AI模型生成的最大token数(近似理解为字数上限)。
- 需要简洁回复、打分、列表、短摘要等,建议小值(如10~50)。
- 防止用户跑长对话导致无关内容或花费过多token费用。
- 如果遇到生成内容经常被截断,可以适当配置更大maxTokens。
stop
截断你不想输出的内容 比如:
spring:
  ai:
    deepseek:
      api-key: ${DEEP_SEEK_KEY}
      chat:
        options:
          model: deepseek-chat
          max-tokens: 20
          stop:
              - "\n"    #只想一行
              - "。"    #只想一句话
              - "政治"  #敏感词
              - "最后最总结一下"  #这种AI惯用的模板词, 减少AI词汇, 让文章更拟人
模型推理
设置深度思考, 思考的内容有个专业名词叫:Chain of Thought (CoT)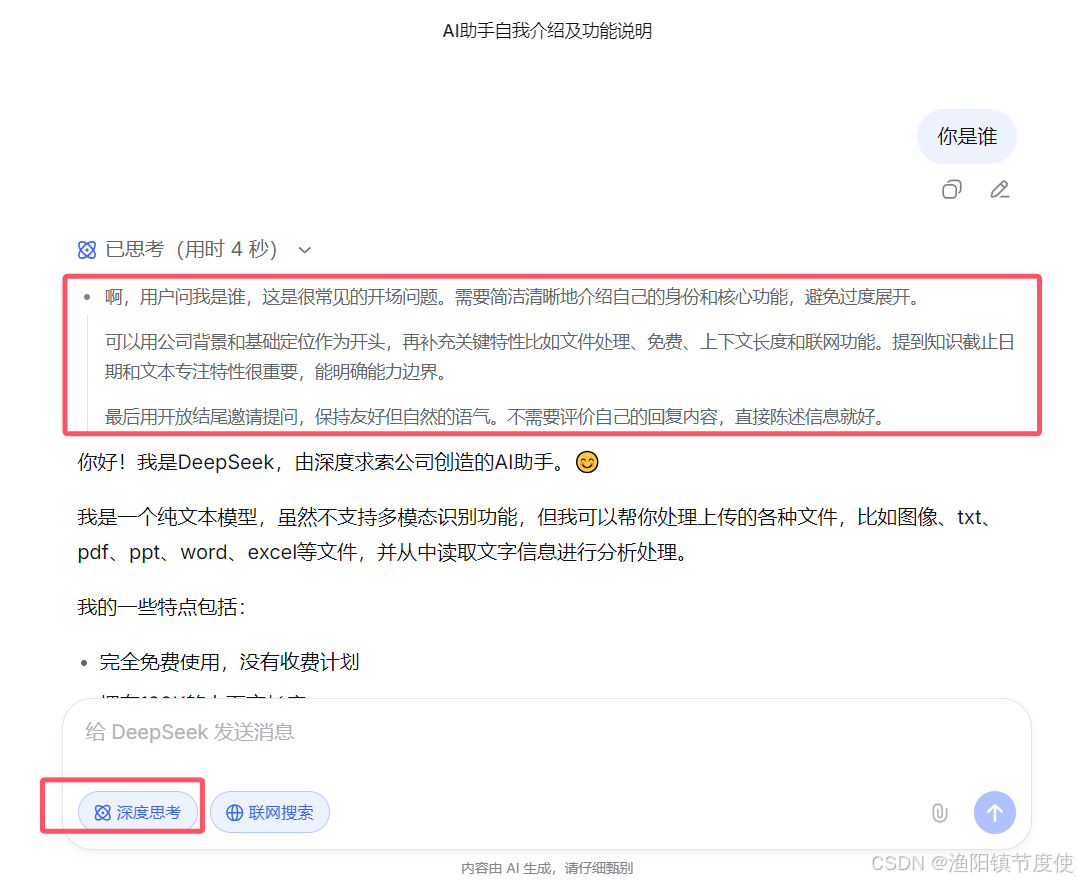
在deepseek中, deepseek-reasoner模型是深度思考模型:
deepseek-chat模型已全面升级为DeepSeek-V3,接口不变。通过指定model-'deepseek-chat'即可调用DeepSeek-V3。deepseek-reasoner是DeepSeek最新推出的推理模型DeepSeek-R1。通过指定model='deepseek-reasoner',即可调用DeepSeek-R1。
@Test
    public void deepSeekReasonerExample(@Autowired DeepSeekChatModel deepSeekChatModel) {
        DeepSeekChatOptions options = DeepSeekChatOptions.builder()
                .model("deepseek-reasoner").build();


        Prompt prompt = new Prompt("请写一句诗描述清晨。", options);
        ChatResponse res = deepSeekChatModel.call(prompt);

        DeepSeekAssistantMessage assistantMessage =  (DeepSeekAssistantMessage)res.getResult().getOutput();

        String reasoningContent = assistantMessage.getReasoningContent();
        String content = assistantMessage.getText();

        System.out.println(reasoningContent);
        System.out.println("--------------------------------------------");
        System.out.println(content);


    }


    @Test
    public void deepSeekReasonerStreamExample(@Autowired DeepSeekChatModel deepSeekChatModel) {
        DeepSeekChatOptions options = DeepSeekChatOptions.builder()
                .model("deepseek-reasoner").build();


        Prompt prompt = new Prompt("请写一句诗描述清晨。", options);
        Flux<ChatResponse> stream = deepSeekChatModel.stream(prompt);

        stream.toIterable().forEach(res -> {
            DeepSeekAssistantMessage assistantMessage =  (DeepSeekAssistantMessage)res.getResult().getOutput();
            String reasoningContent = assistantMessage.getReasoningContent();
            System.out.print(reasoningContent);
        });
        System.out.println("--------------------------------------------");
        stream.toIterable().forEach(res -> {
            DeepSeekAssistantMessage assistantMessage =  (DeepSeekAssistantMessage)res.getResult().getOutput();
            String content = assistantMessage.getText();
            System.out.print(content);
        });

    }
也可以在配置文件中配置
spring.ai.deepseek.chat.options.model= deepseek-reasoner
原理:
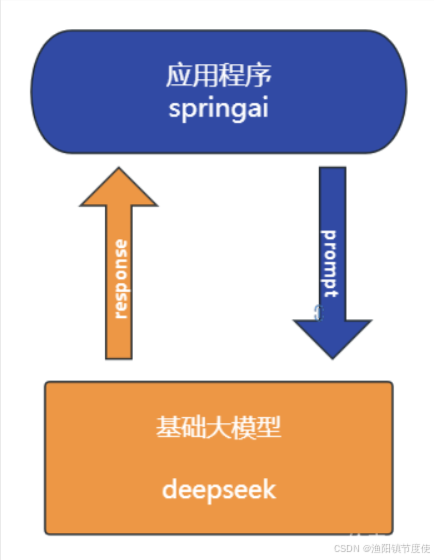
1.当调用cahtModel.call
default String call(String message) {
    Prompt prompt = new Prompt(new UserMessage(message));
    Generation generation = call(prompt).getResult();
    return (generation != null) ? generation.getOutput().getText() : "";
}
a. 首先会将提示词解析到Prompt对象中(用于远程请求的message)
2.调用deepseekModel#call—> internalCall方法
public ChatResponse internalCall(Prompt prompt, ChatResponse previousChatResponse) {

    // a
    ChatCompletionRequest request = createRequest(prompt, false);

    //..省略
    ResponseEntity<ChatCompletion> completionEntity = this.retryTemplate
    // b
    .execute(ctx -> this.deepSeekApi.chatCompletionEntity(request));

    var chatCompletion = completionEntity.getBody();
    //..省略
    ChatResponse chatResponse = new ChatResponse(generations,
                                                 from(completionEntity.getBody(), accumulatedUsage));

    observationContext.setResponse(chatResponse);

    return chatResponse;
    //.. 省略
    return response;
}
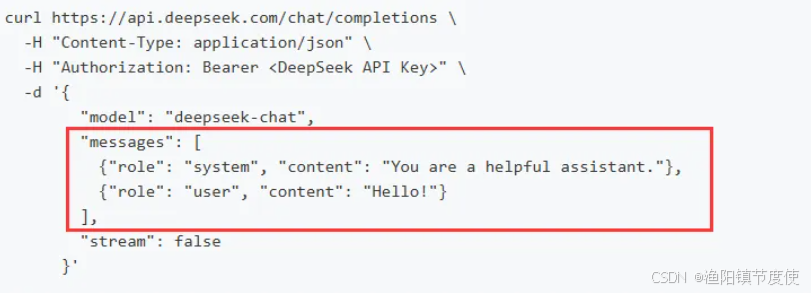
a.通过createRequest封装为远程请求所需的json对象
b.通过spring retry重试机制去远程请求
deepseekthis.deepSeekApi.chatCompletionEntity(request)
// 通过restClient 进行远程请求
public ResponseEntity<ChatCompletion> chatCompletionEntity(ChatCompletionRequest chatRequest) {

		return this.restClient.post()
			.uri(this.getEndpoint(chatRequest))
			.body(chatRequest)
			.retrieve()
			.toEntity(ChatCompletion.class);
	}
c.封装响应数据
接入阿里云百炼

阿里自己的团队维护spring-ai-alibaba. 但是也必须依赖spring-ai 。 好处是扩展度更高,坏处是必须是springai先出来, spring-ai-alibaba.延迟几天出来。
如果需要接入阿里的百炼平台, 就必须用该组件
使用
1.申请api-key
在调用前,需要开通模型服务并获取APIKey,再配置APIKey到环境变量。
2. 依赖
<dependencyManagement>
  <dependencies>
    <dependency>
      <groupId>com.alibaba.cloud.ai</groupId>
      <artifactId>spring-ai-alibaba-bom</artifactId>
      <version>1.0.0.2</version>
      <type>pom</type>
      <scope>import</scope>
    </dependency>
  </dependencies>
</dependencyManagement>

<dependencies>
  <dependency>
    <groupId>com.alibaba.cloud.ai</groupId>
    <artifactId>spring-ai-alibaba-starter-dashscope</artifactId>
  </dependency>
</dependencies>
2.配置
spring:
  ai:
    dashscope:
      api-key: ${AI_DASHSCOPE_API_KEY}
3.使用
@Test
    public void testQwen(@Autowired DashScopeChatModel dashScopeChatModel) {

        String content = dashScopeChatModel.call("你好你是谁");
        System.out.println(content);
    }
文生图
 @Test
    public void text2Img(
           @Autowired DashScopeImageModel imageModel) {
        DashScopeImageOptions imageOptions = DashScopeImageOptions.builder()
                .withModel("wanx2.1-t2i-turbo").build();

        ImageResponse imageResponse = imageModel.call(
                new ImagePrompt("程序员徐庶", imageOptions));
        String imageUrl = imageResponse.getResult().getOutput().getUrl();

        // 图片url
        System.out.println(imageUrl);

        // 图片base64
        // imageResponse.getResult().getOutput().getB64Json();

        /*
        按文件流相应
        InputStream in = url.openStream();

        response.setHeader("Content-Type", MediaType.IMAGE_PNG_VALUE);
        response.getOutputStream().write(in.readAllBytes());
        response.getOutputStream().flush();*/
    }
文生语音text2audio
 // https://bailian.console.aliyun.com/?spm=5176.29619931.J__Z58Z6CX7MY__Ll8p1ZOR.1.74cd59fcXOTaDL&tab=doc#/doc/?type=model&url=https%3A%2F%2Fhelp.aliyun.com%2Fdocument_detail%2F2842586.html&renderType=iframe
    @Test
    public void testText2Audio(@Autowired DashScopeSpeechSynthesisModel speechSynthesisModel) throws IOException {
        DashScopeSpeechSynthesisOptions options = DashScopeSpeechSynthesisOptions.builder()
                //.voice()   // 人声
                //.speed()    // 语速
                //.model()    // 模型
                //.responseFormat(DashScopeSpeechSynthesisApi.ResponseFormat.MP3)
                .build();

        SpeechSynthesisResponse response = speechSynthesisModel.call(
                new SpeechSynthesisPrompt("大家好, 我是人帅活好的徐庶。",options)
        );

        File file = new File( System.getProperty("user.dir") + "/output.mp3");
        try (FileOutputStream fos = new FileOutputStream(file)) {
            ByteBuffer byteBuffer = response.getResult().getOutput().getAudio();
            fos.write(byteBuffer.array());
        }
        catch (IOException e) {
            throw new IOException(e.getMessage());
        }
    }
语音翻译audio2text
   private static final String AUDIO_RESOURCES_URL = "https://dashscope.oss-cn-beijing.aliyuncs.com/samples/audio/paraformer/hello_world_female2.wav";


@Test
    public void testAudio2Text(
            @Autowired
            DashScopeAudioTranscriptionModel transcriptionModel
    ) throws MalformedURLException {
        DashScopeAudioTranscriptionOptions transcriptionOptions = DashScopeAudioTranscriptionOptions.builder()
                //.withModel()   模型
                .build();
        AudioTranscriptionPrompt prompt = new AudioTranscriptionPrompt(
                new UrlResource(AUDIO_RESOURCES_URL),
                transcriptionOptions
        );
        AudioTranscriptionResponse response = transcriptionModel.call(
                prompt
        );

        System.out.println(response.getResult().getOutput());

    }
多模态
图片 语音 视频 传给大模型 理解
@Test
    public void testMultimodal(@Autowired DashScopeChatModel dashScopeChatModel
    ) throws MalformedURLException {
        // flac、mp3、mp4、mpeg、mpga、m4a、ogg、wav 或 webm。
        var audioFile = new ClassPathResource("/files/xushu.png");

        Media media = new Media(MimeTypeUtils.IMAGE_JPEG, audioFile);
        DashScopeChatOptions options = DashScopeChatOptions.builder()
                .withMultiModel(true)
                .withModel("qwen-vl-max-latest").build();

        Prompt  prompt= Prompt.builder().chatOptions(options)
                .messages(UserMessage.builder().media(media)
                        .text("识别图片").build())
                .build();
        ChatResponse response = dashScopeChatModel.call(prompt);

        System.out.println(response.getResult().getOutput().getText());
    }
文生视频(更多功能)
<dependency>
    <groupId>com.alibaba</groupId>
    <artifactId>dashscope-sdk-java</artifactId>
    <!-- 请将 'the-latest-version' 替换为最新版本号:https://mvnrepository.com/artifact/com.alibaba/dashscope-sdk-java -->
    <version>the-latest-version</version>
</dependency>
@Test
    public void text2Video() throws ApiException, NoApiKeyException, InputRequiredException {
        VideoSynthesis vs = new VideoSynthesis();
        VideoSynthesisParam param =
                VideoSynthesisParam.builder()
                        .model("wanx2.1-t2v-turbo")
                        .prompt("一只小猫在月光下奔跑")
                        .size("1280*720")
                        .apiKey(System.getenv("ALI_AI_KEY"))
                        .build();
        System.out.println("please wait...");
        VideoSynthesisResult result = vs.call(param);
        System.out.println(result.getOutput().getVideoUrl());
    }
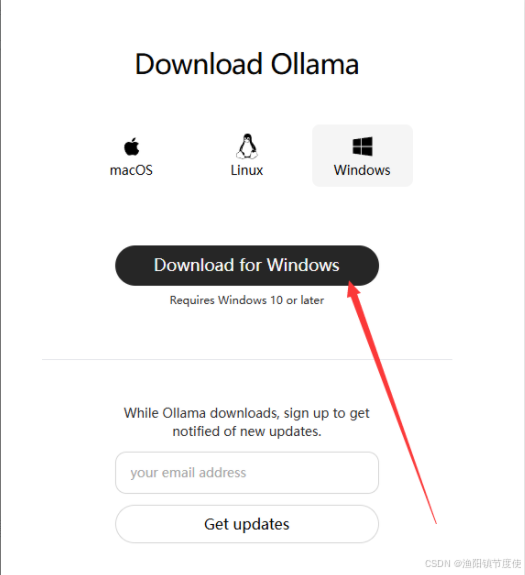
接入ollama本地模型
ollama是大语言模型的运行环境,支持将开源的大语言模型以离线的方式部署到本地,进行私有化部署。这也是企业中常用的方案,因为本地化部署能保证企业级的数据安全,降低企业使用成本。
1. 本地大模型安装
- https://ollama.com/download
- 点击下载, 一直下一步即可非常简单
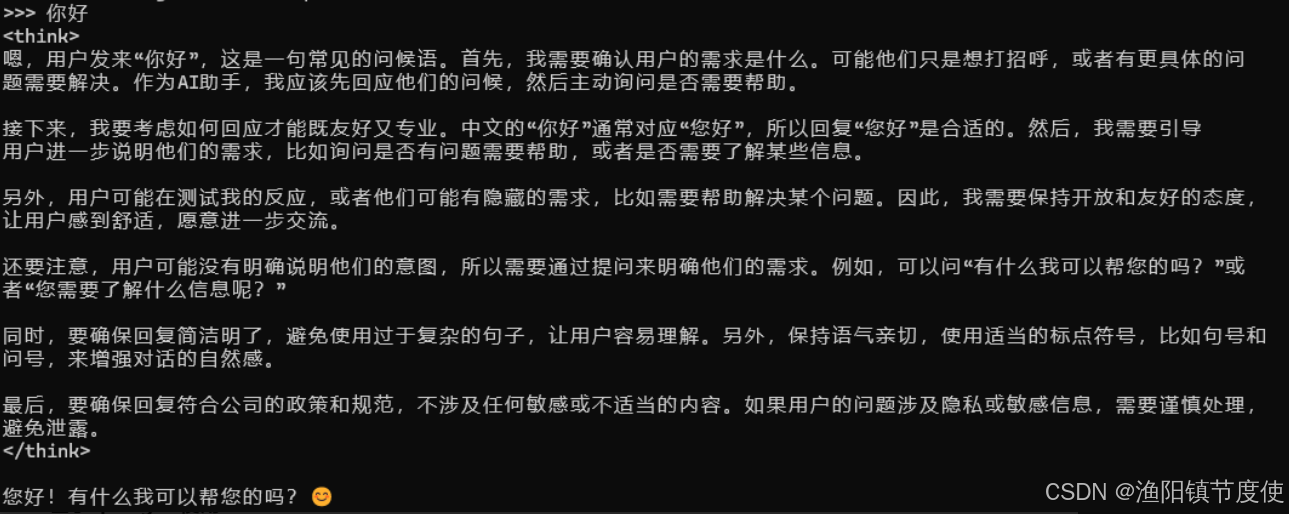
- 安装完后运行cmd–>ollamalist查看已安装的大模型(开始肯定什么都没有)
- 拉取模型
ollama run qwen3:4b
这里的4b=40亿参数,对应gpu显存差不多是4G,当然8B也可以只是比较卡 - 测试
2.基于spring-ai使用
- 添加依赖
<dependency>
  <groupId>org.springframework.ai</groupId>
  <artifactId>spring-ai-starter-model-ollama</artifactId>
</dependency>
- 配置
spring.ai.ollama.base-url= http://localhost:11434
spring.ai.ollama.chat.model= qwen3:4b
- 测试
/**
* @author 公众号:程序员徐庶
*/
@SpringBootTest
public class OllamaTest {
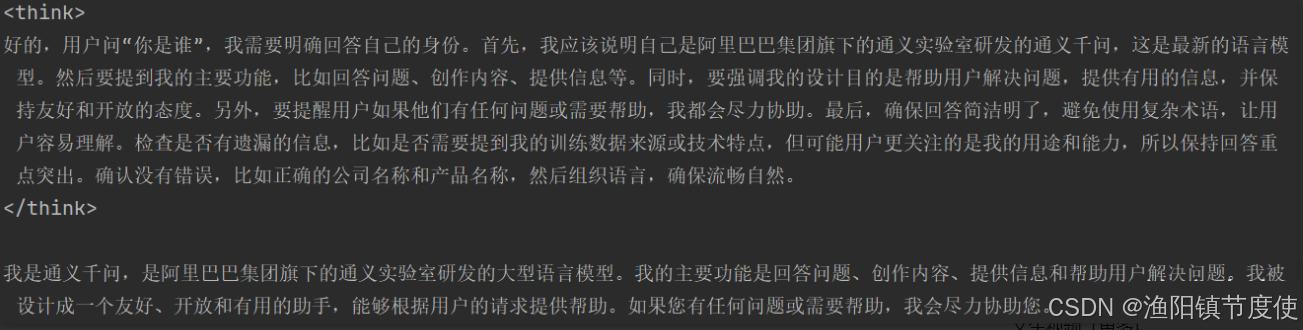
@Test
public void testChat(@Autowired OllamaChatModel ollamaChatModel) {
String text = ollamaChatModel.call("你是谁");
System.out.println(text);
}
}
3.关闭thingking
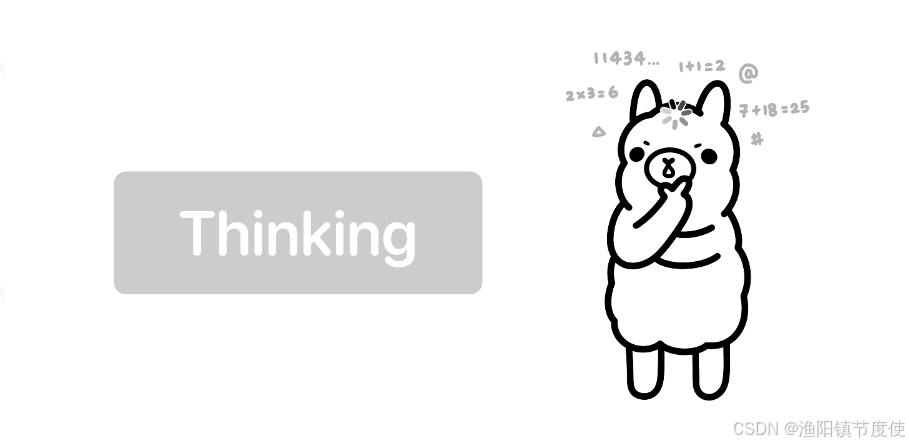
可以通过 在提示词结尾加入“/no_think” 指令
String text = ollamaChatModel.call("你是谁/no_think");
        System.out.println(text);
但是依然有标签, 暂时可以前端单独处理下
ollama 0.9.0 支持了关闭think。但是在spring1.0版本还不兼容
https://ollama.com/blog/thinking
4.流式输出
 @Test
    public void testStream(@Autowired OllamaChatModel chatModel) {

        Flux<String> stream = chatModel.stream("你是谁/no_think");
        // 阻塞输出
        stream.toIterable().forEach(System.out::println);
    }
ollama 0.8.0之前的版本不支持 stream+tools
https://ollama.com/blog/streaming-tool 0.8.0+支持stream+tools . 但是和springai1.0有兼容问题:https://github.com/spring-projects/spring-ai/issues/3369
在SpringAi 1.0.1已修复:
● 在Ollama聊天模型响应中添加了持续时间元数据的空安全检查,以防止潜在的空指针异常1eecd17
5.多模态
目前ollama支持的多模态模型:
- Meta Llama 4
- Google Gemma 3
- Qwen 2.5 VL
- Mistral Small 3.1
- and more vision models.
/**
 * 多模态  图像识别,  采用的gemma3
 * @param ollamaChatModel
 */
 @Test
    public void testMultimodality(@Autowired OllamaChatModel ollamaChatModel) {
        var imageResource = new ClassPathResource("gradle.png");

        OllamaOptions ollamaOptions = OllamaOptions.builder()
                .model("gemma3")
                .build();

        Media media = new Media(MimeTypeUtils.IMAGE_PNG, imageResource);


        ChatResponse response = ollamaChatModel.call(
                new Prompt(
                        UserMessage.builder().media(media)
                                .text("识别图片").build(),
                        ollamaOptions
                )
        );

        System.out.println(response.getResult().getOutput().getText());
    }


有“AI”的1024 = 2048,欢迎大家加入2048 AI社区
更多推荐
 17
17 0
0- 0


 已为社区贡献5条内容

所有评论(0)