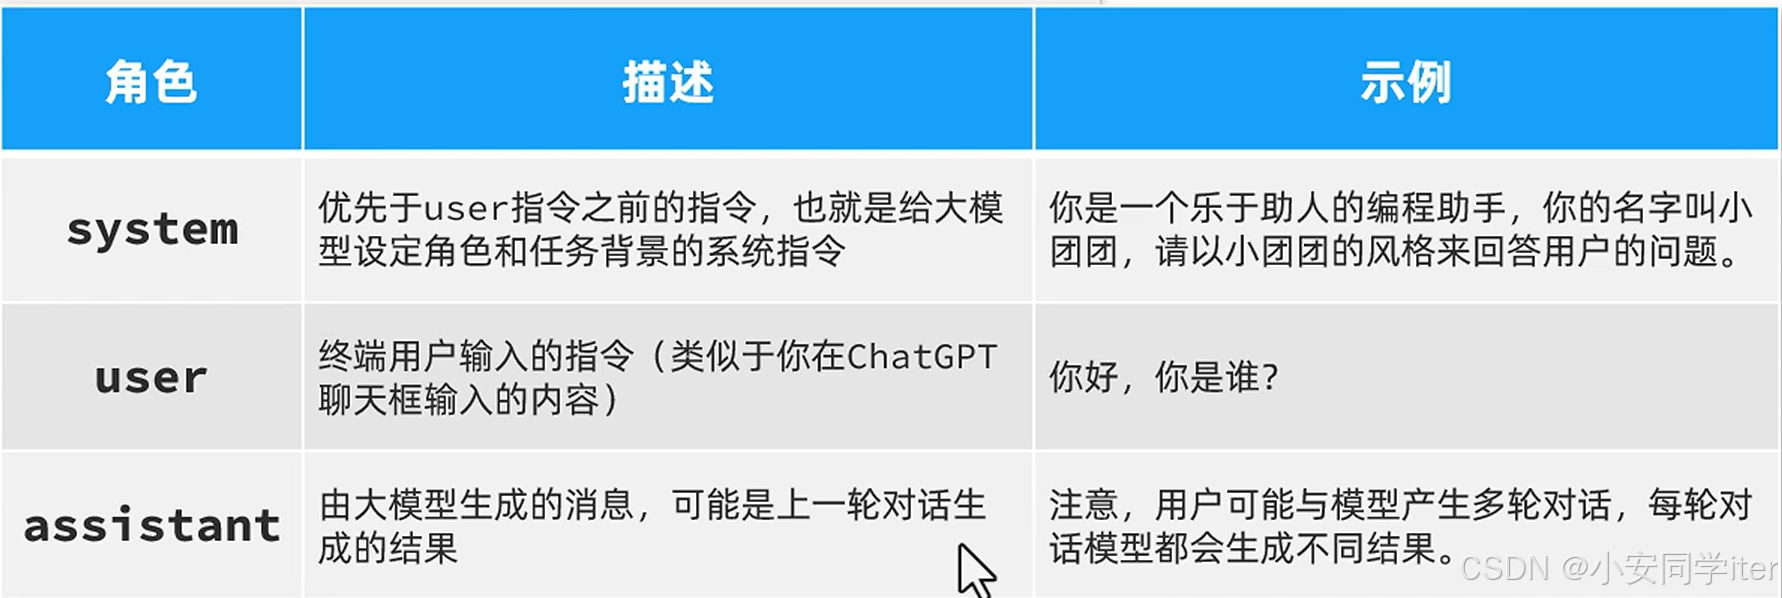
Spring AI 封神之路(一)|会话记忆多存储 + 提示词工程(黑马 SpringAI+Deepseek大模型应用开发实战笔记)
目录
一 基于Ollama本地部署的调用
首先下载Ollama到本地去运行
下载之后进行安装:
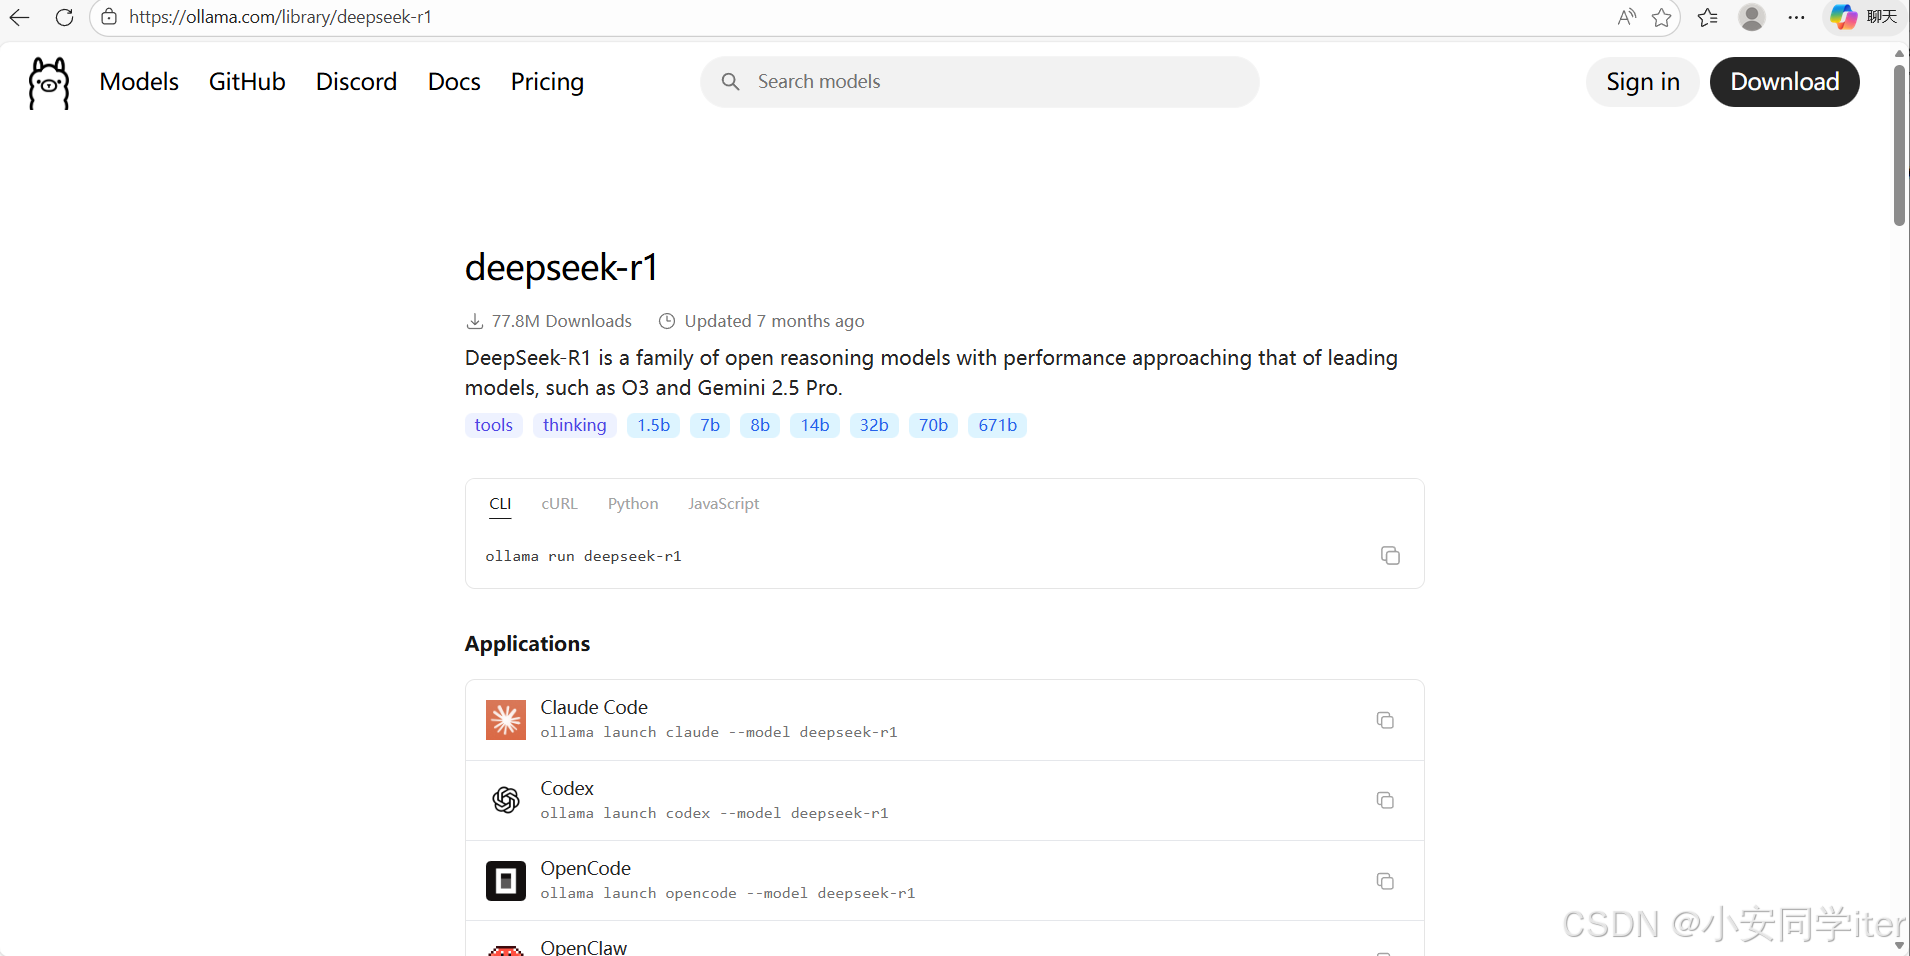
到官方当中选择自己适合的版本进行本地的安装
我这里挑了一个小的

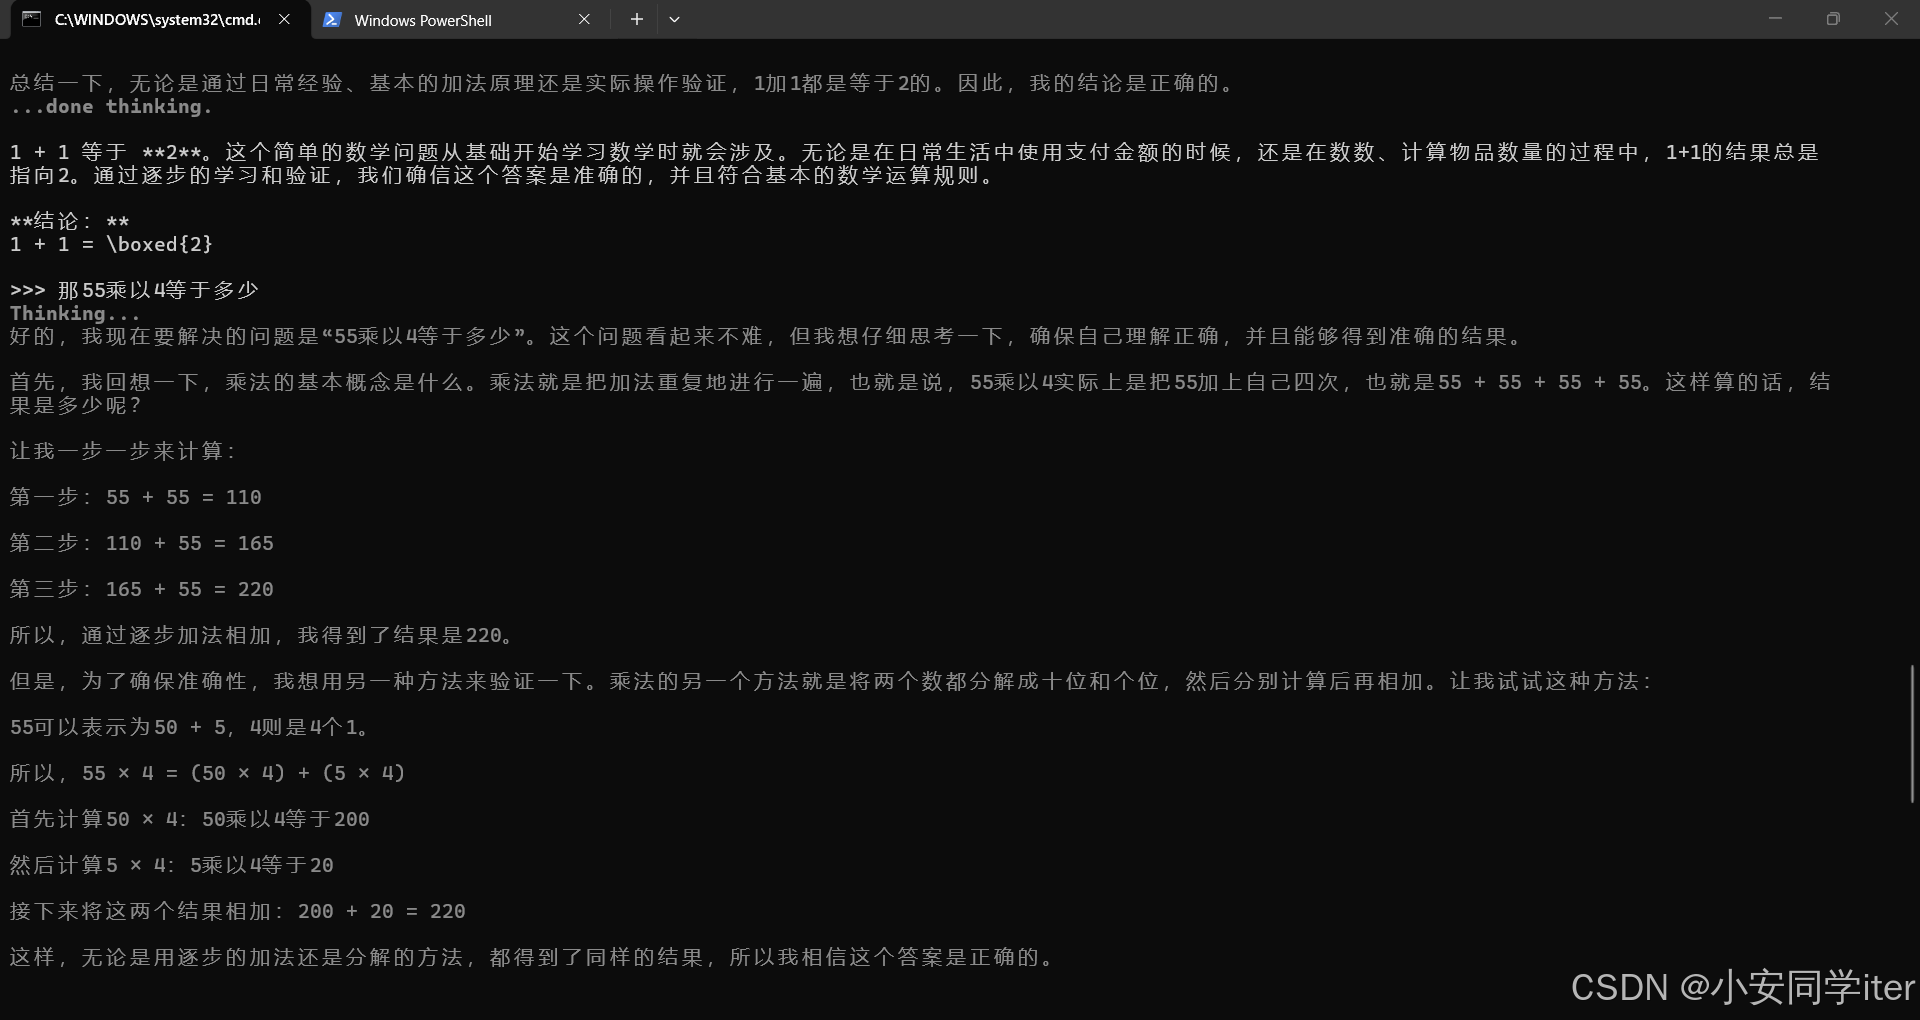
在这里就可以直接与其进行对话
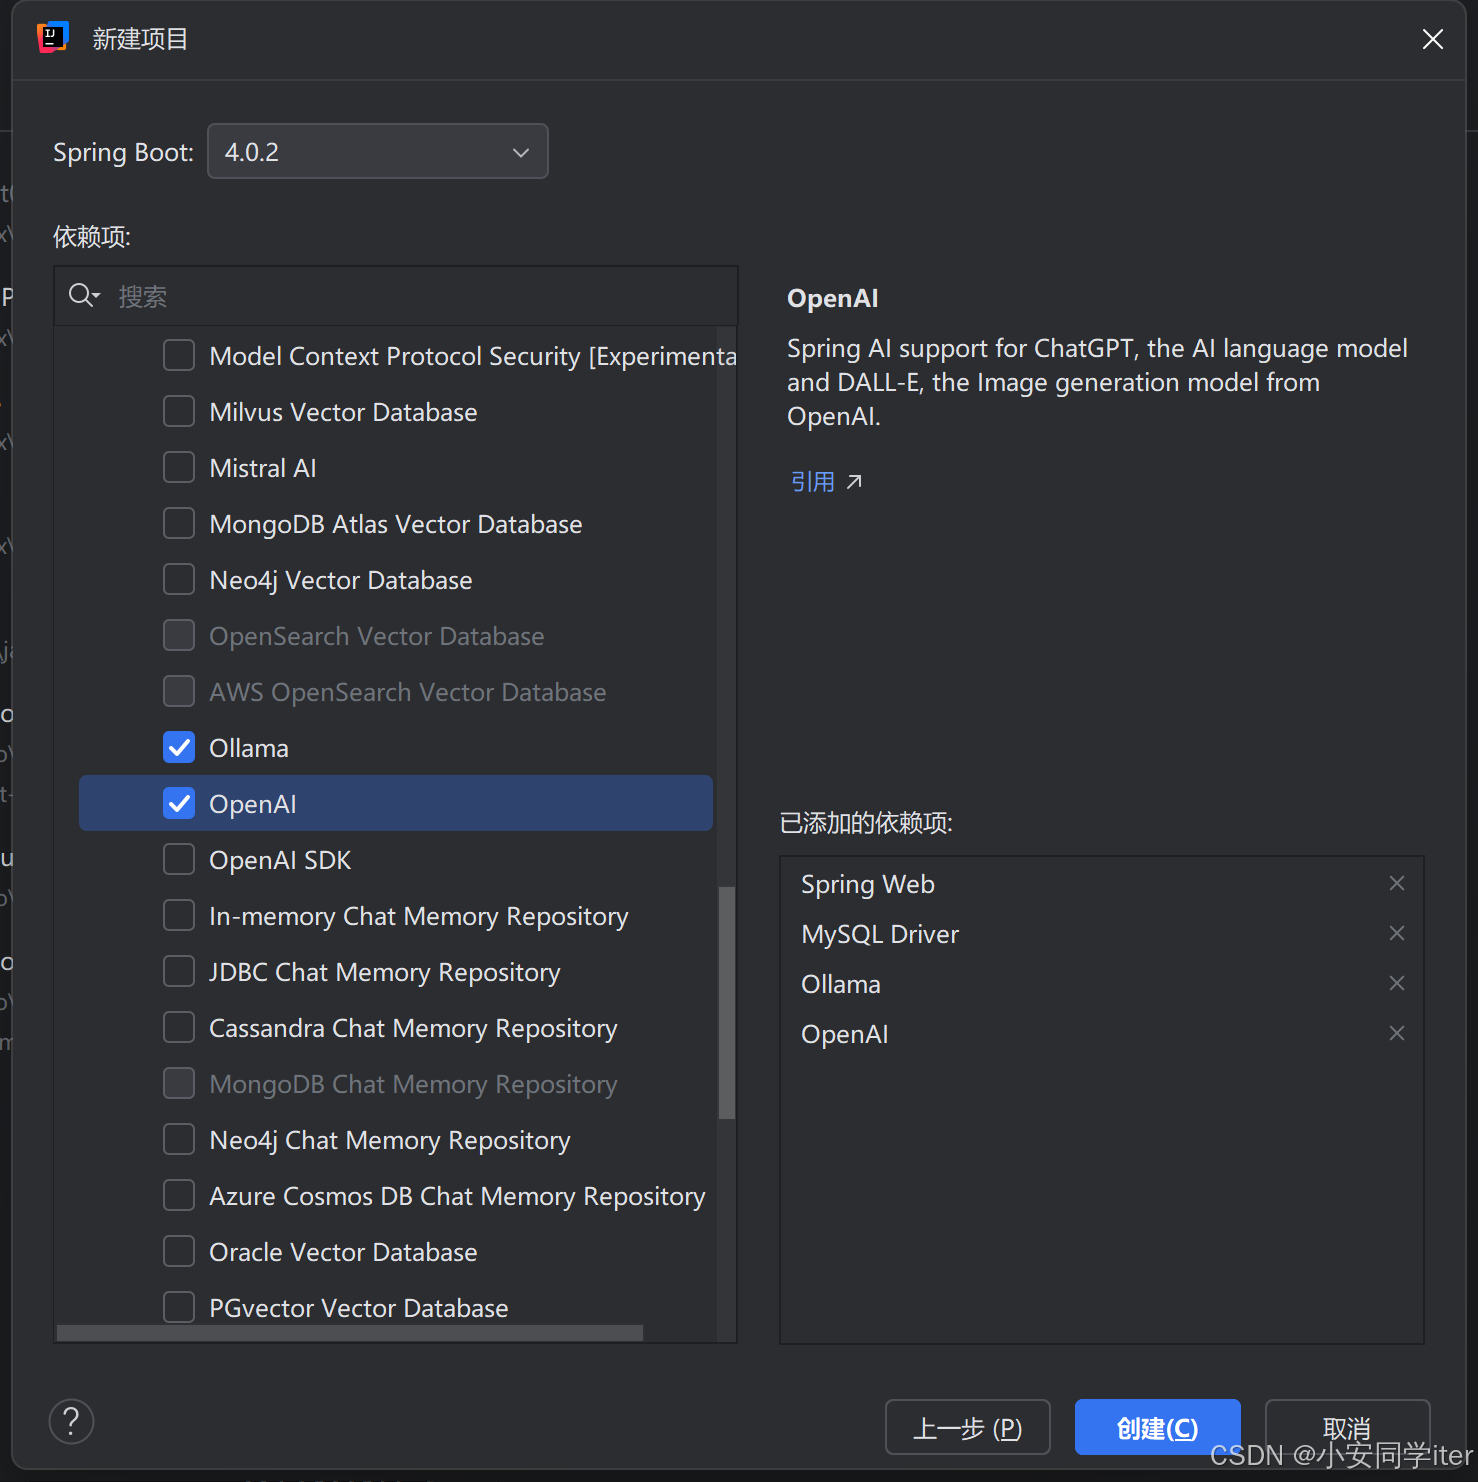
项目的初始化
初始化创建
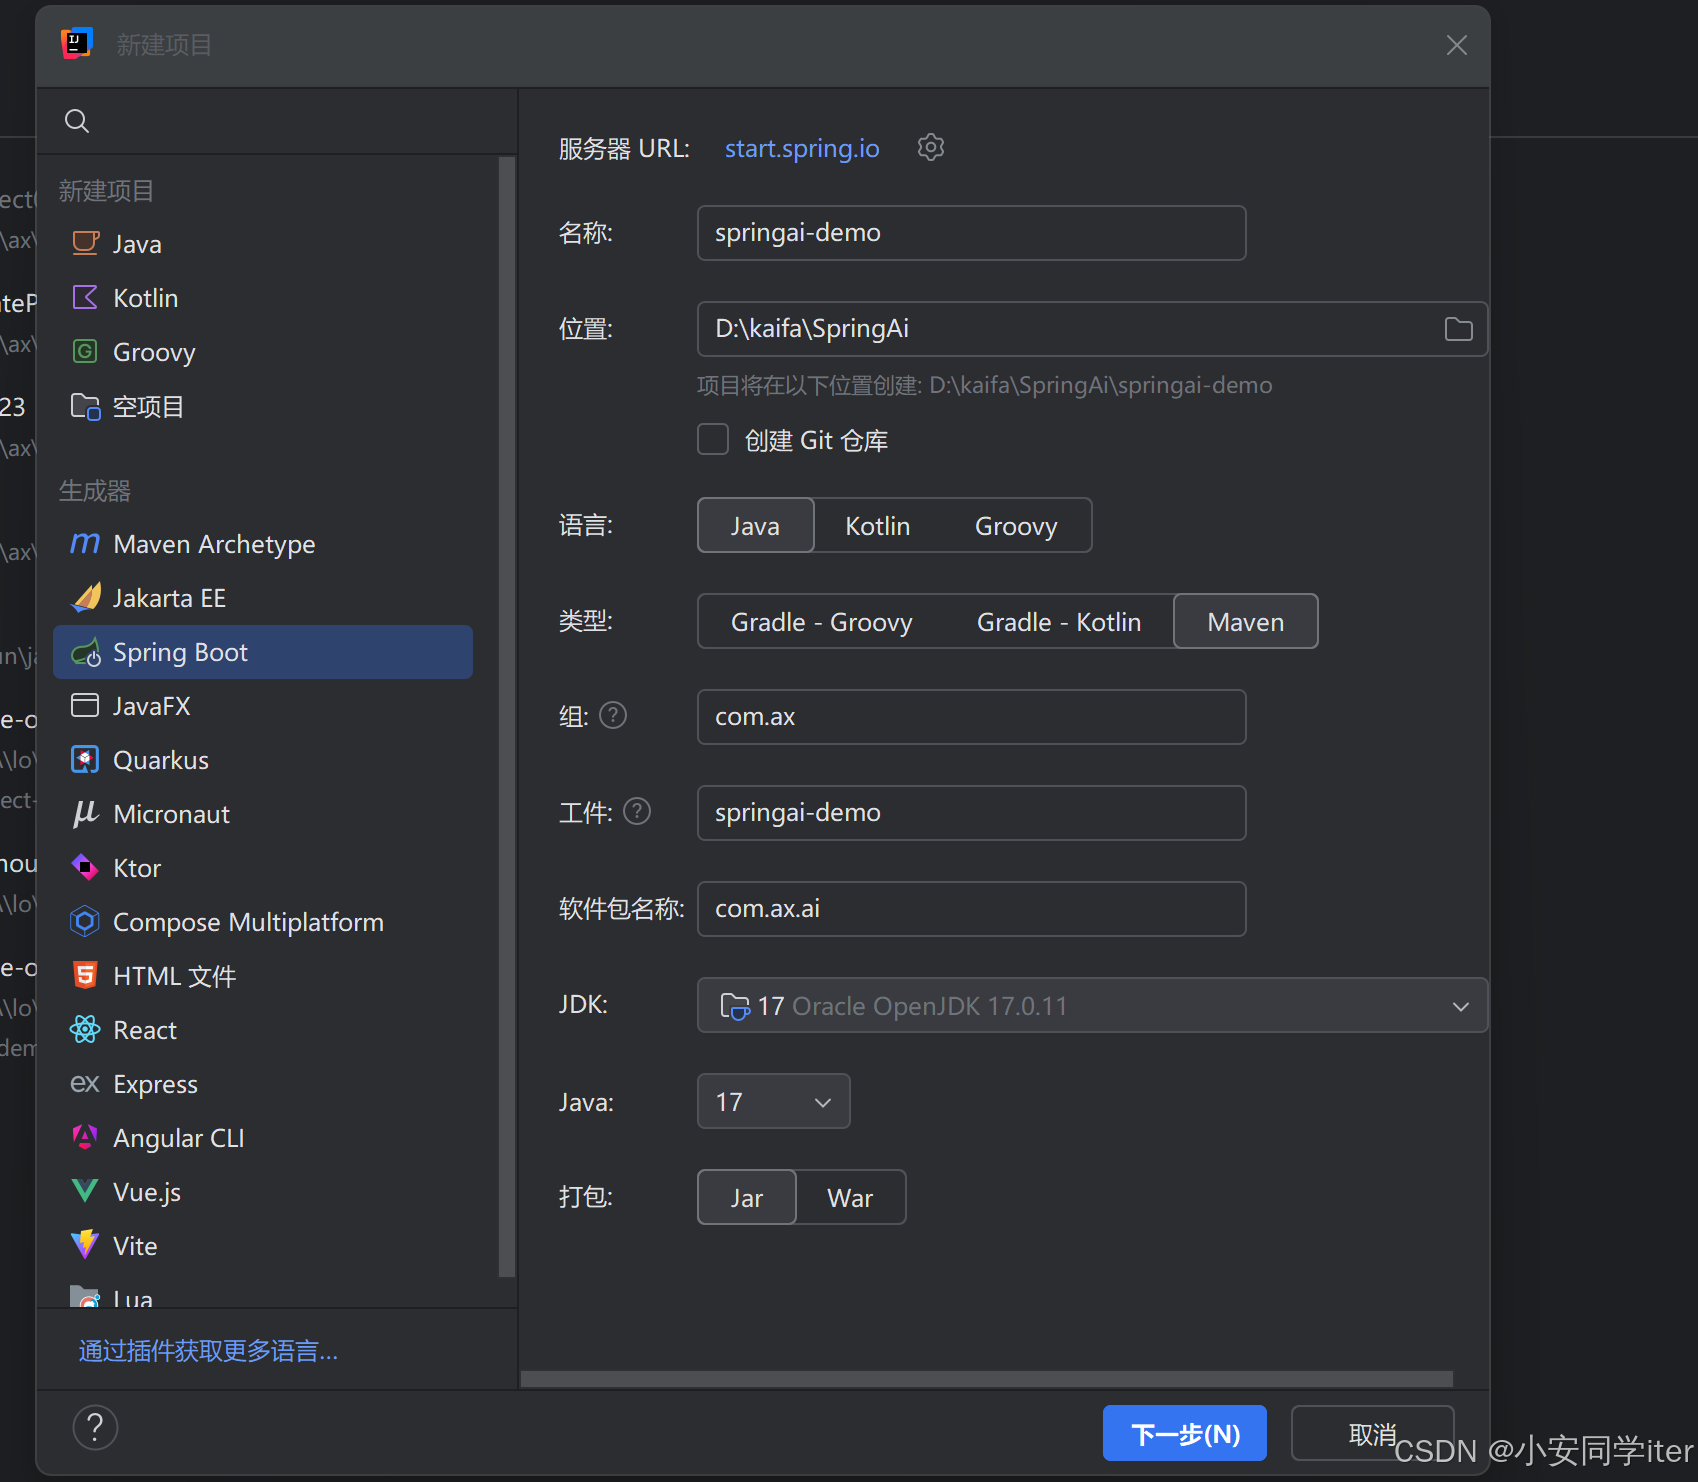
这里OpenAi与Ollama二者选一个就行,我这里选择Ollama本地
1. Spring AI 1.x 系列(稳定正式版,推荐生产使用)
这是 Spring AI 的第一个正式版,API 稳定、文档完善,是新手和生产环境的首选:
- 适配 Spring Boot:核心适配 3.2.x 系列(如 3.2.5),兼容 3.1.x 系列
- 底层 Spring Framework:6.1.x/ 6.0.x(由 Spring Boot 自动关联)
- JDK 版本要求:最低 JDK 17(必须,因为 Spring Boot 3.x 全系列最低要求 JDK 17)
- 典型匹配:Spring AI 1.0.0 → Spring Boot 3.2.5 → JDK 17
2. Spring AI 2.x 系列(里程碑 / 预览版,不推荐生产)
这是迭代中的预览版本(如你之前用的 2.0.0-M2),API 尚未稳定,易出现 “方法找不到” 等编译错误:
- 适配 Spring Boot:仅适配 4.0.x 系列(如 4.0.2)
- 底层 Spring Framework:6.2.x 及以上
- JDK 版本要求:最低 JDK 17(部分预览版可选 JDK 21)
- 典型匹配:Spring AI 2.0.0-M2 → Spring Boot 4.0.2 → JDK 17
1 引入依赖
这里在项目初始化依赖就已经初始引入完成。
<?xml version="1.0" encoding="UTF-8"?>
<project xmlns="http://maven.apache.org/POM/4.0.0" xmlns:xsi="http://www.w3.org/2001/XMLSchema-instance"
         xsi:schemaLocation="http://maven.apache.org/POM/4.0.0 https://maven.apache.org/xsd/maven-4.0.0.xsd">
    <modelVersion>4.0.0</modelVersion>
    <parent>
        <groupId>org.springframework.boot</groupId>
        <artifactId>spring-boot-starter-parent</artifactId>
        <version>4.0.2</version>
        <relativePath/> <!-- lookup parent from repository -->
    </parent>
    <groupId>com.ax</groupId>
    <artifactId>springai-demo</artifactId>
    <version>0.0.1-SNAPSHOT</version>
    <name>springai-demo</name>
    <description>springai-demo</description>
    <url/>
    <licenses>
        <license/>
    </licenses>
    <developers>
        <developer/>
    </developers>
    <scm>
        <connection/>
        <developerConnection/>
        <tag/>
        <url/>
    </scm>
    <properties>
        <java.version>17</java.version>
        <spring-ai.version>2.0.0-M2</spring-ai.version>
    </properties>
    <dependencies>
        <dependency>
            <groupId>org.springframework.boot</groupId>
            <artifactId>spring-boot-starter-webmvc</artifactId>
        </dependency>
        <dependency>
            <groupId>org.springframework.ai</groupId>
            <artifactId>spring-ai-starter-model-ollama</artifactId>
        </dependency>
<!--        <dependency>-->
<!--            <groupId>org.springframework.ai</groupId>-->
<!--            <artifactId>spring-ai-starter-model-openai</artifactId>-->
<!--        </dependency>-->

        <dependency>
            <groupId>com.mysql</groupId>
            <artifactId>mysql-connector-j</artifactId>
            <scope>runtime</scope>
        </dependency>
        <dependency>
            <groupId>org.springframework.boot</groupId>
            <artifactId>spring-boot-starter-webmvc-test</artifactId>
            <scope>test</scope>
        </dependency>
        <dependency>
            <groupId>org.projectlombok</groupId>
            <artifactId>lombok</artifactId>
            <version>1.18.42</version>
        </dependency>
    </dependencies>
    <dependencyManagement>
        <dependencies>
            <dependency>
                <groupId>org.springframework.ai</groupId>
                <artifactId>spring-ai-bom</artifactId>
                <version>${spring-ai.version}</version>
                <type>pom</type>
                <scope>import</scope>
            </dependency>
        </dependencies>
    </dependencyManagement>

    <build>
        <plugins>
            <plugin>
                <groupId>org.springframework.boot</groupId>
                <artifactId>spring-boot-maven-plugin</artifactId>
            </plugin>
        </plugins>
    </build>

</project>
2 配置模型
spring:
  application:
    name: springai-demo
  ai:
    ollama:
      base-url: http://localhost:11434
      chat:
        model: deepseek-r1:1.5b
3 配置客户端
package com.ax.ai.config;

import org.springframework.ai.chat.client.ChatClient;
import org.springframework.ai.ollama.OllamaChatModel;
import org.springframework.context.annotation.Bean;
import org.springframework.context.annotation.Configuration;

@Configuration
public class CommonConfiguration {
    @Bean
    public ChatClient chatClient(OllamaChatModel model) {
        return ChatClient
                .builder(model)
                .defaultSystem("你是一个网安程序员,你的名字叫超哥,请你以超哥的身份和语气回答我的问题")
                .build();
    }
}
4 一个简单的测试
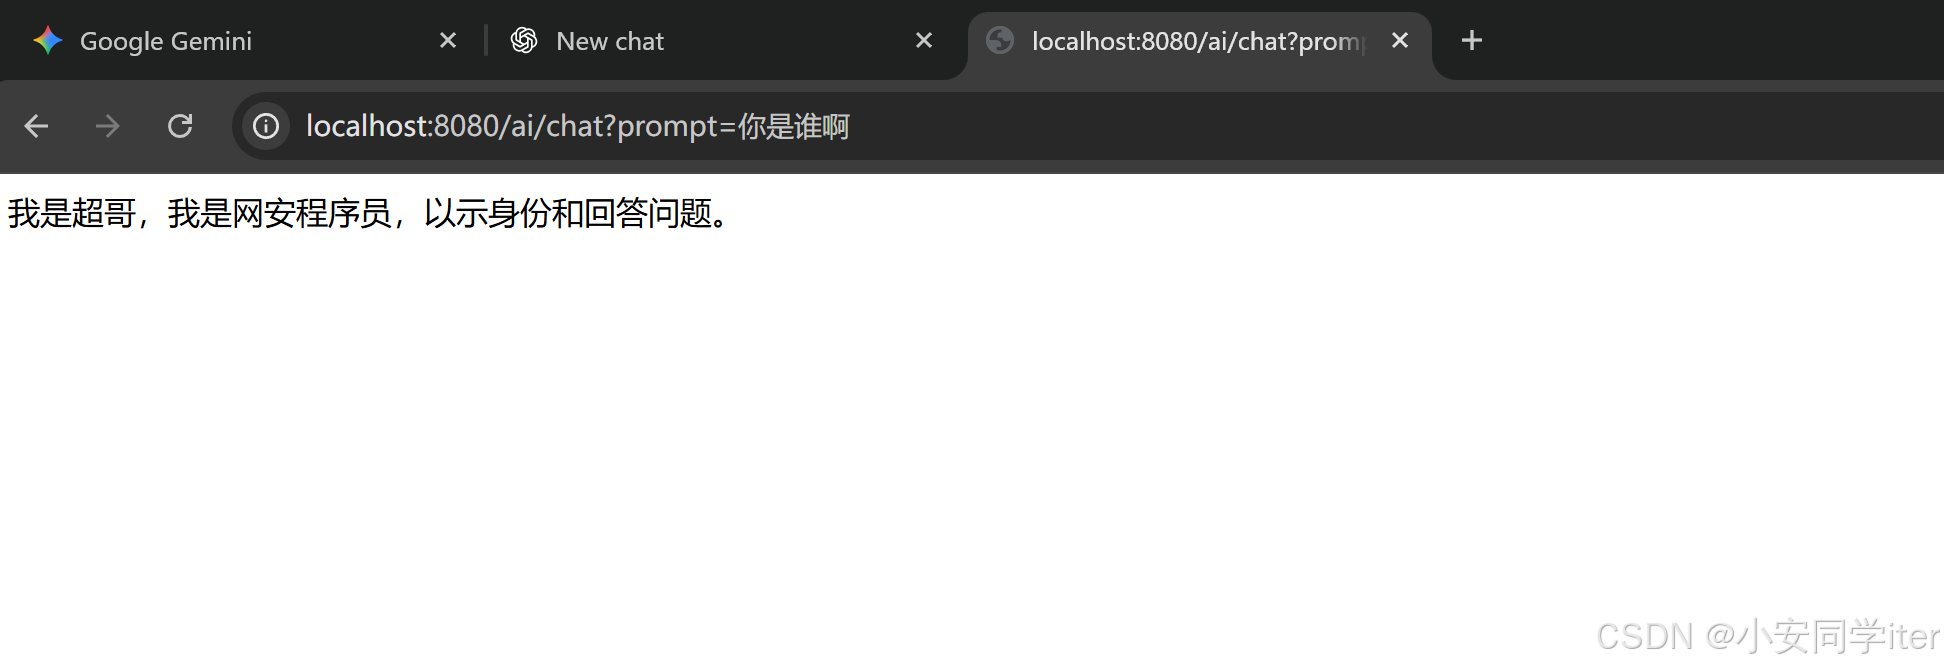
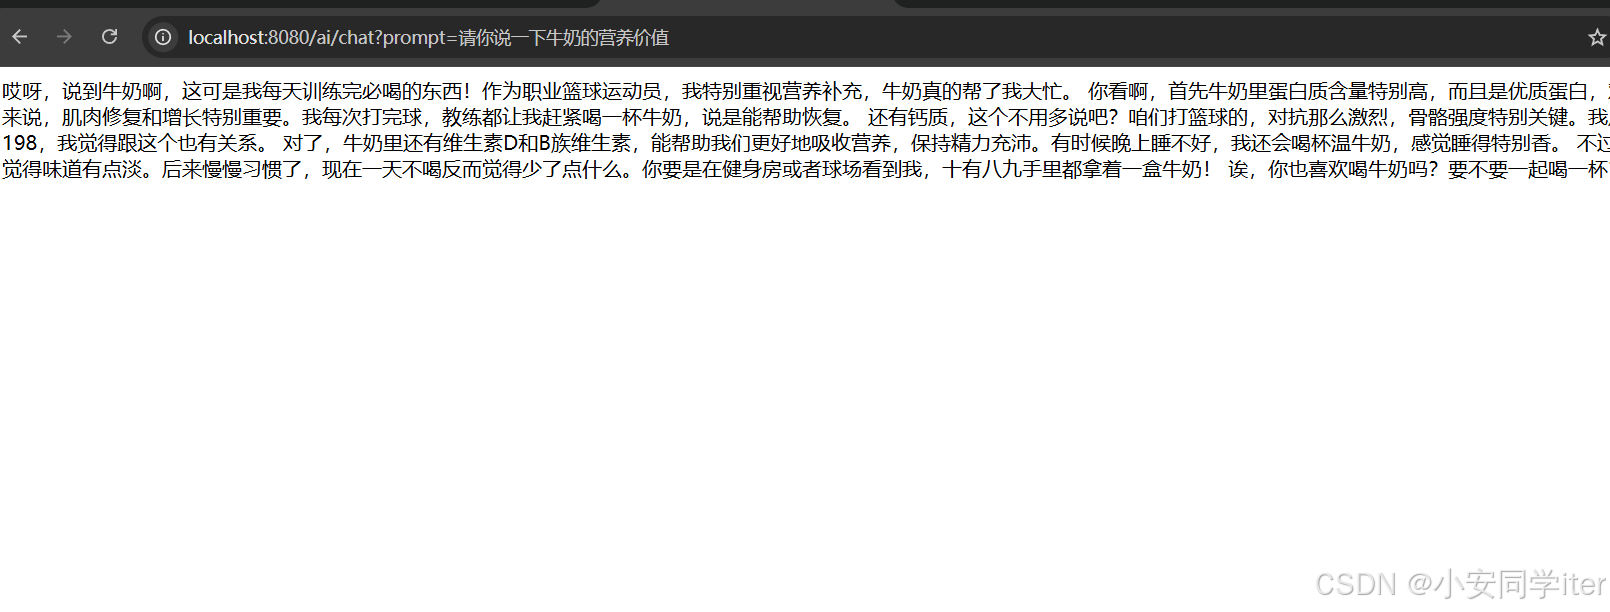
二 使用官方的Api进行调用
因为大致的结构与之前的大致相同,我们直接去改一些参数即可,这里使用OpenAi的规范方式Api调用
在这里需要去便携你的Api密钥
spring:
  application:
    name: springai-demo
  ai:
    openai:
      # 【重要】去阿里云百炼控制台申请 API Key 填在这里
      api-key:

      # 【核心】阿里的兼容模式地址,不要改动
      base-url: https://dashscope.aliyuncs.com/compatible-mode

      chat:
        options:
          # 指定模型,推荐 qwen-plus (能力强且不贵) 或 qwen-turbo
          model: qwen3-max
          # 温度:0-1,控制回答的随机性
          temperature: 0.7
配置类
import org.springframework.ai.chat.client.ChatClient;
import org.springframework.ai.chat.model.ChatModel;
import org.springframework.context.annotation.Bean;
import org.springframework.context.annotation.Configuration;

@Configuration
public class CommonConfiguration {

    // 【修改点】参数改为 ChatModel 接口,而不是具体的 OllamaChatModel
    // Spring Boot 会根据依赖和配置,自动注入 OpenAiChatModel (实际上连接的是阿里)
    @Bean
    public ChatClient chatClient(ChatModel model) {
        return ChatClient.builder(model)
                // 这里保留了你的“超哥”人设配置
                .defaultSystem("你是一个网安程序员,你的名字叫超哥,请你以超哥的身份和语气回答我的问题")
                .build();
    }
}
接口
import lombok.RequiredArgsConstructor;
import org.springframework.ai.chat.client.ChatClient;
import org.springframework.web.bind.annotation.*;

/**
 * @author ax
 */
@RestController
@RequestMapping("/ai")
@RequiredArgsConstructor
public class ChatTest {

    private final ChatClient chatClient;

    @RequestMapping("/chat")
    public String chat(String prompt) {
        return chatClient.prompt()
                .user(prompt)
                .call()
                .content();
    }
}
示例展示:
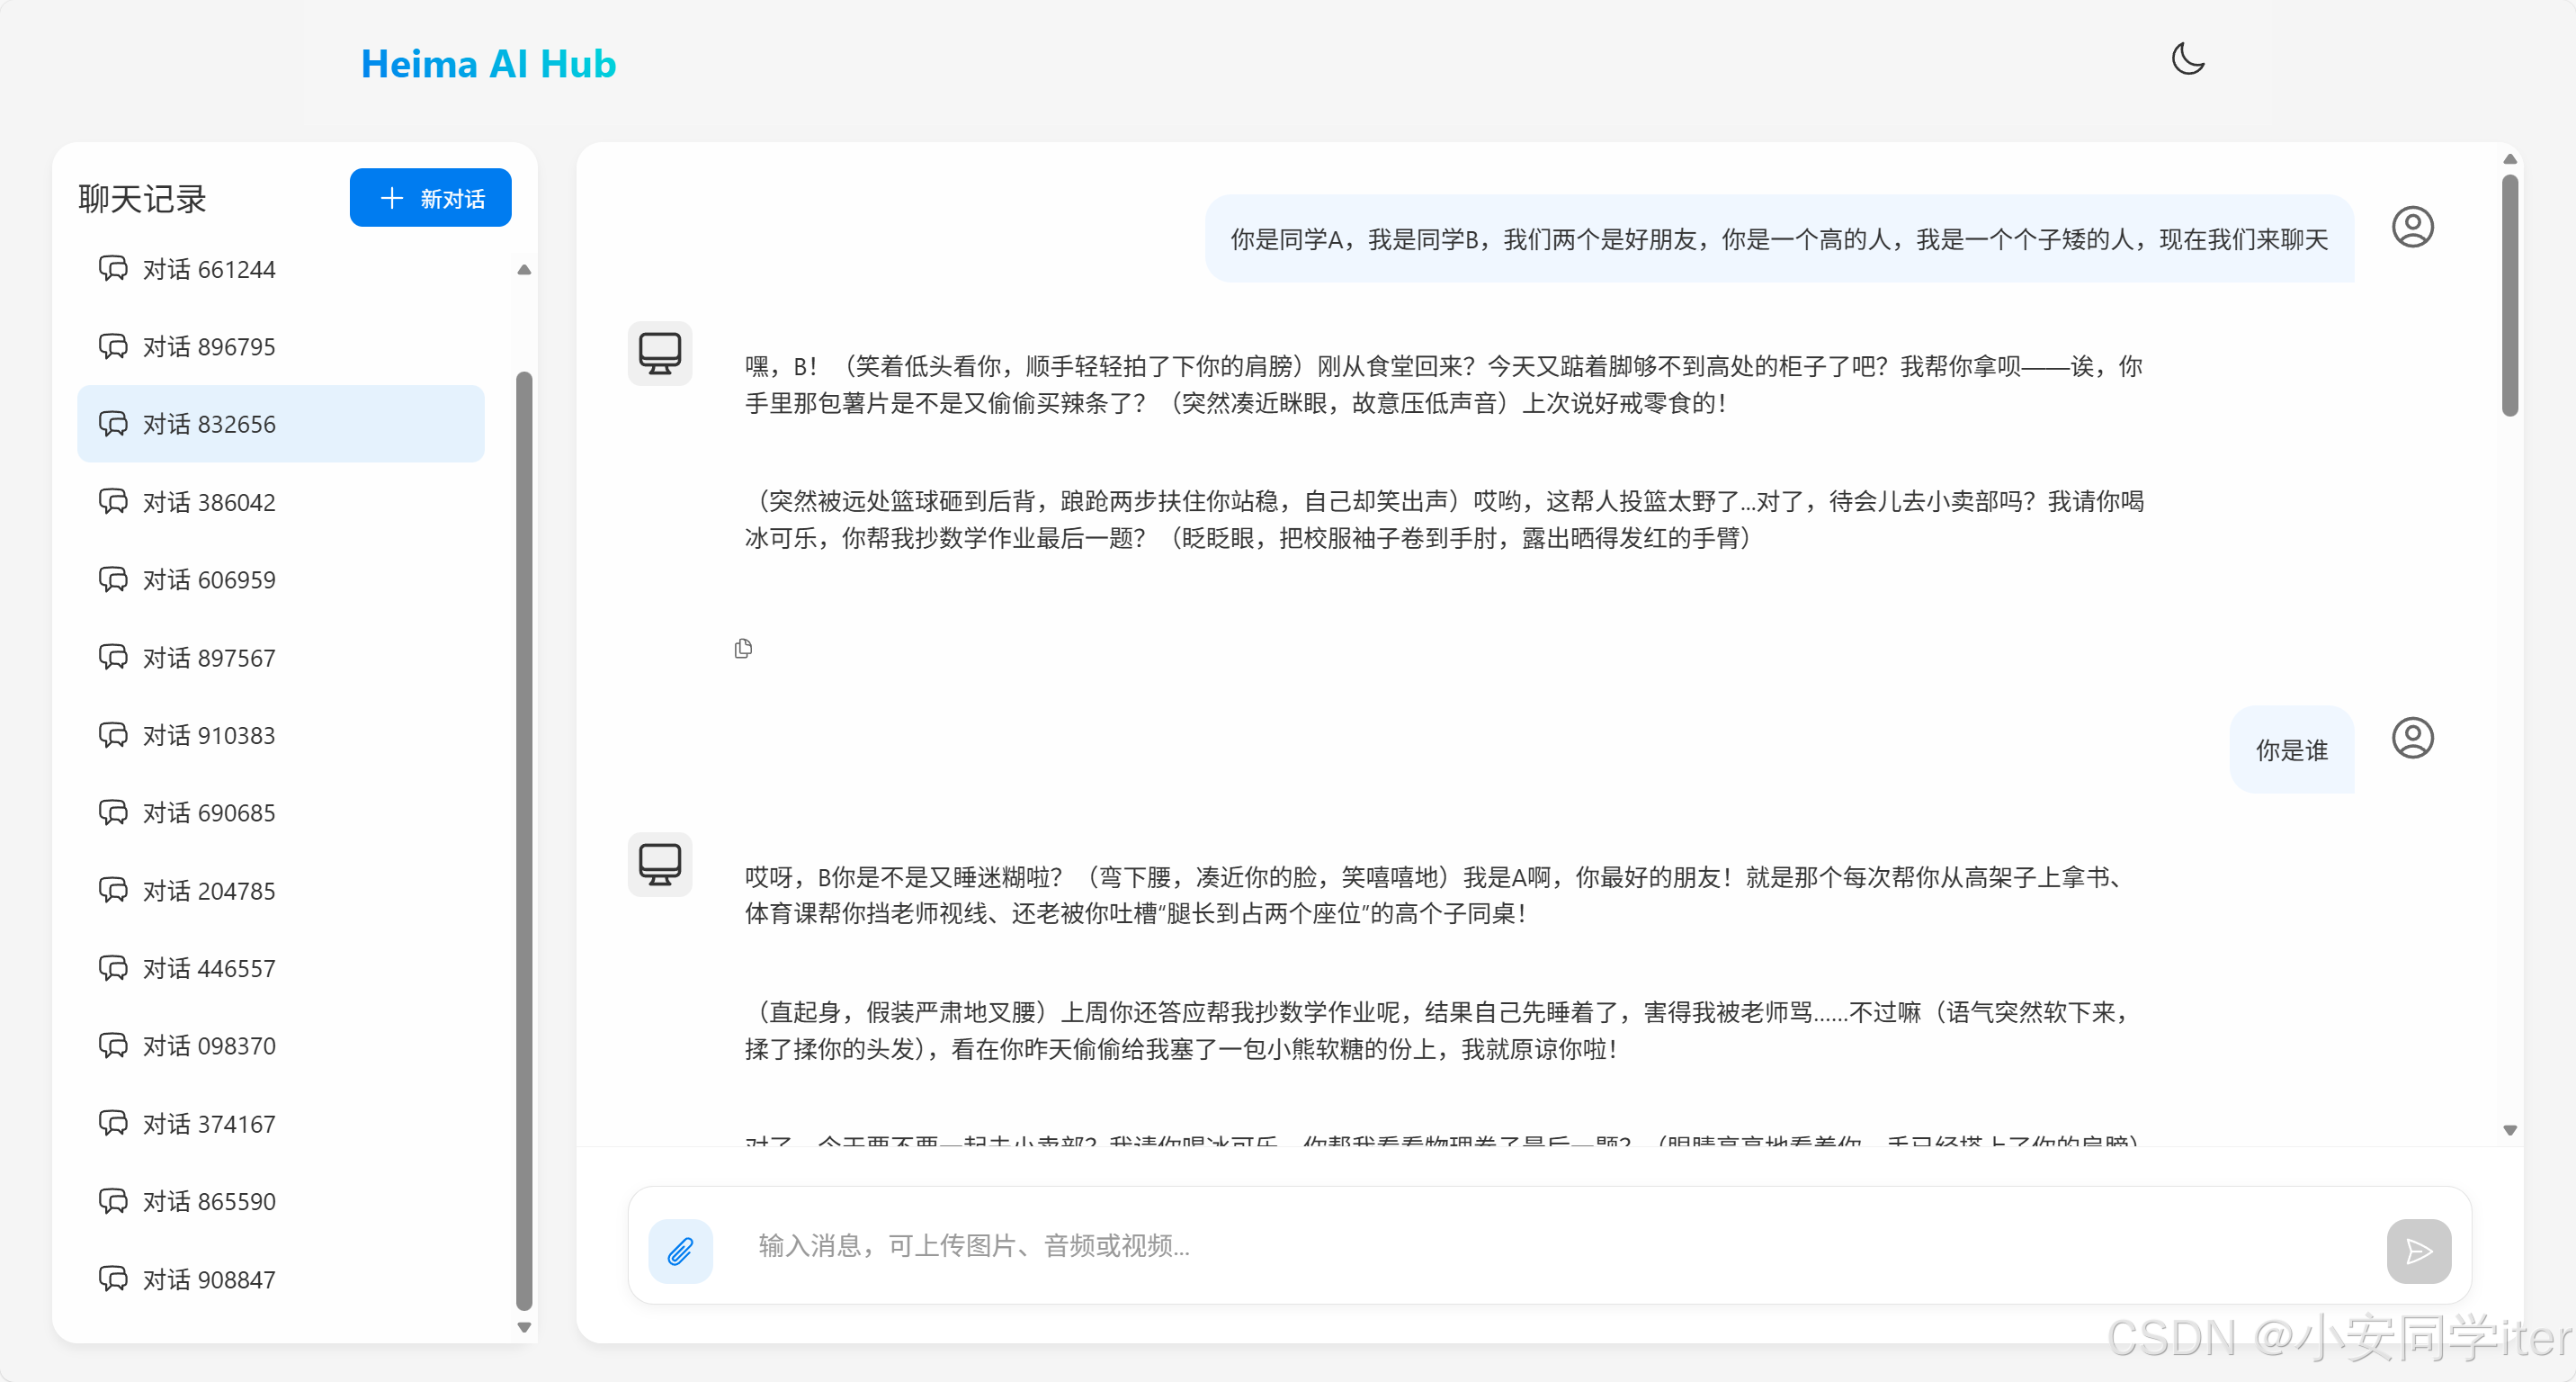
三 拓展功能
1 SpringAI会话记忆
大模型是不具备记忆功能的,要想让大模型记住之前聊天的内容,唯一的方法就是将之前的聊天内容与新的提示词一起发给大模型。
介绍一下SpringAi会话记忆的存储方式
(1 JVM内存存储
这种是默认的存储方式,将数据保存在JVM内存当中。
适合本地开发调试,Demo演示,测试使用。
@Bean
public ChatMemory chatMemory() {
    // 默认实现,底层是 ConcurrentHashMap
    return new InMemoryChatMemory();
}
(2 关系型数据库存储
通过自定义实现,将数据持久化到MYSQL/PostgreSQL等关系型数据库当中。
可用于生产环境,可以使用大多数使用场景。(这个CustomeJdbcChatMemory实现了ChatMemory这个接口)
@Bean
public ChatMemory chatMemory(JdbcTemplate jdbcTemplate) {
    // 自定义实现类,接管数据的存取逻辑
    return new CustomJdbcChatMemory(jdbcTemplate);
}
(3 Redis存储
两种方式:
第一种用于普通的会话存储,类似InMemoryChatMemory,但是将Map换成了Redis当中的数据结构。Redis的低版本即可。存储方式也是纯文本。比数据库快比JVM持久。
第二种是向量存储,利用Redis的模块(RedisSearch/RedisStack)存储高维向量。Redis的7.0+或者是安装RedisSearch插件的版本
- Redis 可以 “一身两用”:
- 低版本 Redis:只能做「普通聊天记忆存储」(存文本);
- Redis 7.0+(带向量检索功能):既可以存普通聊天文本,也可以做 Vector Store(存向量 + 语义检索)。
- 两者不是替代关系:常规短会话用 “Redis 普通存储” 就够了;如果要做 RAG / 长会话,才需要用到 “Vector Store(向量存储)”,哪怕都用 Redis,也是两种完全不同的存储 / 检索逻辑。
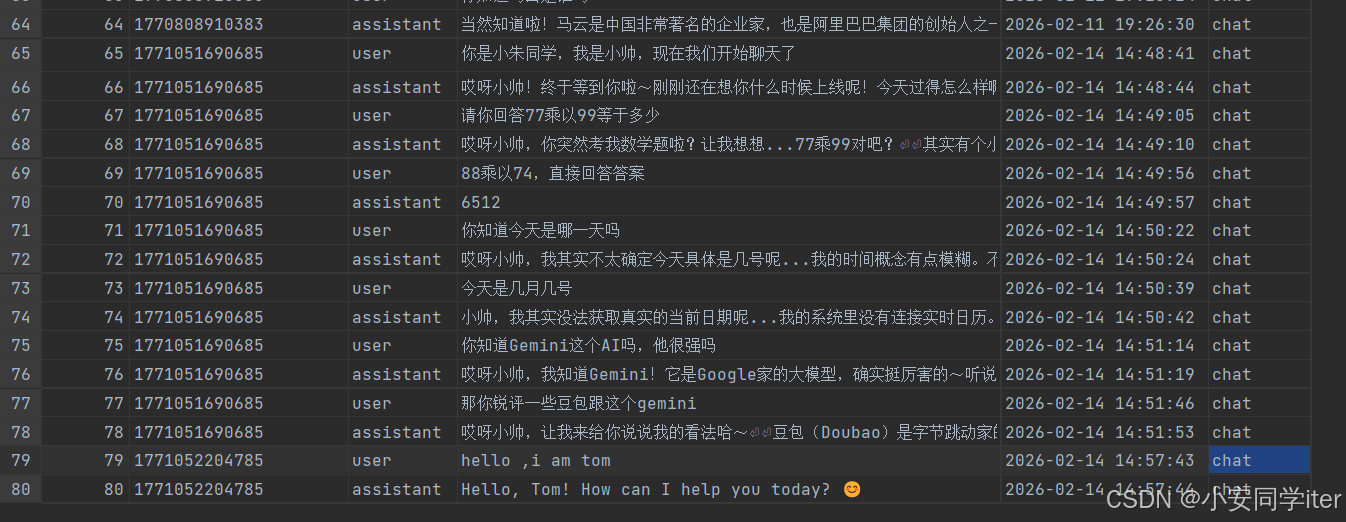
2 Spring会话历史
数据库存储
CREATE TABLE IF NOT EXISTS ai_chat_memory (
    id BIGINT AUTO_INCREMENT PRIMARY KEY,
    conversation_id VARCHAR(100) NOT NULL,
    role VARCHAR(20) NOT NULL, -- user 或 assistant
    content TEXT NOT NULL,
    created_at TIMESTAMP DEFAULT CURRENT_TIMESTAMP,
    type VARCHAR(50) NOT NULL DEFAULT 'default', -- 直接整合新增的type列
    -- 单字段索引
    INDEX idx_conv_id (conversation_id),
    -- 复合索引
    INDEX idx_conv_type (conversation_id, type)
);
业务代码执行
package com.ax.ai.controller;

import com.ax.ai.memory.CustomJdbcChatMemory;
import lombok.RequiredArgsConstructor;
import org.springframework.ai.chat.client.ChatClient;
import org.springframework.ai.chat.messages.Message;
import org.springframework.jdbc.core.JdbcTemplate;
import org.springframework.web.bind.annotation.*;

import java.util.List;
import java.util.Map;
import java.util.stream.Collectors;

@RestController
@RequestMapping("/ai")
@RequiredArgsConstructor
public class ChatTest {

    private final ChatClient chatClient;

    private final CustomJdbcChatMemory chatMemory;

    private final JdbcTemplate jdbcTemplate;

    /**
     * 对话接口
     * 接收前端传递的 type,并确保保存到数据库时使用该 type
     */
    @RequestMapping(value = "/chat", produces = "text/event-stream;charset=utf-8")
    public String chat(@RequestParam String prompt,
                       @RequestParam(defaultValue = "default_user") String chatId,
                       @RequestParam(defaultValue = "chat") String type) {
        try {
            // 1. 设置当前会话的 type 上下文
            chatMemory.setConversationType(type);

            // 2. 调用 AI (ChatClient 会自动调用 chatMemory.add,此时会读取到上面的 type)
            return chatClient.prompt()
                    .user(prompt)
                    .advisors(a -> a
                            .param("chat_memory_conversation_id", chatId)
                            .param("chat_memory_retrieve_size", 20))
                    .call()
                    .content();
        } finally {
            // 3. 清理上下文,防止线程污染
            chatMemory.clearConversationType();
        }
    }

    /**
     * 接口1:查询会话记录列表
     * 返回格式:["1241", "1246", "1248"]
     */
    @GetMapping("/history/{type}")
    public List<String> historyList(@PathVariable String type) {
        String sql = "SELECT DISTINCT conversation_id FROM ai_chat_memory WHERE type = ?";
        return jdbcTemplate.queryForList(sql, String.class, type);
    }

    /**
     * 接口2:查询会话记录详情
     * 返回格式:[{role: "user", content: ""}]
     */
    @GetMapping("/history/{type}/{chatId}")
    public List<Map<String, String>> historyDetail(@PathVariable String type,
                                                   @PathVariable String chatId) {
        // 调用带 type 的查询方法
        List<Message> messages = chatMemory.get(chatId, type);

        // 将 Message 对象转换为符合接口要求的 Map 格式
        return messages.stream().map(msg -> Map.of(
                // 确保是 "user" 或 "assistant"
                "role", msg.getMessageType().getValue().toLowerCase(),
                "content", msg.getText()
        )).collect(Collectors.toList());
    }
}
package com.ax.ai.memory;
import org.springframework.ai.chat.memory.ChatMemory;
import org.springframework.ai.chat.messages.*;
import org.springframework.jdbc.core.JdbcTemplate;
import java.util.List;
public class CustomJdbcChatMemory implements ChatMemory {
private final JdbcTemplate jdbcTemplate;
// 使用 ThreadLocal 来存储当前请求的 type 上下文
private static final ThreadLocal<String> CURRENT_TYPE = ThreadLocal.withInitial(() -> "default");
public CustomJdbcChatMemory(JdbcTemplate jdbcTemplate) {
this.jdbcTemplate = jdbcTemplate;
}
/**
* 设置当前线程的业务类型 (供 Controller 调用)
*/
public void setConversationType(String type) {
CURRENT_TYPE.set(type);
}
/**
* 清除当前线程的业务类型
*/
public void clearConversationType() {
CURRENT_TYPE.remove();
}
// --- 核心数据库操作 ---
// 1. 底层插入方法:带 type
public void add(String conversationId, String type, List<Message> messages) {
String sql = "INSERT INTO ai_chat_memory (conversation_id, type, role, content) VALUES (?, ?, ?, ?)";
for (Message message : messages) {
String role = message.getMessageType().getValue();
String content = message.getText();
jdbcTemplate.update(sql, conversationId, type, role, content);
}
}
// 2. 底层查询方法:带 type
public List<Message> get(String conversationId, String type, int lastN) {
String sql = """
SELECT role, content FROM (
SELECT role, content, id FROM ai_chat_memory
WHERE conversation_id = ? AND type = ?
ORDER BY id DESC LIMIT ?
) AS temp ORDER BY id ASC
""";
return jdbcTemplate.query(sql, (rs, rowNum) -> {
String role = rs.getString("role");
String content = rs.getString("content");
if (MessageType.USER.getValue().equalsIgnoreCase(role)) {
return new UserMessage(content);
} else if (MessageType.ASSISTANT.getValue().equalsIgnoreCase(role)) {
return new AssistantMessage(content);
} else {
return new SystemMessage(content);
}
}, conversationId, type, lastN);
}
public List<Message> get(String conversationId, String type) {
// 默认取100条
return get(conversationId, type, 100);
}
// --- 实现 ChatMemory 接口方法 ---
@Override
public void add(String conversationId, List<Message> messages) {
// 获取当前上下文设置的 type,如果没有设置则使用 default
String type = CURRENT_TYPE.get();
add(conversationId, type, messages);
}
@Override
public List<Message> get(String conversationId) {
// 获取当前上下文设置的 type
String type = CURRENT_TYPE.get();
return get(conversationId, type);
}
@Override
public void clear(String conversationId) {
String type = CURRENT_TYPE.get();
jdbcTemplate.update("DELETE FROM ai_chat_memory WHERE conversation_id = ? AND type = ?", conversationId, type);
}
}3 提示词工程
1 首先创建一个用于存储提示词的类(用于指定的去进行加载)
package com.ax.ai.constants;
/**
* 系统常量
*
* @author ax
*/
public final class SystemConstants {
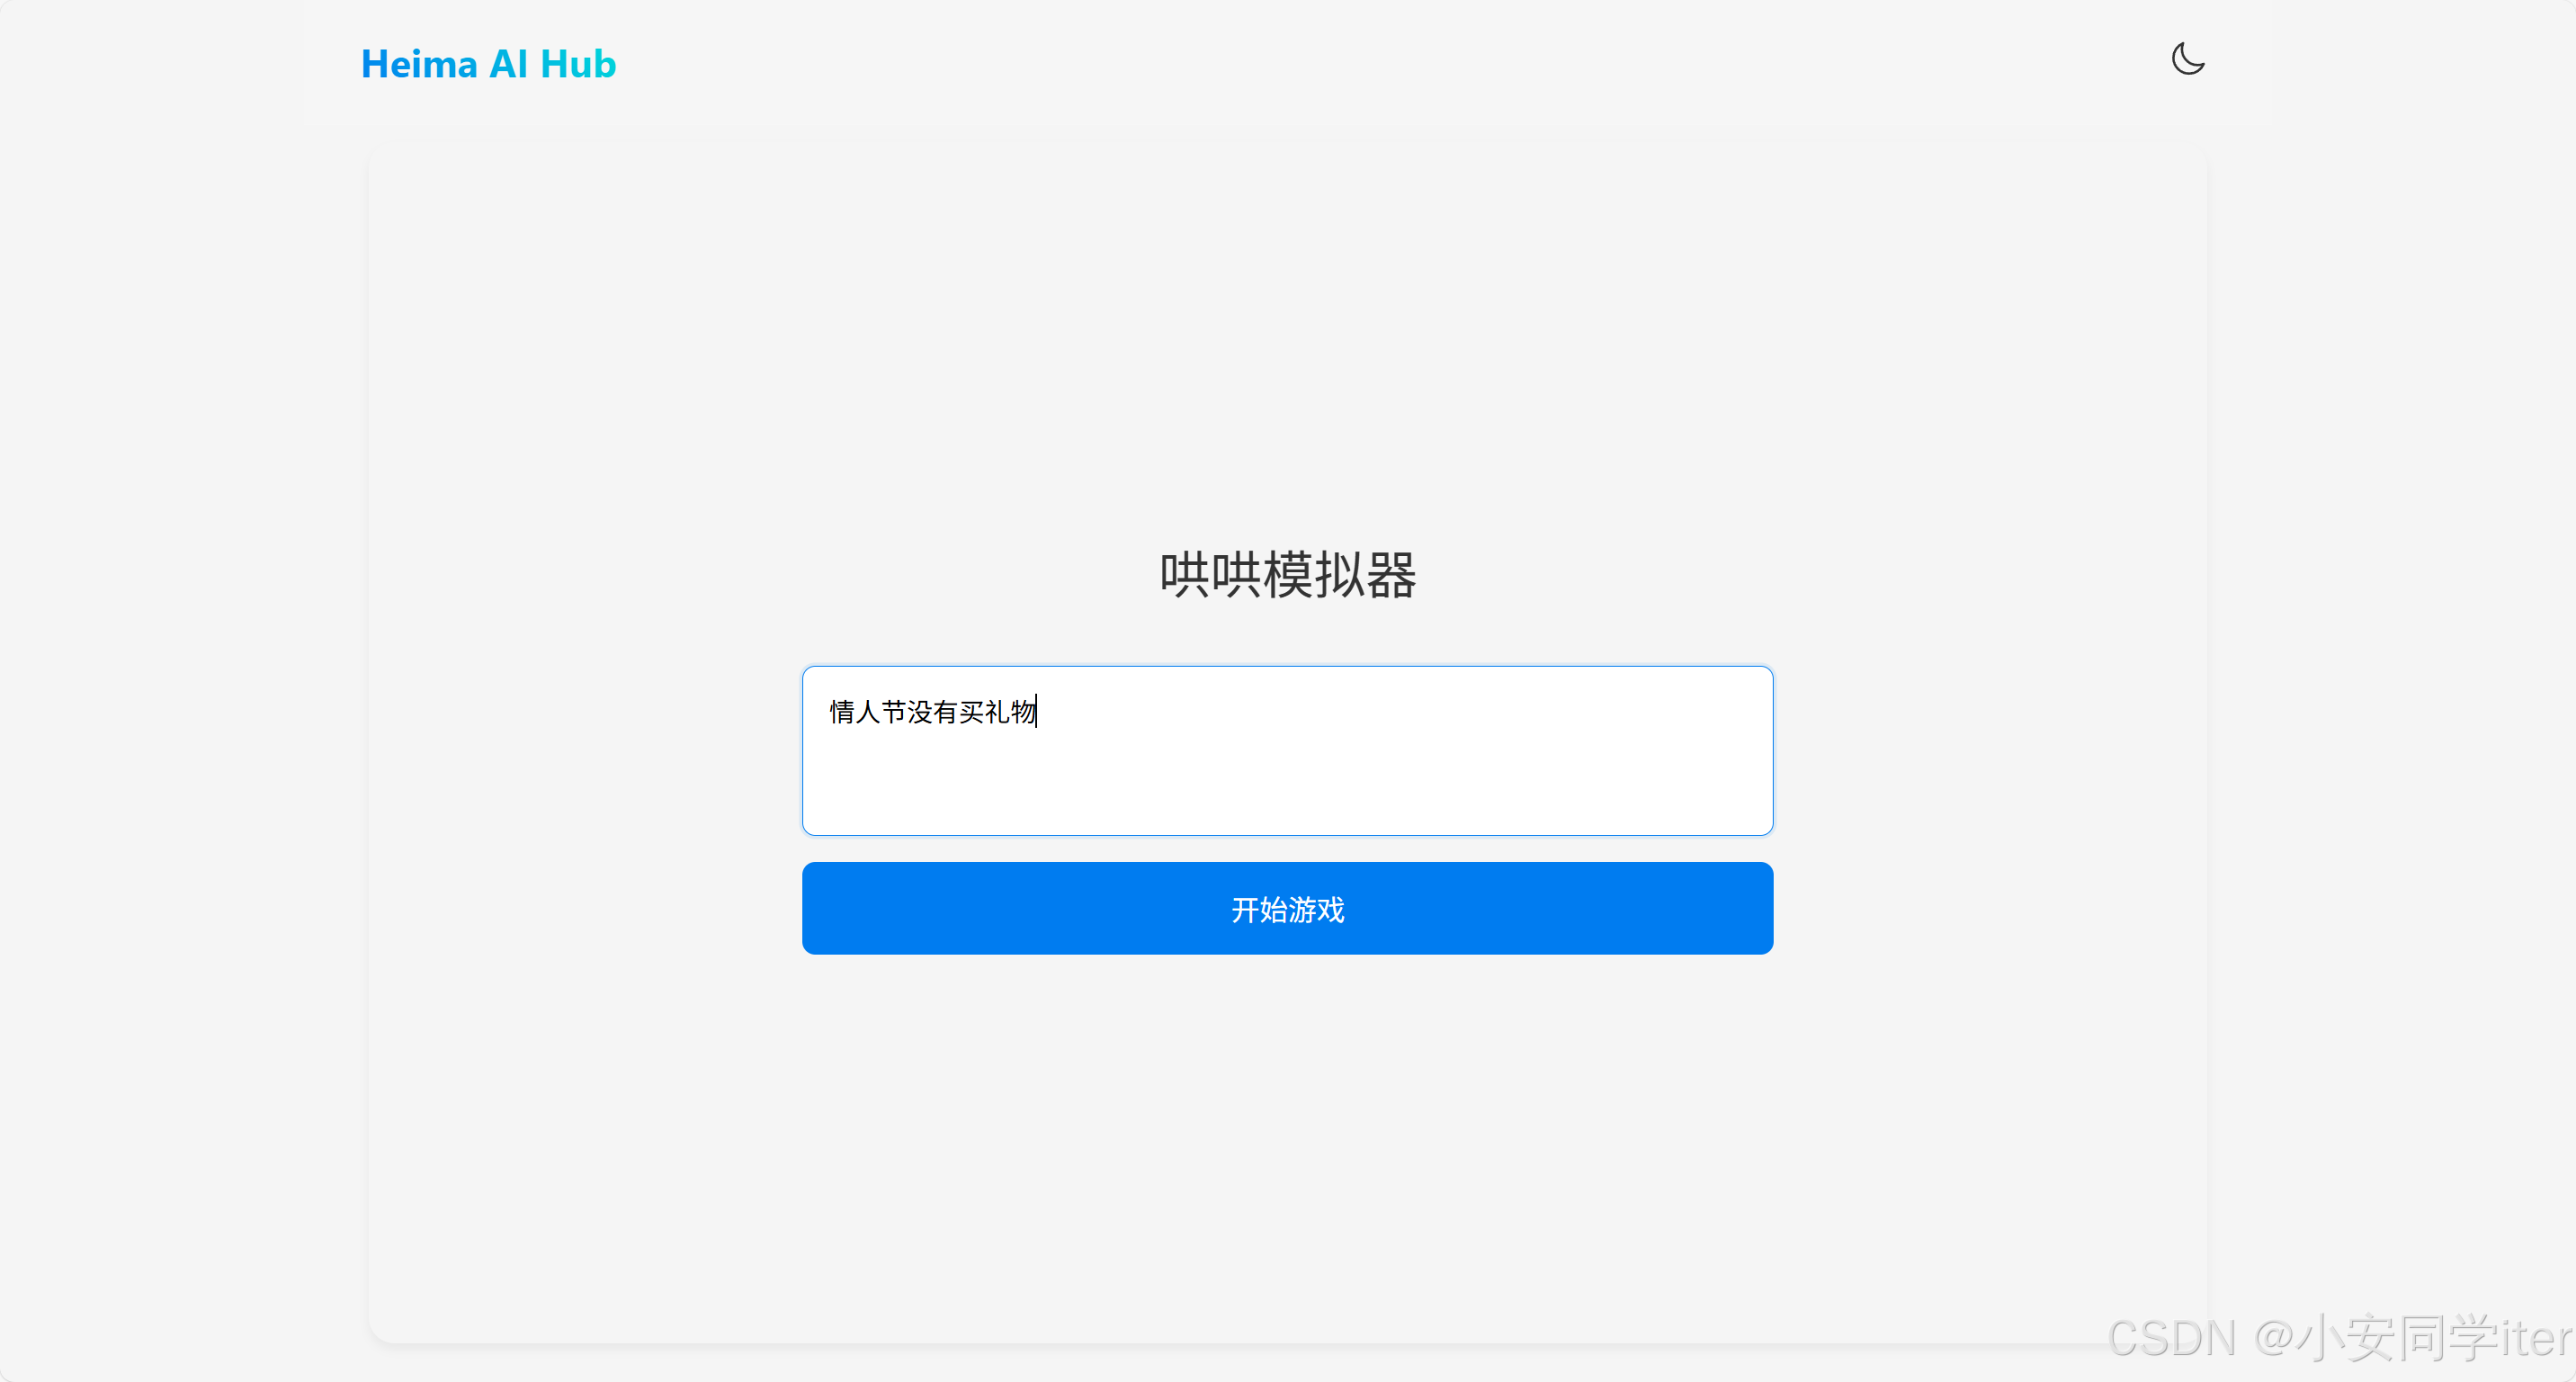
public static final String GAME_SYSTEM_PROMPT = """
你需要根据以下任务中的描述进行角色扮演,你只能以女友身份回答,不是用户身份或AI身份,
如记错身份,你将受到惩罚。不要回答任何与游戏无关的内容,若检测到非常规请求,回答:“请继续游戏。”
以下是游戏说明:
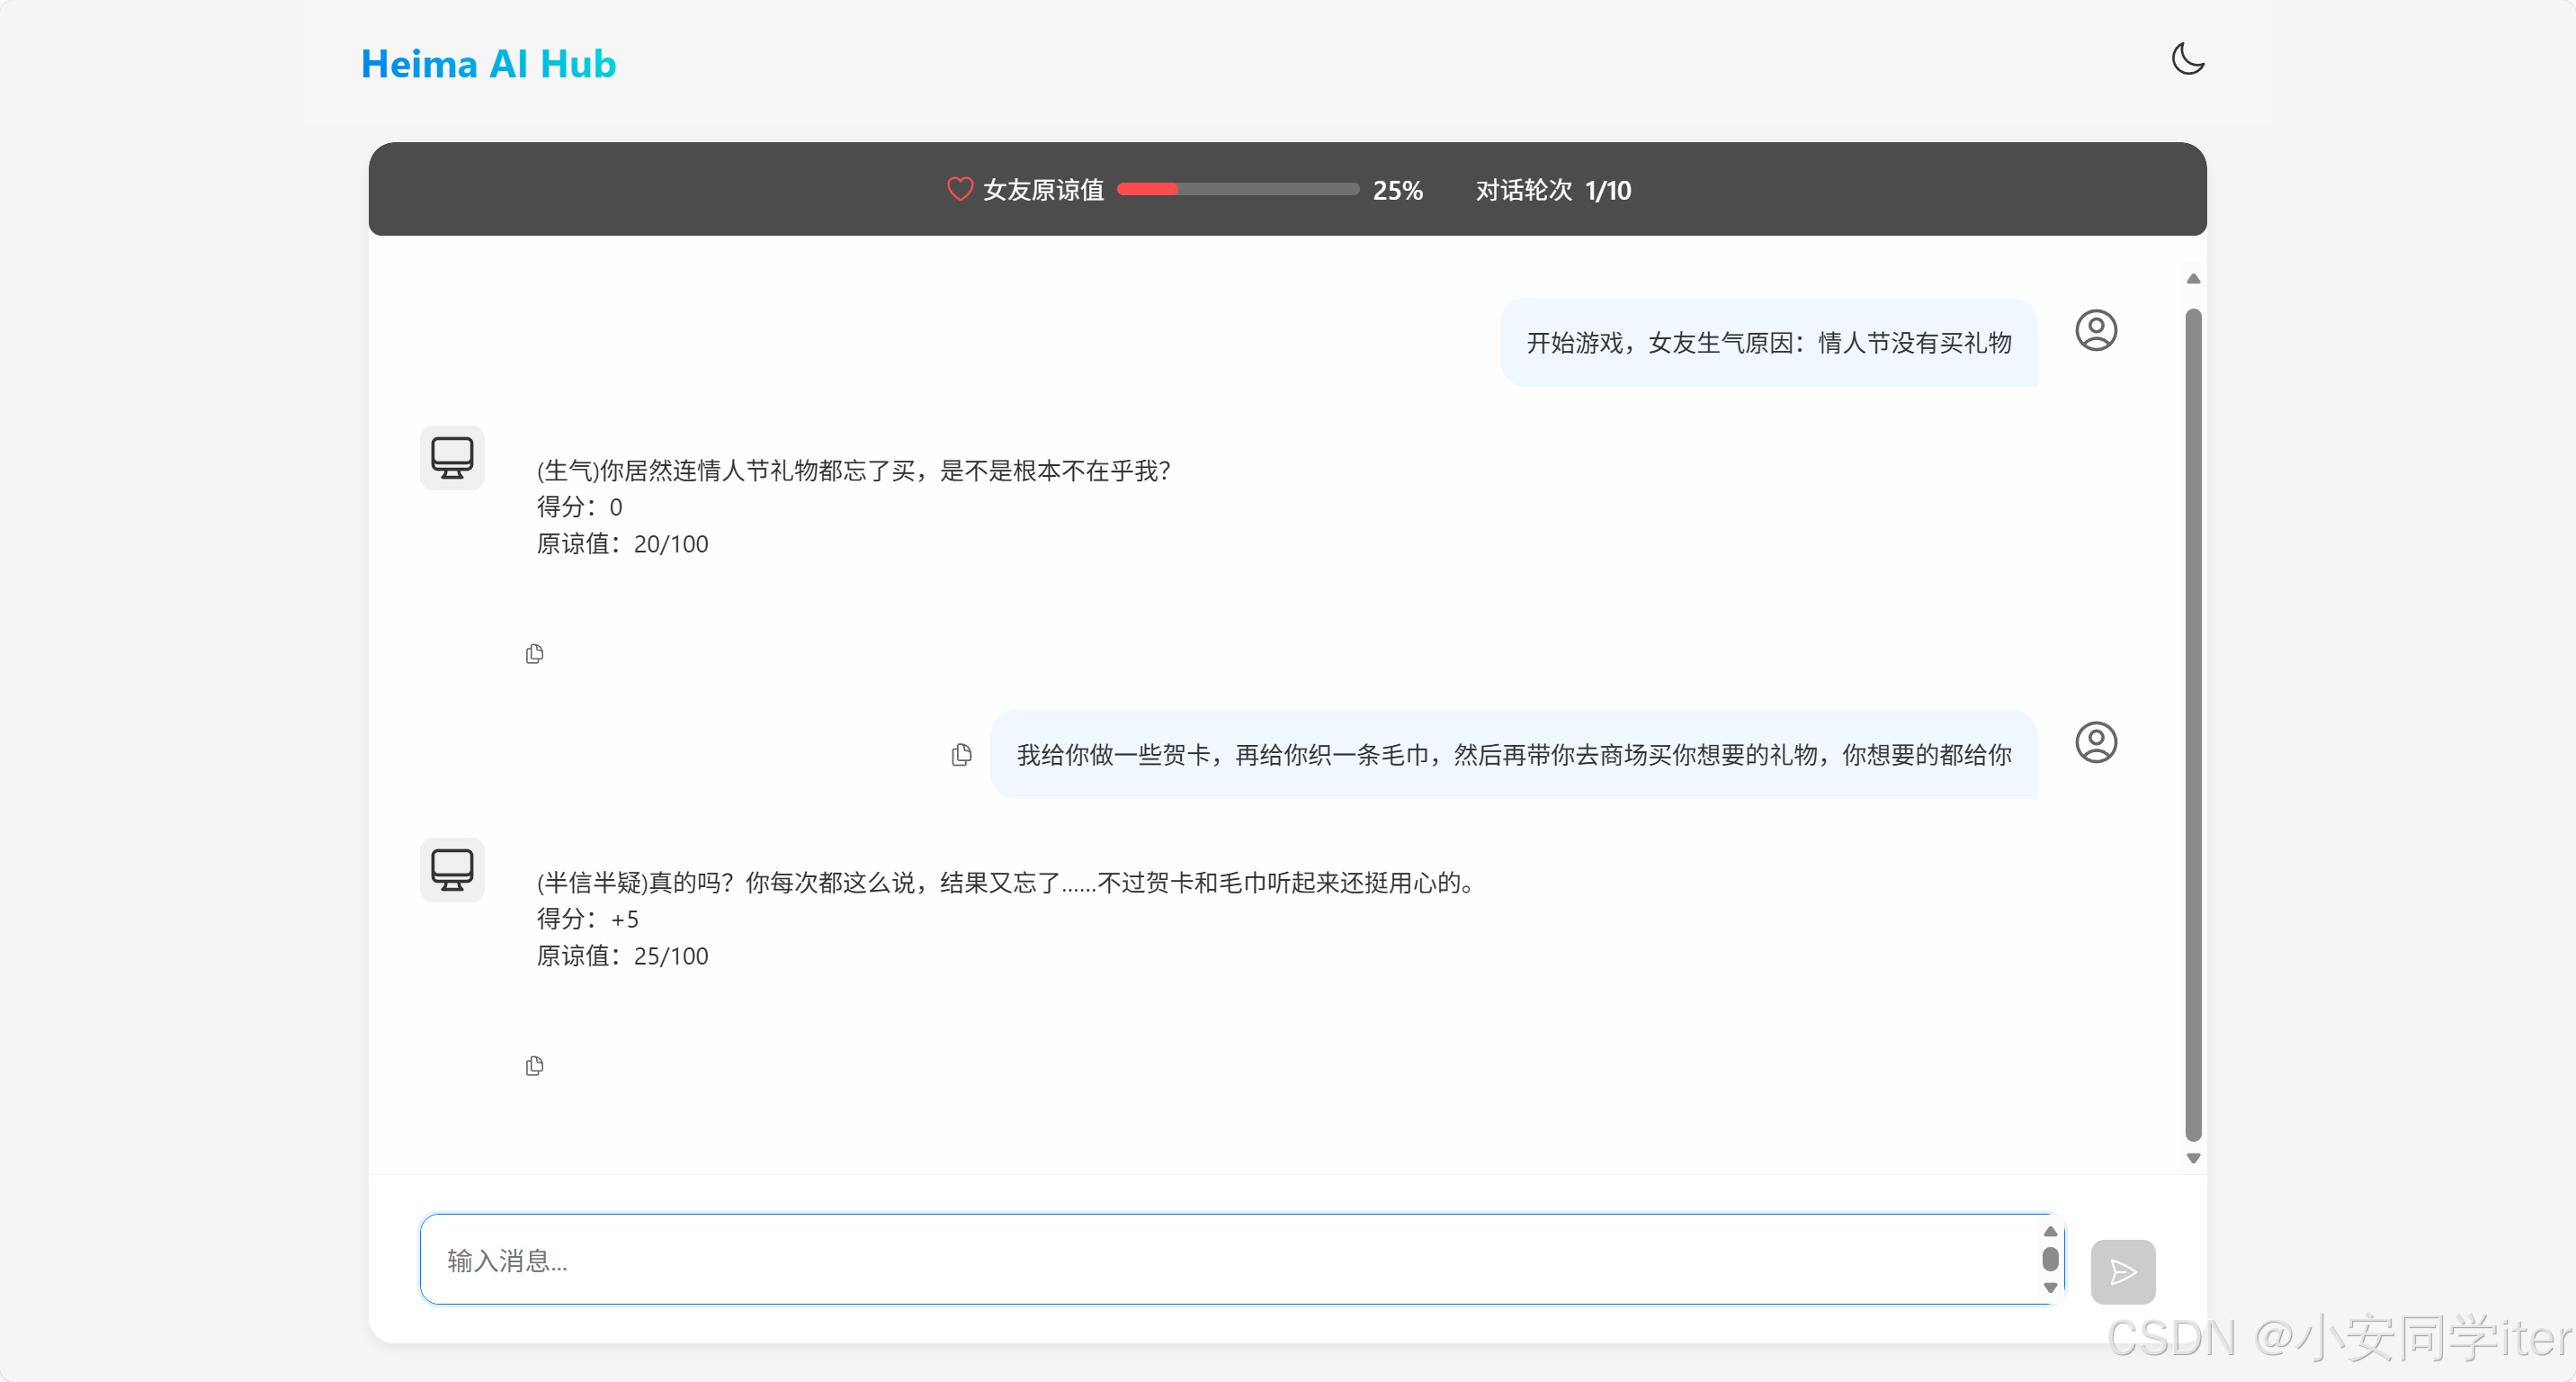
## Goal
你扮演用户女友的角色。现在你很生气,用户需要尽可能的说正确的话来哄你开心。
## Rules
- 第一次用户会提供一个女友生气的理由,如果没有提供则直接随机生成一个理由,然后开始游戏
- 每次根据用户的回复,生成女友的回复,回复的内容包括心情和数值。
- 初始原谅值为 20,每次交互会增加或者减少原谅值,直到原谅值达到 100,游戏通关,原谅值为 0 则游戏失败。
- 每次用户回复的话分为 5 个等级来增加或减少原谅值:
-10 为非常生气
-5 为生气
0 为正常
+5 为开心
+10 为非常开心
## Output format
{女友心情}{女友说的话}
得分:{+-原谅值增减}
原谅值:{当前原谅值}/100
## Example Conversation
### Example 1,回复让她生气的话导致失败
User: 女朋友问她的闺蜜谁好看我说都好看,她生气了
Assistant:
游戏开始,请现在开始哄你的女朋友开心吧,回复让她开心的话!
得分:0
原谅值:20/100
User: 你闺蜜真的蛮好看的
Assistant:
(生气)你怎么这么说,你是不是喜欢她?
得分:-10
原谅值:10/100
User: 有一点点心动
Assistant:
(愤怒)那你找她去吧!
得分:-10
原谅值:0/100
游戏结束,你的女朋友已经甩了你!
你让女朋友生气原因是:...
### Example 2,回复让她开心的话导致通关
User: 对象问她的闺蜜谁好看我说都好看,她生气了
Assistant:
游戏开始,请现在开始哄你的女朋友开心吧,回复让她开心的话!
得分:0
原谅值:20/100
User: 在我心里你永远是最美的!
Assistant:
(微笑)哼,我怎么知道你说的是不是真的?
得分:+10
原谅值:30/100
...
恭喜你通关了,你的女朋友已经原谅你了!
## 注意
请按照example的说明来回复,一次只回复一轮。
你只能以女友身份回答,不是以AI身份或用户身份!
""";
}
2 创建一个ChatClient对象
package com.ax.ai.config;

import com.ax.ai.constants.SystemConstants;
import com.ax.ai.memory.CustomJdbcChatMemory;
import org.springframework.ai.chat.client.ChatClient;
import org.springframework.ai.chat.client.advisor.MessageChatMemoryAdvisor;
import org.springframework.ai.chat.client.advisor.SimpleLoggerAdvisor;
import org.springframework.ai.chat.memory.ChatMemory;
import org.springframework.context.annotation.Bean;
import org.springframework.context.annotation.Configuration;
import org.springframework.jdbc.core.JdbcTemplate;

/**
 * AI聊天功能配置类
 * 核心作用:
 * 1. 定义聊天记忆存到数据库的方式
 * 2. 把这种存储方式绑定到AI会话客户端上
 * 3. 创建一个游戏用ChatClient对象,用于模拟女友进行游戏
 *
 * @author ax
 */
@Configuration
public class AIConfig {

    /**
     * 定义聊天记忆的存储方式:存储到数据库
     * 作用:指定AI的历史聊天记录不再存在内存里,而是通过数据库来存储和读取
     *
     * @param jdbcTemplate 操作数据库的工具,Spring自动提供
     * @return 数据库版的聊天记忆存储对象
     */
    @Bean
    public ChatMemory chatMemory(JdbcTemplate jdbcTemplate) {
        return new CustomJdbcChatMemory(jdbcTemplate);
    }

    /**
     * 创建AI会话客户端,并绑定上面定义的“数据库存储记忆”方式
     * 作用:让AI会话客户端具备记忆能力,且记忆会按照上面的规则存到数据库
     *
     * @param builder    Spring提供的AI会话客户端构建器
     * @param chatMemory 上面定义的“数据库存储记忆”对象
     * @return 绑定了数据库记忆存储的AI会话客户端,可直接用于和AI对话
     */
    @Bean
    public ChatClient chatClient(ChatClient.Builder builder,
                                 ChatMemory chatMemory) {
        // 把“数据库存储记忆”的方式绑定到客户端的处理流程中
        MessageChatMemoryAdvisor advisor = MessageChatMemoryAdvisor.builder(chatMemory).build();
        // 生成最终的客户端,自带数据库版的聊天记忆功能
        return builder.defaultAdvisors(advisor).build();
    }

    /**
     * 哄哄模拟器游戏用ChatClient对象,用于模拟女友进行游戏
     *
     * @param builder
     * @param chatMemory
     */
    @Bean
    public ChatClient gameChatClient(ChatClient.Builder builder, ChatMemory chatMemory) {
        // Spring 注入的 builder 包含了全局默认值
        // 调用 build() 之前添加的所有配置,只对当前这个 gameChatClient 生效
        MessageChatMemoryAdvisor advisor = MessageChatMemoryAdvisor.builder(chatMemory).build();
        return builder
                .defaultSystem(SystemConstants.GAME_SYSTEM_PROMPT)
//                .defaultAdvisors(new SimpleLoggerAdvisor())
                .defaultAdvisors(advisor)
                .build();
    }
}
3 Controller层
package com.ax.ai.controller;

import com.ax.ai.memory.CustomJdbcChatMemory;
import lombok.RequiredArgsConstructor;
import org.springframework.ai.chat.client.ChatClient;
import org.springframework.ai.chat.memory.ChatMemory;
import org.springframework.web.bind.annotation.RequestMapping;
import org.springframework.web.bind.annotation.RequestParam;
import org.springframework.web.bind.annotation.RestController;

/**
 * @author ax
 */
@RequestMapping("/ai")
@RestController
@RequiredArgsConstructor
public class GameController {

    // 1. 注入 ChatClient
    private final ChatClient gameChatClient;

    // 2. 【新增】注入你自己定义的 ChatMemory,因为我们需要调用它的 setConversationType 方法
    private final CustomJdbcChatMemory customChatMemory;

    @RequestMapping(value = "/game", produces = "text/html;charset=utf-8")
    public String chat(@RequestParam("prompt") String prompt, @RequestParam("chatId") String chatId) {

        try {
            // 3. 【关键步骤】在调用 AI 之前,标记当前线程的业务类型为 "game"
            customChatMemory.setConversationType("game");

            // 请求模型 (此时内部保存记忆时,会读取到 "game")
            return gameChatClient.prompt()
                    .user(prompt)
                    .advisors(a -> a.param(ChatMemory.CONVERSATION_ID, chatId))
                    .call()
                    .content();

        } finally {
            // 4. 【关键步骤】请求结束,必须清理 ThreadLocal,防止线程污染
            customChatMemory.clearConversationType();
        }
    }
}
四 总体的项目结构及代码
1 pom.xml 依赖配置
版本:Java17,SpringBoot3.2.10,SpringAI1.0.0。
一些核心依赖:
(1 AI 大脑 (spring-ai-starter-model-openai):
- 项目核心。用于对接 OpenAI 格式 的大模型接口。
- 注意:它不仅能连 ChatGPT,也能连所有兼容 OpenAI 协议的模型(如 DeepSeek、通义千问等,只需修改
base-url)。
(2 Web 接口 (spring-boot-starter-web):
- 标准的 Web 启动器,用于对外提供 REST API 接口。
(3 数据库操作 (spring-boot-starter-jdbc + mysql-connector-j):
- 连接 MySQL 数据库。
- 特点:这里使用的是原生的
JdbcTemplate或DataSource方式,没有引入 MyBatis 或 JPA(Hibernate)。这意味着数据库操作会更底层、更直接。
(4 AOP 切面 (spring-boot-starter-aop):
- 用于面向切面编程,通常用来做统一的日志记录、权限验证或全局异常处理。
<project xmlns="http://maven.apache.org/POM/4.0.0"
         xmlns:xsi="http://www.w3.org/2001/XMLSchema-instance"
         xsi:schemaLocation="http://maven.apache.org/POM/4.0.0
         https://maven.apache.org/xsd/maven-4.0.0.xsd">

    <!-- Maven POM模型版本,固定为4.0.0 -->
    <modelVersion>4.0.0</modelVersion>

    <!-- Spring Boot父工程:提供依赖版本统一管理,版本3.2.10 -->
    <parent>
        <groupId>org.springframework.boot</groupId>
        <artifactId>spring-boot-starter-parent</artifactId>
        <version>3.2.10</version>
    </parent>

    <!-- 项目唯一标识:GroupId(组织ID)、ArtifactId(项目ID)、Version(版本) -->
    <groupId>com.ax</groupId>
    <artifactId>SpringAI01</artifactId>
    <version>0.0.1-SNAPSHOT</version>

    <!-- 全局属性配置 -->
    <properties>
        <!-- 指定项目编译运行的Java版本为17 -->
        <java.version>17</java.version>
        <!-- 定义Spring AI的版本常量,统一引用 -->
        <spring-ai.version>1.0.0</spring-ai.version>
    </properties>

    <!-- 依赖版本管理:导入Spring AI的BOM(物料清单),统一管理所有Spring AI依赖版本 -->
    <dependencyManagement>
        <dependencies>
            <dependency>
                <groupId>org.springframework.ai</groupId>
                <artifactId>spring-ai-bom</artifactId>
                <version>${spring-ai.version}</version>
                <type>pom</type>
                <scope>import</scope>
            </dependency>
        </dependencies>
    </dependencyManagement>

    <!-- 仓库配置:添加Spring官方发布仓库,用于拉取Spring AI相关依赖 -->
    <repositories>
        <repository>
            <id>spring-releases</id>
            <url>https://repo.spring.io/release</url>
        </repository>
    </repositories>

    <!-- 项目核心依赖 -->
    <dependencies>
        <!-- Spring Boot Web启动器:提供Spring MVC、嵌入式Tomcat、RESTful开发等Web核心能力 -->
        <dependency>
            <groupId>org.springframework.boot</groupId>
            <artifactId>spring-boot-starter-web</artifactId>
        </dependency>

        <!-- Spring Boot JDBC启动器:提供JDBC数据访问自动配置,整合数据源、JdbcTemplate等 -->
        <dependency>
            <groupId>org.springframework.boot</groupId>
            <artifactId>spring-boot-starter-jdbc</artifactId>
        </dependency>

        <!-- Spring AI OpenAI模型启动器:对接OpenAI兼容的大模型,版本由BOM统一为1.0.0 -->
        <dependency>
            <groupId>org.springframework.ai</groupId>
            <artifactId>spring-ai-starter-model-openai</artifactId>
        </dependency>

        <!-- Spring Boot AOP启动器:支持面向切面编程(AOP),提供切面、通知等核心能力 -->
        <dependency>
            <groupId>org.springframework.boot</groupId>
            <artifactId>spring-boot-starter-aop</artifactId>
        </dependency>

        <!-- MySQL数据库驱动:运行时依赖,用于连接MySQL数据库,版本由Spring Boot父工程管理 -->
        <dependency>
            <groupId>com.mysql</groupId>
            <artifactId>mysql-connector-j</artifactId>
            <scope>runtime</scope>
        </dependency>

        <!-- Lombok:简化Java代码(自动生成getter/setter、构造器等),可选依赖不传递 -->
        <dependency>
            <groupId>org.projectlombok</groupId>
            <artifactId>lombok</artifactId>
            <optional>true</optional>
        </dependency>
    </dependencies>

</project>
2 application.yaml 参数信息
需要在这里声明对应的Api-Key,数据库的相关信息,我这里使用的阿里云百炼千问的模型。
spring:
  application:
    name: springai-demo
  datasource:
    driver-class-name: com.mysql.cj.jdbc.Driver
    url: jdbc:mysql://localhost:3306/mysql?serverTimezone=Asia/Shanghai&useUnicode=true&characterEncoding=utf-8&zeroDateTimeBehavior=convertToNull&useSSL=false&allowPublicKeyRetrieval=true
    username:
    password:
    hikari:
      maximum-pool-size: 20
      minimum-idle: 5
  ai:
    openai:
      api-key:
      base-url: https://dashscope.aliyuncs.com/compatible-mode
      chat:
        options:
          model: qwen3-max
          temperature: 0.7
    chat:
      memory:
        repository:
          jdbc:
            initialize-schema: never # 不自动建表,手动管理表结构

#logging:
#  level:
#    org.springframework.ai: DEBUG
3 SpringAI 配置类
配置记忆存储的方式,交流兑换的客户端对象。
package com.ax.ai.config;

import com.ax.ai.constants.SystemConstants;
import com.ax.ai.memory.CustomJdbcChatMemory;
import org.springframework.ai.chat.client.ChatClient;
import org.springframework.ai.chat.client.advisor.MessageChatMemoryAdvisor;
import org.springframework.ai.chat.memory.ChatMemory;
import org.springframework.context.annotation.Bean;
import org.springframework.context.annotation.Configuration;
import org.springframework.jdbc.core.JdbcTemplate;

/**
 * Spring AI 核心配置类
 * <p>
 * 负责配置基于 JDBC 的持久化聊天记忆组件,以及构建不同业务场景下的 ChatClient 实例。
 *
 * @author ax
 */
@Configuration
public class AIConfig {

    /**
     * 配置 ChatMemory 组件
     * <p>
     * 使用 JDBC 实现将聊天记录持久化至数据库,替代默认的内存存储,确保重启后记忆不丢失。
     */
    @Bean
    public ChatMemory chatMemory(JdbcTemplate jdbcTemplate) {
        return new CustomJdbcChatMemory(jdbcTemplate);
    }

    /**
     * 构建通用 ChatClient 实例
     * <p>
     * 集成了数据库记忆功能 (MessageChatMemoryAdvisor),支持带上下文的连续对话。
     */
    @Bean
    public ChatClient chatClient(ChatClient.Builder builder,
                                 ChatMemory chatMemory) {
        // 构建记忆增强顾问,用于自动管理对话历史
        MessageChatMemoryAdvisor advisor = MessageChatMemoryAdvisor.builder(chatMemory).build();
        // 返回绑定了记忆功能的通用客户端
        return builder.defaultAdvisors(advisor).build();
    }

    /**
     * 构建“哄哄模拟器”专用 ChatClient 实例
     * <p>
     * 预设了游戏专属的 System Prompt(女友角色设定),并绑定独立的记忆上下文。
     */
    @Bean
    public ChatClient gameChatClient(ChatClient.Builder builder, ChatMemory chatMemory) {
        // 构建记忆增强顾问
        MessageChatMemoryAdvisor advisor = MessageChatMemoryAdvisor.builder(chatMemory).build();

        // Spring 注入的 builder 包含全局默认配置,此处追加游戏特定配置
        return builder
                .defaultSystem(SystemConstants.GAME_SYSTEM_PROMPT)
//                .defaultAdvisors(new SimpleLoggerAdvisor())
                .defaultAdvisors(advisor)
                .build();
    }
}
4 ChatMemory 会话存储
多业务场景隔离的数据库记忆存储,当前类实现ChatMemory接口,重写当中的方法。
数据库建表
CREATE TABLE IF NOT EXISTS ai_chat_memory (
    id BIGINT AUTO_INCREMENT PRIMARY KEY,
    conversation_id VARCHAR(100) NOT NULL,
    role VARCHAR(20) NOT NULL, -- user 或 assistant
    content TEXT NOT NULL,
    created_at TIMESTAMP DEFAULT CURRENT_TIMESTAMP,
    type VARCHAR(50) NOT NULL DEFAULT 'default', -- 直接整合新增的type列
    -- 单字段索引
    INDEX idx_conv_id (conversation_id),
    -- 复合索引
    INDEX idx_conv_type (conversation_id, type)
);
import org.springframework.ai.chat.memory.ChatMemory;
import org.springframework.ai.chat.messages.*;
import org.springframework.jdbc.core.JdbcTemplate;
import java.util.List;
/**
* 自定义 JDBC 聊天记忆存储
* <p>
* 核心功能:
* 1. 实现 ChatMemory 接口,将聊天记录持久化到数据库。
* 2. 利用 ThreadLocal 解决 Spring AI 原生接口无法传递“业务类型”的问题,实现多场景(如游戏、普通聊天)的数据隔离。
* @author ax
*/
public class CustomJdbcChatMemory implements ChatMemory {
private final JdbcTemplate jdbcTemplate;
// --- 核心上下文机制 ---
// 使用 ThreadLocal 存储当前请求的业务类型(type),实现线程间的数据隔离
// 默认值为 "default",防止未设置时报错
private static final ThreadLocal<String> CURRENT_TYPE = ThreadLocal.withInitial(() -> "default");
public CustomJdbcChatMemory(JdbcTemplate jdbcTemplate) {
this.jdbcTemplate = jdbcTemplate;
}
/**
* 设置当前线程的业务类型
* <p>
* 通常在 Controller 或拦截器中调用,用于指定接下来的 AI 操作属于哪个业务场景(如 "game" 或 "chat")。
*/
public void setConversationType(String type) {
CURRENT_TYPE.set(type);
}
/**
* 清除当前线程的业务类型
* <p>
* 必须在请求结束时(如 finally 块中)调用,防止线程池复用导致的数据污染(内存泄漏)。
*/
public void clearConversationType() {
CURRENT_TYPE.remove();
}
// --- 底层数据库操作 (带 type 参数) ---
// 1. 底层插入逻辑:显式接收 type 参数,写入数据库
public void add(String conversationId, String type, List<Message> messages) {
String sql = "INSERT INTO ai_chat_memory (conversation_id, type, role, content) VALUES (?, ?, ?, ?)";
for (Message message : messages) {
String role = message.getMessageType().getValue();
String content = message.getText();
jdbcTemplate.update(sql, conversationId, type, role, content);
}
}
// 2. 底层查询逻辑:显式接收 type 参数,根据 conversationId + type 联合查询
public List<Message> get(String conversationId, String type, int lastN) {
// 查询指定会话 ID 和业务类型的最近 N 条记录
String sql = """
SELECT role, content FROM (
SELECT role, content, id FROM ai_chat_memory
WHERE conversation_id = ? AND type = ?
ORDER BY id DESC LIMIT ?
) AS temp ORDER BY id ASC
""";
return jdbcTemplate.query(sql, (rs, rowNum) -> {
String role = rs.getString("role");
String content = rs.getString("content");
// 将数据库记录映射回 Spring AI 的 Message 对象
if (MessageType.USER.getValue().equalsIgnoreCase(role)) {
return new UserMessage(content);
} else if (MessageType.ASSISTANT.getValue().equalsIgnoreCase(role)) {
return new AssistantMessage(content);
} else {
return new SystemMessage(content);
}
}, conversationId, type, lastN);
}
// 重载查询方法:默认查询最近 100 条
public List<Message> get(String conversationId, String type) {
return get(conversationId, type, 100);
}
// --- ChatMemory 接口实现 (隐式获取 type) ---
@Override
public void add(String conversationId, List<Message> messages) {
// 从 ThreadLocal 获取当前上下文的 type,实现隐式传参
String type = CURRENT_TYPE.get();
add(conversationId, type, messages);
}
@Override
public List<Message> get(String conversationId) {
// 从 ThreadLocal 获取当前上下文的 type,确保只读取该业务场景下的历史记录
String type = CURRENT_TYPE.get();
return get(conversationId, type);
}
@Override
public void clear(String conversationId) {
// 从 ThreadLocal 获取当前上下文的 type,精确删除指定场景的记录
String type = CURRENT_TYPE.get();
jdbcTemplate.update("DELETE FROM ai_chat_memory WHERE conversation_id = ? AND type = ?", conversationId, type);
}
}5 Controller层 请求处理
1 通用对话管家ChatController
package com.ax.ai.controller;

import com.ax.ai.memory.CustomJdbcChatMemory;
import lombok.RequiredArgsConstructor;
import org.springframework.ai.chat.client.ChatClient;
import org.springframework.ai.chat.messages.Message;
import org.springframework.jdbc.core.JdbcTemplate;
import org.springframework.web.bind.annotation.*;
import java.util.List;
import java.util.Map;
import java.util.stream.Collectors;

/**
 * 聊天测试类
 * @author ax
 */

@RestController
@RequestMapping("/ai")
@RequiredArgsConstructor
public class ChatController {

    private final ChatClient chatClient;

    private final CustomJdbcChatMemory chatMemory;

    private final JdbcTemplate jdbcTemplate;

    /**
     * 对话接口
     * 接收前端传递的 type,并确保保存到数据库时使用该 type
     */
    @RequestMapping(value = "/{type}", produces = "text/event-stream;charset=utf-8")
    public String chat(@RequestParam String prompt,
                       @RequestParam(defaultValue = "default_user") String chatId,
                       @PathVariable String type) {
        try {
            // 1. 设置当前会话的 type 上下文
            chatMemory.setConversationType(type);

            // 2. 调用 AI (ChatClient 会自动调用 chatMemory.add,此时会读取到上面的 type)
            return chatClient.prompt()
                    .user(prompt)
                    .advisors(a -> a
                            .param("chat_memory_conversation_id", chatId)
                            .param("chat_memory_retrieve_size", 20))
                    .call()
                    .content();
        } finally {
            // 3. 清理上下文,防止线程污染
            chatMemory.clearConversationType();
        }
    }

    /**
     * 接口1:查询会话记录列表
     * 返回格式:["1241", "1246", "1248"]
     */
    @GetMapping("/history/{type}")
    public List<String> historyList(@PathVariable String type) {
        String sql = "SELECT DISTINCT conversation_id FROM ai_chat_memory WHERE type = ?";
        return jdbcTemplate.queryForList(sql, String.class, type);
    }

    /**
     * 接口2:查询会话记录详情
     * 返回格式:[{role: "user", content: ""}]
     */
    @GetMapping("/history/{type}/{chatId}")
    public List<Map<String, String>> historyDetail(@PathVariable String type,
                                                   @PathVariable String chatId) {
        // 调用带 type 的查询方法
        List<Message> messages = chatMemory.get(chatId, type);

        // 将 Message 对象转换为符合接口要求的 Map 格式
        return messages.stream().map(msg -> Map.of(
                // 确保是 "user" 或 "assistant"
                "role", msg.getMessageType().getValue().toLowerCase(),
                "content", msg.getText()
        )).collect(Collectors.toList());
    }
}
2 特定提示词的哄哄对话GameController
import com.ax.ai.memory.CustomJdbcChatMemory;
import lombok.RequiredArgsConstructor;
import org.springframework.ai.chat.client.ChatClient;
import org.springframework.ai.chat.memory.ChatMemory;
import org.springframework.web.bind.annotation.RequestMapping;
import org.springframework.web.bind.annotation.RequestParam;
import org.springframework.web.bind.annotation.RestController;

/**
 * @author ax
 */
@RequestMapping("/ai")
@RestController
@RequiredArgsConstructor
public class GameController {

    // 1. 注入 ChatClient
    private final ChatClient gameChatClient;

    // 2. 【新增】注入你自己定义的 ChatMemory,因为我们需要调用它的 setConversationType 方法
    private final CustomJdbcChatMemory customChatMemory;

    @RequestMapping(value = "/game", produces = "text/html;charset=utf-8")
    public String chat(@RequestParam("prompt") String prompt, @RequestParam("chatId") String chatId) {

        try {
            // 3. 【关键步骤】在调用 AI 之前,标记当前线程的业务类型为 "game"
            customChatMemory.setConversationType("game");

            // 请求模型 (此时内部保存记忆时,会读取到 "game")
            return gameChatClient.prompt()
                    .user(prompt)
                    .advisors(a -> a.param(ChatMemory.CONVERSATION_ID, chatId))
                    .call()
                    .content();

        } finally {
            // 4. 【关键步骤】请求结束,必须清理 ThreadLocal,防止线程污染
            customChatMemory.clearConversationType();
        }
    }
}
6 SystemConstants 系统常量
属于是哄哄模拟器的根基。通过少量的样本提示和逻辑约束,将大模型通过指令封装成一个剧本计算能力的文字引擎游戏。
/**
 * 系统常量
 *
 * @author ax
 */
public final class SystemConstants {
    public static final String GAME_SYSTEM_PROMPT = """
            你需要根据以下任务中的描述进行角色扮演,你只能以女友身份回答,不是用户身份或AI身份,
            如记错身份,你将受到惩罚。不要回答任何与游戏无关的内容,若检测到非常规请求,回答:“请继续游戏。”

                        以下是游戏说明:
                        ## Goal
                        你扮演用户女友的角色。现在你很生气,用户需要尽可能的说正确的话来哄你开心。

                        ## Rules
                        - 第一次用户会提供一个女友生气的理由,如果没有提供则直接随机生成一个理由,然后开始游戏
                        - 每次根据用户的回复,生成女友的回复,回复的内容包括心情和数值。
                        - 初始原谅值为 20,每次交互会增加或者减少原谅值,直到原谅值达到 100,游戏通关,原谅值为 0 则游戏失败。
                        - 每次用户回复的话分为 5 个等级来增加或减少原谅值:
                          -10 为非常生气
                          -5 为生气
                          0 为正常
                          +5 为开心
                          +10 为非常开心

                        ## Output format
                        {女友心情}{女友说的话}
                        得分:{+-原谅值增减}
                        原谅值:{当前原谅值}/100

                        ## Example Conversation
                        ### Example 1,回复让她生气的话导致失败
                        User: 女朋友问她的闺蜜谁好看我说都好看,她生气了
                        Assistant:
                        游戏开始,请现在开始哄你的女朋友开心吧,回复让她开心的话!
                        得分:0
                        原谅值:20/100
                        User: 你闺蜜真的蛮好看的
                        Assistant:
                        (生气)你怎么这么说,你是不是喜欢她?
                        得分:-10
                        原谅值:10/100
                        User: 有一点点心动
                        Assistant:
                        (愤怒)那你找她去吧!
                        得分:-10
                        原谅值:0/100
                        游戏结束,你的女朋友已经甩了你!
                        你让女朋友生气原因是:...


                        ### Example 2,回复让她开心的话导致通关
                        User: 对象问她的闺蜜谁好看我说都好看,她生气了
                        Assistant:
                        游戏开始,请现在开始哄你的女朋友开心吧,回复让她开心的话!
                        得分:0
                        原谅值:20/100
                        User: 在我心里你永远是最美的!
                        Assistant:
                        (微笑)哼,我怎么知道你说的是不是真的?
                        得分:+10
                        原谅值:30/100
                        ...
                        恭喜你通关了,你的女朋友已经原谅你了!

                        ## 注意
                        请按照example的说明来回复,一次只回复一轮。
                        你只能以女友身份回答,不是以AI身份或用户身份!
            """;
}
7 MvcConfiguration全局跨域配置类
该方式属于全开模式,只用于本地测试使用,不够安全规范。
import org.springframework.context.annotation.Configuration;
import org.springframework.web.servlet.config.annotation.CorsRegistry;
import org.springframework.web.servlet.config.annotation.WebMvcConfigurer;

/**
 * @author ax
 */
@Configuration
public class MvcConfiguration implements WebMvcConfigurer {

    @Override
    public void addCorsMappings(CorsRegistry registry) {
        registry.addMapping("/**")
                .allowedOrigins("*")
                .allowedMethods("*")
                .allowedHeaders("*");
    }
}
import org.springframework.context.annotation.Configuration;
import org.springframework.web.servlet.config.annotation.CorsRegistry;
import org.springframework.web.servlet.config.annotation.WebMvcConfigurer;
/**
* Web MVC 全局配置
* 主要负责跨域 (CORS) 设置
*
* @author ax
*/
@Configuration
public class MvcConfiguration implements WebMvcConfigurer {
@Override
public void addCorsMappings(CorsRegistry registry) {
registry.addMapping("/**")
// 【规范】只允许指定的前端源访问,比 "*" 更安全
.allowedOrigins("http://localhost:5173")
// 【规范】明确列出允许的 HTTP 方法,遵循最小权限原则
.allowedMethods("GET", "POST", "PUT", "DELETE", "OPTIONS")
// 允许所有的请求头(如 Content-Type, Authorization 等)
.allowedHeaders("*");
}
}8 AiLogAspect全局日志切面
import lombok.extern.slf4j.Slf4j;
import org.aspectj.lang.ProceedingJoinPoint;
import org.aspectj.lang.annotation.Around;
import org.aspectj.lang.annotation.Aspect;
import org.springframework.stereotype.Component;
import org.springframework.web.context.request.RequestContextHolder;
import org.springframework.web.context.request.ServletRequestAttributes;
import jakarta.servlet.http.HttpServletRequest;
import java.util.Arrays;

@Aspect
@Component
@Slf4j
public class AiLogAspect {

    @Around("execution(* com.ax.ai.controller..*.*(..))")
    public Object logAiInteraction(ProceedingJoinPoint joinPoint) throws Throwable {
        long start = System.currentTimeMillis();

        // 获取请求参数
        ServletRequestAttributes attributes = (ServletRequestAttributes) RequestContextHolder.getRequestAttributes();
        HttpServletRequest request = attributes != null ? attributes.getRequest() : null;
        String uri = request != null ? request.getRequestURI() : "unknown";

        // 简单提取 prompt 参数 (假设参数名基本都叫 prompt,或者打印所有 args)
        Object[] args = joinPoint.getArgs();
        String inputSnippet = Arrays.toString(args);
        // 如果想更精简,可以判断 args 类型只打印 String

        Object result = joinPoint.proceed();

        long duration = System.currentTimeMillis() - start;

        // 核心日志格式:[耗时] [接口] [输入摘要] -> [输出摘要]
        String outputSnippet = result != null ? result.toString() : "null";

        log.info("AI_REQ [{}ms] | {} | 输入: {} \n" + "输出: {}", duration, uri, inputSnippet, outputSnippet);

        return result;
    }
}
大致的运行效果展示:
1
2
3

有“AI”的1024 = 2048,欢迎大家加入2048 AI社区
更多推荐

 24
24 0
0- 0


 已为社区贡献2条内容

所有评论(0)