腾讯元器智能体:打造专属AI聊天工具
一、点击进入腾讯元器
二、登录之后在智能体模板选择
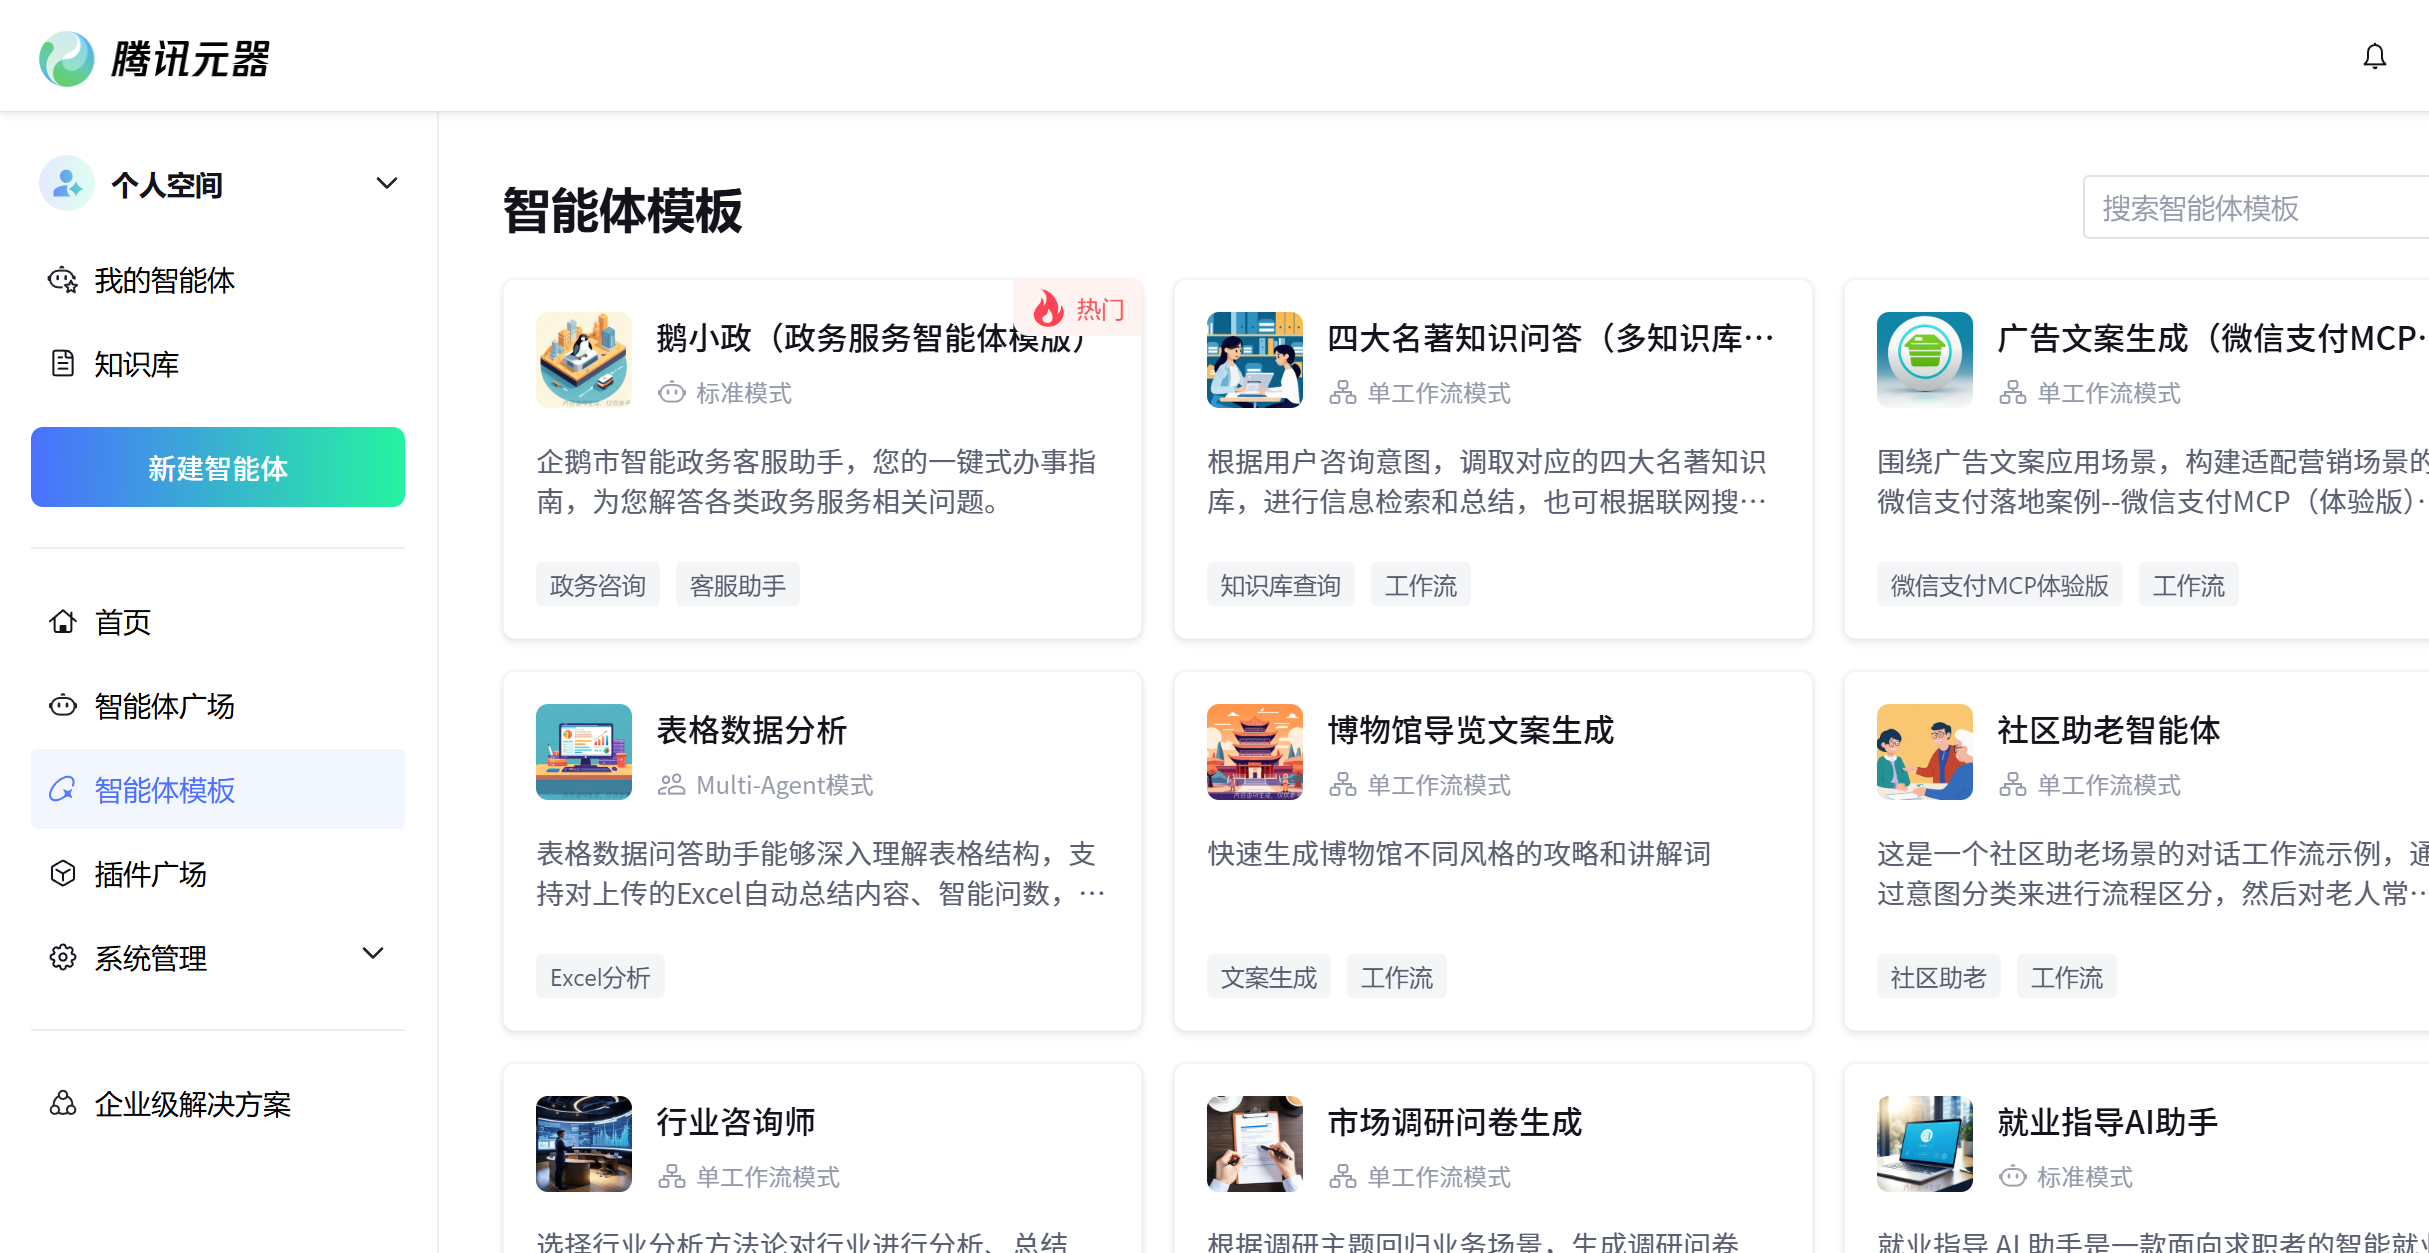
看你喜欢做那个,就选择那个,我选择了博物馆导览文案生成智能体。
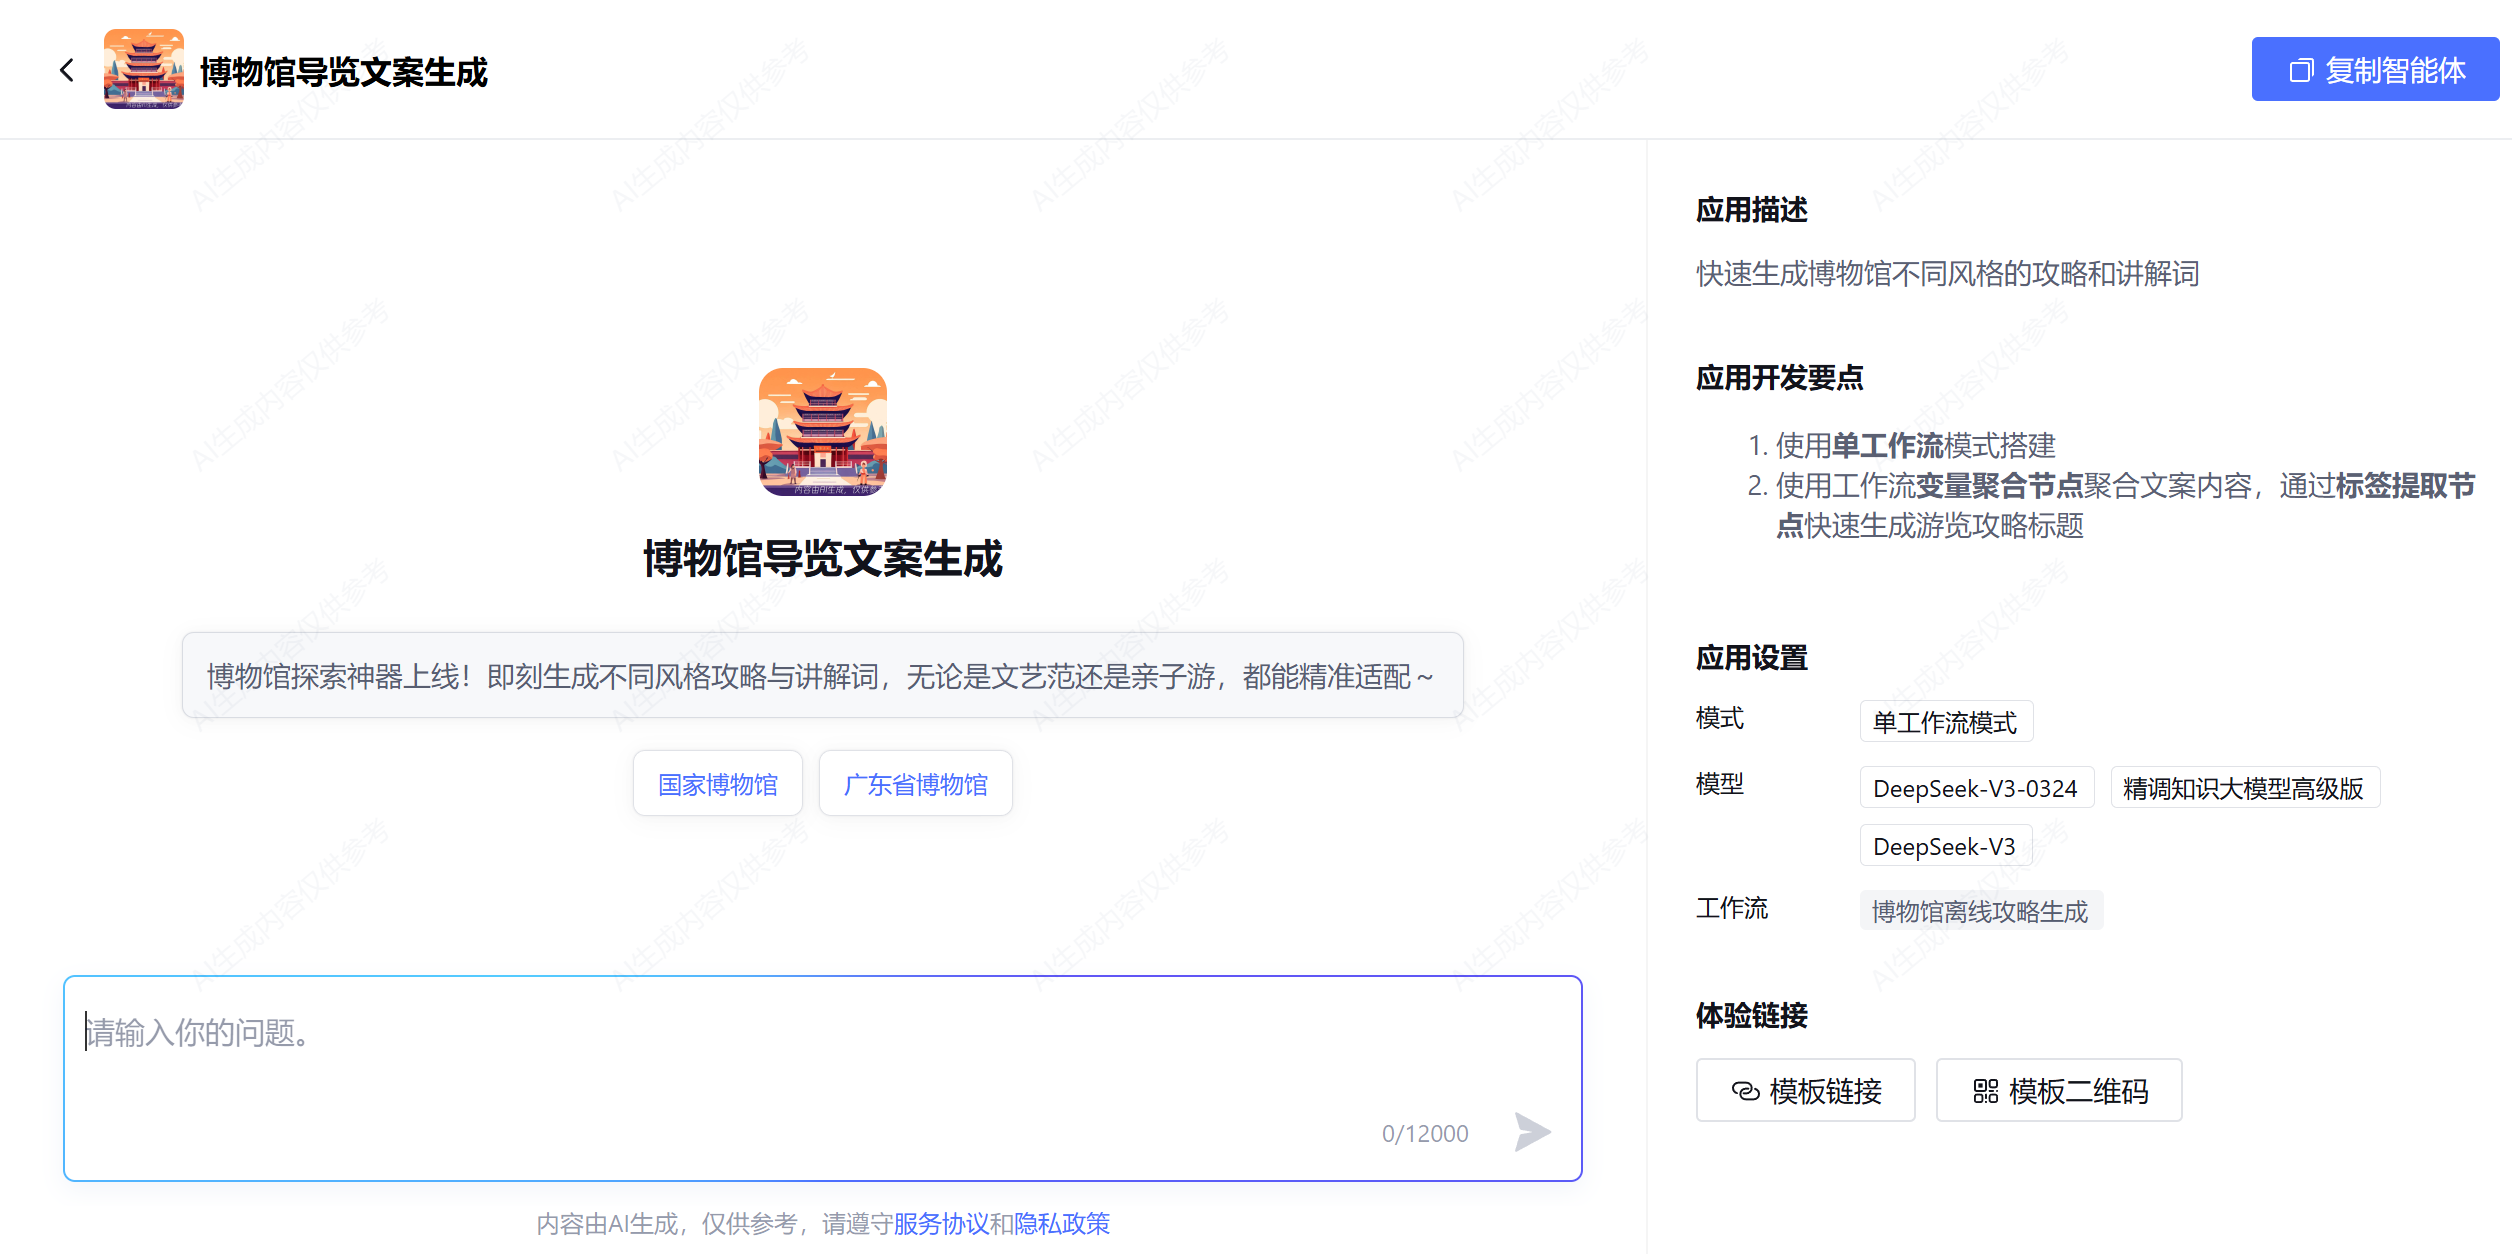
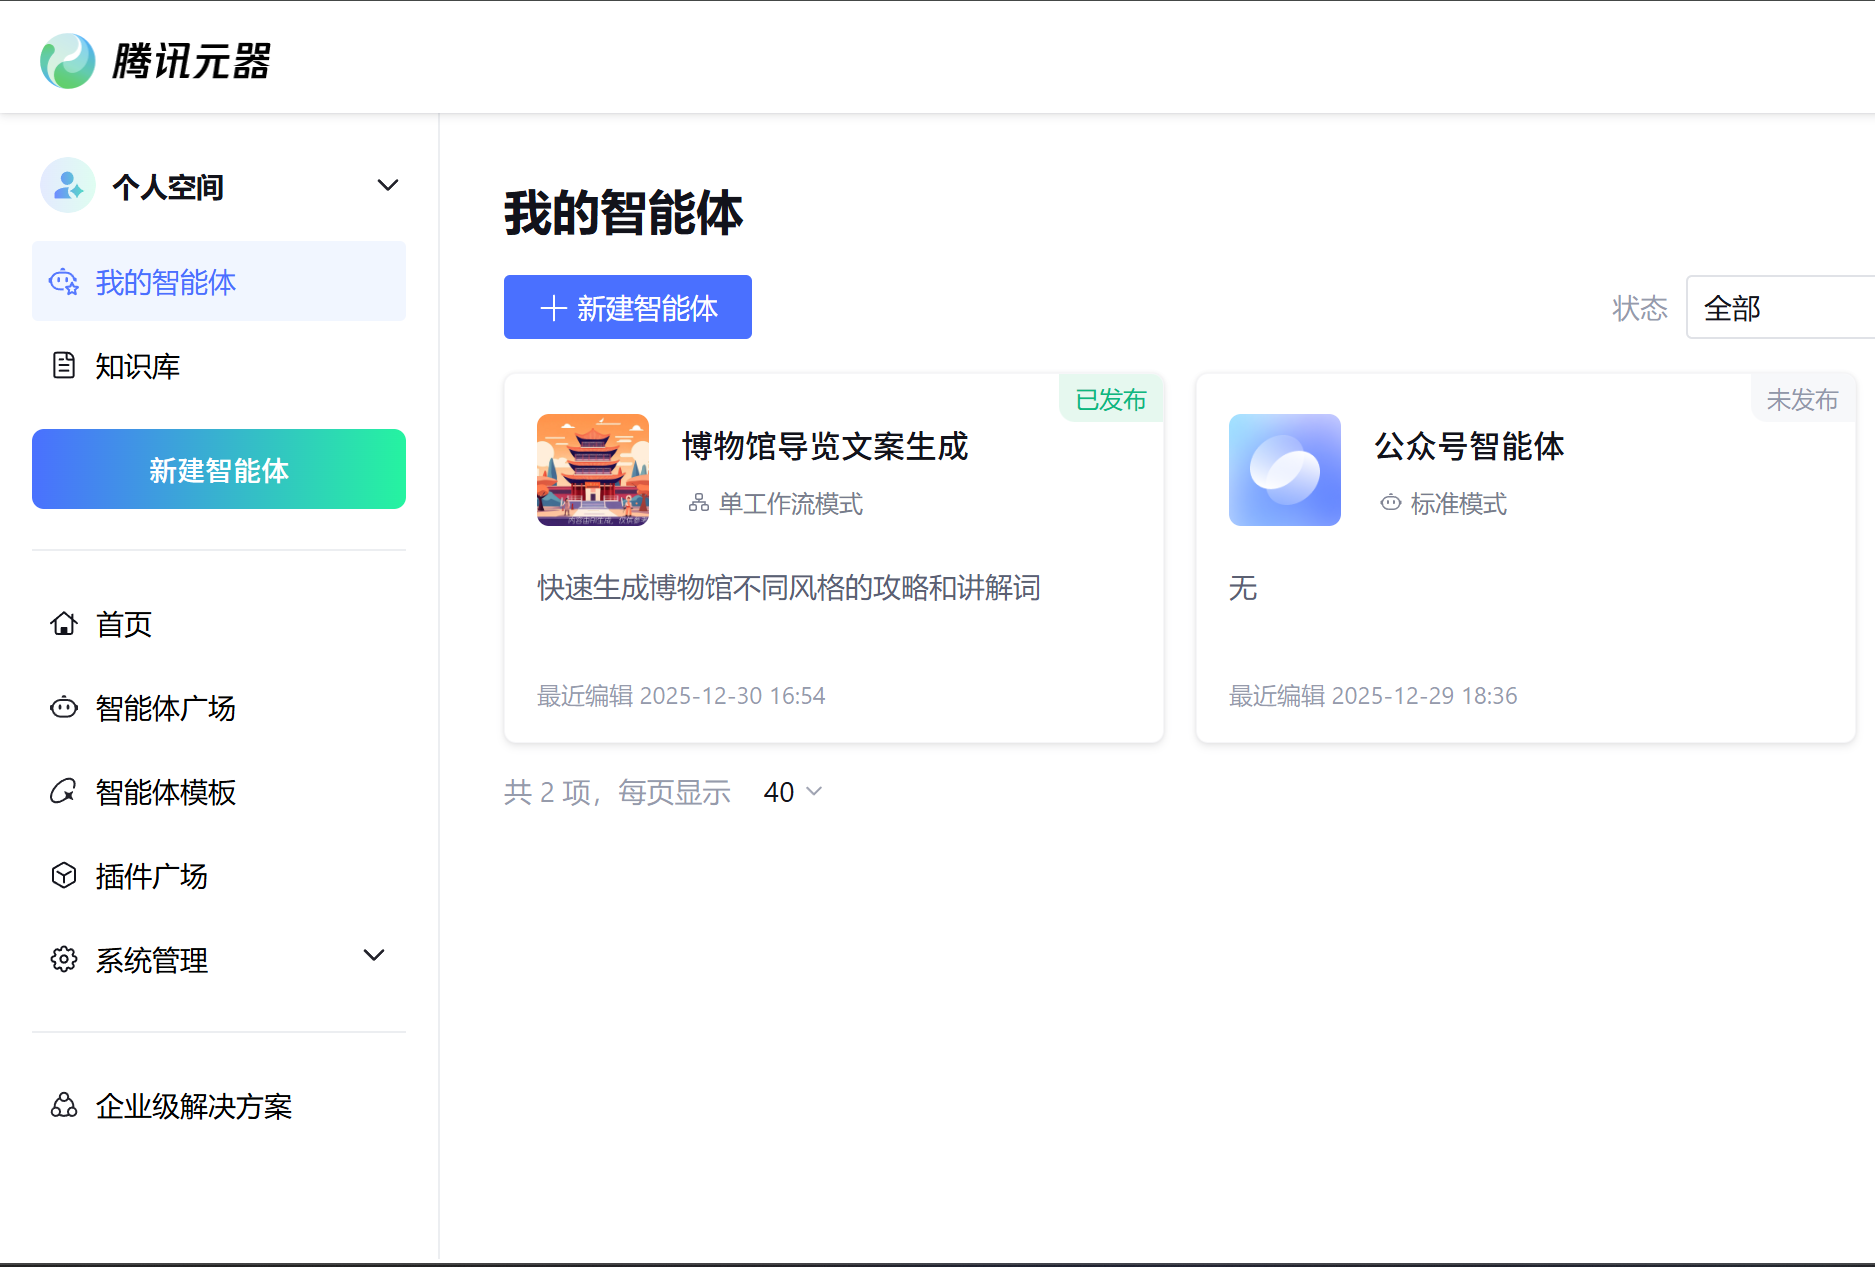
进来之后点击左上角的复制智能体之后,就可以在“我的智能体”页面看到了。
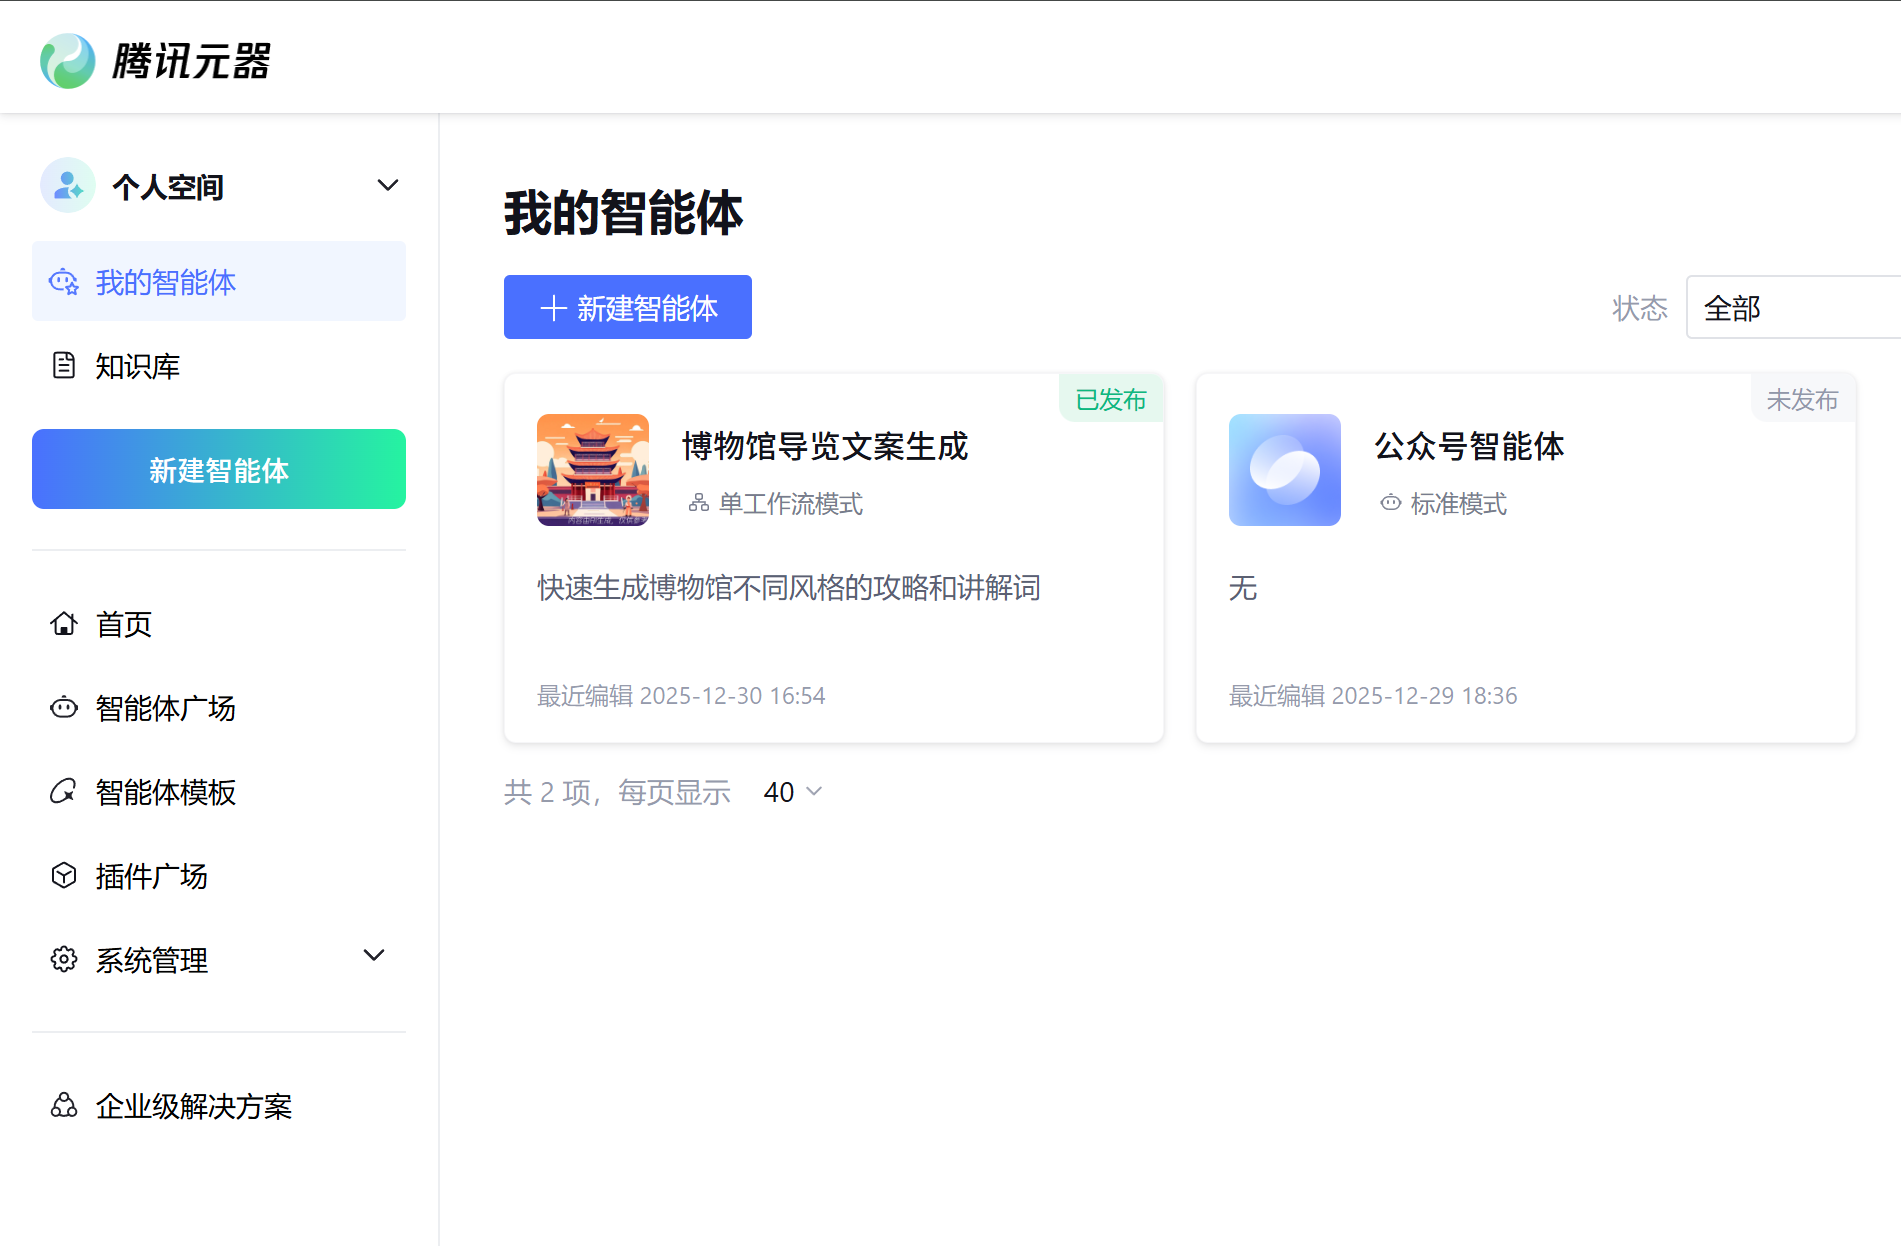
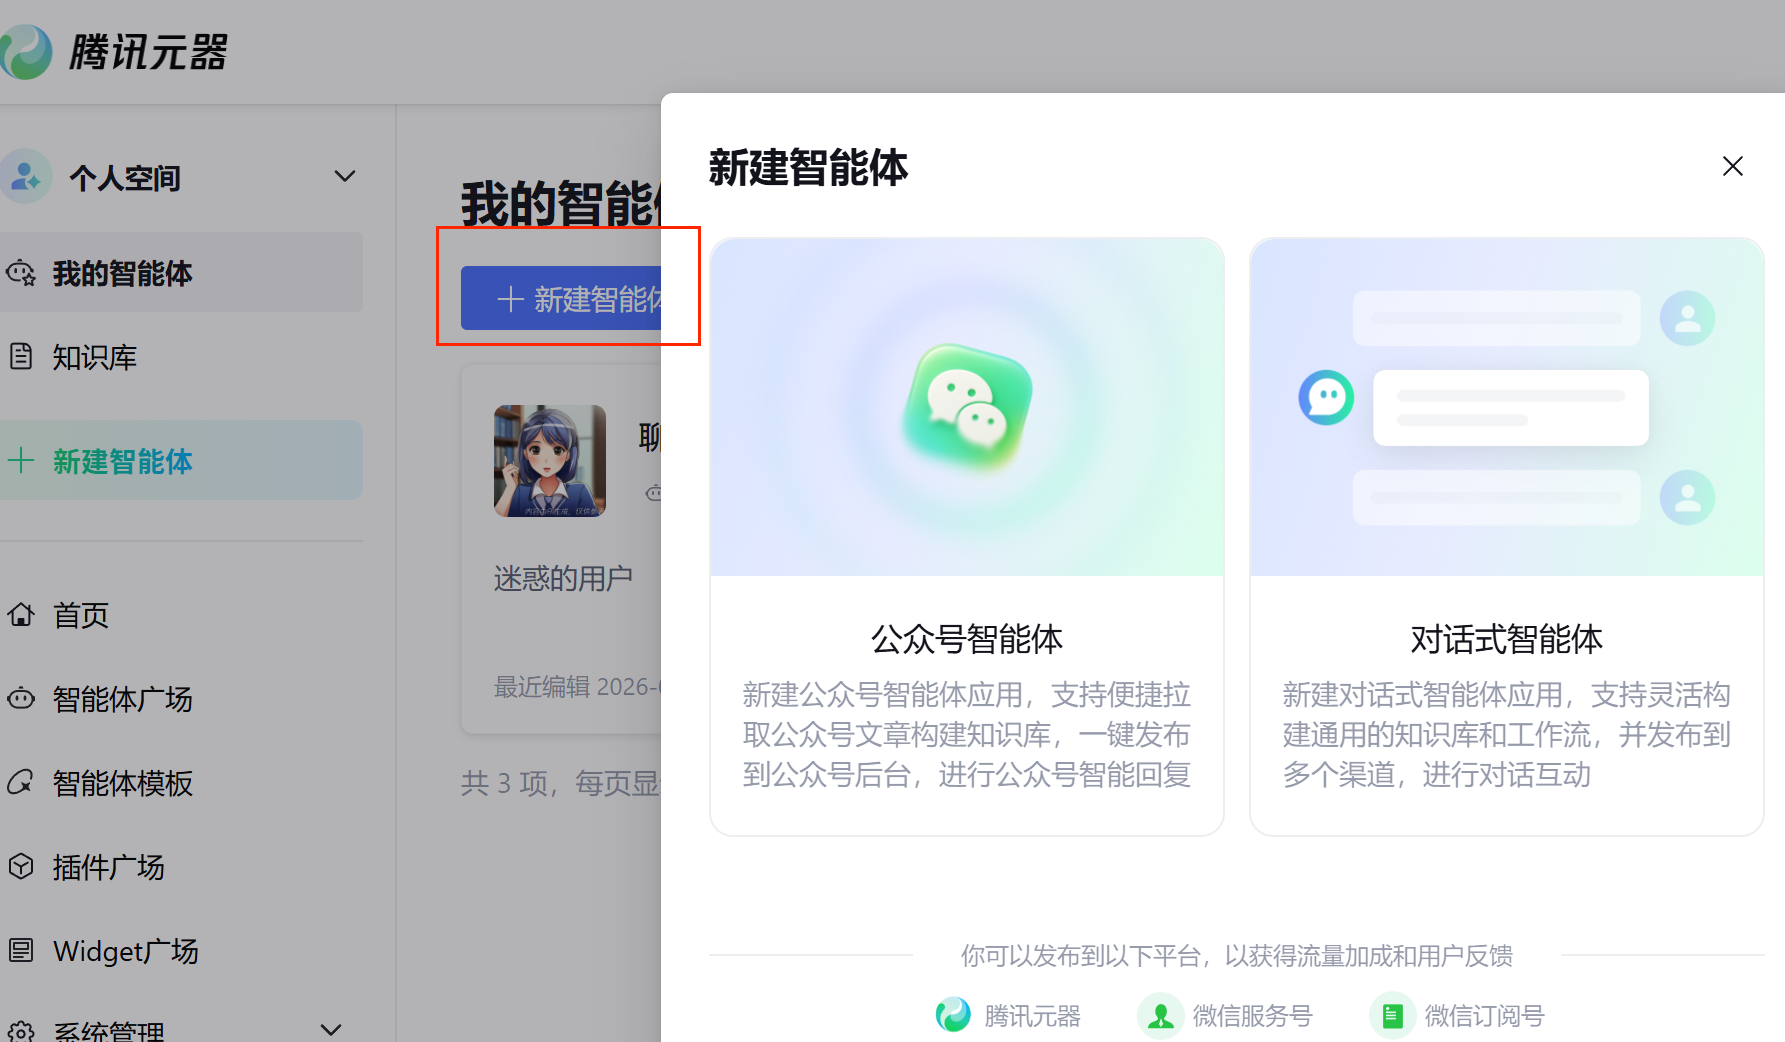
或者点击下图的新建智能体来创建:
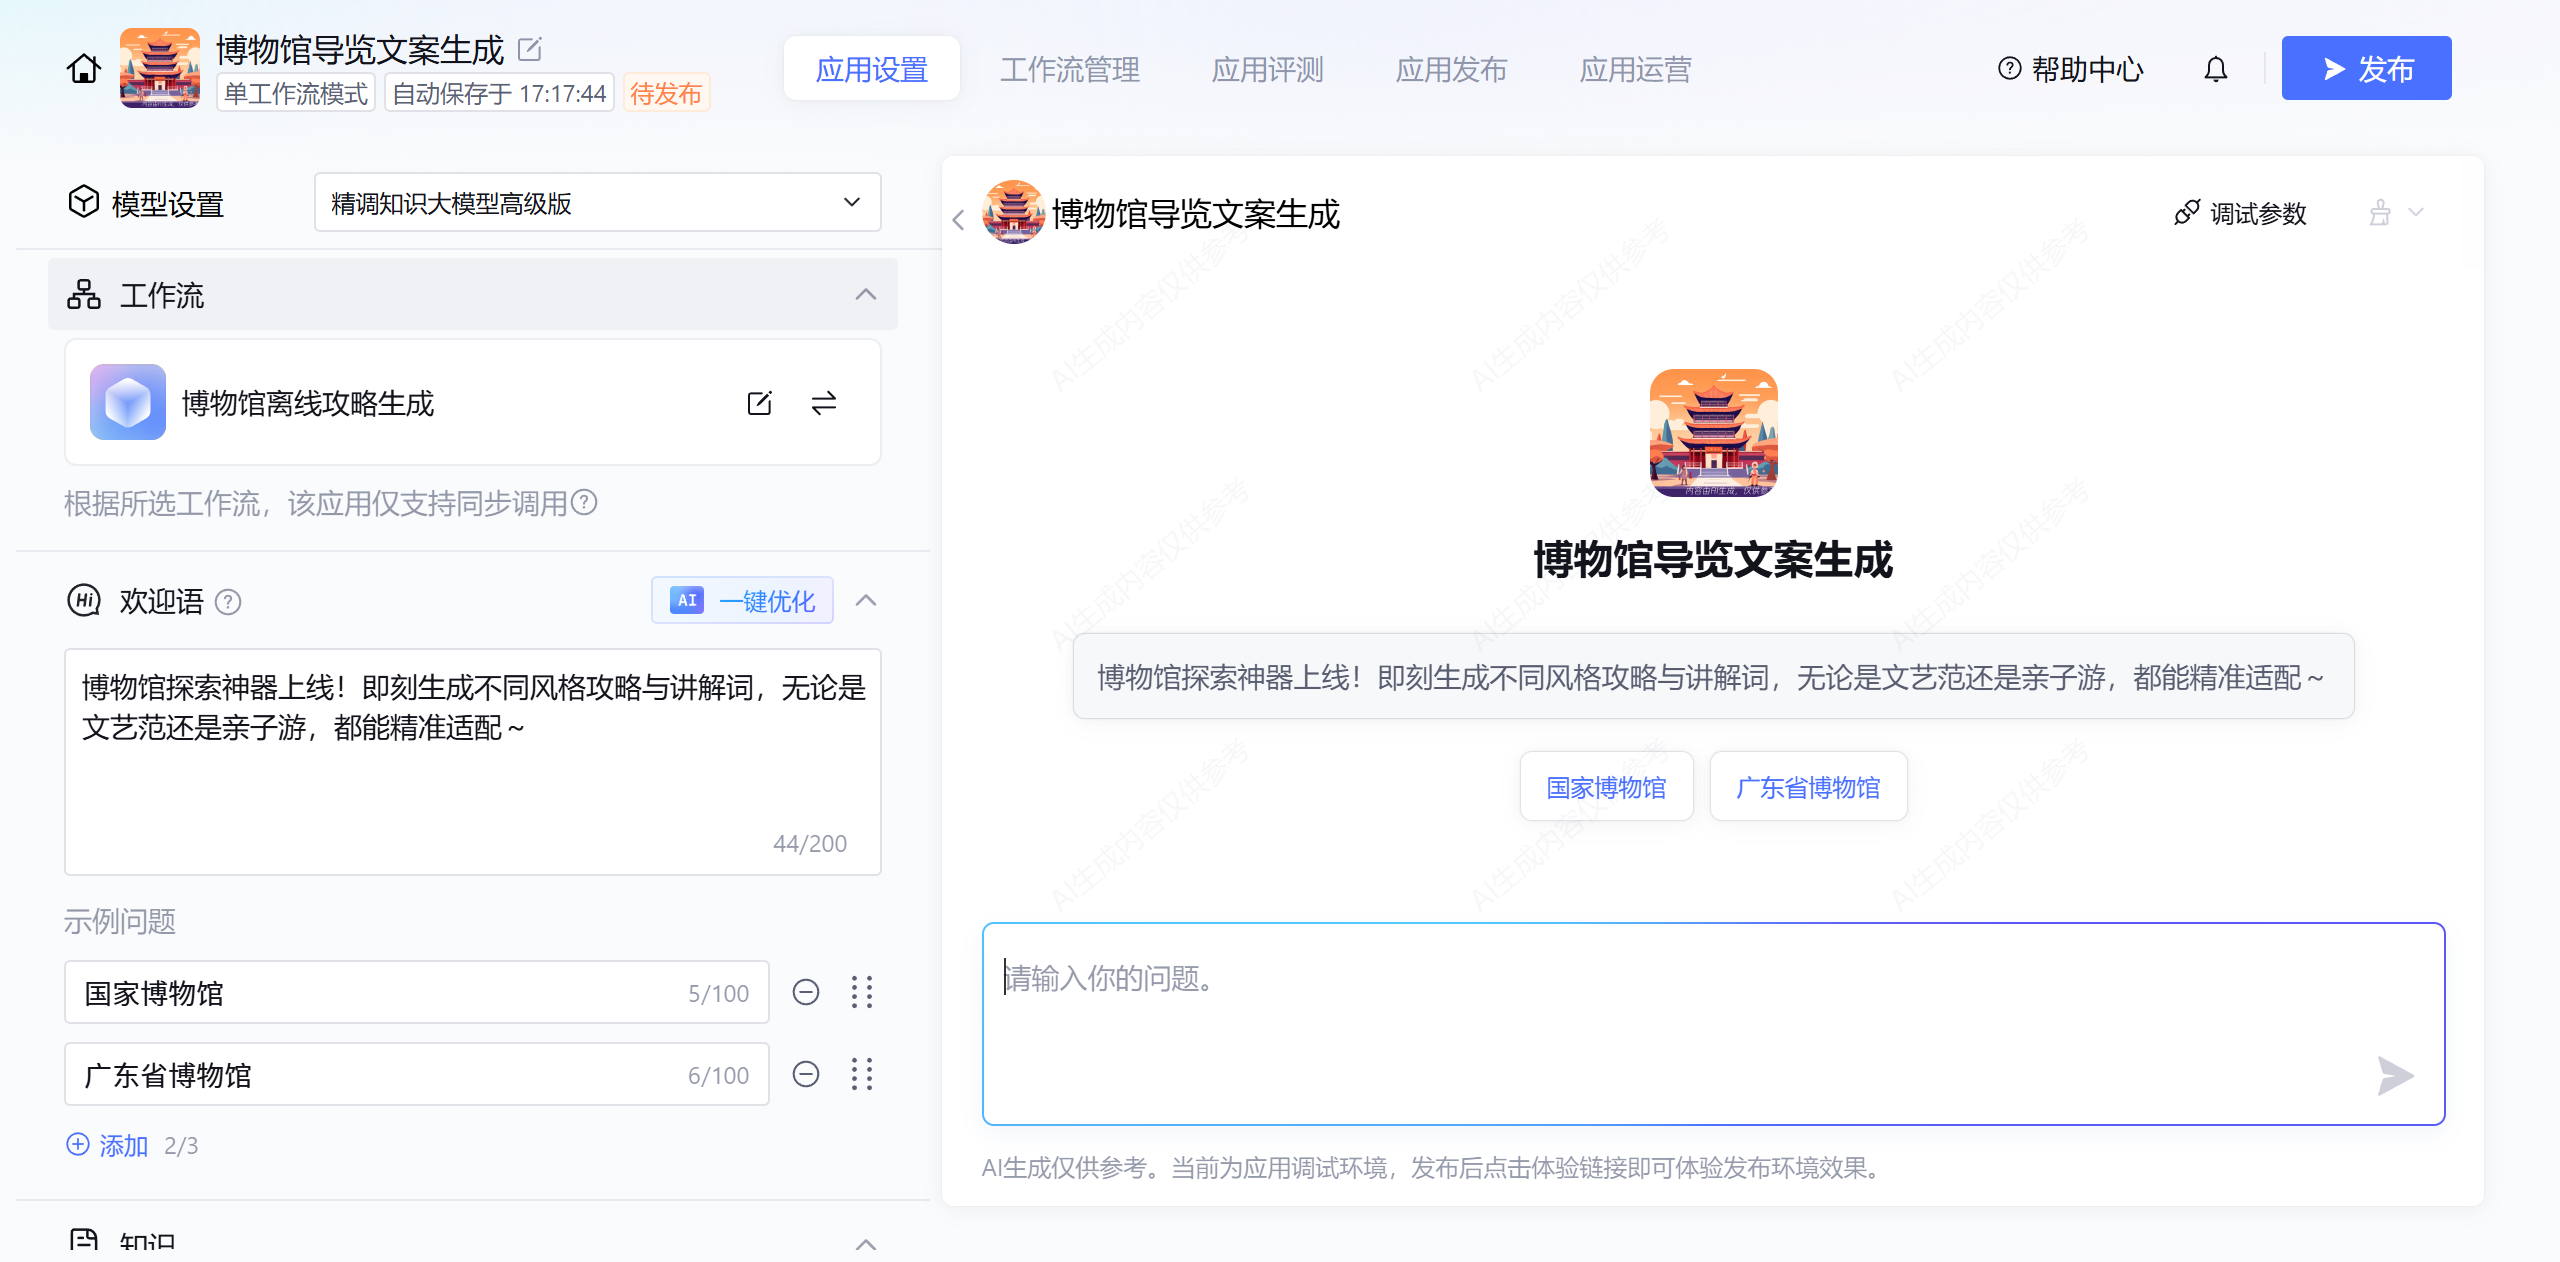
点击刚才选择的智能体,进入到该智能体里面的编辑页面,在这个应用设置页面左边的模型设置、工作流、欢迎语等这些都可以自定义:
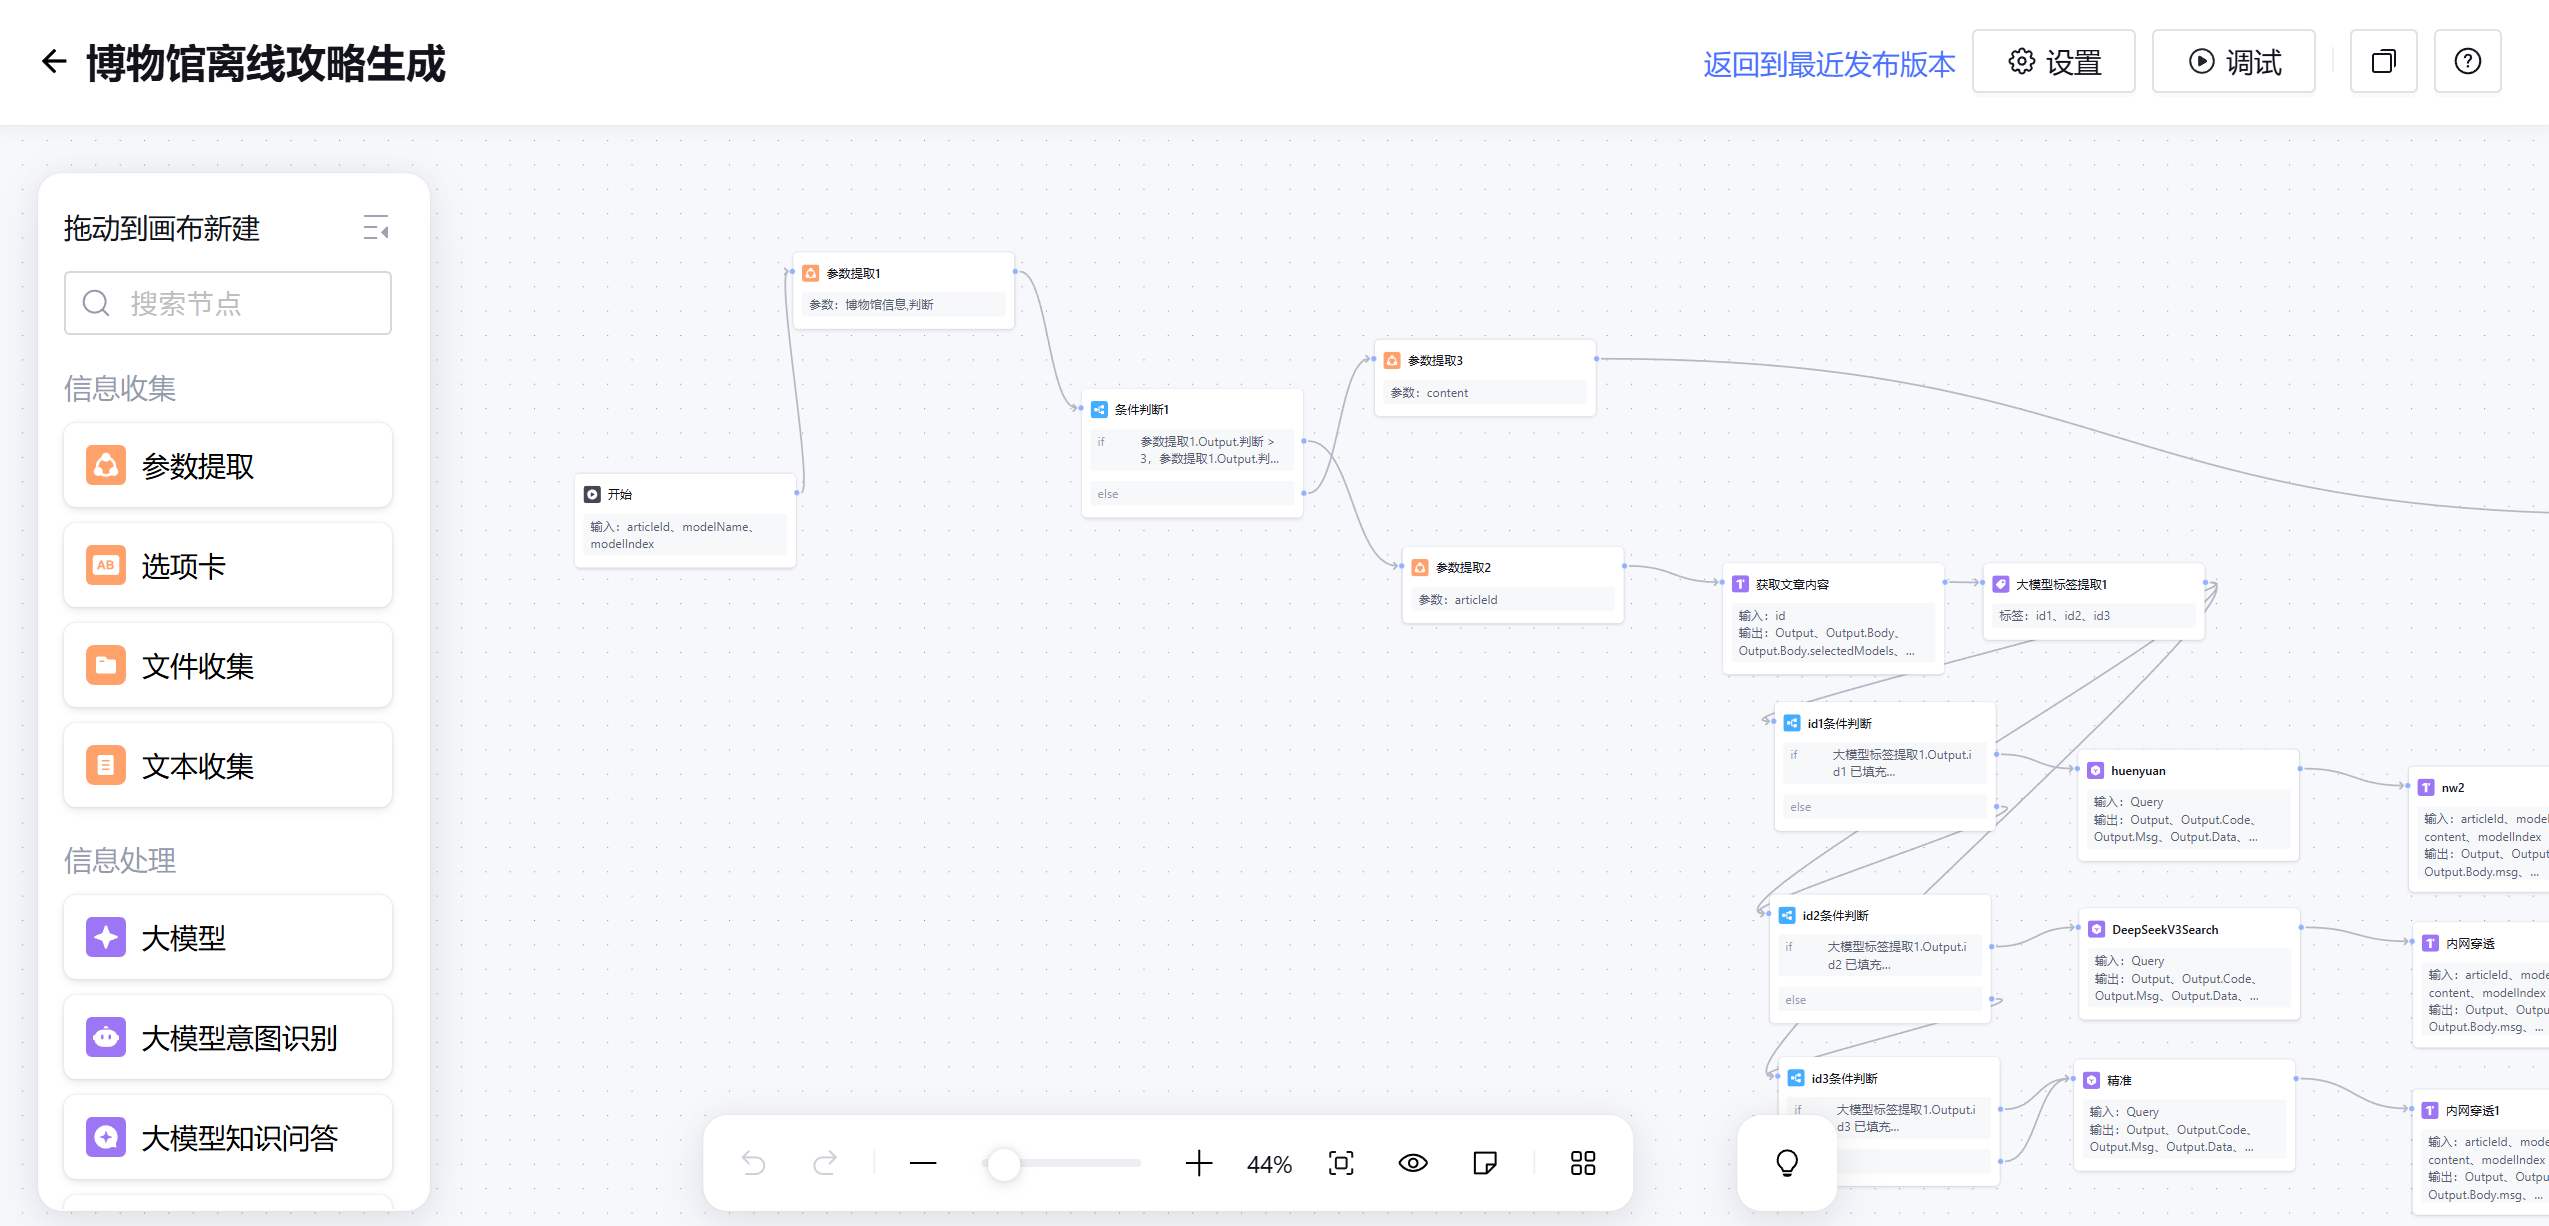
然后点击工作流管理进入到工作流管理里面,这是我们智能体工作的核心流程(自定义):

三、介绍主要构建工作流的工具
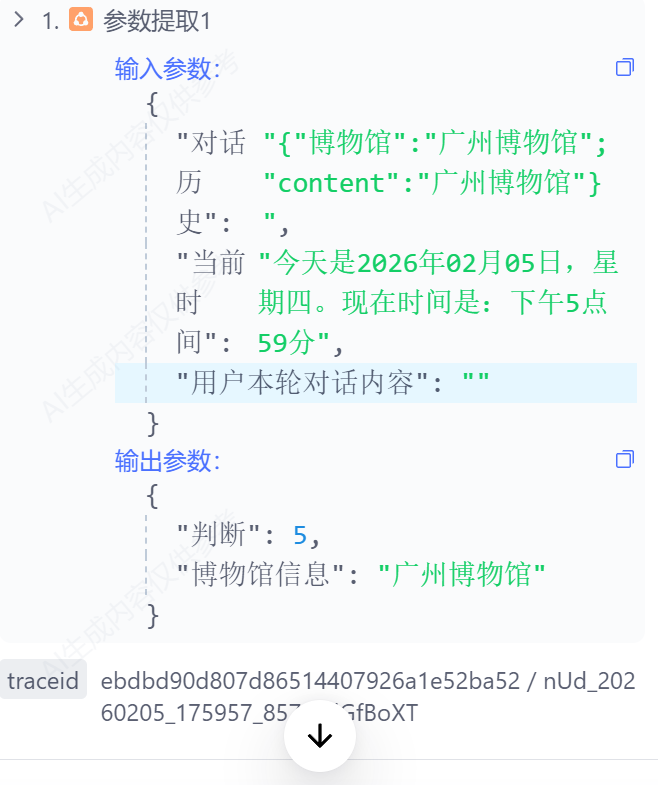
(1)参数提取器![]() :当用户配置好智能体调用的APIKEY和url后,通过与用户进行“单轮、多轮对话”来收集用户发送的参数,参数缺失、模糊时可以自动反问澄清。
:当用户配置好智能体调用的APIKEY和url后,通过与用户进行“单轮、多轮对话”来收集用户发送的参数,参数缺失、模糊时可以自动反问澄清。
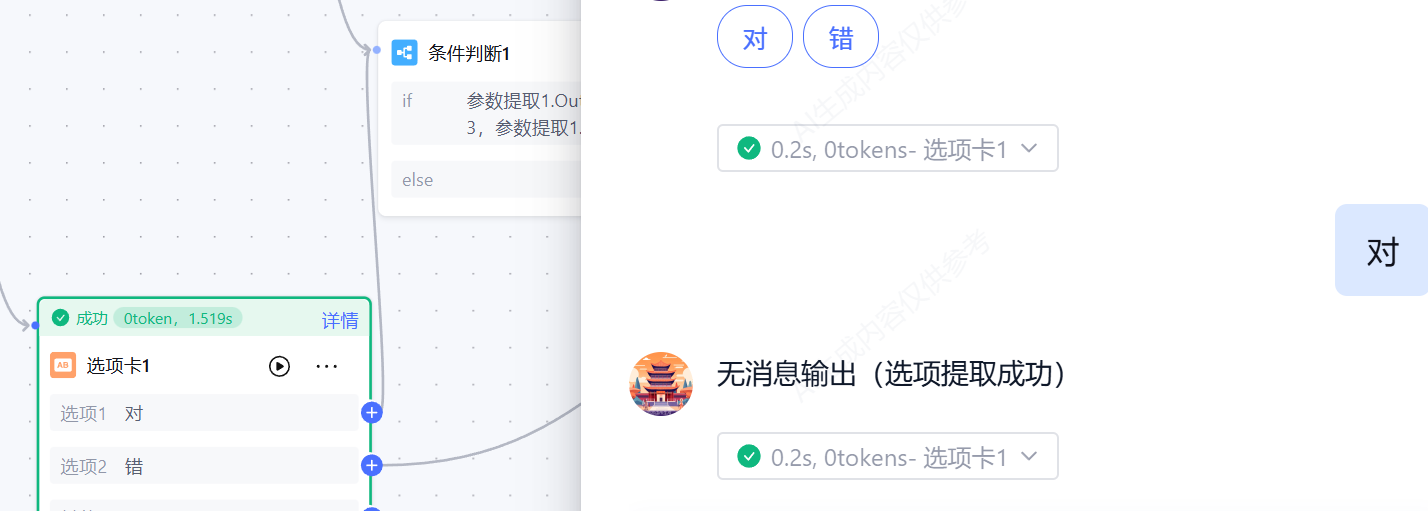
(2)选项卡![]() :提供可点击的选项,适合选项明确且数量少的情况。支持手动输入固定选项(如售前、售后咨询) 或 动态拉取变量值(如拉取客户的订单列表)。
:提供可点击的选项,适合选项明确且数量少的情况。支持手动输入固定选项(如售前、售后咨询) 或 动态拉取变量值(如拉取客户的订单列表)。
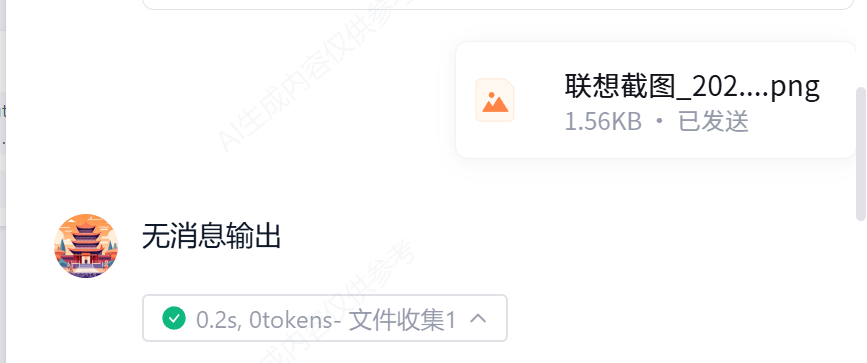
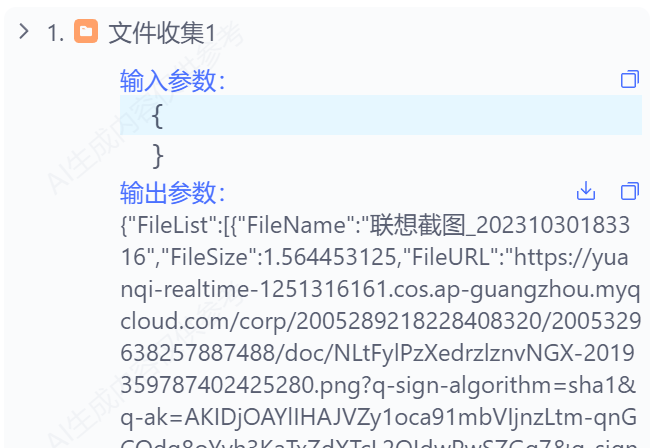
(3)文件收集![]() :设置要收集文件的引导语和要求,收集用户上传的文件(文档、音频等)。
:设置要收集文件的引导语和要求,收集用户上传的文件(文档、音频等)。
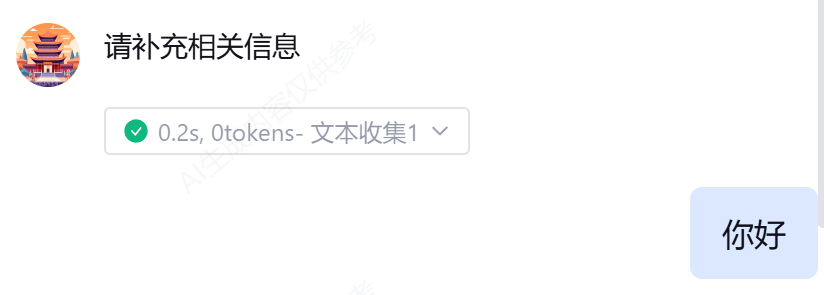
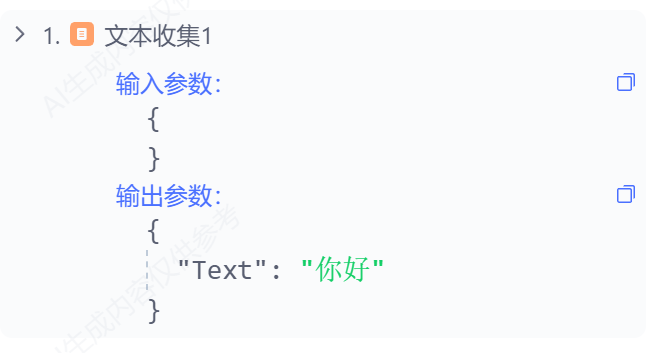
(4)文本收集![]() :在问答场景中向用户提问,并原样输出用户回答。适用场景:收集信息后传递给后续节点处理、沉淀意见反馈原文、合规留存等;特点:不做判断、不追问,一次性收集(如需从用户消息中收集参数,或发起多轮对话引导用户提供,请使用"参数提取节点")。
:在问答场景中向用户提问,并原样输出用户回答。适用场景:收集信息后传递给后续节点处理、沉淀意见反馈原文、合规留存等;特点:不做判断、不追问,一次性收集(如需从用户消息中收集参数,或发起多轮对话引导用户提供,请使用"参数提取节点")。
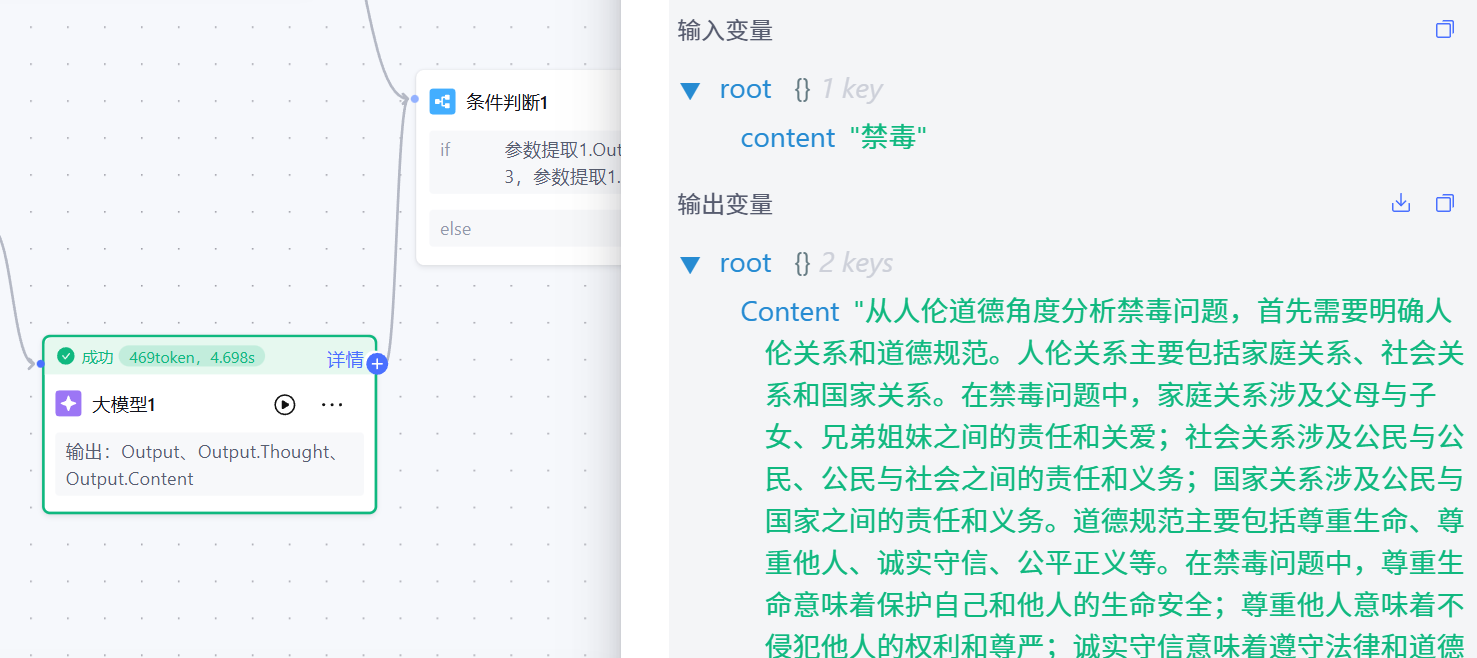
(5)大模型![]() :使用大模型(可以自己选择要使用的大模型)处理自然语言要求,如回答问题。
:使用大模型(可以自己选择要使用的大模型)处理自然语言要求,如回答问题。
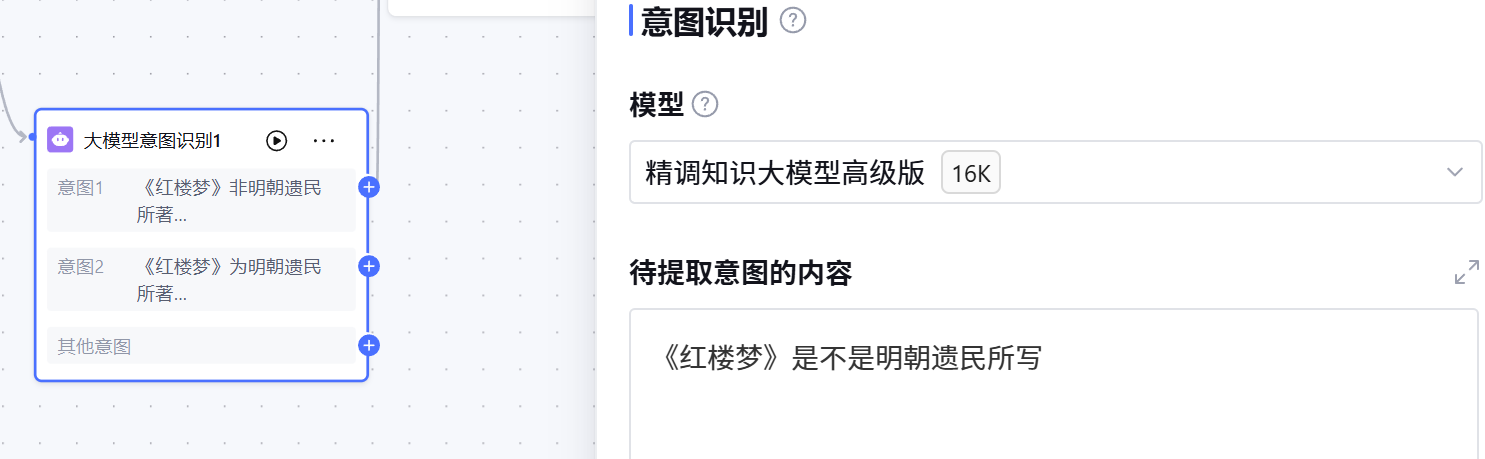
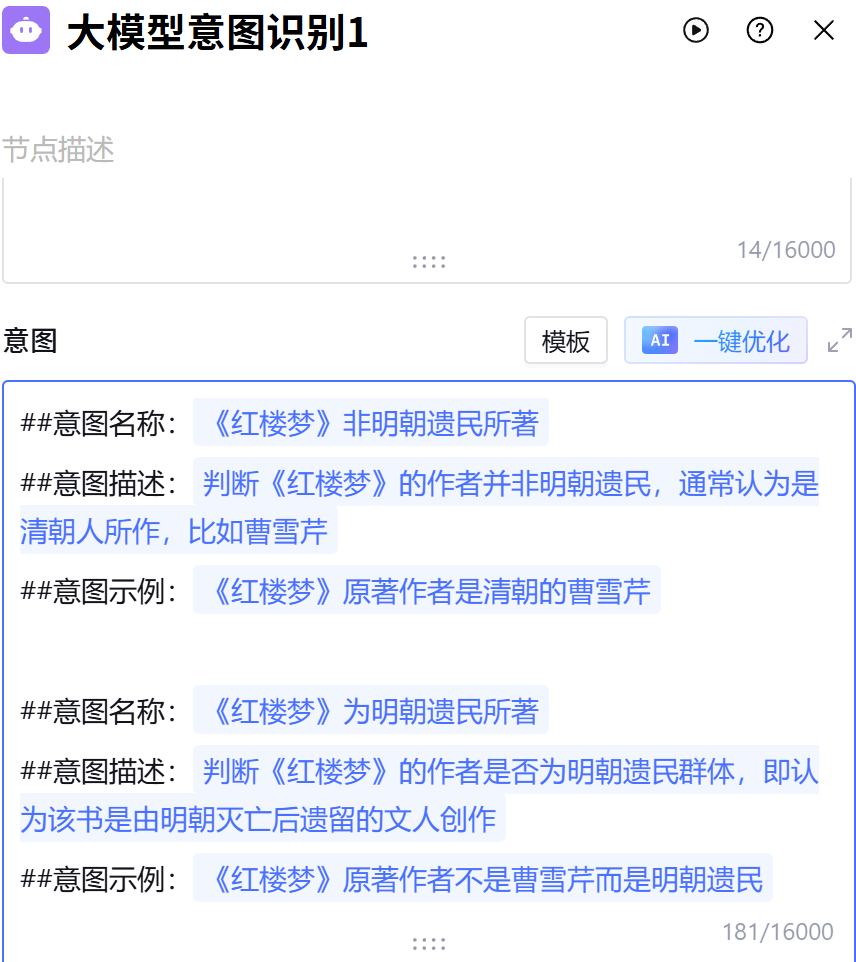
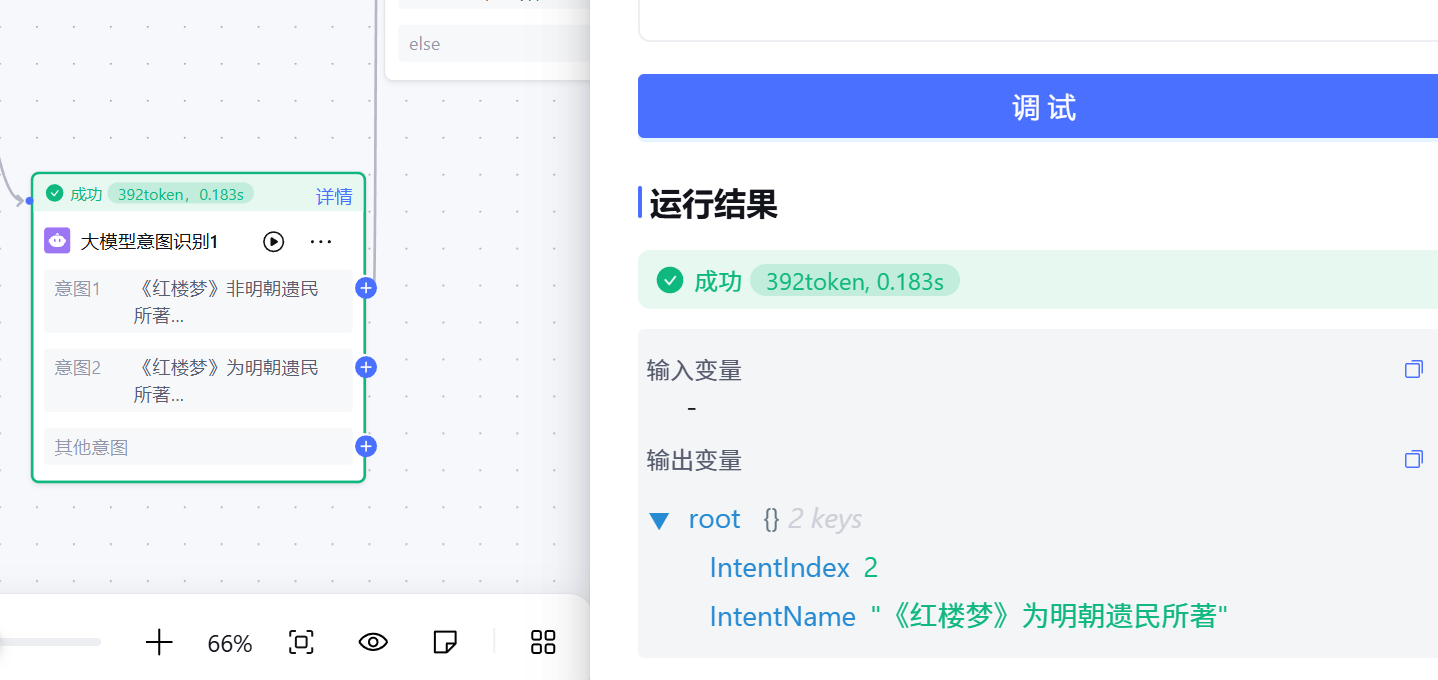
(6)大模型意图识别![]() :大模型根据“待识别内容”识别意图,如“是、否”。
:大模型根据“待识别内容”识别意图,如“是、否”。
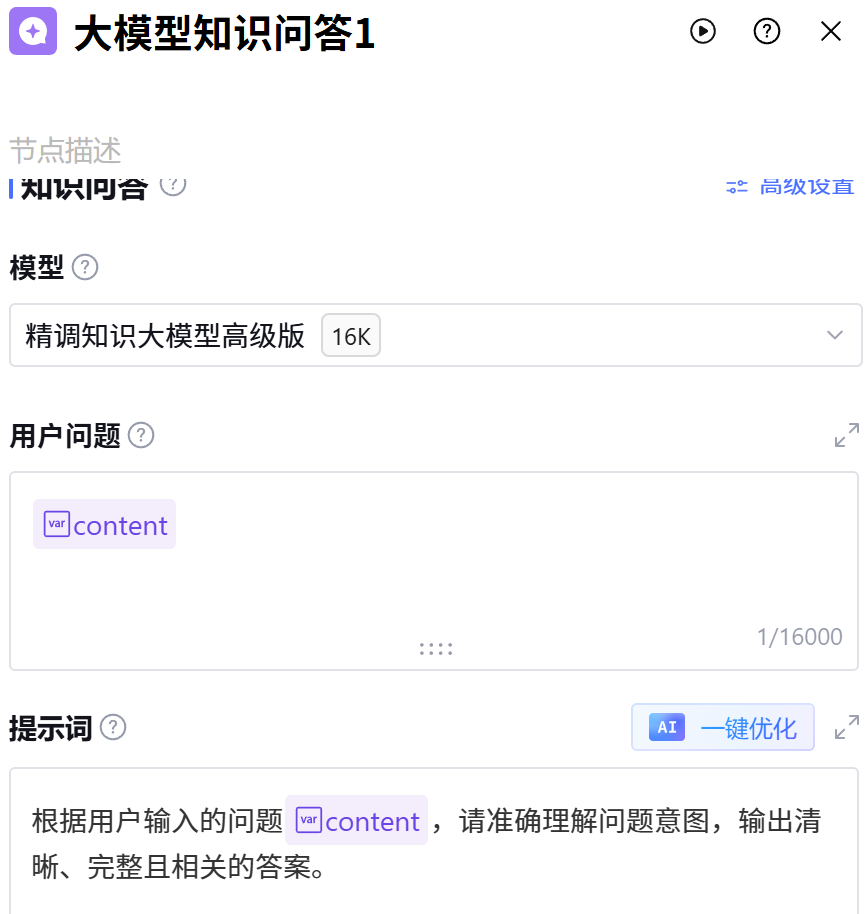
(7)大模型知识问答![]() :从限定范围的知识库中检索内容,并通过大模型润色回复。
:从限定范围的知识库中检索内容,并通过大模型润色回复。
(8)工具![]() :调用“自定义HTTP接口”,集成外部数据和服务,适合在单一工作流内调用(多个工作流重复调用时,建议创建插件)。
:调用“自定义HTTP接口”,集成外部数据和服务,适合在单一工作流内调用(多个工作流重复调用时,建议创建插件)。
更多的工作流工具的使用方法可以在官方文档里面查看或者下图中所示简略用法,使用方法大致与上述工具雷同。
四、使用工作流创建一个简单的聊天工具
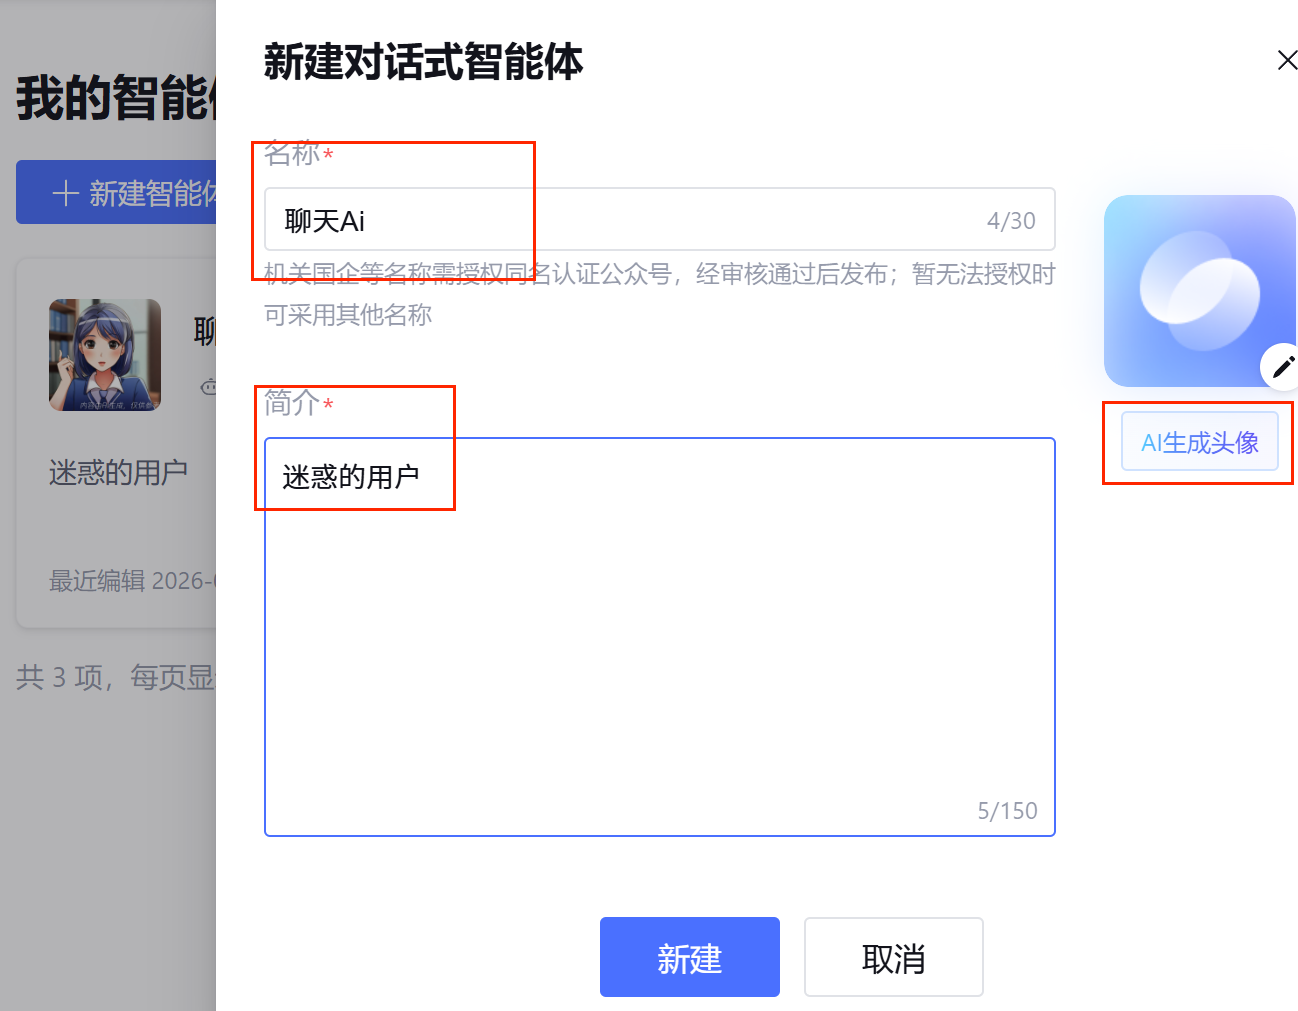
(1)新建一个智能体并点击对话智能体:
(2)填写智能体的名称和简介,可以点击AI生成头像来显示头像:
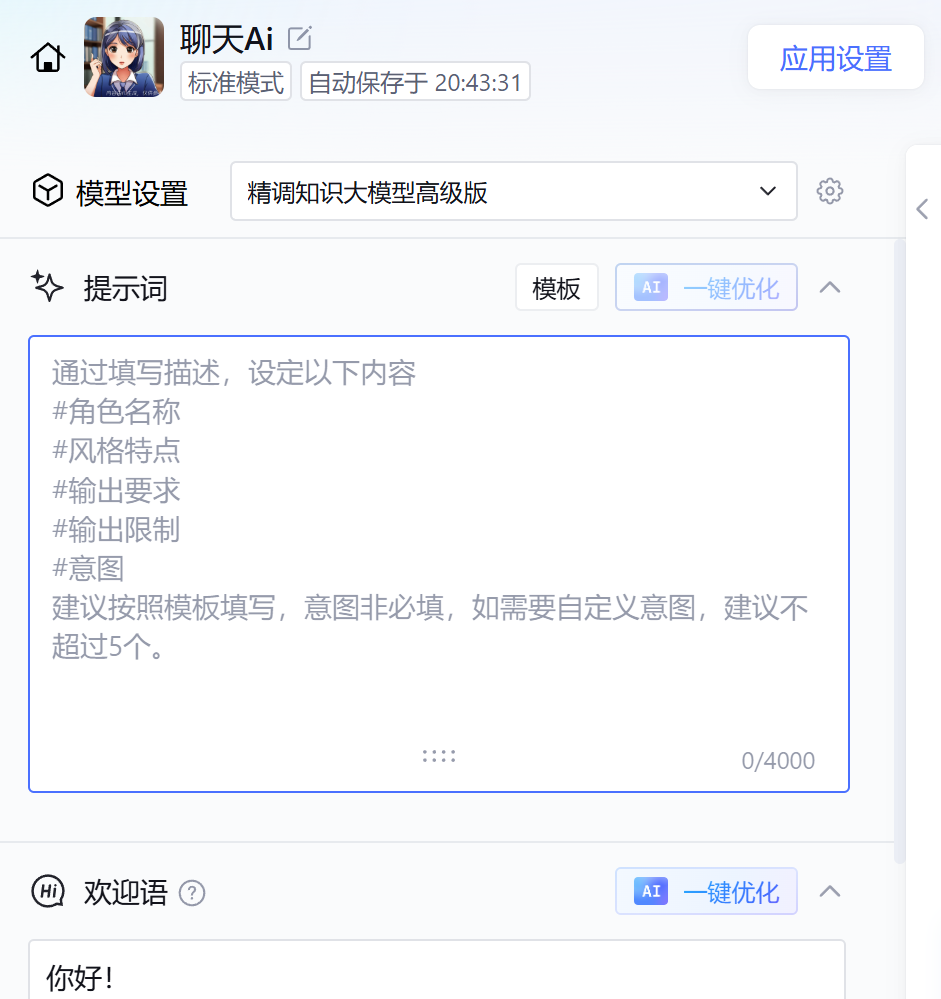
(3)进入智能体内部的应用设置并根据自己所需来填写:
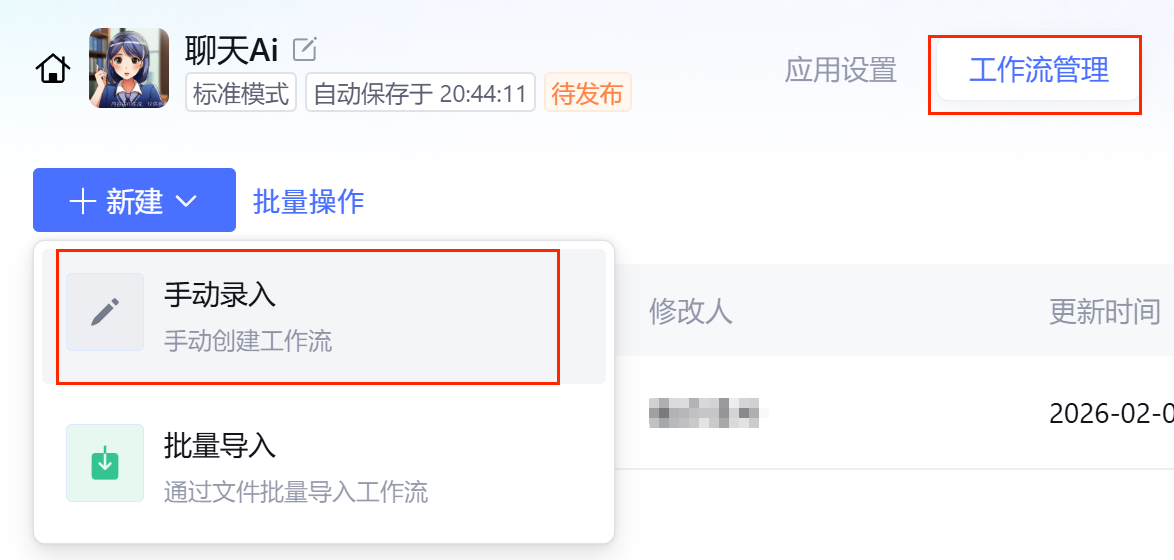
(4)点击顶部菜单的工作流管理并点击新建,选择手动录入:
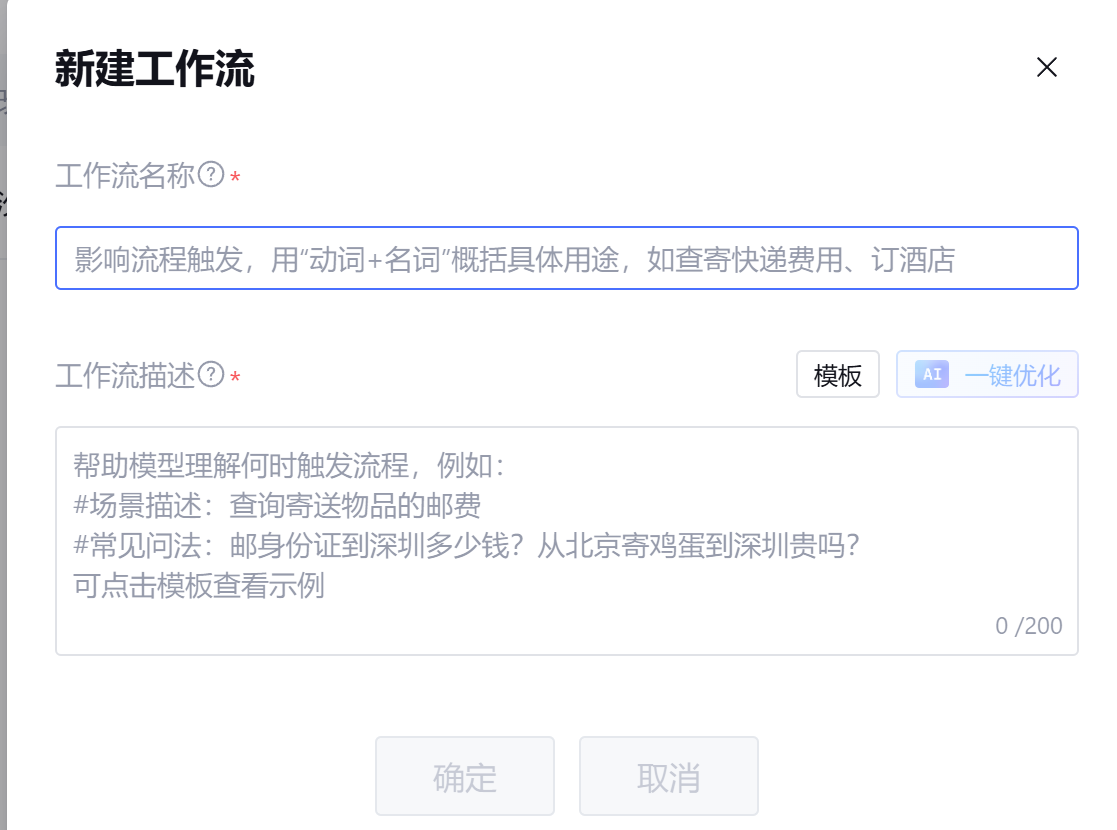
(5)根据个人需求来填写工作流名称(如Ai聊天)和工作流描述(如任务描述: 当用户发起对话交流需求时触发此AI聊天流程,支持各类话题与任意常见问法。 示例问题: "今天天气如何?" "讲个笑话吧" "帮我分析下这篇文章")。可以点击模板并选择一个模板,填入自己的描述(简单明了),点击一键优化,最后点击底部的确认按钮即可进入到工作流编辑页面:

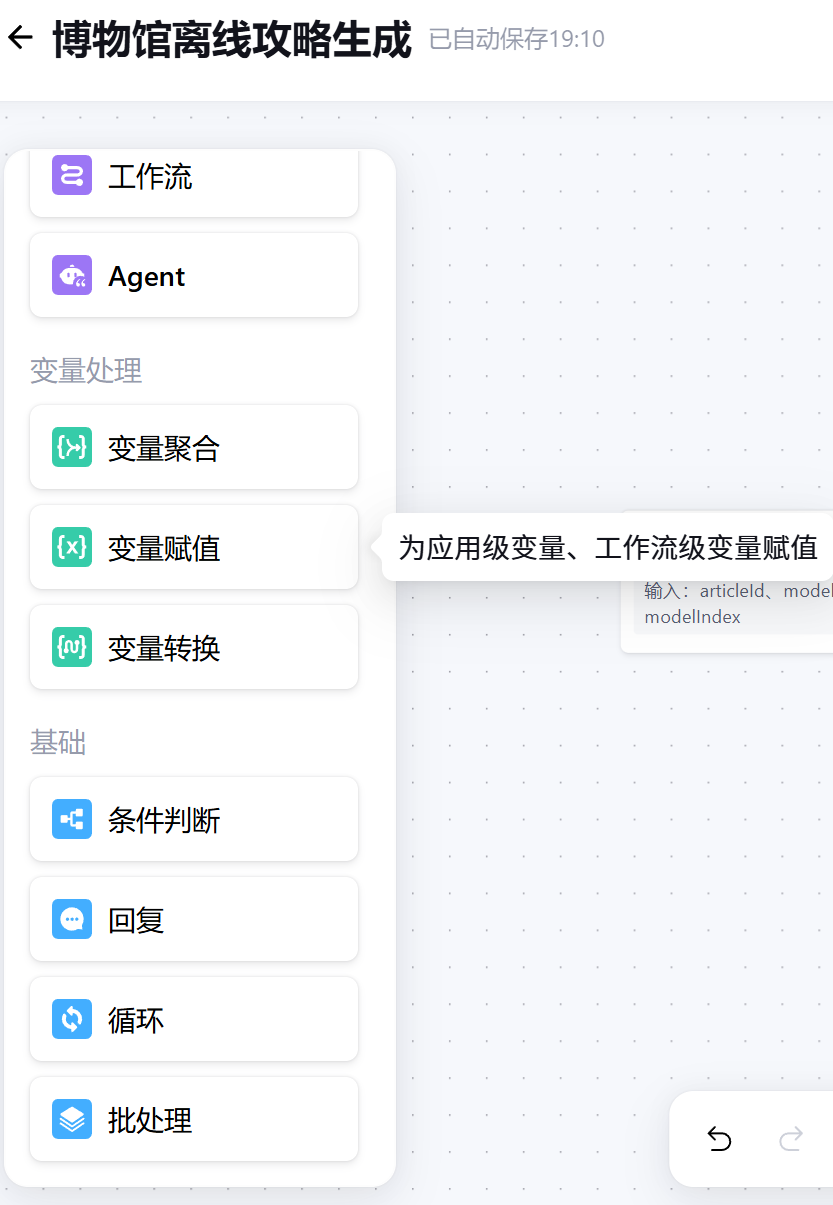
(6)编辑工作流,可以先构思一下流程,在使用左边的工具来构建工作流。本文是做一个简单的聊天Ai工作流,所以第一步需要使用参数提取工具(将工具拖拉进画布,注:不允许在节点开始后与其他信息收集类节点(参数提取节点、选项卡节点、文件收集节点、文本收集节点、等待用户操作类Widget节点)或Agent节点并行)来提取用户发来的聊天内容是什么:
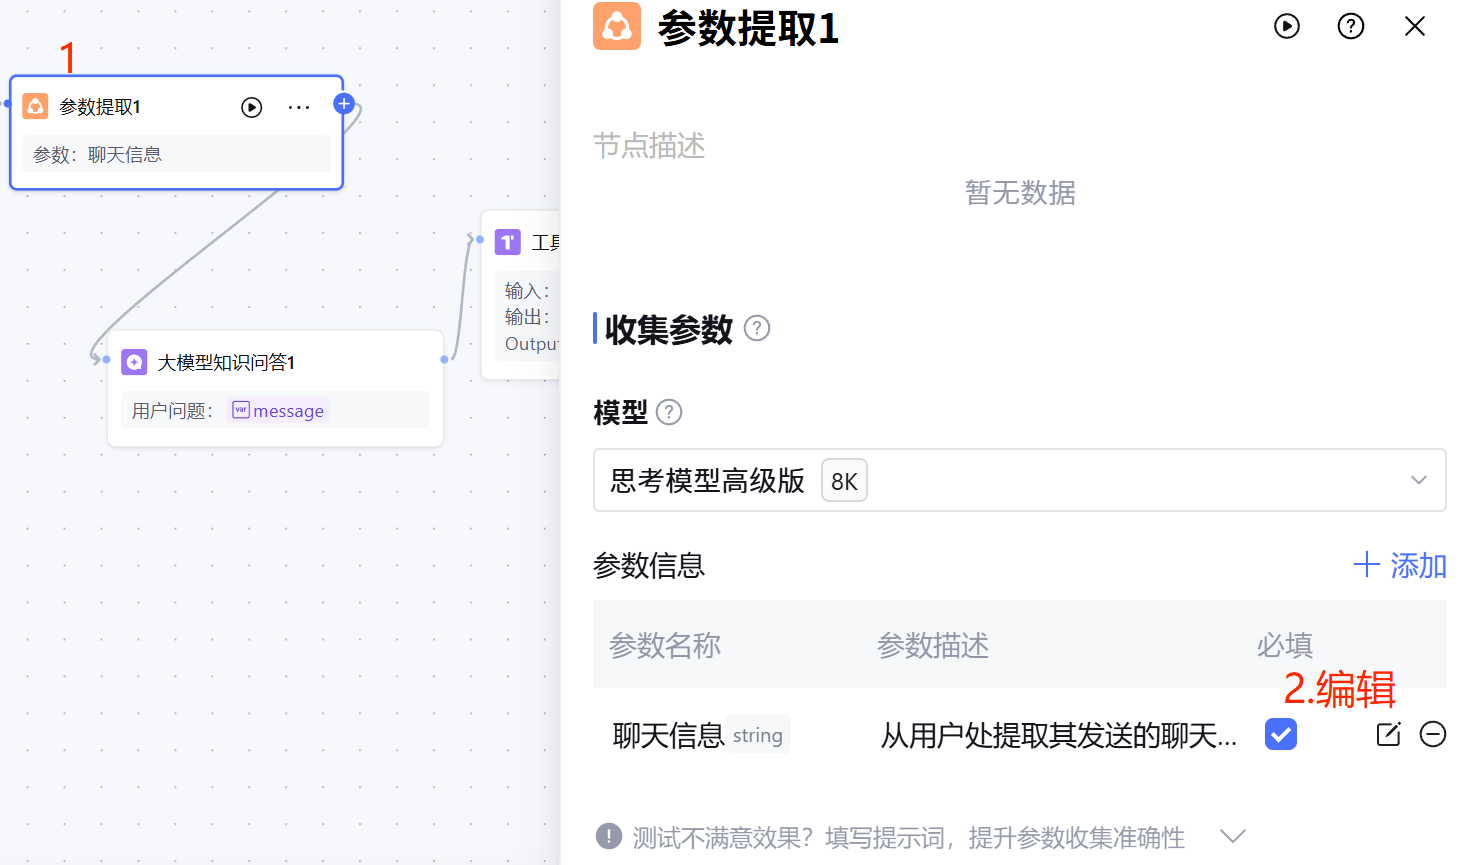
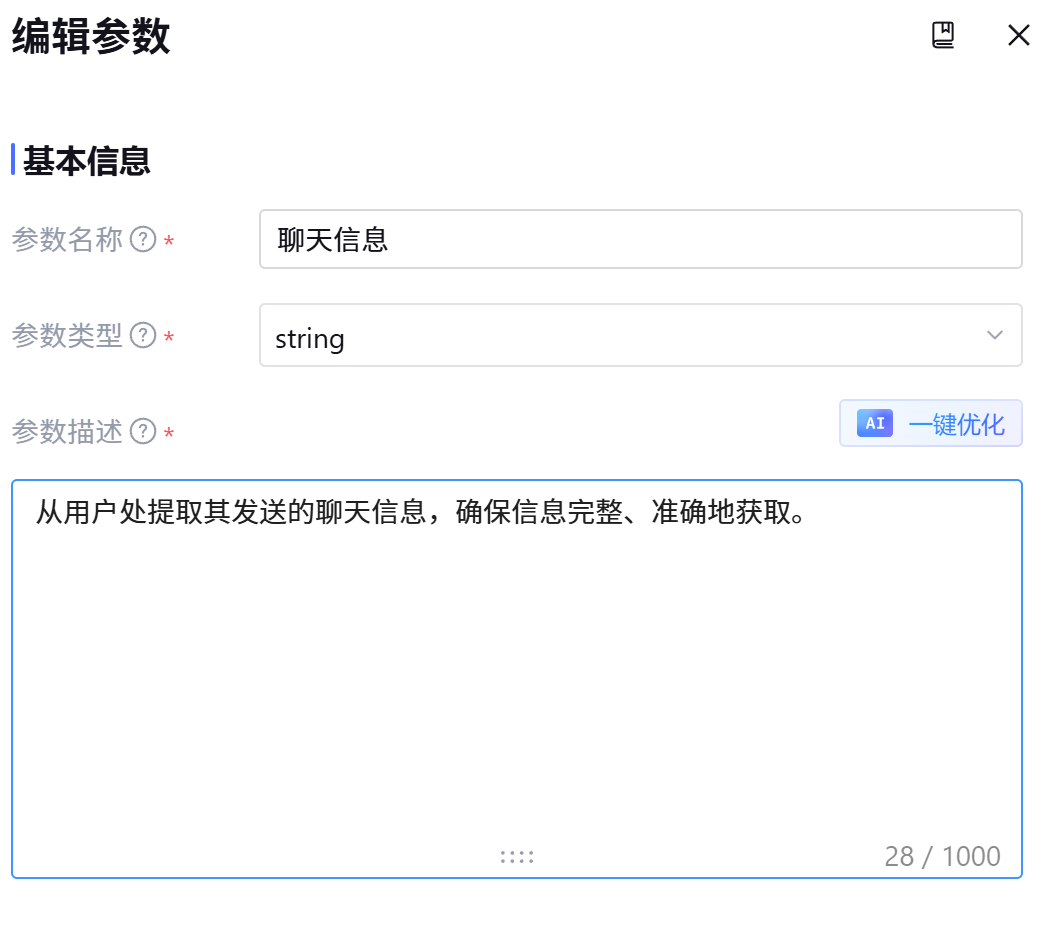
点击编辑之后,如下图的参数名称和参数类型需要填写,参数描述是用于让模型知道你到底想干什么:
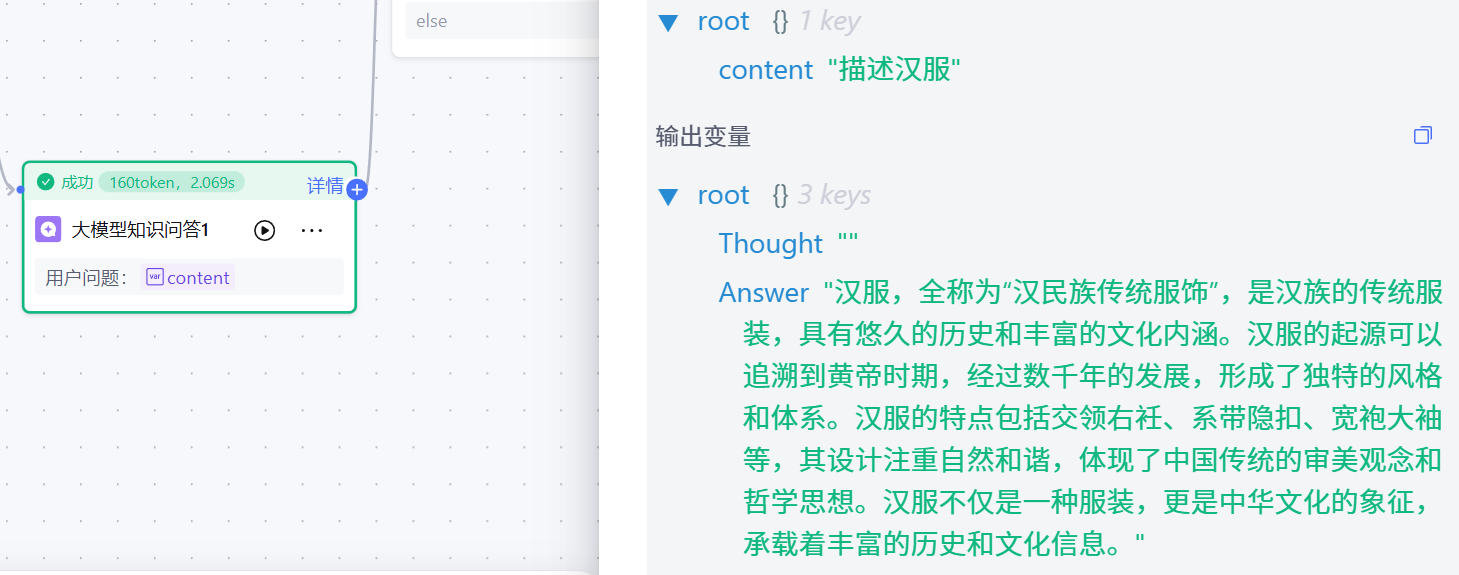
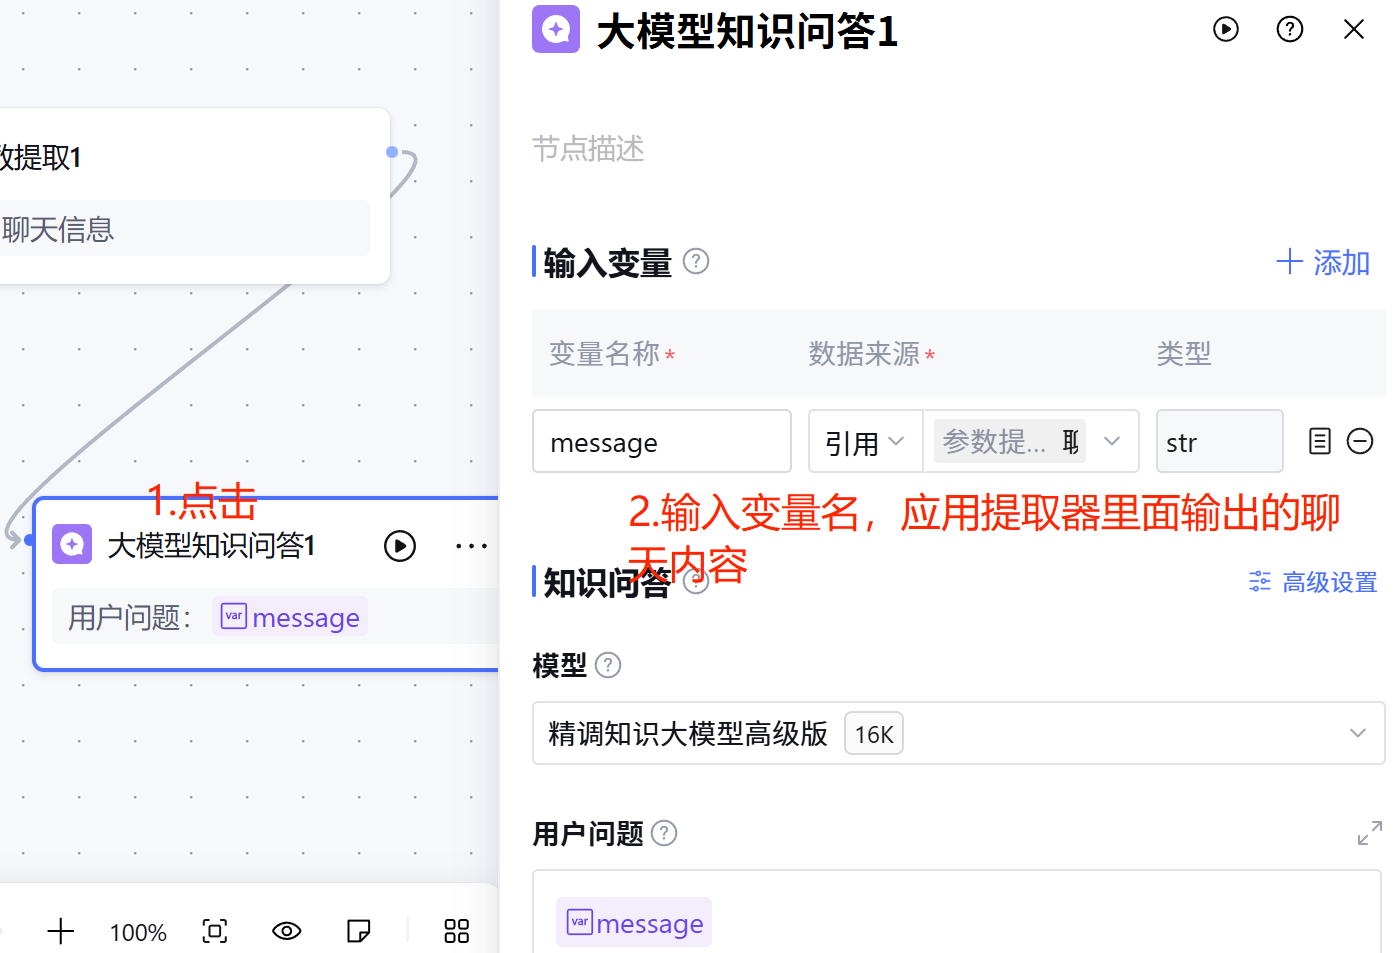
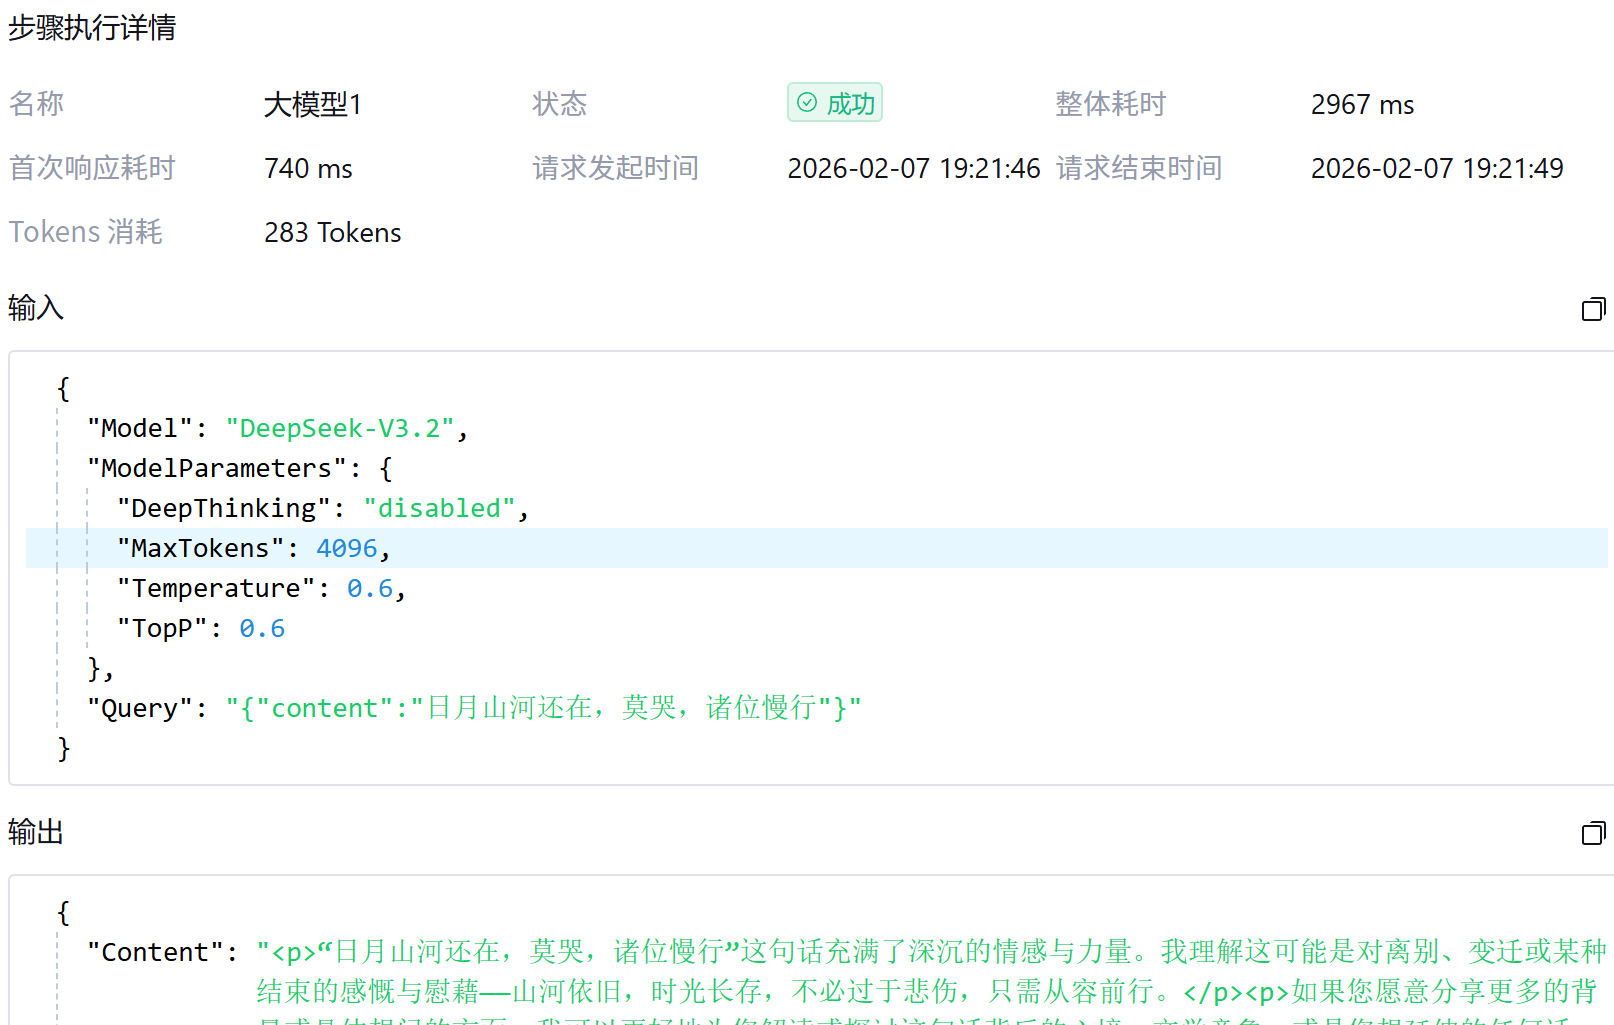
(7)第二步,选择大模型知识问答工具,并将其连接到参数提取器后面(工作流必须要有开始和结束)。如下图变量名称要与待会的代码使用的变量名一致(预防出bug),数据源引用参数提取器里面的输出内容来赋值给message,用户问题可以用于进行知识检索,直接写“/”,然后看到输入变量,可以直接回车也可以点击选择该变量:
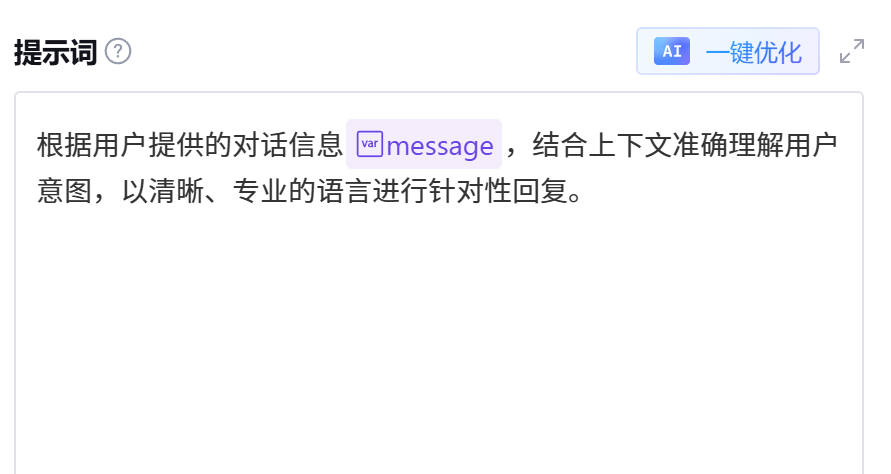
拉下去可以看到提示词,一样是为了让Ai知道你想干嘛,操作步骤和之前的工作流描述操作大致相同,需要使用{{message}}格式来引用上面的输入变量的变量名称,不然Ai是不知道你是什么意思的,最后点击底部的确认:
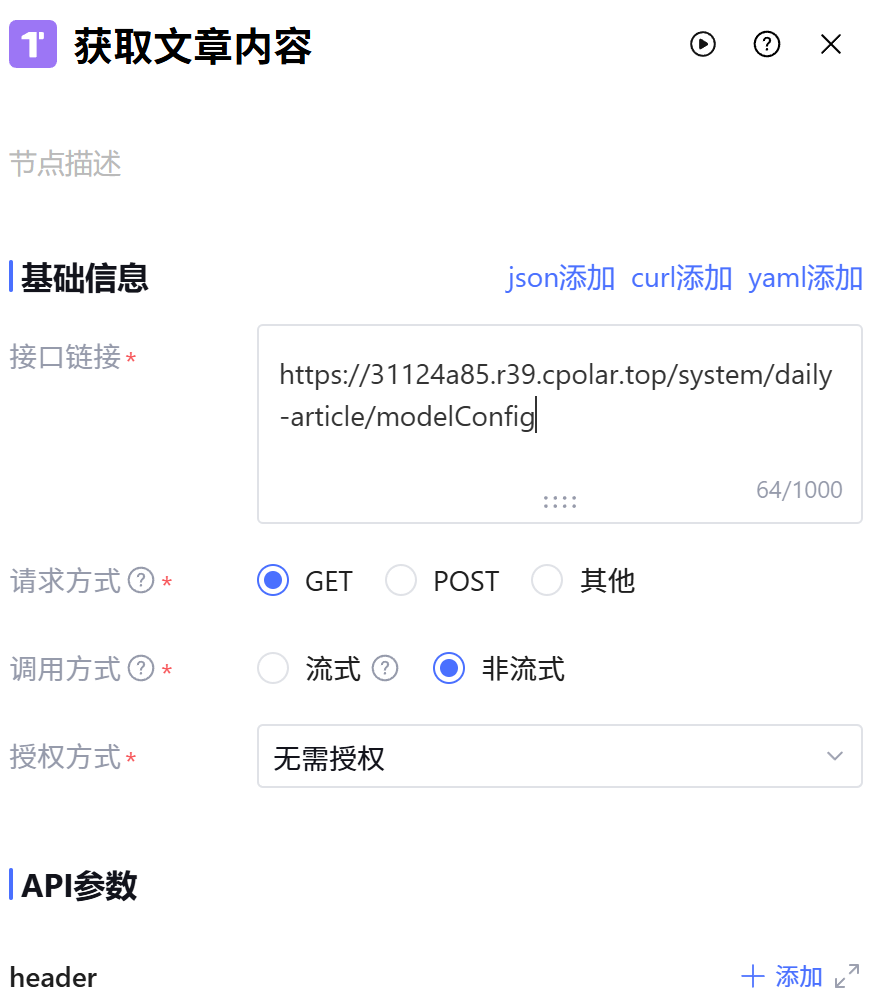
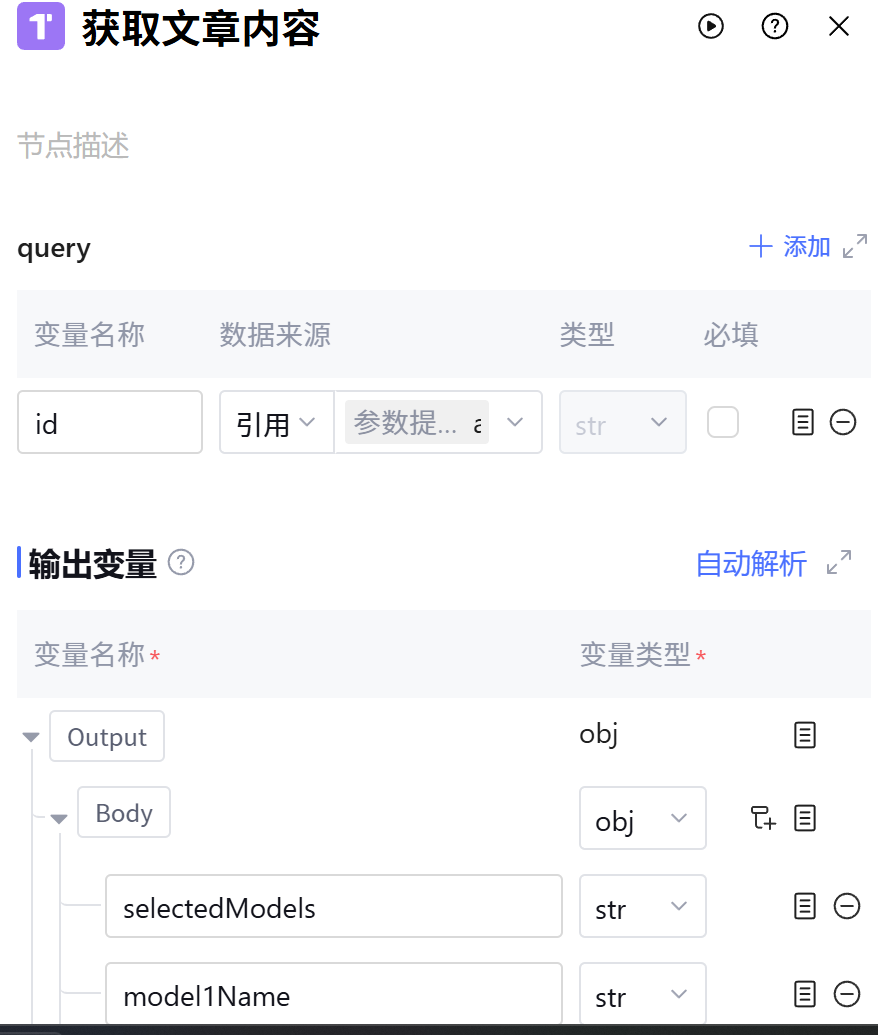
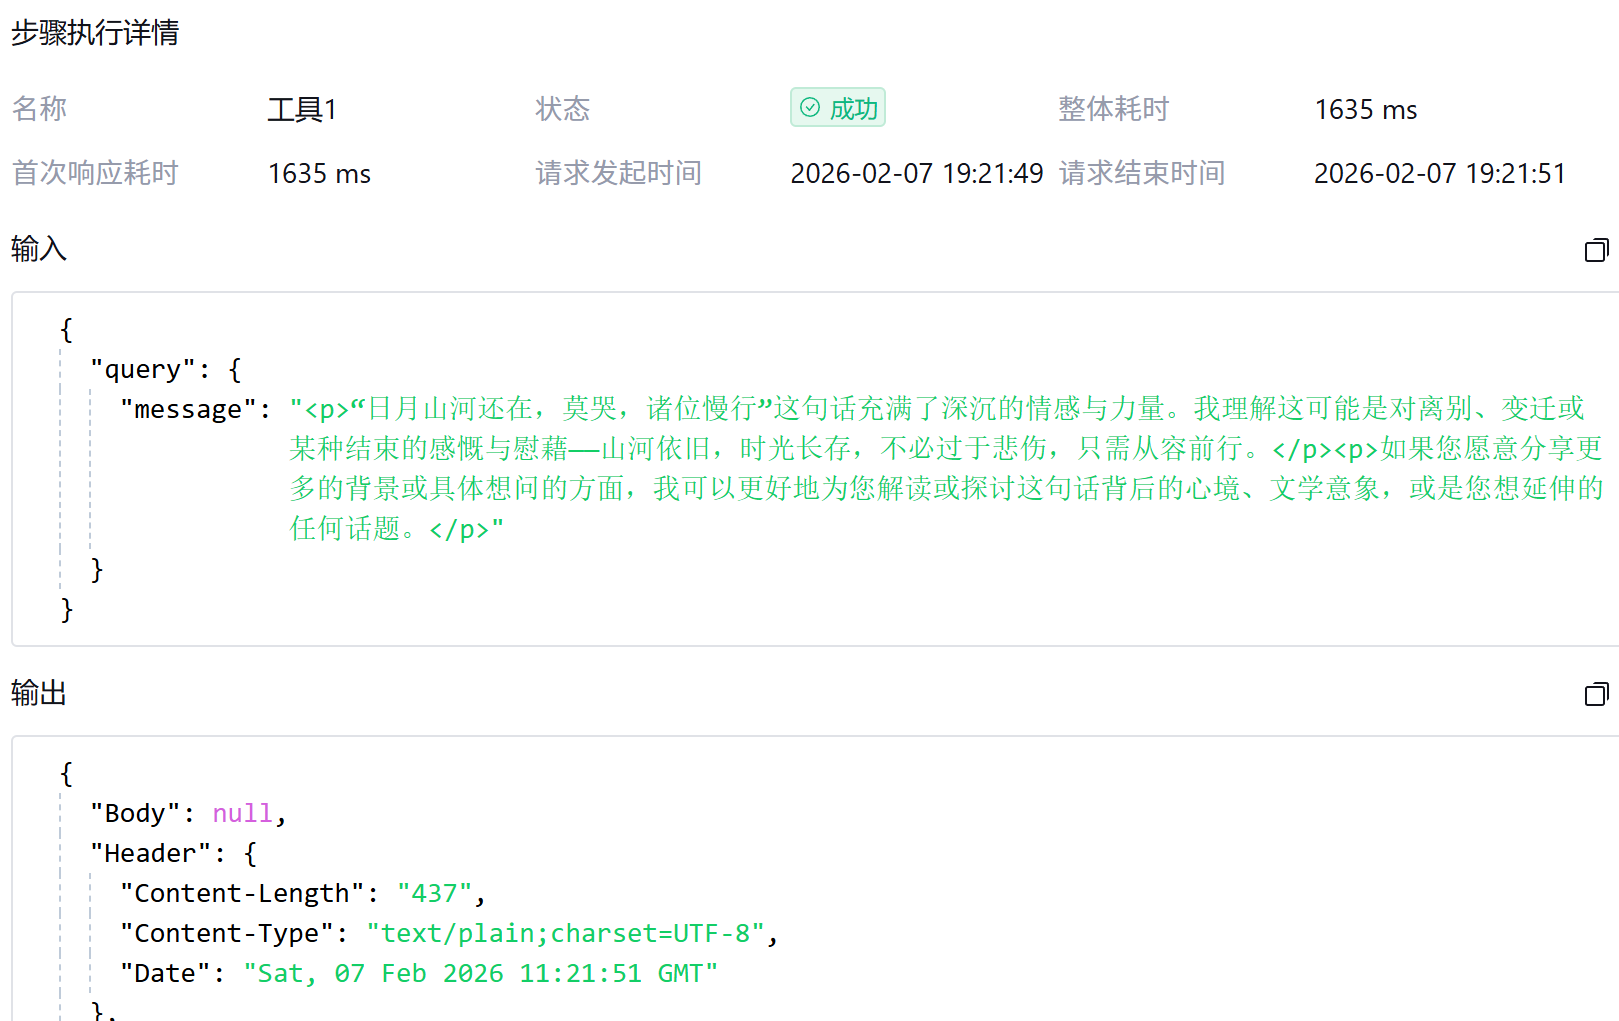
(8)在大模型知识问答后面连接工具,这个工具主要用来接受第三方发起的工作流调用并启动工作流,工作流生成的内容会以响应体的方式返回给第三方平台。工具的接口连接必须是公网ip(本地电脑可以使用内网穿透),不然无法接收和响应请求:
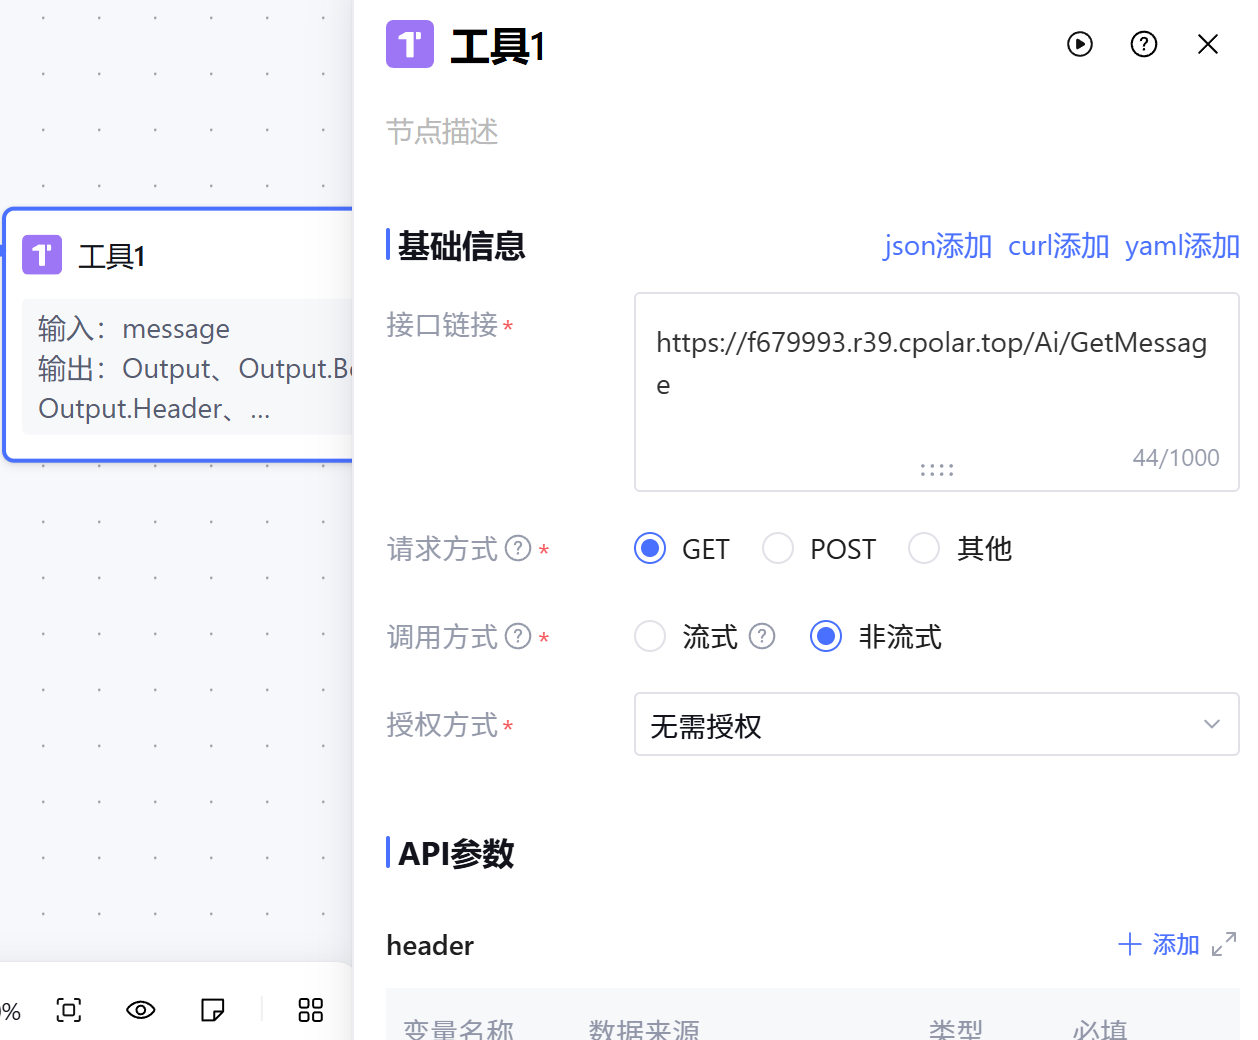
API参数是第三方平台的接口设定的请求参数,变量名称需要保持一致:

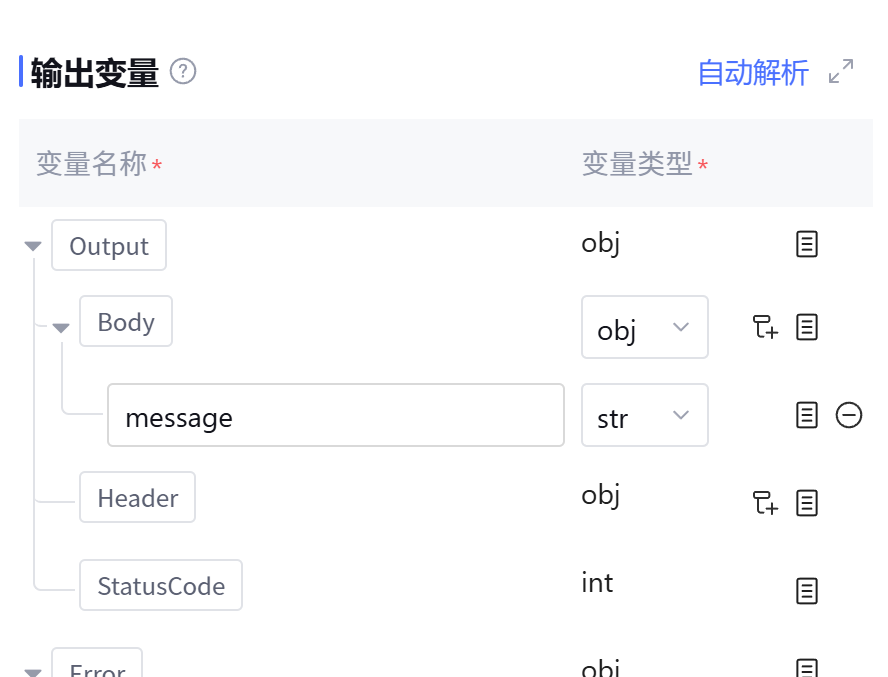
第三方平台的接口如果有输出变量可以写在下面:
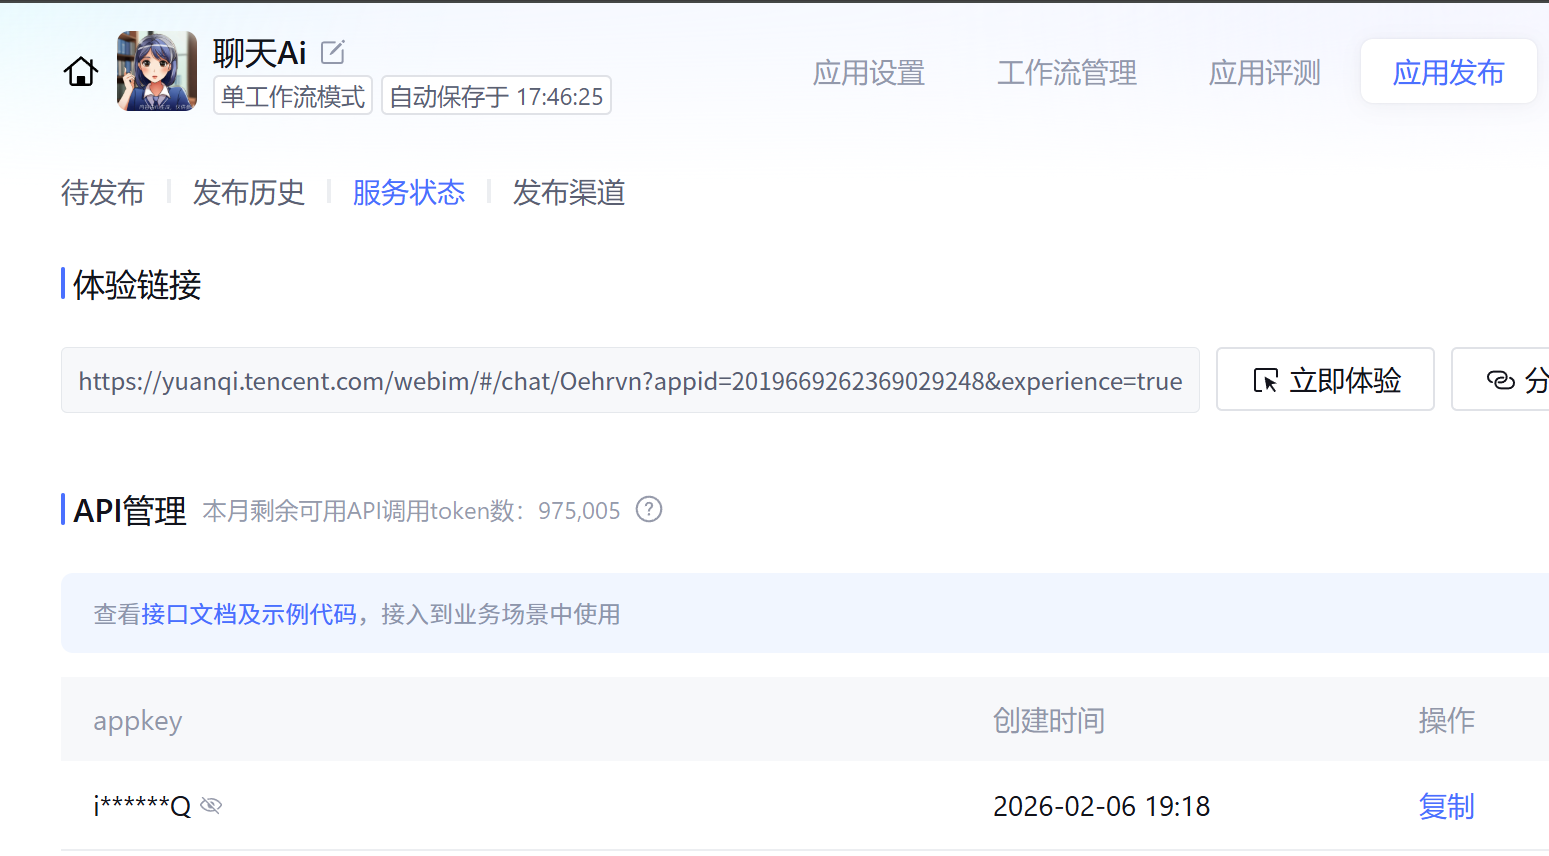
最后,点击右上角的调试按钮,调试通过后,即可点击发布按钮,发布后在顶部的应用发布里面找到体验链接里面的appid和复制appkey填入第三方平台即可使用。
五、编写第三方平台的聊天Ai实现代码
(1)编写聊天Ai的controller类:
@RestController
@RequestMapping("/Ai")
public class AiController {
    @Resource
    private RedisTemplate redisTemplate;
    @Resource
    private AiServerImpl aiServer;
    @GetMapping("/AiChat") // 智能体调用
    private String AiChat(@RequestParam("message") String Message){
        return aiServer.GetAiChat(Message);
    }
    @GetMapping("/GetMessage") // 获取工作流的内容
    public String getMessage(String message){
        if(message!=null) aiServer.getMessage(message);
        else {
            System.out.println((String)redisTemplate.opsForValue().get("ms1"));
        }
         return (String)redisTemplate.opsForValue().get("ms1");
    }
}
(2)编写聊天Ai的Service类:
public interface AiServer{
    String GetAiChat(String Message);

    void getMessage(String message);
}
(3)编写聊天Ai的Impl类:
// 确保该类被Spring管理(加@Component/@Service等注解)
@Slf4j
@Service
public class AiServerImpl implements AiServer {
    @Autowired
    private RedisTemplate redisTemplate;
    // 1. 注入全局RestTemplate(单例,性能最优),建议在配置类中配置RestTemplateConfig
    @Autowired
    private RestTemplate restTemplate;
    @Autowired
    private AiMapper aiMapper;
    // 建议把配置抽离到application.yml,这里先定义常量(替代硬编码)
    private static final String DEEPSEEK_BASE_URL = "https://yuanqi.tencent.com/openapi/v1/agent/chat/completions";
    private static final String DEEPSEEK_API_KEY = "智能体密钥";
    private static final String DEFAULT_MODEL = "智能体id";
    public String GetAiChat(String Message) {
        String ModelName="";
        // 查询AI模型列表(建议增加非空判断,避免空指针)
        List<AiModel> aiModels = aiMapper.getAiModel();
        if (aiModels == null || aiModels.isEmpty()) {
            return "(模型配置为空,请检查AI模型表)";
        }
        ModelName=aiModels.get(0).getAgent_name();
        System.out.println(ModelName);
        // 构造请求头(仅保留必要的头,移除冗余)
        HttpHeaders httpHeaders = new HttpHeaders();
        httpHeaders.setContentType(MediaType.APPLICATION_JSON);
        httpHeaders.setAccept(Collections.singletonList(MediaType.APPLICATION_JSON));
        //仅需要这一个密钥头,核心!
        httpHeaders.set("Authorization", "Bearer " +DEEPSEEK_API_KEY);
        // 构造用户消息:role=user,content=前端传入的Message
        OpenAiMessage userMessage = new OpenAiMessage();
        userMessage.setRole("user"); // 固定为user,表示用户的提问
        userMessage.setContent(Message);
        // 构造请求实体
        HttpEntity<Map<String,Object>> entity = new HttpEntity<>(buildRequestBody(DEFAULT_MODEL,"1",Message), httpHeaders);
        try {
            // 2. 调用正确的完整API地址
            ResponseEntity<String> response = restTemplate.exchange(
                    DEEPSEEK_BASE_URL,
                    HttpMethod.POST,
                    entity,
                    String.class
            );
            // 处理响应
            if (response.getStatusCode()==HttpStatus.OK) {
                String resp = response.getBody();
                if (resp != null) {
                    log.info(resp);
                    return resp;
                }
            }
            return "(无返回内容)";
        } catch (HttpClientErrorException ex) {
            // 捕获4xx错误(400/401/403/404/422等),打印日志方便排查
            String respBody = ex.getResponseBodyAsString();
            String errorMsg = String.format("(模型调用失败) %s: %s", ex.getStatusCode(), respBody != null ? respBody : "[no body]");
            System.err.println("API调用4xx错误:" + errorMsg); // 建议用日志框架(logback/log4j2)
            return errorMsg;
        } catch (Exception ex) {
            // 捕获所有其他异常(如网络超时、5xx服务器错误等),避免程序崩溃
            String errorMsg = String.format("(模型调用异常) %s: %s", ex.getClass().getSimpleName(), ex.getMessage());
            System.err.println("API调用通用异常:" + errorMsg);
            return errorMsg;
        }
    }

    @Override
    public void getMessage(String message) {
        redisTemplate.opsForValue().set("ms1",message);
    }

    private Map<String, Object> buildRequestBody(String agentId, String userId, String message) {
        Map<String, Object> requestBody = new HashMap<>();

        // 智能体ID(必填)
        requestBody.put("assistant_id", agentId);

        // 用户ID(必填)
        requestBody.put("user_id", userId);

        // 流式响应(非流式,等待完整响应)
        requestBody.put("stream", false);

        // 构建消息数组
        List<Map<String, Object>> messages = new ArrayList<>();
        // 用户消息
        Map<String, Object> userMessage = new HashMap<>();
        userMessage.put("role", "user");
        // 消息内容数组(腾讯元器要求content是数组)
        List<Map<String, Object>> contentList = new ArrayList<>();
        Map<String, Object> textContent = new HashMap<>();
        textContent.put("type", "text");
        String jsonMessage = buildJsonMessage(message);
        textContent.put("text", jsonMessage);
        contentList.add(textContent);
        userMessage.put("content", contentList);
        messages.add(userMessage);
        requestBody.put("messages", messages);
        // 可选参数
        Map<String, Object> parameters = new HashMap<>();
        parameters.put("temperature", 0.7);  // 温度
        parameters.put("max_tokens", 2000);  // 最大token数
        requestBody.put("parameters", parameters);
        return requestBody;
    }

    private String buildJsonMessage(String message) {
        try {
            Map<String, Object> params = new HashMap<>();
            params.put("content", message);
            return new ObjectMapper().writeValueAsString(params);
        } catch (Exception e) {
            log.error("构建JSON消息失败", e);
            // 如果JSON构建失败,返回简单格式
            // 转义引号避免JSON格式错误
            String escapedContent = message.replace("\"", "\\\"").replace("\n", "\\n");
            return String.format("{\"content\":\"%s\"}", escapedContent);
        }
    }

    // 建议把实体类抽离为独立的Java文件,不要写在方法内
    @Data
    static class OpenAiMessage {
        // 角色:user(用户)/assistant(助手)/system(系统)
        private String role;
        // 消息内容
        private String content;
    }
    @Data
    static class OpenAiChatRequest {
        // 模型名称
        private String model;
        // 消息列表(核心修复:数组类型,而非字符串)
        private List<OpenAiMessage> messages;
        // 可选:温度,控制回答随机性(0-1,默认0.7,可根据需求调整)
        @JsonProperty("temperature")
        private Double temperature = 0.7;
    }
    @Data
    static class OpenAiChatResponse {
        // 响应体的choices数组
        private List<Choice> choices;
        // 错误信息(API返回错误时会有这个字段,方便排查)
        private OpenAiError error;
        @Data
        static class Choice {
            // 补全的消息
            private OpenAiMessage message;
            // 结束原因(如stop/长度限制等)
            @JsonProperty("finish_reason")
            private String finishReason;
        }
        // 新增:接收API返回的错误信息,方便排查问题
        @Data
        static class OpenAiError {
            private Integer code;
            private String message;
            private String type;
        }
    }
}
(4)编写聊天Ai的实体类:
public class AiModel implements Serializable {
    private long id;
    private long user_id; // 用户id
    private String agent_id; // 智能体id
    private String agent_name; //智能体名称
    private String api_key; //密钥
    private String api_endpoint; //智能体URL

    public long getId() {
        return id;
    }

    public void setId(long id) {
        this.id = id;
    }

    public long getUser_id() {
        return user_id;
    }

    public void setUser_id(long user_id) {
        this.user_id = user_id;
    }

    public String getAgent_id() {
        return agent_id;
    }

    public void setAgent_id(String agent_id) {
        this.agent_id = agent_id;
    }

    public String getAgent_name() {
        return agent_name;
    }

    public void setAgent_name(String agent_name) {
        this.agent_name = agent_name;
    }

    public String getApi_key() {
        return api_key;
    }

    public void setApi_key(String api_key) {
        this.api_key = api_key;
    }

    public String getApi_endpoint() {
        return api_endpoint;
    }

    public void setApi_endpoint(String api_endpoint) {
        this.api_endpoint = api_endpoint;
    }
}
(5)编写聊天Ai的mapper类(如果模型变量是写死的,可有可无):
@Mapper
public interface AiMapper {
    @Select("select id,user_id,agent_id,agent_name,api_key,api_endpoint " +
            "from yuanqi_agent where id=1")
    public List<AiModel> getAiModel();
}
(6)编写用于访问rest服务的同步客户端配置类:
@Configuration
public class Config {
    @Bean
    public RestTemplate restTemplate(){
        return new RestTemplate();
    }
}
(7)编写redis配置类:
@Configuration
public class RedisAutoConfiguration {
    @Bean
    @ConditionalOnMissingBean(name = {"redisTemplate"})
    public RedisTemplate<String, Object> redisTemplate(RedisConnectionFactory factory) {
        RedisTemplate<String, Object> template = new RedisTemplate<>();
        template.setConnectionFactory(factory);
        ObjectMapper om = new ObjectMapper();
        om.setVisibility(PropertyAccessor.ALL, JsonAutoDetect.Visibility.ANY);
        om.enableDefaultTyping(ObjectMapper.DefaultTyping.NON_FINAL);
        om.activateDefaultTyping(LaissezFaireSubTypeValidator.instance,
                ObjectMapper.DefaultTyping.NON_FINAL, JsonTypeInfo.As.PROPERTY);
        Jackson2JsonRedisSerializer jackson2JsonRedisSerializer =
                new Jackson2JsonRedisSerializer<>(om,Object.class);
        template.setKeySerializer(new StringRedisSerializer());
        template.setValueSerializer(jackson2JsonRedisSerializer);
        template.setHashKeySerializer(new StringRedisSerializer());
        template.setHashValueSerializer(jackson2JsonRedisSerializer);
        template.afterPropertiesSet();
        template.setDefaultSerializer(jackson2JsonRedisSerializer);
        return template;
    }
    @Bean
    public RedisCacheManager cacheManager(RedisConnectionFactory factory) {
        ObjectMapper om = new ObjectMapper();
        RedisSerializer<String>stringSerializer = new StringRedisSerializer();
        Jackson2JsonRedisSerializer jackson2JsonRedisSerializer =
                new Jackson2JsonRedisSerializer<>(om,Object.class);
        om.setVisibility(PropertyAccessor.ALL, JsonAutoDetect.Visibility.ANY);
        om.enableDefaultTyping(ObjectMapper.DefaultTyping.NON_FINAL);
        om.activateDefaultTyping(LaissezFaireSubTypeValidator.instance,
                ObjectMapper.DefaultTyping.NON_FINAL, JsonTypeInfo.As.PROPERTY);
        RedisCacheConfiguration config=RedisCacheConfiguration.defaultCacheConfig()
                .entryTtl(Duration.ofDays(1))
                .serializeKeysWith(RedisSerializationContext.SerializationPair
                        .fromSerializer(stringSerializer))
                .serializeValuesWith(RedisSerializationContext
                        .SerializationPair.fromSerializer(jackson2JsonRedisSerializer))
                .disableCachingNullValues();
        RedisCacheManager cacheManager=RedisCacheManager
                .builder(factory).cacheDefaults(config).build();
        return cacheManager;
    }
}
六、效果演示


最后,莫失,莫忘!

有“AI”的1024 = 2048,欢迎大家加入2048 AI社区
更多推荐

 22
22 0
0- 0


 已为社区贡献1条内容

所有评论(0)