Next.js第二十五章(CSS方案)
Next.js CSS方案摘要 Next.js提供多种CSS方案选择:1) Tailwind CSS(推荐)通过原子类快速开发;2) CSS Modules实现模块化样式;3) 内置Sass支持(需安装依赖);4) 全局CSS通过globals.css文件;5) 内联Style样式;6) CSS-in-JS如styled-components(需额外配置)。Tailwind CSS可通过npx c
Next.js CSS方案
在Next.js可以使用多种Css方案,包括:
- Tailwind CSS(个人推荐)
- CSS Modules(创建css模块化,类似于Vue的单文件组件)
- Next.js内置Sass(css预处理器)
- 全局Css(全局的css,可以全局使用)
- Style(内联样式)
- css-in-js(类似于React的styled-components,不推荐)
Tailwind CSS
Tailwind CSS(css原子化),他是一个css框架,可以让你快速构建网页,他提供了大量的css类,你只需要使用这些类,就可以快速构建网页。
安装教程
npx create-next-app@latest my-project
当我们去创建Next.js项目的时候,选择customize settings(自定义选项) 那么就会出现Tailwind CSS的选项,我们选择Yes即可。
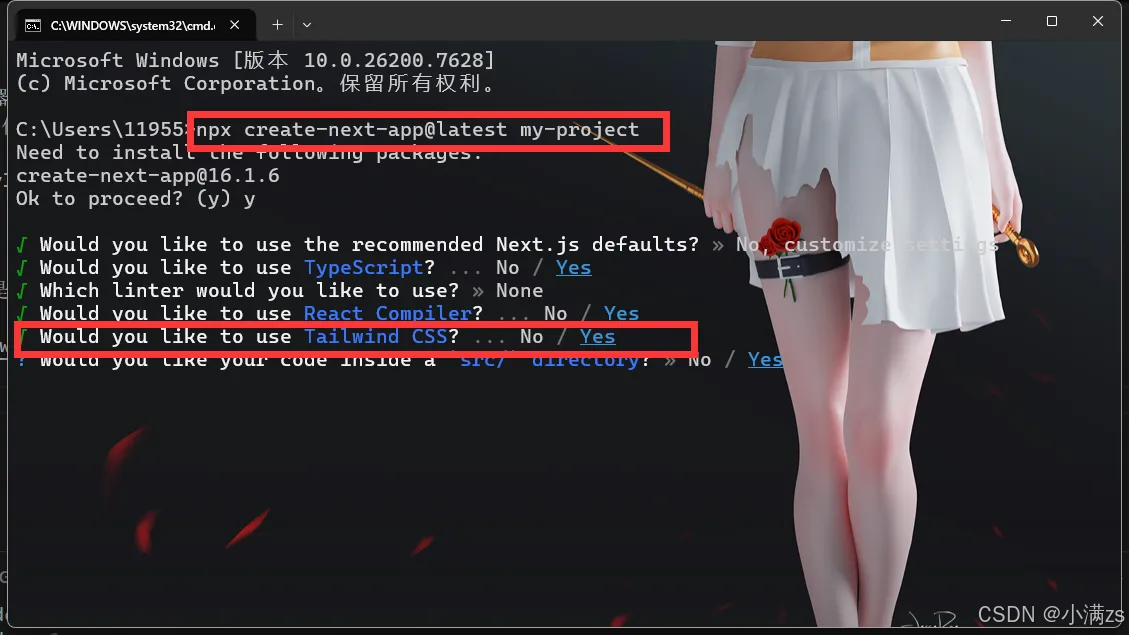
那么如果我在当时忘记选择Tailwind CSS,我该怎么安装呢?
在 Next.js 中安装并使用 Tailwind CSS
下面是如何在 Next.js 项目中集成 Tailwind CSS 的详细流程:
1. 创建你的 Next.js 项目
如果还没有项目,可以使用 Create Next App 快速初始化:
npx create-next-app@latest my-project --typescript --eslint --app
cd my-project
2. 安装 Tailwind CSS 及相关依赖
通过 npm 安装 tailwindcss、@tailwindcss/postcss 以及 postcss 依赖:
npm install tailwindcss @tailwindcss/postcss postcss
3. 配置 PostCSS 插件
在项目根目录下创建 postcss.config.mjs 文件,并添加如下内容:
const config = {
  plugins: {
    "@tailwindcss/postcss": {},
  },
};
export default config;
4. 导入 Tailwind CSS
在 ./app/globals.css 文件中添加 Tailwind CSS 的导入:
@import "tailwindcss";
5. 启动开发服务
运行开发服务:
npm run dev
6. 在项目中开始使用 Tailwind
现在可以直接在组件或页面中使用 Tailwind CSS 的工具类来进行样式编写。例如:
export default function Home() {
  return (
    <h1 className="text-3xl font-bold underline">
      Hello world!
    </h1>
  )
}
这样即可在项目中使用 Tailwind CSS 原子类来快速开发样式。
FAQ
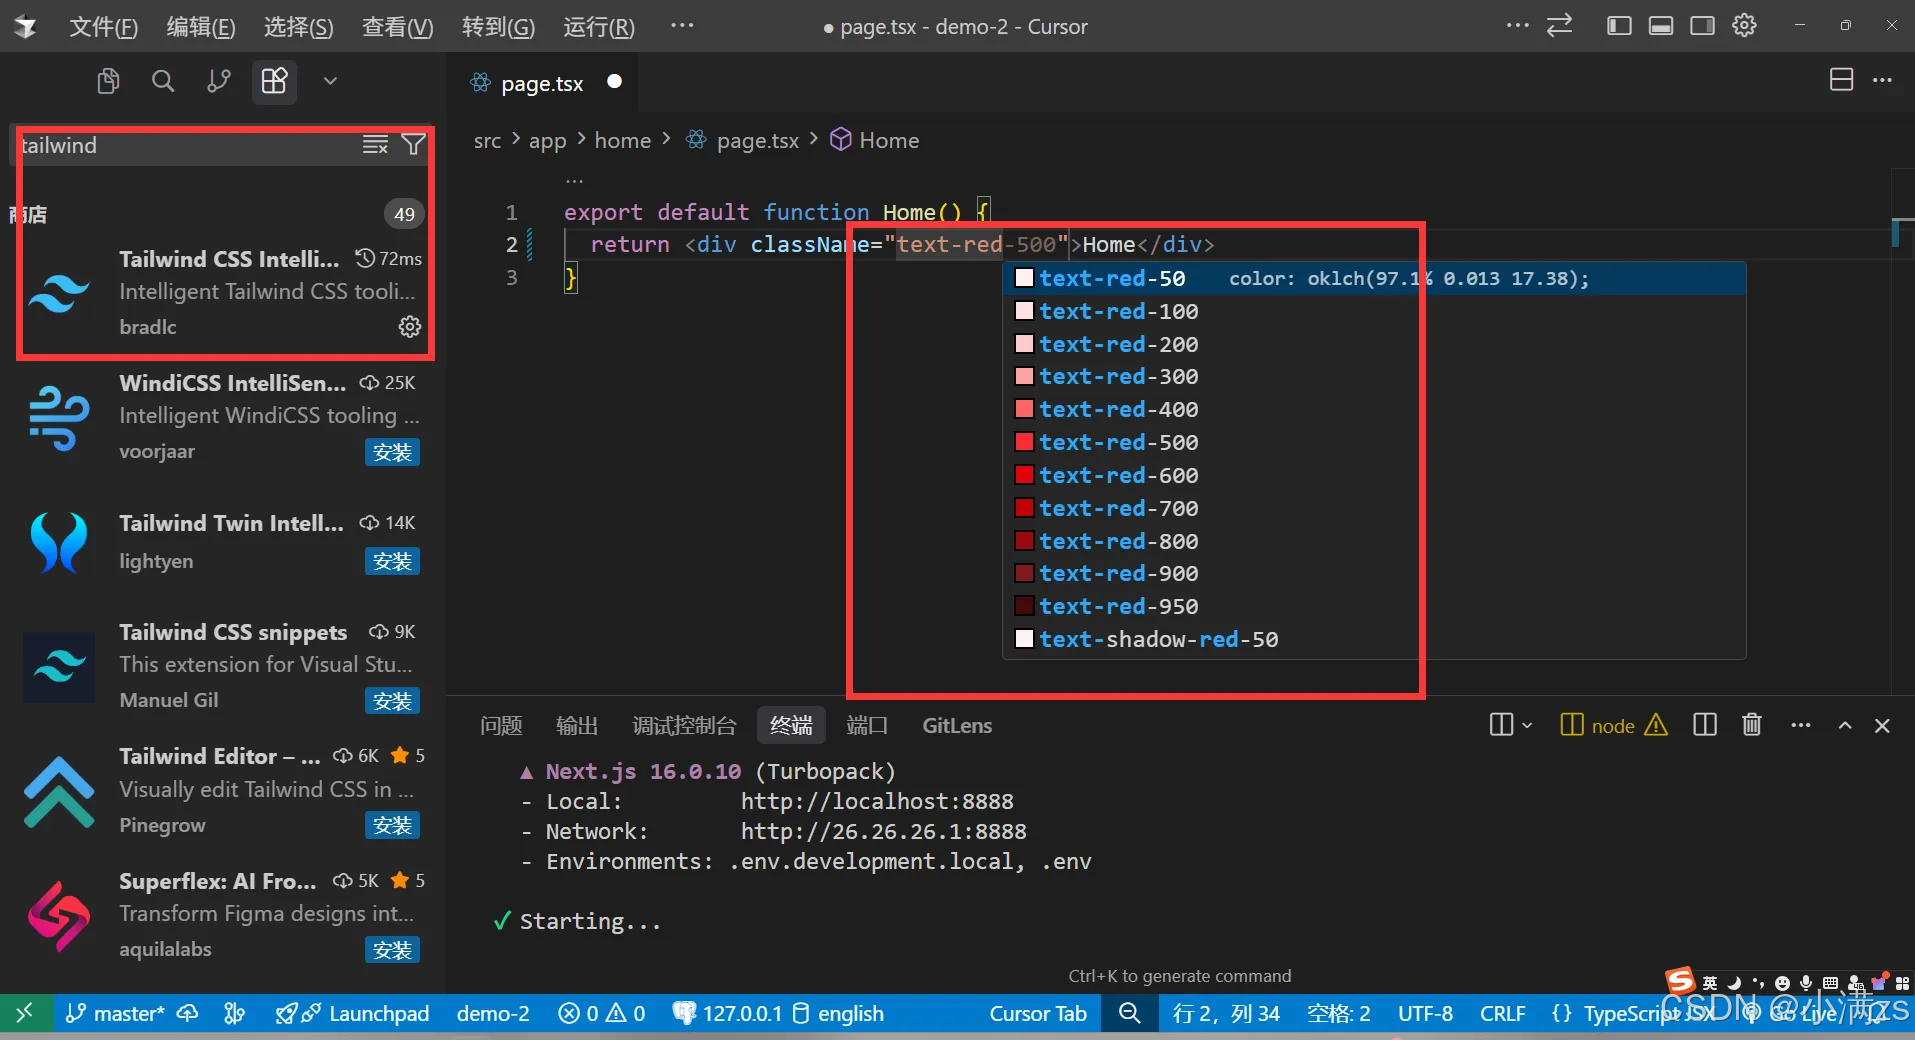
这么多类名我记不住怎么办?
答:你不需要特意去记忆,tailwindCss的类名都是简称,例如backdround-color:red 你可以简写为bg-red-500。另外就是官网也提供文档可以查询,再其次就是还提供了vscode插件,可以自动补全类名。
CSS Modules
CSS Modules 是一种 CSS 模块化方案,可以让你在组件中使用CSS模块化,类似于Vue的单文件组件(scoped)。
Next.js已经内置了对CSS Modules的支持,你只需要在创建文件的时候新增.module.css后缀即可。例如index.module.css。
/** index.module.css */
.container {
  background-color: red;
}
/** index.tsx */
import styles from './index.module.css';
export default function Home() {
  return (
    <div className={styles.container}>
      <h1>Home</h1>
    </div>
  )
}
你会发现他编译出来的类名,就会生成一个唯一的hash值,这样就可以避免类名冲突。
<h1 class="index-module__ifV0vq__test">小满zs Page</h1>
Next.js内置Sass
Next.js已经内置了对Sass的支持,但是依赖还需要手动安装,不过配置项它都内置了,只需要安装一下即可。
npm install --save-dev sass
另外Next.js还支持配置全局sass变量,只需要在next.config.js中配置即可。
import type { NextConfig } from 'next'
const config: NextConfig = {
  reactCompiler: true,
  reactStrictMode: false,
  cacheComponents:false,
  sassOptions:{
    additionalData: `$color: blue;`, // 全局变量
  }
}

export default config
全局Css
全局CSS,就是把所有样式应用到全局路由/组件,那应该怎么搞呢?
在根目录下创建globals.css文件,然后添加全局样式。
/** app/globals.css */
body {
  background-color: red;
}
.flex{
    display: flex;
    justify-content: center;
    align-items: center;
}
在layout.tsx文件中引入globals.css文件。
//app/layout.tsx
import './globals.css'
export default function RootLayout({ children }: { children: React.ReactNode }) {
  return (
    <html lang="en">
      <body>{children}</body>
    </html>
  )
}
Style
Style,就是内联样式,就是直接在组件中使用style属性来定义样式。
export default function Home() {
  return (
    <div style={{ backgroundColor: 'red' }}>
      <h1>Home</h1>
    </div>
  )
}
css-in-js
css-in-js,就是把css + js + html混合在一起,拨入styled-components,不推荐很多人接受不了这种写法。
1.安装启用styled-components
npm install styled-components
import type { NextConfig } from 'next'
const config: NextConfig = {
  compiler:{
    styledComponents:true // 启用styled-components
  }
}
export default config
2.创建style-component注册表
使用styled-componentsAPI 创建一个全局注册表组件,用于收集渲染过程中生成的所有 CSS 样式规则,以及一个返回这些规则的函数。最后,使用该useServerInsertedHTML钩子将注册表中收集的样式注入到<head>根布局的 HTML 标签中。
//lib/registry.ts
'use client'

import React, { useState } from 'react'
import { useServerInsertedHTML } from 'next/navigation'
import { ServerStyleSheet, StyleSheetManager } from 'styled-components'

export default function StyledComponentsRegistry({
  children,
}: {
  children: React.ReactNode
}) {
  // Only create stylesheet once with lazy initial state
  // x-ref: https://reactjs.org/docs/hooks-reference.html#lazy-initial-state
  const [styledComponentsStyleSheet] = useState(() => new ServerStyleSheet())

  useServerInsertedHTML(() => {
    const styles = styledComponentsStyleSheet.getStyleElement()
    styledComponentsStyleSheet.instance.clearTag()
    return <>{styles}</>
  })

  if (typeof window !== 'undefined') return <>{children}</>

  return (
    <StyleSheetManager sheet={styledComponentsStyleSheet.instance}>
      {children}
    </StyleSheetManager>
  )
}
3.注册style-component注册表
//app/layout.tsx
import StyledComponentsRegistry from './lib/registry'

export default function RootLayout({
  children,
}: {
  children: React.ReactNode
}) {
  return (
    <html>
      <body>
        <StyledComponentsRegistry>{children}</StyledComponentsRegistry>
      </body>
    </html>
  )
}
4.使用styled-components
'use client';
import styled from 'styled-components';
const StyledButton = styled.button`
  background-color: red;
  color: white;
  padding: 10px 20px;
  border-radius: 5px;
`;
export default function Home() {
  return (
    <StyledButton>Click me</StyledButton>
  )
}

有“AI”的1024 = 2048,欢迎大家加入2048 AI社区
更多推荐


 14
14 0
0- 0


 已为社区贡献7条内容

所有评论(0)