三、智能体应用开发平台——Dify本地部署
Dify安装部署以及接入外部模型
智能体应用开发平台——Dify本地部署
一、部署Dify
git clone https://github.com/langgenius/dify.git

cd dify

cd docker

cp .env.example .env

vi .env
docker compose up -d
启动时间比较长,耐心等待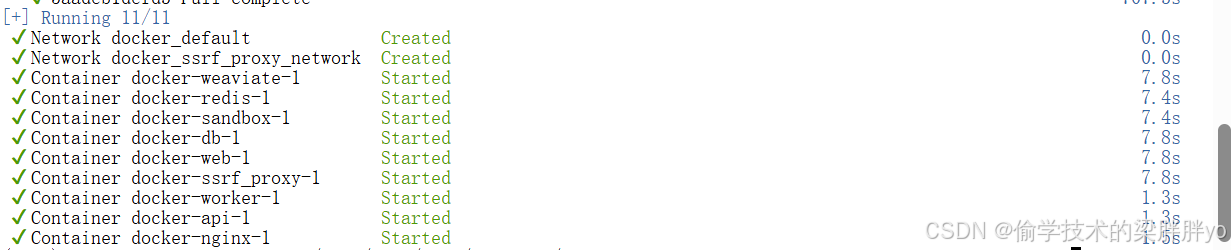
运行之后,可以访问Dify平台
二、模型管理平台之Ollama部署
Ollama在前面的文章已经介绍过了,这里不做赘述,可以跳转到以前文章查看https://blog.csdn.net/liangpangpangyo/article/details/148841182?spm=1001.2014.3001.5501
当然部署也很简单,ollama网站地址:https://ollama.com/一条命令就可以完成部署。
部署完成之后可以查看可部署的模型,地址:https://ollama.com/library,使用ollama run可以对仓库里涉及的任何模型进行部署
三、模型管理平台之Xinference部署
Xinference以前从没有提到过,这里重点介绍一下。
Xinference介绍
Xinference 是⼀个强⼤且通⽤的分布式推理框架,也可以⽤于私有化部署和运⾏⼤语⾔模型,通过 Xinference 可以简化各种AI模型的运⾏和集成,使开发者可以使⽤任何开源⼤语⾔模型、推理模型、多模态模型在云端或本地环境中运⾏、推理,创建强⼤的AI应⽤。
Xinference安装步骤
1:创建虚拟环境
conda create -n Xinference python=3.10.14
激活环境
conda activate Xinference
修改pip缓存
echo 'export PIP_CACHE_DIR=/data/pip/cache' >> ~/.bashrc
source ~/.bashrc
验证缓存文件夹改变
pip cache dir

2:配置清华源
python -m pip install --upgrade pip
pip config set global.index-url https://pypi.tuna.tsinghua.edu.cn/simple

3:使用清华源进行升级
python -m pip install -i https://pypi.tuna.tsinghua.edu.cn/simple --upgrade pip

4:安装所有依赖
直接执行
#pip install -i https://pypi.tuna.tsinghua.edu.cn/simple "xinference[all]"
CMAKE_POLICY_VERSION_MINIMUM=3.5 pip install -i https://pypi.tuna.tsinghua.edu.cn/simple "xinference[all]"

5:验证torch是否可以用
python -c "import torch; print(torch.cuda.is_available())"
如果报错,缺什么依赖就根据提示安装什么依赖即可

6:安装torch
pip install -i https://pypi.tuna.tsinghua.edu.cn/simple torch

7:启动服务
前台
xinference-local --host 0.0.0.0 --port 8890

后台
nohup xinference-local --host 0.0.0.0 --port 8890 & > output.log

步骤8:本地访问
本地访问地址:http://127.0.01:8890/ui/

如果pip安装包过程中报错:libc.musl-x86_64.so.1: cannot open shared object file: No such file or directory
解决方案:
apt-get install musl-dev
sudo ln -s /usr/lib/x86_64-linux-musl/libc.so /usr/lib/libc.musl-x86_64.so.1
Xinference种启动模型
Xinferencek可以运行任何类型的模型,如embedding、rerank等
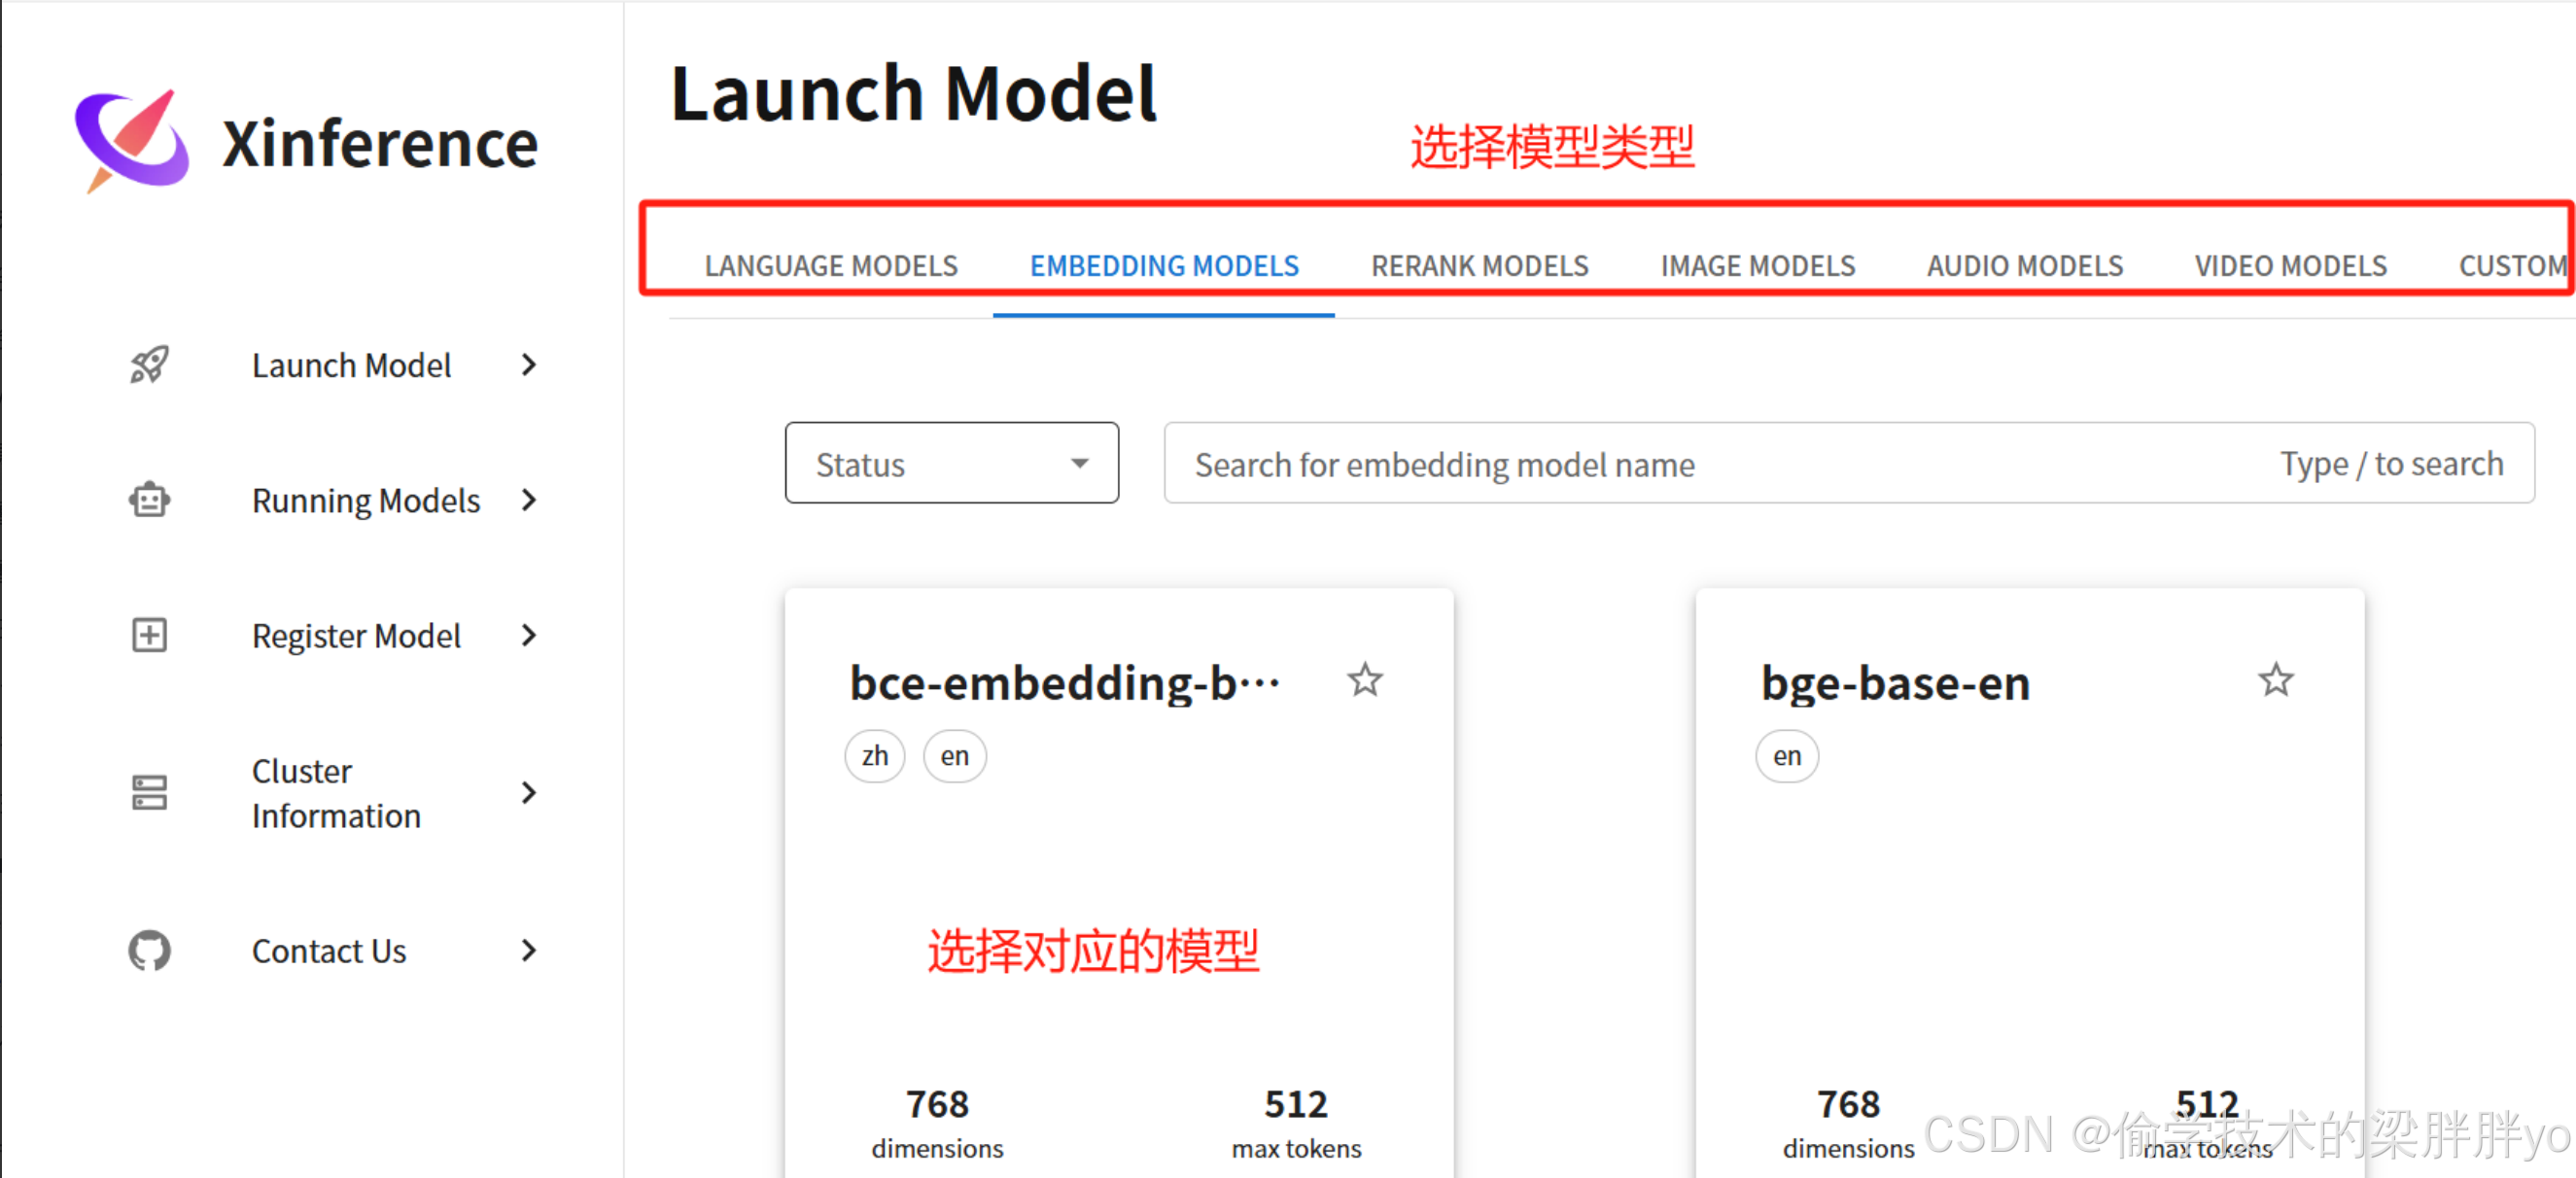
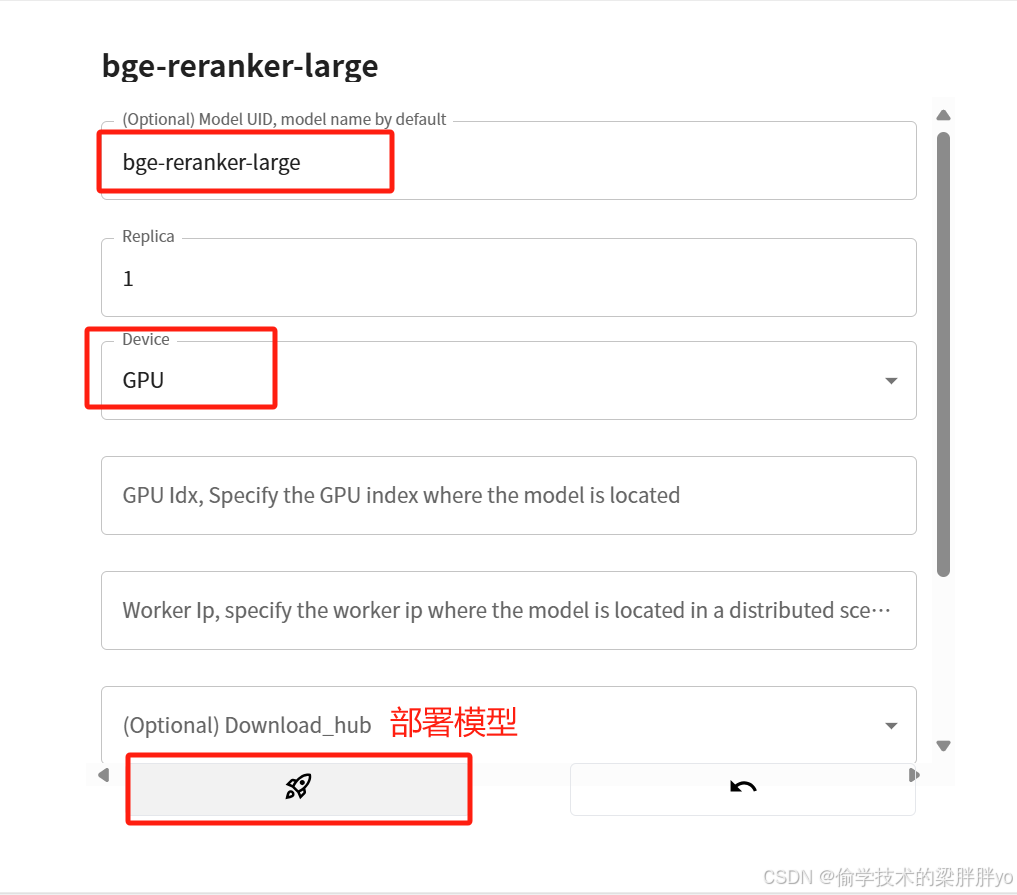
选择模型进行部署
部署成功的模型可以在Running Models中查看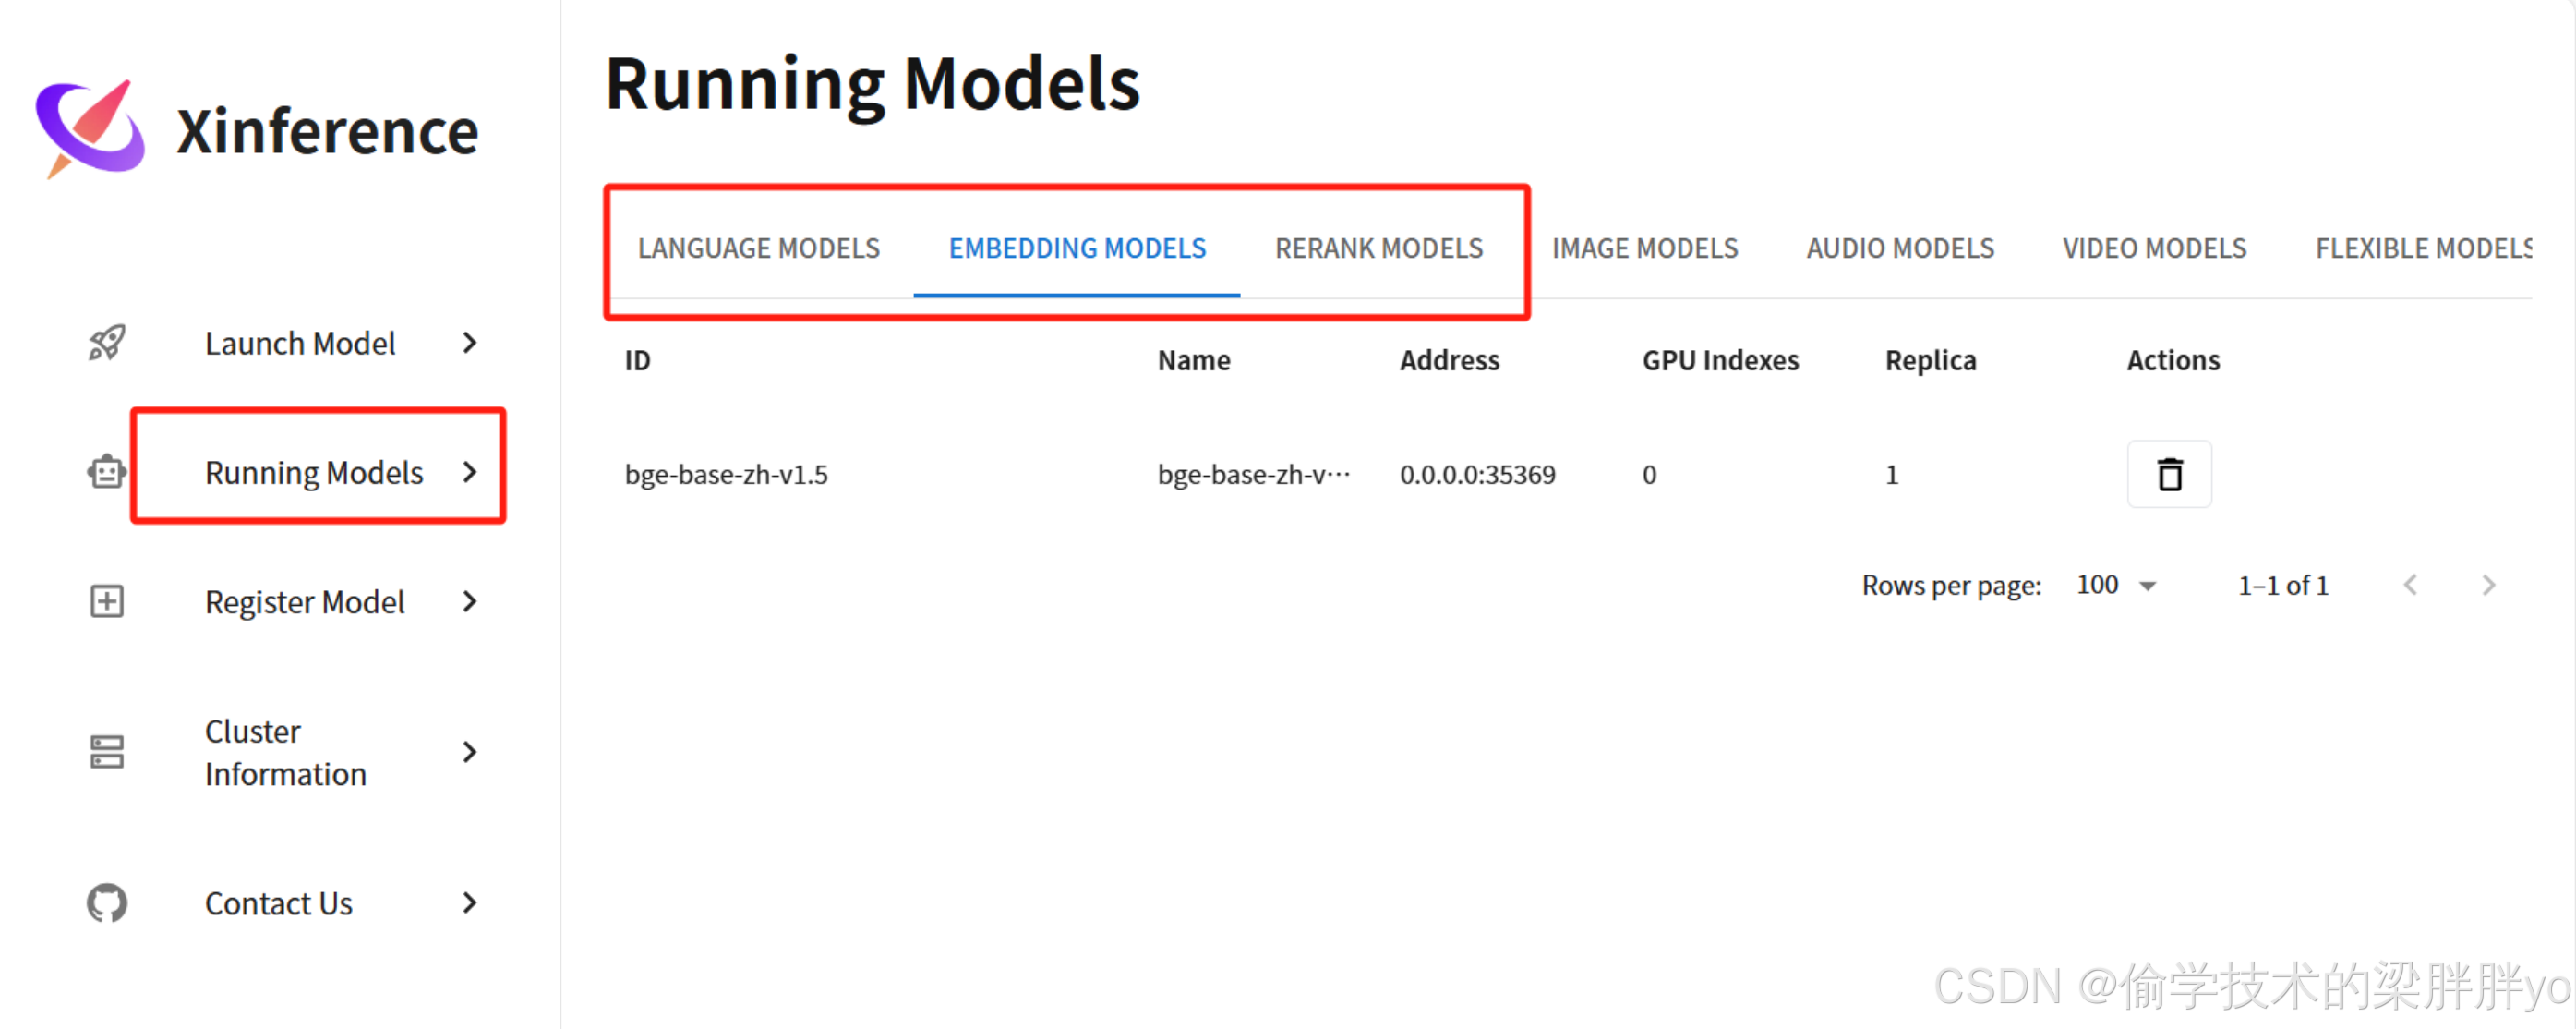
四、Dify接入模型管理
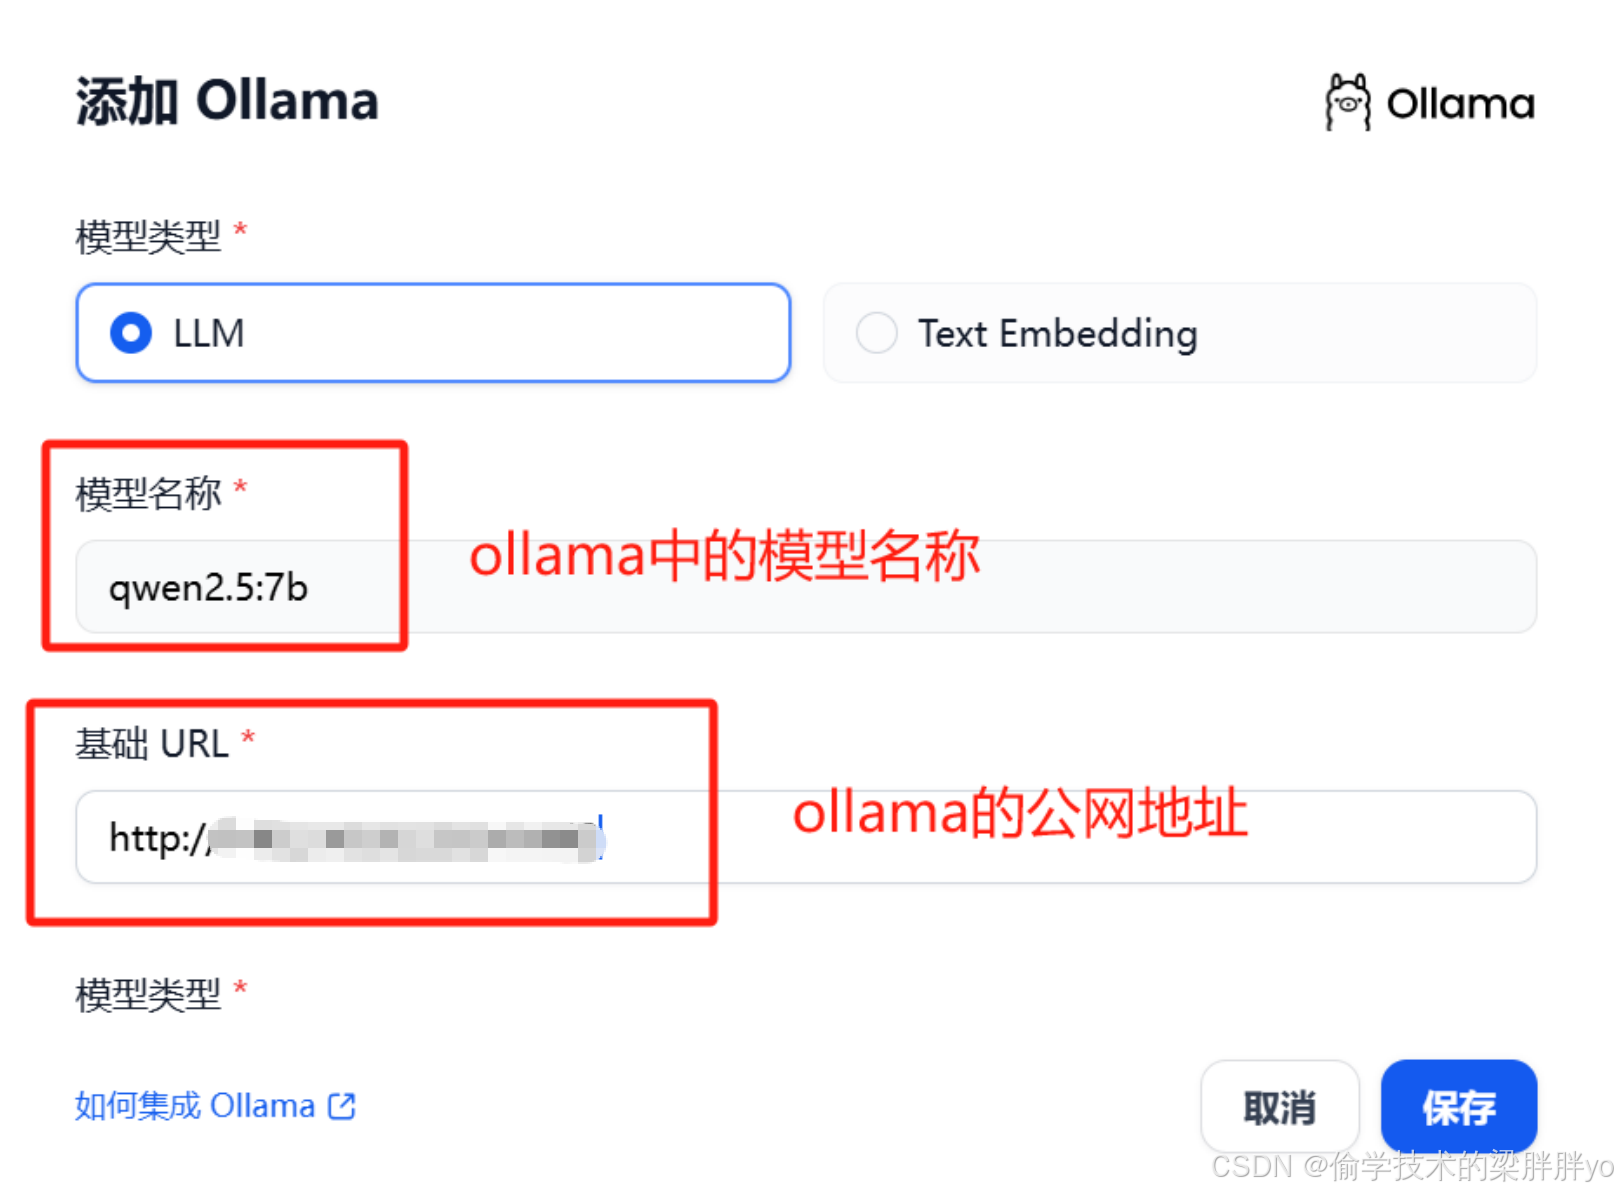
接入ollama模型
将ollama run运行的模型添加到Dify平台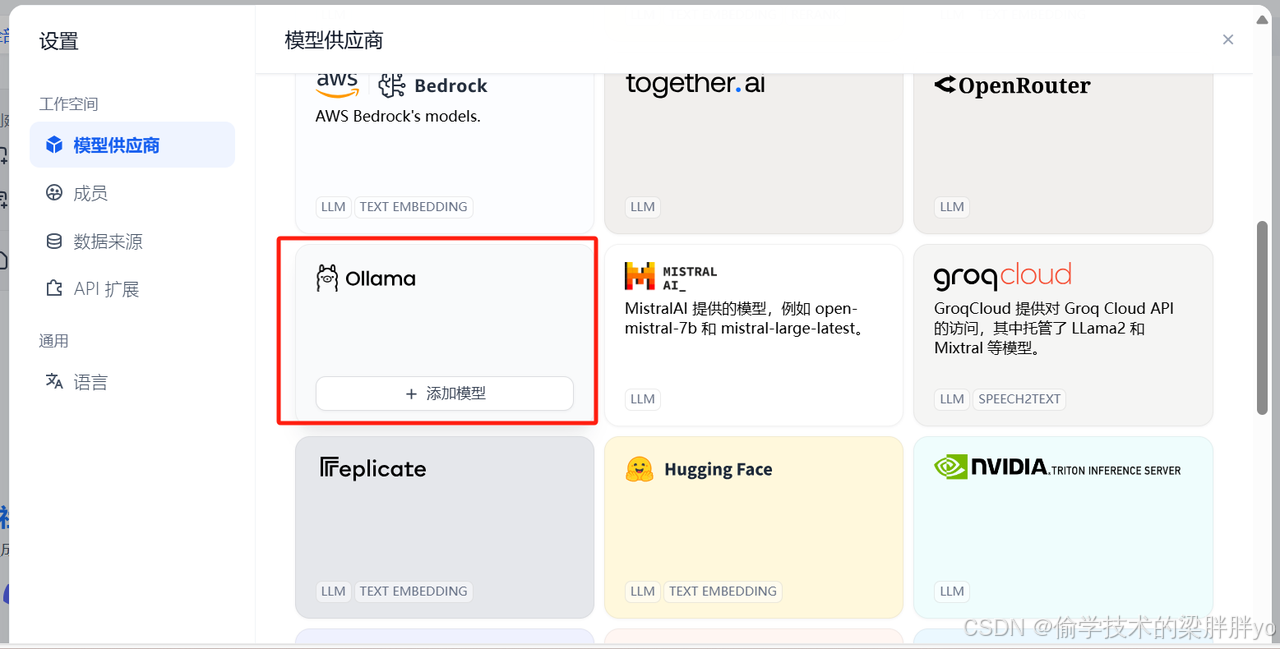
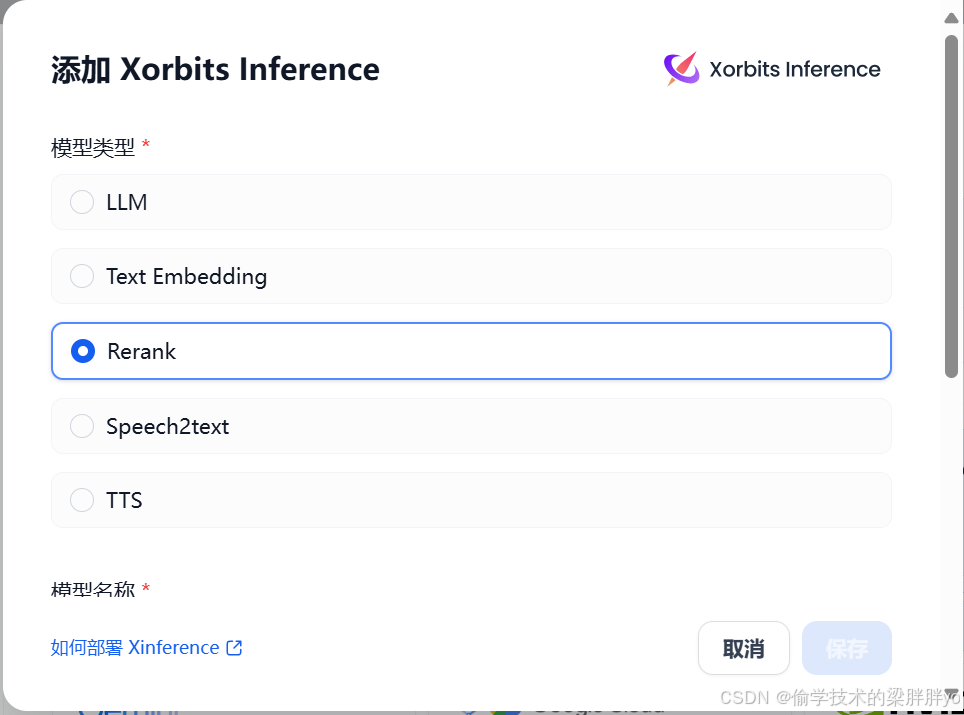
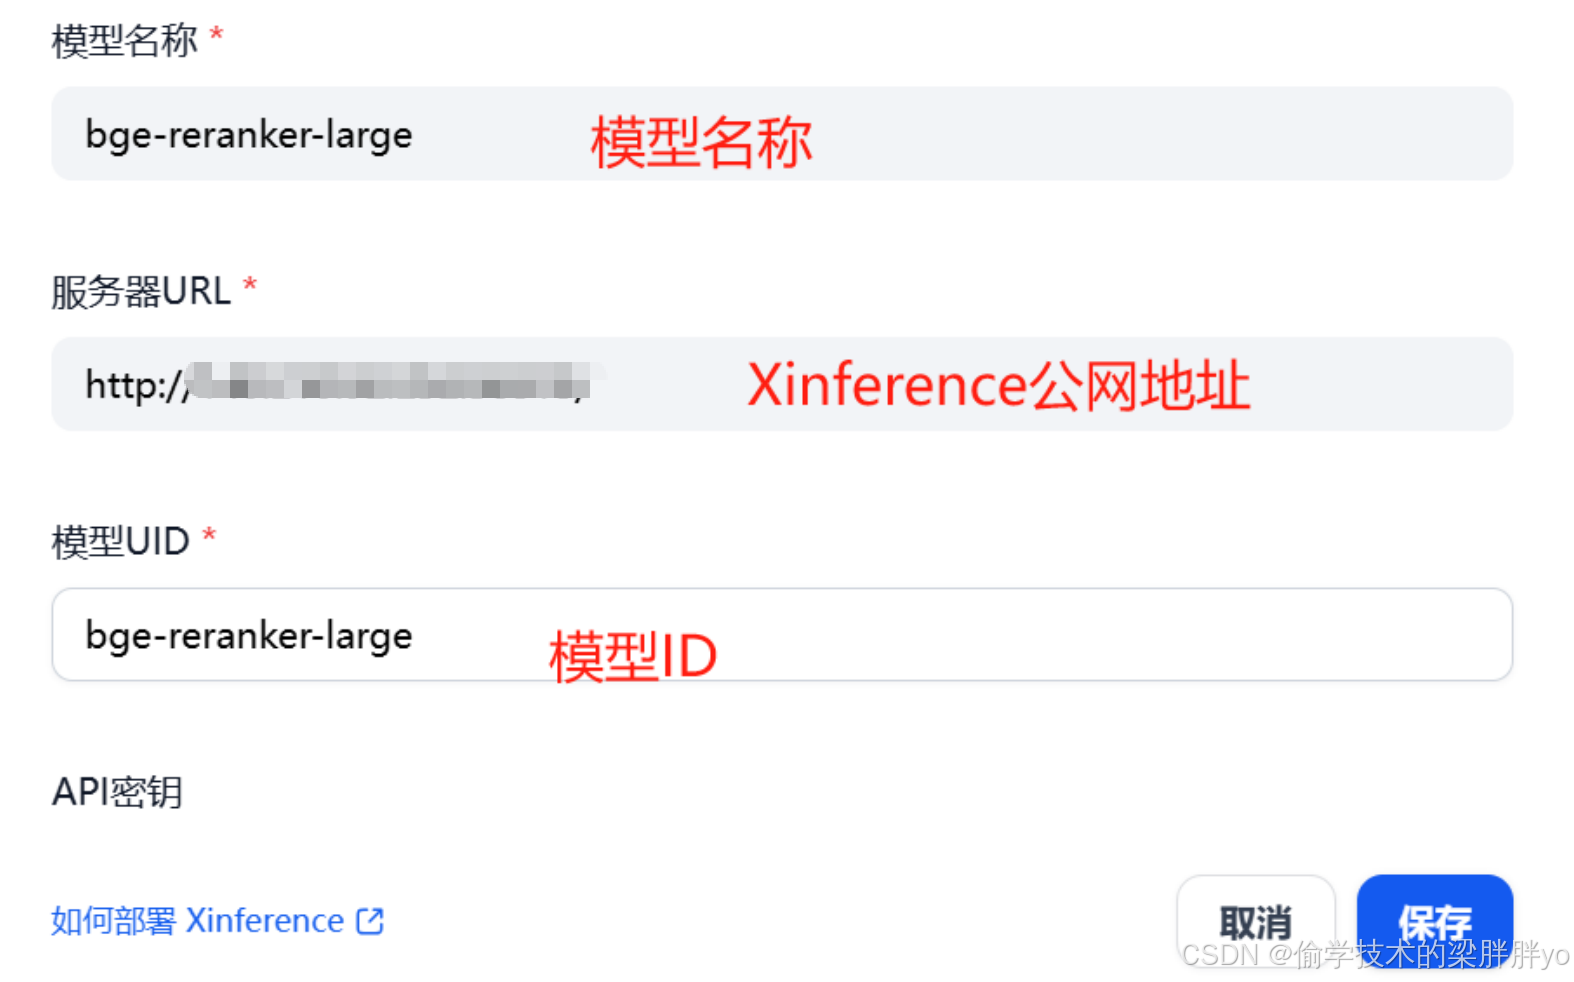
接入Xinference模型
模型提供商-选择Xinference-添加模型-选择模型类型-填写模型信息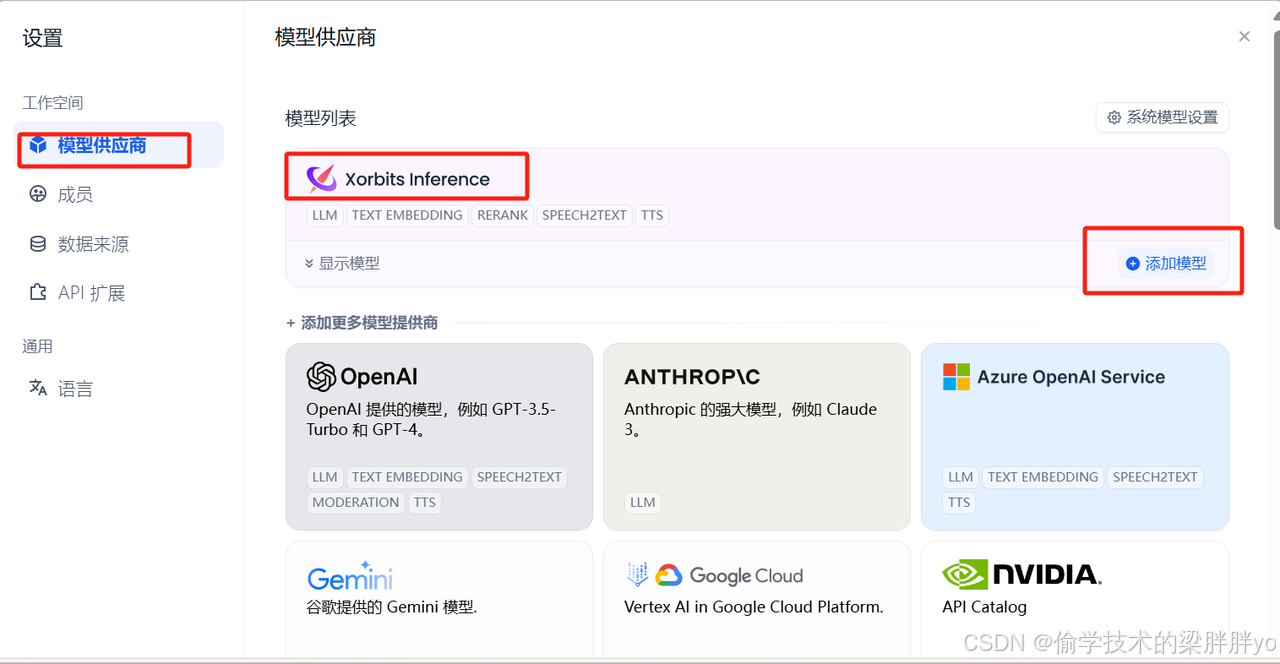
总结
到这里LLM和RERANK MODEL都已经接入到Dify平台,示例中是使用的本地模型接入,如果使用商用模型,填写对应的api和key即可。后面会在Dify上演示一些示例,让大家更容易了解Dify。

有“AI”的1024 = 2048,欢迎大家加入2048 AI社区
更多推荐


 13
13 0
0- 0


 已为社区贡献3条内容

所有评论(0)