前端vue3 路由——学习记录
但这样传参的缺点是,传过去的id和name都是字符串,to=“/news/detail?同样的方式,在你想要添加子展示区的page组件中,使用<RouterLink>和<RouterView>,注意to的用法为to:"/news/detail",要把路径写完整,只写detail的话就会变成和news路由平行的路由,匹配不到。像上面那种,Detail.vue文件接收参数需要用的query.id,pa
1、路由就是一组key+value的对应关系,多个路由toute,需要一个路由器router管理
2、SPA(single page web application)应用,单页面应用,只有一个html,如后台管理系统,通过地址栏地址切换来实现内容的切换。页面路径发生变化,就会被router监视到,由路由器进行规则匹配,如/class对应班级组件
3、路由使用流程:
(1)导航区、展示区
(2)请来路由器
(3)制定路由的具体规则(什么路径,对应着什么组件)
(4).形成 一个一个的 .vue文件
4、配置路由环境:
下载:npm i vue-router
创建router文件夹和index.ts文件
在index.ts文件中,引入createRouter和createWebHistory,并引入相关vue组件
创建路由器并暴露:
const router=createRouter({
  history:createWebHistory(),//路由器工作模式

  //添加路由配置项:key+value,路由规则:
  routes:[
    {
      path:'/home',
      component:Home
    },
    {
      path:'/about',
      component:About
    },
    {
      path:'/news',
      component:News
    }
  ]
})

//暴露
export default router
在main.ts中导入并使用:
import router from './router'
app.use(router)//使用路由器
5、此时页面在链接上输入路径是可以正常跳转的,只不过找不到对应的组件,因为没有正确链接,不知道要把组件放在哪里,因此:
在页面中(我这个是App.vue)导入 import {RouterLink,RouterView} from 'vue-router'
RouterView:展示区
RouterLink:跳转按钮,是一个组件,to表示要去的路径,active-class是激活的类,如果点击了“首页“,就会在首页的按钮上激活active样式
<!-- 导航区 -->
    <div class="navigate">
      <RouterLink to="/home" active-class="active">首页</RouterLink>
      <RouterLink to="/news" active-class="active">新闻</RouterLink>
      <RouterLink to="/about" active-class="active">关于</RouterLink>
    </div>
    <!-- 展示区 -->
    <div class="main-content">
      <RouterView></RouterView>
</div>6、路由组件通常存放在pages 或 views文件夹,一般组件通常存放在components文件夹。通过点击导航,视觉效果上“消失” 了的路由组件,默认是被卸载掉的,需要的时候再去挂载。(对该组件调用onMounted和onUnmounted可知)
7、路由器工作模式:
history模式:
优点:URL更加美观,不带有#,更接近传统的网站URL。
缺点:后期项目上线,需要服务端配合处理路径问题,否则刷新会有404错误。(不了解怎么配合处理,应该是后端的事hhhh)
Vue2: mode:'history“
Vue3: history:createWebHistory()
React: BrowserRouter
hash模式:
优点:兼容性更好,因为不需要服务器端处理路径。
缺点:URL带有#不太美观,且在SEO优化方面相对较差。
![]()
history:createWebHashHistory()
后台项目可能比较喜欢用hash模式,前台项目用history
8、to的两种写法:
(1):对象写法:
path跳转::to="{path:'/about'}"
名字跳转::to="{name:'shouye'}" ——需要在router/index.ts创建router时的路由配置项中添加:
name:'你的路由名字'
(2)字符串写法:to="/about"
9、重定向
10、路由嵌套:在一个展示区中再嵌套一个展示区,子路由
在路由配置项中你想要添加子路由的对象中添加属性children:
 children:[
        {
          path:'detail',  //子集不用写‘/’,
          component:Detail
        }
      ]
同样的方式,在你想要添加子展示区的page组件中,使用<RouterLink>和<RouterView>,注意to的用法为 to:"/news/detail",要把路径写完整,只写detail的话就会变成和news路由平行的路由,匹配不到。
11、路由传参
query传参:
字符串to写法传参:
写法:to=“/news/detail?id=123&name=aaa”
在detail组件中接收:导入useRoute(一个hooks),let route=useRoute(),引用:route.query.a,route.query.b
但这样传参的缺点是,传过去的id和name都是字符串,to=“/news/detail?id=item.id“ 这样传过去的是字符串,因此需要用到模板字符串to="`/news/detail?id=${item.id}&title=${item.title}`"
此时,在浏览器上方显示的链接中会有id、title的内容
对象to写法传参:
<RouterLink :to="{
        path:'/news/detail',
        query:{
          id:item.id,
          title:item.title,
          content:item.content
        }
      }">
        {{ item.title }}</RouterLink>
param传参:
首先在路由配置中添加占位符:
//params传参,要写占位符:
      children:[
        {
          name:'xiangqing',
          path:'detail/:id/:title/:content?',  //子集不用写‘/’,不能传数组,加?表示这个属性可传可不传
          component:Detail
        }
      ]
字符串to写法:
<RouterLink :to="`/news/detail/${item.id}/${item.title}/${item.content}`">{{ item.title }}</RouterLink>
对象to写法:此时必须给子路由命名,然后使用name,不能使用path
<RouterLink :to="{
          name:'xiangqing',  //不能用path,要用name
          params:{
            id:item.id,
            title:item.title,
            content:item.content
          }
        }">
          {{ item.title }}</RouterLink>
接收参数时同上,就把query改为params就行
12、路由的props配置项
像上面那种,Detail.vue文件接收参数需要用的query.id,params.id,这样很麻烦,路由props配置项让路由组件更方便的收到参数(可以将路由参数作为props传给组件)
(1)在路由配置项index.ts文件中,给对应的对象添加props:true
children:[
        {
          name:'xiangqing',
          path:'detail/:id/:title/:content?',
          component:Detail,
          props:true
        }
将全部params参数(prop的对象写法不能传递query参数)以props形式传递给Detail组件,组件直接写id就行
接收参数方法:在对应组件中使用defineProps(['id','title','content']),然后直接写id,title就行
(2)要想将query参数直接传递:函数写法,自己决定将什么(query或者params)作为props传给组件,想要传递query的参数,就return route.query
const routes = [
  {
    path: '/user', // 注意:query参数无需在path中定义
    name: 'User',
    component: User,
    // 核心:props函数接收route对象,返回要传递给组件的props(手动包含query)
    props: (route) => ({
      // 解析query参数:把route.query.id映射为组件的id props
      id: route.query.id,
      // 可同时解析params(如果有)+ query参数
      name: route.params.name,
      age: route.query.age
    })
  }
]


接收:
<!-- User.vue -->
<template>
  <div>
    <!-- 直接用props取值,和query/params无关,组件更通用 -->
    <p>ID(来自query):{{ props.id }}</p>
    <p>年龄(来自query):{{ props.age }}</p>
    <p>姓名(来自params):{{ props.name }}</p>
  </div>
</template>

<script setup>
// 声明props,接收路由传递的参数(包括query)
const props=defineProps({
  id: String,
  age: String,
  name: String
})
</script>
13、浏览器记录——replace属性
路由会有浏览器记录,操作浏览器记录:push(可以借助前进后退调整,追加历史记录(默认值) )和replace(直接替换)
操作:直接在<RouterLink>中添加replace属性
14、编程式路由导航:脱离<RouterLink>实现路由跳转
如果只用RouterLink调整,导航区都是a标签,但如果想要点击button跳转呢?或者是想要进入首页后过一段时间自动跳转到其他页面呢?
vue2的是 this.$router.push
vue3:
import { onMounted } from 'vue';
import { useRouter } from 'vue-router';
const router=useRouter()
onMounted(()=>{
  setTimeout(() => {
    router.push('/news')
  }, 3000);
})
此代码实现的功能是挂载后在当前页面停留3秒后自动跳转(利用router.push),想要直接替换可以用replace
push的内容里,to可以怎么写,()里就怎么写(对象/字符串写法)
 let router=useRouter()
  function showDetail(item:NewsInter){
    router.push({
      name:'xiangqing',  //不能用path,要用name
      params:{
        id:item.id,
        title:item.title,
        content:item.content
      }
    })
  }
此代码是对象写法
编程式导航使用场景: 1、符合某些条件就跳转;2、鼠标滑过一个东西就跳转
15、路由重定向
打开浏览器之后是空白的,既不是首页也不是其他页面,此时需要重定向redirect
方法:在router index.ts中的route配置项中添加:
{
path:'/',
redirect:'/home'
}
页面打开后就是home页面
16、其他
给路由菜单添加icon或者title时可以使用meta属性:
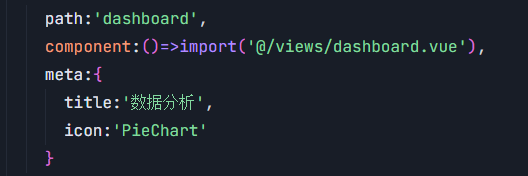
使用:

欢迎补充纠正!

有“AI”的1024 = 2048,欢迎大家加入2048 AI社区
更多推荐


 18
18 0
0- 0


 已为社区贡献2条内容

所有评论(0)