自己用wikijs架设wiki网站:安装篇
本文详细记录了在FreeBSD的Linux Jail环境中安装Wiki.js的过程。首先通过npm安装yarn,克隆Wiki.js源码并修改配置为SQLite数据库。由于FreeBSD不支持inotify,需设置CHOKIDAR_USEPOLLING=1环境变量才能启动开发服务器。安装过程中遇到依赖编译错误,最终耗时80分钟完成。配置完成后成功访问3000端口完成初始化设置,并实现了中文界面支持。
wikijs,号称最强大的可扩展开源Wiki软件!
官网:Wiki.js
源码:requarks/wiki: Wiki.js | A modern and powerful wiki app built on Node.js
手动安装Manually手册
Prerequisites
- All standard Wiki.js prerequisites
- Yarn 1.x (
npm i -g yarn) - Native compilation dependencies
- Ubuntu:
apt-get install build-essential - Windows: from an administrator Powershell:
npm i -g --production windows-build-tools
- Ubuntu:
Installing the project
- Clone the project from GitHub (make sure to use the
devbranch). - From the project folder, run the command:
yarn - Rename
config.sample.ymltoconfig.yml. - Edit
config.ymlwith your local dev machine settings (port, database, etc.)
Run the project
From the project folder, simply run yarn dev
This will start Wiki.js in dev mode. Client assets are compiled first (using Webpack), then the server will start automatically. Wait for this process to complete before loading the app!
Browse to the site, using the configuration you defined in config.yml. For example, if using port 3000 on your local machine, you would browse to http://localhost:3000/.
The first time you load the wiki, you'll get greeted with the setup wizard. Complete all the steps to finish the installation.
Building production assets
Once you're ready to deploy your changes, you need to build the client assets into a production optimized bundle:
yarn build实践
安装yarn,然后用yarn启动项目
安装yarn
使用npm进行安装
npm i -g yarn下载源代码
git clone https://github.com/Requarks/wiki执行yarn安装
进入wiki目录后,执行yarn进行安装:
yarn需要较长的时间,如果国内网速慢,可以用镜像
yarn config set registry https://registry.npm.taobao.org修改配置
改名config.sample.yml to config.yml.
cp config.sample.yml config.yml编辑config.yml文件,增加了sqlite,去掉默认的postgre:
db:
  type: sqlite
  storage: db.sqlite
暂时没有修改里面其它的配置。
yarn dev 启动项目
yarn dev因为是在FreeBSD的linux jail里启动的,不支持inotify(Linux文件系统监视机制),所以要加上环境变量,最终命令是:
CHOKIDAR_USEPOLLING=1 yarn dev启动后显示
2026-01-11T00:50:59.650Z [MASTER] warn: DB Configuration is empty or incomplete. Switching to Setup mode...
2026-01-11T00:50:59.650Z [MASTER] info: Starting setup wizard...
2026-01-11T00:51:00.205Z [MASTER] info: Starting HTTP server on port 3000...
2026-01-11T00:51:00.206Z [MASTER] info: HTTP Server on port: [ 3000 ]
2026-01-11T00:51:00.229Z [MASTER] info: HTTP Server: [ RUNNING ]
2026-01-11T00:51:00.229Z [MASTER] info: 🔻🔻🔻🔻🔻🔻🔻🔻🔻🔻🔻🔻🔻🔻🔻🔻🔻🔻🔻🔻🔻🔻🔻🔻🔻🔻🔻🔻🔻
2026-01-11T00:51:00.230Z [MASTER] info:
2026-01-11T00:51:00.230Z [MASTER] info: Browse to http://YOUR-SERVER-IP:3000/ to complete setup!
2026-01-11T00:51:00.230Z [MASTER] info:
2026-01-11T00:51:00.230Z [MASTER] info: 🔺🔺🔺🔺🔺🔺🔺🔺🔺🔺🔺🔺🔺🔺🔺🔺🔺🔺🔺🔺🔺🔺🔺🔺🔺🔺🔺🔺🔺
登录3000端口
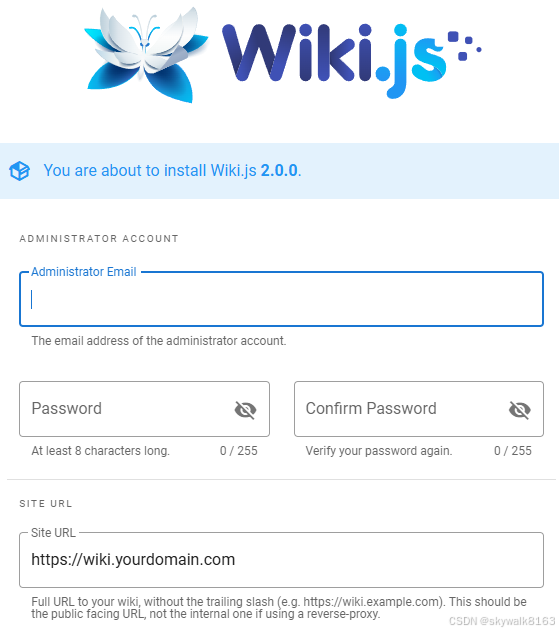
填写完毕提交,配置完毕:
2026-01-11T03:27:09.058Z [MASTER] info: Purging orphaned upload files...
2026-01-11T03:27:09.062Z [MASTER] info: Syncing locales with Graph endpoint...
2026-01-11T03:27:09.065Z [MASTER] info: Fetching latest updates from Graph endpoint...
2026-01-11T03:27:09.319Z [MASTER] info: Purging orphaned upload files: [ COMPLETED ]
Loading configuration from /home/skywalk/work/wiki/config.yml... OK
2026-01-11T03:27:09.779Z [JOB] info: Rebuilding page tree...
2026-01-11T03:27:11.541Z [JOB] info: Using database driver sqlite3 for sqlite [ OK ]
{
  method: 'select',
  options: {},
  timeout: false,
  cancelOnTimeout: false,
  bindings: [],
  __knexQueryUid: '6ab2e330-ee9d-11f0-825f-f11944243bbf',
  sql: 'select `settings`.* from `settings`'
}
2026-01-11T03:27:11.641Z [JOB] info: Rebuilding page tree: [ COMPLETED ]
2026-01-11T03:27:12.981Z [MASTER] info: Pulled latest locale updates for English from Graph endpoint: [ COMPLETED ]
2026-01-11T03:27:12.990Z [MASTER] info: Syncing locales with Graph endpoint: [ COMPLETED ]
2026-01-11T03:27:13.283Z [MASTER] info: Fetching latest updates from Graph endpoint: [ COMPLETED ]
出现登录界面
注册好后,再次登录,就出现登录界面

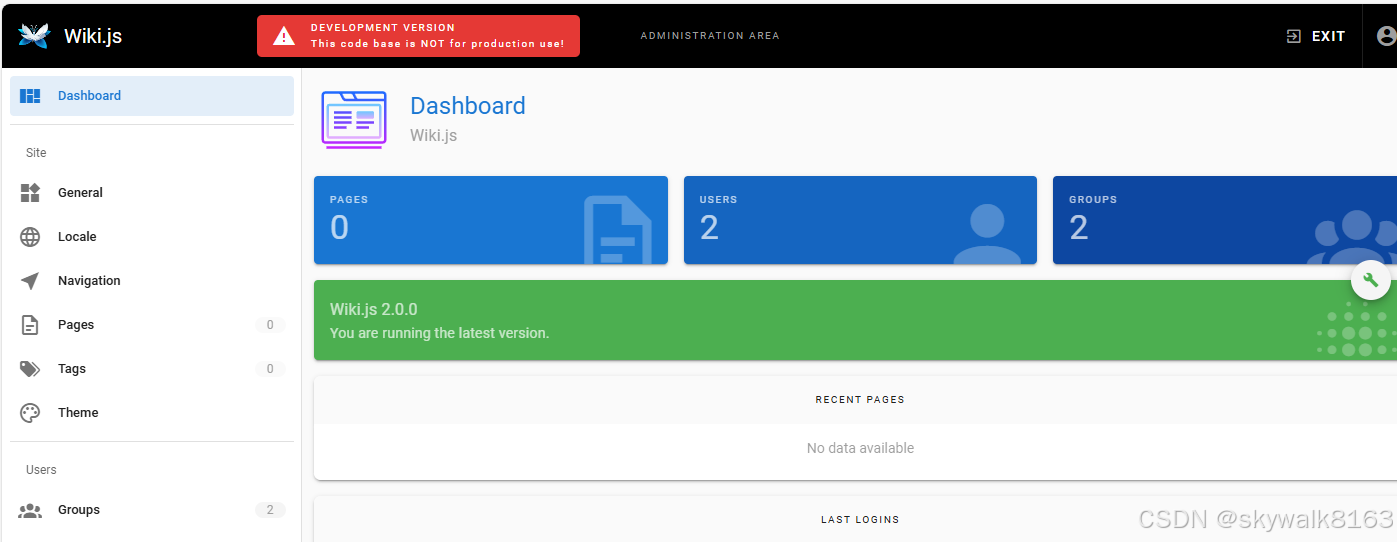
登录后,出现管理界面

点击ADMINISTRATION进入管理面板
先到“语言包”找到中文库,下载,然后多语言设置为“中文”,然后点右上角的apply
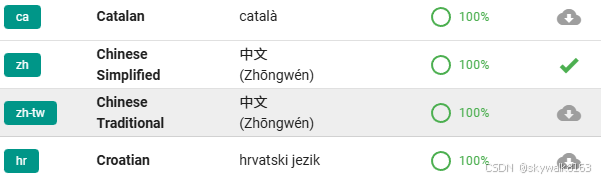
中文ok了
好了,就先到这里吧!
项目最终的编译
项目修改完毕,进行编译
yarn build调试
yarn 报错Error: Platform: "freebsd" is not supported.
没办法,换系统,换成Ubuntu
npm安装yarn后还是没哟yarn命令
npm i -g yarn加上sudo
sudo npm i -g yarnok 了
yarn报错gyp ERR! cwd /home/skywalk/work/wiki/node_modules/cpu-features
make: *** [cpufeatures.target.mk:121: Release/obj.target/cpufeatures/src/binding.o] Error 1
make: Leaving directory '/home/skywalk/work/wiki/node_modules/cpu-features/build'
gyp ERR! build error
gyp ERR! stack Error: `make` failed with exit code: 2
gyp ERR! stack at ChildProcess.<anonymous> (/usr/local/lib/node_modules/npm/node_modules/node-gyp/lib/build.js:219:23)
gyp ERR! System Linux 5.15.0
gyp ERR! command \"/usr/local/bin/node\" \"/usr/local/lib/node_modules/npm/node_modules/node-gyp/bin/node-gyp.js\" \"rebuild\"
gyp ERR! cwd /home/skywalk/work/wiki/node_modules/cpu-features
[15/16] ⠐ ssh2
暂时不管它
yarm卡在sqlite这里
gyp ERR! cwd /home/skywalk/work/wiki/node_modules/cpu-features
[-/16] ⠠ waiting...
[14/16] ⠠ cypress
[-/16] ⠠ waiting...
[-/16] ⠠ waiting...
[5/16] ⠠ sqlite3
花了很长时间才装好,多长时间呢?
Done in 4797.54s.
整整80分钟啊!
不过最终装完了,可喜可贺!
yarn dev启动报错
>>> Starting Wiki.js in DEVELOPER mode...
Loading configuration from /home/skywalk/work/wiki/config.yml... FAILED
duplicated mapping key at line 56, column 3:
storage: path/to/database.sqlite
^
>>> Unable to read configuration file! Did you create the config.yml file?
error Command failed with exit code 1.
info Visit https://yarnpkg.com/en/docs/cli/run for documentation about this command.
发现配置文件里sqlite的数据库位置没修改,修改成这句:
storage: data/database.sqlite
并创建data目录
mkdir data还是报错,改成
storage: ./data/database.sqlite还是报错,原来是config文件里storage重复了两次,我写了
db:
  type: sqlite
  storage: db.sqlite
  storage: ./data/database.sqlite
把下面一行去掉,ok了
yarm dev启动报错Error: ENOSYS: function not implemented, watch '/home/skywalk/work/wiki/server'
at FSWatcher.<computed> (node:internal/fs/watchers:254:19)
Error: ENOSYS: function not implemented, watch '/home/skywalk/work/wiki/server'
at FSWatcher.<computed> (node:internal/fs/watchers:254:19)
at Object.watch (node:fs:2539:36)
at createFsWatchInstance (/home/skywalk/work/wiki/node_modules/chokidar/lib/nodefs-handler.js:119:15)
at setFsWatchListener (/home/skywalk/work/wiki/node_modules/chokidar/lib/nodefs-handler.js:166:15)
at NodeFsHandler._watchWithNodeFs (/home/skywalk/work/wiki/node_modules/chokidar/lib/nodefs-handler.js:331:14)
at NodeFsHandler._handleDir (/home/skywalk/work/wiki/node_modules/chokidar/lib/nodefs-handler.js:567:19)
at process.processTicksAndRejections (node:internal/process/task_queues:103:5)
at async NodeFsHandler._addToNodeFs (/home/skywalk/work/wiki/node_modules/chokidar/lib/nodefs-handler.js:617:16)
at async /home/skywalk/work/wiki/node_modules/chokidar/index.js:451:21
at async Promise.all (index 0)
Emitted 'error' event on FSWatcher instance at:
at FSWatcher._handleError (/home/skywalk/work/wiki/node_modules/chokidar/index.js:647:10)
at NodeFsHandler._addToNodeFs (/home/skywalk/work/wiki/node_modules/chokidar/lib/nodefs-handler.js:645:18)
at process.processTicksAndRejections (node:internal/process/task_queues:103:5)
at async /home/skywalk/work/wiki/node_modules/chokidar/index.js:451:21
at async Promise.all (index 0) {
errno: -38,
syscall: 'watch',
code: 'ENOSYS',
path: '/home/skywalk/work/wiki/server',
filename: '/home/skywalk/work/wiki/server'
}
Node.js v24.12.0
error Command failed with exit code 1.
info Visit https://yarnpkg.com/en/docs/cli/run for documentation about this command.
原来是FreeBSD的linux jail内部inotify(Linux文件系统监视机制)不支持,使用这条命令看一下:
# 测试inotify是否可用
node -e "const fs = require('fs'); fs.watch('.', () => {}); console.log('Watch supported:', true);"
解决方案一:启用 chokidar 的“轮询模式”(Polling) —— 通用做法
如果你当前只是本地开发,最简单稳定的办法就是改用轮询,而不是依赖底层的 fs.watch。
方式 1:通过环境变量启用(最推荐)
在你运行 dev 命令前设置环境变量
# Linux / macOS
export CHOKIDAR_USEPOLLING=1
npm start   # 或 npm run dev / yarn dev 等

# 一次性执行(不污染全局环境)
CHOKIDAR_USEPOLLING=1 npm start
设置后screen竟然卡住了,真的很奇怪。
yarn应该用这句:
CHOKIDAR_USEPOLLING=1 yarn dev写完之后yarn就开始启动了,最后服务就启动了
2026-01-11T00:50:59.650Z [MASTER] warn: DB Configuration is empty or incomplete. Switching to Setup mode...
2026-01-11T00:50:59.650Z [MASTER] info: Starting setup wizard...
2026-01-11T00:51:00.205Z [MASTER] info: Starting HTTP server on port 3000...
2026-01-11T00:51:00.206Z [MASTER] info: HTTP Server on port: [ 3000 ]
2026-01-11T00:51:00.229Z [MASTER] info: HTTP Server: [ RUNNING ]
2026-01-11T00:51:00.229Z [MASTER] info: 🔻🔻🔻🔻🔻🔻🔻🔻🔻🔻🔻🔻🔻🔻🔻🔻🔻🔻🔻🔻🔻🔻🔻🔻🔻🔻🔻🔻🔻
2026-01-11T00:51:00.230Z [MASTER] info:
2026-01-11T00:51:00.230Z [MASTER] info: Browse to http://YOUR-SERVER-IP:3000/ to complete setup!
2026-01-11T00:51:00.230Z [MASTER] info:
2026-01-11T00:51:00.230Z [MASTER] info: 🔺🔺🔺🔺🔺🔺🔺🔺🔺🔺🔺🔺🔺🔺🔺🔺🔺🔺🔺🔺🔺🔺🔺🔺🔺🔺🔺🔺🔺
记住,以后每次启动都要加上这个环境变量!

有“AI”的1024 = 2048,欢迎大家加入2048 AI社区
更多推荐

 31
31 0
0- 0


 已为社区贡献120条内容

所有评论(0)