50天50个小项目 (React19 + Tailwindcss V4) ✨| PasswordStrengthBackground(密码强度背景组件)
使用 React19 和 TailwindCSS 创建实现一个密码强度检测组件,密码强度越强背景图片越清晰反之越模糊。
·
📅 今天我们继续 50 个小项目挑战!——MobileTabNavigation组件
仓库地址:https://gitee.com/hhm-hhm/50days50projects.git
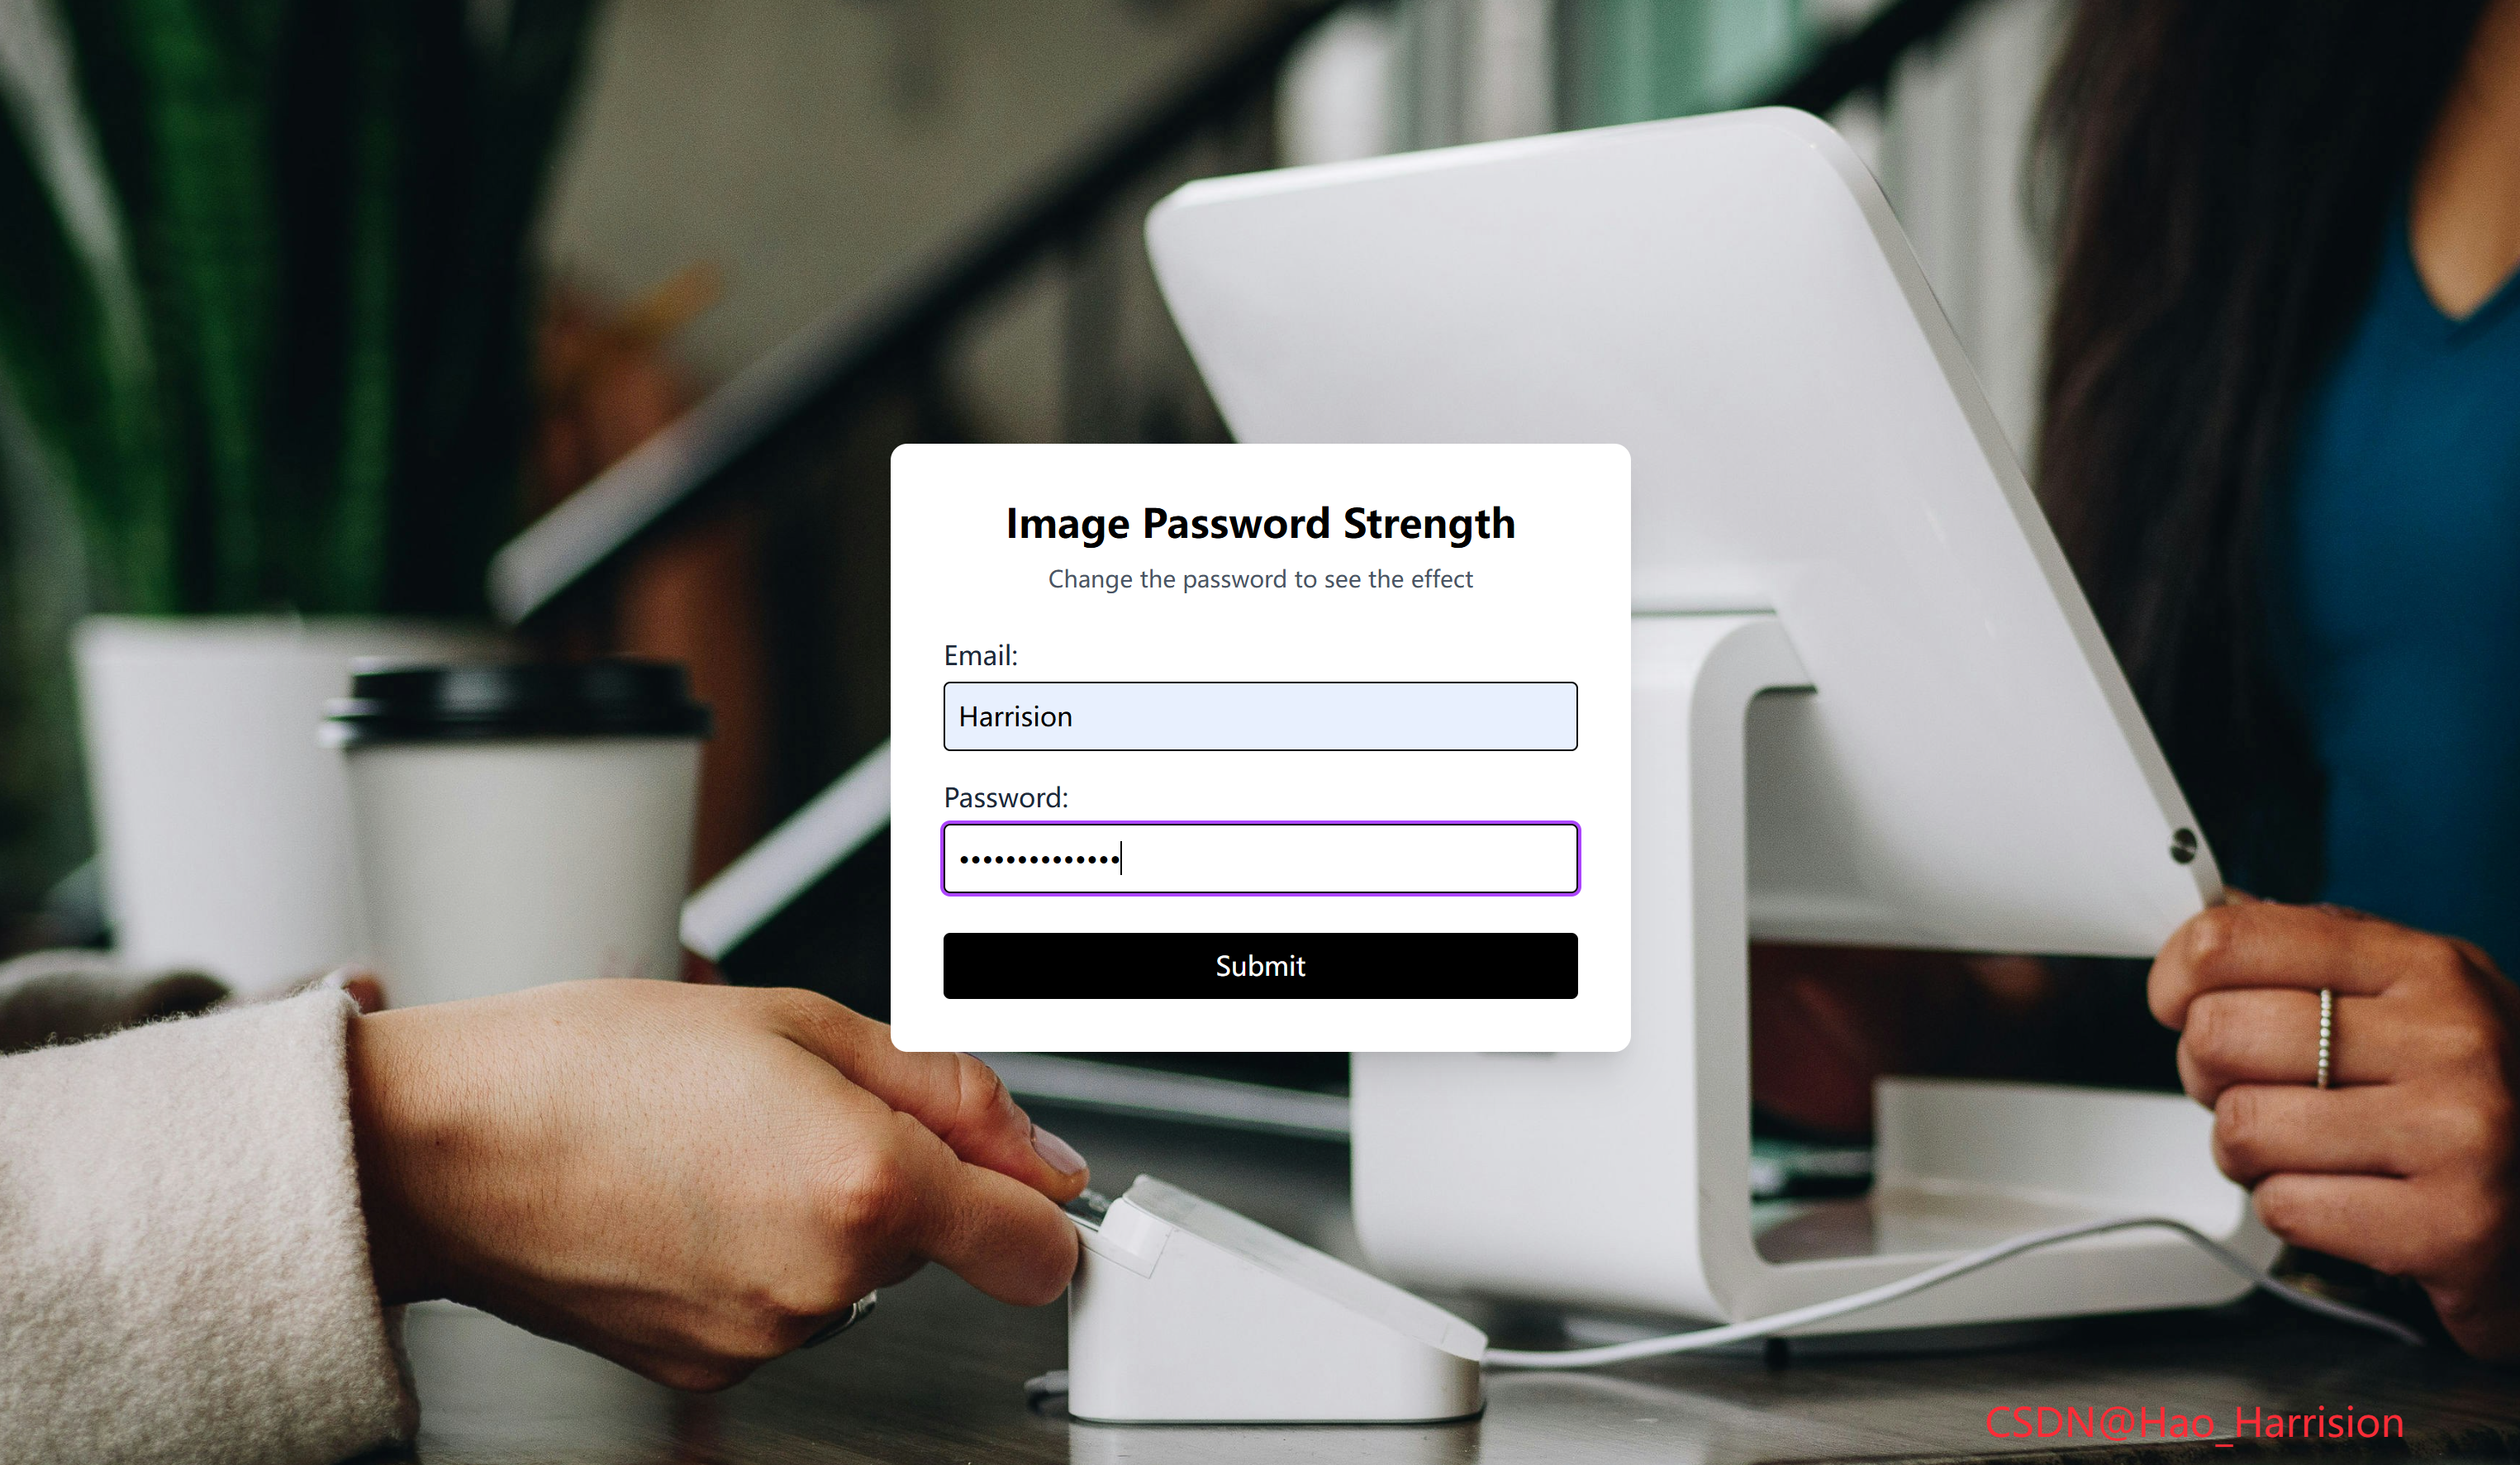
来创建实现一个密码强度检测组件,密码强度越强背景图片越清晰反之越模糊。🚀
让我们一起动手实现这个酷炫的效果吧!🚀
🌀 组件目标
- 背景动态模糊
- 由密码的强弱程度决定背景的清晰程度
- 采用 Tailwind CSS 快速构建美观的响应式布局
🔧 PasswordStrengthBackground.tsx组件实现
import React, { useState, useMemo } from 'react'

const PasswordStrengthBackground: React.FC = () => {
    const [password, setPassword] = useState<string>('')

    // 根据密码长度计算模糊值(最大20px,最小0px)
    const blurValue = useMemo(() => {
        const baseBlur = 20
        const lengthFactor = 2
        return Math.max(baseBlur - password.length * lengthFactor, 0)
    }, [password])

    return (
        <div className="m-0 flex min-h-screen items-center justify-center overflow-hidden bg-gray-900">
            {/* 动态模糊背景 */}
            <div
                className="absolute inset-0 z-0 -m-5 bg-cover bg-center transition-all duration-300 ease-out"
                style={{
                    backgroundImage: `url('https://images.unsplash.com/photo-1556745757-8d76bdb6984b')`,
                    filter: `blur(${blurValue}px)`,
                }}
            />

            {/* 登录表单 */}
            <div className="z-10 w-full max-w-md rounded-lg bg-white p-8 shadow-xl">
                <h1 className="mb-2 text-center text-2xl font-bold">Image Password Strength</h1>
                <p className="mb-6 text-center text-sm text-gray-600">
                    Change the password to see the effect
                </p>

                <div className="mb-4 text-left">
                    <label htmlFor="email" className="mb-1 block text-gray-800">
                        Email:
                    </label>
                    <input
                        type="text"
                        id="email"
                        placeholder="Enter Email"
                        className="w-full rounded border p-2 focus:ring-2 focus:ring-purple-500 focus:outline-none"
                    />
                </div>

                <div className="mb-6 text-left">
                    <label htmlFor="password" className="mb-1 block text-gray-800">
                        Password:
                    </label>
                    <input
                        type="password"
                        id="password"
                        placeholder="Enter Password"
                        value={password}
                        onChange={(e) => setPassword(e.target.value)}
                        className="w-full rounded border p-2 focus:ring-2 focus:ring-purple-500 focus:outline-none"
                    />
                </div>

                <button
                    type="submit"
                    className="w-full rounded bg-black py-2 text-white transition-colors hover:bg-gray-800">
                    Submit
                </button>
            </div>
            <div className="fixed right-20 bottom-5 z-100 text-2xl text-red-500">
                CSDN@Hao_Harrision
            </div>
        </div>
    )
}

export default PasswordStrengthBackground
🔄 关键差异总结
| 功能 | Vue 3 | React + TS |
|---|---|---|
| 响应式数据 | ref() |
useState() |
| 计算属性 | computed() |
useMemo() |
| 双向绑定 | v-model |
value + onChange |
| 动态样式 | :style |
style={{}} |
| 属性绑定 | class, for |
className, htmlFor |
| 模板 vs 渲染 | <template> |
return (JSX) |
✅ 使用前准备
-
引入 Font Awesome(任选其一):
- 全局 CDN(开发快速):在
index.html添加<link>; - React 组件(生产推荐):安装
@fortawesome包并改用<FontAwesomeIcon>。
- 全局 CDN(开发快速):在
-
确保 Tailwind 已配置:支持
h-[600px]、w-[340px]等任意值。
🔁 转换说明
1. 状态管理:ref → useState
| Vue | React |
|---|---|
const password = ref('') |
const [password, setPassword] = useState('') |
✅ 完全对应。React 使用 useState 管理可变状态。
2. 派生状态:computed → useMemo
| Vue | React |
|---|---|
const blurValue = computed(() => { ... }) |
const blurValue = useMemo(() => { ... }, [password]) |
✅ useMemo 是 React 中用于缓存计算结果的 Hook,等价于 Vue 的 computed。
- 依赖项
[password]确保当密码变化时重新计算; - 避免不必要的重复计算,提升性能。
💡 若逻辑简单且无性能问题,也可直接写成函数调用(但
useMemo更规范)。
3. 双向绑定:v-model → value + onChange
Vue 中:
<input v-model="password" />React 中需手动绑定:
<input
  value={password}
  onChange={(e) => setPassword(e.target.value)}
/>
✅ 这是 React 受控组件的标准写法。
4. 模板语法 → JSX
:style="{ ... }"→style={{ ... }}- 所有 HTML 属性名转为 camelCase(如
htmlFor代替for) - 类名使用
className而非class
✅ JSX 与 Vue 模板功能对等,只是语法不同。
5. 样式与布局
- 完全保留原始 Tailwind 类名;
transition-all duration-300 ease-out实现平滑模糊过渡;overflow-hidden防止背景溢出;z-0/z-10控制层叠顺序(背景在下,表单在上)。
6. 响应式行为
- 用户输入密码 →
password状态更新 →blurValue重新计算 →style.filter更新 → 背景模糊度实时变化; - 与 Vue 版本行为 完全一致。
💡 优化建议(可选)
- 添加密码强度提示文字(如“Weak”, “Medium”, “Strong”);
- 限制最大密码长度(避免负模糊);
- 使用
useCallback包装事件处理器(此处非必需)。
🦌 路由组件 + 常量定义
router/index.tsx 中 children数组中添加子路由
{
    path: '/',
    element: <App />,
    children: [
       ...
       {
                path: '/PasswordStrengthBackground',
                lazy: () =>
                    import('@/projects/PasswordStrengthBackground').then((mod) => ({
                        Component: mod.default,
                    })),
        },
    ],
 },
constants/index.tsx 添加组件预览常量
import demo39Img from '@/assets/pic-demo/demo-37.png'
省略部分....
export const projectList: ProjectItem[] = [
    省略部分....
      {
        id: 39,
        title: 'Password Strength Background',
        image: demo39Img,
        link: 'PasswordStrengthBackground',
    },
]
🚀 小结
通过这篇文章,我们使用 React19 和 TailwindCSS 创建实现一个密码强度检测组件,密码强度越强背景图片越清晰反之越模糊。🚀
📅 明日预告: 我们将完成3dBackgroundBoxes组件,一个好玩儿的3D背景盒子组件,可以变换显示形式。🚀
感谢阅读,欢迎点赞、收藏和分享 😊
原文链接:https://blog.csdn.net/qq_44808710/article/details/149737153
每天造一个轮子,码力暴涨不是梦!🚀

有“AI”的1024 = 2048,欢迎大家加入2048 AI社区
更多推荐


 15
15 0
0- 0


 已为社区贡献34条内容

所有评论(0)