AutoGen【部署 01】Windows环境安装部署AutoGen、AutoGenStudio和LiteLLM流程说明
本文介绍了在Windows环境下部署AutoGen多智能体AI框架的完整流程。主要内容包括:1)使用Anaconda创建Python 3.10虚拟环境;2)通过pip安装AutoGen核心组件及扩展模块;3)安装AutoGenStudio可视化界面并启动Web服务;4)配置LiteLLM桥接本地模型服务。文章详细记录了各步骤的安装命令、常见错误及解决方法,并提供了AutoGen官方文档链接,帮助开
Windows环境安装部署AutoGen、AutoGenStudio和LiteLLM
AutoGen is a framework for creating multi-agent AI applications that can act autonomously or work alongside humans.
AutoGen 是一个用于开发多智能体 AI 应用的框架,此类应用既可自主运行,亦可与人类协同工作。
1.AutoGen 环境搭建
1.1 Anaconda 创建虚拟环境
Anaconda 的安装操作这里不再赘述,官网说明 AutoGen requires Python 3.10 or later 。
# 创建虚拟环境
conda create -n AutoGen python=3.10
也可以直接安装 Python3.10 版本。
1.2 安装 AutoGen 及扩展
AutoGen 的 GitHub 地址:https://github.com/microsoft/autogen,亲测使用 conda 安装失败,使用 pip 进行安装:
# 安装AutoGen和扩展模块,提供模型客户端和外部工具的支持。
# Install AgentChat and OpenAI client from Extensions
pip install -U "autogen-agentchat" "autogen-ext[openai]"
1.3 安装 AutoGenStudio
AutoGenStudio 的 GitHub 地址:https://github.com/microsoft/autogen/tree/main/python/packages/autogen-studio
# Install AutoGen Studio for no-code GUI
pip install -U "autogenstudio"
# 启动 Web Ui
autogenstudio ui --port 8081

# 输出的信息
INFO:     Loading environment from 'C:\Users\Lenovo\.autogenstudio\temp_env_vars.env'
C:\Users\Lenovo\.conda\envs\AutoGen\lib\site-packages\pydub\utils.py:170: RuntimeWarning: Couldn't find ffmpeg or avconv - defaulting to ffmpeg, but may not work
  warn("Couldn't find ffmpeg or avconv - defaulting to ffmpeg, but may not work", RuntimeWarning)
2025-12-25 18:05:52.424 | INFO     | autogenstudio.web.initialization:__init__:39 - Initializing application data folder: C:\Users\Lenovo\.autogenstudio
2025-12-25 18:05:52.424 | INFO     | autogenstudio.web.auth.manager:__init__:26 - Initialized auth manager with provider: none
INFO:     Started server process [20352]
INFO:     Waiting for application startup.
2025-12-25 18:05:52.544 | INFO     | autogenstudio.database.db_manager:initialize_database:82 - Creating database tables...
2025-12-25 18:05:52.604 | INFO     | autogenstudio.database.schema_manager:_initialize_alembic:133 - Alembic initialization complete
INFO  [alembic.runtime.migration] Context impl SQLiteImpl.
INFO  [alembic.runtime.migration] Will assume non-transactional DDL.
2025-12-25 18:05:52.751 | INFO     | autogenstudio.web.app:lifespan:39 - Application startup complete. Navigate to http://127.0.0.1:8081
AutoGen Studio 还接受多个参数来自定义应用程序:
- –host :指定主机地址。默认情况下是本机 localhost。
- –appdir :指定应用程序文件(例如,数据库和生成的用户文件)的存储目录。默认情况下,它设置为用户主目录中的 .autogenstudio 目录。
- –port :指定端口号。默认情况下,它设置为 8080。
- –reload :在代码更改时启用服务器自动重新加载。默认情况下,它设置为 False。
- –database-uri :指定数据库 URI。示例值包括 SQLite 的 sqlite:///database.sqlite 和 PostgreSQL 的 postgresql+psycopg://user:password@localhost/dbname。如果未指定,数据库 URL 默认为 --appdir 目录中的 database.sqlite 文件。
- –upgrade-database :将数据库架构升级到最新版本。默认情况下,该参数设置为 False。
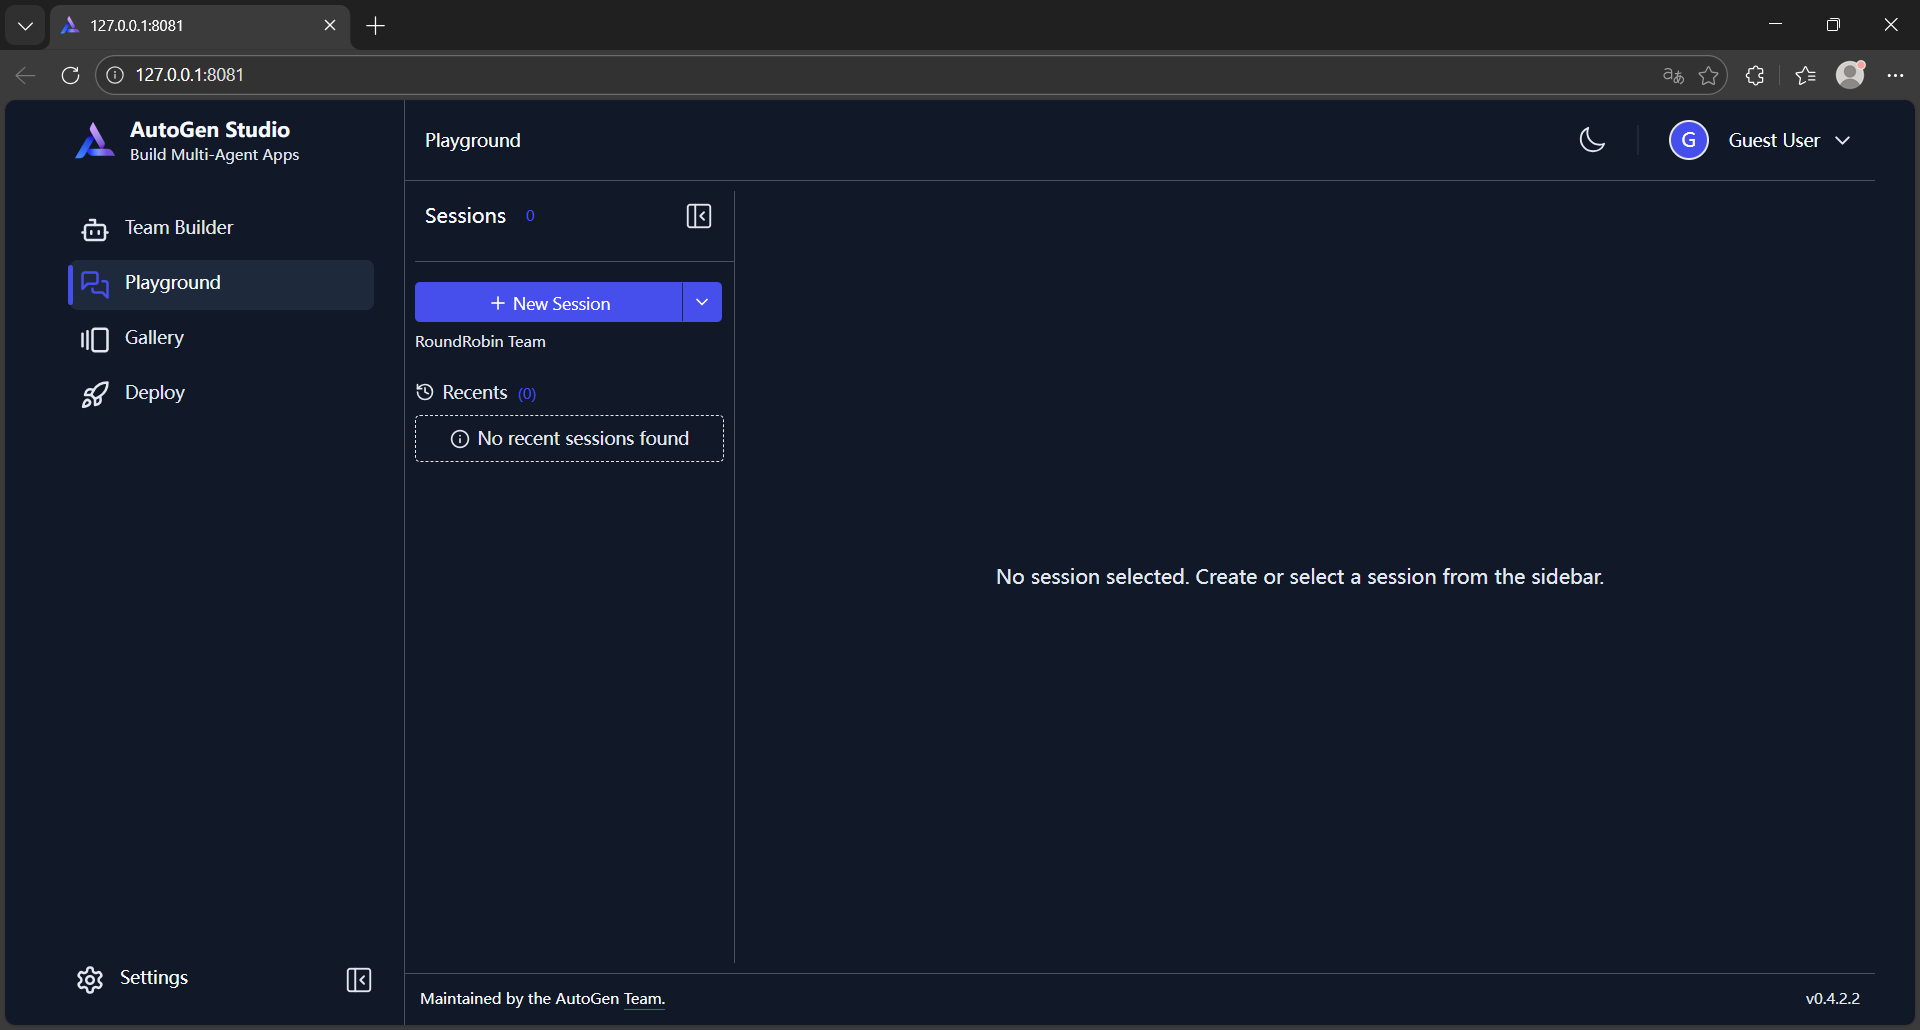
访问 Web UI http://127.0.0.1:8081:
2.安装 LiteLLM
AutoGen 支持的模型说明:https://microsoft.github.io/autogen/stable/user-guide/agentchat-user-guide/tutorial/models.html,想要使用本地模型就要借助 Ollama,先安装:
pip install -U "autogen-ext[ollama]"
安装 LiteLLM,用于桥接 AutoGen Studio 与本地模型服务。
pip install "litellm"
安装依赖 litellm[proxy]:
pip install "litellm[proxy]"

# 否则启用模型时会报错
ImportError: Missing dependency No module named 'backoff'. Run `pip install 'litellm[proxy]'`
安装过程中报以下错误,再次执行安装命令后未再次报错,有知道原因的小伙伴儿吗?
  Installing build dependencies ... error
  error: subprocess-exited-with-error

  × installing build dependencies for uvloop did not run successfully.
  │ exit code: 1
  ╰─> [2 lines of output]
      ERROR: Could not find a version that satisfies the requirement setuptools>=60 (from versions: none)
      ERROR: No matching distribution found for setuptools>=60
      [end of output]

  note: This error originates from a subprocess, and is likely not a problem with pip.
ERROR: Failed to build 'uvloop' when installing build dependencies for uvloop
启用模型:
# 启用模型命令
litellm --model ollama/qwen2.5:1.5b

# 输出信息
INFO:     Started server process [16984]
INFO:     Waiting for application startup.

   ██╗     ██╗████████╗███████╗██╗     ██╗     ███╗   ███╗
   ██║     ██║╚══██╔══╝██╔════╝██║     ██║     ████╗ ████║
   ██║     ██║   ██║   █████╗  ██║     ██║     ██╔████╔██║
   ██║     ██║   ██║   ██╔══╝  ██║     ██║     ██║╚██╔╝██║
   ███████╗██║   ██║   ███████╗███████╗███████╗██║ ╚═╝ ██║
   ╚══════╝╚═╝   ╚═╝   ╚══════╝╚══════╝╚══════╝╚═╝     ╚═╝


#------------------------------------------------------------#
#                                                            #
#       'This feature doesn't meet my needs because...'       #
#        https://github.com/BerriAI/litellm/issues/new        #
#                                                            #
#------------------------------------------------------------#

 Thank you for using LiteLLM! - Krrish & Ishaan


Give Feedback / Get Help: https://github.com/BerriAI/litellm/issues/new


INFO:     Application startup complete.
INFO:     Uvicorn running on http://0.0.0.0:4000 (Press CTRL+C to quit)
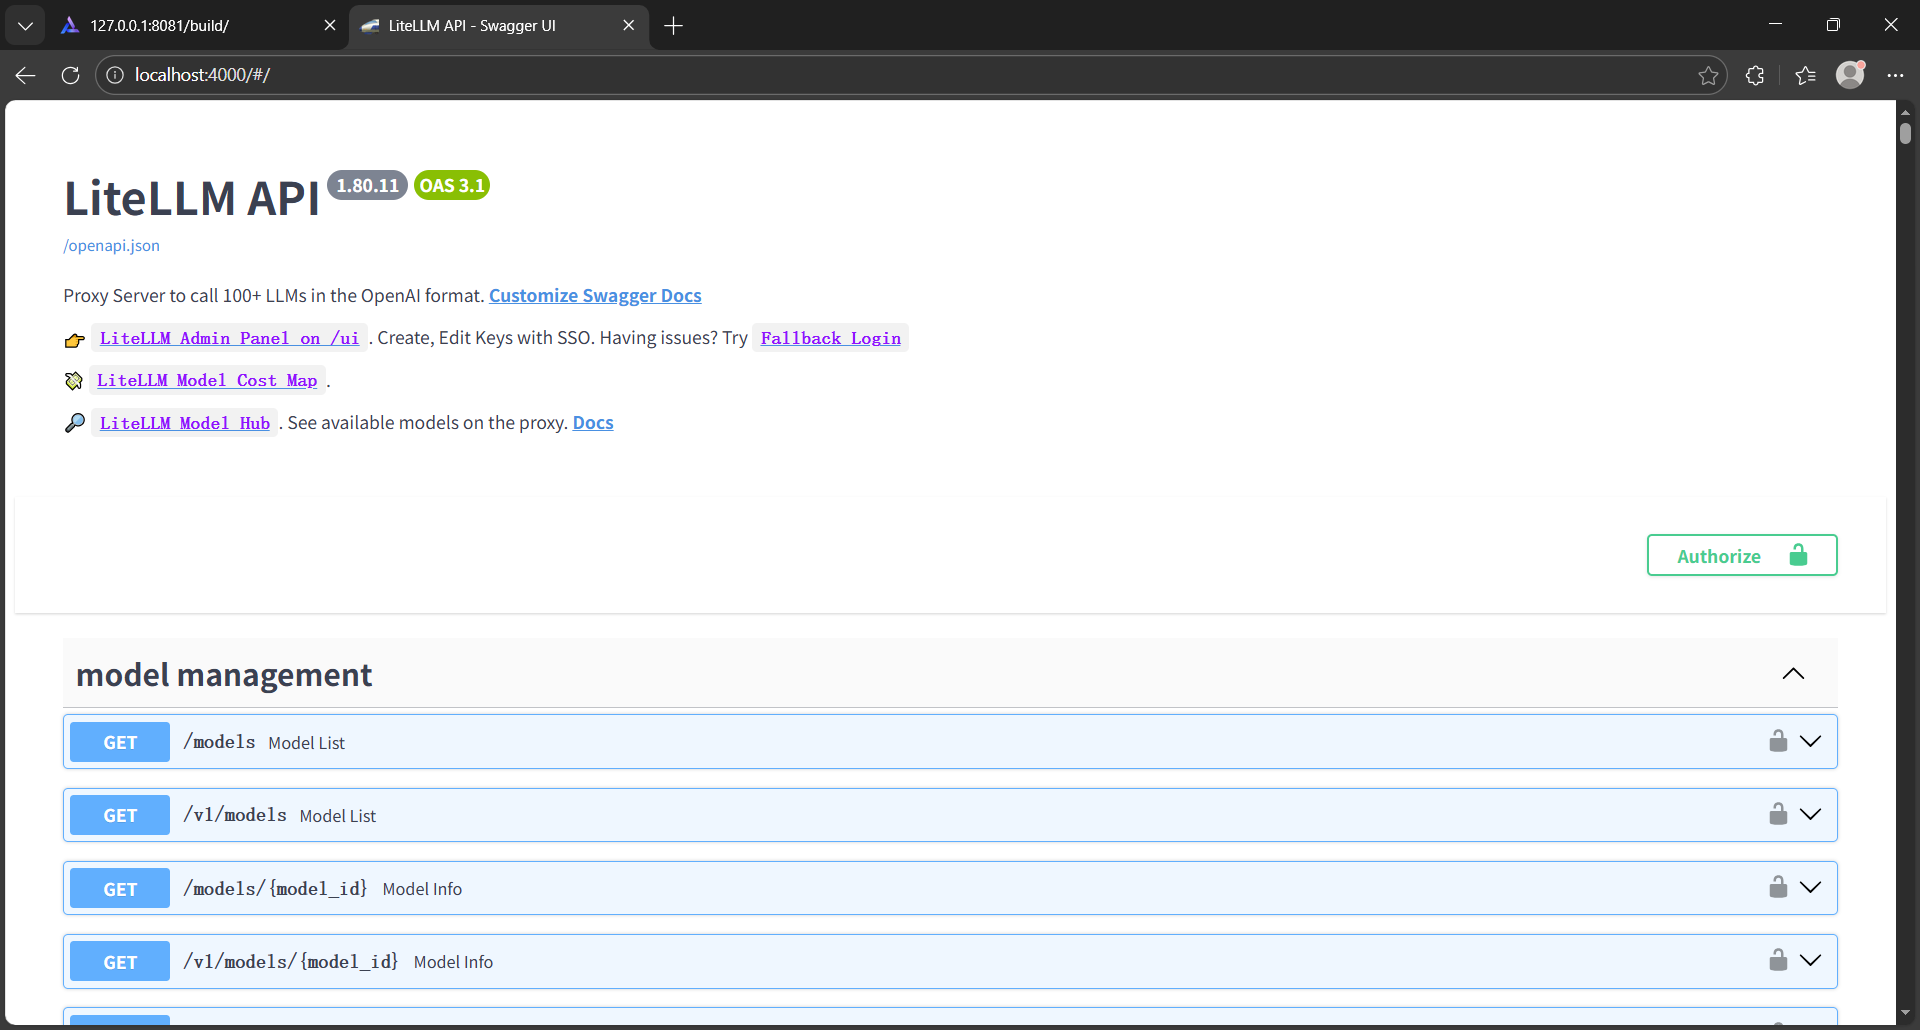
可视化界面:

有“AI”的1024 = 2048,欢迎大家加入2048 AI社区
更多推荐

 30
30 0
0- 0


 已为社区贡献2条内容

所有评论(0)