SpringBoot自动配置原理
无须各种的配置文件,无须各种繁杂的pom坐标,一个main方法,就能run起来了。我们知道SpringBoot可以帮我们减少很多的配置,也肯定听过“约定大于配置”这么一句话,那SpringBoot是怎么做的呢?从Properties对象获取到EnableAutoConfiguration.class对应的值,然后添加到容器里边。)的所在包及其子包里边的组件扫描到Spring容器中。为key的数据,
开篇福利
1、IDEA补丁
🔑🔒IDEA 2025 补丁文件下载
链接:https://pan.quark.cn/s/b8fe36e2adbd?pwd=xbJ7
提取码:xbJ7
2、navicat 17 补丁文件
🔑🔒Navicat 17 Premium 下载(带补丁+教程):
链接:https://pan.quark.cn/s/7ad58bf49d44?pwd=1fG1
提取码:1fG
3、Java全套八股文+80W字场景题
全套八股文+最新场景题自取:
链接:https://pan.quark.cn/s/6f4e346f7f3b?pwd=WKRZ
提取码:WKRZ
一、SpringBoot的自动配置原理
不知道大家第一次搭SpringBoot环境的时候,有没有觉得非常简单。无须各种的配置文件,无须各种繁杂的pom坐标,一个main方法,就能run起来了。与其他框架整合也贼方便,使用EnableXXXXX注解就可以搞起来了!
所以今天来讲讲SpringBoot是如何实现自动配置的~
1.1三个重要的注解
我们可以发现,在使用main()启动SpringBoot的时候,只有一个注解@SpringBootApplication
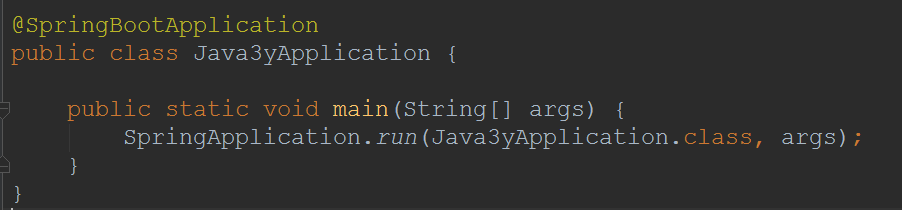
只有一个@SpringBootApplication注解
我们可以点击进去@SpringBootApplication注解中看看,可以发现有三个注解是比较重要的:
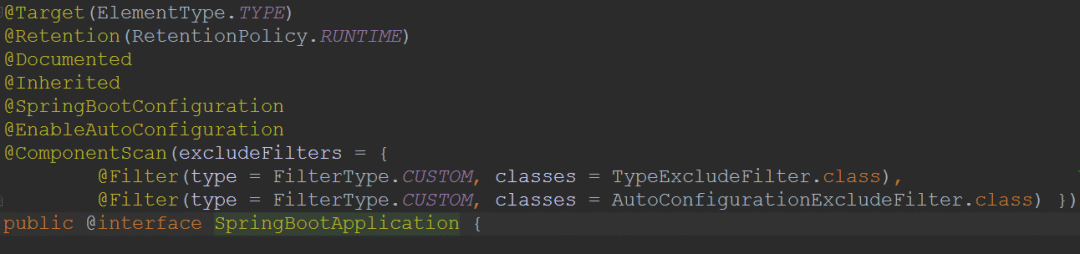
SpringBootApplication注解详情
@SpringBootConfiguration:我们点进去以后可以发现底层是Configuration注解,说白了就是支持JavaConfig的方式来进行配置(使用Configuration配置类等同于XML文件)。@EnableAutoConfiguration:开启自动配置功能(后文详解)@ComponentScan:这个注解,学过Spring的应该对它不会陌生,就是扫描注解,默认是扫描当前类下的package。将@Controller/@Service/@Component/@Repository等注解加载到IOC容器中。
所以,Java3yApplication类可以被我们当做是这样的:
@SpringBootConfiguration
@EnableAutoConfiguration
@ComponentScan
public class Java3yApplication {

    public static void main(String[] args) {
        SpringApplication.run(Java3yApplication.class, args);
    }
}
1.2重点EnableAutoConfiguration
我们知道SpringBoot可以帮我们减少很多的配置,也肯定听过“约定大于配置”这么一句话,那SpringBoot是怎么做的呢?其实靠的就是@EnableAutoConfiguration注解。
简单来说,这个注解可以帮助我们自动载入应用程序所需要的所有默认配置。
介绍有一句说:
if you have tomcat-embedded.jar on your classpath you are likely to want a TomcatServletWebServerFactory
如果你的类路径下有tomcat-embedded.jar包,那么你很可能就需要TomcatServletWebServerFactory
我们点进去看一下,发现有两个比较重要的注解:
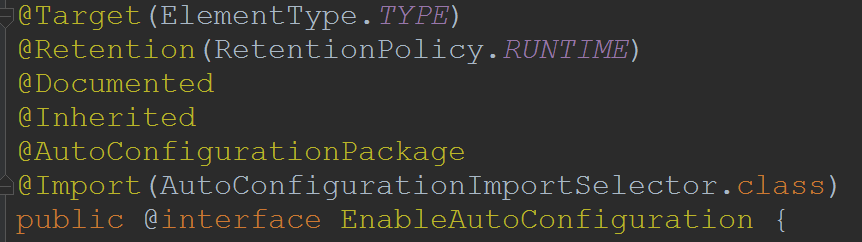
EnableAutoConfiguration注解详情
@AutoConfigurationPackage:自动配置包@Import:给IOC容器导入组件
1.2.1AutoConfigurationPackage
网上将这个@AutoConfigurationPackage注解解释成自动配置包,我们也看看@AutoConfigurationPackage里边有什么:
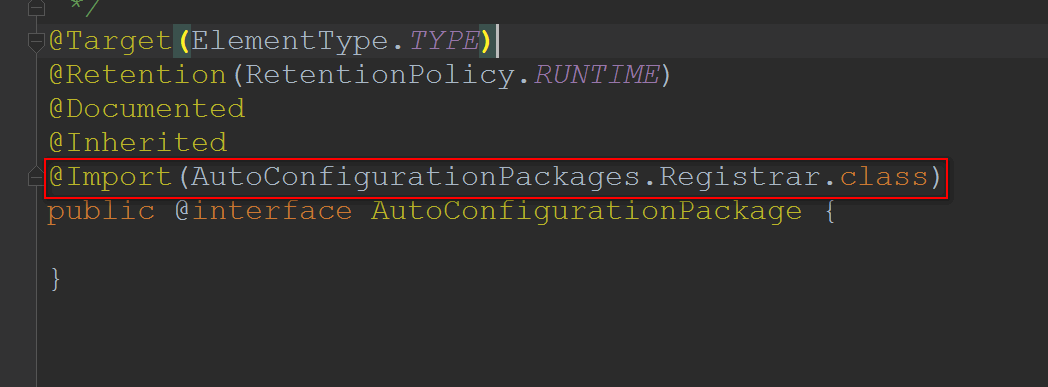
AutoConfigurationPackage注解实现
我们可以发现,依靠的还是@Import注解,再点进去查看,我们发现重要的就是以下的代码:
@Override
public void registerBeanDefinitions(AnnotationMetadata metadata,
        BeanDefinitionRegistry registry) {
    register(registry, new PackageImport(metadata).getPackageName());
}在默认的情况下就是将:主配置类(@SpringBootApplication)的所在包及其子包里边的组件扫描到Spring容器中。
- 看完这句话,会不会觉得,这不就是ComponentScan的功能吗?这俩不就重复了吗?
我开始也有这个疑问,直到我看到文档的这句话:
it will be used when scanning for code @Entity classes. It is generally recommended that you place EnableAutoConfiguration (if you're not using @SpringBootApplication) in a root package so that all sub-packages and classes can be searched.
比如说,你用了Spring Data JPA,可能会在实体类上写@Entity注解。这个@Entity注解由@AutoConfigurationPackage扫描并加载,而我们平时开发用的@Controller/@Service/@Component/@Repository这些注解是由ComponentScan来扫描并加载的。
- 简单理解:这二者扫描的对象是不一样的。
1.2.2回到Import
我们回到@Import(AutoConfigurationImportSelector.class)这句代码上,再点进去AutoConfigurationImportSelector.class看看具体的实现是什么:
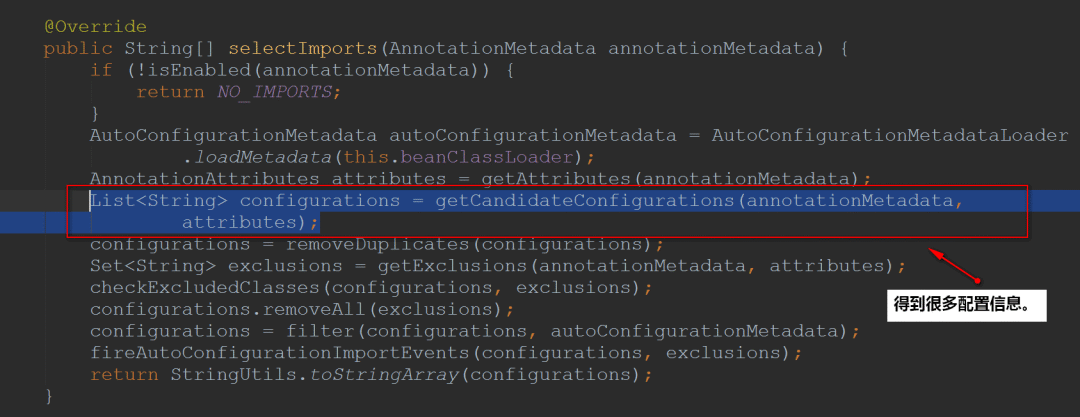
得到很多配置信息
我们再进去看一下这些配置信息是从哪里来的(进去getCandidateConfigurations方法):
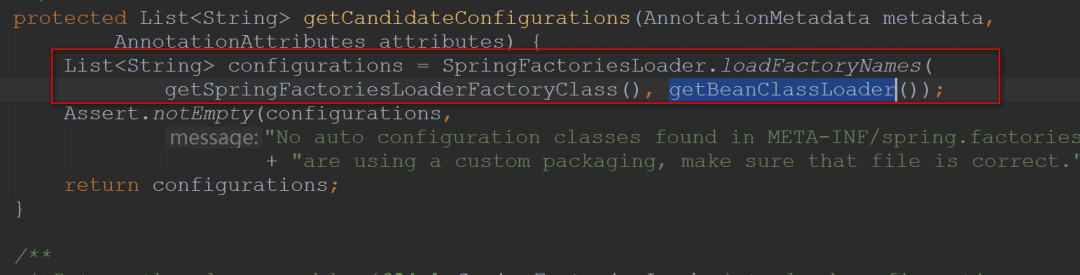
通过SpringFactoriesLoader来加载
这里包装了一层,我们看到的只是通过SpringFactoriesLoader来加载,还没看到关键信息,继续进去:

跟踪实现
简单梳理:
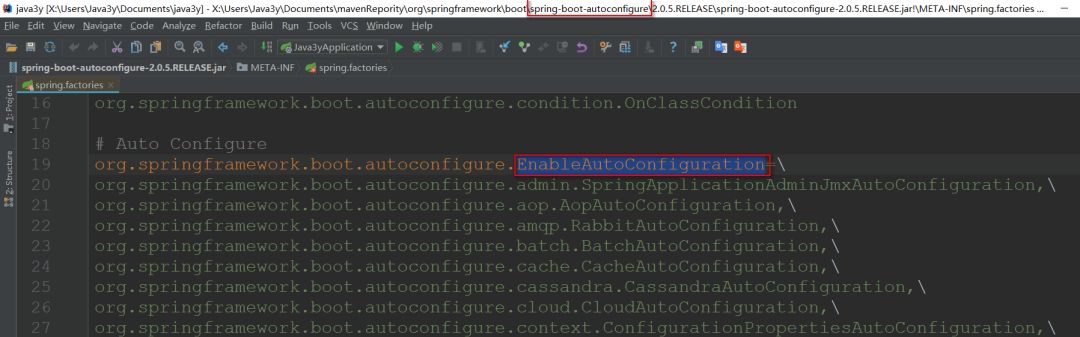
FACTORIES_RESOURCE_LOCATION的值是META-INF/spring.factories- Spring启动的时候会扫描所有jar路径下的
META-INF/spring.factories,将其文件包装成Properties对象- 从Properties对象获取到key值为
EnableAutoConfiguration的数据,然后添加到容器里边。
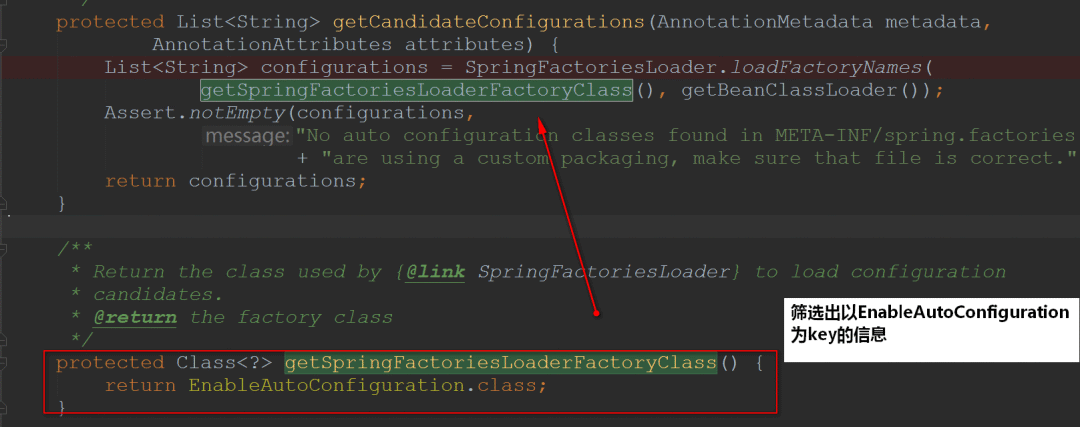
从Properties对象获取到EnableAutoConfiguration.class对应的值,然后添加到容器里边
最后我们会默认加载113个默认的配置类:
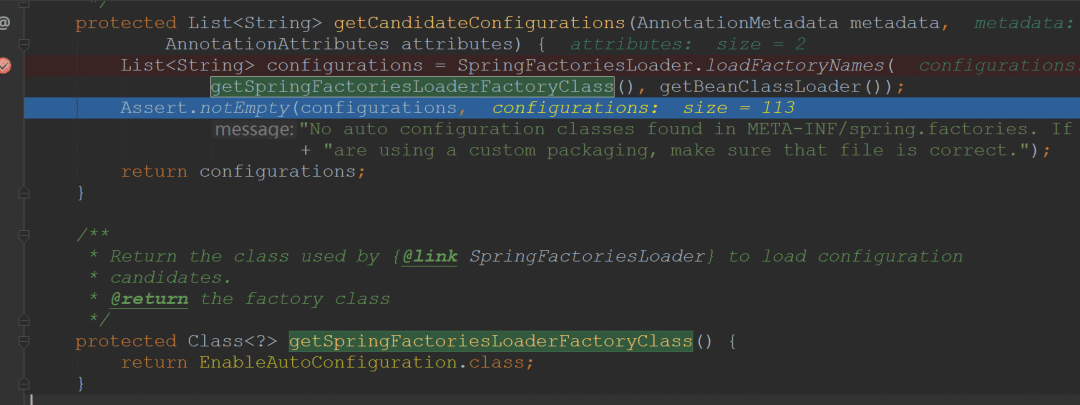
有兴趣的同学可以去翻一下这些文件以及配置类哦:
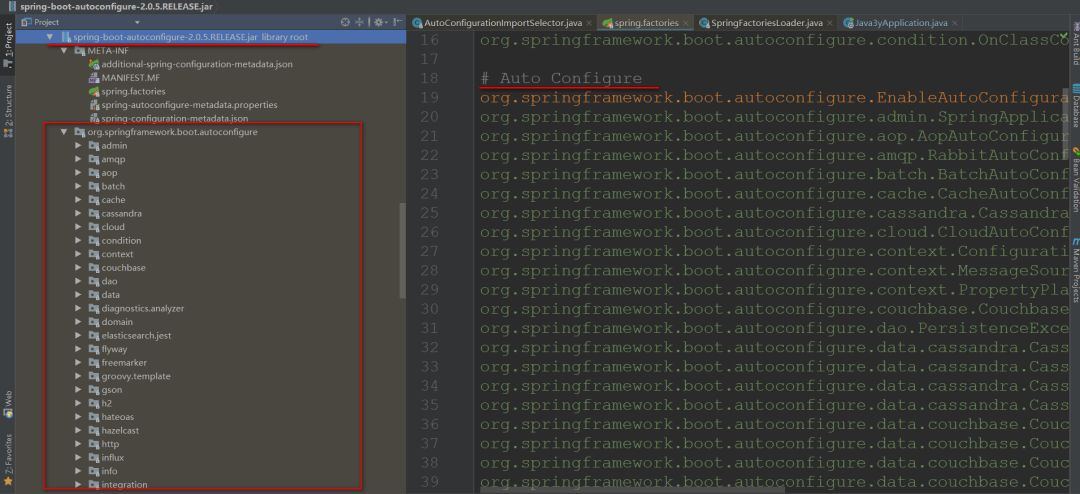
加载的配置类和文件的信息
官网文档参考:
- https://docs.spring.io/spring-boot/docs/2.2.0.BUILD-SNAPSHOT/reference/html/using-spring-boot.html#using-boot-structuring-your-code
英语不好的同学可以像我一样,对照着来看:
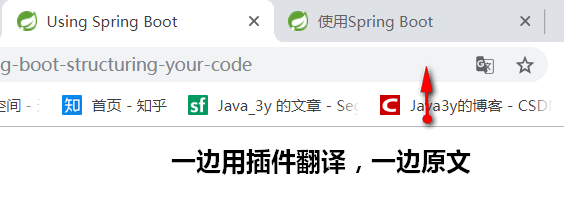
一边插件,一边原文
1.3总结
@SpringBootApplication等同于下面三个注解:
@SpringBootConfiguration@EnableAutoConfiguration@ComponentScan
其中@EnableAutoConfiguration是关键(启用自动配置),内部实际上就去加载META-INF/spring.factories文件的信息,然后筛选出以EnableAutoConfiguration为key的数据,加载到IOC容器中,实现自动配置功能!

有“AI”的1024 = 2048,欢迎大家加入2048 AI社区
更多推荐


 9
9 0
0- 0


 已为社区贡献1条内容

所有评论(0)