建模步骤 2 :收集数据 — 下篇
摘要:本文介绍了数据处理中的合并、抽样和拆分方法。在数据合并部分,详细说明了纵向合并(pd.concat(axis=0)、np.vstack())和横向合并(pd.concat(axis=1)、np.hstack())的操作方法。数据抽样部分包含随机抽样、放回随机抽样(resample()、sample(replace=True))和分层随机抽样。数据拆分部分展示了使用train_test_spl
👏6、数据合并
-- 6.1、纵向合并
----(1)pd.concat(axis=0)
----(2)np.vstack()
-- 6.2、横向合并
----(1)pd.concat(axis=1)
----(2)np.hstack((a, b))
7、数据抽样
-- 7.1、随机抽样
-- 7.2、放回随机抽样
----(1)sklearn.utils.resample()
----(2)df.sample(replace=True)
-- 7.3、分层随机抽样
8、数据拆分\训练\测试
----(1)train_test_split()
----(2)df.sample()
6、数据合并
6.1、纵向合并
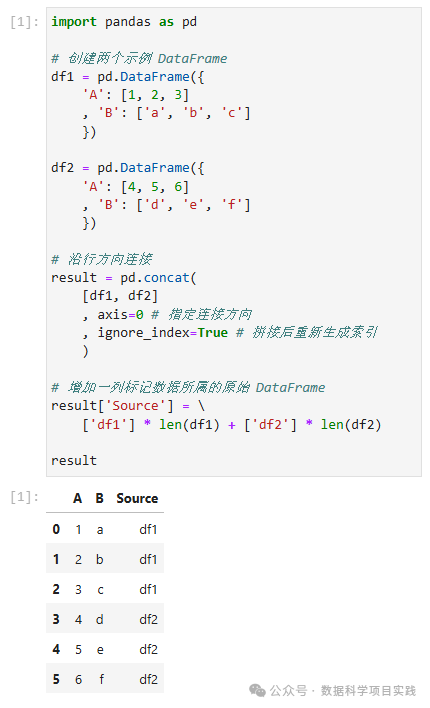
(1)pd.concat(axis=0)
👏注:使用
pd.concat(axis=0)纵向合并时,是按照索引对齐的方式进行合并的(就是需要含有相同的列名称)。
import pandas as pd

# 创建两个示例 DataFrame
df1 = pd.DataFrame({
    'A': [1, 2, 3]
    , 'B': ['a', 'b', 'c']
    })

df2 = pd.DataFrame({
    'A': [4, 5, 6]
    , 'B': ['d', 'e', 'f']
    })

# 沿行方向连接
result = pd.concat(
    [df1, df2]
    , axis=0 # 指定连接方向
    , ignore_index=True # 拼接后重新生成索引
    )

# 增加一列标记数据所属的原始 DataFrame
result['Source'] = \
    ['df1'] * len(df1) + ['df2'] * len(df2)

result
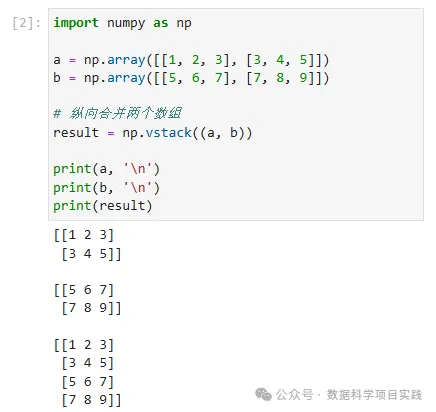
(2)np.vstack((a, b))
import numpy as np

a = np.array([[1, 2, 3], [3, 4, 5]])
b = np.array([[5, 6, 7], [7, 8, 9]])

# 纵向合并两个数组
result = np.vstack((a, b))

print(a, '\n')
print(b, '\n')
print(result)
6.2、横向合并
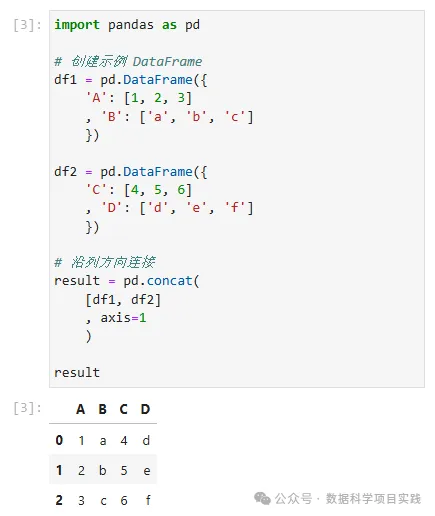
(1)pd.concat(axis=1)
👏注:使用
pd.concat(axis=1)横向合并时,是按照索引对齐的方式进行合并的。
import pandas as pd

# 创建示例 DataFrame
df1 = pd.DataFrame({
    'A': [1, 2, 3]
    , 'B': ['a', 'b', 'c']
    })

df2 = pd.DataFrame({
    'C': [4, 5, 6]
    , 'D': ['d', 'e', 'f']
    })

# 沿列方向连接
result = pd.concat(
    [df1, df2]
    , axis=1
    )

result
(2)np.hstack((a, b))
import numpy as np

a = np.array([[1, 2], [3, 4]])
b = np.array([[5, 6], [7, 8]])

# 横向合并两个数组
result = np.hstack((a, b))

print(a, '\n')
print(b, '\n')
print(result)

7、数据抽样
可用的选定数据可能比您需要使用的要多得多。更多的数据可能导致算法的运行时间更长,计算和内存要求更高。在考虑整个数据集之前,您可以对所选数据进行较小的代表性示例,这些样本对于探索和原型设计解决方案可能要快得多。 在数据上使用的机器学习工具很可能会影响您需要执行的预处理。您可能会重新访问此步骤。
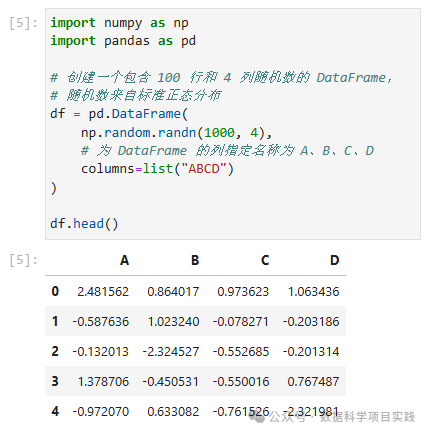
7.1、随机抽样
import numpy as np
import pandas as pd

# 创建一个包含 100 行和 4 列随机数的 DataFrame,
# 随机数来自标准正态分布
df = pd.DataFrame(
    np.random.randn(1000, 4),
    # 为 DataFrame 的列指定名称为 A、B、C、D
    columns=list("ABCD")
)

df.head()
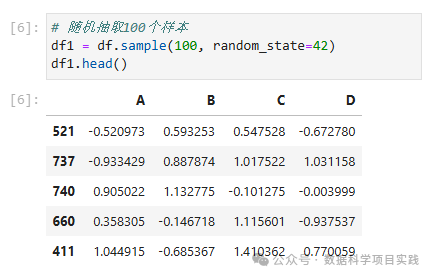
# 随机抽取100个样本
df1 = df.sample(100, random_state=42)
df1.head()
# 随机抽取 10% 样本
df2 = df.sample(frac=0.1, random_state=42)
df2.head()

7.2、放回随机抽样
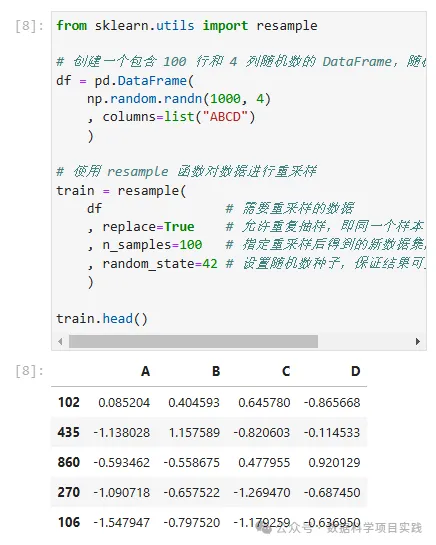
(1)sklearn.utils.resample()
from sklearn.utils import resample

# 创建一个包含 100 行和 4 列随机数的 DataFrame,随机数来自标准正态分布
df = pd.DataFrame(
    np.random.randn(1000, 4)
    , columns=list("ABCD")
    )

# 使用 resample 函数对数据进行重采样
train = resample(
    df                # 需要重采样的数据
    , replace=True    # 允许重复抽样,即同一个样本可以被多次选中
    , n_samples=100   # 指定重采样后得到的新数据集的样本数量为 100
    , random_state=42 # 设置随机数种子,保证结果可重复
    )

train.head()
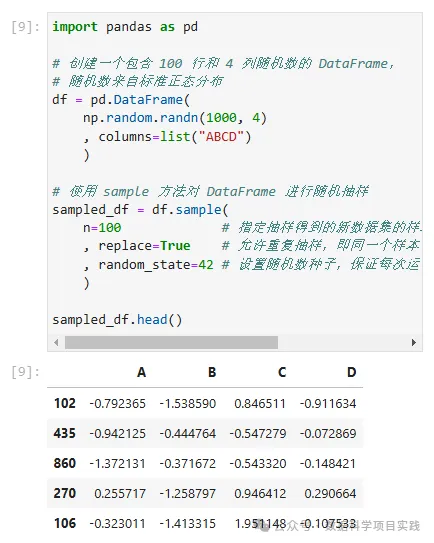
(2)df.sample(replace=True)
import pandas as pd

# 创建一个包含 100 行和 4 列随机数的 DataFrame,
# 随机数来自标准正态分布
df = pd.DataFrame(
    np.random.randn(1000, 4)
    , columns=list("ABCD")
    )

# 使用 sample 方法对 DataFrame 进行随机抽样
sampled_df = df.sample(
    n=100             # 指定抽样得到的新数据集的样本数量为 100
    , replace=True    # 允许重复抽样,即同一个样本可以被多次选中
    , random_state=42 # 设置随机数种子,保证每次运行代码时得到的随机结果是可重复的
    )

sampled_df.head()
import pandas as pd

# 创建一个包含 100 行和 4 列随机数的 DataFrame,
# 随机数来自标准正态分布
df = pd.DataFrame(
    np.random.randn(1000, 4)
    , columns=list("ABCD")
    )

# 使用 sample 方法对 DataFrame 进行随机抽样
sampled_df = df.sample(
    frac=0.1          # 指定抽样得到的新数据集的样本数量占比 0.1
    , replace=True    # 允许重复抽样,即同一个样本可以被多次选中
    , random_state=42 # 设置随机数种子,保证每次运行代码时得到的随机结果是可重复的
    )

sampled_df.head()

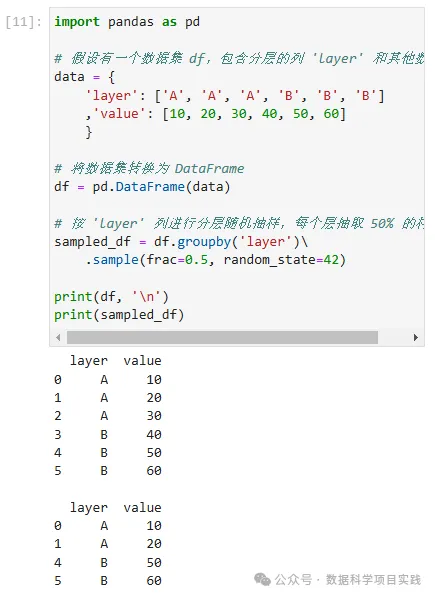
7.3、分层随机抽样
import pandas as pd

# 假设有一个数据集 df,包含分层的列 'layer' 和其他数据列
data = {
    'layer': ['A', 'A', 'A', 'B', 'B', 'B']
    ,'value': [10, 20, 30, 40, 50, 60]
    }

# 将数据集转换为 DataFrame
df = pd.DataFrame(data)

# 按 'layer' 列进行分层随机抽样,每个层抽取 50% 的样本
sampled_df = df.groupby('layer')\
    .sample(frac=0.5, random_state=42)

print(df, '\n')
print(sampled_df)
8、数据拆分\训练\测试
(1)train_test_split()
from sklearn import datasets

iris = datasets.load_iris()
X, y = iris.data, iris.target

from sklearn.model_selection import train_test_split

# Create training and test sets
X_train, X_test, y_train, y_test = train_test_split(
    X, y
    , test_size=0.1
    , stratify=y
    , random_state=1
    ,  shuffle = True # 打乱排序
    )
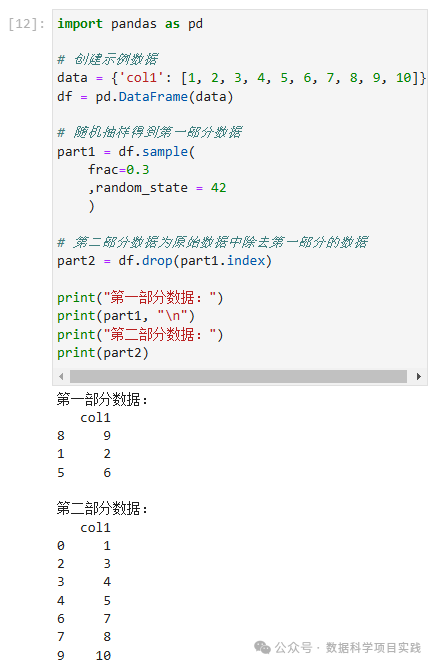
(2)df.sample()
👏使用
df.sample()函数对 DataFrame 进行随机抽样拆分
import pandas as pd

# 创建示例数据
data = {'col1': [1, 2, 3, 4, 5, 6, 7, 8, 9, 10]}
df = pd.DataFrame(data)

# 随机抽样得到第一部分数据
part1 = df.sample(
    frac=0.3
    ,random_state = 42
    )

# 第二部分数据为原始数据中除去第一部分的数据
part2 = df.drop(part1.index)

print("第一部分数据:")
print(part1, "\n")
print("第二部分数据:")
print(part2)
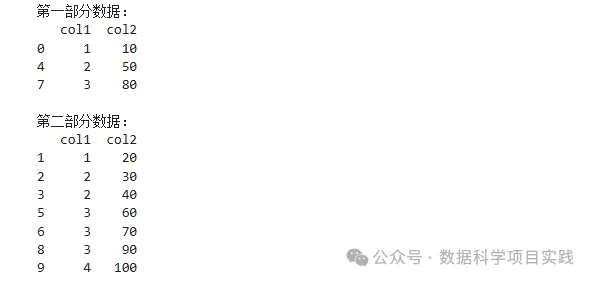
👏使用
df.sample()函数对 DataFrame 进行分层随机抽样拆分
import pandas as pd
import numpy as np

# 创建示例数据,假设根据 'col1' 的值分层
data = {'col1': [1, 1, 2, 2, 2, 3, 3, 3, 3, 4],
        'col2': [10, 20, 30, 40, 50, 60, 70, 80, 90, 100]}
df = pd.DataFrame(data)

# 定义分层列
stratify_column = 'col1'

# 获取分层列的唯一值
strata = df[stratify_column].unique()

# 抽样比例(例如 30%)
sample_ratio = 0.3

# 存储抽样后的两部分数据
part1 = pd.DataFrame()
part2 = pd.DataFrame()

# 对每个分层进行抽样
for stratum in strata:
    stratum_df = df[df[stratify_column] == stratum]
    stratum_sample = stratum_df.sample(frac=sample_ratio)
    part1 = pd.concat([part1, stratum_sample])
    part2 = pd.concat([part2, stratum_df.drop(stratum_sample.index)])

print("第一部分数据:")
print(part1, "\n")
print("第二部分数据:")
print(part2)

👏总结 : 以上内容介绍了机器学习建模过程的第二步:收集数据的内容。由于内容多,分成了上,中,下篇三篇。 上篇介绍了数据来源,工作空间,
pandas\numpy\matplotlib一些常见设置;中篇介绍了导入.csv,excel,mysql数据,通过sklearn创建数据;下篇介绍了使用python进行数据合并,数据抽样。
Python 端到端的机器学习AI入门:详细介绍机器学习建模过程,步骤细节;以及人工智能的分阶段学习线路图。 🚀 点击查看 |
统计学习\机器学习\深度学习算法介绍有关统计学习,机器学习,深度学习的算法。 🚀 点击查看 |
SQL + Pandas 练习题SQL 练习题目,使用 Pandas 库实现,使用 Sqlalchemy 库查看 SQL 代码血缘关系。 🚀 点击查看 |
Python 数据可视化介绍了有关 Matplotlib,Seaborn,Plotly 几个 Python 绘图库的简单使用。 🚀 点击查看 |

有“AI”的1024 = 2048,欢迎大家加入2048 AI社区
更多推荐


 30
30 0
0- 0


 已为社区贡献4条内容

所有评论(0)