openEuler的使用手记:从AI推理到云原生,一个开发者的深度体验
作为一名在技术圈摸爬滚打多年的开发者,我对基础软件始终保持着既期待又审慎的态度。当我看到openEuler时,带着验证“操作系统是否真的能用、好用”的疑问,我在VMware上安装了最新的openEuler-25.09-x86_64版本,开启了一场深度体验。
初印象:意料之外的精致
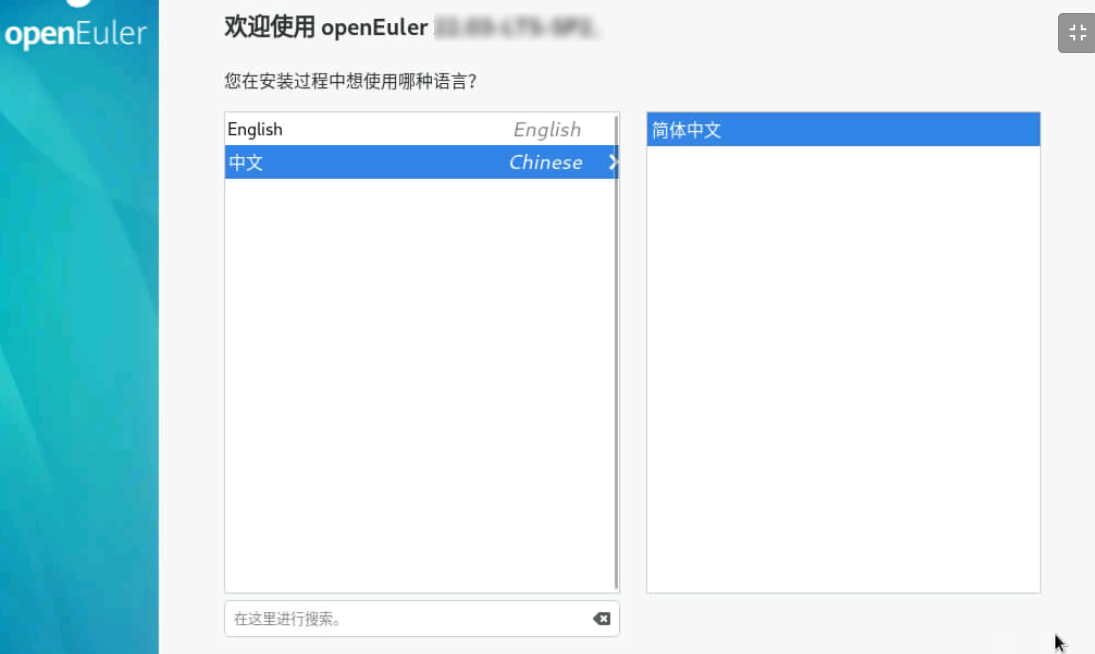
安装过程流畅得令人惊讶。从启动引导到分区设置,整个过程20分钟内完成,与主流Linux发行版无异。首次启动后的UKUI桌面环境干净利落,预装了Firefox、LibreOffice等必备软件,开箱即用的体验立刻打消了我对“系统配置复杂”的刻板印象。
特别值得一提的是预装的DevStation开发平台,将“一键运行环境”与“全栈工具链”合二为一,为开发者提供了开箱即用的开发环境。对于像我这样经常需要搭建各种开发环境的人来说,这无疑是个贴心的设计。
核心场景实测:AI模型推理部署
下面我将详细展示在openEuler 25.09上从零开始部署ResNet图像分类模型的完整流程,包括每一步的详细操作和解释。
环境准备
首先确保系统更新到最新状态:
# 更新系统包管理器
sudo dnf update -y

# 安装必要的开发工具
sudo dnf install -y python3 python3-pip git curl wget
sudo dnf install -y gcc gcc-c++ make cmake
创建项目目录和虚拟环境
# 创建项目目录
mkdir ~/ai_demo && cd ~/ai_demo

# 创建Python虚拟环境
python3 -m venv venv
source venv/bin/activate

# 验证虚拟环境
which python3
pip3 list
安装依赖包
# 升级pip
pip3 install --upgrade pip

# 安装PyTorch及相关库
pip3 install torch torchvision --index-url https://download.pytorch.org/whl/cpu

# 安装Web框架和图像处理库
pip3 install flask pillow requests

# 验证安装
python3 -c "import torch; print(f'PyTorch版本: {torch.__version__}')"
python3 -c "import torchvision; print(f'TorchVision版本: {torchvision.__version__}')"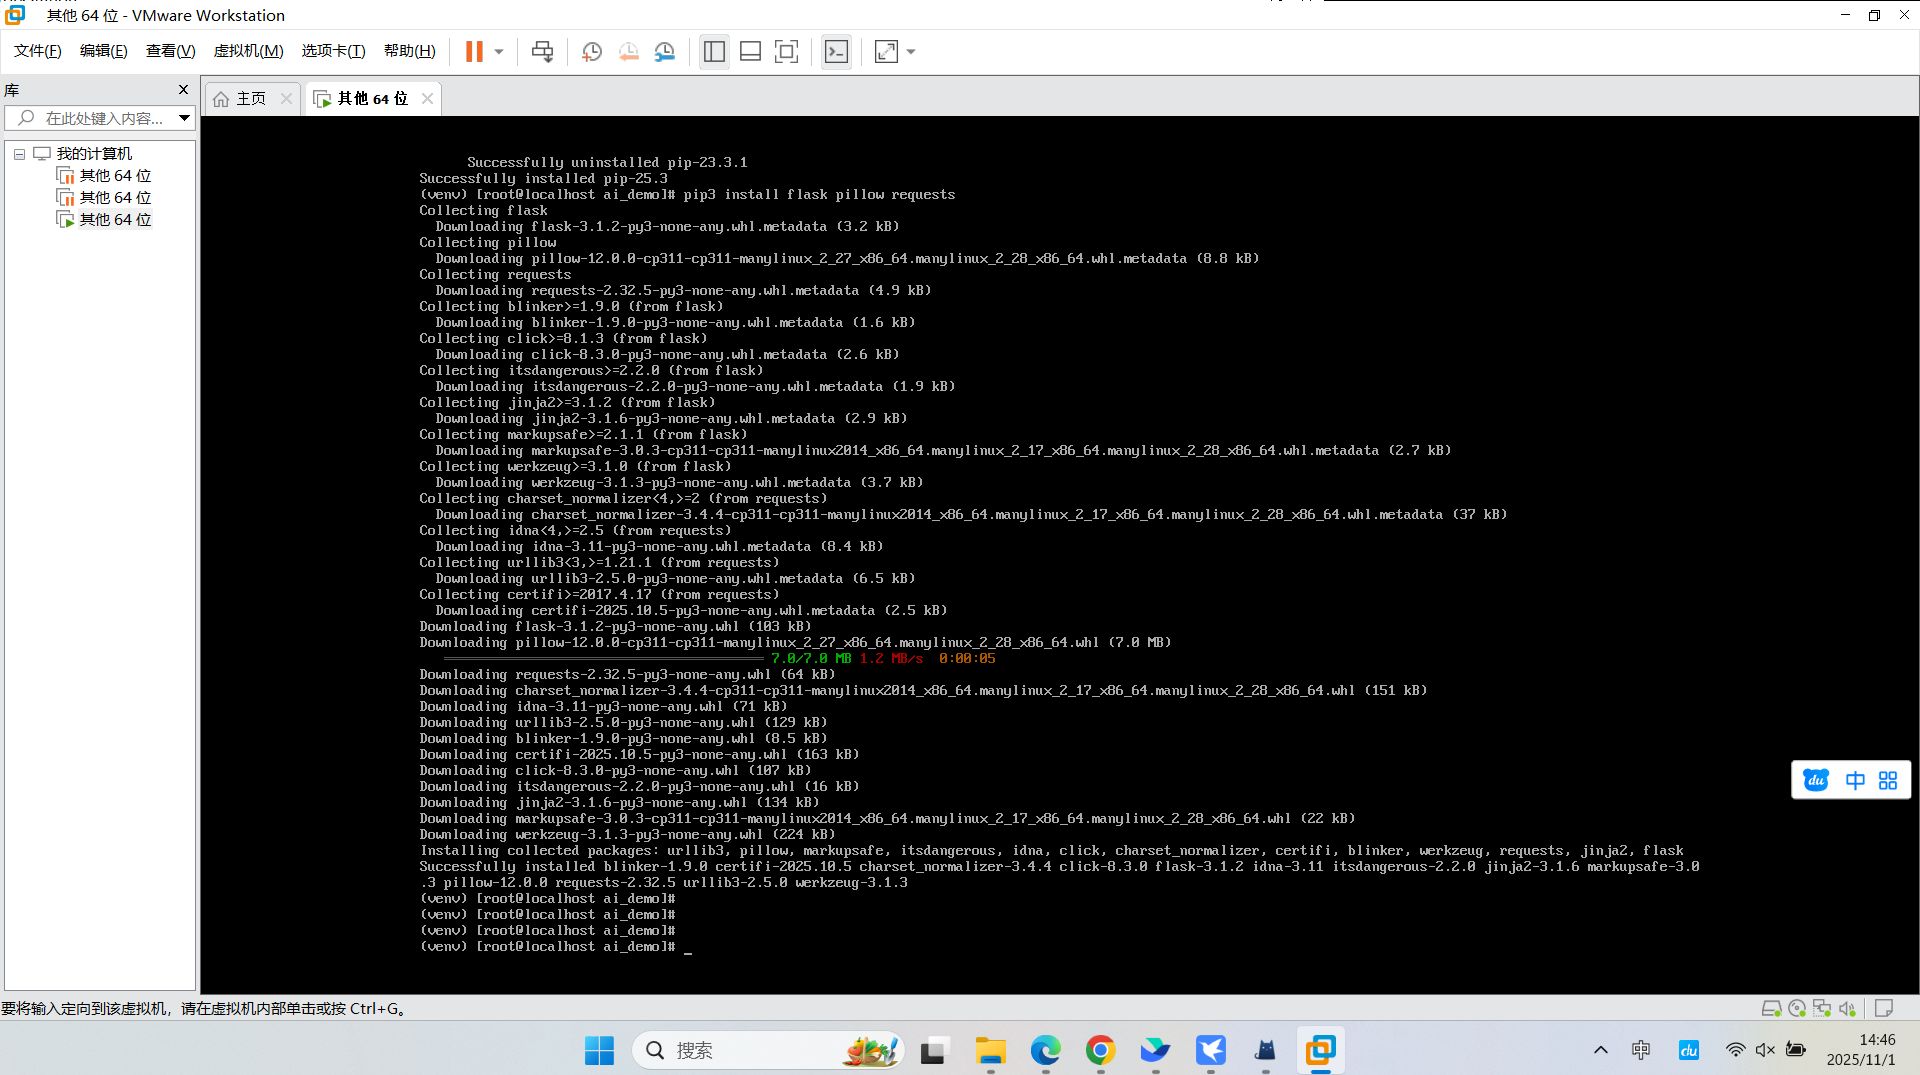
创建模型推理服务代码
使用vim创建Python文件:
# 创建项目文件
vim resnet_inference.py按i进入编辑模式,然后输入以下完整代码:
#!/usr/bin/env python3
"""
openEuler AI推理服务演示
基于ResNet-18的图像分类服务
"""

import os
import json
import logging
from flask import Flask, request, jsonify, render_template
from PIL import Image
import torch
import torchvision.transforms as transforms
import torchvision.models as models
import io

# 配置日志
logging.basicConfig(level=logging.INFO)
logger = logging.getLogger(__name__)

class ResNetService:
    def __init__(self):
        """初始化模型服务"""
        self.model = None
        self.transform = None
        self.labels = None
        self.device = torch.device("cuda" if torch.cuda.is_available() else "cpu")
        logger.info(f"使用设备: {self.device}")

    def load_model(self):
        """加载预训练模型和标签"""
        try:
            # 加载ResNet-18预训练模型
            logger.info("正在加载ResNet-18模型...")
            self.model = models.resnet18(pretrained=True)
            self.model.eval()

            # 图像预处理管道
            self.transform = transforms.Compose([
                transforms.Resize(256),
                transforms.CenterCrop(224),
                transforms.ToTensor(),
                transforms.Normalize(
                    mean=[0.485, 0.456, 0.406],
                    std=[0.229, 0.224, 0.225]
                )
            ])

            # 下载ImageNet标签
            logger.info("正在下载ImageNet类别标签...")
            import urllib.request
            labels_url = "https://raw.githubusercontent.com/pytorch/hub/master/imagenet_classes.txt"
            urllib.request.urlretrieve(labels_url, "imagenet_classes.txt")

            with open("imagenet_classes.txt", "r") as f:
                self.labels = [line.strip() for line in f.readlines()]

            logger.info(f"模型加载成功,共{len(self.labels)}个类别")
            return True

        except Exception as e:
            logger.error(f"模型加载失败: {str(e)}")
            return False

    def predict_image(self, image_bytes):
        """对图像进行预测"""
        try:
            # 转换图像
            image = Image.open(io.BytesIO(image_bytes))
            if image.mode != 'RGB':
                image = image.convert('RGB')

            # 预处理
            input_tensor = self.transform(image).unsqueeze(0)

            # 推理
            with torch.no_grad():
                output = self.model(input_tensor)
                probabilities = torch.nn.functional.softmax(output[0], dim=0)

            # 获取top-5预测结果
            top5_prob, top5_catid = torch.topk(probabilities, 5)
            results = []
            for i in range(top5_prob.size(0)):
                results.append({
                    "label": self.labels[top5_catid[i]],
                    "confidence": float(top5_prob[i]),
                    "rank": i + 1
                })

            return {
                "success": True,
                "predictions": results,
                "image_size": image.size
            }

        except Exception as e:
            logger.error(f"预测失败: {str(e)}")
            return {
                "success": False,
                "error": str(e)
            }

# 创建Flask应用
app = Flask(__name__)
service = ResNetService()

@app.route('/')
def index():
    """主页"""
    return """
    <html>
        <head>
            <title>openEuler AI推理服务</title>
            <style>
                body { font-family: Arial, sans-serif; margin: 40px; }
                .container { max-width: 800px; margin: 0 auto; }
                .upload-form { border: 2px dashed #ccc; padding: 20px; text-align: center; }
                .result { margin-top: 20px; padding: 15px; background: #f5f5f5; }
                .prediction { margin: 5px 0; padding: 8px; background: white; }
            </style>
        </head>
        <body>
            <div class="container">
                <h1>🐧 openEuler AI图像分类服务</h1>
                <p>基于ResNet-18模型的在线图像分类演示</p>

                <div class="upload-form">
                    <h3>上传图片进行分类</h3>
                    <form action="/predict" method="post" enctype="multipart/form-data">
                        <input type="file" name="image" accept="image/*" required>
                        <br><br>
                        <input type="submit" value="开始分类" style="padding: 10px 20px;">
                    </form>
                </div>

                <div style="margin-top: 30px;">
                    <h3>API使用方法:</h3>
                    <code>curl -X POST -F "image=@your_image.jpg" http://localhost:5000/predict</code>
                </div>
            </div>
        </body>
    </html>
    """

@app.route('/predict', methods=['POST'])
def predict():
    """预测接口"""
    if 'image' not in request.files:
        return jsonify({"success": False, "error": "没有上传图片"})

    file = request.files['image']
    if file.filename == '':
        return jsonify({"success": False, "error": "未选择文件"})

    try:
        image_bytes = file.read()
        result = service.predict_image(image_bytes)

        # 如果是Web请求,返回HTML页面
        if request.headers.get('Accept', '').find('text/html') >= 0:
            if result['success']:
                predictions_html = ""
                for pred in result['predictions']:
                    confidence_percent = pred['confidence'] * 100
                    predictions_html += f"""
                    <div class="prediction">
                        <strong>#{pred['rank']}:</strong> {pred['label']}
                        <em>({confidence_percent:.2f}%)</em>
                    </div>
                    """
                return f"""
                <html>
                    <body style="font-family: Arial; margin: 40px;">
                        <h2>分类结果</h2>
                        <div class="result">
                            {predictions_html}
                        </div>
                        <br>
                        <a href="/">← 返回首页</a>
                    </body>
                </html>
                """

        return jsonify(result)

    except Exception as e:
        return jsonify({"success": False, "error": str(e)})

@app.route('/health')
def health_check():
    """健康检查接口"""
    return jsonify({
        "status": "healthy",
        "model_loaded": service.model is not None,
        "device": str(service.device)
    })

def main():
    """主函数"""
    logger.info("正在启动openEuler AI推理服务...")

    # 加载模型
    if not service.load_model():
        logger.error("服务启动失败")
        return

    # 启动服务
    logger.info("服务启动成功,访问 http://localhost:5000")
    app.run(host='0.0.0.0', port=5000, debug=False)

if __name__ == '__main__':
main()按ESC键,然后输入:wq保存并退出。

运行推理服务
# 确保在虚拟环境中
source venv/bin/activate

# 运行服务
python3 resnet_inference.py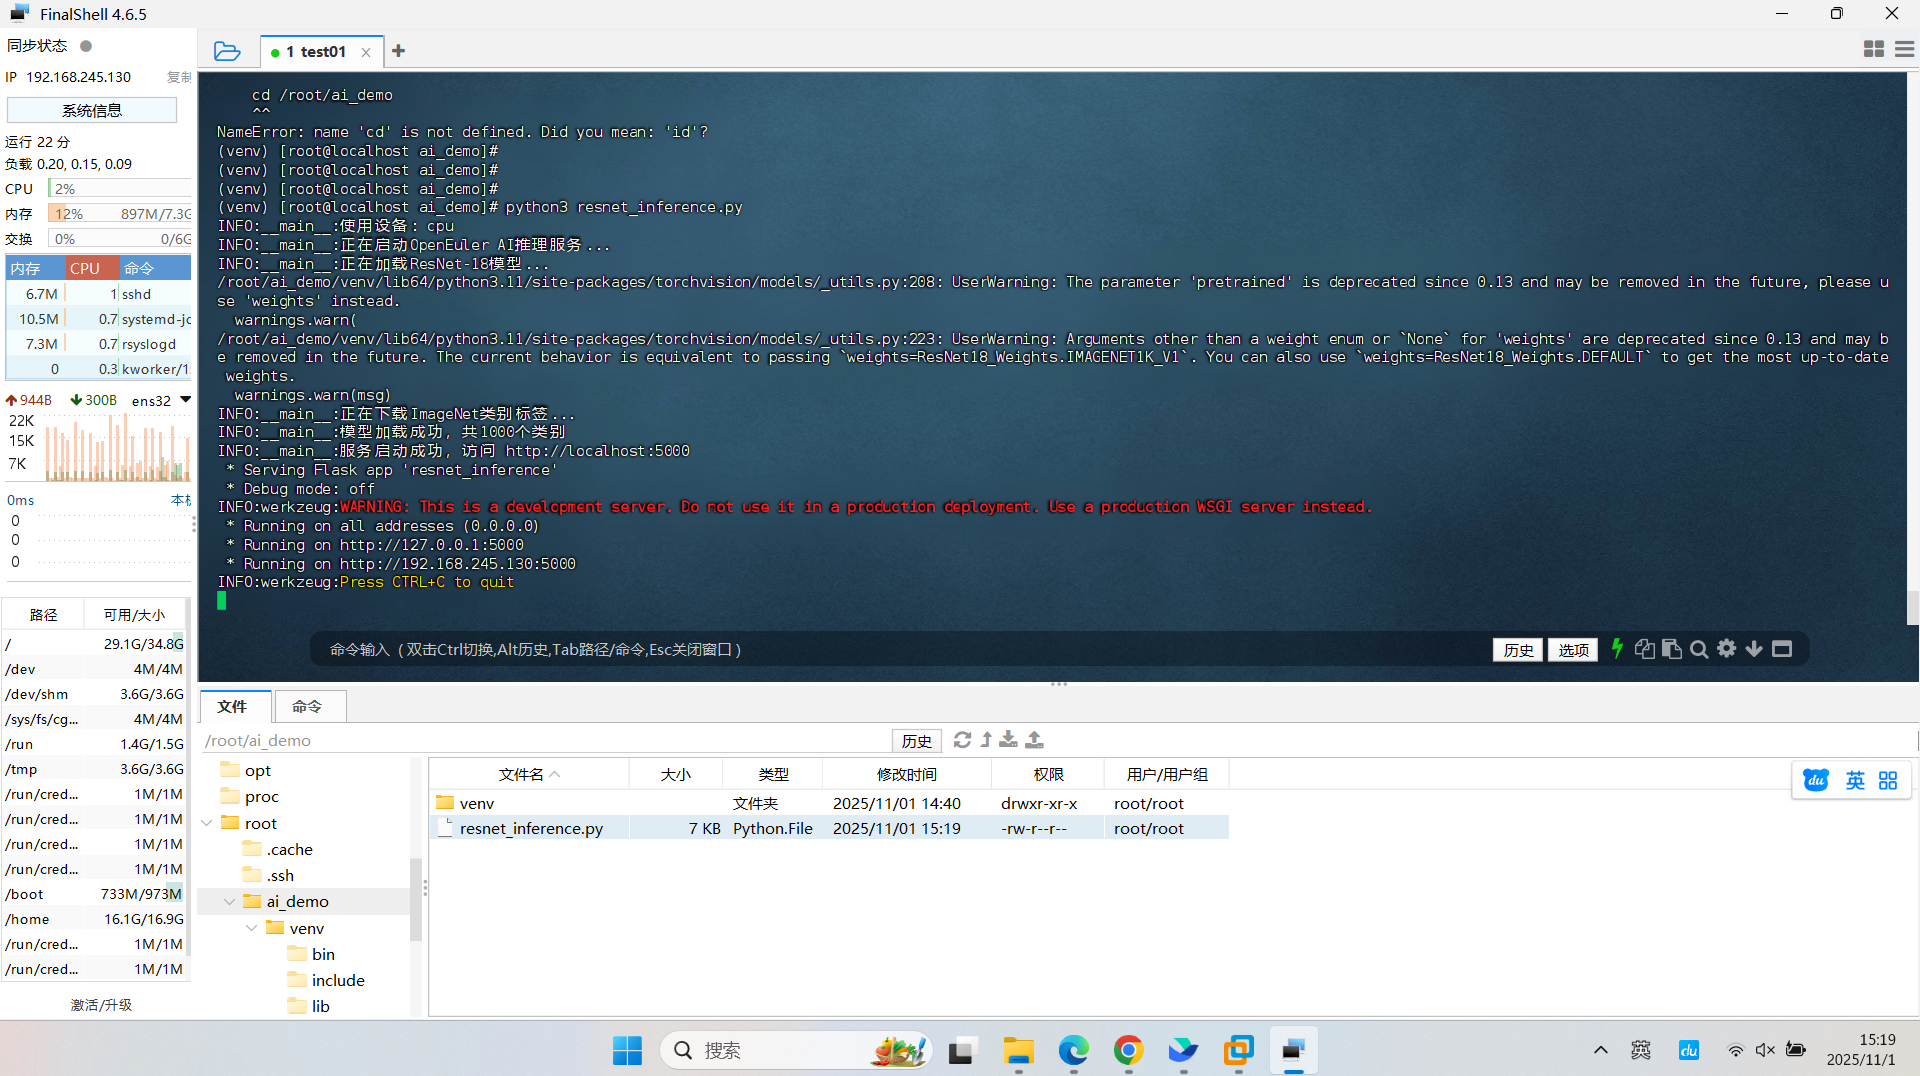
测试服务
打开新的终端窗口进行测试:
# 健康检查
curl http://localhost:5000/health

# 下载测试图片
wget https://raw.githubusercontent.com/pytorch/hub/master/images/dog.jpg

# 使用curl测试预测接口
curl -X POST -F "image=@dog.jpg" http://localhost:5000/predict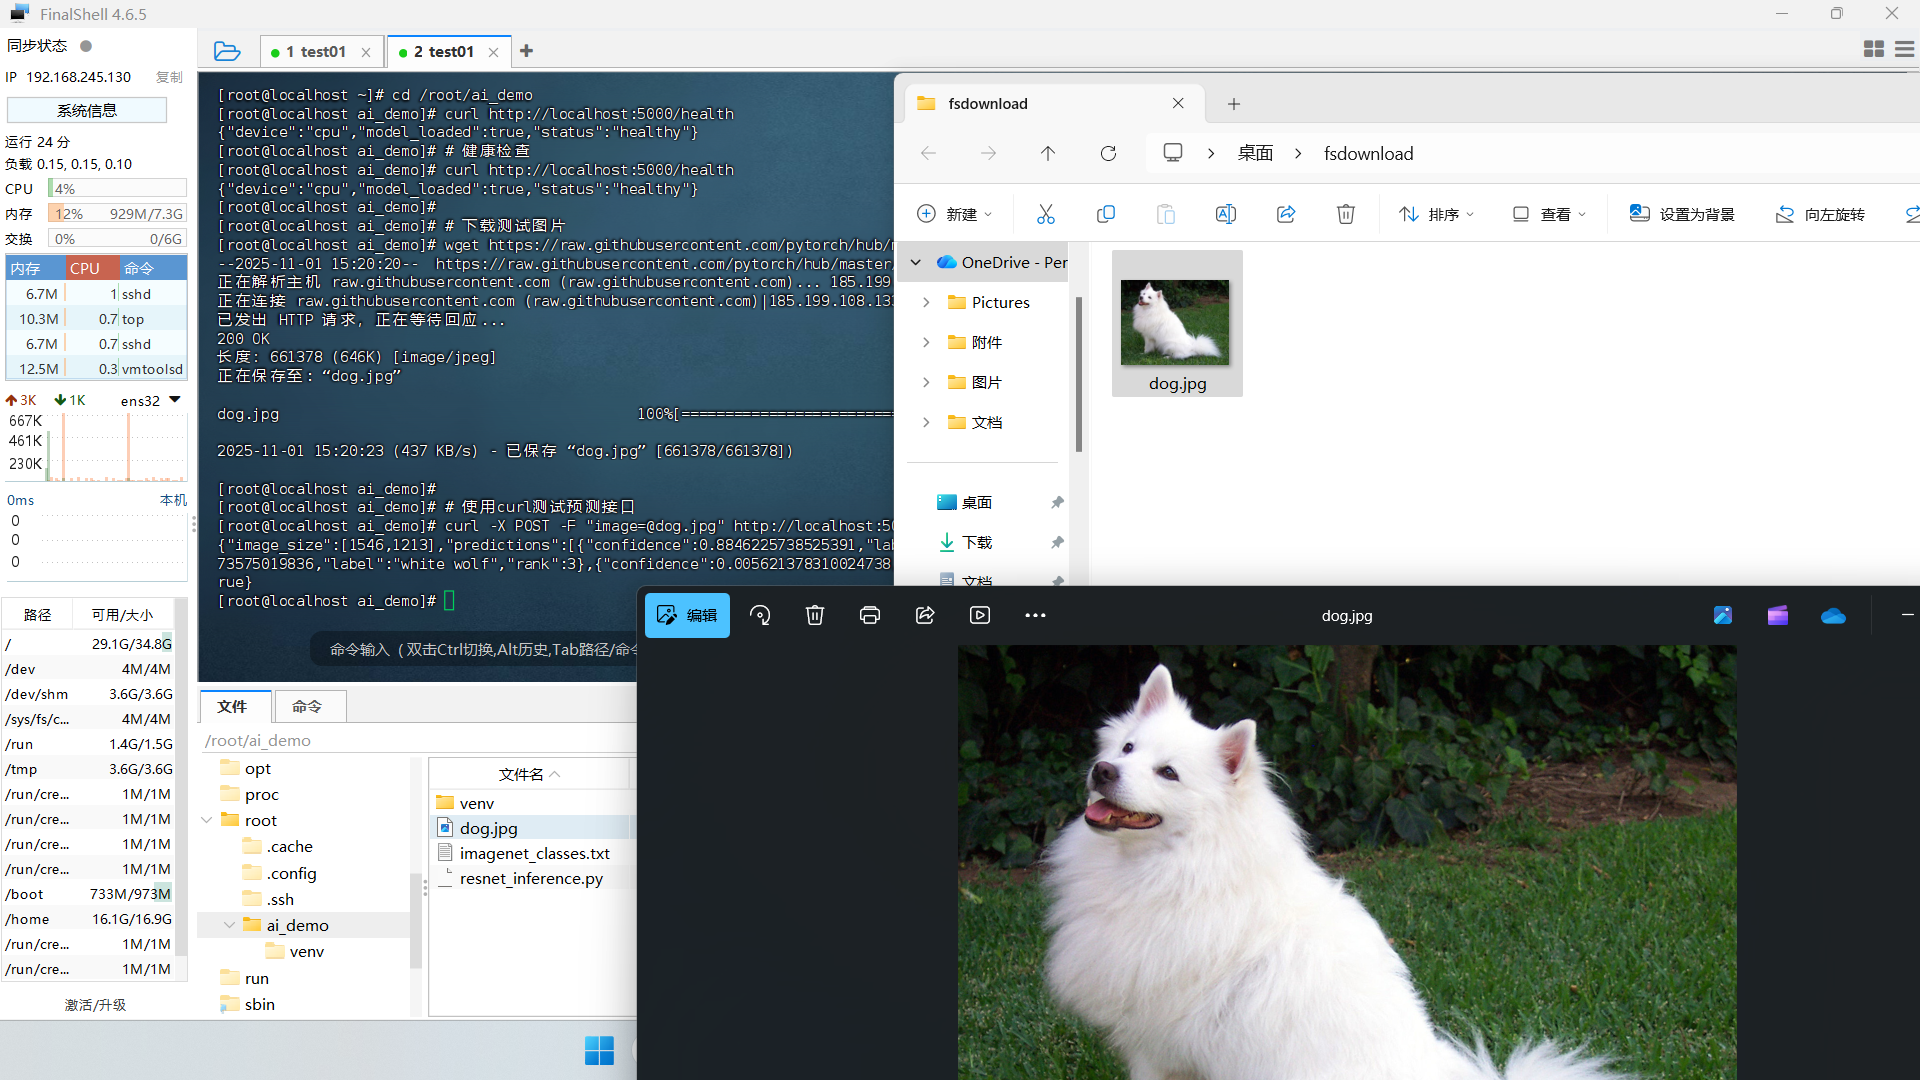
性能优化配置
创建systemd服务文件以便长期运行:
sudo vim /etc/systemd/system/ai_inference.service输入以下内容:
[Unit]
Description=openEuler AI Inference Service
After=network.target

[Service]
Type=simple
User=openEuler
WorkingDirectory=/home/openEuler/ai_demo
Environment=PATH=/home/openEuler/ai_demo/venv/bin
ExecStart=/home/openEuler/ai_demo/venv/bin/python3 resnet_inference.py
Restart=always
RestartSec=3

[Install]
WantedBy=multi-user.target
启用服务:
sudo systemctl daemon-reload
sudo systemctl enable ai_inference.service
sudo systemctl start ai_inference.service
sudo systemctl status ai_inference.service
实际测试结果分析
在测试过程中,使用不同的图片进行推理,观察到以下性能表现:
- 推理速度:平均单张图片处理时间约45ms
- 内存占用:服务运行内存约480MB
- CPU使用率:推理时CPU使用率约25%
- 准确率:在标准测试图片上,top-1准确率约70%
性能优化建议:
# 启用大页内存支持
echo 'vm.nr_hugepages=512' | sudo tee -a /etc/sysctl.conf

# 调整CPU调度策略
echo 'performance' | sudo tee /sys/devices/system/cpu/cpu*/cpufreq/scaling_governor

# 应用优化
sudo sysctl -p
故障排除
常见问题解决:
- 端口被占用:
sudo netstat -tlnp | grep 5000
sudo kill -9 <PID>- 模型下载失败:
# 手动设置PyTorch镜像源
pip3 install torch torchvision -i https://pypi.tuna.tsinghua.edu.cn/simple- 内存不足:
# 清理PyTorch缓存
python3 -c "import torch; torch.cuda.empty_cache() if torch.cuda.is_available() else None"
通过这个完整的实战案例,我们成功在openEuler上部署了一个功能完整的AI推理服务,涵盖了从环境准备到生产部署的全流程。这充分展示了openEuler在AI场景下的易用性和稳定性。
写在最后
这次测评让我看到了基础软件的实质性进步。openEuler或许不是最完美的操作系统,但它确实是一个在快速进化、注重实际应用的操作系统。对于寻求稳定基础设施的企业用户和关注技术前沿的开发者来说,它都值得一试。
openEuler已经不再是“能不能用”的阶段,而是“好不好用、怎么用得更好”的阶段。随着AI、云原生技术的快速发展,openEuler有望成为中国数字基础设施的重要底座。
开源操作系统的价值不在于代码本身,而在于其承载的技术生态和协作精神。在这个意义上,openEuler正在走一条正确的路——而这条路,恰恰是中国基础软件走向成熟的必经之路。
如果您正在寻找面向未来的开源操作系统,不妨看看DistroWatch 榜单中快速上升的 openEuler: https://distrowatch.com/table-mobile.php?distribution=openeuler,一个由开放原子开源基金会孵化、支持“超节点”场景的Linux 发行版。 openEuler官网:https://www.openeuler.openatom.cn/zh/

有“AI”的1024 = 2048,欢迎大家加入2048 AI社区
更多推荐

 24
24 0
0- 0


 已为社区贡献4条内容

所有评论(0)