【AI】嵌入式的AI应用实践记录
前言
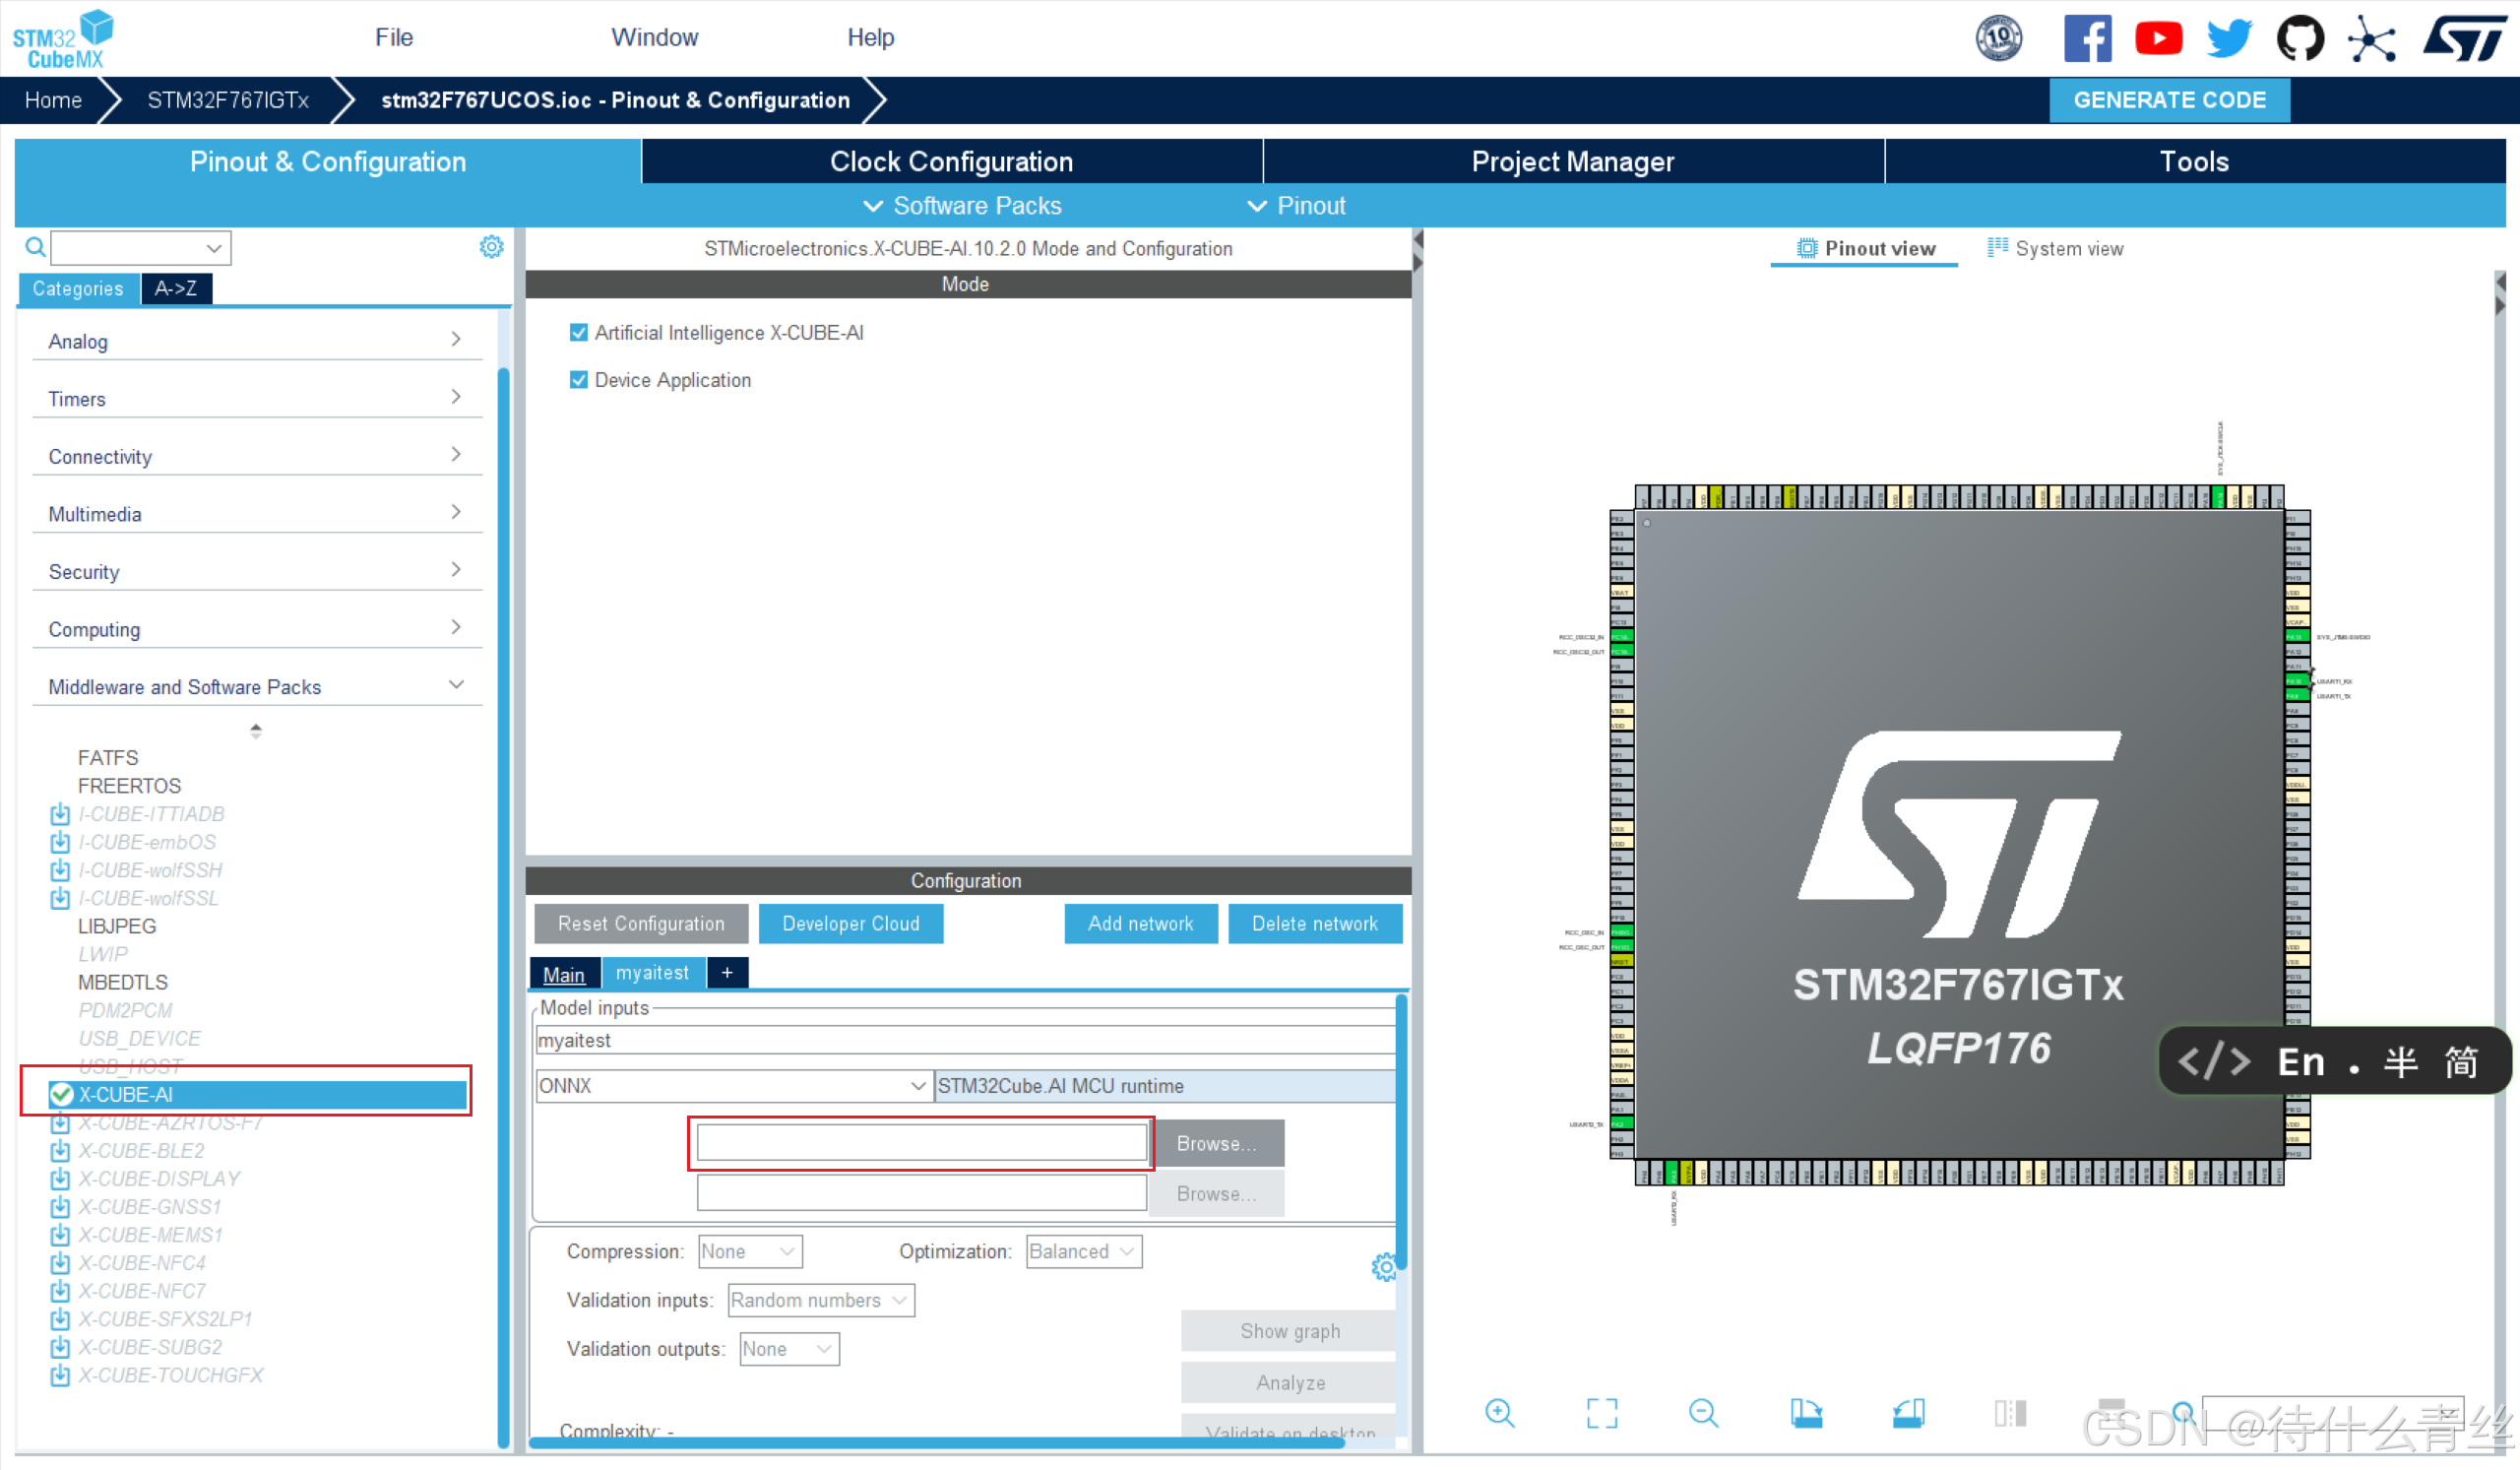
如何在STM32F767上部署AI大模型
步骤
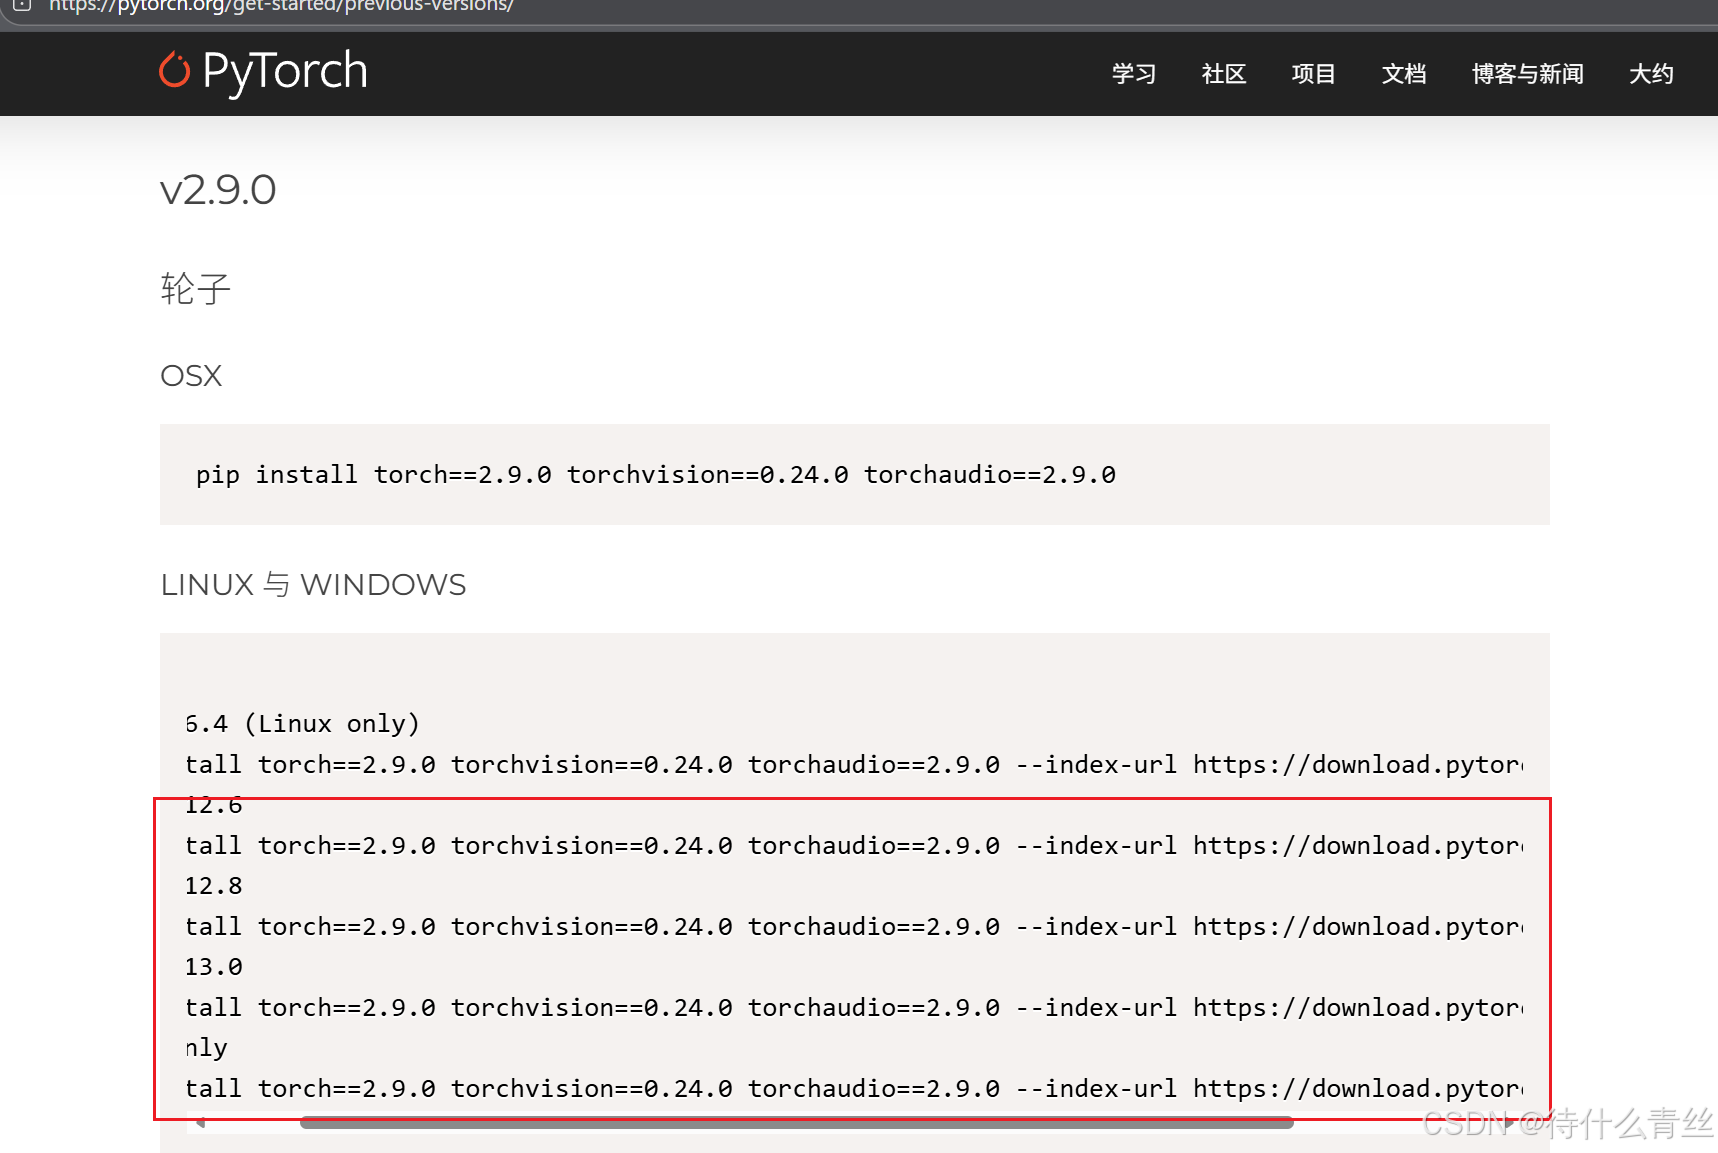
安装pytorch
ERROR: Could not find a version that satisfies the requirement typing-extensions>=4.10.0 (from torch) (from versions: 4.4.0, 4.8.0, 4.9.0, 4.12.2, 4.14.0, 4.15.0)
ERROR: No matching distribution found for typing-extensions>=4.10.0
# 中文输出这个问题解决方案
问题原因 解决方法 额外提示
Python版本过旧 检查并升级Python版本至3.8或更高。 使用 python --version 检查。
pip源或配置问题 更换pip源(如清华源):
pip install -i https://pypi.tuna.tsinghua.edu.cn/simple typing-extensions 华为源可能导致依赖问题。
网络问题导致下载失败 使用上述国内镜像源,或确保网络连接稳定。 -
包版本缓存或冲突 手动安装指定版本:
pip install typing-extensions==4.10.0 可尝试安装稍旧但兼容的版本,如4.8.0
笔者是通过更换清华源解决问题
Using cached https://download.pytorch.org/whl/cu126/torch-2.9.0%2Bcu126-cp310-cp310-win_amd64.whl (2582.7 MB)
Using cached https://download.pytorch.org/whl/cu126/torchvision-0.24.0%2Bcu126-cp310-cp310-win_amd64.whl (8.2 MB)
Using cached https://download.pytorch.org/whl/cu126/torchaudio-2.9.0%2Bcu126-cp310-cp310-win_amd64.whl (2.0 MB)
Using cached https://download.pytorch.org/whl/fsspec-2025.9.0-py3-none-any.whl (199 kB)
Using cached https://download.pytorch.org/whl/networkx-3.3-py3-none-any.whl (1.7 MB)
Using cached https://download.pytorch.org/whl/pillow-11.3.0-cp310-cp310-win_amd64.whl (7.0 MB)
Using cached https://download.pytorch.org/whl/sympy-1.14.0-py3-none-any.whl (6.3 MB)
Using cached https://download.pytorch.org/whl/filelock-3.19.1-py3-none-any.whl (15 kB)
Using cached https://download.pytorch.org/whl/numpy-2.1.2-cp310-cp310-win_amd64.whl (12.9 MB)
Installing collected packages: mpmath, sympy, pillow, numpy, networkx, MarkupSafe, fsspec, filelock, jinja2, torch, torchvision, torchaudio
以上提示是正在安装,请耐心等待,安装完成会有对应提示。不放心可以执行一下代码
python -c "import torch; print(torch.__version__); print(torch.cuda.is_available())"
用python 生成一个大模型
D:\myapp\00-live\02py\py\python.exe “E:\live\pro\stm32study - 副本\stm32f7_AI\stm32F767UCOS\AI_test\SimpleModel_test.py”
Traceback (most recent call last):
File “E:\live\pro\stm32study - 副本\stm32f7_AI\stm32F767UCOS\AI_test\SimpleModel_test.py”, line 30, in
torch.onnx.export(
File “D:\myapp\00-live\02py\py\lib\site-packages\torch\onnx_init_.py”, line 282, in export
from torch.onnx._internal.exporter import _compat
File “D:\myapp\00-live\02py\py\lib\site-packages\torch\onnx_internal\exporter_compat.py”, line 16, in
from torch.onnx._internal.exporter import (
File “D:\myapp\00-live\02py\py\lib\site-packages\torch\onnx_internal\exporter_core.py”, line 18, in
import onnxscript
ModuleNotFoundError: No module named ‘onnxscript’
Process finished with exit code 1
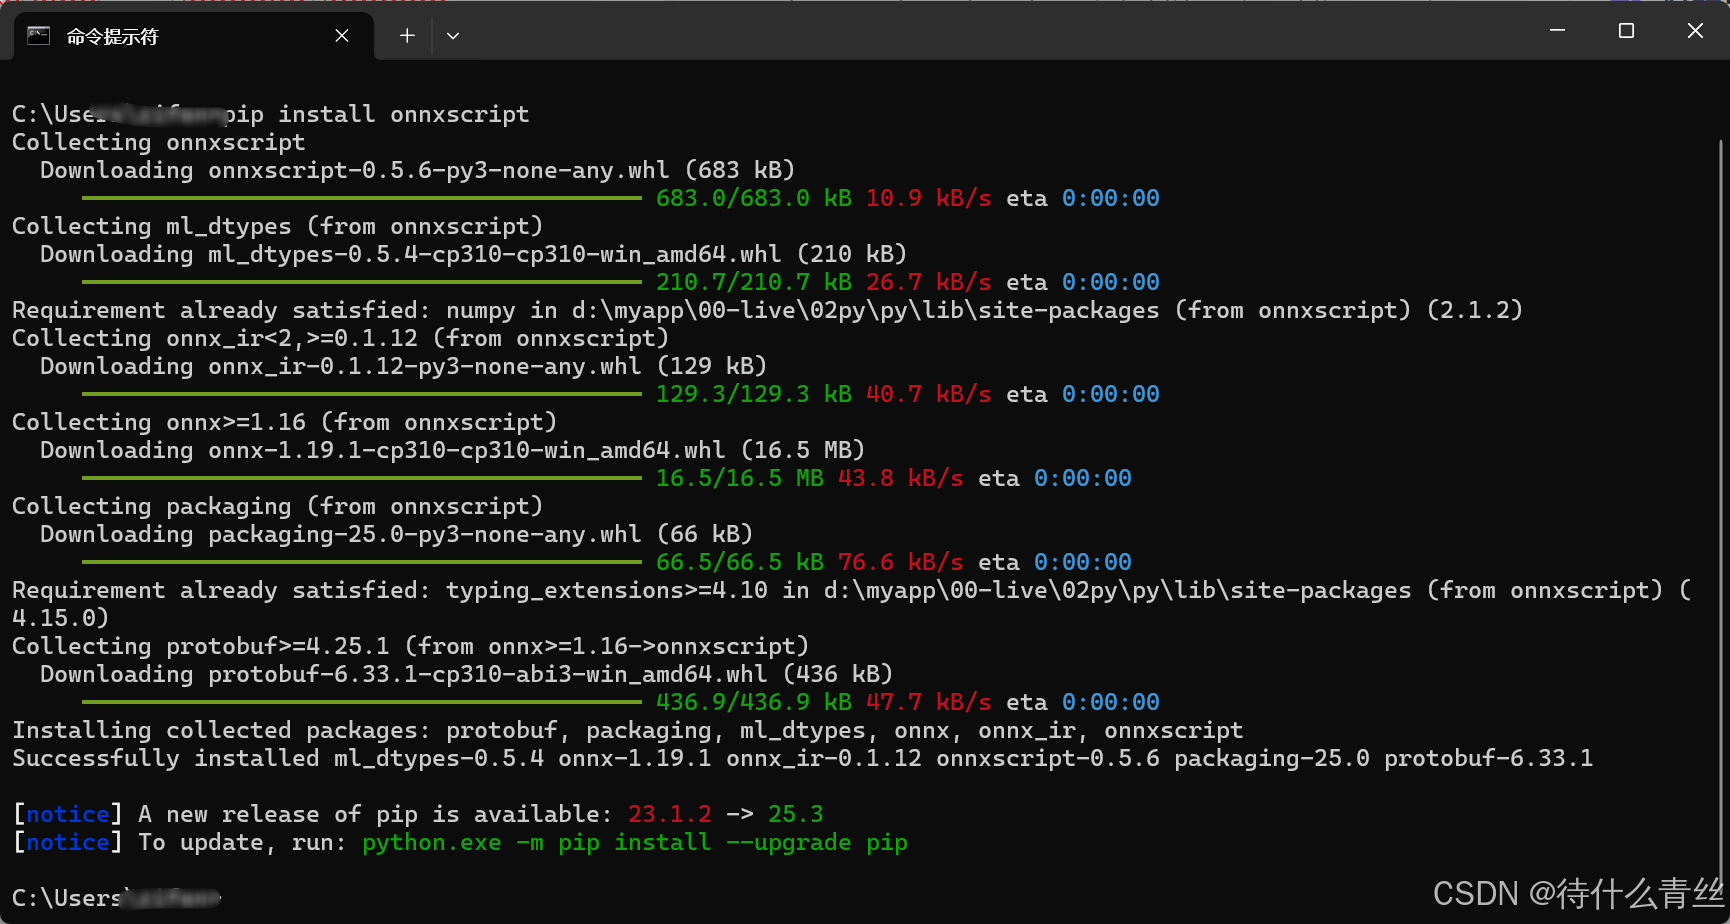
解决办法安装
pip install onnxscript
分析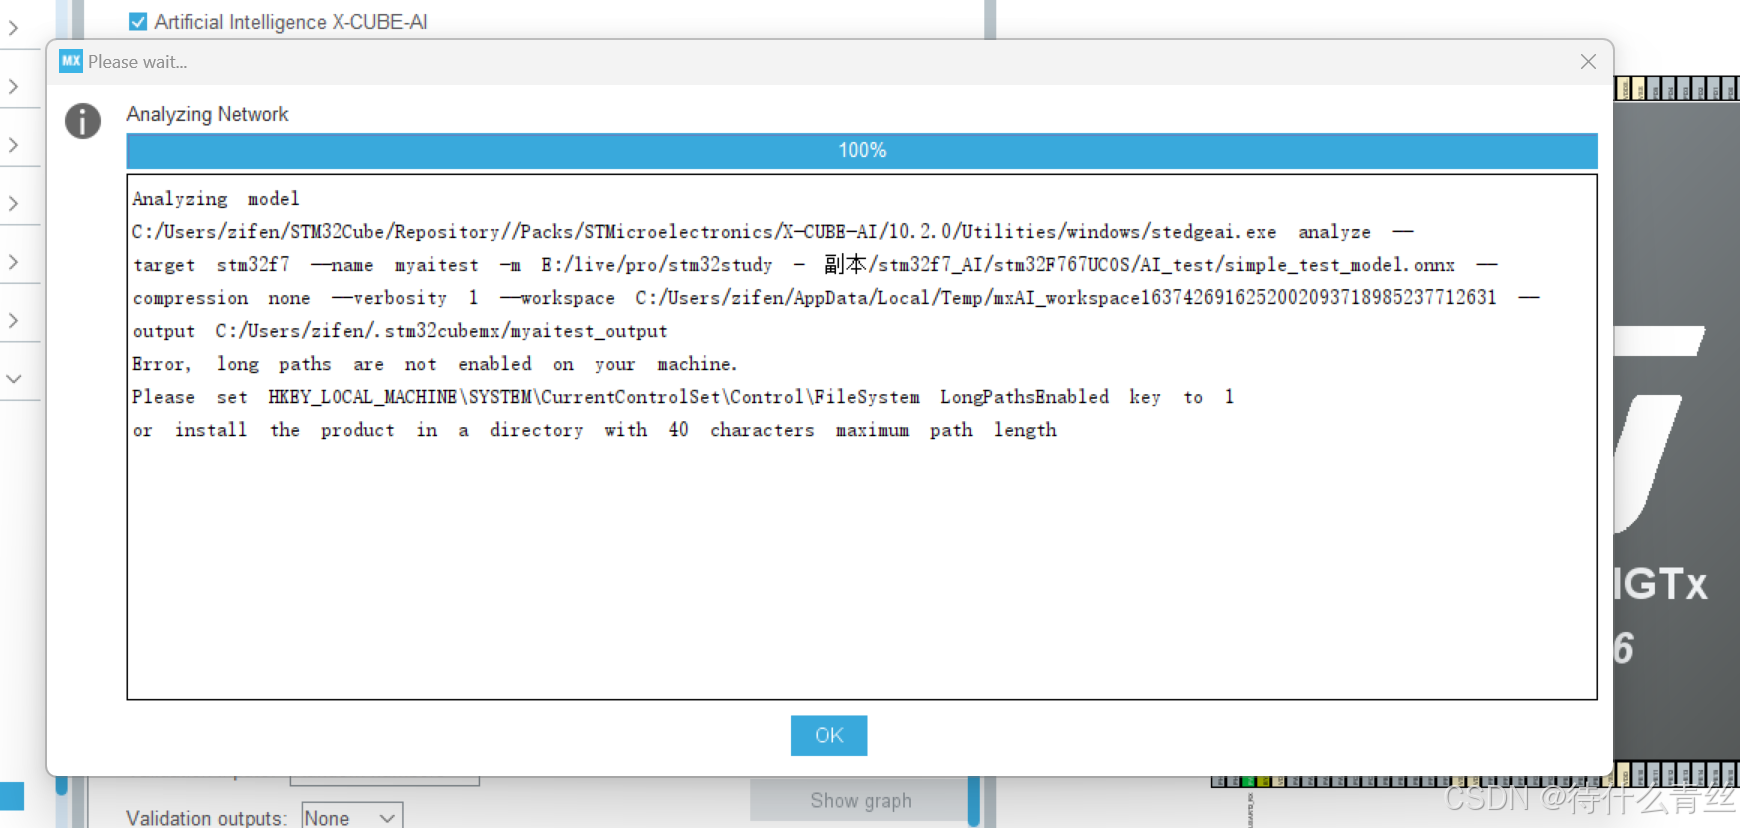
失败是由于路径太长。
解决方法
# 在管理员PowerShell中执行
Set-ItemProperty -Path "HKLM:\SYSTEM\CurrentControlSet\Control\FileSystem" -Name "LongPathsEnabled" -Value 1
shutdown /r /t 0
[AI:mytest] C:/Users/zifen/STM32Cube/Repository/Packs/STMicroelectronics/X-CUBE-AI/10.2.0/Utilities/windows/stedgeai.exe analyze --target stm32f7 --name mytest -m E:/simple_test_model.onnx --compression none --verbosity 1 --workspace C:/Users/zifen/AppData/Local/Temp/mxAI_workspace23832635380011711547863756895850 --output C:/Users/zifen/.stm32cubemx/mytest_output
[AI:mytest] ST Edge AI Core v2.2.0-20266 2adc00962
[AI:mytest] INTERNAL ERROR: Your model ir_version 10 is higher than the checker’s (9).
[AI:mytest] Analyze fail on the AI model
模型IR版本(10)高于X-CUBE-AI工具支持的版本(9)
修改模型生成兼容性版本后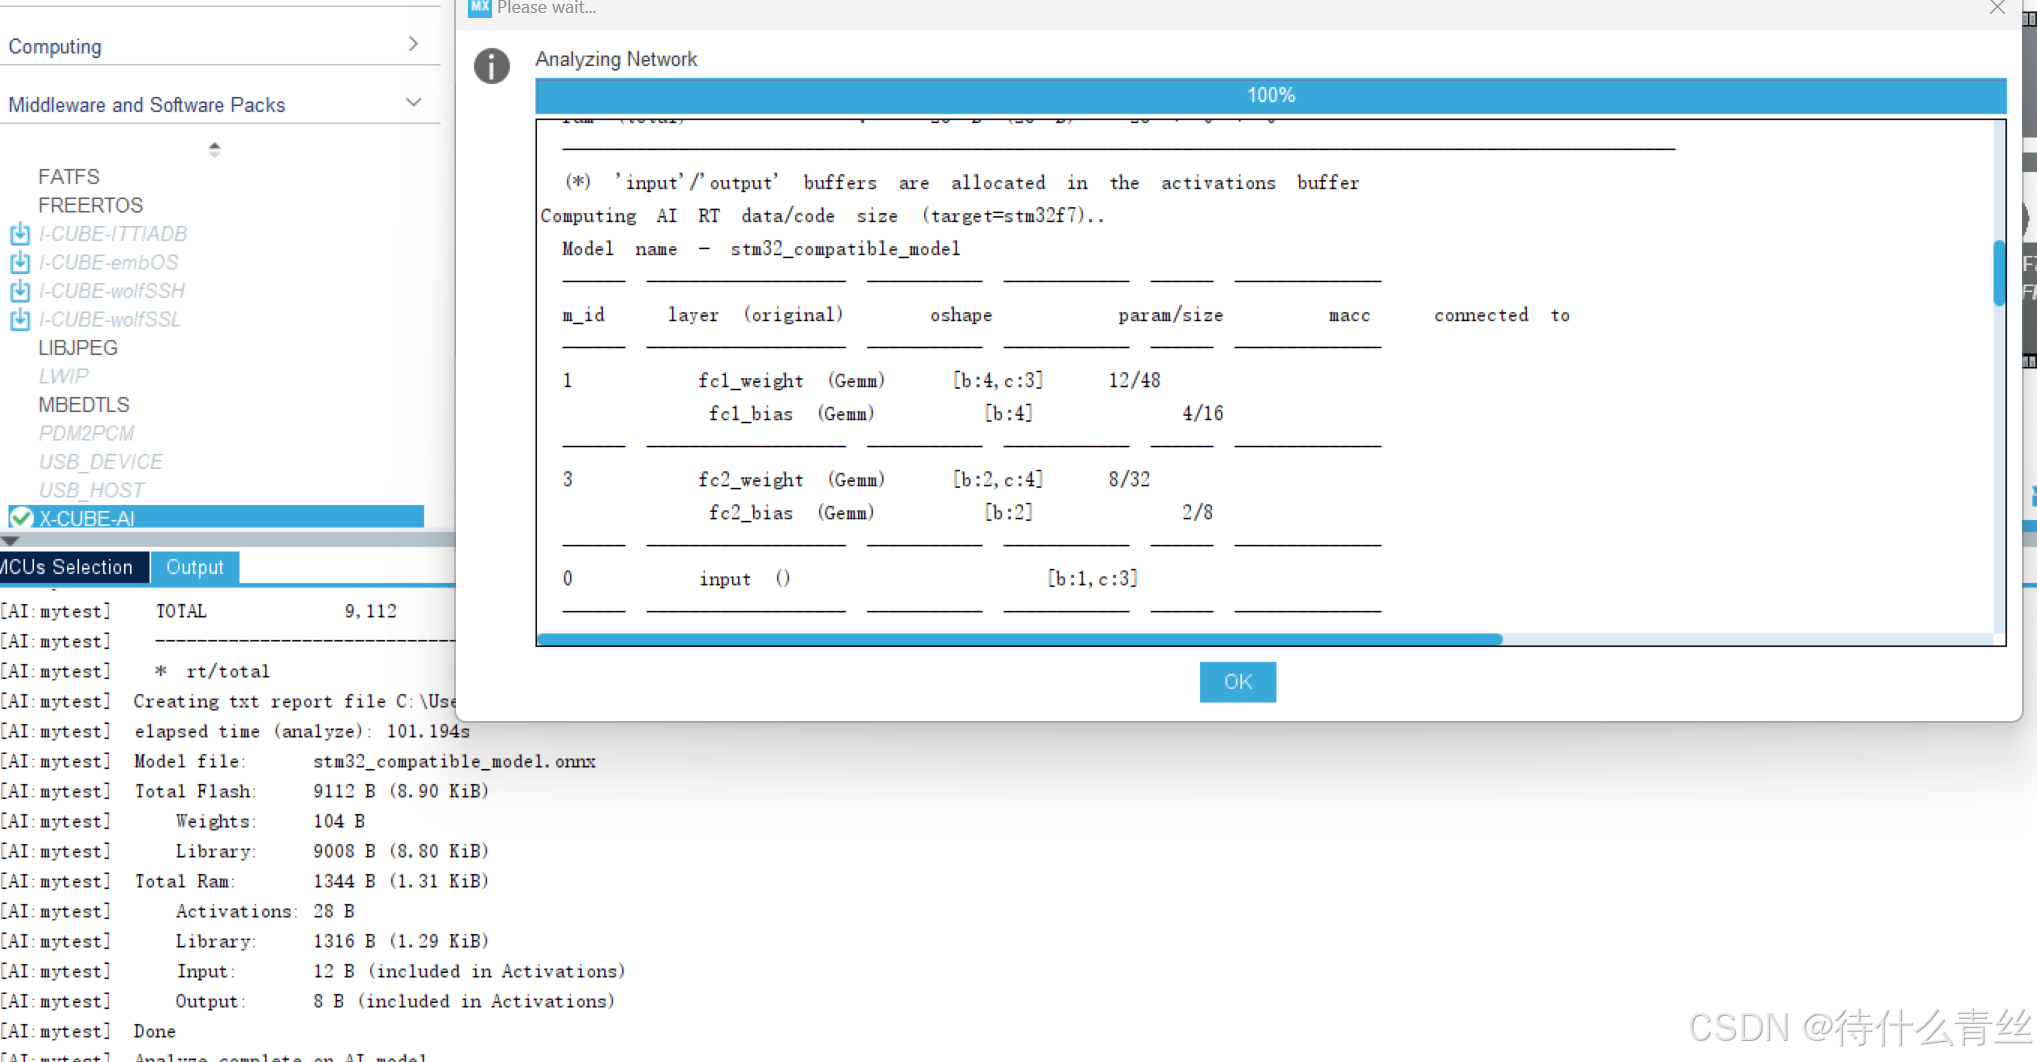
F767阿尔法开发板,板载晶振是25MHZ,cube默认是8MHZ,不然运行不了。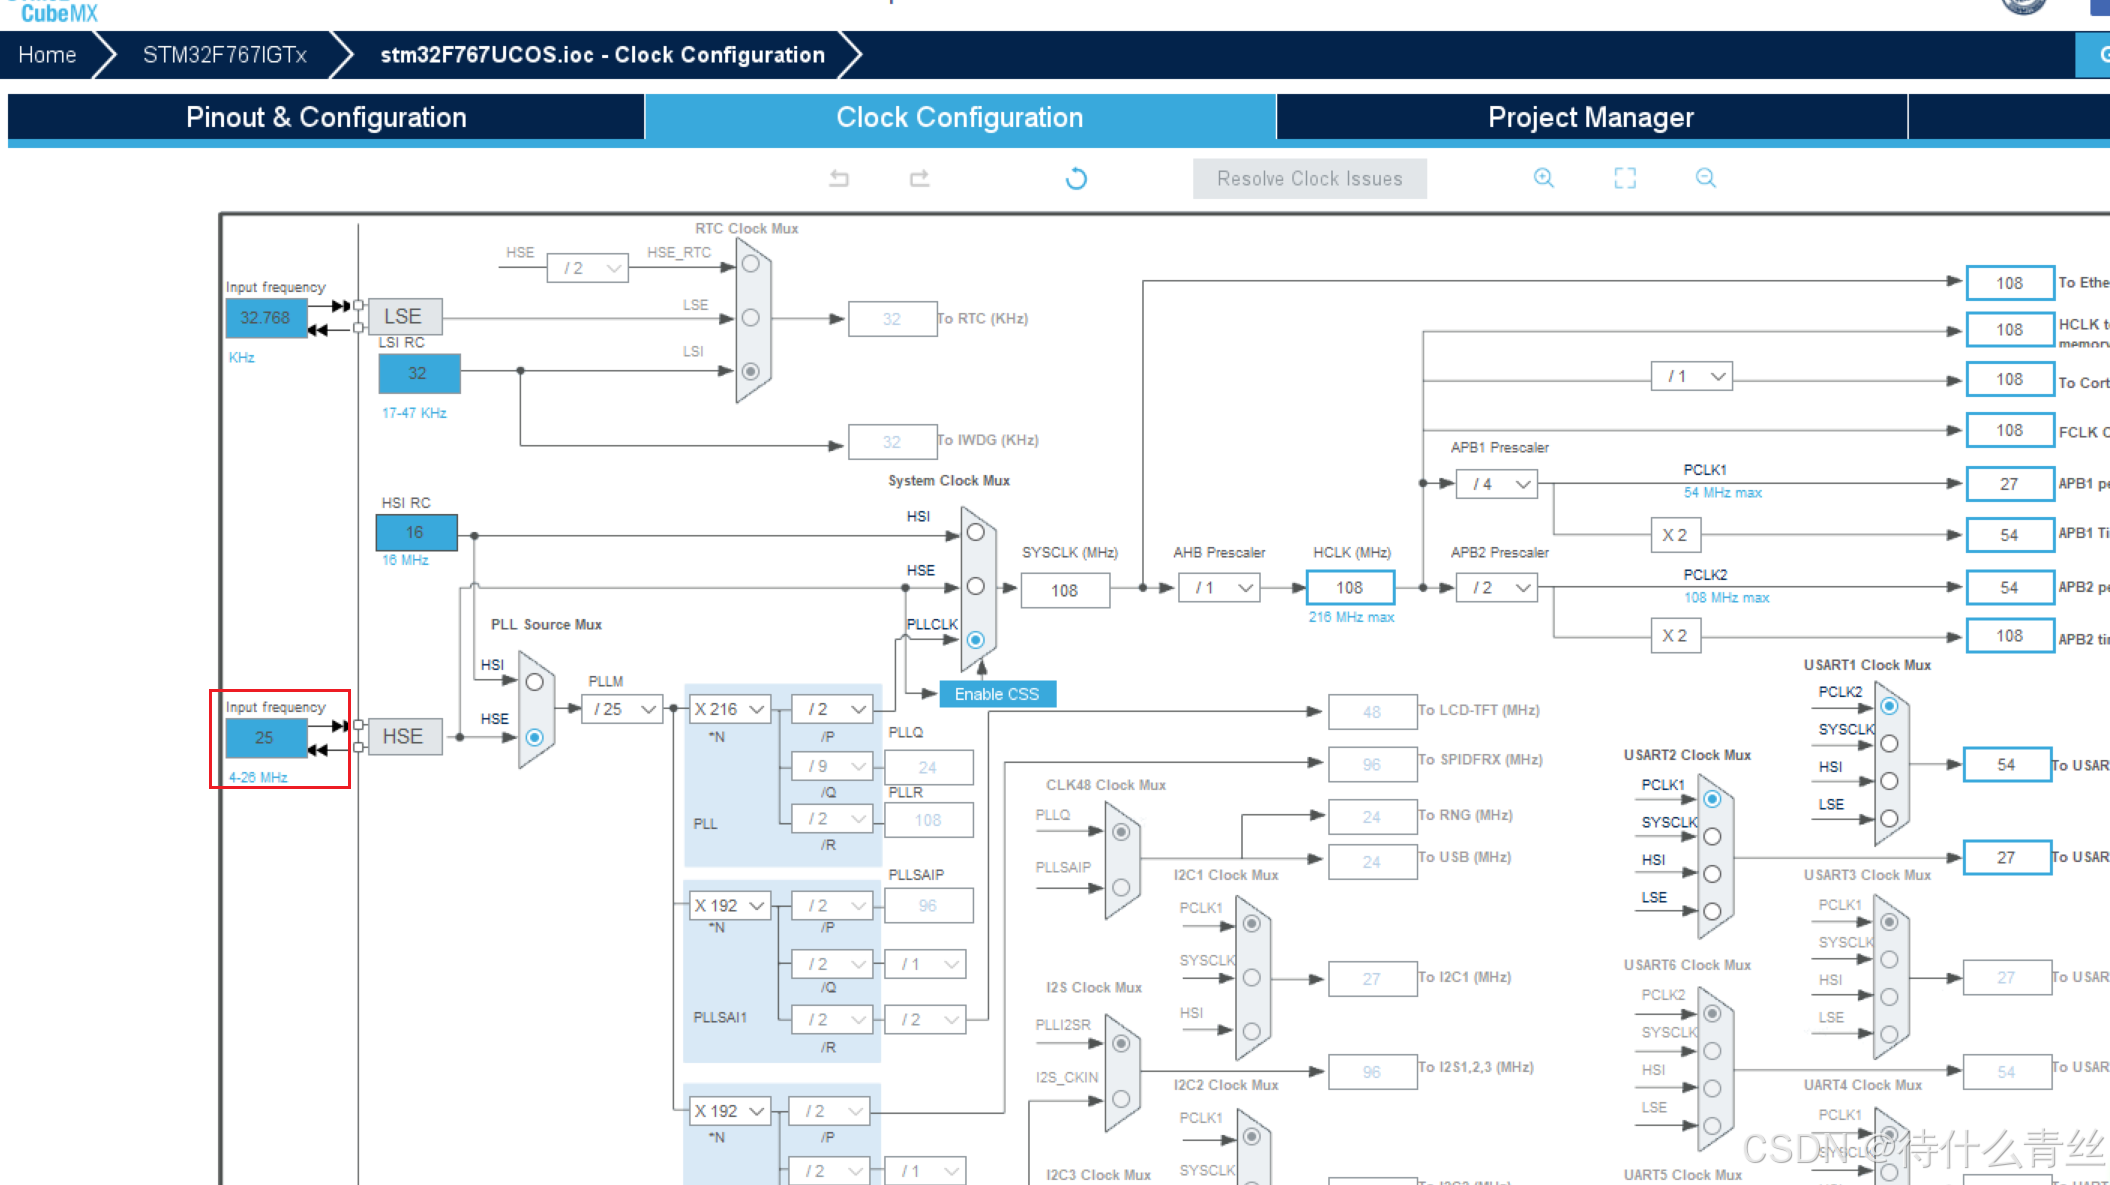
模型验证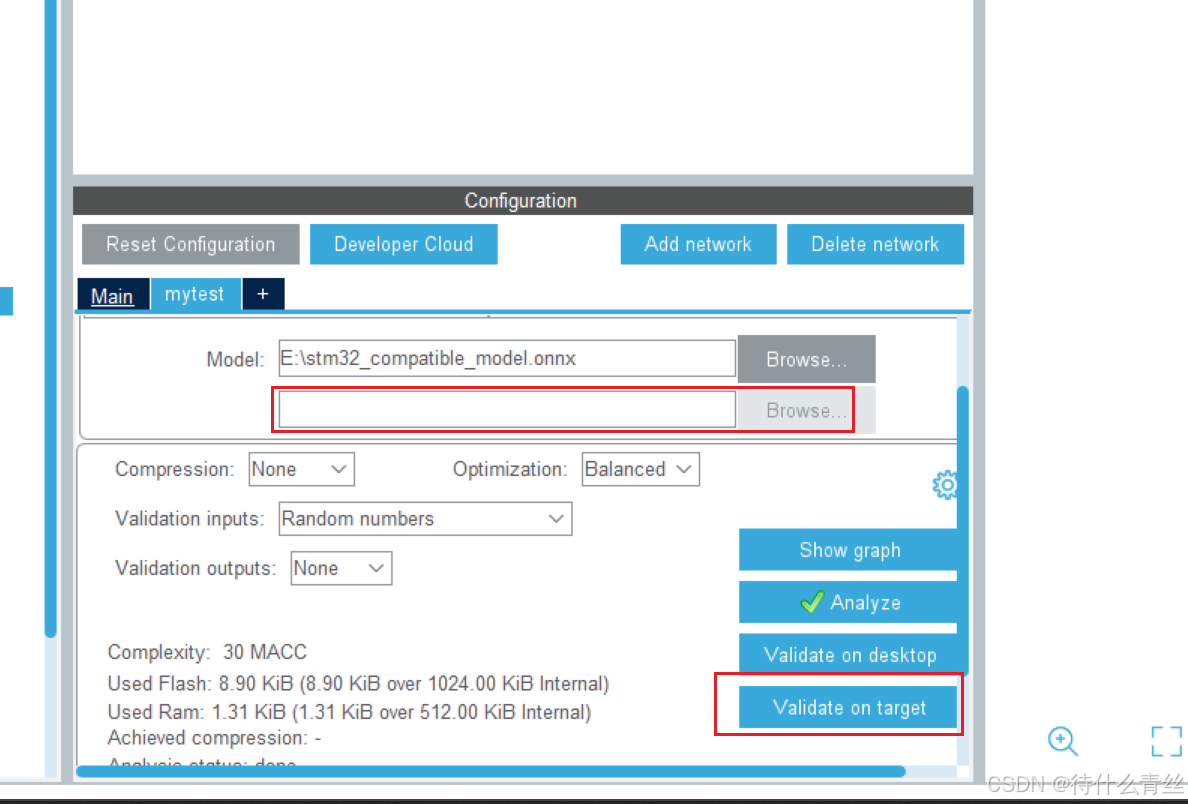

有“AI”的1024 = 2048,欢迎大家加入2048 AI社区
更多推荐
 25
25 0
0- 0


 已为社区贡献1条内容

所有评论(0)