docker系列1:docker安装和基本使用篇
1,docker 简介docker中文网站:http://www.docker.org.cn/book/docker/what-is-docker-16.html基本概念: container, image镜像: is an executable package that includes everything needed to run an application–the code, ...
·
- docker 国内镜像加速站点:
wang@wang-T58-V:~$ cat /etc/docker/daemon.json
{"registry-mirrors":["https://registry.docker-cn.com","https://reg-mirror.qiniu.com","http://hub-mirror.c.163.com","https://docker.mirrors.ustc.edu.cn"]}
文章目录
docker 简介:docker官方安装文档:(yum安装,apt 安装, tar包解压安装) https://docs.docker.com/install/linux/docker-ce/centos/
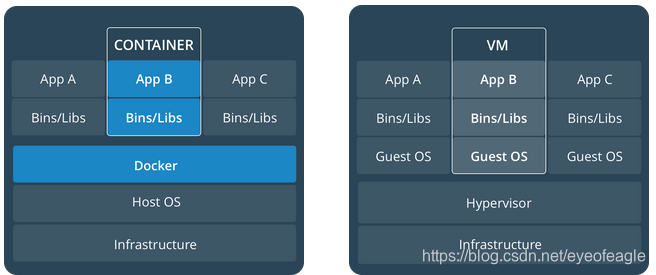
基本概念: container, image
- 镜像: is an executable package that includes everything needed to run an application–the code, a runtime, libraries, environment variables, and configuration files.
- 容器: is launched by running an image,is a runtime instance of an image–what the image becomes in memory when executed (that is, an image with state, or a user process)
1,docker 安装配置
a, ubuntu 安装docker
# step 1: 安装必要的docker依赖
sudo apt-get update
sudo apt-get -y install apt-transport-https ca-certificates curl software-properties-common
# step 2: 安装GPG证书
curl -fsSL http://mirrors.aliyun.com/docker-ce/linux/ubuntu/gpg | sudo apt-key add -

# Step 3: 写入软件源信息
sudo add-apt-repository "deb [arch=amd64] http://mirrors.aliyun.com/docker-ce/linux/ubuntu $(lsb_release -cs) stable"
# Step 4: 更新并安装 Docker-CE
sudo apt-get -y update
sudo apt-get -y install docker-ce
b, centos6安装docker:测试环境
二进制包安装指南: https://docs.docker.com/install/linux/docker-ce/binaries/
cgroupfs-mount脚本:https://github.com/tianon/cgroupfs-mount/blob/master/cgroupfs-mount
#1, centos6升级内核:2.6.x --> 3.10+
## centos6内核版本太低,不支持docker,需要升级内核
	# FATA[2019-11-13T09:35:11.425842848+08:00] Your Linux kernel version 2.6.32-754.el6.x86_64
	# is not supported for running docker. Please upgrade your kernel to 3.10.0 or newer.
rpm -Uv https://www.elrepo.org/elrepo-release-6-9.el6.elrepo.noarch.rpm --nodeps
yum -y  install kernel-lt kernel-lt-headers kernel-lt-devel --enablerepo=elrepo-kernel

#修改grup.conf, 重启生效
sed -i s/default=1/default=0/   /etc/grub.conf
sed -i s/default=1/default=0/  /boot/grub/grub.conf

#2,下载docker二进制安装包
wget https://download.docker.com/linux/static/stable/x86_64/docker-17.03.0-ce.tgz
tar -xvf docker-17.03.0-ce.tgz
cd docker-17.03.0 ; mv * /usr/local/bin
dockerd & #启动服务

#3, centos6启动一般会报错:Devices cgroup isn't mounted
#这时需要使用到: mout-group.sh脚本,从git上找到文件,复制过来就行
[root@c6 ~]#  cat /usr/local/bin/mout-group.sh
#!/bin/sh
# Copyright 2011 Canonical, Inc
#           2014 Tianon Gravi
# Author: Serge Hallyn <serge.hallyn@canonical.com>
#         Tianon Gravi <tianon@debian.org>
set -e

# for simplicity this script provides no flexibility

# if cgroup is mounted by fstab, don't run
# don't get too smart - bail on any uncommented entry with 'cgroup' in it
if grep -v '^#' /etc/fstab | grep -q cgroup; then
	echo 'cgroups mounted from fstab, not mounting /sys/fs/cgroup'
	exit 0
fi

# kernel provides cgroups?
if [ ! -e /proc/cgroups ]; then
	exit 0
fi

# if we don't even have the directory we need, something else must be wrong
if [ ! -d /sys/fs/cgroup ]; then
	exit 0
fi

# mount /sys/fs/cgroup if not already done
if ! mountpoint -q /sys/fs/cgroup; then
	mount -t tmpfs -o uid=0,gid=0,mode=0755 cgroup /sys/fs/cgroup
fi
cd /sys/fs/cgroup

# get/mount list of enabled cgroup controllers
for sys in $(awk '!/^#/ { if ($4 == 1) print $1 }' /proc/cgroups); do
	mkdir -p $sys
	if ! mountpoint -q $sys; then
		if ! mount -n -t cgroup -o $sys cgroup $sys; then
			rmdir $sys || true
		fi
	fi
done
chmod +x /usr/local/bin/cgroupfs-mount.sh

#4, 设置开机启动
[ -f /etc/rc.d/rc.local ] && [ ! -x /etc/rc.d/rc.local ] && chmod +x /etc/rc.d/rc.local
cat  >> /etc/rc.d/rc.local  <<EOF
/usr/local/bin/cgroupfs-mount.sh
dockerd &
EOF

reboot #重启后,docker即可正常使用
c, centos7 安装docker
#卸载旧的版本
rpm -qa |grep docker |xargs -n 1 rpm -e --nodeps
#1, 配置docker依赖
yum -y install yum-utils device-mapper-persisten-data lvm2
yum-config-manager --add-repo http://mirrors.aliyun.com/docker-ce/linux/centos/docker-ce.repo
yum list docker-ce
#2, 下载安装docker
yum -y install docker-ce docker-ce-cli containerd.io # 指定版本安装docker-ce-17.12.1.ce
systemctl start docker
systemctl enable docker
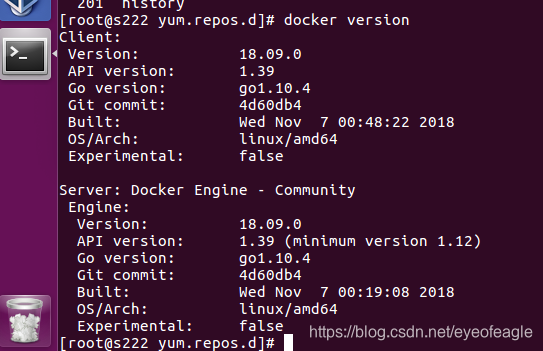
#3,查看安装后的dock版本信息
docker version
[配置: 使用阿里云镜像加速]
在阿里云注册docker仓库: https://cr.console.aliyun.com
# repo addr:   registry.cn-beijing.aliyuncs.com/docker_eyeofeagle/
sudo docker login --username=180xxx1897 registry.cn-beijing.aliyuncs.com
镜像加速 local config :
#1,创建配置文件
sudo tee /etc/docker/daemon.json <<-'EOF'
{
  "registry-mirrors": ["https://yywkvob3.mirror.aliyuncs.com"]
}
EOF
#或者编辑 /usr/lib/systemd/system/docker.service文件
#ExecStart=/usr/bin/dockerd --insecure-registry a.a.a.a:5000 --registry-mirrors https://yywkvob3.mirror.aliyuncs.com


#2, 重启docker服务
#sudo systemctl daemon-reload
#sudo systemctl restart docker
service docker restart

# 3, 查看配置是否生效
################# docker info 显示的前后变化############
Docker Root Dir: /var/lib/docker
Debug Mode (client): false
Debug Mode (server): false
Registry: https://index.docker.io/v1/
Labels:
Experimental: false
Insecure Registries:
 127.0.0.0/8
Registry Mirrors:					 ##### 新增了一条信息###########
 https://yywkvob3.mirror.aliyuncs.com/  ##### 新增了一条信息###########
Live Restore Enabled: false
Product License: Community Engine
2,docker 镜像管理
docker ENV 传参--> 动态修改配置文件
  1, 在dockerfile启动命令中,添加修改命令:  sed -i "s/param1=.*/param1=$param1/" filename
  2, 重新构建镜像
  3, docker run -itd .... -e "param1=value1" xximag  ==> 镜像里面有了变量: echo $param1, 会获取到value1


镜像导入导出:
	docker run -it --name b1 busybox
		docker cp ./ b1:/root/
	docker commit -m 'busybox1' b1 b1

	docker save b1 |gzip > b1.img
	docker load < b1.img

推送镜像到仓库
root@wang-GA-MA770T-UD3P:/home/wang/txt#    docker images  |grep registry.cn-beijing.aliyuncs.com/kube_eyeofeagle/  |awk '{print $1":"$2}'
registry.cn-beijing.aliyuncs.com/kube_eyeofeagle/kube-proxy:v1.13.1

root@wang-GA-MA770T-UD3P:/home/wang/txt# docker images  |grep registry.cn-beijing.aliyuncs.com/kube_eyeofeagle/  |awk '{print $1":"$2}'|xargs -n 1 docker push
The push refers to repository [registry.cn-beijing.aliyuncs.com/kube_eyeofeagle/kube-proxy]
f9cdaf1489a0: Pushed
5fe6d025ca50: Pushed
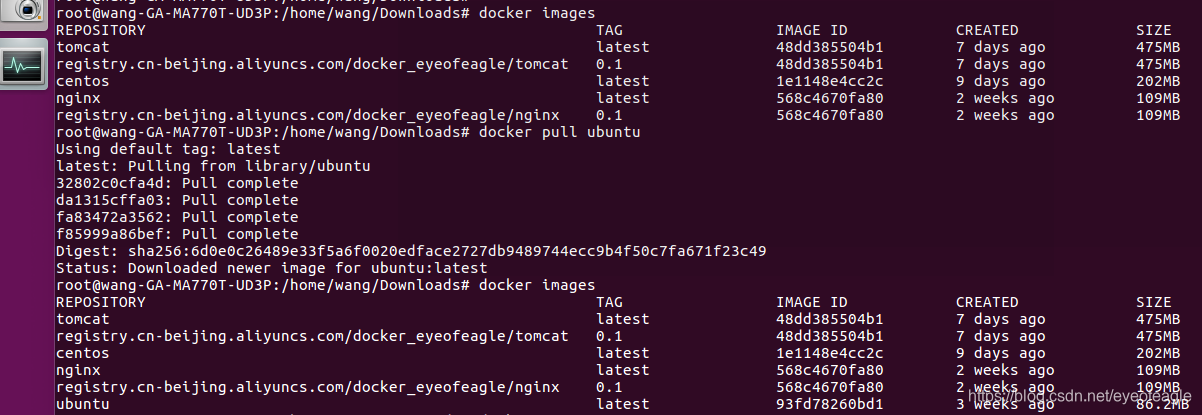
a, docker 查看本地镜像
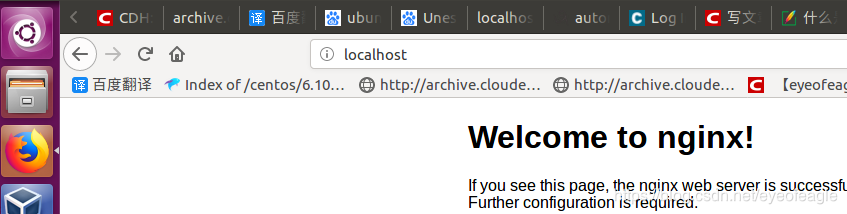
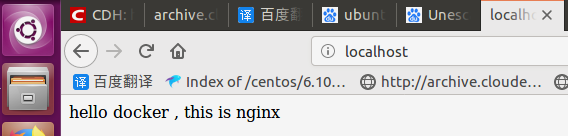
b, docker 运行nignx程序

3, docker容器和主机的交互:
A, 在容器外执行命令
[root@hadoop01 ~]# docker exec -it busyboxy1 sh -c 'hostname; ls /; echo 123'
6bf6bde51306
bin   dev   etc   home  proc  root  sys   tmp   usr   var
123
B, 文件拷贝

C, 由主机进入容器中

4, docker 管理容器生命周期
查看运行中的所有容器, 停止容器,删除容器

有“AI”的1024 = 2048,欢迎大家加入2048 AI社区
更多推荐

 0
0 0
0- 0


 已为社区贡献3条内容

所有评论(0)