【AscendC】在云主机编译和通过Ascend C算子开发能力认证(中级)全流程
写在前面:鼠鼠我没有NPU机器,只有自己的笔记本,所以这个测试完全靠的华为云主机,感谢华为喵~
1、平台准备
指路平台:
昇思大模型平台![]() https://xihe.mindspore.cn/training-projects
https://xihe.mindspore.cn/training-projects
一次能免费申请3小时,记得提前写好代码,申请一个NPU的Ascend 环境的主机
2、环境准备
要装一个新的CANN软件包(感谢全能的师兄提醒),不然你在这个云主机编译完后根本安装不上run包,上述获取的云主机是不会给你这个NPU的cann的root权限,所以你装run包时大概会出现权限报错如下,这里我被绕了两三天,各种创建新的目录把run包放在新目录下设置环境变量运行依旧没有权限,希望有跟我一样被下面报错绕来绕去的人能看到这个博客
About to compress 724 KB of data...
Adding files to archive named "custom_opp_openEuler_aarch64.run"...
./help.info
./install.sh
./packages/vendors/customize/framework/tensorflow/libcust_tf_parsers.so
./packages/vendors/customize/framework/tensorflow/npu_supported_ops.json
./packages/vendors/customize/op_api/include/aclnn_sigmoid_custom.h
./packages/vendors/customize/op_api/lib/libcust_opapi.so
./packages/vendors/customize/op_impl/ai_core/tbe/config/ascend310b/aic-ascend310b-ops-info.json
./packages/vendors/customize/op_impl/ai_core/tbe/config/ascend910b/aic-ascend910b-ops-info.json
./packages/vendors/customize/op_impl/ai_core/tbe/customize_impl/dynamic/sigmoid_custom.cpp
./packages/vendors/customize/op_impl/ai_core/tbe/customize_impl/dynamic/sigmoid_custom.py
./packages/vendors/customize/op_impl/ai_core/tbe/kernel/ascend310b/sigmoid_custom/
./packages/vendors/customize/op_impl/ai_core/tbe/kernel/ascend910b/sigmoid_custom/
./packages/vendors/customize/op_impl/ai_core/tbe/kernel/config/ascend310b/
./packages/vendors/customize/op_impl/ai_core/tbe/kernel/config/ascend910b/
./packages/vendors/customize/op_impl/ai_core/tbe/op_tiling/lib/linux/aarch64/libcust_opmaster_rt2.0.so
./packages/vendors/customize/op_impl/ai_core/tbe/op_tiling/liboptiling.so
./packages/vendors/customize/op_proto/inc/op_proto.h
./packages/vendors/customize/op_proto/lib/linux/aarch64/libcust_opsproto_rt2.0.so
./packages/vendors/customize/version.info
./upgrade.sh
CRC: 638171488
SHA256: 0dca71b05d07e0021515d30c559c236b9d3099298d6bda3760316e710830ba6e
Skipping md5sum at user request

Self-extractable archive "custom_opp_openEuler_aarch64.run" successfully created.
Copy /home/mindspore/work/SigmoidCustom/SigmoidCustom/build_out/_CPack_Packages/Linux/External/custom_opp_openEuler_aarch64.run/custom_opp_openEuler_aarch64.run to /home/mindspore/work/SigmoidCustom/SigmoidCustom/build_out/
CPack: - package: /home/mindspore/work/SigmoidCustom/SigmoidCustom/build_out/custom_opp_openEuler_aarch64.run.json generated.
CPack: - package: /home/mindspore/work/SigmoidCustom/SigmoidCustom/build_out/custom_opp_openEuler_aarch64.run generated.
Verifying archive integrity...  100%   SHA256 checksums are OK. All good.
Uncompressing version:1.0  100%
[ops_custom] [2025-11-18 10:23:15] [WARNING] The directory /usr/local/Ascend/ascend-toolkit/latest/opp does not have sufficient permissions. Please check and modify the folder permissions (e.g., using chmod), or use the --install-path option to specify an installation path and change the environment variable ASCEND_CUSTOM_OPP_PATH to the specified path.
[ops_custom] [2025-11-18 10:23:15] [INFO] copy uninstall sh success
chmod: 正在更改 '/usr/local/Ascend/ascend-toolkit/latest/opp/vendors' 的权限: Operation not permitted
[ops_custom] [2025-11-18 10:23:15] [INFO] upgrade framework
[ops_custom] [2025-11-18 10:23:15] [INFO] create /usr/local/Ascend/ascend-toolkit/latest/opp/vendors/customize/framework.
mkdir: 无法创建目录 “/usr/local/Ascend/ascend-toolkit/latest/opp/vendors/customize”: Permission denied
[ops_custom] [2025-11-18 10:23:15] [ERROR] create /usr/local/Ascend/ascend-toolkit/latest/opp/vendors/customize/framework failed
指路软件包:
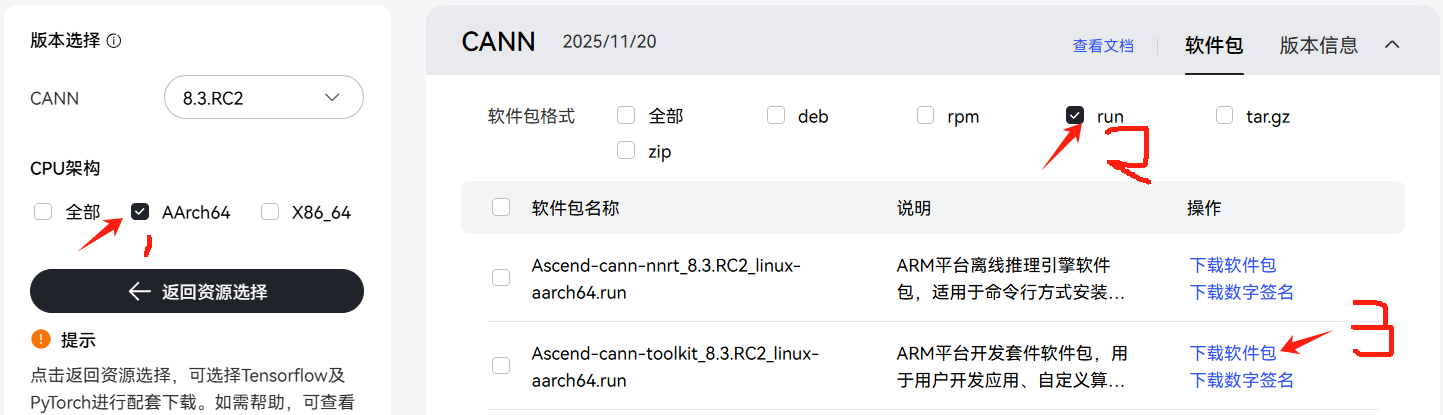
下载到本地,然后拖拽上传到你的云主机,并移动到/home/mindspore这个目录下
cp 从你上传的路径到 /home/mindspore下赋予软件包执行权限
chmod +x Ascend-cann-toolkit_8.3.RC2_linux-aarch64.run安装,期间要同意用户协议
./Ascend-cann-toolkit_8.3.RC2_linux-aarch64.run --installsource一下环境变量
source /home/mindspore/Ascend/ascend-toolkit/set_env.sh至此,你获得了一个完全拥有权限的cann
3、上传代码包并编译
拖拽上传本地写好的代码压缩包
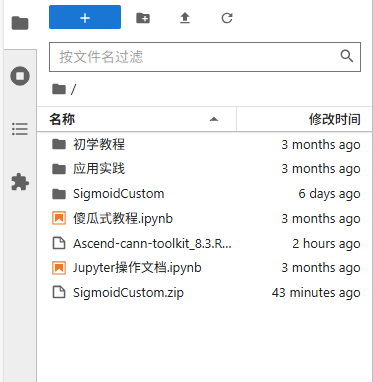
解压
unzip SigmoidCustom.zip 赋予权限
chmod +x cmake/util/gen_ops_filter.sh这一步的原因是编译会报下面这种错误,如果有相同报错的人可以看过来了
[ 71%] Built target gen_version_info
/bin/sh: line 1: ../../cmake/util/gen_ops_filter.sh: Permission denied
gmake[2]: *** [op_kernel/CMakeFiles/npu_supported_ops.dir/build.make:74:op_kernel/tbe/op_info_cfg/ai_core/npu_supported_ops.json] 错误 126
gmake[1]: *** [CMakeFiles/Makefile2:671:op_kernel/CMakeFiles/npu_supported_ops.dir/all] 错误 2
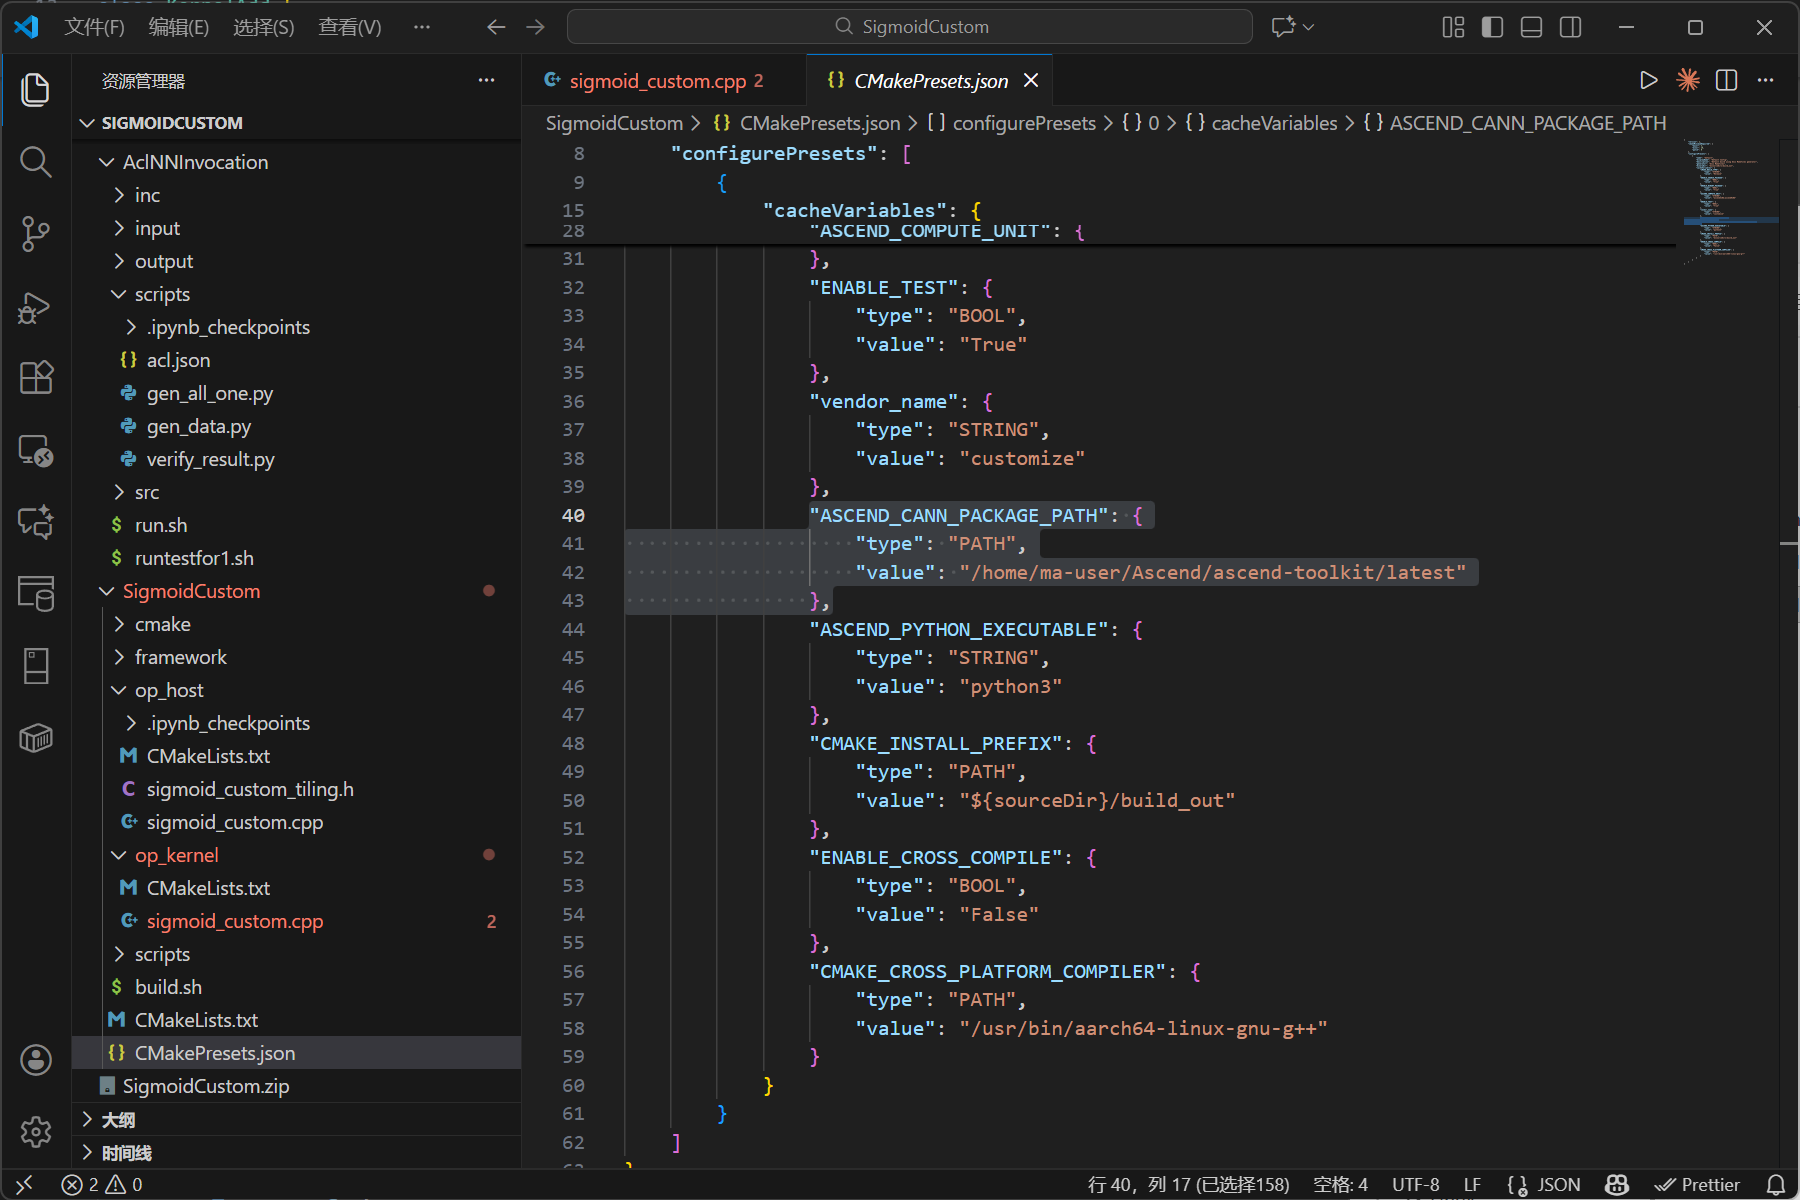
gmake[1]: *** 正在等待未完成的任务....修改配置信息
vim CMakePresets.json将ASCEND_CANN_PACKAGE_PATH修改为你的cann文件夹/home/mindspore/Ascend/ascend-toolkit/latest/大概是CMakePresets.json这个地方(注:是在云主机修改,不是本地,本地修改的话记得上传提交前要改回来 awa)
编译
bash build.sh4、运行与测试
回到acl端根据考试要求进行测试
cd ../../AclNNInvocation/
bash run.sh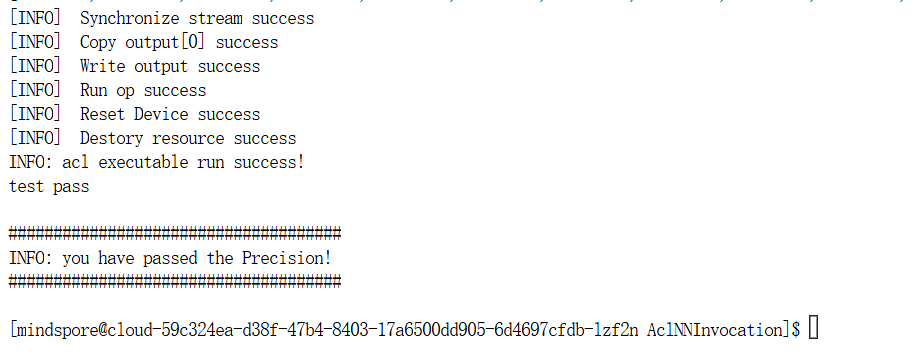
通过后上交也通过
至此流程结束!
5、详细代码
我看到网上有的人是sin的,但我的考题是实现sigmoid函数,这里只给出sigmoid_custom.cpp的代码,其他部分和案例没有什么区别大家多看看案例就好
#include "kernel_operator.h"
using namespace AscendC;
constexpr int32_t BUFFER_NUM = 2;
class KernelSigmoid {
public:
    __aicore__ inline KernelSigmoid() {}
    __aicore__ inline void Init(GM_ADDR x, GM_ADDR y, uint32_t totalLength, uint32_t tileNum)
    {
        //考生补充初始化代码
        ASSERT(GetBlockNum() != 0 && "block dim can not be zero!");
        ASSERT(tileNum != 0 && "tile num can not be zero!");
        this->blockLength = totalLength / GetBlockNum();
        this->tileNum = tileNum;
        this->tileLength = this->blockLength / tileNum / BUFFER_NUM;
        xGm.SetGlobalBuffer((__gm__ DTYPE_X *)x + this->blockLength * GetBlockIdx(), this->blockLength);
        yGm.SetGlobalBuffer((__gm__ DTYPE_Y *)y + this->blockLength * GetBlockIdx(), this->blockLength);

        pipe.InitBuffer(inQueueX, BUFFER_NUM, this->tileLength * sizeof(DTYPE_X));
        pipe.InitBuffer(outQueueY, BUFFER_NUM, this->tileLength * sizeof(DTYPE_Y));

        pipe.InitBuffer(tmpBuffer1, this->tileLength * sizeof(DTYPE_X));
        pipe.InitBuffer(tmpBuffer2, this->tileLength * sizeof(DTYPE_X));
        pipe.InitBuffer(tmpBuffer3, this->tileLength * sizeof(DTYPE_X));
        pipe.InitBuffer(tmpBuffer4, this->tileLength * sizeof(DTYPE_X));

    }
    __aicore__ inline void Process()
    {
        int32_t loopCount = this->tileNum * BUFFER_NUM;
        //考生补充对“loopCount”的定义,注意对Tiling的处理
        for (int32_t i = 0; i < loopCount; i++) {
            CopyIn(i);
            Compute(i);
            CopyOut(i);
        }
    }

private:

    __aicore__ inline void HighPrecisionReciprocal(LocalTensor<DTYPE_X>& yLocal, const LocalTensor<DTYPE_X>& tmpTensor3, int32_t length, int iterations)
    {
        LocalTensor<DTYPE_X> tmpTensor4 = tmpBuffer4.Get<DTYPE_X>();
        AscendC::Reciprocal(yLocal, tmpTensor3, length);
        DTYPE_X two = static_cast<DTYPE_X>(2.0);
        DTYPE_X negone = static_cast<DTYPE_X>(-1.0);
        //a = 1 + exp(-x),x_n ≈ 1/a,x_{n+1}:第n+1次迭代得到的更精确的倒数近似值
        // 牛顿迭代法提高精度 x_{n+1} = x_n * (2 - a * x_n)
        for(int i = 0; i < iterations; i++){
            AscendC::Mul(tmpTensor4, tmpTensor3, yLocal, length);//a * x_n
            AscendC::Muls(tmpTensor4, tmpTensor4, negone, length);//- a * x_n
            AscendC::Adds(tmpTensor4, tmpTensor4, two, length);//2 - a * x_n
            AscendC::Mul(yLocal, yLocal, tmpTensor4, length);//x_n * (2 - a * x_n)
        }

    }
    __aicore__ inline void CopyIn(int32_t progress)
    {
        //考生补充算子代码
        LocalTensor<DTYPE_X> xLocal = inQueueX.AllocTensor<DTYPE_X>();
        DataCopy(xLocal, xGm[progress * this->tileLength], this->tileLength);
        inQueueX.EnQue(xLocal);
    }
    __aicore__ inline void Compute(int32_t progress)
    {
        //考生补充算子计算代码
        LocalTensor<DTYPE_X> xLocal = inQueueX.DeQue<DTYPE_X>();
        LocalTensor<DTYPE_Y> yLocal = outQueueY.AllocTensor<DTYPE_Y>();
        LocalTensor<DTYPE_X> tmpTensor1 = tmpBuffer1.Get<DTYPE_X>();
        LocalTensor<DTYPE_X> tmpTensor2 = tmpBuffer2.Get<DTYPE_X>();
        LocalTensor<DTYPE_X> tmpTensor3 = tmpBuffer3.Get<DTYPE_X>();

        // sigmoid(x) = 1/(1 + exp(-x))
        DTYPE_X inputVal1 = -1;
        DTYPE_X inputVal2 = 1;
        AscendC::Muls(tmpTensor1, xLocal, inputVal1, this->tileLength);//-x
        // DumpTensor(tmpTensor1,1,12);
        AscendC::Exp(tmpTensor2, tmpTensor1, this->tileLength);//exp(-x)
        // DumpTensor(tmpTensor2,2,12);
        AscendC::Adds(tmpTensor3, tmpTensor2, inputVal2, this->tileLength);//(1 + exp(-x))
        // DumpTensor(tmpTensor3,3,12);
        // Reciprocal(yLocal, tmpTensor3, this->tileLength);//1/(1 + exp(-x))
        HighPrecisionReciprocal(yLocal,tmpTensor3,this->tileLength,2);
        // DumpTensor(yLocal,4,12);
        outQueueY.EnQue<DTYPE_Y>(yLocal);
        inQueueX.FreeTensor(xLocal);


    }
    __aicore__ inline void CopyOut(int32_t progress)
    {
        //考生补充算子代码
        LocalTensor<DTYPE_Y> yLocal = outQueueY.DeQue<DTYPE_Y>();
        DataCopy(yGm[progress * this->tileLength], yLocal, this->tileLength);
        outQueueY.FreeTensor(yLocal);
    }

private:
    TPipe pipe;
    //create queue for input, in this case depth is equal to buffer num
    TQue<QuePosition::VECIN, BUFFER_NUM> inQueueX;
    //create queue for output, in this case depth is equal to buffer num
    TQue<QuePosition::VECOUT, BUFFER_NUM> outQueueY;
    GlobalTensor<half> xGm;
    GlobalTensor<half> yGm;

    //考生补充自定义成员变量
    TBuf<QuePosition::VECCALC> tmpBuffer1, tmpBuffer2, tmpBuffer3, tmpBuffer4;
    uint32_t blockLength;
    uint32_t tileNum;
    uint32_t tileLength;

};
extern "C" __global__ __aicore__ void sigmoid_custom(GM_ADDR x, GM_ADDR y, GM_ADDR workspace, GM_ADDR tiling) {
    GET_TILING_DATA(tiling_data, tiling);
    KernelSigmoid op;
    //补充init和process函数调用内容
    op.Init(x, y, tiling_data.totalLength, tiling_data.tileNum);
    op.Process();
}
6、实践心得
6.1逻辑正确但是无法通过测试——可能是精度不够
我一开始想的是:第一步Muls(标量和张量)实现-x——>第二步Exp实现exp(-x)——>第三步Adds(标量和张量)实现(1 + exp(-x))——>第四步Reciproca实现1/(1 + exp(-x))逻辑正确但是无法通过测试,dumptensor打出来后发现确实不同,上网查阅文档中发现文档确实有说Reciproca的精度约束
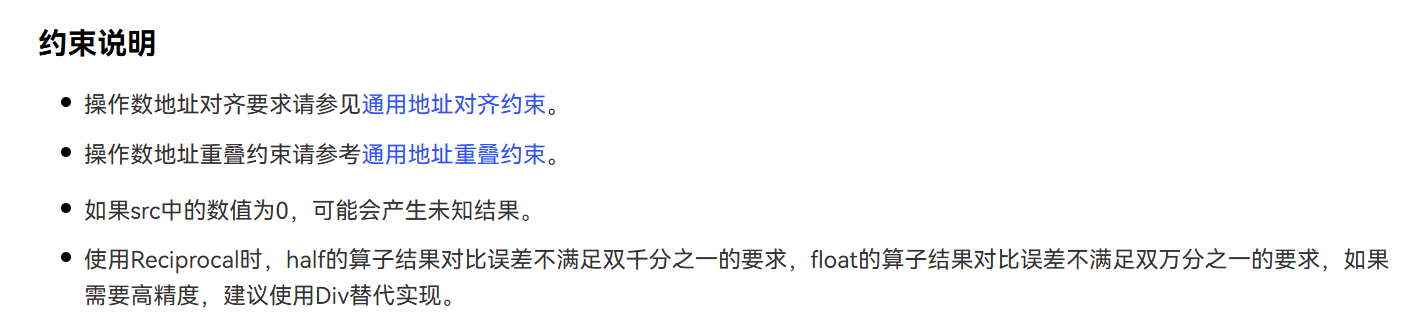
后面是参考了这个博主的方法使用了牛顿迭代x_{n+1} = x_n * (2 - a * x_n),大家也可以试试这个约束中说的用Div实现华为Ascend C算子开发能力认证(中级)_ascend c算子开发能力认证(中级)-CSDN博客
理论指路:
(99+ 封私信 / 81 条消息) 数值方法求解非线性方程——牛顿迭代法 - 知乎
6.2参数顺序不能随便写
我在实验的时候用Muls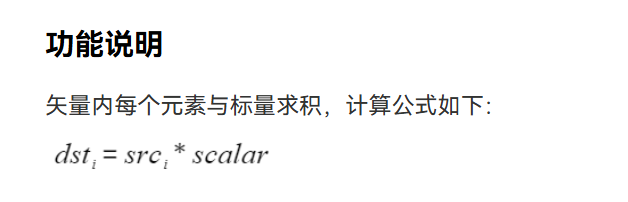
方法时,原本是参数序列是(dst,src,scalar,count),我错以为这两个操作数跟指令一样两个源操作数顺序无所谓所以写成了(dst,scalar,src,count),结果报错
/home/mindspore/work/SigmoidCustom/SigmoidCustom/build_out/op_kernel/binary/ascend910b/src/sigmoid_custom.cpp:49:13: error: no matching function for call to 'Muls'
            Muls(tmpTensor4, negone, tmpTensor4, length);//- a * x_n
            ^~~~
/home/mindspore/Ascend/ascend-toolki
[ERROR] TBE(157389,python3):2025-11-24-01:44:10.569.255 [op_compilation.py:324][__single_op_compile] Exception occured, An error occurred during compile phases of CompileStage.INFERCHANNEL, msg is /home/mindspore/work/SigmoidCustom/SigmoidCustom/build_out/op_kernel/binary/ascend910b/src/sigmoid_custom.cpp:24:25: error: use of undeclared identifier 'tmpBuffer4'
        pipe.InitBuffer(tmpBuffer4, this->tileLength * sizeof(DTYPE_X));
                        ^
/home/mindspore/work/SigmoidCustom/SigmoidCustom/build_out/op_kernel/binary/ascend910b/src/sigmoid_custom.cpp:42:43: error: use of undeclared identifier 'tmpBuffer4'
        LocalTensor<DTYPE_X> tmpTensor4 = tmpBuffer4.Get<DTYPE_X>();
大致意思是找不到匹配的方法,也有什么Muls函数需要6个参数,但代码中只提供了4个参数什么的,这个时候检查源代码方法的参数顺序,改完就好了
6.3学会查看日志以及调试
我在运行时大概遇到了什么同步流失败的鬼情况
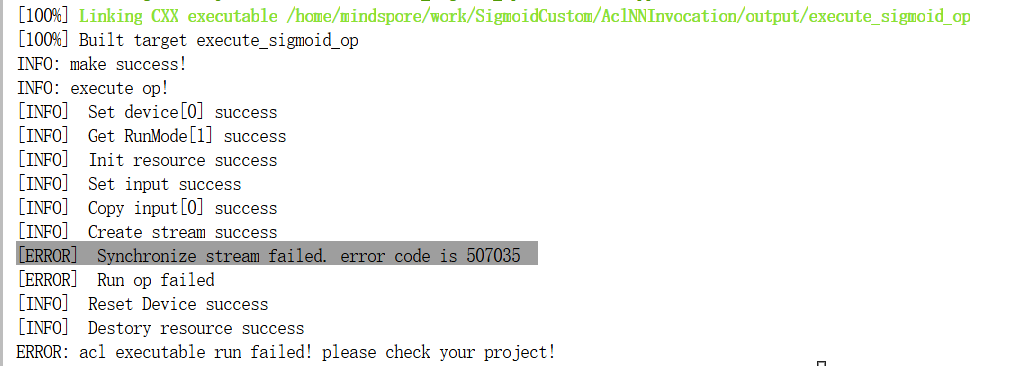
师兄(膜拜万能的师兄orz)查看了我home/mindspore/ascend/log/debug/plog这个路径下的日志后又查看了代码指出了问题——在compute里忘记FreeTensor了,后续师兄还告诉了调试的两个技巧,一个是把测试数据全1查看逻辑上有没有问题,另一个是通过DumpTensor、printf打印进行输出查看调试,我后续还发现了msdebug这个算子调试工具,因为临近期末,暂时还没有去研究,后续会去研究一下。
下面是笔者自己的随笔,供笔者日后回顾,大家不用看了。
//上传Ascend-cann-toolkit_8.3.RC2_linux-aarch64.run
//cp到/home/mindspore
//chmod +x Ascend-cann-toolkit_8.3.RC2_linux-aarch64.run
// ./Ascend-cann-toolkit_8.3.RC2_linux-aarch64.run --install
//source环境变量source /home/mindspore/Ascend/ascend-toolkit/set_env.sh

//chmod +x cmake/util/gen_ops_filter.sh
//vim CMakePresets.json  cmakelist文件中修改/home/mindspore/Ascend/ascend-toolkit/latest/      "ASCEND_CANN_PACKAGE_PATH": {"type": "PATH" "value": "/home/mindspore/Ascend/ascend-toolkit/latest/"}  TODO:提交前修改回来
//bash build.sh

//cd build_out/
//build_out文件夹里./custom_opp_openEuler_aarch64.run
//cd ../../AclNNInvocation/
//AclNNInvocation文件夹里bash run.sh


//cd ~/work
// 数据精度问题
//方法参数顺序不能颠倒
// //home/mindspore/ascend/log/debug/plog
有“AI”的1024 = 2048,欢迎大家加入2048 AI社区
更多推荐
 20
20 0
0- 0


 已为社区贡献1条内容

所有评论(0)