LMDeploy 量化部署书生大模型实践
由于 LMDeploy 的两个推理后端在量化支持上存在结构性差异,三种量化场景无法在同一后端下进行真实横向对比:PyTorchEngine 只支持 AWQ 权重量化,不支持 KV Cache 量化;导致场景 1/3(使用 AWQ)只能在 PyTorchEngine 运行,而场景 2(使用 KV 量化)只能在 TurboMind 运行。因此,理论上描述的三种量化策略无法在统一条件下获得可比的实测结果
任务来源:https://aicarrier.feishu.cn/wiki/ZrbowJQhDifIrKkvj9xc5FjYnnf
闯关任务:实践过程中的全部笔记与运行结果截图
本课程以 LMDeploy 为核心,带你完成大模型从 环境搭建 → 推理服务 → OpenAI 接口化 → 模型量化 → 并发优化 的完整部署链路。
课程重点掌握三项核心能力:
-
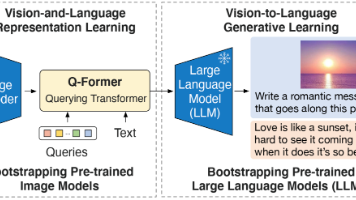
多模态任务推理:构建支持图文输入的 API 服务
-
显存优化:通过 INT4 权重量化 让大模型在有限显存设备上运行
-
高并发处理:借助 批处理(batch)+ KV Cache 量化 提升吞吐能力
1.环境安装
创建开发机时选择镜像:
-
Cuda 12.8-conda
-
30% A100 GPU(文章部分需要高显卡要求时,直接切换100%A100进行效果演示)
安装依赖:
conda create -n lmdeploy2 python=3.10 -y
conda activate lmdeploy2
pip install lmdeploy openai datasets jmespath
2.快速开始
from lmdeploy import pipeline, PytorchEngineConfig
from lmdeploy.vl import load_image

def main():
    # 初始化pipeline
    pipe = pipeline("/root/share/new_models/Intern-S1-mini",
                    backend_config=PytorchEngineConfig(
                        max_batch_size=32,
                        enable_prefix_caching=True,
                        cache_max_entry_count=0.1,
                        session_len=4096,
                    ))

    print("✅ Pipeline初始化成功!")

    # 测试推理
    image_path = "https://pic1.imgdb.cn/item/68d20846c5157e1a8828f9bf.jpg"  # 替换为实际图片路径
    prompt = "请描述这张图片的内容"

    response = pipe([(prompt, load_image(image_path))])
    print("回复:", response[0].text)

    return pipe

if __name__ == '__main__':
    pipe = main()
python intern-s1-mini.py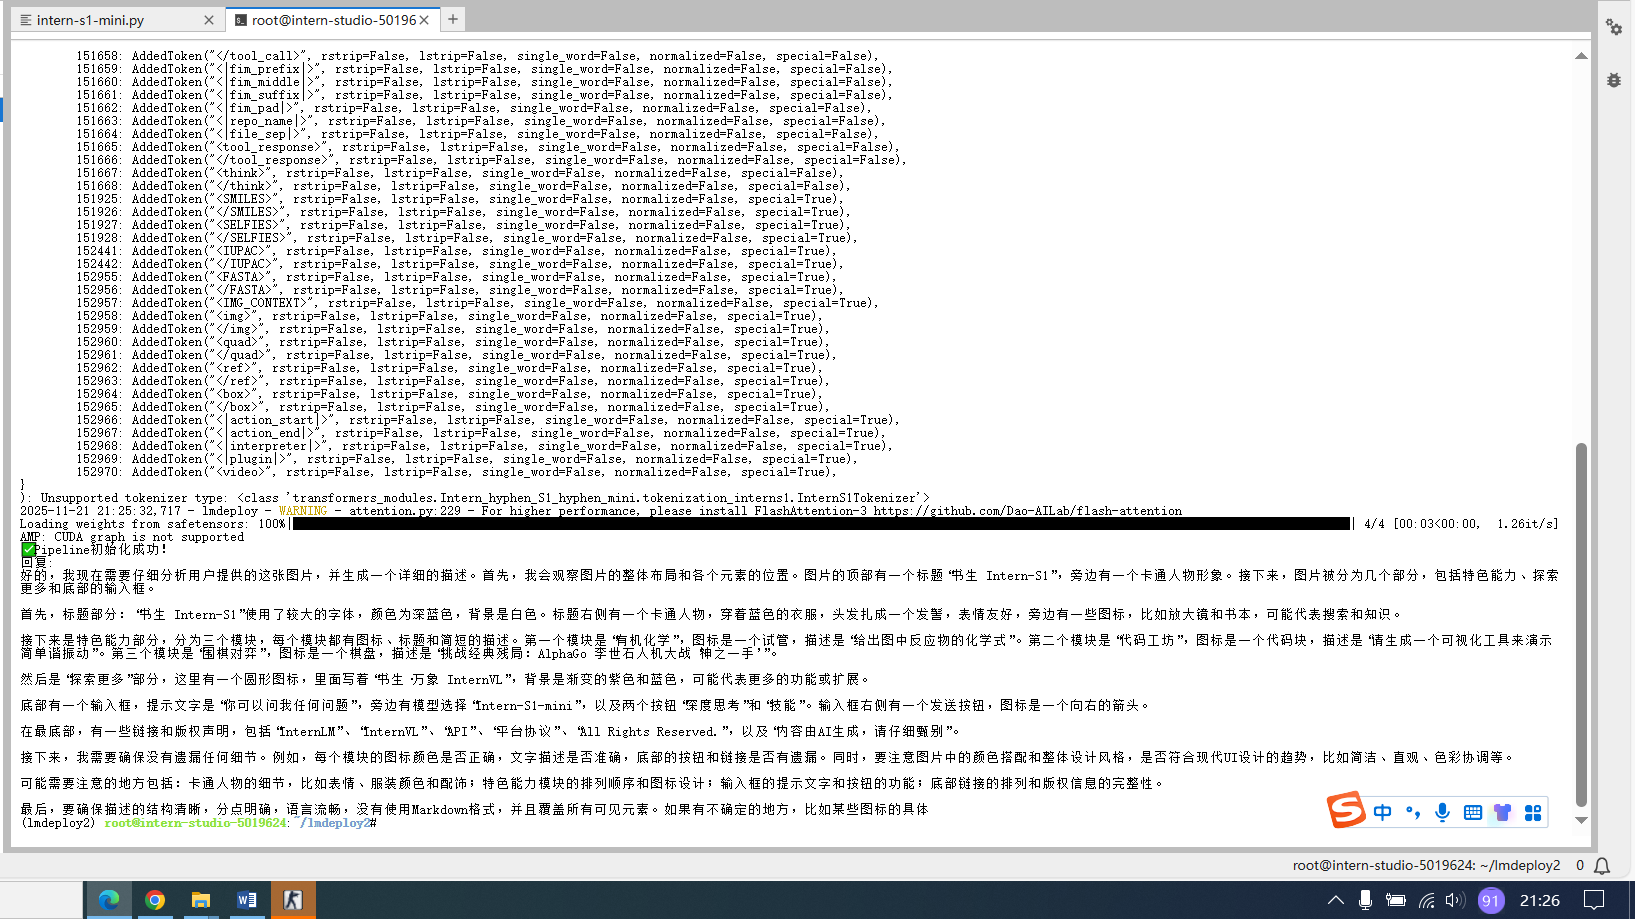
2.1高并发请求
from lmdeploy import pipeline, PytorchEngineConfig
from lmdeploy.vl import load_image
import time

def main():
    # 初始化pipeline - 设置批量处理能力
    pipe = pipeline("/root/share/new_models/Intern-S1-mini",
                    backend_config=PytorchEngineConfig(
                        max_batch_size=32,  # 一次能处理32个请求
                        enable_prefix_caching=True,
                        cache_max_entry_count=0.1,
                        session_len=4096,
                    ))

    print("✅ Pipeline初始化成功!")
    print("🚀 模拟多个用户同时请求...")

    # 准备多个不同的图片和问题(模拟多个用户)
    requests = [
        ("描述这张图片的主要内容", "https://pic1.imgdb.cn/item/68d20846c5157e1a8828f9bf.jpg"),
        ("图片里有什么颜色?", "https://pic1.imgdb.cn/item/68d20846c5157e1a8828f9bf.jpg"),
        ("这张图片让你想到什么?", "https://pic1.imgdb.cn/item/68d20846c5157e1a8828f9bf.jpg"),
        ("分析图片的构图", "https://pic1.imgdb.cn/item/68d20846c5157e1a8828f9bf.jpg"),
        ("图片中有文字吗?", "https://pic1.imgdb.cn/item/68d20846c5157e1a8828f9bf.jpg")
    ]

    # 方法1:一次性批量发送所有请求(就像快餐店一次接多个订单)
    print("\n📦 方法1:批量处理(一次发送所有请求)")
    batch_inputs = []
    for prompt, img_path in requests:
        batch_inputs.append((prompt, load_image(img_path)))

    start_time = time.time()
    batch_responses = pipe(batch_inputs)  # 一次处理所有请求
    end_time = time.time()

    for i, response in enumerate(batch_responses):
        print(f"用户{i+1} 问: {requests[i][0]}")
        print(f"AI回复: {response.text[:50]}...")  # 只显示前50个字
        print("---")

    print(f"✅ 批量处理耗时: {end_time - start_time:.2f}秒")

    # 方法2:逐个发送请求(对比效果)
    print("\n🐌 方法2:逐个处理(一个一个来)")
    start_time = time.time()
    for prompt, img_path in requests:
        single_response = pipe([(prompt, load_image(img_path))])
        print(f"单个回复: {single_response[0].text[:30]}...")
    end_time = time.time()
    print(f"⏱️  逐个处理耗时: {end_time - start_time:.2f}秒")

    return pipe

if __name__ == '__main__':
    pipe = main()
python intern-s1-mini-batch.py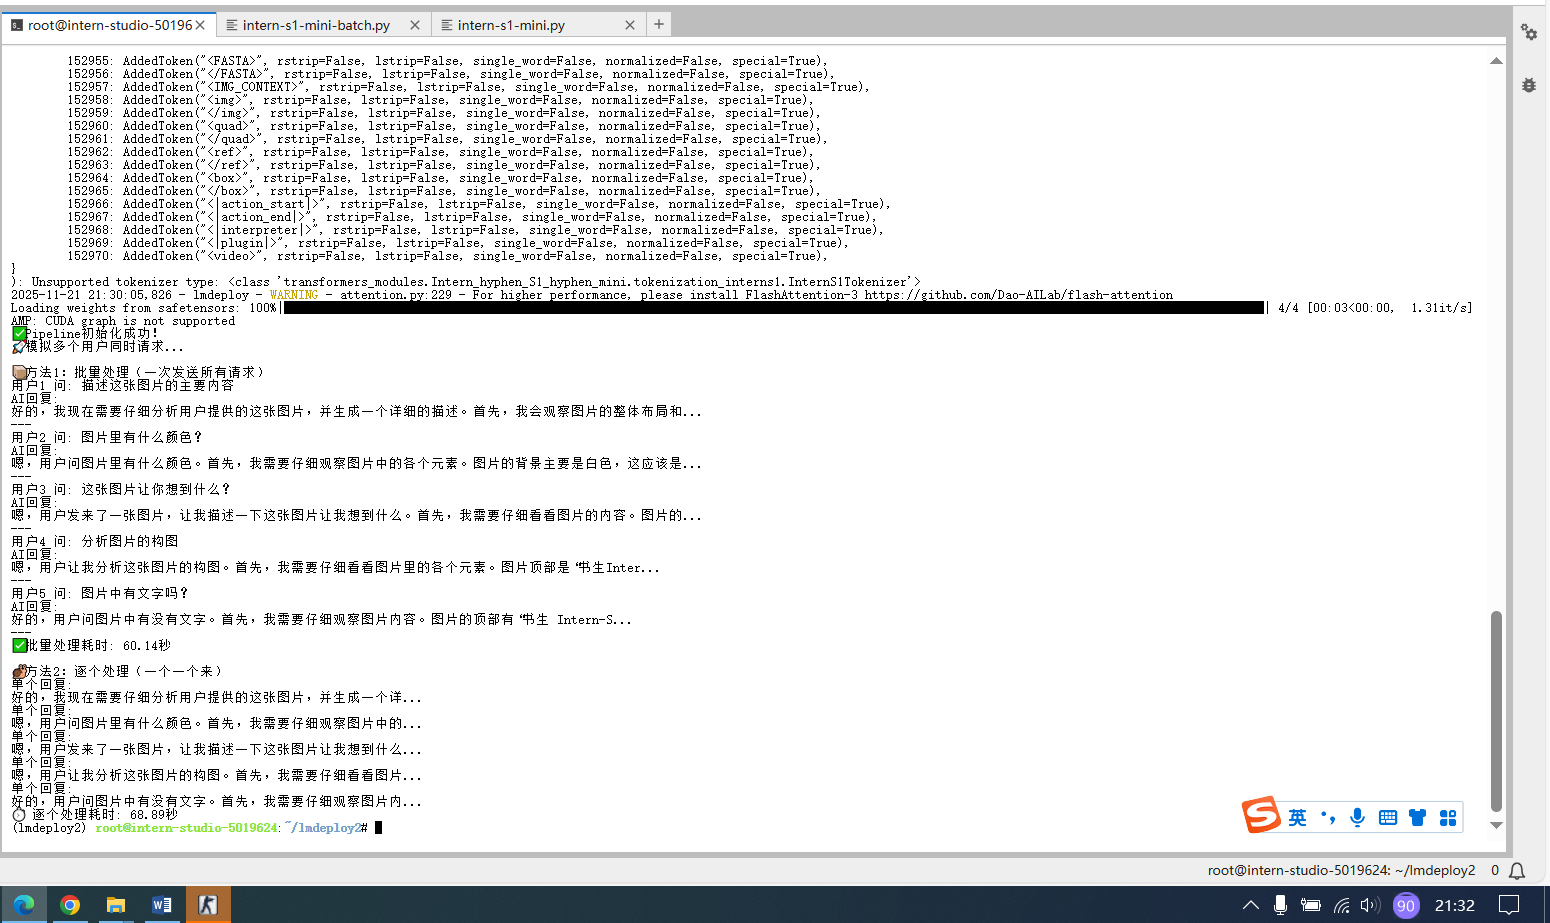
3.模型服务
lmdeploy serve api_server /root/share/new_models/Intern-S1-mini \
  --model-format hf \
  --quant-policy 0 \
  --cache-max-entry-count 0.1 \
  --server-name 0.0.0.0 \
  --server-port 23333 \
  --tp 1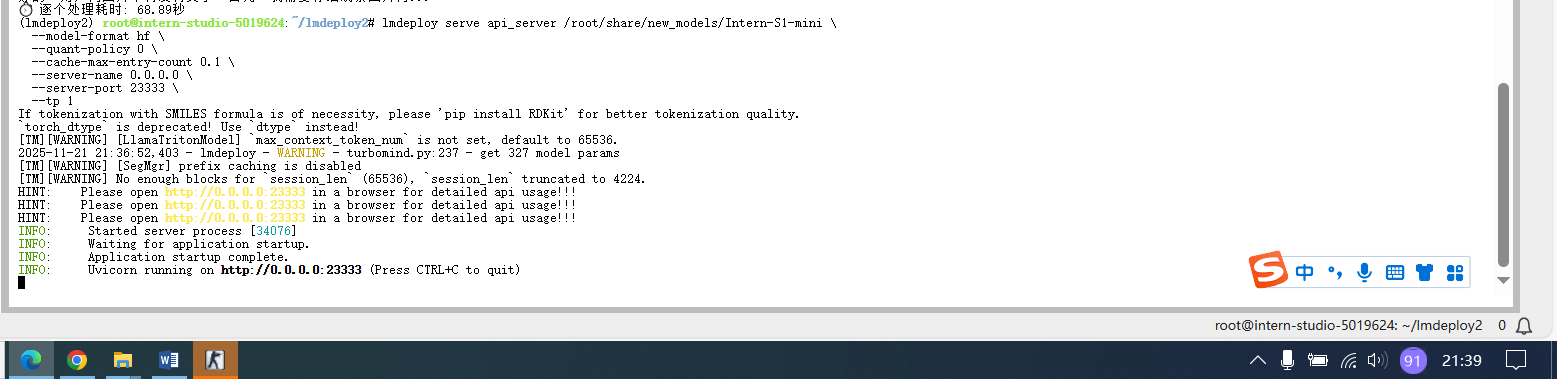
from openai import OpenAI

client = OpenAI(api_key='YOUR_API_KEY', # A dummy api_key is required
                base_url='http://0.0.0.0:23333/v1')
model_name = client.models.list().data[0].id
response = client.chat.completions.create(
    model=model_name,
    messages=[{
        'role':
        'user',
        'content': [{
            'type': 'text',
            'text': 'Describe the image please',
        }, {
            'type': 'image_url',
            'image_url': {
                'url':
                'https://raw.githubusercontent.com/open-mmlab/mmdeploy/main/tests/data/tiger.jpeg',
            },
        }],
    }],
    temperature=0.8,
    top_p=0.8)
print(response)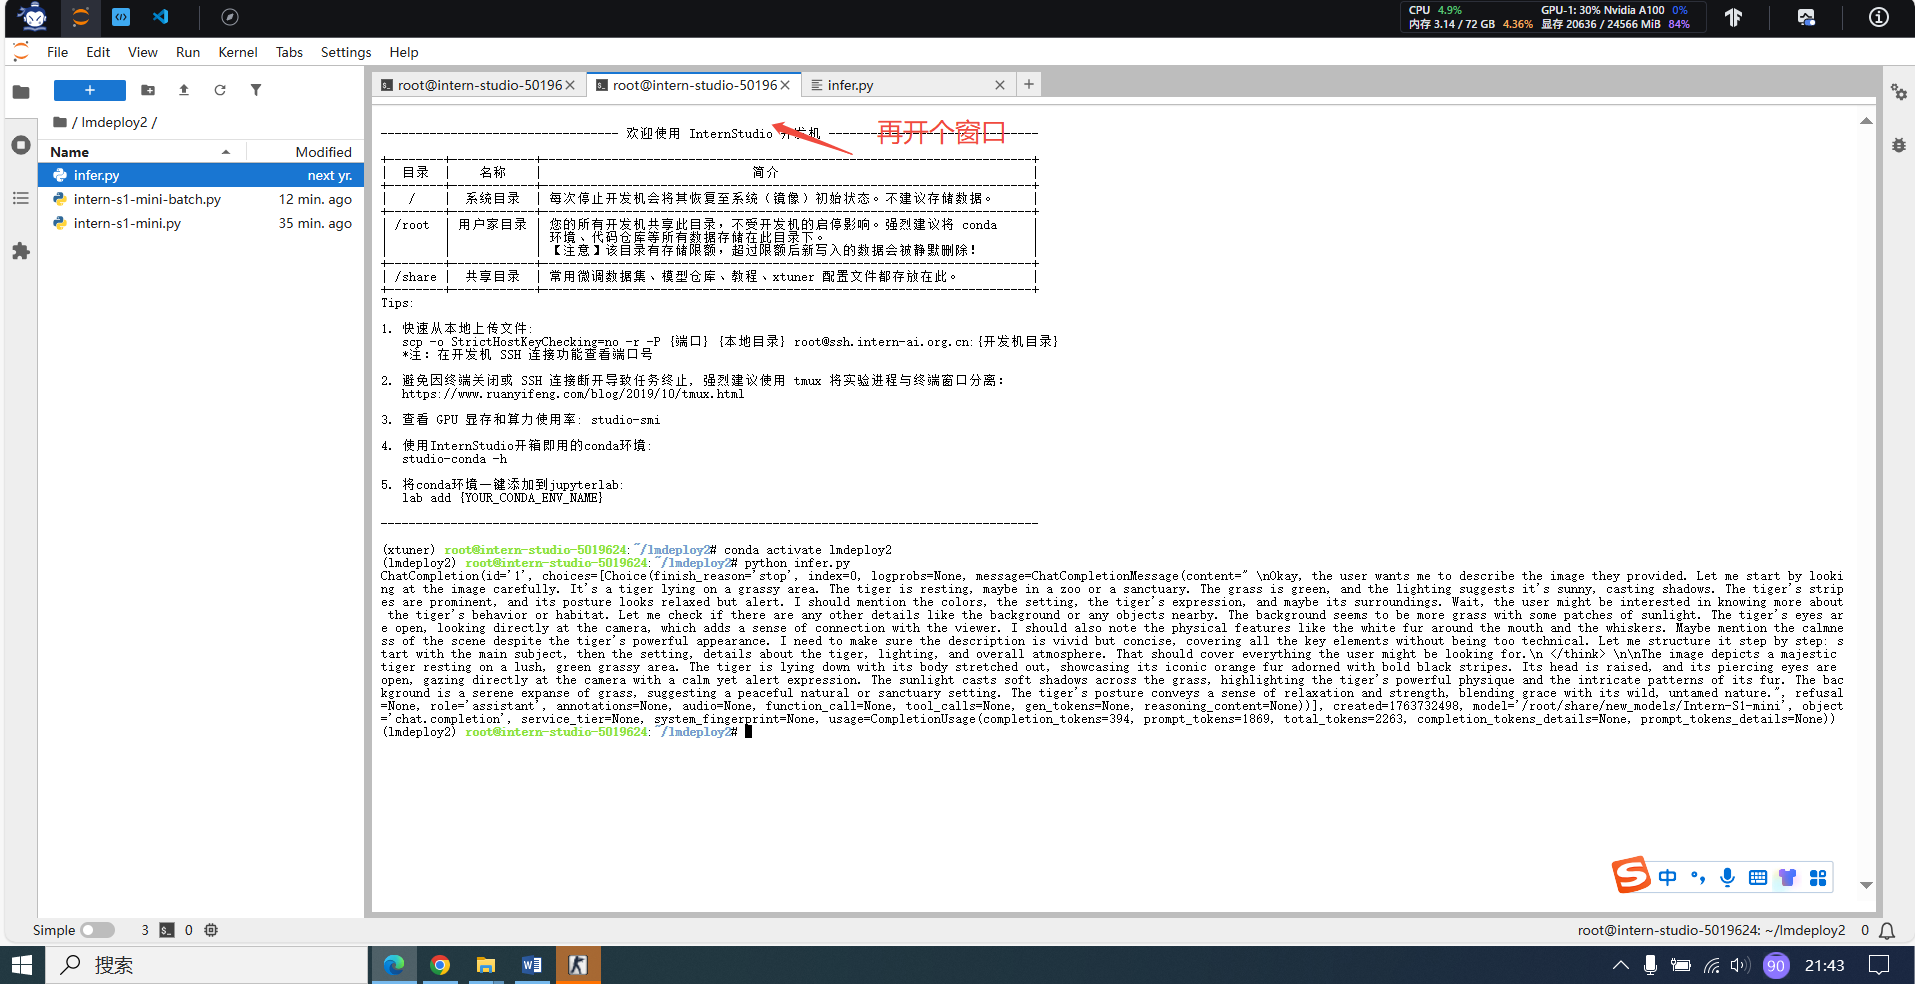
4.模型量化
lmdeploy serve api_server /root/share/model_repos/internlm2-7b 显卡充足可以直接启动,这里使用100%A100演示
4.1INT4模型量化和部署(权重量化)
4.1.1执行模型量化
lmdeploy lite auto_awq /root/share/model_repos/internlm2-7b --work-dir /root/internlm2-7b-4bit4.1.2部署量化模型
lmdeploy serve api_server /root/internlm2-7b-4bit 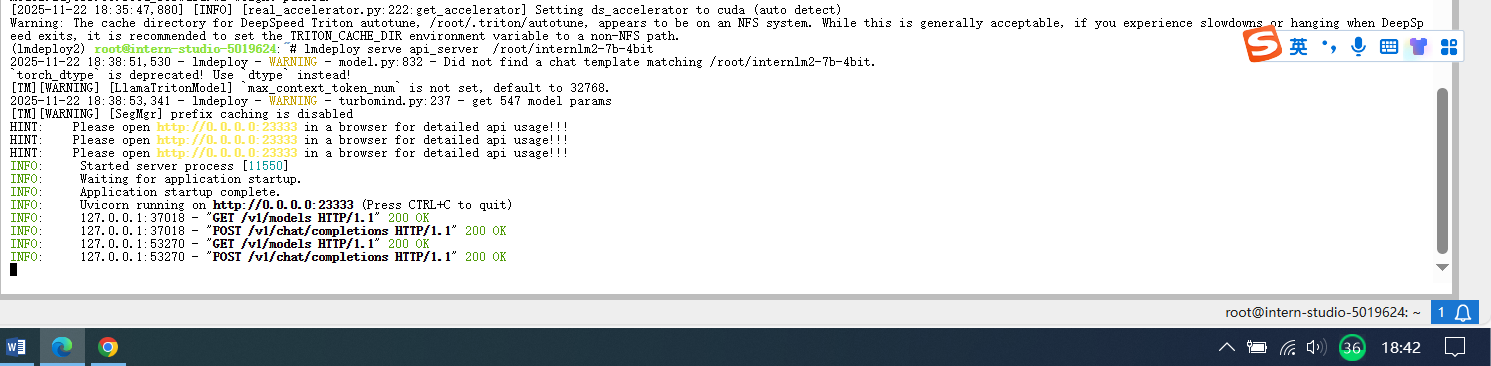
from openai import OpenAI

client = OpenAI(api_key='YOUR_API_KEY',  # A dummy api_key is required
                base_url='http://0.0.0.0:23333/v1')
model_name = client.models.list().data[0].id
response = client.chat.completions.create(
    model=model_name,
    messages=[{
        'role': 'user',
        'content': [{
            'type': 'text',
            'text': "上海有什么?"  # 这里将外层单引号改为双引号
        }],
    }],
    temperature=0.8,
    top_p=0.8,
    max_tokens=100)
print(response)
4.2 KV Cache模型量化(提高并发能力)
-
权重量化(INT4):让模型“变瘦”→ 节省显存
-
KV 量化(INT4/INT8):让“座位”变多 → 同时服务更多用户
4.2.1量化对比
import torch
from lmdeploy import pipeline, GenerationConfig, PytorchEngineConfig

def test_inference(pipe, prompt="上海有什么著名景点?", max_new_tokens=50):
    try:
        gen_config = GenerationConfig(max_new_tokens=max_new_tokens, temperature=0.7, top_p=0.8)
        response = pipe(prompt, gen_config=gen_config)
        text = getattr(response, 'text', str(response))
        print(f"✅ 输出: {text[:120]}{'...' if len(text) > 120 else ''}")
        return True
    except Exception as e:
        print(f"❌ 推理失败: {e}")
        return False

def safe_cleanup(pipe):
    del pipe
    torch.cuda.empty_cache()
    torch.cuda.synchronize()

def compare_quantization_effects():
    prompt = "上海有什么著名景点?"

    print("=" * 70)
    print("🔍 量化效果对比实验(场景2为原始模型 baseline)")
    print("=" * 70)

    # === 场景1:Weight INT4 + KV FP16 ===
    print("\n🔵 场景1: Weight INT4 + KV FP16 (quant_policy=0)")
    try:
        pipe1 = pipeline(
            "/root/internlm2-7b-4bit",
            backend_config=PytorchEngineConfig(
                model_format='awq',
                quant_policy=0,
                max_batch_size=1,
                session_len=1024
            )
        )
        test_inference(pipe1, prompt)
        safe_cleanup(pipe1)
    except Exception as e:
        print(f"⚠️ 场景1失败: {e}")

    # === 场景2:原始 FP16 模型(作为 baseline,无法启用 KV 量化)===
    print("\n🟢 场景2: 原始 FP16 模型(baseline,KV 量化在 LMDeploy 中不支持)")
    try:
        pipe2 = pipeline(
            "/root/share/model_repos/internlm2-7b",
            backend_config=PytorchEngineConfig(
                model_format='hf',
                quant_policy=0,  # 注意:这里必须是 0,否则会报错
                max_batch_size=1,
                session_len=1024
            )
        )
        test_inference(pipe2, prompt)
        safe_cleanup(pipe2)
    except Exception as e:
        print(f"⚠️ 场景2失败(原始模型可能显存不足): {e}")

    # === 场景3:Weight INT4 + KV INT4 ===
    print("\n🚀 场景3: Weight INT4 + KV INT4 (quant_policy=4)")
    try:
        pipe3 = pipeline(
            "/root/internlm2-7b-4bit",
            backend_config=PytorchEngineConfig(
                model_format='awq',
                quant_policy=4,
                max_batch_size=1,
                session_len=1024,
                cache_max_entry_count=0.6
            )
        )
        test_inference(pipe3, prompt)
        safe_cleanup(pipe3)
    except Exception as e:
        print(f"⚠️ 场景3失败: {e}")

    print("\n" + "=" * 70)
    print("✅ 实验完成!")
    print("   • 场景1 & 3:AWQ 量化模型,支持 KV 量化")
    print("   • 场景2:原始模型,仅作性能/质量 baseline(无 KV 量化)")
    print("=" * 70)

if __name__ == "__main__":
    compare_quantization_effects()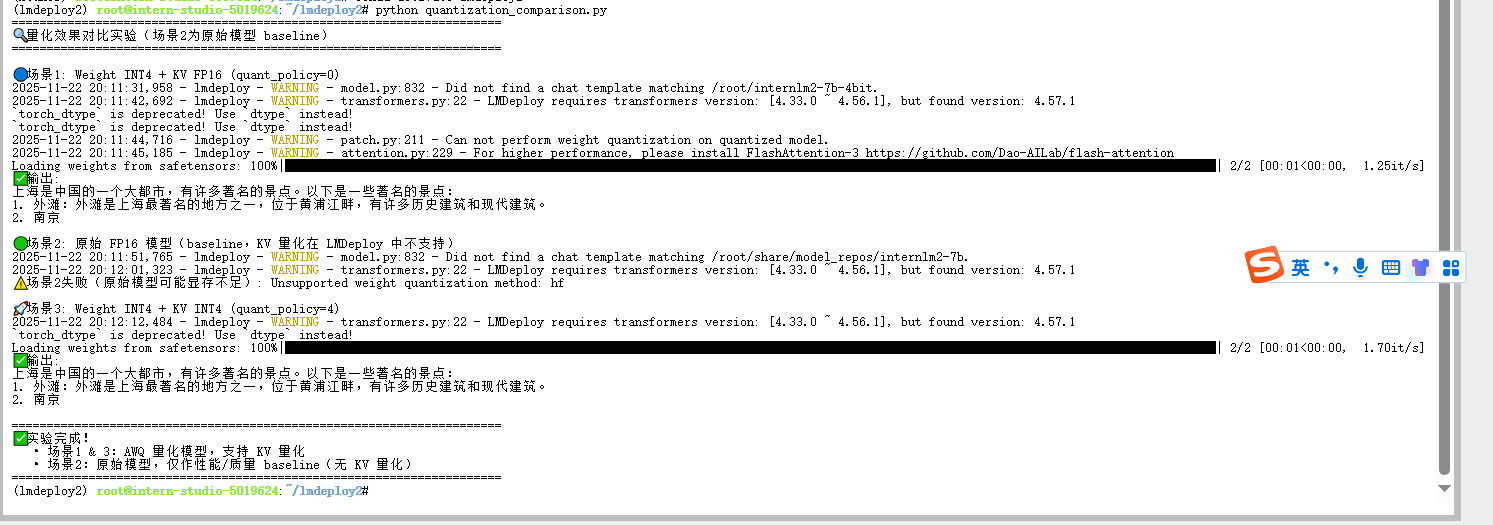
import torch
from lmdeploy import pipeline, TurbomindEngineConfig
def test_inference(pipe, prompt="上海有什么著名景点?", max_new_tokens=80):
try:
response = pipe(
prompt,
top_p=0.8,
temperature=0.7,
max_new_tokens=max_new_tokens
)
print("\n✅ 推理输出:")
print(response.text)
except Exception as e:
print(f"❌ 推理失败: {e}")
def main():
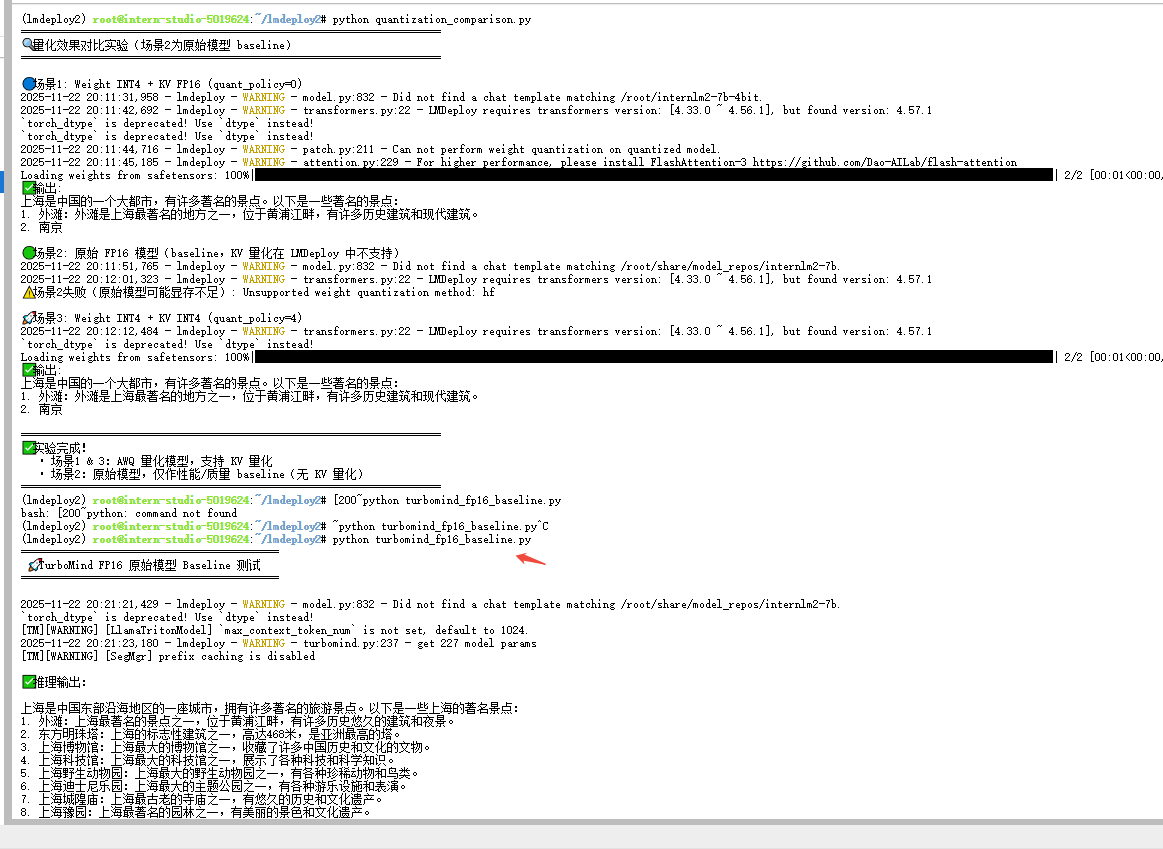
print("===========================================")
print(" 🚀 TurboMind FP16 原始模型 Baseline 测试 ")
print("===========================================\n")
try:
pipe = pipeline(
"/root/share/model_repos/internlm2-7b",
backend_config=TurbomindEngineConfig(
model_name="internlm2",
session_len=1024,
tp=1
)
)
test_inference(pipe, "上海有什么著名景点?")
except Exception as e:
print(f"❌ 模型加载失败: {e}")
if __name__ == "__main__":
main()
其他说明,下面属于作者的思考未必准确,供参考。
由于 LMDeploy 的两个推理后端在量化支持上存在结构性差异,三种量化场景无法在同一后端下进行真实横向对比:PyTorchEngine 只支持 AWQ 权重量化,不支持 KV Cache 量化;TurboMind 则只支持 KV 量化,不支持 AWQ 权重量化。导致场景 1/3(使用 AWQ)只能在 PyTorchEngine 运行,而场景 2(使用 KV 量化)只能在 TurboMind 运行。因此,理论上描述的三种量化策略无法在统一条件下获得可比的实测结果,实际对比只能分别体现两个后端的能力差异,而非量化策略本身的公平对照。
具体分析如下:
| 场景 | 量化方式 | 模型文件 | 需要的量化特性 | PyTorchEngine 支持情况 | TurboMind 支持情况 | 能否运行 | 说明 |
|---|
| 场景 1 | 仅权重量化(AWQ INT4) | 已量化 AWQ 模型 | Weight INT4 | ✔️ 支持(可正常加载与推理) | ❌ 不支持 AWQ 模型 | ✔️ 只能在 PyTorchEngine 跑 | TurboMind 不支持加载 AWQ 权重量化权重 |
| 场景 2 | 仅 KV Cache 量化(INT4/INT8) | 原始 FP16 模型 | KV Cache INT4/8 | ❌ 不支持 KV 量化 | ✔️ 支持 KV INT4/8 | ✔️ 只能在 TurboMind 跑 | PyTorchEngine 完全不支持 KV 量化 |
| 场景 3 | 权重量化 + KV 量化(AWQ + KV INT4/8) | AWQ 量化模型 | Weight INT4 + KV INT4/8 | ✔️ 仅支持 AWQ,不支持 KV | ❌ 不支持 AWQ | ✔️ 只能在 PyTorchEngine 跑(但无 KV) | 两者特性互斥,无法完整启用双重量化 |
4.2.2量化最佳实践
lmdeploy serve api_server /root/internlm2-7b-4bit --quant-policy 8 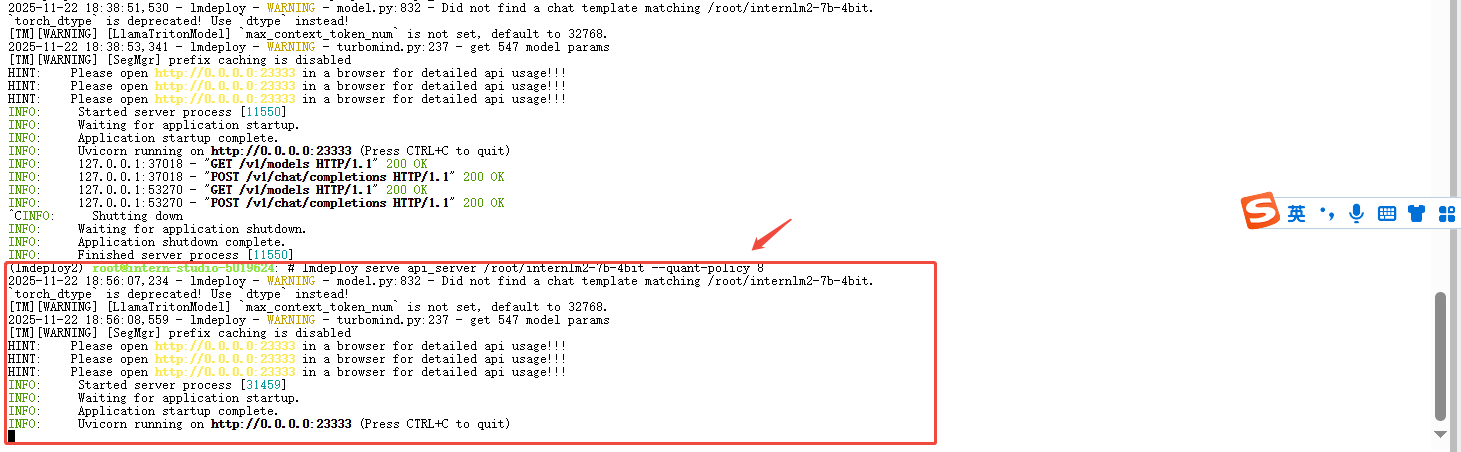

有“AI”的1024 = 2048,欢迎大家加入2048 AI社区
更多推荐
 5
5 0
0- 0


 已为社区贡献2条内容

所有评论(0)