【C++】基于HashTable的底层实现unordered_map和unordered _set 的封装
本文分析了unordered_map和unordered_set的源码实现,重点探讨了哈希表框架的构建要点。文章详细介绍了迭代器实现中的++操作逻辑,以及insert返回类型从bool改为pair<Iterator,bool>的变更原因。通过封装哈希表,分别实现了unordered_set(单key结构)和unordered_map(key/value结构),其中unordered_m
本文是小编巩固自身而作,如有错误,欢迎指出!
目录
一、unordered_map和unordered _set的源码剖析
一、unordered_map和unordered _set的源码剖析
在分析了解我们要封装实现的unordered_map和unordered _set之前,我们先要对其,有一个简单的了解,就如同他的名字一般,unordered_map和unordered _set相较于map和set的主要区别就是无序,我们在前面已经学习了map和set的封装实现,其底层是使用红黑树进行实现的因为其有序的要求二叉树结构很适合(不了解的可以看看往期笔记)
而对于无序要求的unordered_map和unordered _set我们就可以使用哈希表了
下面是unordered_map和unordered _set的源码
// stl_hash_set
template <class Value, class HashFcn = hash<Value>,
 class EqualKey = equal_to<Value>,
 class Alloc = alloc>
class hash_set
{
private:
 typedef hashtable<Value, Value, HashFcn, identity<Value>,
 EqualKey, Alloc> ht;
 ht rep;
public:
 typedef typename ht::key_type key_type;
 typedef typename ht::value_type value_type;
 typedef typename ht::hasher hasher;
 typedef typename ht::key_equal key_equal;

 typedef typename ht::const_iterator iterator;
 typedef typename ht::const_iterator const_iterator;
 hasher hash_funct() const { return rep.hash_funct(); }
 key_equal key_eq() const { return rep.key_eq(); }
};
// stl_hash_map
template <class Key, class T, class HashFcn = hash<Key>,
 class EqualKey = equal_to<Key>,
 class Alloc = alloc>
class hash_map
{
private:
 typedef hashtable<pair<const Key, T>, Key, HashFcn,
 select1st<pair<const Key, T> >, EqualKey, Alloc> ht;
 ht rep;
public:
 typedef typename ht::key_type key_type;
 typedef T data_type;
 typedef T mapped_type;
 typedef typename ht::value_type value_type;
 typedef typename ht::hasher hasher;
 typedef typename ht::key_equal key_equal;
 typedef typename ht::iterator iterator;
 typedef typename ht::const_iterator const_iterator;
};
// stl_hashtable.h
template <class Value, class Key, class HashFcn,
 class ExtractKey, class EqualKey,
 class Alloc>
class hashtable {
public:
 typedef Key key_type;
 typedef Value value_type;
 typedef HashFcn hasher;
 typedef EqualKey key_equal;
private:
 hasher hash;
 key_equal equals;
 ExtractKey get_key;
 typedef __hashtable_node<Value> node;

 vector<node*,Alloc> buckets;
 size_type num_elements;
public:
 typedef __hashtable_iterator<Value, Key, HashFcn, ExtractKey, EqualKey,
Alloc> iterator;
 pair<iterator, bool> insert_unique(const value_type& obj);
 const_iterator find(const key_type& key) const;
};
template <class Value>
struct __hashtable_node
{
 __hashtable_node* next;
Value val;
};
通过源码可以看到,结构上hash_map和hash_set跟map和set的完 全类似,复⽤同⼀个hashtable实现key和key/value结构,hash_set传给hash_table的是两个 key,hash_map传给hash_table的是pair<const key,value>
二、实现合适的哈希表框架
哈希表的实现其实就是老生常谈了,这里只强调一些着重点。
(1)迭代器实现
和我们之前单单学习的哈希表结构而言,要封装实现肯定是少不了其迭代器的。
template<class K, class T, class Ref, class Ptr, class KeyOfT, class Hash>
struct HTIterator
{
typedef HashNode<T> Node;
typedef HashTable<K, T, KeyOfT, Hash> HT;
typedef HTIterator<K, T, Ref, Ptr, KeyOfT, Hash> Self;
Node* _node;
const HT* _ht;
HTIterator(Node* node, const HT* ht)
:_node(node)
, _ht(ht)
{}
Ref operator*()
{
return _node->_data;
}
Ptr operator->()
{
return &_node->_data;
}
Self& operator++()
{
if (_node->_next) // 当前还有节点
{
_node = _node->_next;
}
else // 当前桶为空,找下一个不为空的桶的第一个
{
size_t hashi = Hash()(KeyOfT()(_node->_data)) % _ht->_tables.size();
++hashi;
while (hashi != _ht->_tables.size())
{
if (_ht->_tables[hashi])
{
_node = _ht->_tables[hashi];
break;
}
hashi++;
}
// 最后一个桶的最后一个节点已经遍历结束,走到end()去,nullptr充当end()
if (hashi == _ht->_tables.size())
{
_node = nullptr;
}
}
return *this;
}
bool operator!=(const Self& s) const
{
return _node != s._node;
}
bool operator==(const Self& s) const
{
return _node == s._node;
}
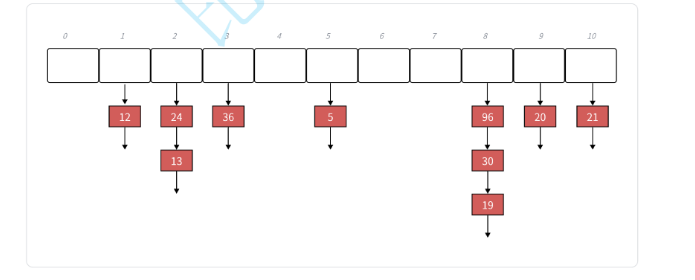
};其主要思路其实我们都了解了,就是一个数组下面挂一条条链表
我们这里主要和其他封装实现最大的区别就在于++的复现,iterator中有⼀个指向结点的指针,如果当前桶下⾯还有结点,则结点的指针需要指向下⼀个结点。如果当前桶⾛完了,则需要想办法计算找到下⼀个桶。这⾥的难点是反⽽是结构设计的问题,参考上⾯的源码,我们可以看到iterator中除了有结点的指针,还有哈希表对象的指针,这样当前桶⾛完了,要计算下⼀个桶就相对容易,⽤key值计算出当前桶位置,依次往后找下⼀个不为空的桶即
可
(2)insert返回类型的变更
由于我们后面要实现的unordered_map是key/value结构,后面需要通过“[]”访问元素,我们先前学习的insert的返回类型为bool现在就需。要变成一个pair类,同时包含插入后的返回位置和是否插入成功。
pair<Iterator, bool> Insert(const T& data)
	{
		KeyOfT kot;
		auto it = Find(kot(data));
		if (it != End())
			return { it, false };

		Hash hs;
		// 负载因子==1扩容
		if (_n == _tables.size())
		{
			//HashTable<K, V> newHT;
			//newHT._tables.resize(_tables.size()*2);
			//// 遍历旧表将所有值映射到新表
			//for (auto cur : _tables)
			//{
			//	while (cur)
			//	{
			//		newHT.Insert(cur->_kv);
			//		cur = cur->_next;
			//	}
			//}
			//_tables.swap(newHT._tables);

			vector<Node*> newtables(__stl_next_prime(_tables.size() + 1));
			for (size_t i = 0; i < _tables.size(); i++)
			{
				Node* cur = _tables[i];
				// 当前桶的节点重新映射挂到新表
				while (cur)
				{
					Node* next = cur->_next;

					// 插入到新表
					size_t hashi = hs(kot(cur->_data)) % newtables.size();
					cur->_next = newtables[hashi];
					newtables[hashi] = cur;

					cur = next;
				}

				_tables[i] = nullptr;
			}

			_tables.swap(newtables);
		}

		size_t hashi = hs(kot(data)) % _tables.size();
		// 头插
		Node* newNode = new Node(data);
		newNode->_next = _tables[hashi];
		_tables[hashi] = newNode;

		++_n;
		return { Iterator(newNode, this), true };
	}
三、unordered _set的实现
其实现非常简单,将哈希表的每个功能嵌套一层即可
namespace yiming
{
	template<class K, class Hash = HashFunc<K>>
	class unordered_set
	{
		struct SetKeyOfT
		{
			const K& operator()(const K& key)
			{
				return key;
			}
		};
	public:
		typedef typename HashTable<K, const K, SetKeyOfT, Hash>::Iterator iterator;
		typedef typename HashTable<K, const K, SetKeyOfT, Hash>::ConstIterator const_iterator;

		iterator begin()
		{
			return _t.Begin();
		}

		iterator end()
		{
			return _t.End();
		}

		const_iterator begin() const
		{
			return _t.Begin();
		}

		const_iterator end() const
		{
			return _t.End();
		}

		pair<iterator, bool> insert(const K& k)
		{
			return _t.Insert(k);
		}

		bool erase(const K& key)
		{
			return _t.Erase(key);
		}

		iterator find(const K& key)
		{
			return _t.Find(key);
		}

	private:
		HashTable<K, const K, SetKeyOfT, Hash> _t;
	};
四、unordered_map的实现
和unordered_set相似,都是嵌套一层,但是因为其为key/value结构,我们多实现一个"[]"用来提取value.。
namespace yiming
{
	template<class K, class V, class Hash = HashFunc<K>>
	class unordered_map
	{
		struct MapKeyOfT
		{
			const K& operator()(const pair<K, V>& kv)
			{
				return kv.first;
			}
		};
	public:
		typedef typename HashTable<K, pair<const K, V>, MapKeyOfT, Hash>::Iterator iterator;
		typedef typename HashTable<K, pair<const K, V>, MapKeyOfT, Hash>::ConstIterator const_iterator;

		iterator begin()
		{
			return _t.Begin();
		}

		iterator end()
		{
			return _t.End();
		}

		const_iterator begin() const
		{
			return _t.Begin();
		}

		const_iterator end() const
		{
			return _t.End();
		}

		pair<iterator, bool> insert(const pair<K, V>& kv)
		{
			return _t.Insert(kv);
		}

		V& operator[](const K& key)
		{
			pair<iterator, bool> ret = insert({ key, V() });

			return ret.first->second;
		}

		bool erase(const K& key)
		{
			return _t.Erase(key);
		}

		iterator find(const K& key)
		{
			return _t.Find(key);
		}
	private:
		HashTable<K, pair<const K, V>, MapKeyOfT, Hash> _t;
	};
五、代码测试
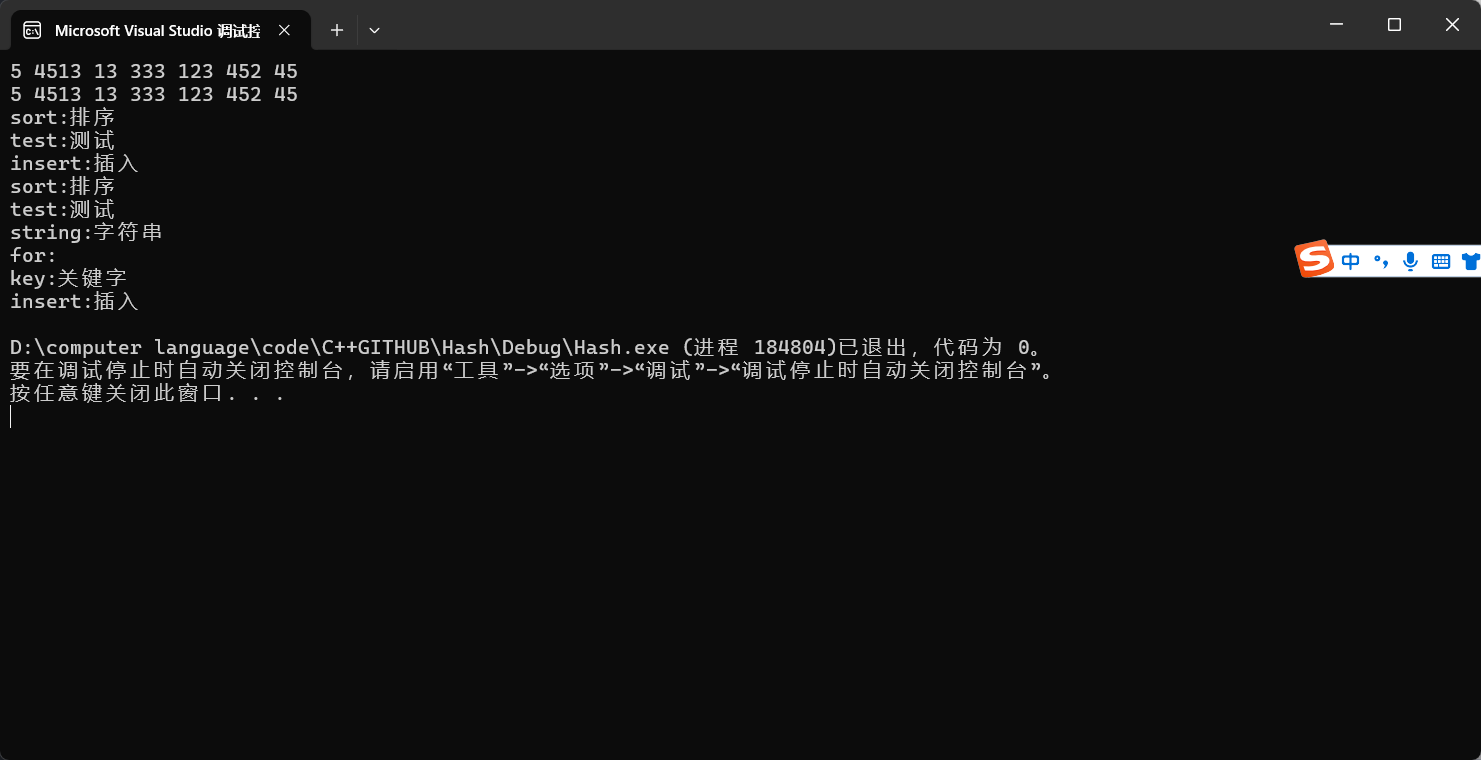
void test_umap()
	{
		unordered_map<string, string> dict;
		dict.insert({ "insert", "插入" });
		dict.insert({ "sort", "排序" });
		dict.insert({ "test", "测试" });

		for (auto& [k, v] : dict)
		{
			// k += 'x';

			cout << k << ":" << v << endl;
		}

		dict["string"] = "字符串";
		dict["key"];
		dict["key"] = "关键字";
		dict["for"];


		for (auto& [k, v] : dict)
		{
			cout << k << ":" << v << endl;
		}
	}
void Func(const unordered_set<int>& s)
{
auto it1 = s.begin();
while (it1 != s.end())
{
// *it1 = 1;
cout << *it1 << " ";
++it1;
}
cout << endl;
}
void test_uset1()
{
unordered_set<int> s1;
s1.insert(45);
s1.insert(5);
s1.insert(13);
s1.insert(45);
s1.insert(452);
s1.insert(4513);
s1.insert(333);
s1.insert(123);
Func(s1);
auto it1 = s1.begin();
while (it1 != s1.end())
{
//*it1 = 1;
cout << *it1 << " ";
++it1;
}
cout << endl;
}
struct Date
{
int _year;
int _month;
int _day;
bool operator==(const Date& d) const
{
return _year == d._year
&& _month == d._month
&& _day == d._day;
}
};
struct DateHashFunc
{
// BKDR
size_t operator()(const Date& d)
{
//2025 1 9
//2025 9 1
//2025 2 8
size_t hash = 0;
hash += d._year;
hash *= 131;
hash += d._month;
hash *= 131;
hash += d._day;
hash *= 131;
return hash;
}
};
void test_uset2()
{
unordered_set<Date, DateHashFunc> s1;
s1.insert({ 2025, 9, 15 });
s1.insert({ 2025, 9, 18 });
}
本次分享就到这里结束了,后续会继续更新,感谢阅读!

有“AI”的1024 = 2048,欢迎大家加入2048 AI社区
更多推荐


 9
9 0
0- 0


 已为社区贡献2条内容

所有评论(0)