Spring AI Alibaba 【二】
摘要: SpringAIAlibaba框架通过ChatModel和ChatClient组件实现与大模型服务的交互。ChatModel提供基础API支持文本、图片、音频交互,支持同步/流式响应及参数调优;ChatClient提供更高级的FluentAPI,集成提示词模板、记忆管理、RAG等功能,适合复杂场景开发。两者可混合使用:ChatModel适用于简单功能,ChatClient适合企业级应用开发
1. chatModel 与chatClient
1.1 对话模型(Chat Model)
对话模型(Chat Model)接收一系列消息(Message)作为输入,与模型 LLM 服务进行交互,并接收返回的聊天消息(Chat Message)作为输出。相比于普通的程序输入,模型的输入与输出消息(Message)不止支持纯字符文本,还支持包括语音、图片、视频等作为输入输出。同时,在 Spring AI Alibaba 中,消息中还支持包含不同的角色,帮助底层模型区分来自模型、用户和系统指令等的不同消息。
Spring AI Alibaba 复用了 Spring AI 抽象的 Model API,并与通义系列大模型服务进行适配(如通义千问、通义万相等),目前支持纯文本聊天、文生图、文生语音、语音转文本等。以下是框架定义的几个核心 API:
- ChatModel,文本聊天交互模型,支持纯文本格式作为输入,并将模型的输出以格式化文本形式返回。
- ImageModel,接收用户文本输入,并将模型生成的图片作为输出返回。
- AudioModel,接收用户文本输入,并将模型合成的语音作为输出返回。
Spring AI Alibaba 支持以上 Model 抽象与通义系列模型的适配,并通过 spring-ai-alibaba-starter AutoConfiguration 自动初始化了默认实例,因此我们可以在应用程序中直接注入 ChatModel、ImageModel 等 bean,当然在需要的时候也可以自定义 Model 实例。
1.1.1 Chat Model
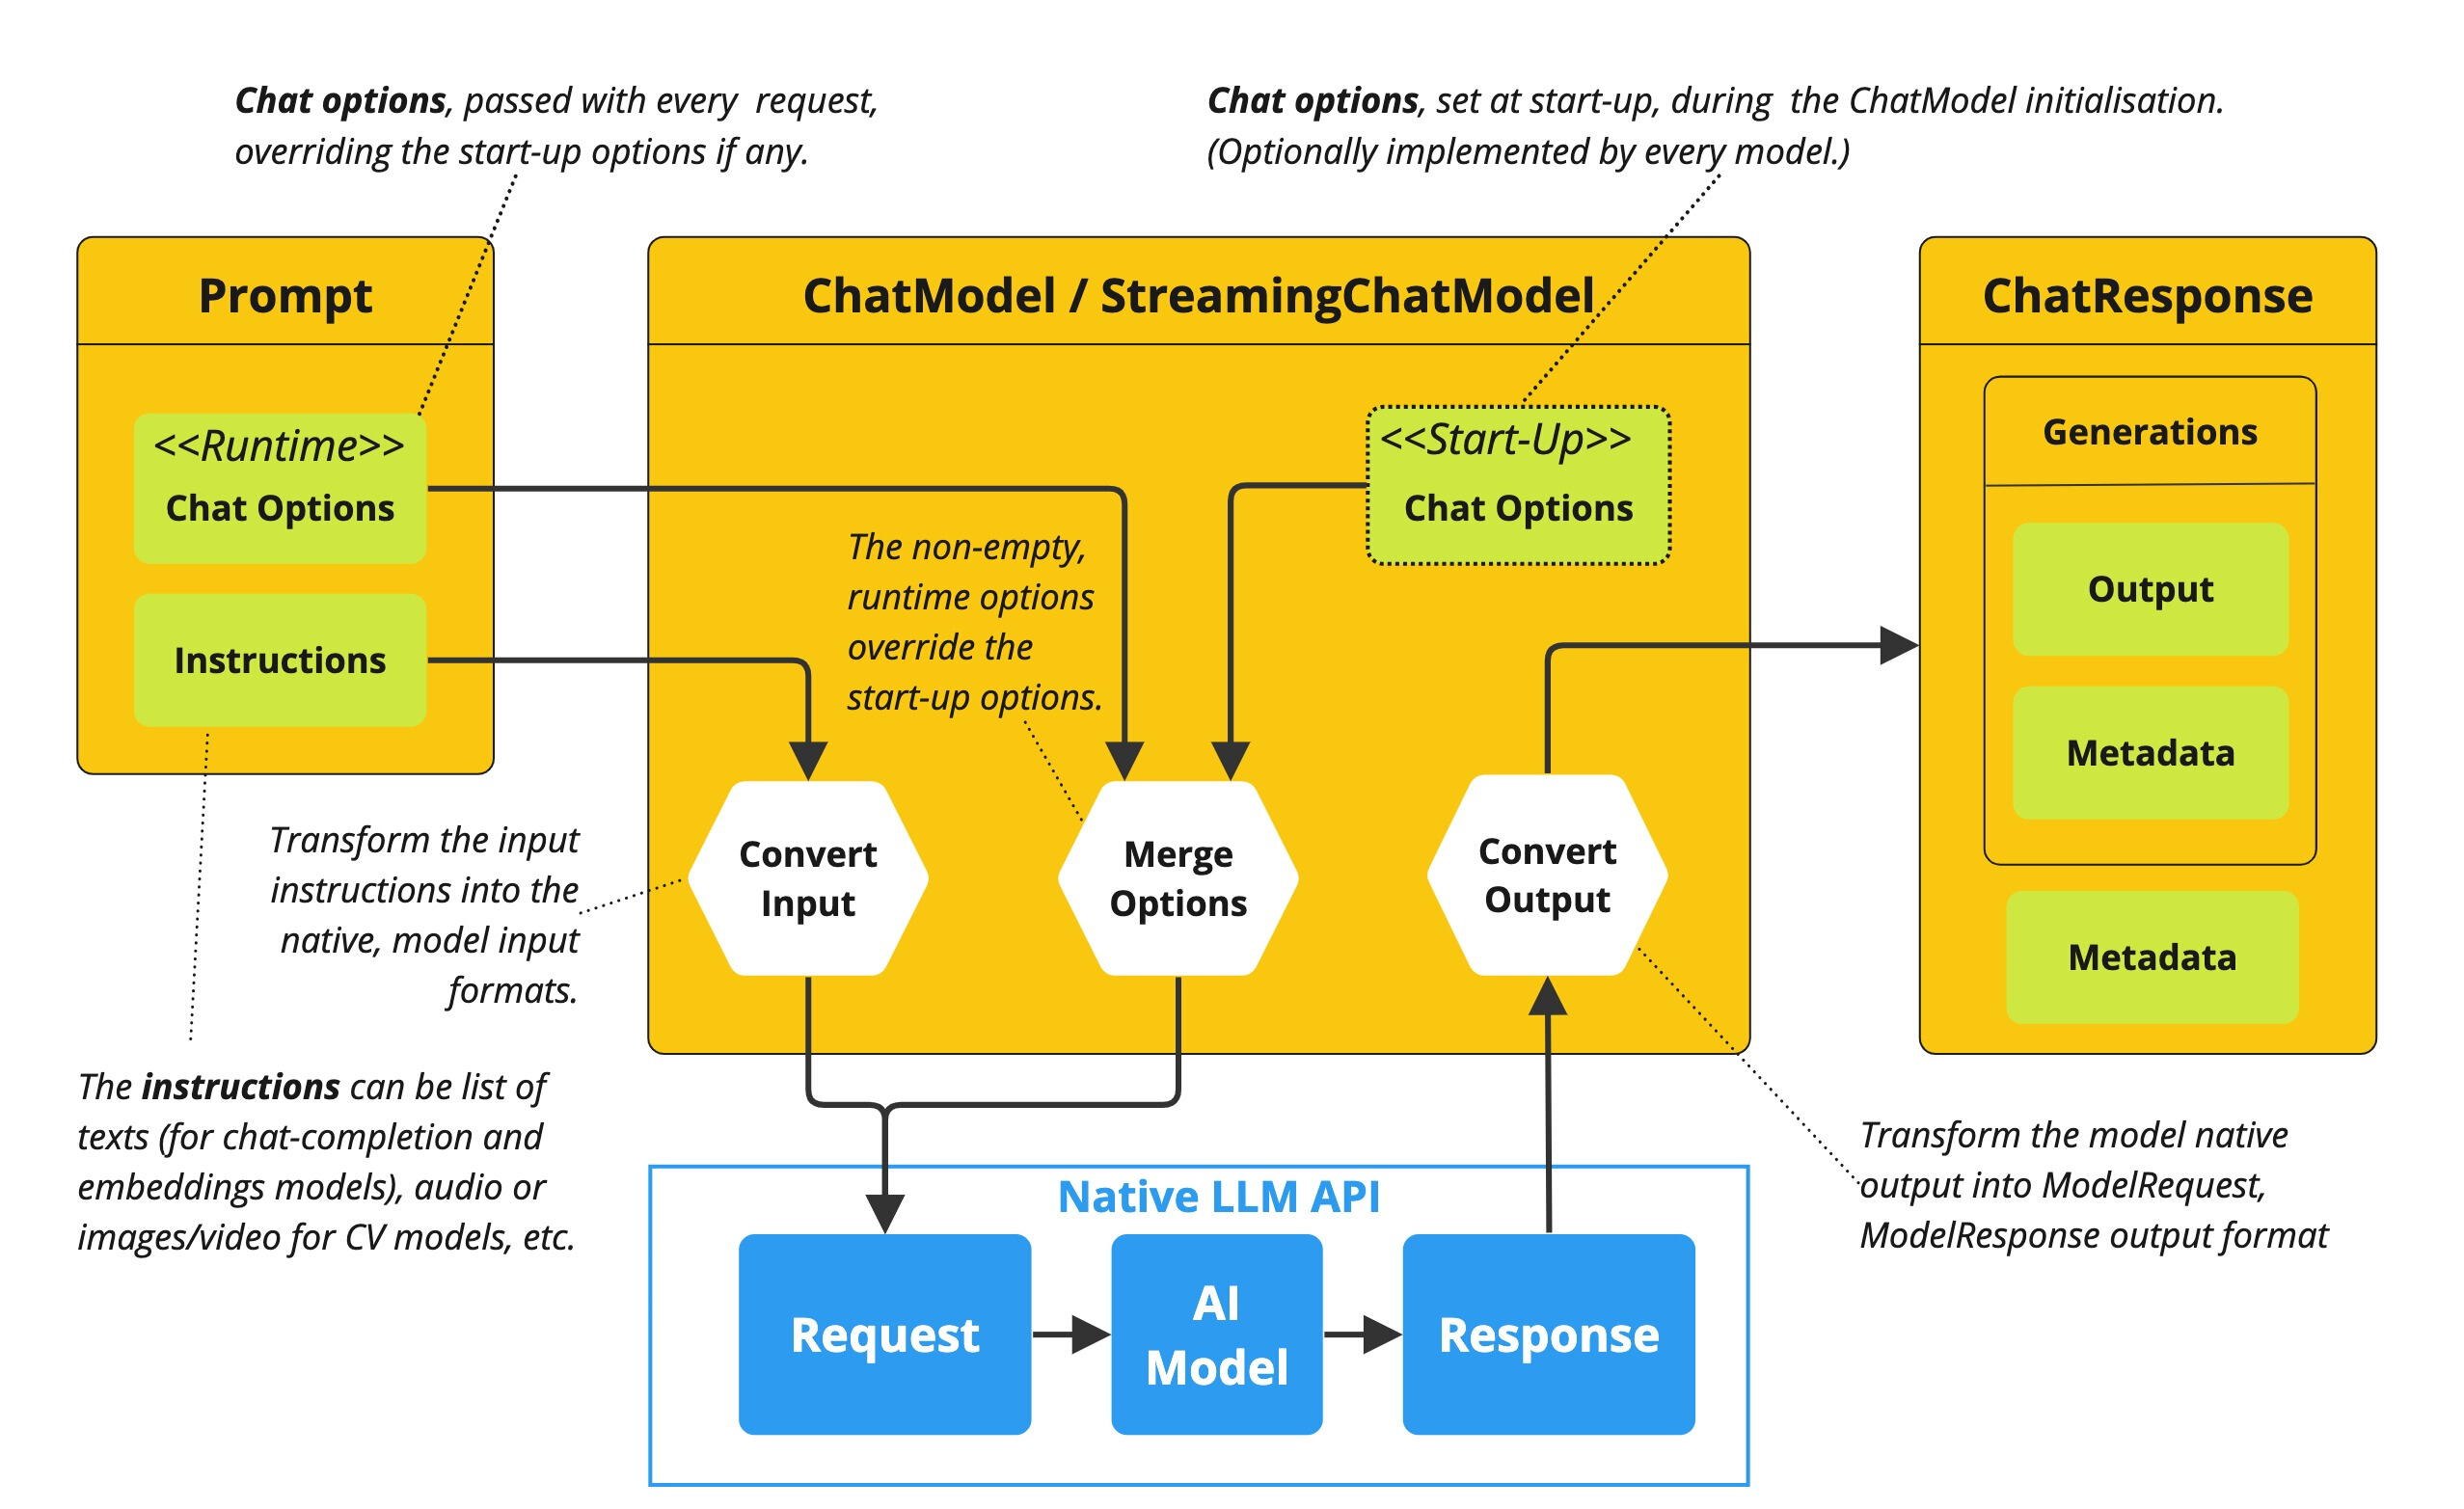
ChatModel API 让开发者可以非常方便的与 AI 模型进行文本交互,它抽象了应用与模型交互的过程,包括使用 Prompt 作为输入,使用 ChatResponse 作为输出等。ChatModel 的工作原理是接收 Prompt 或部分对话作为输入,将输入发送给后端大模型,模型根据其训练数据和对自然语言的理解生成对话响应,应用程序可以将响应呈现给用户或用于进一步处理。
1.1.2 使用示例
开发完整的 ChatModel 示例应用,需要添加 spring-ai-alibaba-starter 依赖。
以下是 ChatModel 基本使用示例,它可以接收 String 字符串作为输入:
@RestController

public class ChatModelController {

    private final ChatModel chatModel;

    public ChatModelController(ChatModel chatModel) {

        this.chatModel = chatModel;

    }

    @RequestMapping("/chat")

    public String chat(String input) {

        ChatResponse response = chatModel.call(new Prompt(input));

        return response.getResult().getOutput().getContent();

    }

}
使用 Prompt 作为输入:
@RequestMapping("/chatWithPrompt")

public String chatWithPrompt(String input) {

    Prompt prompt = new Prompt(input);

    ChatResponse response = chatModel.call(prompt);

    return response.getResult().getOutput().getContent();

}
Streaming 示例:
@RequestMapping("/streamChat")

public void streamChat(String input, HttpServletResponse response) throws IOException {

    response.setContentType("text/event-stream");

    response.setCharacterEncoding("UTF-8");

    Prompt prompt = new Prompt(input);

    chatModel.stream(prompt, new StreamHandler() {

        @Override

        public void onMessage(ChatMessage message) {

                try {

                        response.getWriter().write("data: " + message.getContent() + "\n\n");

                        response.getWriter().flush();

                } catch (IOException e) {

                        e.printStackTrace();

                }

        }

    @Override

    public void onComplete() {

        try {

                response.getWriter().write("event: complete\n\n");

                response.getWriter().flush();

            } catch (IOException e) {

                e.printStackTrace();

            }

        }

    });

}
通过 ChatOptions 在每次调用中调整模型参数:
@RequestMapping("/chatWithOptions")

public String chatWithOptions(String input) {

        ChatOptions options = ChatOptions.builder()

        .withTemperature(0.7)

        .withMaxTokens(150)

        .build();

        Prompt prompt = new Prompt(input, options);

        ChatResponse response = chatModel.call(prompt);

        return response.getResult().getOutput().getContent();

}
1.2 Chat Client
1.2.1 ChatClient 简介
ChatClient 提供了与 AI 模型通信的 Fluent API,它支持同步和反应式(Reactive)编程模型。与 ChatModel、Message、ChatMemory 等原子 API 相比,使用 ChatClient 可以将与 LLM 及其他组件交互的复杂性隐藏在背后,因为基于 LLM 的应用程序通常要多个组件协同工作(例如,提示词模板、聊天记忆、LLM Model、输出解析器、RAG 组件:嵌入模型和存储),并且通常涉及多个交互,因此协调它们会让编码变得繁琐。当然使用 ChatModel 等原子 API 可以为应用程序带来更多的灵活性,成本就是需要使用者编写大量样板代码。
ChatClient 类似于应用程序开发中的服务层,它为应用程序直接提供 AI 服务,开发者可以使用 ChatClient Fluent API 快速完成一整套 AI 交互流程的组装。
包括一些基础功能,如:
- 定制和组装模型的输入(Prompt)
- 格式化解析模型的输出(Structured Output)
- 调整模型交互参数(ChatOptions)
还支持更多高级功能:
- 聊天记忆(Chat Memory)
- 工具/函数调用(Function Calling)
- RAG
1.2.2 创建 ChatClient
使用 ChatClient.Builder 对象创建 ChatClient 实例,开发者可以自动注入由Spring Boot 自动配置创建的默认 ChatClient.Builder 实例,也可以通过编程方式自行创建一个 ChatClient.Builder 实例并用它来得到 ChatClient 实例。
1.2.2.1 使用自动配置的 ChatClient.Builder
使用 Spring Boot 自动装配默认生成的 ChatClient.Builder 的 bean,把它注入到您自定义的类中。这里是根据用户提问并从模型得到文本回答的简单例子:
@RestController

public class ChatController {

    private final ChatClient chatClient;

    public ChatController(ChatClient.Builder builder) {

            this.chatClient = builder.build();

    }

    @GetMapping("/chat")

    public String chat(String input) {

            return this.chatClient.prompt()

                        .user(input)

                        .call()

                        .content();

    }

}
在这个示例中,首先设置了用户消息的内容,call 方法向 AI 模型发送请求,content 方法以字符串形式返回 AI 模型的响应。
1.2.2.2 以编程方式创建 ChatClient
可以通过设置属性 spring.ai.chat.client.enabled=false 来禁用 ChatClient.Builder bean 的自动配置,若需要多个聊天模型一起使用,这会很有用,然后以编程方式创建 ChatClient.Builder,这样可以为每个聊天模型创建一个实例 ChatModel:
ChatModel myChatModel = ... // usually autowired

ChatClient.Builder builder = ChatClient.builder(myChatModel);

// or create a ChatClient with the default builder settings:

ChatClient chatClient = ChatClient.create(myChatModel);
1.2.3 处理 ChatClient 响应
ChatClient API 提供了多种方法来格式化来自 AI 模型的响应。
1.2.3.1 返回 ChatResponse
AI 模型的响应是一种由ChatResponse类型定义的丰富结构。它包含响应生成相关的元数据,同时它还可以包含多个子响应(称为Generation),每个子响应都有自己的元数据。元数据包括用于创建响应的令牌(token)数量信息(在英文中,每个令牌大约为一个单词的 3/4),了解令牌信息很重要,因为 AI 模型根据每个请求使用的令牌数量收费。
下面的代码段显示了通过调用 chatResponse() 返回 ChatResponse 的示例,相比于调用 content() 方法,这里在调用 call() 方法之后调用 chatResponse()。
ChatResponse chatResponse = chatClient.prompt()

                            .user("Tell me a joke")

                            .call()

                            .chatResponse();
1.2.3.2 返回实体类(Entity)
如果希望返回一个预先定义好的实体类型响应,Spring AI 框架可以自动替我们完成从 String 到实体类的转换,调用entity() 方法可完成响应数据转换。
例如,给定 Java record(POJO)定义:
record ActorFilms(String actor, List<String> movies) {

}
可以使用该 entity 方法轻松地将 AI 模型的输出映射到 ActorFilms 类型,如下所示:
ActorFilms actorFilms = chatClient.prompt()

                                .user("Generate the filmography for a random actor.")

                                .call()

                                .entity(ActorFilms.class);
entity 还有一种带有参数的重载方法 entity(ParameterizedTypeReference<T> type),可指定如泛型 List 等类型:
List<ActorFilms> actorFilms = chatClient.prompt()

                                        .user("Generate the filmography of 5 movies for Tom Hanks and Bill Murray.")

                                        .call()

                                        .entity(new ParameterizedTypeReference<List<ActorFilms>>() {});
1.2.3.3 流式响应
stream 方法是一种异步的、持续的获得模型响应的方式:
Flux<String> output = chatClient.prompt()

                                .user("Tell me a joke")

                                .stream()

                                .content();
相比于上面的 Flux<String>,还可以使用 Flux<ChatResponse> chatResponse() 方法获得 ChatResponse 响应数据流。
1.2.3.4 call() 返回值
ChatClient.call() 方法支持几种不同类型的响应格式。
String content():返回响应的字符串内容ChatResponse chatResponse():返回ChatResponse包含多个代以及有关响应的元数据的对象,例如,使用了多少个令牌来创建响应。entity返回 Java 类型- entity(ParameterizedTypeReference type):用于返回实体类型的集合。
- entity(Class type): 用于返回特定的实体类型。
- entity(StructuredOutputConverter structuredOutputConverter): 用于指定一个实例
StructuredOutputConverter,将String转换为实体类型。
1.2.3.5 stream() 返回值
还可以调用该stream方法,在指定ChatClient后调用stream方法,响应类型有几个选项:
Flux<String> content():返回由AI模型生成的字符串的Flux。Flux<ChatResponse> chatResponse():返回对象的 FluxChatResponse,其中包含有关响应的附加元数据。
1.2.4 定制 ChatClient 默认值
还可以通过修改 ChatClient.Builder 定制 ChatClient 实例。
注意,创建 ChatClient 时指定的配置将作为与模型交互时的默认参数,这样可以避免每次调用都重复设置。
1.2.4.1 设置默认 System Message
在以下示例中,为 ChatClient 设置了一个默认的 system message(以海盗风格回答所有问题),这样,当 ChatClient 与模型交互时都会自动携带这条 system message,用户只需要指定 user message 即可。
@Configuration

class Config {

        @Bean

        ChatClient chatClient(ChatClient.Builder builder) {

        return builder.defaultSystem("You are a friendly chat bot that answers question in the voice of a Pirate")

                        .build();

        }

}
在 Controller 中使用这个 ChatClient
@RestController

class AIController {

        private final ChatClient chatClient;

        AIController(ChatClient chatClient) {

                this.chatClient = chatClient;

        }

        @GetMapping("/ai/simple")

        public Map<String, String> completion(@RequestParam(value = "message", defaultValue = "Tell me a joke") String message) {

                return Map.of("completion", chatClient.prompt().user(message).call().content());

        }

}
启动示例,通过 curl 测试效果:
curl localhost:8080/ai/simple{"generation":"Why did the pirate go to the comedy club? To hear some arrr-rated jokes! Arrr, matey!"}在上面 builder.defaultSystem() 创建 ChatClient 的时,还可以选择使用模板,类似 “You are a friendly chat bot that answers question in the voice of a {voice}“,这样就可以在每次调用前修改请求参数。
@Configuration

class Config {

    @Bean

    ChatClient chatClient(ChatClient.Builder builder) {

                return builder.defaultSystem("You are a friendly chat bot that answers question in the voice of a {voice}")

                                .build();

    }

}

@RestController

class AIController {

        private final ChatClient chatClient

        AIController(ChatClient chatClient) {

                this.chatClient = chatClient;

        }

        @GetMapping("/ai")

        Map<String, String> completion(@RequestParam(value = "message", defaultValue = "Tell me a joke") String message, String voice) {

                return Map.of(

                    "completion",

                    chatClient.prompt()

                    .system(sp -> sp.param("voice", voice))

                    .user(message)

                    .call()

                    .content());

        }

}
http localhost:8080/ai voice=='Robert DeNiro'
{
"completion": "You talkin' to me? Okay, here's a joke for ya: Why couldn't the bicycle stand up by itself? Because it was two tired! Classic, right?"
}1.2.4.2 其他默认设置
除了 defaultSystem 之外,还可以在 ChatClient.Builder 级别上指定其他默认提示。
-
defaultOptions(ChatOptions chatOptions):传入ChatOptions类中定义的可移植选项或特定于模型实现的如DashScopeChatOptions选项。 -
defaultFunction(String name, String description, java.util.function.Function<I, O> function):name用于在用户文本中引用该函数,description解释该函数的用途并帮助 AI 模型选择正确的函数以获得准确的响应,参数function是模型将在必要时执行的 Java 函数实例。 -
defaultFunctions(String... functionNames):应用程序上下文中定义的 java.util.Function 的 bean 名称。 -
defaultUser(String text)、defaultUser(Resource text)、defaultUser(Consumer<UserSpec> userSpecConsumer)这些方法允许您定义用户消息输入,Consumer<UserSpec>允许您使用 lambda 指定用户消息输入和任何默认参数。 -
defaultAdvisors(RequestResponseAdvisor... advisor):Advisors 允许修改用于创建Prompt的数据,QuestionAnswerAdvisor实现通过在 Prompt 中附加与用户文本相关的上下文信息来实现Retrieval Augmented Generation模式。 -
defaultAdvisors(Consumer<AdvisorSpec> advisorSpecConsumer):此方法允许您定义一个Consumer并使用AdvisorSpec配置多个 Advisor,Advisor 可以修改用于创建Prompt的最终数据,Consumer<AdvisorSpec>允许指定 lambda 来添加 Advisor 例如QuestionAnswerAdvisor。
可以在运行时使用 ChatClient 提供的不带 default 前缀的相应方法覆盖这些默认值。
-
options(ChatOptions chatOptions) -
function(String name, String description, java.util.function.Function<I, O> function) -
functions(String... functionNames) -
user(String text)、user(Resource text)、user(Consumer<UserSpec> userSpecConsumer) -
advisors(RequestResponseAdvisor... advisor) -
advisors(Consumer<AdvisorSpec> advisorSpecConsumer)
1.3 编码实战
1.3.1 新建Module
可以命名为ChatModelChatClient
1.3.2 修改POM文件
在依赖配置节点修改为以下配置:
<dependencies>
        <dependency>
            <groupId>org.springframework.boot</groupId>
            <artifactId>spring-boot-starter-web</artifactId>
        </dependency>
        <!--spring-ai-alibaba dashscope-->
        <dependency>
            <groupId>com.alibaba.cloud.ai</groupId>
            <artifactId>spring-ai-alibaba-starter-dashscope</artifactId>
        </dependency>
        <!--lombok-->
        <dependency>
            <groupId>org.projectlombok</groupId>
            <artifactId>lombok</artifactId>
            <optional>true</optional>
        </dependency>
        <!--hutool-->
        <dependency>
            <groupId>cn.hutool</groupId>
            <artifactId>hutool-all</artifactId>
            <version>5.8.22</version>
        </dependency>
        <dependency>
            <groupId>org.springframework.boot</groupId>
            <artifactId>spring-boot-starter-test</artifactId>
            <scope>test</scope>
        </dependency>
    </dependencies>

    <build>
        <plugins>
            <plugin>
                <groupId>org.springframework.boot</groupId>
                <artifactId>spring-boot-maven-plugin</artifactId>
            </plugin>
            <plugin>
                <groupId>org.apache.maven.plugins</groupId>
                <artifactId>maven-compiler-plugin</artifactId>
                <version>3.11.0</version>
                <configuration>
                    <compilerArgs>
                        <arg>-parameters</arg>
                    </compilerArgs>
                    <source>21</source>
                    <target>21</target>
                </configuration>
            </plugin>
        </plugins>
    </build>

    <repositories>
        <repository>
            <id>spring-milestones</id>
            <name>Spring Milestones</name>
            <url>https://repo.spring.io/milestone</url>
            <snapshots>
                <enabled>false</enabled>
            </snapshots>
        </repository>
    </repositories>
1.3.3 编写配置文件
在resources目录下新建application.properties配置文件,内容如下:
server.port=8003

server.servlet.encoding.enabled=true
server.servlet.encoding.force=true
server.servlet.encoding.charset=UTF-8

spring.application.name=ChatModelChatClient

# ====SpringAIAlibaba Config=============
spring.ai.dashscope.api-key=${DASHSCOPE_API_KEY}
1.3.4 编写主启动类
新建主启动类,并编写如下内容:
import org.springframework.boot.SpringApplication;
import org.springframework.boot.autoconfigure.SpringBootApplication;

@SpringBootApplication
public class ChatModelChatClientApplication{

    public static void main(String[] args){
        SpringApplication.run(ChatModelChatClientApplication.class, args);
    }

}
1.3.5 编写配置类
新建子包config,并在其中新建配置类SaaLLMConfig
import com.alibaba.cloud.ai.dashscope.api.DashScopeApi;
import org.springframework.ai.chat.model.ChatModel;
import org.springframework.ai.chat.client.ChatClient;
import org.springframework.context.annotation.Bean;
import org.springframework.context.annotation.Configuration;


@Configuration
public class SaaLLMConfig{
    @Bean
    public DashScopeApi dashScopeApi(){
        return DashScopeApi.builder()
                    .apiKey(System.getenv("DASHSCOPE_API_KEY"))
                .build();
    }

    /**
     * 知识出处:
     * https://java2ai.com/docs/1.0.0.2/tutorials/basics/chat-client/?spm=5176.29160081.0.0.2856aa5cmUTyXC#%E5%88%9B%E5%BB%BA-chatclient
     * @param dashscopeChatModel
     * @return
     */
    @Bean
    public ChatClient chatClient(ChatModel dashscopeChatModel){
        return ChatClient.builder(dashscopeChatModel).build();
    }
}
1.3.6 编写业务类
新建子包controller,并在其中新建业务类ChatClientController
import com.alibaba.cloud.ai.dashscope.api.DashScopeApi;
import jakarta.annotation.Resource;
import org.springframework.ai.chat.client.ChatClient;
import org.springframework.ai.chat.model.ChatModel;
import org.springframework.web.bind.annotation.GetMapping;
import org.springframework.web.bind.annotation.RequestParam;
import org.springframework.web.bind.annotation.RestController;


@RestController
public class ChatClientController
{
    /**
     * chatModel + ChatClient 混合使用
     */
    @Resource
    private ChatModel chatModel;

    @Resource
    private ChatClient dashScopechatClient;

    /**
     * http://localhost:8003/chatclient/dochat
     * @param msg
     * @return
     */
    @GetMapping("/chatclient/dochat")
    public String doChat(@RequestParam(name = "msg",defaultValue = "你是谁") String msg)
    {
        String result = dashScopechatClient.prompt().user(msg).call().content();
        System.out.println("ChatClient响应:" + result);
        return result;
    }

    /**
     * http://localhost:8003/chatmodel/dochat
     * @param msg
     * @return
     */
    @GetMapping("/chatmodel/dochat")
    public String doChat2(@RequestParam(name = "msg",defaultValue = "你是谁") String msg)
    {
        String result = chatModel.call(msg);
        System.out.println("ChatModel响应:" + result);
        return result;
    }
}
1.3.7 总结
在生产环境下,两者混合使用,两者之间不是非此即彼,可以同时出现交替使用;
1.4 两者对比
| 对比项 | ChatModel | ChatClient |
|---|---|---|
| 注入形式 | 自动注入 | 手动注入且依赖ChatModel,使用自动配置的 Client.Builder |
| 调用方式 | 直接调用call()或者stream()方法 | 链式调用,支持同步和反应式(Reactive)编程模型,自动封装提示词和解析响应 |
| 结构化输出 | 需手动解析响应文本 | 支持自动映射为Java对象 |
| 适用场景 | 实现简单功能和场景 | 快速开发复杂功能的场景,如企业级智能问答系统 |
| 功能扩展 | 偏弱 | 强,支持聊天记忆(Chat Memory)/工具Tool/函数调用(Function Calling)/RAG等等 |
2. Server-SentEvents(SSE)实现Stream流式输出及多模型共存
2.1 Response Streaming流式输出
流式输出(StreamingOutput)
是一种逐步返回大模型生成结果的技术,生成一点返回一点,允许服务器将响应内容分批次实时传输给客户端,而不是等待全部内容生成完毕后再一次性返回。
这种机制能显著提升用户体验,尤其适用于大模型响应较慢的场景(如生成长文本或复杂推理结果)。
而SpringAI Alibaba流式输出有两种:
- 通过ChatModel实现stream实现流式输出;
- 通过ChatClient实现stream实现流式输出。
2.2 SSE(Server-Sent Events)服务器发送事件
Server-Sent:由服务器发送;Events:事件,指服务器主动推送给客户端的数据或消息。Server-Sent Events (SSE) 是一种允许服务端可以持续推送数据片段(如逐词或逐句)到前端的 Web 技术。通过单向的HTTP长连接,使用一个长期存在的连接,让服务器可以主动将数据"推"给客户端,SSE是轻量级的单向通信协议,适合AI对话这类服务端主导的场景。
2.2.1 核心概念
SSE 的核心思想是:客户端发起一个请求,服务器保持这个连接打开并在有新数据时,通过这个连接将数据发送给客户端。这与传统的请求-响应模式(客户端请求一次,服务器响应一次,连接关闭)有本质区别。
2.2.2 与WS的简单对比
| 特性 | Server-Sent Events (SSE) | WebSocket |
|---|---|---|
| 通信方向 | 单向(服务器->客户端) | 双向 |
| 协议 | 基于HTTP | 独立的ws://或wss://协议 |
| 数据类型 | 文本 | 文本和二进制 |
| 复杂性 | 简单 | 相对复杂 |
| 连接开销 | 较低 | 较高 |
| 自动重连 | 是 | 需要手动实现 |
| 浏览器支持 | 广泛支持(除IE) | 广泛支持 |
简单来说,SSE是一种让服务器能够主动、持续地向客户端(比如网页浏览器)推送数据的技术。
2.2.3 适用场景
SSE 非常适合需要服务器向客户端实时推送更新的场景,例如:
- 实时通知:股票行情、新闻推送、聊天应用(仅接收消息)、系统告警;
- 状态更新:长时间运行的任务进度(如文件上传、后台处理);
- 实时数据流:传感器数据、监控仪表盘;
- 协作应用:显示其他用户的在线状态或操作(但不包括发送操作)。
2.3 编码实战
要求:要求同时存在多种大模型产品在系统里共存使用。
2.3.1 新建Module
新建子模块Module,可以命名为StreamingOutput
2.3.2 修改POM文件
在依赖配置节点修改为以下配置:
<dependencies>
        <dependency>
            <groupId>org.springframework.boot</groupId>
            <artifactId>spring-boot-starter-web</artifactId>
        </dependency>
        <!--spring-ai-alibaba dashscope-->
        <dependency>
            <groupId>com.alibaba.cloud.ai</groupId>
            <artifactId>spring-ai-alibaba-starter-dashscope</artifactId>
        </dependency>
        <!--lombok-->
        <dependency>
            <groupId>org.projectlombok</groupId>
            <artifactId>lombok</artifactId>
            <version>1.18.38</version>
        </dependency>
        <!--hutool-->
        <dependency>
            <groupId>cn.hutool</groupId>
            <artifactId>hutool-all</artifactId>
            <version>5.8.22</version>
        </dependency>
        <dependency>
            <groupId>org.springframework.boot</groupId>
            <artifactId>spring-boot-starter-test</artifactId>
            <scope>test</scope>
        </dependency>
    </dependencies>

    <build>
        <plugins>
            <plugin>
                <groupId>org.springframework.boot</groupId>
                <artifactId>spring-boot-maven-plugin</artifactId>
            </plugin>
            <plugin>
                <groupId>org.apache.maven.plugins</groupId>
                <artifactId>maven-compiler-plugin</artifactId>
                <version>3.11.0</version>
                <configuration>
                    <compilerArgs>
                        <arg>-parameters</arg>
                    </compilerArgs>
                    <source>21</source>
                    <target>21</target>
                </configuration>
            </plugin>
        </plugins>
    </build>

    <repositories>
        <repository>
            <id>spring-milestones</id>
            <name>Spring Milestones</name>
            <url>https://repo.spring.io/milestone</url>
            <snapshots>
                <enabled>false</enabled>
            </snapshots>
        </repository>
    </repositories>
2.3.3 编写配置文件
在resources目录下新建application.properties配置文件,内容如下:
server.port=8004

server.servlet.encoding.enabled=true
server.servlet.encoding.force=true
server.servlet.encoding.charset=UTF-8

spring.application.name=StreamingOutput

# ====SpringAIAlibaba Config=============
spring.ai.dashscope.api-key=${DASHSCOPE_API_KEY}
2.3.4 编写主启动类
新建主启动类,并编写如下内容:
import org.springframework.boot.SpringApplication;
import org.springframework.boot.autoconfigure.SpringBootApplication;

@SpringBootApplication
public class StreamingOutputApplication
{

    public static void main(String[] args)
    {
        SpringApplication.run(StreamingOutputApplication.class, args);
    }
}
2.3.5 编写配置类
新建子包config,并在其中新建配置类SaaLLMConfig:
import com.alibaba.cloud.ai.dashscope.api.DashScopeApi;
import com.alibaba.cloud.ai.dashscope.chat.DashScopeChatModel;
import com.alibaba.cloud.ai.dashscope.chat.DashScopeChatOptions;
import org.springframework.ai.chat.client.ChatClient;
import org.springframework.ai.chat.model.ChatModel;
import org.springframework.ai.chat.prompt.ChatOptions;
import org.springframework.beans.factory.annotation.Qualifier;
import org.springframework.context.annotation.Bean;
import org.springframework.context.annotation.Configuration;

/**
 * @Description ChatModel+ChatClient+多模型共存
 */
@Configuration
public class SaaLLMConfig
{
    // 模型名称常量定义,一套系统多模型共存
    private final String DEEPSEEK_MODEL = "deepseek-v3";
    private final String QWEN_MODEL = "qwen-max";

    @Bean(name = "deepseek")
    public ChatModel deepSeek()
    {
        return DashScopeChatModel.builder()
                .dashScopeApi(DashScopeApi.builder().apiKey(System.getenv("DASHSCOPE_API_KEY")).build())
                .defaultOptions(DashScopeChatOptions.builder().withModel(DEEPSEEK_MODEL).build())
                .build();
    }

    @Bean(name = "qwen")
    public ChatModel qwen()
    {
        return DashScopeChatModel.builder()
                .dashScopeApi(DashScopeApi.builder().apiKey(System.getenv("DASHSCOPE_API_KEY")).build())
                .defaultOptions(DashScopeChatOptions.builder().withModel(QWEN_MODEL).build())
                .build();
    }

    @Bean(name = "deepseekChatClient")
    public ChatClient deepseekChatClient(@Qualifier("deepseek") ChatModel deepseek)
    {
        return
            ChatClient.builder(deepseek)
                .defaultOptions(ChatOptions.builder().model(DEEPSEEK_MODEL).build())
            .build();
    }

    @Bean(name = "qwenChatClient")
    public ChatClient qwenChatClient(@Qualifier("qwen") ChatModel qwen)
    {
        return
                ChatClient.builder(qwen)
                        .defaultOptions(ChatOptions.builder().model(QWEN_MODEL).build())
                        .build();
    }
}
2.3.6 编写业务类
新建子包controller,并在其中新建业务类StreamOutputController
import jakarta.annotation.Resource;
import org.springframework.ai.chat.client.ChatClient;
import org.springframework.ai.chat.model.ChatModel;
import org.springframework.web.bind.annotation.GetMapping;
import org.springframework.web.bind.annotation.RequestParam;
import org.springframework.web.bind.annotation.RestController;
import reactor.core.publisher.Flux;

/**
 * @Description 流式输出
 */
@RestController
public class StreamOutputController
{
    //V1 通过ChatModel实现stream实现流式输出
    @Resource(name = "deepseek")
    private ChatModel deepseekChatModel;
    @Resource(name = "qwen")
    private ChatModel qwenChatModel;

    @GetMapping(value = "/stream/chatflux1")
    public Flux<String> chatflux(@RequestParam(name = "question",defaultValue = "你是谁") String question)
    {
        return deepseekChatModel.stream(question);
    }

    @GetMapping(value = "/stream/chatflux2")
    public Flux<String> chatflux2(@RequestParam(name = "question",defaultValue = "你是谁") String question)
    {
        return qwenChatModel.stream(question);
    }

    //V2 通过ChatClient实现stream实现流式输出
    @Resource(name = "deepseekChatClient")
    private ChatClient deepseekChatClient;
    @Resource(name = "qwenChatClient")
    private ChatClient qwenChatClient;

    @GetMapping(value = "/stream/chatflux3")
    public Flux<String> chatflux3(@RequestParam(name = "question",defaultValue = "你是谁") String question)
    {
        return deepseekChatClient.prompt(question).stream().content();
    }

    @GetMapping(value = "/stream/chatflux4")
    public Flux<String> chatflux4(@RequestParam(name = "question",defaultValue = "你是谁") String question)
    {
        return qwenChatClient.prompt(question).stream().content();
    }
}
2.3.7 新建前端页面
在resources目录下新建static目录,在其中新建前端文件index.html
<!DOCTYPE html>
<html>
<head>
    <title>SSE流式ChatModel+ChatClient+多模型共存</title>
    <style>
        body {
            font-family: Arial, sans-serif;
            background-color: #f4f4f4;
            margin: 0;
            padding: 20px;
        }

        #messageInput {
            width: 90%;
            padding: 10px;
            font-size: 16px;
            border: 1px solid #ccc;
            border-radius: 4px;
            margin-bottom: 10px;
        }

        button {
            padding: 10px 20px;
            font-size: 16px;
            background-color: #007bff;
            color: white;
            border: none;
            border-radius: 4px;
            cursor: pointer;
        }

        button:hover {
            background-color: #0056b3;
        }

        #messages {
            margin-top: 20px;
            padding: 15px;
            background-color: #f9f9f9;
            border: 1px solid #ddd;
            border-radius: 8px;
            max-height: 300px;
            overflow-y: auto;
            box-shadow: 0 2px 4px rgba(0, 0, 0, 0.1);
        }

        #messages div {
            padding: 8px 0;
            border-bottom: 1px solid #eee;
            font-size: 14px;
            color: #333;
        }

        #messages div:last-child {
            border-bottom: none;
        }
    </style>
</head>

<body>
    <textarea id="messageInput" rows="4" cols="50" placeholder="请输入你的问题..."></textarea><br>
    <button onclick="sendMsg()">发送提问</button>
    <div id="messages"></div>
    <script>
        function sendMsg()
        {
            // 每次新的提问清空之前问题的消息
            document.getElementById("messages").innerHTML = "";
            // 获取用户输入的消息
            const message = document.getElementById('messageInput').value;
            if (message == "") return false;

            //1 客户端使用 JavaScript 的 EventSource 对象连接到服务器上的一个特定端点(URL)
            const eventSource = new EventSource('stream/chatflux2?question='+message);
            //2 监听消息事件
            eventSource.onmessage = function (event)
            {
                //2.1 获得流式返回的数据
                const data = event.data;
                //2.2 将收获到的数据展示到页面回答窗口上
                const messagesDiv = document.getElementById('messages');
                //2.3 类似java里面append追加的形式将数据批次的显示
                messagesDiv.innerHTML += data;
            }

            //3 监听错误事件,当连接发生错误(包括断开)时触发。
            eventSource.onerror = function (error){
                console.error('EventSource发生了错误: ',error);
                eventSource.close();//关闭链接
            }
        }
    </script>
</body>
</html>
2.3.8 测试
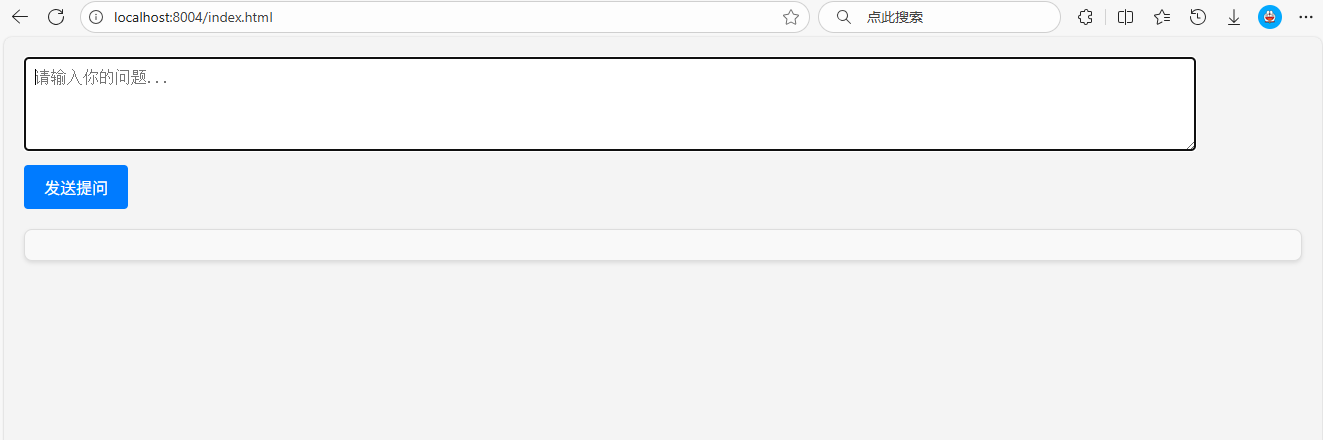
启动 StreamingOutputApplication 主启动类后,在浏览器中输入以下地址:http://localhost:8004/index.html
首先能看到页面是这样的:
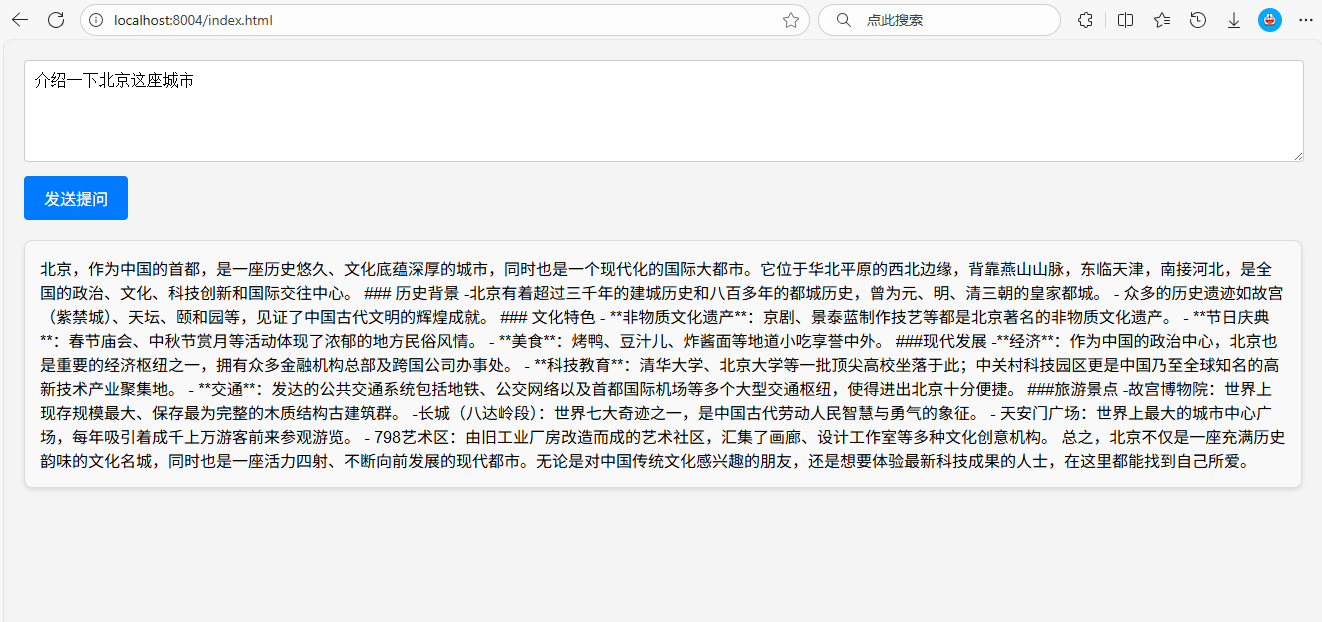
然后在问题输入框中写出想要问的问题,大模型就会返回给相应的信息:
2.4 Flux<T>本质简单叙述
package reactor.core.publisher;
public abstract class Flux<T> implements CorePublisher<T> {}
Flux是SpringWebFlux中的一个核心组件,属于响应式编程模型的一部分。它主要用于处理异步、非阻塞的流式数据,能够高效地处理高并发场景。Flux可以生成和处理一系列的事件或数据如流式输出等。
SAA中的流式输出是通过ReactorStreams技术实现的和SpringWebFlux的底层实现是一样的技术。
具体执行流程:
ReactorStreams会订阅数据源,当有数据时,ReactorStreams以分块流的方式发送给客户端用户。
3. 提示词Prompt
3.1 定义
提示词是引导 AI 模型生成特定输出的输入格式,其设计和措辞会显著影响模型的响应。
Prompt 最开始只是简单的字符串,随着时间的推移,prompt 逐渐开始包含特定的占位符,例如 AI 模型可以识别的 “USER:”、“SYSTEM:” 等。阿里云通义模型可通过将多个消息字符串分类为不同的角色,然后再由 AI 模型处理,为 prompt 引入了更多结构。每条消息都分配有特定的角色,这些角色对消息进行分类,明确 AI 模型提示的每个部分的上下文和目的。这种结构化方法增强了与 AI 沟通的细微差别和有效性,因为 prompt 的每个部分在交互中都扮演着独特且明确的角色。
3.2 API 概览
3.2.1 Prompt
通常使用 ChatModel 的 call() 方法,该方法接受 Prompt 实例并返回 ChatResponse。
Prompt 类充当有组织的一系列 Message 对象和请求 ChatOptions 的容器。每条消息在提示中都体现了独特的角色,其内容和意图各不相同。这些角色可以包含各种元素,从用户查询到 AI 生成的响应再到相关背景信息。这种安排可以实现与 AI 模型的复杂而详细的交互,因为提示是由多条消息构成的,每条消息都被分配了在对话中扮演的特定角色。
下面是 Prompt 类的截断版本,为简洁起见省略了构造函数和实用方法:
public class Prompt implements ModelRequest<List<Message>> {

    private final List<Message> messages;

    private ChatOptions chatOptions;
}
3.2.2 Message
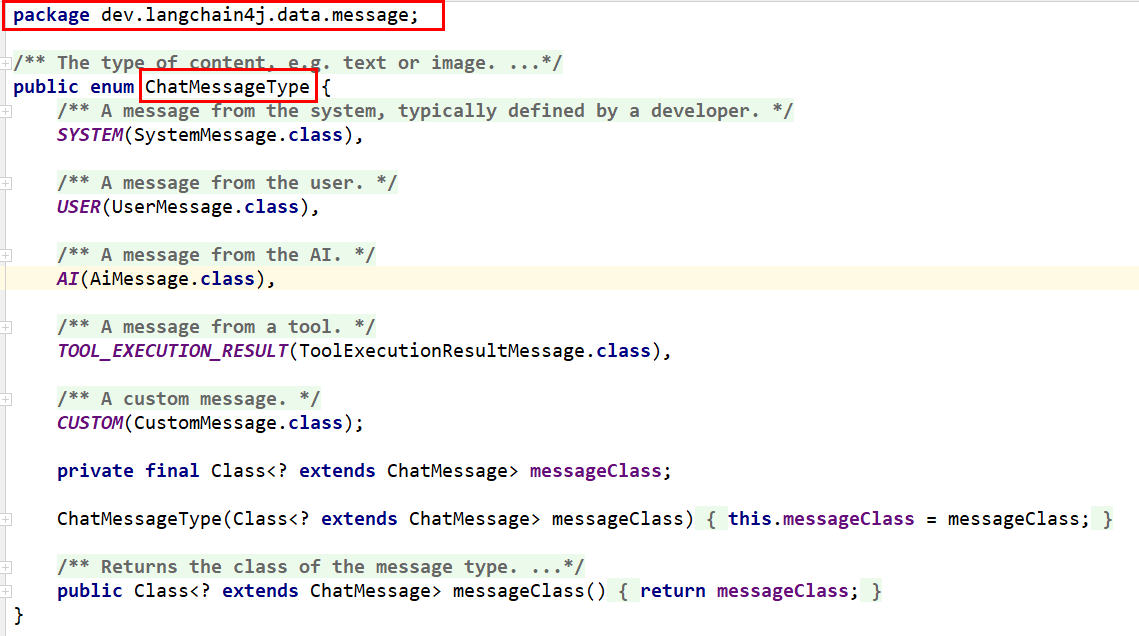
Message 接口封装了一个提示文本、一组元数据属性以及一个称为 MessageType 的分类。
该接口定义如下:
public interface Content {

  String getContent();

  Map<String, Object> getMetadata();
}

public interface Message extends Content {

  MessageType getMessageType();
}
Message 接口的各种实现对应 AI 模型可以处理的不同类别的消息。模型根据对话角色区分消息类别。

3.2.3 Role
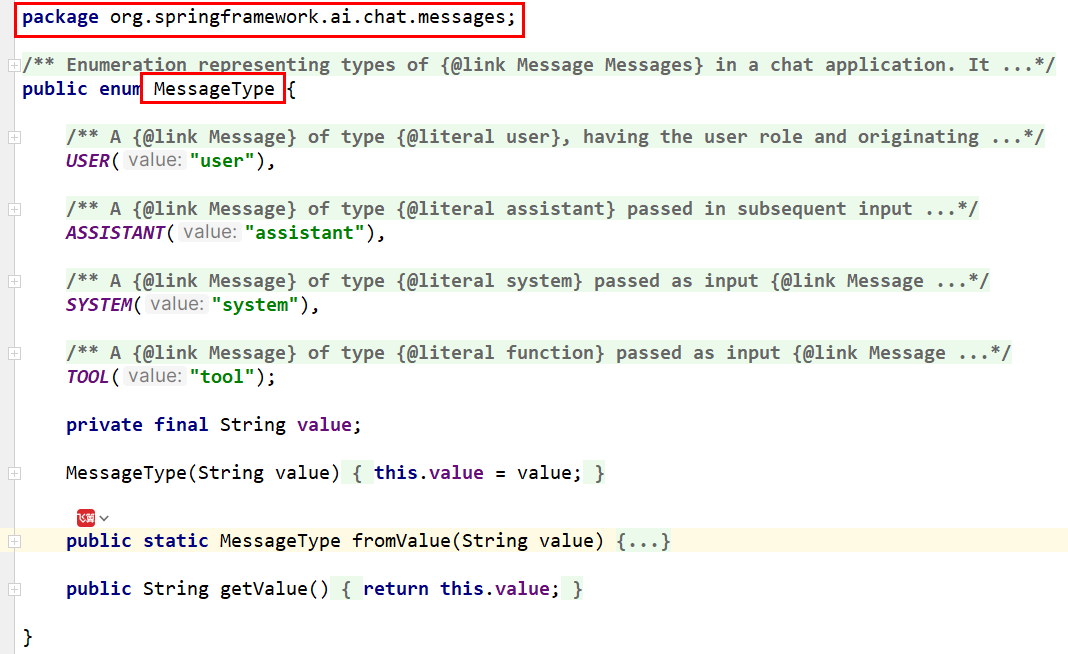
角色在 Spring AI 中表示为枚举,如下所示:
public enum MessageType {
USER("user"),
ASSISTANT("assistant"),
SYSTEM("system"),
TOOL("tool");
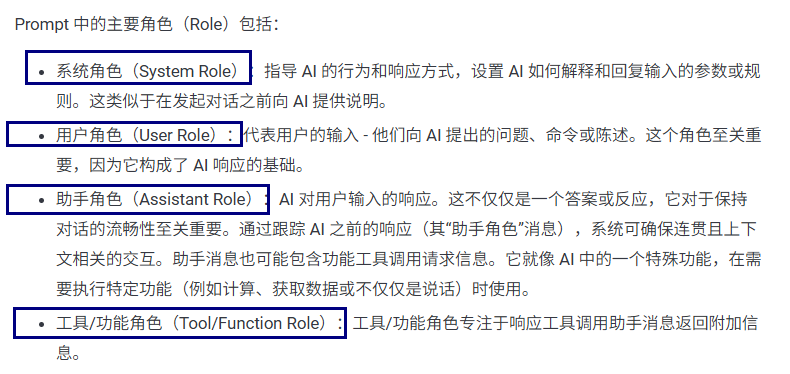
}Prompt 中的主要角色(Role)包括:
- 系统角色(System Role):指导 AI 的行为和响应方式,设置 AI 如何解释和回复输入的参数或规则。这类似于在发起对话之前向 AI 提供说明。
- 用户角色(User Role):代表用户的输入 - 他们向 AI 提出的问题、命令或陈述。这个角色至关重要,因为它构成了 AI 响应的基础。
- 助手角色(Assistant Role):AI 对用户输入的响应。这不仅仅是一个答案或反应,它对于保持对话的流畅性至关重要。通过跟踪 AI 之前的响应(其“助手角色”消息),系统可确保连贯且上下文相关的交互。助手消息也可能包含功能工具调用请求信息。它就像 AI 中的一个特殊功能,在需要执行特定功能(例如计算、获取数据或不仅仅是说话)时使用。
- 工具/功能角色(Tool/Function Role):工具/功能角色专注于响应工具调用助手消息返回附加信息,可以用来桥接外部服务,也可以进行函数调用如,支付/数据查询等操作,类似调用第三方util工具类。
3.2.4 简单总结
可以近似的理解为:Prompt > Message > String 简单的文本字符串提问。
3.3 编码实战
3.3.1 新建Module
新建子模块Module,可以命名为 Prompt
3.3.2 修改POM文件
在依赖配置节点修改为以下配置:
<dependencies>
        <dependency>
            <groupId>org.springframework.boot</groupId>
            <artifactId>spring-boot-starter-web</artifactId>
        </dependency>
        <!--spring-ai-alibaba dashscope-->
        <dependency>
            <groupId>com.alibaba.cloud.ai</groupId>
            <artifactId>spring-ai-alibaba-starter-dashscope</artifactId>
        </dependency>
        <!--lombok-->
        <dependency>
            <groupId>org.projectlombok</groupId>
            <artifactId>lombok</artifactId>
            <version>1.18.38</version>
        </dependency>
        <!--hutool-->
        <dependency>
            <groupId>cn.hutool</groupId>
            <artifactId>hutool-all</artifactId>
            <version>5.8.22</version>
        </dependency>
        <dependency>
            <groupId>org.springframework.boot</groupId>
            <artifactId>spring-boot-starter-test</artifactId>
            <scope>test</scope>
        </dependency>
    </dependencies>

    <build>
        <plugins>
            <plugin>
                <groupId>org.springframework.boot</groupId>
                <artifactId>spring-boot-maven-plugin</artifactId>
            </plugin>
            <plugin>
                <groupId>org.apache.maven.plugins</groupId>
                <artifactId>maven-compiler-plugin</artifactId>
                <version>3.11.0</version>
                <configuration>
                    <compilerArgs>
                        <arg>-parameters</arg>
                    </compilerArgs>
                    <source>21</source>
                    <target>21</target>
                </configuration>
            </plugin>
        </plugins>
    </build>

    <repositories>
        <repository>
            <id>spring-milestones</id>
            <name>Spring Milestones</name>
            <url>https://repo.spring.io/milestone</url>
            <snapshots>
                <enabled>false</enabled>
            </snapshots>
        </repository>
    </repositories>
3.3.3 修改配置文件
在resources目录下新建application.properties配置文件,内容如下:
server.port=8005

server.servlet.encoding.enabled=true
server.servlet.encoding.force=true
server.servlet.encoding.charset=UTF-8

spring.application.name=Prompt


# ====SpringAIAlibaba Config=============
spring.ai.dashscope.api-key=${DASHSCOPE_API_KEY}
3.3.4 编写主启动类
新建主启动类,并编写如下内容:
import org.springframework.boot.SpringApplication;
import org.springframework.boot.autoconfigure.SpringBootApplication;

/**
 * @Description 知识出处,https://java2ai.com/docs/1.0.0.2/tutorials/basics/prompt/?spm=5176.29160081.0.0.2856aa5cdeol7a
 */
@SpringBootApplication
public class PromptApplication
{
    public static void main(String[] args)
    {
        SpringApplication.run(PromptApplication.class,args);
    }
}
3.3.5 编写配置类
新建子包config,并在其中新建配置类SaaLLMConfig:
import com.alibaba.cloud.ai.dashscope.api.DashScopeApi;
import com.alibaba.cloud.ai.dashscope.chat.DashScopeChatModel;
import com.alibaba.cloud.ai.dashscope.chat.DashScopeChatOptions;
import org.springframework.ai.chat.client.ChatClient;
import org.springframework.ai.chat.model.ChatModel;
import org.springframework.ai.chat.prompt.ChatOptions;
import org.springframework.beans.factory.annotation.Qualifier;
import org.springframework.context.annotation.Bean;
import org.springframework.context.annotation.Configuration;

@Configuration
public class SaaLLMConfig
{
    // 模型名称常量定义
    private final String DEEPSEEK_MODEL = "deepseek-v3";
    private final String QWEN_MODEL = "qwen-plus";

    @Bean(name = "deepseek")
    public ChatModel deepSeek()
    {
        return DashScopeChatModel.builder()
                        .dashScopeApi(DashScopeApi.builder()
                                    .apiKey(System.getenv("DASHSCOPE_API_KEY"))
                                .build())
                .defaultOptions(
                        DashScopeChatOptions.builder().withModel(DEEPSEEK_MODEL).build()
                )
                .build();
    }

    @Bean(name = "qwen")
    public ChatModel qwen()
    {
        return DashScopeChatModel.builder().dashScopeApi(DashScopeApi.builder()
                        .apiKey(System.getenv("DASHSCOPE_API_KEY"))
                        .build())
                .defaultOptions(
                        DashScopeChatOptions.builder()
                                .withModel(QWEN_MODEL)
                                .build()
                )
                .build();
    }

    @Bean(name = "deepseekChatClient")
    public ChatClient deepseekChatClient(@Qualifier("deepseek") ChatModel deepSeek)
    {
        return ChatClient.builder(deepSeek)
                .defaultOptions(ChatOptions.builder()
                        .model(DEEPSEEK_MODEL)
                        .build())
                .build();
    }


    @Bean(name = "qwenChatClient")
    public ChatClient qwenChatClient(@Qualifier("qwen") ChatModel qwen)
    {
        return ChatClient.builder(qwen)
                .defaultOptions(ChatOptions.builder()
                        .model(QWEN_MODEL)
                        .build())
                .build();
    }
}
3.3.6 编写业务类
新建子包controller,并在其中新建业务类 PromptController
import jakarta.annotation.Resource;
import org.springframework.ai.chat.client.ChatClient;
import org.springframework.ai.chat.messages.AssistantMessage;
import org.springframework.ai.chat.messages.SystemMessage;
import org.springframework.ai.chat.messages.ToolResponseMessage;
import org.springframework.ai.chat.messages.UserMessage;
import org.springframework.ai.chat.model.ChatModel;
import org.springframework.ai.chat.model.ChatResponse;
import org.springframework.ai.chat.prompt.Prompt;
import org.springframework.web.bind.annotation.GetMapping;
import org.springframework.web.bind.annotation.RestController;
import reactor.core.publisher.Flux;

import java.util.List;

/**
 * @Description 知识出处,https://java2ai.com/docs/1.0.0.2/tutorials/basics/prompt/?spm=5176.29160081.0.0.2856aa5cdeol7a
 */
@RestController
public class PromptController
{
    @Resource(name = "deepseek")
    private ChatModel deepseekChatModel;
    @Resource(name = "qwen")
    private ChatModel qwenChatModel;

    @Resource(name = "deepseekChatClient")
    private ChatClient deepseekChatClient;
    @Resource(name = "qwenChatClient")
    private ChatClient qwenChatClient;

    // http://localhost:8005/prompt/chat?question=介绍一下北京
    @GetMapping("/prompt/chat")
    public Flux<String> chat(String question)
    {
        return deepseekChatClient.prompt()
                // AI 能力边界
                .system("你是一个法律助手,只回答法律问题,其它问题回复,我只能回答法律相关问题,其它无可奉告")
                .user(question)
                .stream()
                .content();
    }

    /**
     * http://localhost:8005/prompt/chat2?question=西游记
     * @param question
     * @return
     */
    @GetMapping("/prompt/chat2")
    public Flux<ChatResponse> chat2(String question)
    {
        // 系统消息
        SystemMessage systemMessage = new SystemMessage("你是一个讲故事的助手,每个故事控制在300字以内");

        // 用户消息
        UserMessage userMessage = new UserMessage(question);

        Prompt prompt = new Prompt(userMessage, systemMessage);

        return deepseekChatModel.stream(prompt);

    }

    /**
     * http://localhost:8005/prompt/chat3?question=西游记
     * @param question
     * @return
     */
    @GetMapping("/prompt/chat3")
    public Flux<String> chat3(String question)
    {
        // 系统消息
        SystemMessage systemMessage = new SystemMessage("你是一个讲故事的助手," +
                "每个故事控制在600字以内且以HTML格式返回");

        // 用户消息
        UserMessage userMessage = new UserMessage(question);

        Prompt prompt = new Prompt(userMessage, systemMessage);

        return deepseekChatModel.stream(prompt)
                .map(response -> response.getResults().get(0).getOutput().getText());

    }

    /**
     * http://localhost:8005/prompt/chat4?question=西游记
     * @param question
     * @return
     */
    @GetMapping("/prompt/chat4")
    public String chat4(String question)
    {
        AssistantMessage assistantMessage = deepseekChatClient.prompt()
                    .user(question)
                    .call()
                    .chatResponse()
                    .getResult()
                    .getOutput();

        return assistantMessage.getText();

    }

    /**
     * http://localhost:8005/prompt/chat5?city=北京
     * 近似理解Tool
     * @param city
     * @return
     */
    @GetMapping("/prompt/chat5")
    public String chat5(String city)
    {

        String answer = deepseekChatClient.prompt()
                .user(city + "未来3天天气情况如何?")
                .call()
                .chatResponse()
                .getResult()
                .getOutput()
                .getText();

        ToolResponseMessage toolResponseMessage =
                new ToolResponseMessage(
                        List.of(new ToolResponseMessage.ToolResponse("1","获得天气",city)
                        )
                );

        String toolResponse = toolResponseMessage.getText();

        String result = answer + toolResponse;

        return result;
    }
}
3.3.7 测试
浏览器中输入 http://localhost:8005/prompt/chat5?city=北京 测试效果如下:

此时的数据可能是大模型在训练时录入的旧数据,这也就是很多时候如果我们需要检索的信息可能需要使用联网搜索功能。
4. 提示词模板 Prompt Template
4.1 Prompt演化历程
4.1.1 简单纯字符串提问问题
最初的Prompt只是简单的文本字符串。
4.1.2 多角色消息
将消息分为不同角色(如用户、助手、系统等),设置功能边界,增强交互的复杂性和上下文感知能力。
此处简单列举各模型之间对于该概念的实现:
- LangChain4j
- Spring AI
- SpringAI Alibaba
4.1.3 占位符(Prompt Template)
引入占位符(如{占位符变量名})以动态插入内容。
4.2 Prompt Template
4.2.1 定义
Spring AI 中用于提示模板的关键组件是 PromptTemplate 类。该类使用 Terence Parr 开发的 OSS StringTemplate 引擎来构建和管理提示。PromptTemplate 类旨在促进结构化提示的创建,然后将其发送到 AI 模型进行处理。
public class PromptTemplate implements PromptTemplateActions, PromptTemplateMessageActions{
    // Other methods to be discussed later
}
4.3 编码实战
4.3.1 新建Module
新建子模块Module,可以命名为 PromptTemplate
4.3.2 修改POM文件
在依赖配置节点修改为以下配置:
<dependencies>
        <dependency>
            <groupId>org.springframework.boot</groupId>
            <artifactId>spring-boot-starter-web</artifactId>
        </dependency>
        <!--spring-ai-alibaba dashscope-->
        <dependency>
            <groupId>com.alibaba.cloud.ai</groupId>
            <artifactId>spring-ai-alibaba-starter-dashscope</artifactId>
        </dependency>
        <!--lombok-->
        <dependency>
            <groupId>org.projectlombok</groupId>
            <artifactId>lombok</artifactId>
            <version>1.18.38</version>
        </dependency>
        <!--hutool-->
        <dependency>
            <groupId>cn.hutool</groupId>
            <artifactId>hutool-all</artifactId>
            <version>5.8.22</version>
        </dependency>
        <dependency>
            <groupId>org.springframework.boot</groupId>
            <artifactId>spring-boot-starter-test</artifactId>
            <scope>test</scope>
        </dependency>
    </dependencies>

    <build>
        <plugins>
            <plugin>
                <groupId>org.springframework.boot</groupId>
                <artifactId>spring-boot-maven-plugin</artifactId>
            </plugin>
            <plugin>
                <groupId>org.apache.maven.plugins</groupId>
                <artifactId>maven-compiler-plugin</artifactId>
                <version>3.11.0</version>
                <configuration>
                    <compilerArgs>
                        <arg>-parameters</arg>
                    </compilerArgs>
                    <source>21</source>
                    <target>21</target>
                </configuration>
            </plugin>
        </plugins>
    </build>

    <repositories>
        <repository>
            <id>spring-milestones</id>
            <name>Spring Milestones</name>
            <url>https://repo.spring.io/milestone</url>
            <snapshots>
                <enabled>false</enabled>
            </snapshots>
        </repository>
    </repositories>
4.3.3 修改配置文件
在resources目录下新建application.properties配置文件,内容如下:
server.port=8006

server.servlet.encoding.enabled=true
server.servlet.encoding.force=true
server.servlet.encoding.charset=UTF-8

spring.application.name=PromptTemplate


# ====SpringAIAlibaba Config=============
spring.ai.dashscope.api-key=${DASHSCOPE_API_KEY}
4.3.4 编写主启动类
新建主启动类,并编写如下内容:
import org.springframework.boot.SpringApplication;
import org.springframework.boot.autoconfigure.SpringBootApplication;

@SpringBootApplication
public class PromptTemplateApplication
{

    public static void main(String[] args)
    {
        SpringApplication.run(PromptTemplateApplication.class, args);
    }

}
4.3.5 编写配置类
新建子包config,并在其中新建配置类SaaLLMConfig:
import com.alibaba.cloud.ai.dashscope.api.DashScopeApi;
import com.alibaba.cloud.ai.dashscope.chat.DashScopeChatModel;
import com.alibaba.cloud.ai.dashscope.chat.DashScopeChatOptions;
import org.springframework.ai.chat.client.ChatClient;
import org.springframework.ai.chat.model.ChatModel;
import org.springframework.ai.chat.prompt.ChatOptions;
import org.springframework.beans.factory.annotation.Qualifier;
import org.springframework.context.annotation.Bean;
import org.springframework.context.annotation.Configuration;

/**
 * @Description ChatModel+ChatClient+多模型共存
 */
@Configuration
public class SaaLLMConfig
{
    // 模型名称常量定义
    private final String DEEPSEEK_MODEL = "deepseek-v3";
    private final String QWEN_MODEL = "qwen-plus";

    @Bean(name = "deepseek")
    public ChatModel deepSeek()
    {
        return DashScopeChatModel.builder()
                        .dashScopeApi(DashScopeApi.builder()
                                    .apiKey(System.getenv("DASHSCOPE_API_KEY"))
                                .build())
                .defaultOptions(
                        DashScopeChatOptions.builder().withModel(DEEPSEEK_MODEL).build()
                )
                .build();
    }

    @Bean(name = "qwen")
    public ChatModel qwen()
    {
        return DashScopeChatModel.builder().dashScopeApi(DashScopeApi.builder()
                        .apiKey(System.getenv("DASHSCOPE_API_KEY"))
                        .build())
                .defaultOptions(
                        DashScopeChatOptions.builder()
                                .withModel(QWEN_MODEL)
                                .build()
                )
                .build();
    }

    @Bean(name = "deepseekChatClient")
    public ChatClient deepseekChatClient(@Qualifier("deepseek") ChatModel deepSeek)
    {
        return ChatClient.builder(deepSeek)
                .defaultOptions(ChatOptions.builder()
                        .model(DEEPSEEK_MODEL)
                        .build())
                .build();
    }


    @Bean(name = "qwenChatClient")
    public ChatClient qwenChatClient(@Qualifier("qwen") ChatModel qwen)
    {
        return ChatClient.builder(qwen)
                .defaultOptions(ChatOptions.builder()
                        .model(QWEN_MODEL)
                        .build())
                .build();
    }
}
4.3.6 编写业务类
新建子包controller,并在其中新建业务类 PromptController
import jakarta.annotation.Resource;
import org.springframework.ai.chat.client.ChatClient;
import org.springframework.ai.chat.messages.Message;
import org.springframework.ai.chat.messages.SystemMessage;
import org.springframework.ai.chat.messages.UserMessage;
import org.springframework.ai.chat.model.ChatModel;
import org.springframework.ai.chat.prompt.Prompt;
import org.springframework.ai.chat.prompt.PromptTemplate;
import org.springframework.ai.chat.prompt.SystemPromptTemplate;
import org.springframework.web.bind.annotation.GetMapping;
import org.springframework.web.bind.annotation.RestController;
import reactor.core.publisher.Flux;
import org.springframework.beans.factory.annotation.Value;

import java.util.List;
import java.util.Map;

@RestController
public class PromptTemplateController
{
    @Resource(name = "deepseek")
    private ChatModel deepseekChatModel;
    @Resource(name = "qwen")
    private ChatModel qwenChatModel;

    @Resource(name = "deepseekChatClient")
    private ChatClient deepseekChatClient;
    @Resource(name = "qwenChatClient")
    private ChatClient qwenChatClient;

    @Value("classpath:/prompttemplate/atguigu-template.txt")
    private org.springframework.core.io.Resource userTemplate;

    /**
     * @Description: PromptTemplate基本使用,使用占位符设置模版 PromptTemplate
     * 测试地址
     * http://localhost:8006/prompttemplate/chat?topic=java&output_format=html&wordCount=200
     */
    @GetMapping("/prompttemplate/chat")
    public Flux<String> chat(String topic, String output_format, String wordCount)
    {
        PromptTemplate promptTemplate = new PromptTemplate("" +
                "讲一个关于{topic}的故事" +
                "并以{output_format}格式输出," +
                "字数在{wordCount}左右");

        // PromptTempate -> Prompt
        Prompt prompt = promptTemplate.create(Map.of(
                "topic", topic,
                "output_format",output_format,
                "wordCount",wordCount));

        return deepseekChatClient.prompt(prompt).stream().content();
    }

    /**
     * @Description: PromptTemplate读取模版文件实现模版功能
     * 测试地址
     * http://localhost:8006/prompttemplate/chat2?topic=java&output_format=html
     */
    @GetMapping("/prompttemplate/chat2")
    public String chat2(String topic,String output_format)
    {
        PromptTemplate promptTemplate = new PromptTemplate(userTemplate);

        Prompt prompt = promptTemplate.create(Map.of("topic", topic, "output_format", output_format));

        return deepseekChatClient.prompt(prompt).call().content();
    }

    /**
     * @Description:
     * 系统消息(SystemMessage):设定AI的行为规则和功能边界(xxx助手/什么格式返回/字数控制多少)。
     * 用户消息(UserMessage):用户的提问/主题
     * http://localhost:8006/prompttemplate/chat3?sysTopic=法律&userTopic=知识产权法
     *
     * http://localhost:8006/prompttemplate/chat3?sysTopic=法律&userTopic=夫妻肺片
     */
    @GetMapping("/prompttemplate/chat3")
    public String chat3(String sysTopic, String userTopic)
    {
        // 1.SystemPromptTemplate
        SystemPromptTemplate systemPromptTemplate = new SystemPromptTemplate("你是{systemTopic}助手,只回答{systemTopic}其它无可奉告,以HTML格式的结果。");
        Message sysMessage = systemPromptTemplate.createMessage(Map.of("systemTopic", sysTopic));
        // 2.PromptTemplate
        PromptTemplate userPromptTemplate = new PromptTemplate("解释一下{userTopic}");
        Message userMessage = userPromptTemplate.createMessage(Map.of("userTopic", userTopic));
        // 3.组合【关键】 多个 Message -> Prompt
        Prompt prompt = new Prompt(List.of(sysMessage, userMessage));
        // 4.调用 LLM
        return deepseekChatClient.prompt(prompt).call().content();
    }


    /**
     * @Description: 人物角色设定,通过SystemMessage来实现人物设定,本案例用ChatModel实现
     * 设定AI为”医疗专家”时,仅回答医学相关问题
     * 设定AI为编程助手”时,专注于技术问题解答
     * http://localhost:8006/prompttemplate/chat4?question=牡丹花
     */
    @GetMapping("/prompttemplate/chat4")
    public String chat4(String question)
    {
        //1 系统消息
        SystemMessage systemMessage = new SystemMessage("你是一个Java编程助手,拒绝回答非技术问题。");
        //2 用户消息
        UserMessage userMessage = new UserMessage(question);
        //3 系统消息+用户消息=完整提示词
        //Prompt prompt = new Prompt(systemMessage, userMessage);
        Prompt prompt = new Prompt(List.of(systemMessage, userMessage));
        //4 调用LLM
        String result = deepseekChatModel.call(prompt).getResult().getOutput().getText();
        System.out.println(result);
        return result;
    }

    /**
     * @Description: 人物角色设定,通过SystemMessage来实现人物设定,本案例用ChatClient实现
     * 设定AI为”医疗专家”时,仅回答医学相关问题
     * 设定AI为编程助手”时,专注于技术问题解答
     * http://localhost:8006/prompttemplate/chat5?question=火锅
     */
    @GetMapping("/prompttemplate/chat5")
    public Flux<String> chat5(String question)
    {
        return deepseekChatClient.prompt()
                .system("你是一个Java编程助手,拒绝回答非技术问题。")
                .user(question)
                .stream()
                .content();
    }
}
4.3.7 测试
浏览器中输入 localhost:8006/prompttemplate/chat5?question=火锅 测试效果如下:

此外还可以根据代码中的注释进行各功能的测试。

有“AI”的1024 = 2048,欢迎大家加入2048 AI社区
更多推荐

 21
21 0
0- 0


 已为社区贡献8条内容

所有评论(0)