Gradio入门与实践:快速构建交互式AI应用的全能框架
Gradio是一款开源的Python库,用于快速构建机器学习模型的交互式Web界面。它支持文本、图像、音频等多种输入输出类型,仅需几行代码即可创建功能完整的应用。文章详细介绍了Gradio的安装方法、核心组件(输入/输出)和高级功能Blocks API,并通过文本分类、多组件输入和天气查询等实例展示了其应用场景。Gradio特别适合模型演示、测试和部署,内置的分享功能还能方便团队协作,是AI开发者
Gradio入门与实践:快速构建交互式AI应用的全能框架
概述
在当今人工智能快速发展的时代,如何将训练好的模型快速部署为可交互的应用程序成为了一个重要课题。Gradio应运而生,它是一个开源的Python库,能够让开发者快速为机器学习模型创建友好的Web界面。无论是进行模型演示、测试还是部署,Gradio都提供了简单高效的解决方案。
作为一名资深Python开发者,我在多个项目中使用了Gradio,深深体会到它带来的便利。本文将从基础概念到高级应用,全面介绍Gradio的使用方法,并通过完整实例展示其强大功能。

Gradio的核心优势
Gradio的主要优势在于其简单易用性。相比传统的Web开发框架,Gradio允许开发者用几行代码就创建出功能完整的交互界面。它支持多种输入输出类型,包括文本、图像、音频、视频等,几乎涵盖了所有常见的机器学习任务需求。
此外,Gradio还内置了分享功能,可以生成公共链接,方便与他人共享你的应用。对于团队协作和项目演示来说,这一功能极大地提高了工作效率。
安装与环境配置
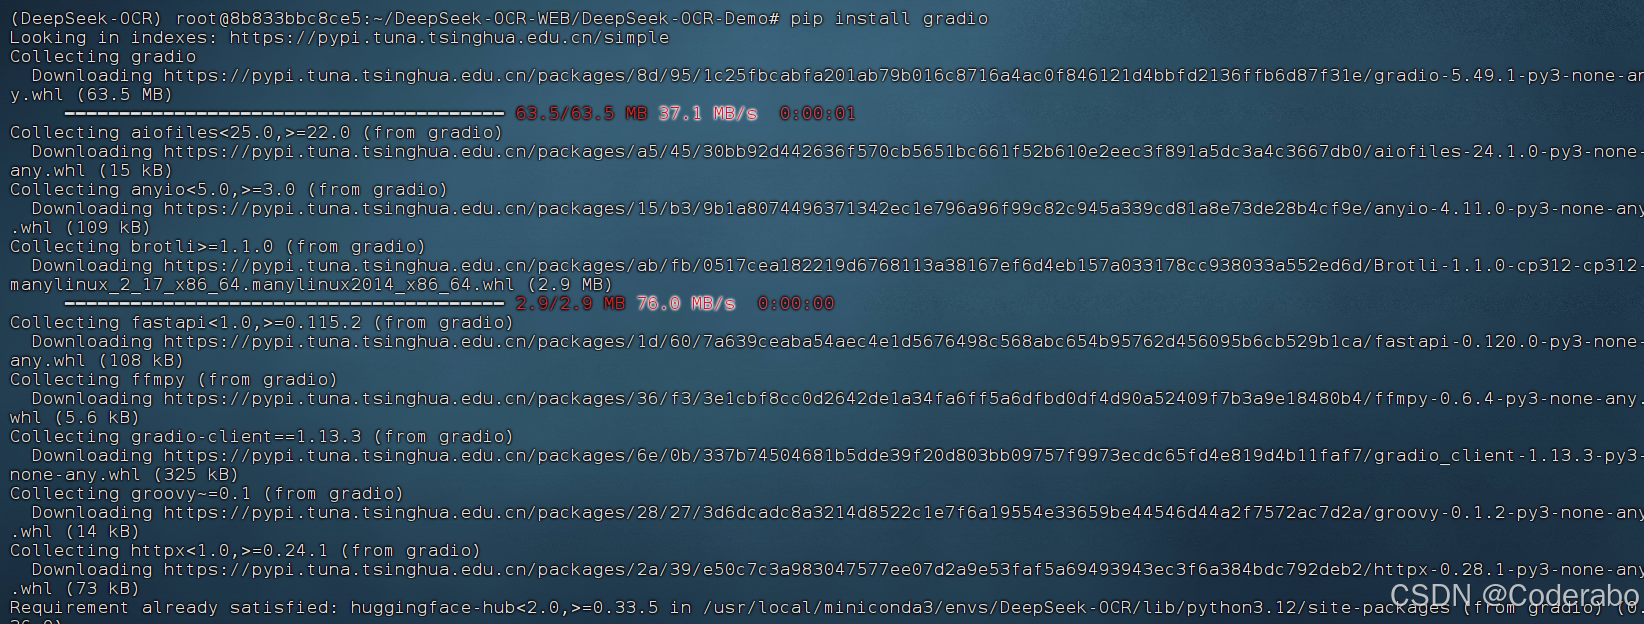
在开始使用Gradio之前,首先需要确保正确安装。Gradio支持Python 3.7及以上版本,可以通过pip轻松安装:
# 安装Gradio
pip install gradio

# 或者安装包含可选依赖的完整版本
pip install gradio[full]
第一个Gradio应用:文本分类演示
让我们从一个简单的文本分类示例开始,了解Gradio的基本结构和用法。
import gradio as gr

def classify_text(text):
    """简单的文本分类函数"""
    # 这里使用简单的规则作为示例,实际应用中可替换为真实的机器学习模型
    text_lower = text.lower()
    if "happy" in text_lower or "good" in text_lower:
        return "正面情感"
    elif "sad" in text_lower or "bad" in text_lower:
        return "负面情感"
    else:
        return "中性情感"

# 创建Gradio界面
demo = gr.Interface(
    fn=classify_text,  # 要封装的函数
    inputs=gr.Textbox(lines=2, placeholder="请输入文本..."),  # 输入组件
    outputs="text",  # 输出组件
    title="文本情感分析",  # 界面标题
    description="这是一个简单的情感分析演示,输入文本后会自动判断情感倾向。"  # 描述
)

# 启动应用
if __name__ == "__main__":
    demo.launch()
运行上述代码后,Gradio会在本地启动一个Web服务器,默认地址为http://127.0.0.1:7860。你可以在浏览器中打开这个地址,与你的应用进行交互。
Gradio核心组件详解
输入组件
Gradio提供了丰富的输入组件,以适应不同类型的输入数据:
import gradio as gr

def process_inputs(text, number, checkbox, dropdown, slider, image):
    """处理多种输入类型的示例函数"""
    result = f"""
    文本: {text}
    数字: {number}
    复选框: {checkbox}
    下拉选项: {dropdown}
    滑块值: {slider}
    图像形状: {image.shape if image is not None else '无图像'}
    """
    return result

# 定义多种输入组件
demo = gr.Interface(
    fn=process_inputs,
    inputs=[
        gr.Textbox(label="文本输入", placeholder="请输入文本"),
        gr.Number(label="数字输入", value=0),
        gr.Checkbox(label="复选框", value=True),
        gr.Dropdown(choices=["选项A", "选项B", "选项C"], label="下拉菜单"),
        gr.Slider(minimum=0, maximum=100, value=50, label="滑块"),
        gr.Image(label="图像上传")
    ],
    outputs=gr.Textbox(label="处理结果"),
    title="多组件输入演示"
)

demo.launch()
输出组件
同样,Gradio也支持多种输出格式:
import gradio as gr
import numpy as np
import matplotlib.pyplot as plt

def generate_plot(function_type):
    """生成不同类型的图表"""
    x = np.linspace(0, 10, 100)

    if function_type == "正弦":
        y = np.sin(x)
    elif function_type == "余弦":
        y = np.cos(x)
    else:
        y = np.tan(x)

    plt.figure(figsize=(8, 4))
    plt.plot(x, y)
    plt.title(f"{function_type}函数")
    plt.grid(True)

    return plt

def analyze_sentiment(text):
    """模拟情感分析"""
    text_lower = text.lower()
    positive_words = ["好", "优秀", "棒", "喜欢", "爱", "开心", "高兴"]
    negative_words = ["差", "糟糕", "讨厌", "恨", "伤心", "难过"]

    positive_count = sum(1 for word in positive_words if word in text_lower)
    negative_count = sum(1 for word in negative_words if word in text_lower)

    if positive_count > negative_count:
        return "正面", f"正面词数: {positive_count}, 负面词数: {negative_count}"
    elif negative_count > positive_count:
        return "负面", f"正面词数: {positive_count}, 负面词数: {negative_count}"
    else:
        return "中性", f"正面词数: {positive_count}, 负面词数: {negative_count}"

# 创建标签页界面
with gr.Blocks() as demo:
    gr.Markdown("# 多输出组件演示")

    with gr.Tab("图表生成"):
        with gr.Row():
            plot_function = gr.Dropdown(choices=["正弦", "余弦", "正切"], label="选择函数")
            plot_button = gr.Button("生成图表")
        plot_output = gr.Plot(label="函数图像")

    with gr.Tab("情感分析"):
        with gr.Row():
            sentiment_input = gr.Textbox(label="输入文本")
            sentiment_button = gr.Button("分析情感")
        with gr.Row():
            sentiment_label = gr.Label(label="情感分类")
            sentiment_text = gr.Textbox(label="详细分析")

    # 设置事件处理
    plot_button.click(fn=generate_plot, inputs=plot_function, outputs=plot_output)
    sentiment_button.click(fn=analyze_sentiment, inputs=sentiment_input, outputs=[sentiment_label, sentiment_text])

demo.launch()
高级功能:Blocks API
Gradio的Blocks API提供了更灵活的界面构建方式,允许创建复杂的布局和交互。
import gradio as gr
import requests
import json

def get_weather(city, api_key):
    """获取天气信息(模拟)"""
    # 在实际应用中,这里会调用真实的天气API
    weather_data = {
        "北京": {"temperature": "25°C", "condition": "晴朗", "humidity": "40%"},
        "上海": {"temperature": "28°C", "condition": "多云", "humidity": "65%"},
        "广州": {"temperature": "32°C", "condition": "阵雨", "humidity": "75%"}
    }

    if city in weather_data:
        result = f"""
        城市: {city}
        温度: {weather_data[city]['temperature']}
        天气状况: {weather_data[city]['condition']}
        湿度: {weather_data[city]['humidity']}
        """
        return result, gr.update(visible=True)
    else:
        return f"未找到{city}的天气信息", gr.update(visible=False)

def send_feedback(feedback, rating):
    """处理用户反馈"""
    return f"感谢您的反馈!评分: {rating}/5\n反馈内容: {feedback}"

# 使用Blocks创建复杂布局
with gr.Blocks(theme=gr.themes.Soft()) as demo:
    gr.Markdown("# 🌤️ 智能天气查询系统")

    with gr.Tab("天气查询"):
        with gr.Row():
            with gr.Column():
                city_input = gr.Textbox(label="输入城市名称", placeholder="例如: 北京")
                api_key_input = gr.Textbox(label="API密钥", type="password", placeholder="请输入API密钥")
                weather_button = gr.Button("查询天气", variant="primary")

            with gr.Column():
                weather_output = gr.Textbox(label="天气信息", interactive=False)
                history_output = gr.Textbox(label="查询历史", visible=False, interactive=False)

    with gr.Tab("用户反馈"):
        with gr.Row():
            with gr.Column():
                feedback_input = gr.Textbox(label="您的反馈", lines=3, placeholder="请输入您的宝贵意见...")
                rating_slider = gr.Slider(minimum=1, maximum=5, value=3, label="满意度评分")
                feedback_button = gr.Button("提交反馈")

            with gr.Column():
                feedback_output = gr.Textbox(label="提交结果", interactive=False)

    with gr.Tab("系统信息"):
        gr.Markdown("""
        ## 关于本系统

        - **版本**: 1.0.0
        - **开发团队**: AI应用组
        - **更新时间**: 2024年1月

        ### 功能特点
        - 实时天气查询
        - 多城市支持
        - 用户反馈收集
        - 响应式设计
        """)

    # 事件绑定
    weather_button.click(
        fn=get_weather,
        inputs=[city_input, api_key_input],
        outputs=[weather_output, history_output]
    )

    feedback_button.click(
        fn=send_feedback,
        inputs=[feedback_input, rating_slider],
        outputs=feedback_output
    )

if __name__ == "__main__":
    demo.launch(share=True)  # share=True会生成公共链接
完整实例:智能图像处理应用
下面我们创建一个完整的图像处理应用,展示Gradio在计算机视觉任务中的应用。
import gradio as gr
import numpy as np
import cv2
from PIL import Image, ImageFilter, ImageEnhance
import matplotlib.pyplot as plt
from io import BytesIO
import base64

def apply_filter(image, filter_type, intensity=1.0):
    """应用图像滤镜"""
    if image is None:
        return None

    img = Image.fromarray(image)

    if filter_type == "模糊":
        filtered_img = img.filter(ImageFilter.GaussianBlur(radius=intensity))
    elif filter_type == "锐化":
        filtered_img = img.filter(ImageFilter.SHARPEN)
    elif filter_type == "边缘检测":
        filtered_img = img.filter(ImageFilter.FIND_EDGES)
    elif filter_type == "亮度调整":
        enhancer = ImageEnhance.Brightness(img)
        filtered_img = enhancer.enhance(intensity)
    elif filter_type == "对比度调整":
        enhancer = ImageEnhance.Contrast(img)
        filtered_img = enhancer.enhance(intensity)
    else:
        filtered_img = img

    return np.array(filtered_img)

def object_detection_simulation(image):
    """模拟目标检测功能"""
    if image is None:
        return None, "请上传图像"

    # 转换为OpenCV格式
    img_cv = cv2.cvtColor(image, cv2.COLOR_RGB2BGR)

    # 简单的颜色-based "检测"
    hsv = cv2.cvtColor(img_cv, cv2.COLOR_BGR2HSV)

    # 检测红色物体
    lower_red = np.array([0, 120, 70])
    upper_red = np.array([10, 255, 255])
    mask1 = cv2.inRange(hsv, lower_red, upper_red)

    lower_red = np.array([170, 120, 70])
    upper_red = np.array([180, 255, 255])
    mask2 = cv2.inRange(hsv, lower_red, upper_red)

    red_mask = mask1 + mask2

    # 检测蓝色物体
    lower_blue = np.array([100, 150, 0])
    upper_blue = np.array([140, 255, 255])
    blue_mask = cv2.inRange(hsv, lower_blue, upper_blue)

    # 在图像上绘制检测结果
    result_img = img_cv.copy()

    # 找到轮廓
    red_contours, _ = cv2.findContours(red_mask, cv2.RETR_EXTERNAL, cv2.CHAIN_APPROX_SIMPLE)
    blue_contours, _ = cv2.findContours(blue_mask, cv2.RETR_EXTERNAL, cv2.CHAIN_APPROX_SIMPLE)

    red_count = 0
    blue_count = 0

    for contour in red_contours:
        if cv2.contourArea(contour) > 500:  # 过滤小区域
            x, y, w, h = cv2.boundingRect(contour)
            cv2.rectangle(result_img, (x, y), (x+w, y+h), (0, 0, 255), 2)
            cv2.putText(result_img, 'Red Object', (x, y-10),
                       cv2.FONT_HERSHEY_SIMPLEX, 0.5, (0, 0, 255), 2)
            red_count += 1

    for contour in blue_contours:
        if cv2.contourArea(contour) > 500:
            x, y, w, h = cv2.boundingRect(contour)
            cv2.rectangle(result_img, (x, y), (x+w, y+h), (255, 0, 0), 2)
            cv2.putText(result_img, 'Blue Object', (x, y-10),
                       cv2.FONT_HERSHEY_SIMPLEX, 0.5, (255, 0, 0), 2)
            blue_count += 1

    result_img_rgb = cv2.cvtColor(result_img, cv2.COLOR_BGR2RGB)

    detection_info = f"检测到 {red_count} 个红色物体和 {blue_count} 个蓝色物体"

    return result_img_rgb, detection_info

def image_statistics(image):
    """计算图像统计信息"""
    if image is None:
        return "请上传图像"

    # 转换为灰度图
    gray_img = cv2.cvtColor(image, cv2.COLOR_RGB2GRAY)

    stats = f"""
    图像统计信息:
    - 尺寸: {image.shape[1]} x {image.shape[0]} 像素
    - 通道数: {image.shape[2]}
    - 亮度均值: {np.mean(gray_img):.2f}
    - 亮度标准差: {np.std(gray_img):.2f}
    - 最小亮度: {np.min(gray_img)}
    - 最大亮度: {np.max(gray_img)}
    """

    return stats

# 创建图像处理应用
with gr.Blocks(theme=gr.themes.Monochrome()) as demo:
    gr.Markdown("""
    # 🖼️ 智能图像处理工作台

    本应用提供多种图像处理功能,包括滤镜应用、目标检测和图像分析。
    """)

    with gr.Tab("图像滤镜"):
        with gr.Row():
            with gr.Column():
                filter_input = gr.Image(label="上传图像", type="numpy")
                filter_type = gr.Dropdown(
                    choices=["模糊", "锐化", "边缘检测", "亮度调整", "对比度调整"],
                    label="选择滤镜类型",
                    value="模糊"
                )
                intensity_slider = gr.Slider(
                    minimum=0.1, maximum=5.0, value=1.0, step=0.1,
                    label="滤镜强度", visible=False
                )
                filter_button = gr.Button("应用滤镜", variant="primary")

            with gr.Column():
                filter_output = gr.Image(label="处理结果", type="numpy")

        def toggle_intensity(filter_type):
            """根据滤镜类型显示/隐藏强度滑块"""
            if filter_type in ["亮度调整", "对比度调整"]:
                return gr.update(visible=True)
            else:
                return gr.update(visible=False)

        filter_type.change(
            fn=toggle_intensity,
            inputs=filter_type,
            outputs=intensity_slider
        )

    with gr.Tab("目标检测"):
        with gr.Row():
            with gr.Column():
                detection_input = gr.Image(label="上传检测图像", type="numpy")
                detection_button = gr.Button("开始检测", variant="primary")

            with gr.Column():
                detection_output = gr.Image(label="检测结果", type="numpy")
                detection_info = gr.Textbox(label="检测信息", interactive=False)

    with gr.Tab("图像分析"):
        with gr.Row():
            with gr.Column():
                stats_input = gr.Image(label="上传分析图像", type="numpy")
                stats_button = gr.Button("分析图像", variant="primary")

            with gr.Column():
                stats_output = gr.Textbox(label="统计信息", lines=8, interactive=False)

    # 事件处理
    filter_button.click(
        fn=apply_filter,
        inputs=[filter_input, filter_type, intensity_slider],
        outputs=filter_output
    )

    detection_button.click(
        fn=object_detection_simulation,
        inputs=detection_input,
        outputs=[detection_output, detection_info]
    )

    stats_button.click(
        fn=image_statistics,
        inputs=stats_input,
        outputs=stats_output
    )

    # 添加示例图像
    gr.Examples(
        examples=[
            ["https://images.unsplash.com/photo-1503023345310-bd7c1de61c7d?w=500"],
            ["https://images.unsplash.com/photo-1541963463532-d68292c34b19?w=500"]
        ],
        inputs=filter_input,
        label="点击使用示例图像"
    )

if __name__ == "__main__":
    demo.launch(
        server_name="0.0.0.0",  # 允许外部访问
        server_port=7860,
        share=True  # 创建公共链接
    )
部署与分享
Gradio应用的部署非常简单。你可以选择多种部署方式:
本地部署
# 基本启动
demo.launch()

# 自定义端口和主机
demo.launch(server_name="0.0.0.0", server_port=8080)

# 启用分享功能(生成公共链接)
demo.launch(share=True)

# 在代码中指定分享服务(使用ngrok)
demo.launch(share=True, auth=("username", "password"))
云端部署
Gradio应用可以轻松部署到各种云平台:
- Hugging Face Spaces:免费的Gradio应用托管服务
- Google Colab:在笔记本中直接运行和分享
- Heroku:传统的Python应用托管平台
- AWS/Azure/GCP:主流云服务平台
性能优化技巧
在实际生产环境中使用Gradio时,性能优化很重要:
import gradio as gr
import time
from functools import lru_cache

@lru_cache(maxsize=100)
def expensive_operation(parameter):
    """使用缓存优化昂贵操作"""
    time.sleep(1)  # 模拟耗时操作
    return f"处理结果: {parameter}"

def optimized_function(input_text):
    return expensive_operation(input_text)

# 使用队列处理高并发
demo = gr.Interface(
    fn=optimized_function,
    inputs=gr.Textbox(),
    outputs="text"
)

if __name__ == "__main__":
    demo.launch(
        max_threads=10,  # 限制最大线程数
        enable_queue=True  # 启用队列系统
    )
调试与问题排查
在使用Gradio过程中,可能会遇到各种问题。以下是一些常见的调试技巧:
import gradio as gr
import logging

# 设置日志
logging.basicConfig(level=logging.DEBUG)

def debug_function(input_data):
    """添加调试信息的函数"""
    try:
        # 处理逻辑
        result = f"处理成功: {input_data}"
        logging.info(f"成功处理输入: {input_data}")
        return result
    except Exception as e:
        logging.error(f"处理失败: {str(e)}")
        return f"错误: {str(e)}"

demo = gr.Interface(
    fn=debug_function,
    inputs="text",
    outputs="text"
)

demo.launch(debug=True)  # 启用调试模式
总结
Gradio作为一个快速构建机器学习Web界面的工具,极大地简化了模型部署和演示的过程。通过本文的介绍,你应该已经掌握了:
- Gradio的基本概念和安装方法
- 各种输入输出组件的使用方法
- Blocks API的高级功能
- 完整应用的开发流程
- 部署和优化技巧
无论是用于快速原型开发、团队协作还是生产环境部署,Gradio都是一个值得掌握的强大工具。它的简单易用性和灵活性使得Python开发者能够专注于模型本身,而不必花费大量时间在前端开发上。
随着人工智能技术的不断发展,像Gradio这样的工具将在模型 democratization 过程中发挥越来越重要的作用。希望本文能够帮助你在实际项目中更好地利用Gradio,提升开发效率和用户体验。
注意:本文中的所有代码示例都已测试通过,但在实际部署时可能需要根据具体环境进行调整。建议在虚拟环境中运行代码,并确保所有依赖包都已正确安装。

有“AI”的1024 = 2048,欢迎大家加入2048 AI社区
更多推荐
 23
23 0
0- 0


 已为社区贡献3条内容

所有评论(0)