AutoDL 部署GLM大模型-简单实例讲解
使用AutoDL 本地部署ChatGLM3-6B(智谱清言大模型),并简单的进行一个多轮对话的调用。
前情提要
使用AutoDL 本地部署ChatGLM3-6B(智谱清言大模型),并简单的进行一个多轮对话的调用。
一、准备工作
1.AutoDL
根据ChatGLM3-6B 的运行要求,选择配置
ChatGLM3-6B 硬件要求
-
最低配置(int4 推理):
-
显卡:6GB 显存(如 RTX 3060 / A2000)
-
内存:≥8GB
-
系统:Linux/macOS/Windows(支持
transformers和ggml模型) -
加速:支持 CPU、CUDA、OpenCL、MPS(Mac)
-
AUtoDL配置,主机配置与
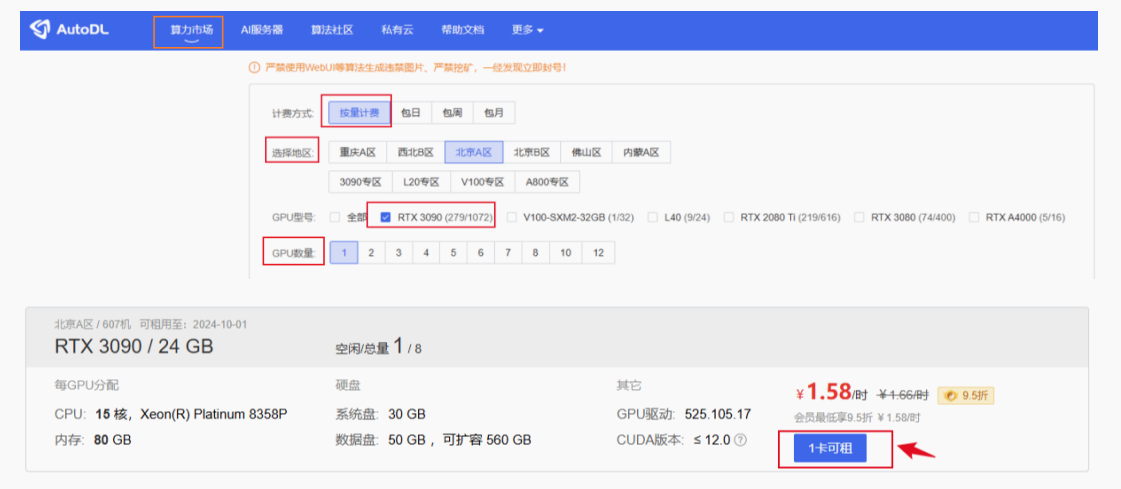
主机配置
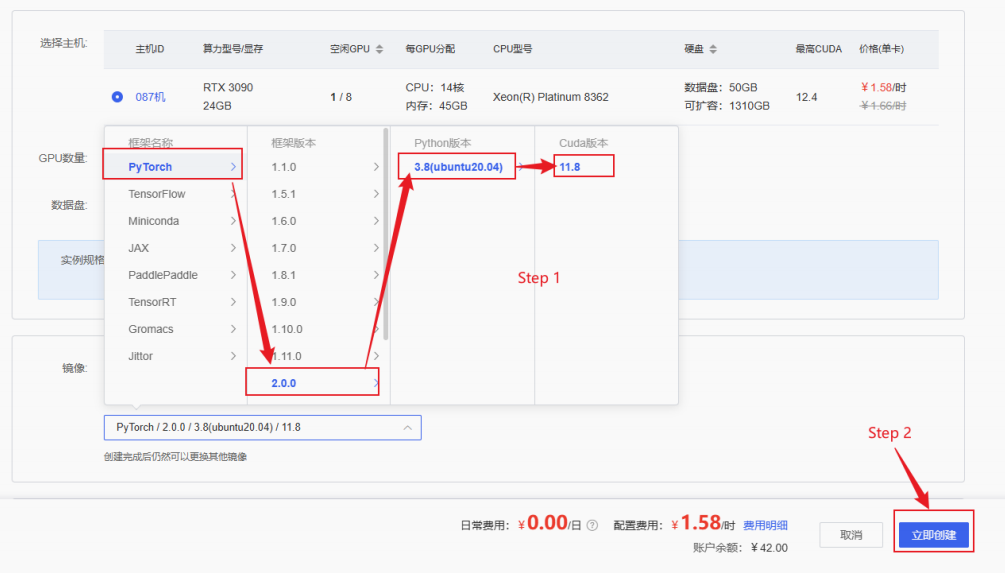
环境配置
2.更换pip源、安装依赖
# 升级pip,以防止旧版本的pip无法安装 最新的库
python -m pip install --upgrade pip
# 更换 pypi 源加速库的安装,将默认源更换为清华源
pip config set global.index-url https://pypi.tuna.tsinghua.edu.cn/simple
# 安装GLM依赖库,阿里达摩院的AI模型工具库
pip install modelscope
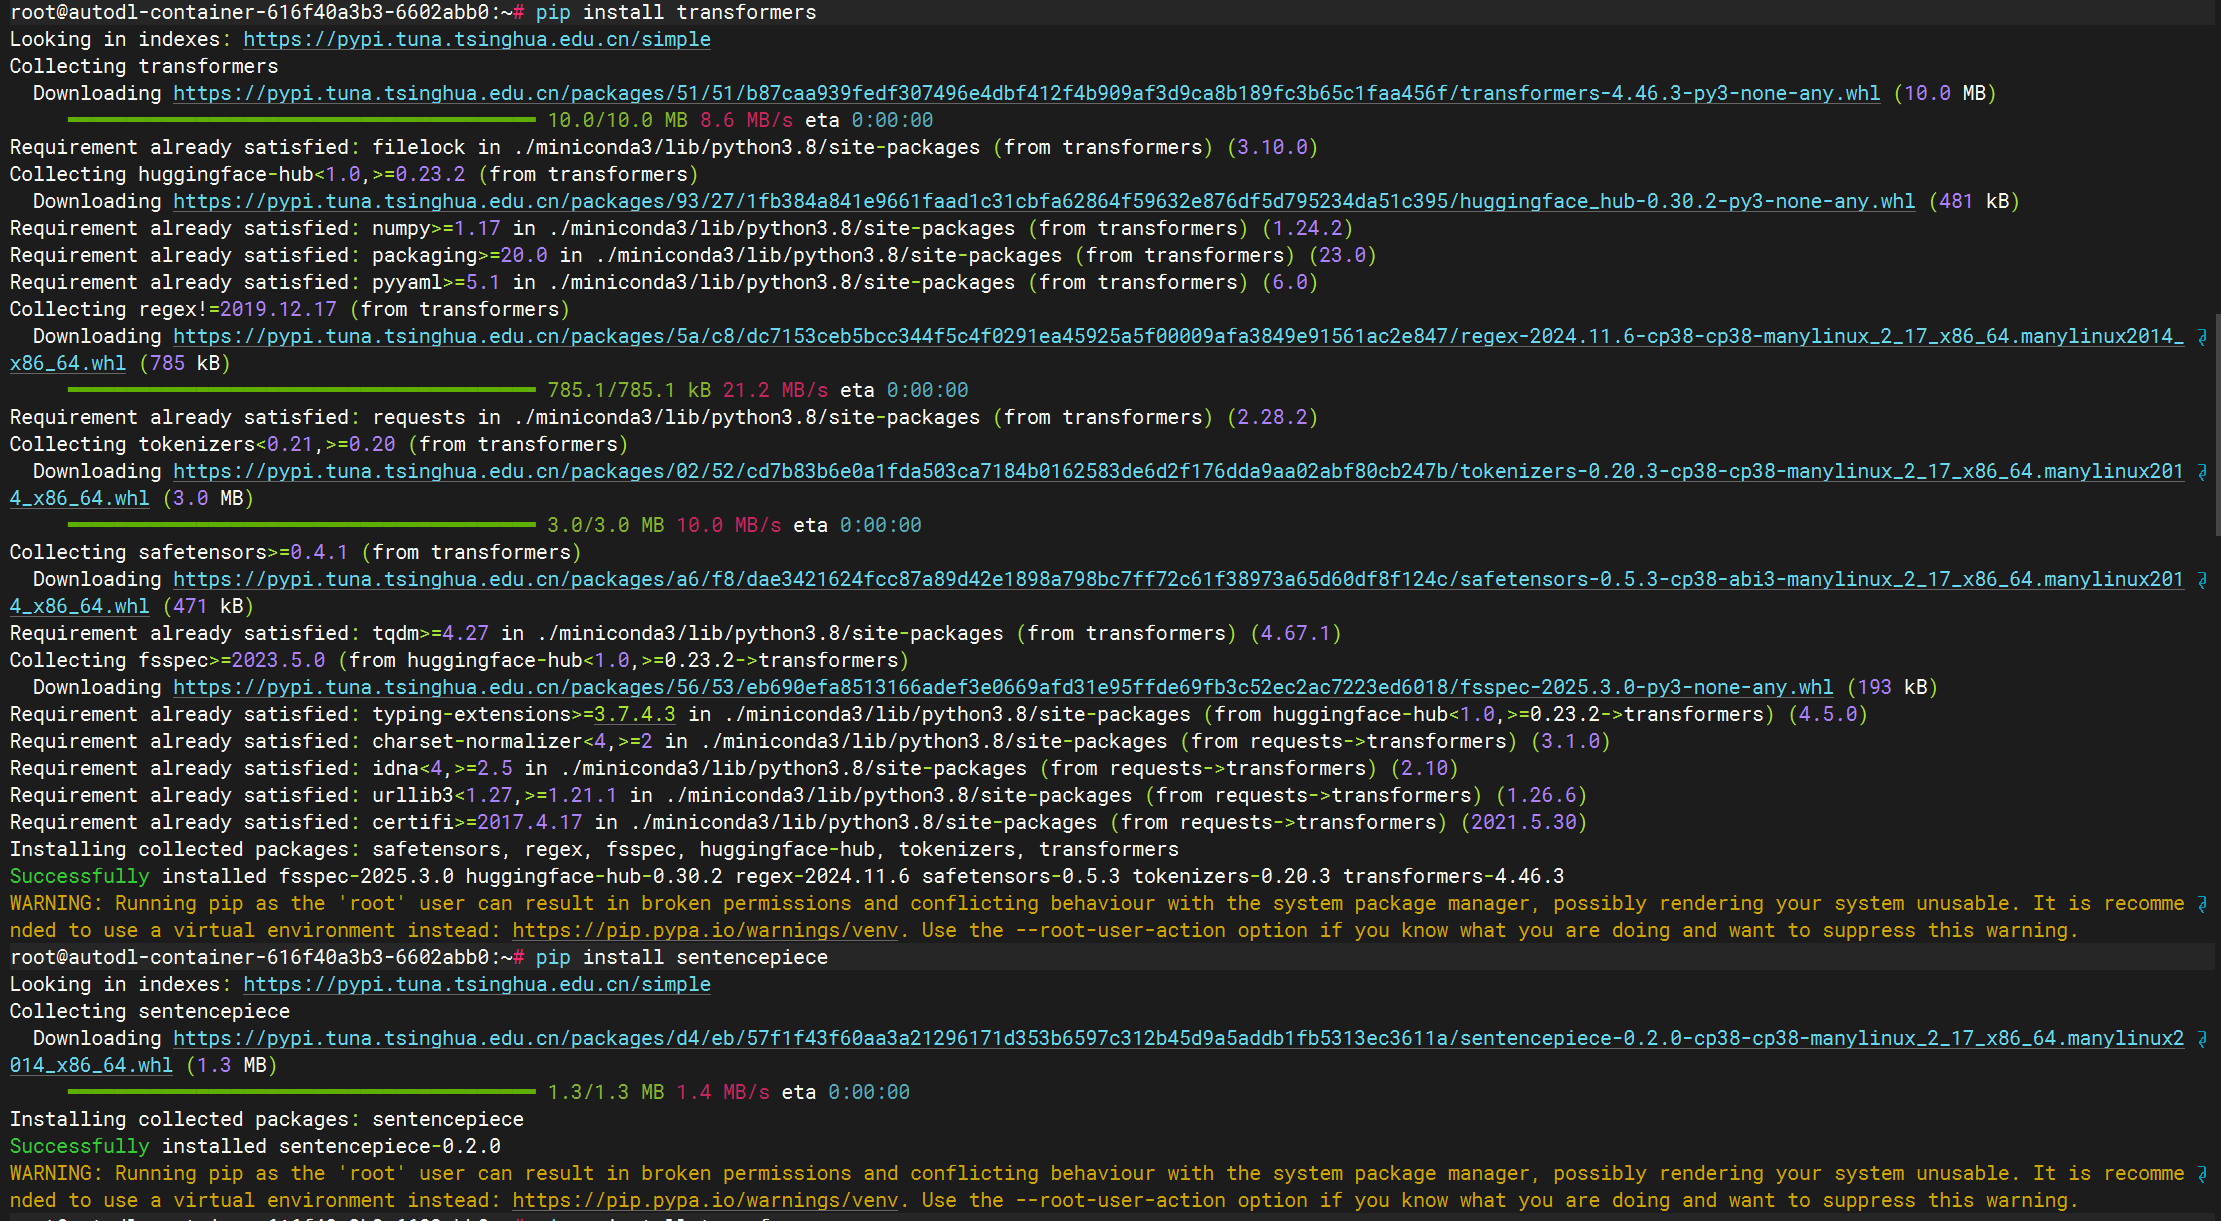
#安装transformer 库
pip install transformers
#安装 子词分词工具库
pip install sentencepiece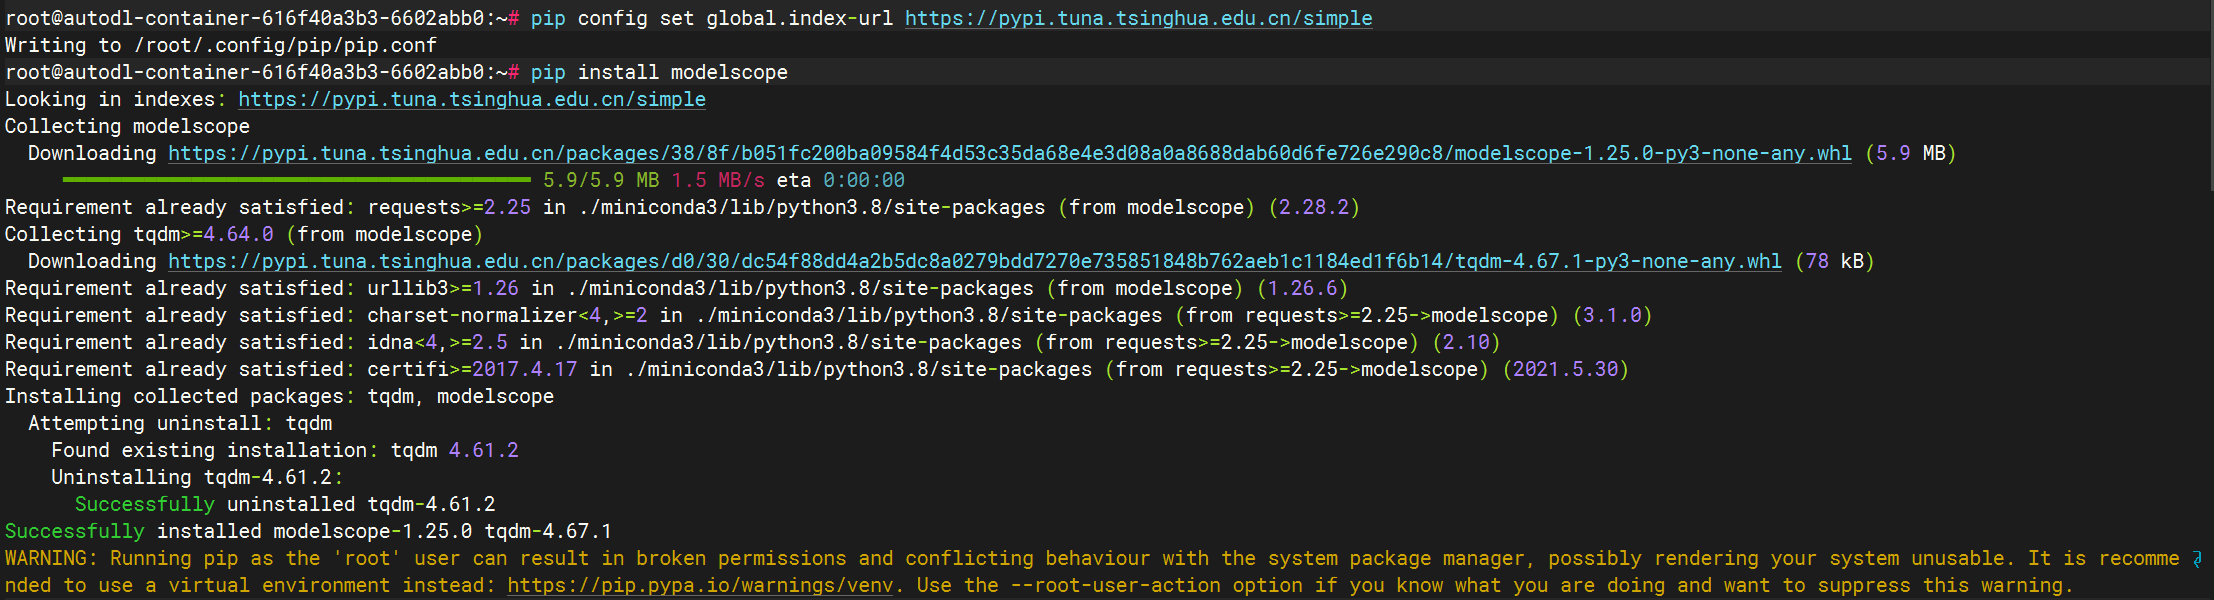
二、GLM 模型下载
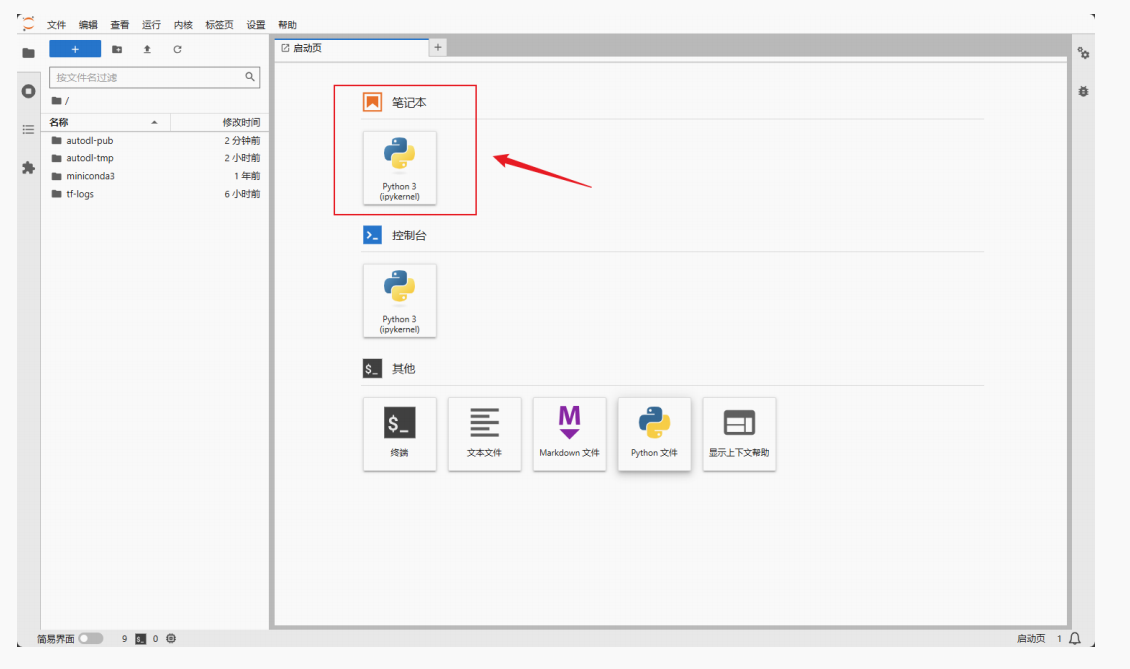
jupyter lab 中下载模型
import torch
from modelscope import snapshot_download, AutoModel, AutoTokenizer
import os

#modelscope 中的snapshot_download函数下载模型,这个函数中的第⼀个参数为模型名称,第⼆个参数 cache_dir 为模型的下载路径
model_dir = snapshot_download('ZhipuAI/chatglm3-6b', cache_dir='/root/autodltmp', revision='master')
或者以命令行的方式运行:
将上面的 Python 脚本保存为 download_glm.py,并在终端中运行,python download_glm.py
实际在服务器中发生了什么?
-
访问 ModelScope 平台:代码连接到 魔搭社区 下载模型。
-
下载模型文件:下载包括:
-
模型结构(
config.json、权重.bin) -
分词器(
tokenizer_config.json,vocab.txt,sentencepiece.model等) -
代码文件(用于自定义模型构造逻辑,如
modeling_chatglm.py)
-
-
缓存保存:文件被保存到
/root/autodl-tmp/ZhipuAI/chatglm3-6b路径下。 -
生成本地路径变量:将最终下载好的路径保存在变量
model_dir中,供后续加载使用。
三、模型调用与运行
创建以下的python 文件,进行模型调用
# 使用Hugging Face中'transformer'库中的AutoTokenizer和AutoModelForCausalLM以加载分词器和对话模型
from transformers import AutoTokenizer, AutoModelForCausalLM
import torch

# 使用模型下载到的本地路径以加载
model_dir = '/root/autodl-tmp/ZhipuAI/chatglm3-6b'

# 分词器的加载,本地加载,trust_remote_code=True设置允许从⽹络上下载模型权重和相关的代码
tokenizer = AutoTokenizer.from_pretrained(model_dir, trust_remote_code=True)

# 模型加载,本地加载,使用AutoModelForCausalLM类
model = AutoModelForCausalLM.from_pretrained(model_dir,trust_remote_code=True)
device = torch.device("cuda" if torch.cuda.is_available() else "cpu")
# 将模型移动到GPU上进⾏加速(如果有GPU的话)
model.to(device)
model.eval() # 使模型的评估模式来产⽣对话

# 第一轮对话
response, history = model.chat(tokenizer, "你好", history=[])
print(response)

# 第二轮对话
response, history = model.chat(tokenizer, "请介绍下你⾃⼰", history=history)
print(response)

# 第三轮对话
response, history = model.chat(tokenizer, "请帮我使python语⾔写段冒泡排序的代码", history=history)

print(response)
上面代码的详细解释:
1. 导入必要库
from transformers import AutoTokenizer, AutoModelForCausalLM
import torch
-
transformers: Hugging Face 的核心库,用于处理预训练模型、分词器。 -
AutoTokenizer: 根据模型自动加载合适的分词器。 -
AutoModelForCausalLM: 用于加载因果语言建模类模型(如对话生成模型)。 -
torch: PyTorch 框架,用于张量计算、模型部署。
2. 指定模型路径
model_dir = '/root/autodl-tmp/ZhipuAI/chatglm3-6b'
-
指定你本地已经下载的模型路径(来自
snapshot_download)。 -
后续分词器和模型都从这里加载,避免再次联网下载。
3. 加载分词器和模型
tokenizer = AutoTokenizer.from_pretrained(model_dir, trust_remote_code=True)
model = AutoModelForCausalLM.from_pretrained(model_dir, trust_remote_code=True)
-
from_pretrained:从本地路径中加载模型和分词器配置、权重。 -
trust_remote_code=True:允许加载模型作者提供的自定义 Python 代码(例如 ChatGLM 的.py文件),是加载 ChatGLM 所必需的参数。
实际效果:
-
读取
config.json,tokenizer_config.json,tokenizer.model,pytorch_model.bin等文件。 -
加载分词器词表及模型结构和权重到内存。
4. 选择设备并部署模型
device = torch.device("cuda" if torch.cuda.is_available() else "cpu")
model.to(device)
model.eval()
-
自动检测是否有可用的 GPU。
-
如果有,则把模型转移到 GPU 加速运算。
-
model.eval()设置模型为推理(非训练)模式,关闭 dropout 和梯度计算,提高推理效率。
5. 多轮对话执行
第一轮对话
response, history = model.chat(tokenizer, "你好", history=[])
print(response)
-
使用
model.chat()方法,与模型进行一次对话。 -
tokenizer:用于将输入文本编码为张量。 -
history=[]:首次对话历史为空。 -
返回两个值:
-
response: 模型当前这轮的回复。 -
history: 包含之前对话历史的结构(token ID形式),供后续继续对话用。
-
第二轮对话
response, history = model.chat(tokenizer, "请介绍下你自己", history=history)
-
继续对话,上下文历史被保留。
-
模型会结合“你好”的上下文生成更自然的回答。
第三轮对话
response, history = model.chat(tokenizer, "请帮我用python语言写段冒泡排序的代码", history=history)
print(response)
-
再次在已有历史基础上扩展一轮对话,进行 任务型问答。
-
模型会输出类似如下 Python 代码:
def bubble_sort(arr):
    n = len(arr)
    for i in range(n):
        for j in range(n - i - 1):
            if arr[j] > arr[j + 1]:
                arr[j], arr[j + 1] = arr[j + 1], arr[j]
    return arr
总结(代码完成了哪些操作)
| 步骤 | 描述 |
|---|---|
| 下载 | 模型已提前下载到本地 /root/autodl-tmp/ZhipuAI/chatglm3-6b |
| 加载 | 使用 transformers 自动加载分词器与对话模型 |
| 设备管理 | 自动选择 GPU(如可用)以提高速度 |
| 模型使用 | 使用 model.chat() 进行多轮中文自然语言对话 |
| 上下文保持 | 每轮对话通过 history 保持上下文,实现连续对话 |

有“AI”的1024 = 2048,欢迎大家加入2048 AI社区
更多推荐

 17
17 0
0- 0


 已为社区贡献1条内容

所有评论(0)