AI模型在内网,老板要外网聊天?1Panel+FRP 让 Llama3.1 瞬间“上线”
在家用旧服务器挖到宝?本文带你 30 分钟完成一套「私有大模型+飞书机器人」全流程:用 1Panel 一键拉起 Ollama 和 Llama3.1:8b,Node.js 编写回调服务,再通过 FRP 实现无公网 IP 穿透。无需昂贵云 GPU,内网部署也能让同事在飞书里@AI 秒回消息。全程命令行复制即跑,附带踩坑记录,新手也能一次成功!
简介
在家用旧服务器挖到宝?本文带你 30 分钟完成一套「私有大模型+飞书机器人」全流程:用 1Panel 一键拉起 Ollama 和 Llama3.1:8b,Node.js 编写回调服务,再通过 FRP 实现无公网 IP 穿透。无需昂贵云 GPU,内网部署也能让同事在飞书里@AI 秒回消息。全程命令行复制即跑,附带踩坑记录,新手也能一次成功!
以下是2025年推荐的轻量级开源LLM模型列表,优化为在低资源设备(低显存GPU或纯CPU)上运行,参数规模1B-8B,量化版本(如Q4_K_M)通过Ollama或llama.cpp运行。内存需求基于2048 token上下文。
| 模型名称 | 参数规模 | 优劣 | 最低配置 | 进阶配置 |
|---|---|---|---|---|
| Phi-3 Mini | 3.8B | 优: 高效推理,擅长代码、数学、Q&A;低内存占用,适合边缘设备;速度快(~20 tokens/s)。 劣: 深度任务不如大模型;可能需微调。 | 纯CPU: 8GB RAM,现代多核CPU(如i5+);Q4量化,~2-4GB占用,速度3-5 tokens/s。 | GPU: 6-8GB VRAM(如RTX 3060),16GB RAM;速度20 tokens/s,支持长上下文。 |
| Mistral 7B | 7B | 优: 省电70%,推理快(CPU上40 tokens/s);适合文本生成、总结、翻译;Apache 2.0许可。 劣: MMLU准确率83%,复杂多模态弱。 | 纯CPU: 4GB RAM(Q4量化),多核CPU;~4-7GB占用,速度10-15 tokens/s。 | GPU: 8-12GB VRAM(如RTX 4060),16GB RAM;vLLM优化,适合实时聊天。 |
| Llama 3.1 8B | 8B | 优: 多语言(200+种,95%准确),性能与效率平衡;强于内容创建、翻译。 劣: 资源需求较高;量化后精度略降。 | 纯CPU: 8GB RAM(Q4量化),i5+ CPU;~4-8GB占用,速度8-12 tokens/s。 | GPU: 12GB VRAM(如RTX 3060),32GB RAM;支持70B变体需多GPU。 |
| Gemma 4B | 4B | 优: 多模态(文本+视觉),128K上下文;适合RAG、聊天助手;边缘高效。 劣: 基本任务为主,复杂推理弱;需许可。 | 纯CPU: 4GB RAM(Q4量化),入门CPU;~3-6GB占用,速度中等。 | GPU: 6-7GB VRAM(如GTX 1650),16GB RAM;多语言任务效率高。 |
| TinyLlama | 1.1B | 优: 超小,适合移动/IoT;低延迟,文本生成/总结;极低资源占用。 劣: 任务深度有限,高级推理弱。 | 纯CPU: 2GB RAM,任意现代CPU;~1-2GB占用,速度3-5 tokens/s。 | GPU: 4GB VRAM(如集成显卡),8GB RAM;适合脚本自动化。 |
| Qwen 2.5 7B | 7B | 优: 多模态(文本+图像),强数学/代码;文档理解优秀。 劣: 大变体资源高;多语言非完美。 | 纯CPU: 16GB RAM(Q4量化),Ryzen 5+;~4-7GB占用。 | GPU: 4GB VRAM(如MX550),32GB RAM;适合图像生成任务。 |
| DeepSeek R1 8B | 8B | 优: 推理/代码优秀(数学98%准确);适合研究/分析;低计算足迹。 劣: 资源稍高;需优化量化。 | 纯CPU: 8GB RAM(Q4量化),i7+;~4-7GB占用。 | GPU: 6GB VRAM(如RTX 3060),32GB RAM;适合金融/科学模拟。 |
Ps:本文章使用Llama 3.1 8B来作为演示。
部署步骤
一、1Panel安装ollama
- 安装1Panel
bash -c "$(curl -sSL https://resource.fit2cloud.com/1panel/package/v2/quick_start.sh)"
- 安装ollama
首先,在应用市场找到ollama,然后点击安装,如图: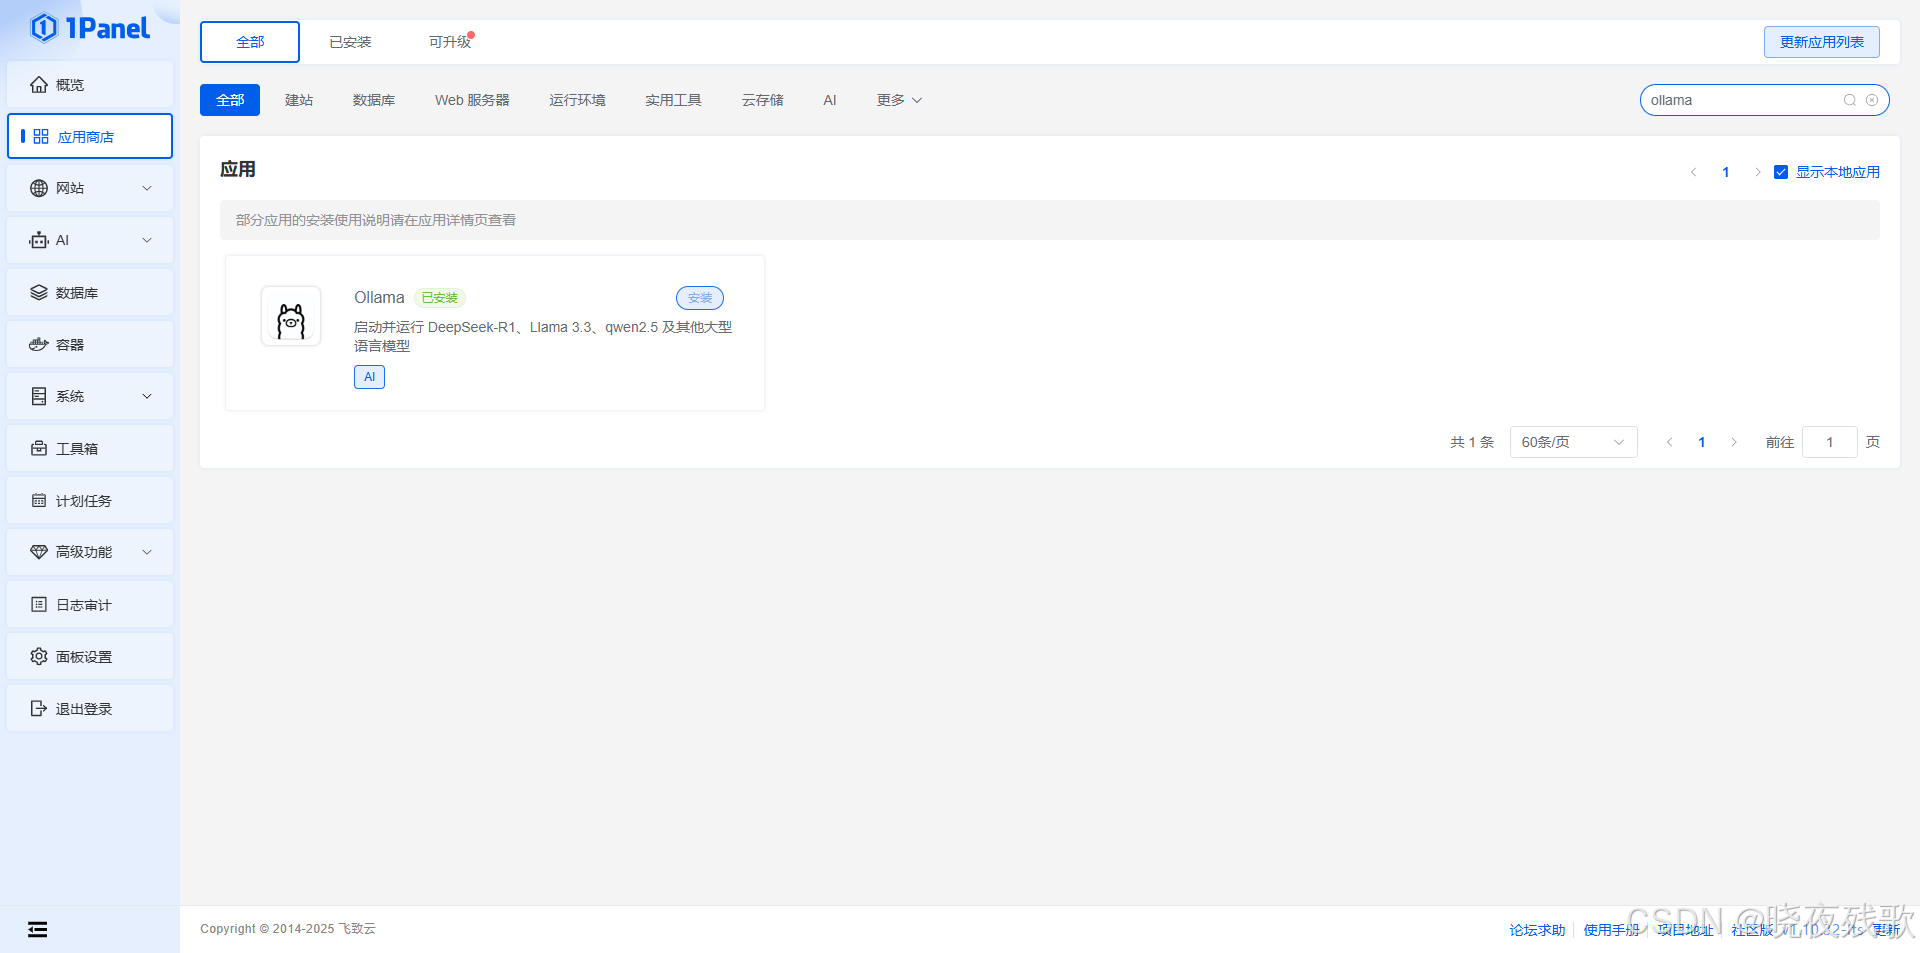
然后,拉取模型:
ollama run llama3.1:8b
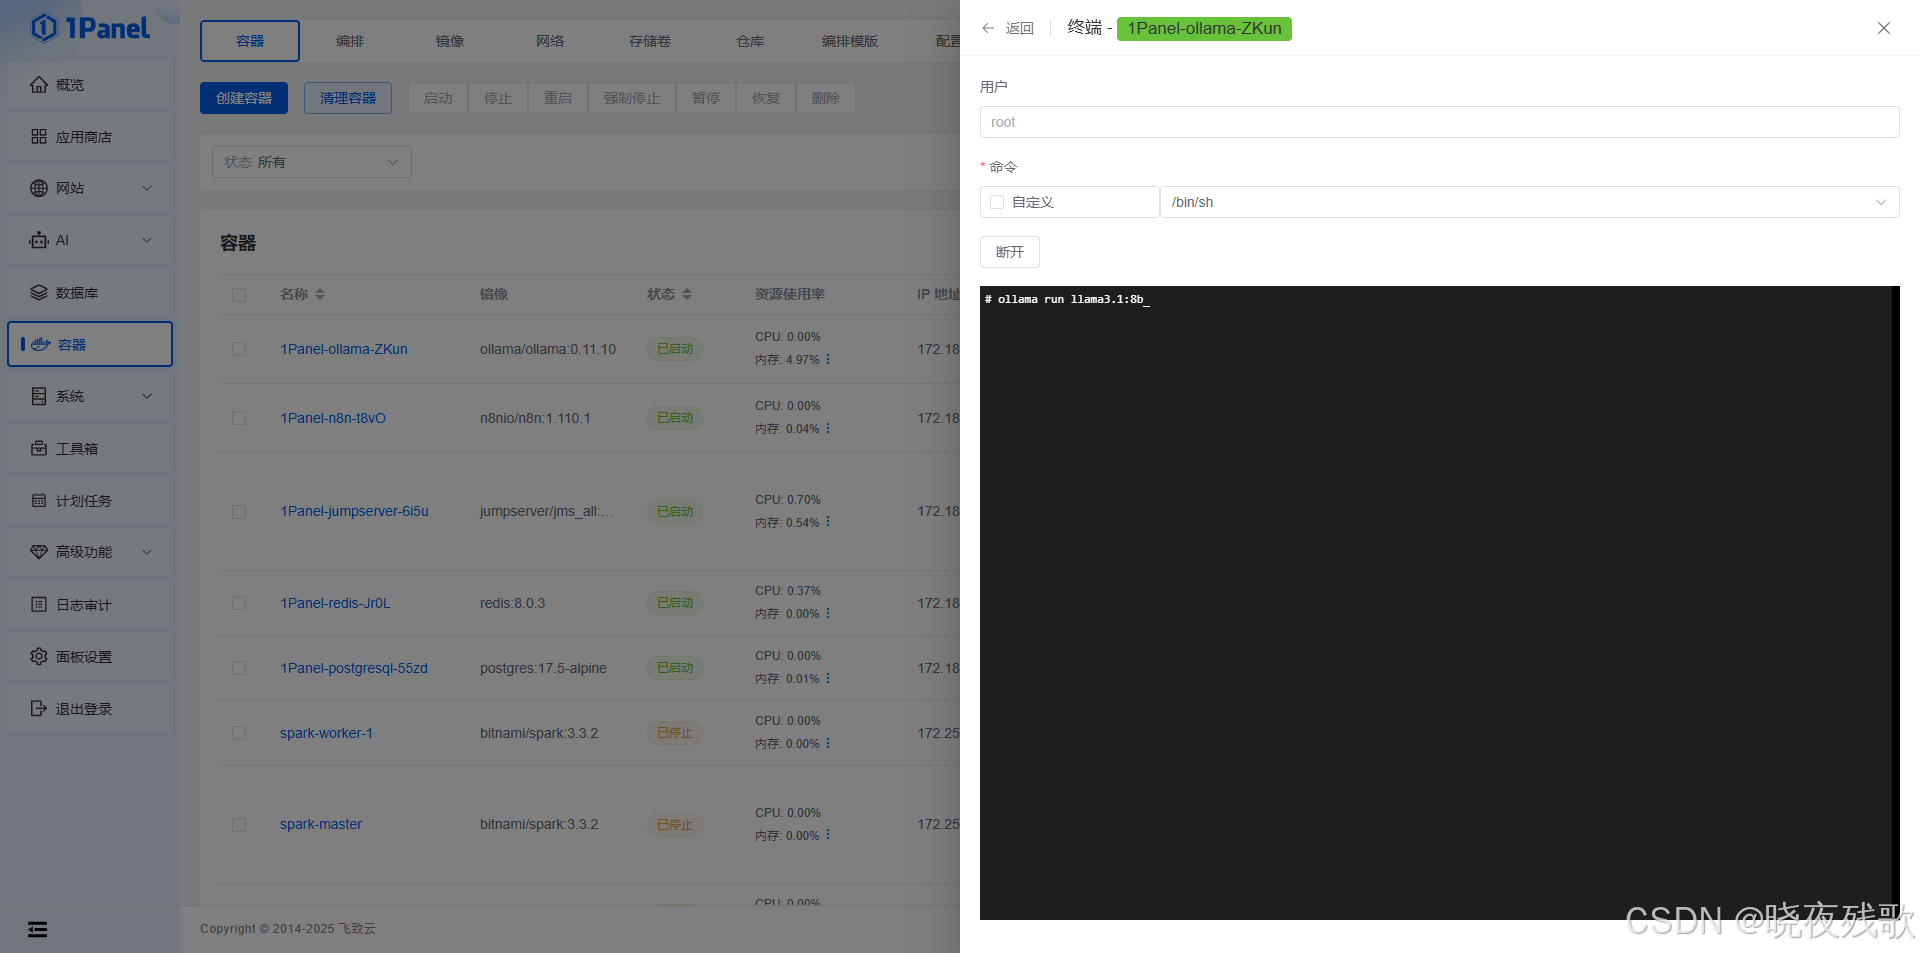
模型拉取成功后,我们就愉快的完成了第一步。
如果需要直接在本地客户端使用Page Assist访问,则需要更改参数添加环境变量,然后点击重建:
二、Node.js中间件编写(必需)
该中间件仅为本博客测试使用的demo,可以自行更换更加适合自己的哈!
const express = require('express');
const crypto = require('crypto');
const axios = require('axios');
const NodeCache = require('node-cache');
const { v4: uuidv4 } = require('uuid');
const winston = require('winston');

const app = express();
app.use(express.json());

// 配置参数
const CONFIG = {
  FEISHU_APP_ID: process.env.FEISHU_APP_ID || "your_app_id",
  FEISHU_APP_SECRET: process.env.FEISHU_APP_SECRET || "your_app_secret",
  OLLAMA_API_BASE: process.env.OLLAMA_API_BASE || "http://localhost:11434",
  PORT: process.env.PORT || 3000,
  REQUEST_TIMEOUT: parseInt(process.env.REQUEST_TIMEOUT) || 10000,
  CACHE_TTL: parseInt(process.env.CACHE_TTL) || 300, // 5分钟
  MAX_RETRIES: parseInt(process.env.MAX_RETRIES) || 3
};

// 初始化缓存 - 用于消息去重和访问令牌缓存
const cache = new NodeCache({ stdTTL: CONFIG.CACHE_TTL, checkperiod: 60 });

// 初始化日志
const logger = winston.createLogger({
  level: 'info',
  format: winston.format.combine(
    winston.format.timestamp(),
    winston.format.json()
  ),
  transports: [
    new winston.transports.File({ filename: 'error.log', level: 'error' }),
    new winston.transports.File({ filename: 'combined.log' }),
    new winston.transports.Console({
      format: winston.format.simple()
    })
  ]
});

// 请求重试机制
const axiosWithRetry = axios.create();
axiosWithRetry.interceptors.response.use(undefined, async (err) => {
  const config = err.config;
  if (!config || !config.retry) {
    return Promise.reject(err);
  }

  config.retryCount = config.retryCount || 0;
  const shouldRetry = config.retryCount < config.retry;

  if (shouldRetry) {
    config.retryCount += 1;
    const delay = Math.pow(2, config.retryCount) * 1000;
    await new Promise(resolve => setTimeout(resolve, delay));
    return axiosWithRetry(config);
  }

  return Promise.reject(err);
});

// 飞书URL验证和事件处理
app.post('/feishu/webhook', async (req, res) => {
  const { challenge, token, type, header } = req.body;

  // 1. 处理URL验证
  if (type === 'url_verification') {
    logger.info("Received verification request");
    return res.json({ challenge });
  }

  // 2. 验证请求签名(可选)
  if (!verifyFeishuSignature(req)) {
    logger.warn("Invalid signature detected");
    return res.status(401).json({ error: "Invalid signature" });
  }

  // 3. 处理消息去重
  const eventId = header.event_id;
  if (cache.has(`event_${eventId}`)) {
    logger.info(`Duplicate event ${eventId} received, ignoring`);
    return res.json({ code: 0, msg: "success" });
  }
  cache.set(`event_${eventId}`, true);

  // 4. 立即响应飞书,避免超时
  res.json({ code: 0, msg: "success" });

  // 5. 异步处理消息事件
  if (header.event_type === 'im.message.receive_v1') {
    processMessageEvent(req.body).catch(err => {
      logger.error("Error processing message event:", err);
    });
  }
});

// 处理消息事件的异步函数
async function processMessageEvent(eventData) {
  const { event } = eventData;
  const message = event.message;
  const chatId = message.chat_id;
  const messageId = message.message_id;
  const msgContent = JSON.parse(message.content);
  const userInput = msgContent.text;

  logger.info(`Processing message ${messageId} from chat ${chatId}`);

  try {
    // 调用Ollama API
    const ollamaResponse = await axiosWithRetry.post(
      `${CONFIG.OLLAMA_API_BASE}/api/generate`,
      {
        model: "llama3.1:8b",
        prompt: userInput,
        stream: false
      },
      {
        timeout: CONFIG.REQUEST_TIMEOUT,
        retry: CONFIG.MAX_RETRIES
      }
    );

    const ollamaReply = ollamaResponse.data.response;

    // 发送回复到飞书
    await replyToFeishu(chatId, ollamaReply, messageId);
    logger.info(`Successfully replied to message ${messageId}`);
  } catch (error) {
    logger.error("Error processing message:", error);
    await replyToFeishu(
      chatId,
      "抱歉,处理您的请求时出错了,请稍后重试。",
      messageId
    ).catch(err => {
      logger.error("Failed to send error message to Feishu:", err);
    });
  }
}

// 发送消息回飞书(支持重试)
async function replyToFeishu(chatId, text, messageId) {
  const accessToken = await getFeishuAccessToken();
  const replyUrl = 'https://open.feishu.cn/open-apis/im/v1/messages';

  try {
    await axiosWithRetry.post(
      replyUrl,
      {
        receive_id: chatId,
        msg_type: "text",
        content: JSON.stringify({ text: text }),
        uuid: uuidv4() // 防止重复发送
      },
      {
        params: { receive_id_type: 'chat_id' },
        headers: {
          'Authorization': `Bearer ${accessToken}`,
          'Content-Type': 'application/json'
        },
        timeout: CONFIG.REQUEST_TIMEOUT,
        retry: CONFIG.MAX_RETRIES
      }
    );
  } catch (error) {
    logger.error("Failed to reply to Feishu:", error.response?.data || error.message);
    throw error;
  }
}

// 获取飞书访问令牌(带缓存)
async function getFeishuAccessToken() {
  const cacheKey = 'feishu_access_token';
  const cachedToken = cache.get(cacheKey);

  if (cachedToken) {
    return cachedToken;
  }

  const url = 'https://open.feishu.cn/open-apis/auth/v3/tenant_access_token/internal/';

  try {
    const response = await axios.post(url, {
      app_id: CONFIG.FEISHU_APP_ID,
      app_secret: CONFIG.FEISHU_APP_SECRET
    }, {
      timeout: CONFIG.REQUEST_TIMEOUT
    });

    const { tenant_access_token, expire } = response.data;

    // 缓存令牌,提前60秒过期
    cache.set(cacheKey, tenant_access_token, expire - 60);

    return tenant_access_token;
  } catch (error) {
    logger.error("Failed to get Feishu access token:", error.response?.data || error.message);
    throw error;
  }
}

// 飞书请求签名验证(可选)
function verifyFeishuSignature(req) {
  // 在实际生产环境中,应该验证飞书请求的签名
  // 这里简化处理,实际应根据飞书文档实现签名验证
  // 参考: https://open.feishu.cn/document/ukTMukTMukTM/ukTNz4SO2MjL5czM/auth-v3/auth/request-authentication
  return true; // 生产环境中应实现真正的签名验证
}

// 健康检查端点
app.get('/health', (req, res) => {
  res.status(200).json({ status: 'ok', timestamp: new Date().toISOString() });
});

// 关闭处理
process.on('SIGTERM', () => {
  logger.info('SIGTERM received, shutting down gracefully');
  server.close(() => {
    logger.info('Process terminated');
  });
});

// 启动服务器
const server = app.listen(CONFIG.PORT, () => {
  logger.info(`Server is running on port ${CONFIG.PORT}`);
});

module.exports = app; // 用于测试
主要作用
接收:使用用一个 HTTP 服务器监听飞书平台发送过来的消息事件。
处理:理解这个消息,然后调用你本地的 Ollama API(通过 axios 库发送请求)。
发送:接收 Ollama 返回的文本,再按照飞书要求的格式打包好,发送回飞书平台。
重要提示:
将你的应用App ID 和 你的应用App Secret 替换为你在飞书开放平台创建应用时获取的实际值。
如果 Ollama 没有和这段 Node.js 代码运行在同一台机器上,请将 OLLAMA_API_BASE 中的 localhost 改为之后你运行的frp的端口。
依赖安装
npm install express axios
npm install node-cache uuid@^8.3.2 winston
启动
#直接启动
node index.js
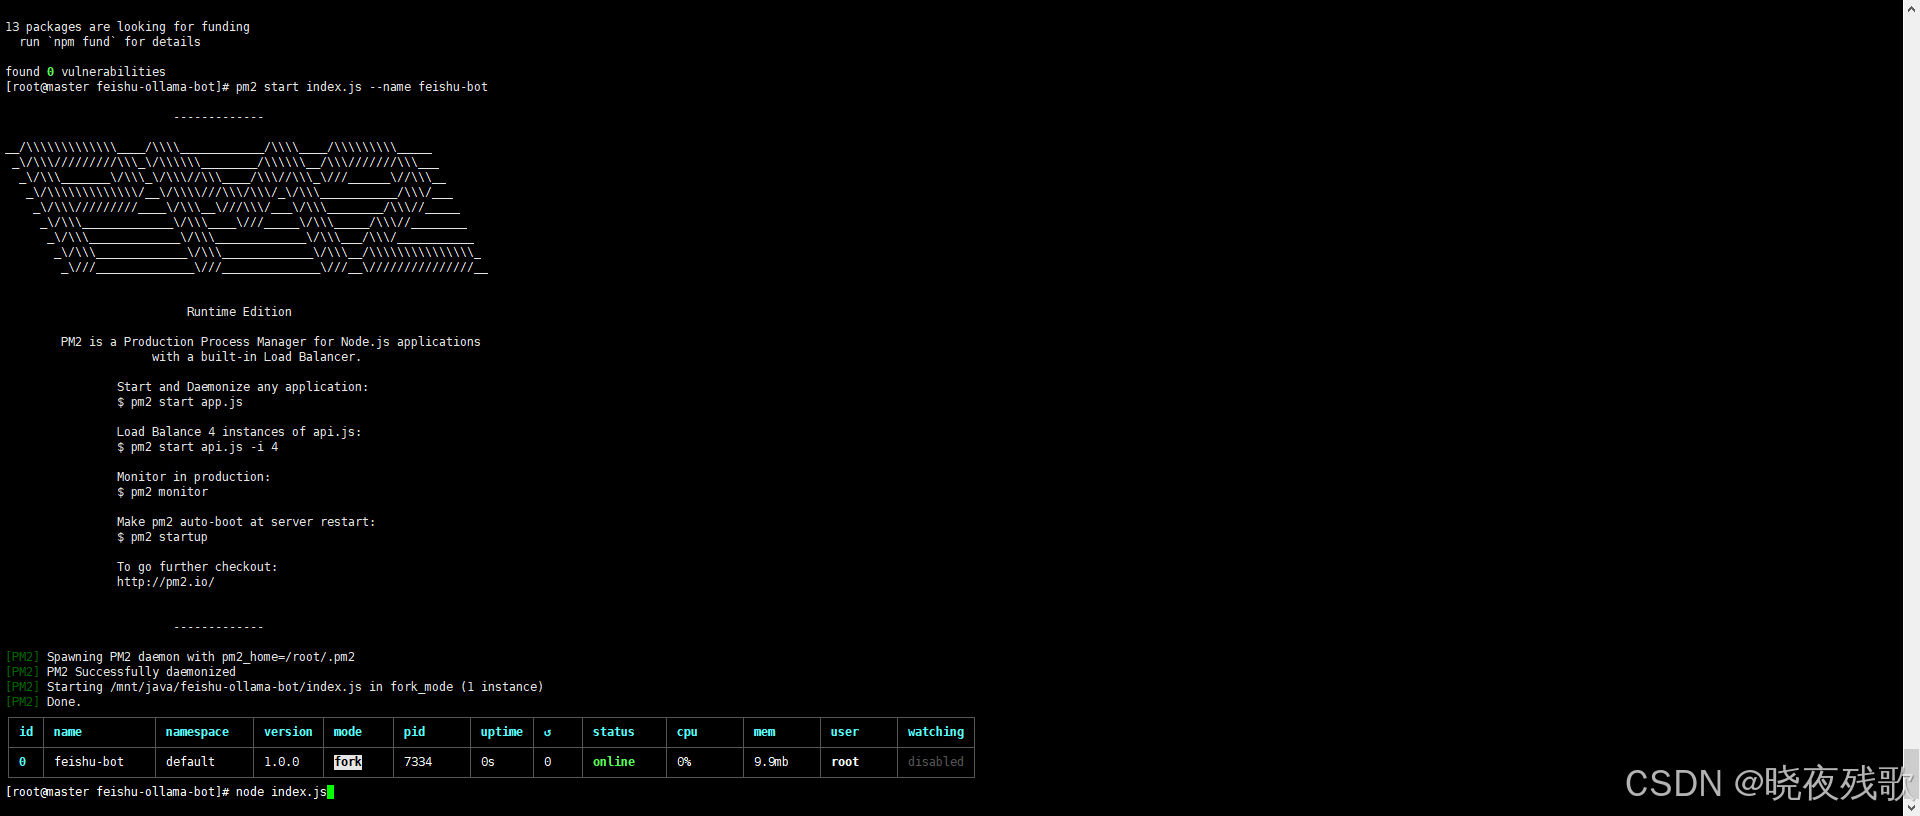
#守护进程启动
npm install -g pm2
pm2 start index.js --name feishu-bot
三、frp穿透
-
下载 frp
可以参考这篇博客:https://blog.csdn.net/weixin_57025326/article/details/135466796?fromshare=blogdetail&sharetype=blogdetail&sharerId=135466796&sharerefer=PC&sharesource=weixin_57025326&sharefrom=from_link -
服务端配置
# 基础连接端口,frpc 必须连这里
bind_port = 20000

# HTTPS 虚拟主机统一入口(单端口模式)
vhost_https_port = 20001

# 客户端令牌,frpc 必须填相同值
token = "123456"

# 日志落盘路径,空 = 不写文件
log_file = "/var/log/frps.log"

# 日志级别:trace/debug/info/warn/error
log_level = "debug"

# 只保留最近 3 天日志,自动轮转
log_max_days = 3

# 开启心跳校验,防止假死连接
authentication_heartbeats = true

# 900 秒内没心跳则踢掉客户端(秒)
authentication_timeout = 900

# 每个客户端最多复用 5 条连接
max_pool_count = 5
- 客户端配置
# ========== 通用配置 ==========
# frps 服务器地址(域名或 IP)
server_addr = youip
# frps 监听端口,与服务器 bind_port 保持一致
server_port = 20000
# 与服务器相同的令牌,验证通过才允许连接
token = 123456

# ========== Ollama 穿透 ==========
[ollama]
# 协议类型:HTTPS 虚拟主机
type = https
# 本机 Ollama 监听端口
local_port = 11434
# 远程 HTTPS 入口端口(与 frps vhost_https_port 相同)
remote_port = 20001
# 访问域名(需解析到 frps 服务器)
custom_domains = www.test1.com
# 把 HTTPS 请求转成 HTTP 再发给本地
plugin = https2http
# 本地真实服务地址
plugin_local_addr = 127.0.0.1:11434
# 改写 Host 头为 127.0.0.1(规避部分服务校验)
plugin_host_header_rewrite = 127.0.0.1
# 证书与私钥路径( frps 侧插件需要)
plugin_crt_path = /usr/local/frp/ssl/test.pem
plugin_key_path = /usr/local/frp/ssl/test.key

# ========== 中间件穿透 ==========
[Node.js]
type = https
# 本机监听端口
local_port = 3000
# 同样使用 20001 端口,靠域名区分
remote_port = 20001
# 不同子域名
custom_domains = test.test1.com
plugin = https2http
plugin_local_addr = 127.0.0.1:3000
plugin_host_header_rewrite = 127.0.0.1
plugin_crt_path = /usr/local/frp/ssl/test.pem
plugin_key_path = /usr/local/frp/ssl/test.key
Ps:我使用的是云服务器做的frps服务,所以配置好后,还需要将相应的端口在安全组或防火墙开通。
上面的证书,如果你有真实域名的话,可以参考下面的链接使用acme申请证书:https://blog.csdn.net/weixin_57025326/article/details/136286399?fromshare=blogdetail&sharetype=blogdetail&sharerId=136286399&sharerefer=PC&sharesource=weixin_57025326&sharefrom=from_link
四、飞书应用创建
- 登录 飞书开放平台
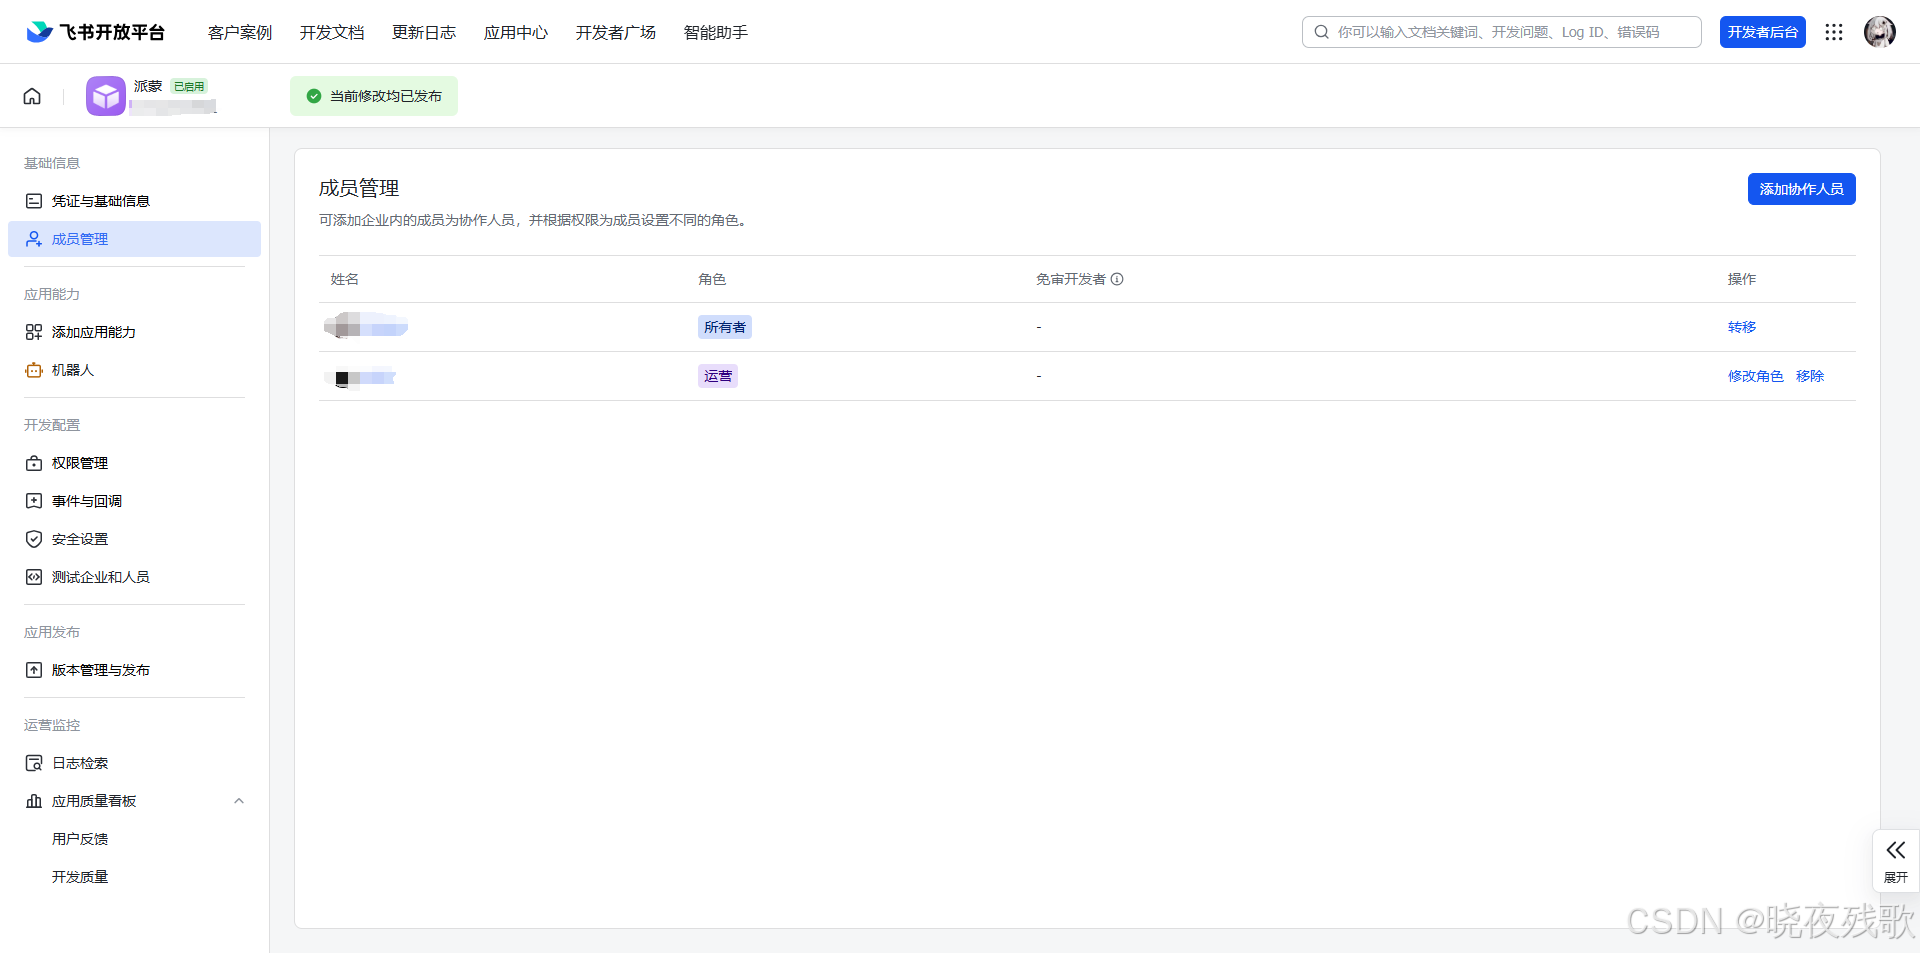
- 点击“创建企业自建应用”,填写应用名称和描述。
- 进入应用后,在左侧找到 “权限管理”,为你的机器人添加以下权限
im:message (获取用户发给机器人的消息)
im:message:send_as_bot (以机器人身份发送消息) - 在左侧找到 “事件订阅”,进行配置
请求网址 URL:填写你的服务器公网 URL,并加上路径,例如 https://your-public-domain.com:20001/feishu/webhook。飞书会向这个 URL 发送验证请求和消息事件。
订阅事件:添加 接收消息 事件。 - 发布
在左侧找到 “应用发布” -> “版本管理与发布”,创建并发布一个版本。发布后,在飞书客户端中搜索你的应用名称并添加。
结论
折腾完这个项目,Llama 3.1 8B在1Panel的Ollama容器里跑得挺顺,Node.js服务跟飞书对接也还行,FRP把内网外网打通还是挺好玩的,虽然有点笨,但不是不能用。接下来想试试压缩模型省内存,或者加点多模态功能。有啥好玩的点子?评论区来聊!
###############################################################################################################
今日推荐
小说:《没钱修什么仙》
小说简介:老者:“你想报仇?”
少年:“我被强者反复侮辱,被师尊视为垃圾,我怎么可能不想报仇?”
老者摸了摸少年的脑袋,叹道:“好孩子,我来传功给你吧。”
少年惊道:“前辈!这怎么行?”
老者伸出手:“把你手机给我。”
少年看着手机上的变化,震惊道:“前辈!这哪里来的百年功力?”
老者微微一笑:“好孩子,这是你在天庭的备用功力,以后急用的时候随用随取,别再被人侮辱了。”
少年皱眉:“这不是法力贷吗?我怕……”
老者:“天庭是大平台,新用户借百年功力有30天免息,日息最低半天功力,还没你吐纳一周天多。”
……
张羽冷哼一声,关掉了上面的广告。

有“AI”的1024 = 2048,欢迎大家加入2048 AI社区
更多推荐


 40
40 0
0- 0


 已为社区贡献3条内容

所有评论(0)