Apple 公司更新了其视觉大模型 FastVLM
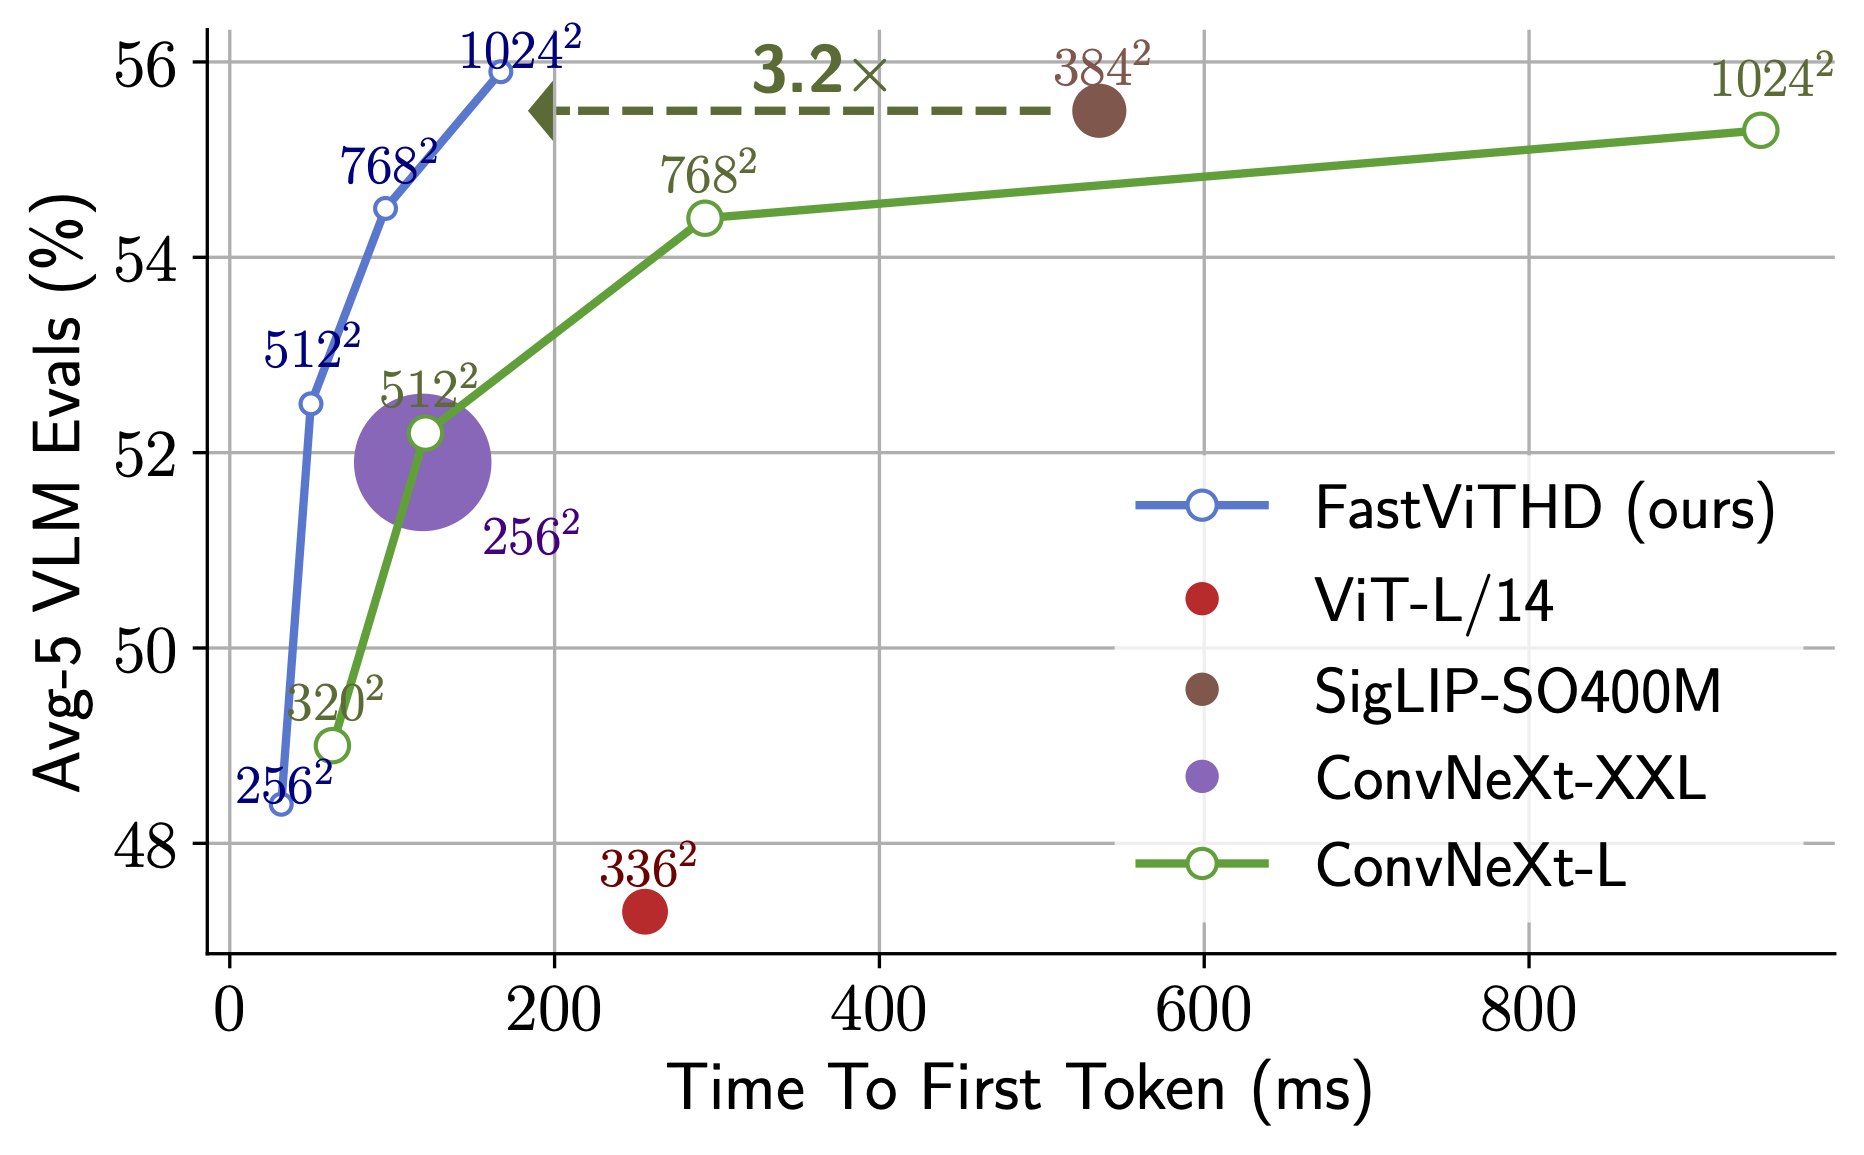
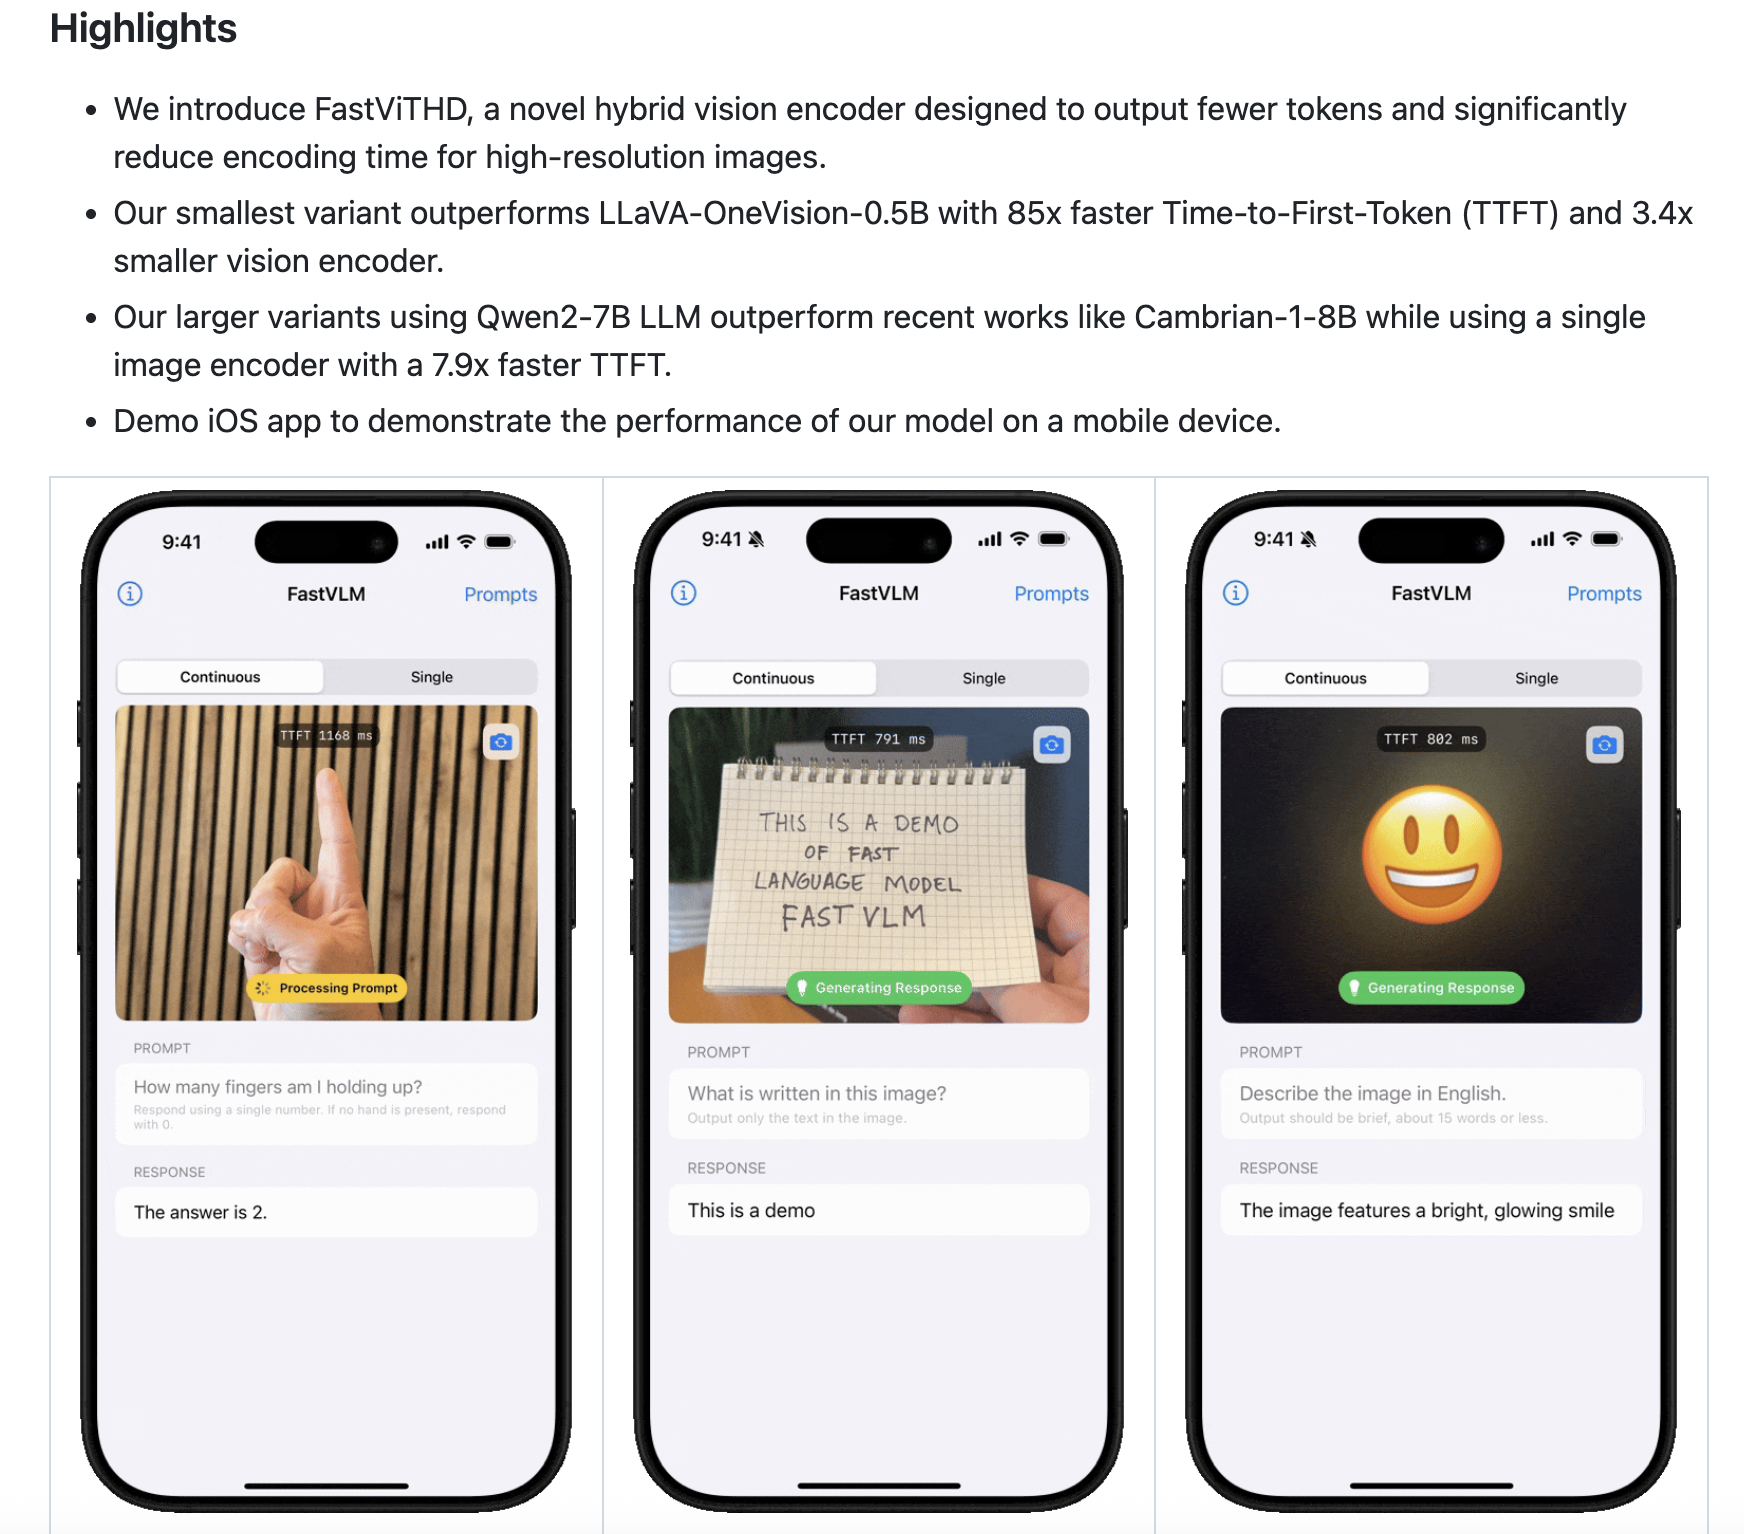
FastVLM是苹果公司提出的高效视觉语言模型,相关论文已提交CVPR2025。该项目开源了代码实现,支持通过conda创建Python3.10环境安装。模型提供FastVLM-7B版本下载,包含stage2和stage3两个权重文件。该研究旨在优化视觉编码效率,相关资源可通过Huggingface、GitHub和苹果数据站点获取,为视觉语言任务提供了新的解决方案。
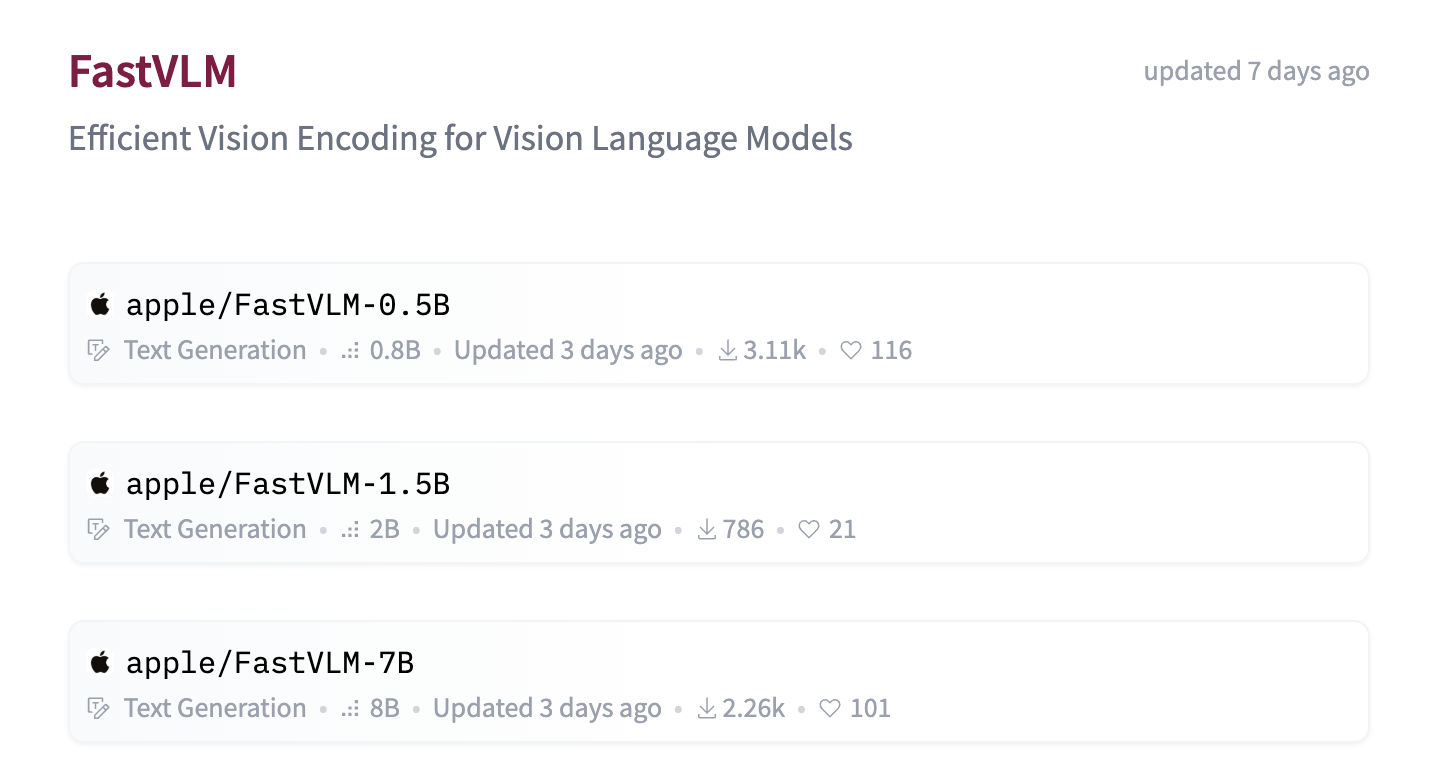
Hugging face https://huggingface.co/collections/apple/fastvlm-68ac97b9cd5cacefdd04872e
论文地址 [2412.13303] FastVLM: Efficient Vision Encoding for Vision Language Models
启用模型
conda create -n fastvlm python=3.10
conda activate fastvlm
pip install -e .
FastVLM - 7B 下载地址
https://ml-site.cdn-apple.com/datasets/fastvlm/llava-fastvithd_7b_stage3.ziphttps://ml-site.cdn-apple.com/datasets/fastvlm/llava-fastvithd_7b_stage2.zip
------
下载模型
huggingface-cli download apple/FastVLM-0.5B
Repo
python predict.py --model-path /path/to/checkpoint-dir \
--image-file /path/to/image.png \
--prompt "Describe the image."
import torch
from PIL import Image
from transformers import AutoTokenizer, AutoModelForCausalLM

MID = "apple/FastVLM-0.5B"
IMAGE_TOKEN_INDEX = -200  # what the model code looks for

# Load
tok = AutoTokenizer.from_pretrained(MID, trust_remote_code=True)
model = AutoModelForCausalLM.from_pretrained(
    MID,
    torch_dtype=torch.float16 if torch.cuda.is_available() else torch.float32,
    device_map="auto",
    trust_remote_code=True,
)

# Build chat -> render to string (not tokens) so we can place <image> exactly
messages = [
    {"role": "user", "content": "<image>\nDescribe this image in detail."}
]
rendered = tok.apply_chat_template(
    messages, add_generation_prompt=True, tokenize=False
)

pre, post = rendered.split("<image>", 1)

# Tokenize the text *around* the image token (no extra specials!)
pre_ids  = tok(pre,  return_tensors="pt", add_special_tokens=False).input_ids
post_ids = tok(post, return_tensors="pt", add_special_tokens=False).input_ids

# Splice in the IMAGE token id (-200) at the placeholder position
img_tok = torch.tensor([[IMAGE_TOKEN_INDEX]], dtype=pre_ids.dtype)
input_ids = torch.cat([pre_ids, img_tok, post_ids], dim=1).to(model.device)
attention_mask = torch.ones_like(input_ids, device=model.device)

# Preprocess image via the model's own processor
img = Image.open("test-2.jpg").convert("RGB")
px = model.get_vision_tower().image_processor(images=img, return_tensors="pt")["pixel_values"]
px = px.to(model.device, dtype=model.dtype)

# Generate
with torch.no_grad():
    out = model.generate(
        inputs=input_ids,
        attention_mask=attention_mask,
        images=px,
        max_new_tokens=128,
    )

print(tok.decode(out[0], skip_special_tokens=True))

有“AI”的1024 = 2048,欢迎大家加入2048 AI社区
更多推荐
 11
11 0
0- 0


 已为社区贡献19条内容

所有评论(0)