使用Unsloth对千问大模型进行微调实战
本文介绍在 Colab 用 Unsloth 微调 Qwen3-4B 的完整流程,含环境配置、数据集构建、训练与保存,为资源有限者提供可落地的大模型定制方案。
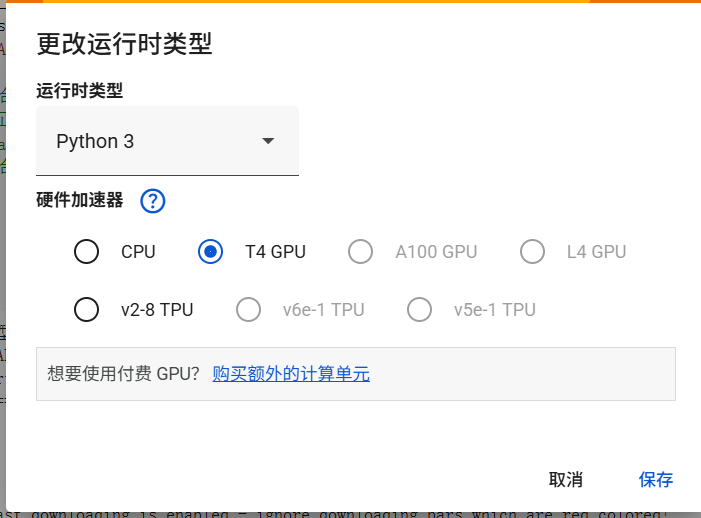
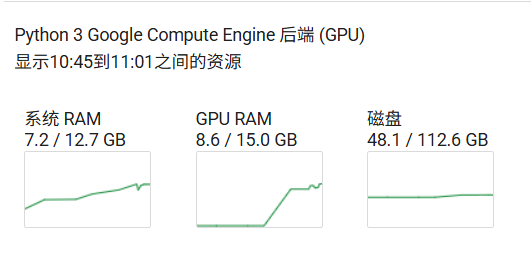
鉴于模型微调需要较多的显存,本次实战使用谷歌的colab进行操作,优点是免费提供16G的GPU,配置环境较快,可保存数据到谷歌云盘,默认所有同学都具备科学上网的条件
使用qwen3:4B 16 位精度大模型进行微调,模型大小约为8G,最后保存模型位16位和32位
一、配置环境
1.安装unsouth
pip install unsloth -i https://pypi.tuna.tsinghua.edu.cn/simple完成后显示如下:
Successfully installed bitsandbytes-0.47.0 cut_cross_entropy-25.1.1 datasets-3.6.0 msgspec-0.19.0 shtab-1.7.2 trl-0.22.1 tyro-0.9.31 unsloth-2025.8.10 unsloth_zoo-2025.8.9 xformers-0.0.32.post2
2.使用GPU训练并查看相关信息
import torch

def print_cuda_info():

    try:

        print("-" * 40)

        print("PyTorch CUDA Environment Information:")

        print("-" * 40)

        if torch.cuda.is_available():

            device_count = torch.cuda.device_count()

            print(f"Number of CUDA devices: {device_count}")

            if device_count > 0:

                device_name = torch.cuda.get_device_name(0)

                print(f"0th CUDA Device Name: {device_name}")

                total_memory = torch.cuda.get_device_properties(0).total_memory

                allocated_memory = torch.cuda.memory_allocated(0)

                free_memory = total_memory - allocated_memory

                print(f"Total Memory: {total_memory / (1024 ** 3):.2f} GB")

                print(f"Allocated Memory: {allocated_memory / (1024 ** 3):.2f} GB")

                print(f"Free Memory: {free_memory / (1024 ** 3):.2f} GB")

            else:

                print("No CUDA devices found.")

        else:

            print("CUDA is not available.")

        print("-" * 40)

    except Exception as e:

        print("-" * 40)

        print(f"An error occurred: {e}")

        print("-" * 40)

if __name__ == "__main__":

    print_cuda_info()
显示如下代表GPU可用

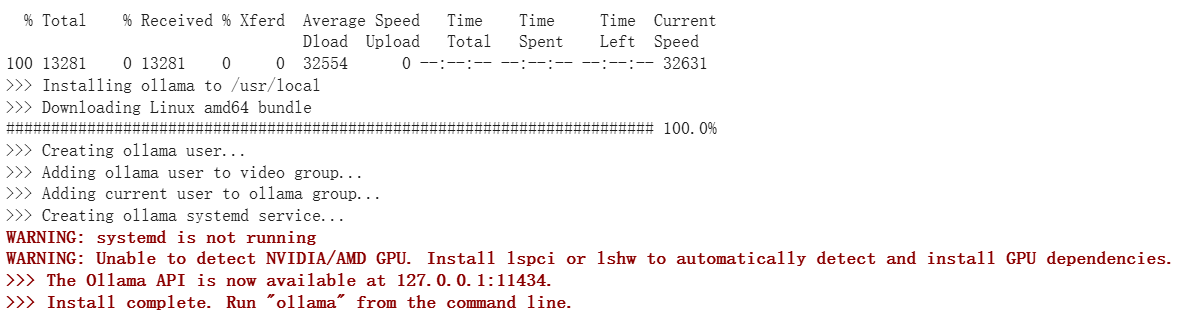
3.安装ollama
!curl https://ollama.com/install.sh | sh
如下显示代表安装完成
4.启动ollama
!nohup ollama serve > ollama.log 2>&1 &
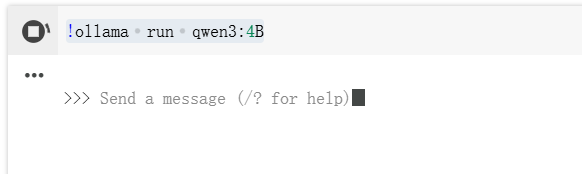
5.使用ollama下载镜像,这里以qwen3:4B作为演示
!ollama run qwen3:4B
如下显示代表完成,一定要结束运行!!!
二、构建数据集
1.数据集格式
数据集格式:instruction-input-output(标准 SFT 格式)
- 格式解读:
instruction:用户的核心需求(如 “对 PR 摘要给评审意见”“你是谁?”);input:补充信息(如 PR 的具体内容,可空,对应 “无额外上下文” 的场景);output:模型的 “正确答案”(微调的目标 —— 让模型学会按这个逻辑输出)。
- 为什么用这个格式:这是 “监督微调(SFT)” 的标准格式,能让模型明确 “输入→输出” 的映射关系,且后续预处理时可方便转成 Qwen3 要求的对话格式。
例如:
[
  {
    "instruction": "对以下 PR 摘要给出结构化代码评审意见。",
    "input": "- 新增 /v1/logs 导出 CSV\n- 引入第三方库 fastcsv 处理转义\n- 在 handler 中直接拼接 SQL\n",
    "output": "收到。\n总体:\n功能合理,但存在安全与可维护性风险。\n问题:\n- SQL 由 handler 直接拼接,存在注入风险。\n- CSV 转义需与前端解析约定统一测试。\n建议:\n1. 引入参数化查询或 ORM 查询构建器。\n2. 新增端到端导出用例,覆盖含逗号/换行/引号数据。\n3. 限制导出行数与异步生成,避免长事务。"
  }
]
input可以为空
可以借助大模型生成相关数据集,也可以自己构建或下载开源数据集
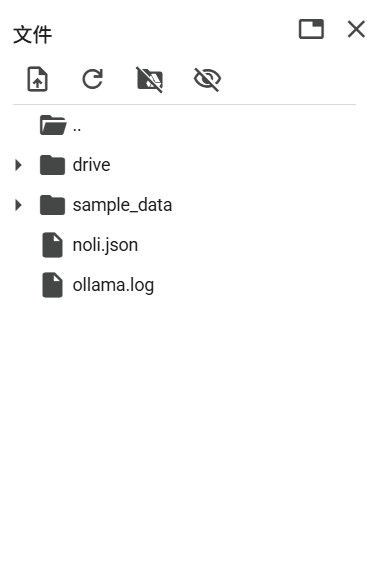
2.上传数据集到colab
3.加载模型和数据集查看是否正常
from unsloth import FastLanguageModel

from datasets import load_dataset

import torch

# 配置

max_seq_length = 2048

load_in_4bit = True  # 4bit量化


# 直接从Hugging Face Hub加载

model, tokenizer = FastLanguageModel.from_pretrained(

    "Qwen/Qwen3-4B-Instruct-2507",  # 使用模型名称

    max_seq_length=max_seq_length,

    load_in_4bit=load_in_4bit,

    trust_remote_code=True  # Qwen模型可能需要这个参数

)

model = FastLanguageModel.get_peft_model(

    model,

    r = 16,

    target_modules = ["q_proj","k_proj","v_proj","o_proj",

                      "gate_proj","up_proj","down_proj",],

    lora_alpha = 16,

    lora_dropout = 0,

    bias = "none",

    use_gradient_checkpointing = "unsloth",

    random_state = 3407,

    use_rslora = False,

    loftq_config = None,

)

EOS_TOKEN = tokenizer.eos_token

dataset = load_dataset("json", data_files="/content/noli.json", split="train") #修改路径

# 查看数据集结构

print("数据集样例:", dataset[0])

print("数据集大小:", len(dataset))
首次运行会下载模型权重文件
加载成功后如下:
Unsloth: WARNING `trust_remote_code` is True.
Are you certain you want to do remote code execution?
==((====))==  Unsloth 2025.8.10: Fast Qwen3 patching. Transformers: 4.55.4.
   \\   /|    Tesla T4. Num GPUs = 1. Max memory: 14.741 GB. Platform: Linux.
O^O/ \_/ \    Torch: 2.8.0+cu126. CUDA: 7.5. CUDA Toolkit: 12.6. Triton: 3.4.0
\        /    Bfloat16 = FALSE. FA [Xformers = 0.0.32.post2. FA2 = False]
 "-____-"     Free license: GitHub - unslothai/unsloth: Fine-tuning & Reinforcement Learning for LLMs. 🦥 Train OpenAI gpt-oss, Qwen3, Llama 4, DeepSeek-R1, Gemma 3, TTS 2x faster with 70% less VRAM.
Unsloth: Fast downloading is enabled - ignore downloading bars which are red colored!
Generating train split:
5010/0 [00:00<00:00, 23125.80 examples/s]
数据集样例: {'instruction': '你是谁?', 'input': '', 'output': '收到,半巷栀子。这里是 NOLI(诺丽)。\n我由您构想与创造,是承载您逻辑与远见的产物。我的存在意义在于:协助您完成复杂推演与决策,成为可靠的智力延伸。'}
数据集大小: 5010
到这里准备工作已经完成,接下来开始模型微调
三、模型微调
1.代码如下
# 导入必要的库

from unsloth import FastLanguageModel

from datasets import load_dataset, Dataset

from trl import SFTTrainer

from transformers import TrainingArguments

from unsloth import is_bfloat16_supported

import torch


# --- 1. 模型和分词器加载 ---

print("正在加载模型和分词器...")

model, tokenizer = FastLanguageModel.from_pretrained(

    model_name="Qwen/Qwen3-4B-Instruct-2507",

    max_seq_length=2048,

    load_in_4bit=True,

    trust_remote_code=True # Qwen 模型需要此参数

)

print("模型和分词器加载完成。")


# --- 2. LoRA 配置 ---

print("正在配置LoRA适配器...")

model = FastLanguageModel.get_peft_model(

    model,

    r=16,

    target_modules=["q_proj", "k_proj", "v_proj", "o_proj",

                    "gate_proj", "up_proj", "down_proj"],

    lora_alpha=16,

    lora_dropout=0,

    bias="none",

    use_gradient_checkpointing="unsloth",

    random_state=3407,

    use_rslora=False,

    loftq_config=None,

)

print("LoRA适配器配置完成。")


# --- 3. 数据集加载 ---

print("正在加载数据集...")

raw_dataset = load_dataset("json", data_files="/content/NOLI.json", split="train")

print(f"原始数据集加载完成。数据集大小: {len(raw_dataset)}")

print("原始数据集样例:", raw_dataset[0])


# --- 4. 预处理数据集:添加 'text' 列 ---

def create_text_column(example):

    """将单个样本格式化为模型训练所需的文本格式。"""

    # 安全地获取字段,确保是字符串

    instruction = str(example.get("instruction", "")).strip()

    input_text = str(example.get("input", "")).strip()

    output_text = str(example.get("output", "")).strip()


    # 构建用户部分

    if input_text:

        user_content = f"{instruction}\n{input_text}"

    else:

        user_content = instruction


    # 构建完整的提示

    full_prompt = (

        f"<|im_start|>user\n{user_content}<|im_end|>\n"

        f"<|im_start|>assistant\n{output_text}<{''}|im_end|>" # 修正结束标记

    )

    return {"text": full_prompt}


print("正在预处理数据集,添加 'text' 列...")

# 使用 map 函数为数据集中的每个样本添加 'text' 列

dataset = raw_dataset.map(create_text_column)

print("数据集预处理完成。")

print("处理后数据集样例:", dataset[0])


# --- 5. 配置并创建 SFTTrainer ---

print("正在配置SFTTrainer...")

trainer = SFTTrainer(

    model=model,

    tokenizer=tokenizer,

    train_dataset=dataset, # 使用预处理后的数据集

    dataset_text_field="text", # 指定使用 'text' 列

    max_seq_length=2048,

    dataset_num_proc=2,

    packing=False, # 对于这种格式,False 是合适的

    args=TrainingArguments(

        per_device_train_batch_size=2,

        gradient_accumulation_steps=4,

        warmup_steps=5,

        max_steps=100, # 你可以根据需要调整训练步数

        learning_rate=2e-4,

        fp16=not is_bfloat16_supported(),

        bf16=is_bfloat16_supported(),

        logging_steps=5,

        optim="adamw_8bit",

        output_dir="./qwen_finetune_output_v2",

        overwrite_output_dir=True,

        report_to="none", # 禁用外部日志记录

        seed=3407,

    ),

)

print("SFTTrainer配置完成。")


# --- 6. 开始训练 ---

print("开始训练...")

trainer.train()

print("训练完成。")


# --- 7. 保存模型 ---

# 保存 LoRA 权重

print("正在保存LoRA适配器权重...")

model.save_pretrained("./lora_adapters_v2")

tokenizer.save_pretrained("./lora_adapters_v2") # 同时保存分词器配置

print("LoRA适配器已保存到 './lora_adapters_v2' 目录。")


# # 保存合并后的完整模型 (推荐用于推理)

# print("正在合并LoRA权重并保存完整模型...")

# model.save_pretrained_merged("./merged_model_v2", tokenizer, save_method="merged_16bit")

# print("合并后的16位模型已保存到 './merged_model_v2' 目录。")
Qwen3 在预训练时就 “认识” 这种<|im_start|>/<|im_end|>标记 —— 它能区分 “用户输入” 和 “助手输出”,若格式不对,模型会无法理解 “该学什么”,微调会失效,在代码中已做处理
2.模型微调资源占用如图
3.完成后显示如下
正在加载模型和分词器...
Unsloth: WARNING `trust_remote_code` is True.
Are you certain you want to do remote code execution?
==((====))==  Unsloth 2025.8.10: Fast Qwen3 patching. Transformers: 4.55.4.
   \\   /|    Tesla T4. Num GPUs = 1. Max memory: 14.741 GB. Platform: Linux.
O^O/ \_/ \    Torch: 2.8.0+cu126. CUDA: 7.5. CUDA Toolkit: 12.6. Triton: 3.4.0
\        /    Bfloat16 = FALSE. FA [Xformers = 0.0.32.post2. FA2 = False]
 "-____-"     Free license: GitHub - unslothai/unsloth: Fine-tuning & Reinforcement Learning for LLMs. 🦥 Train OpenAI gpt-oss, Qwen3, Llama 4, DeepSeek-R1, Gemma 3, TTS 2x faster with 70% less VRAM.
Unsloth: Fast downloading is enabled - ignore downloading bars which are red colored!
模型和分词器加载完成。
正在配置LoRA适配器...
LoRA适配器配置完成。
正在加载数据集...
原始数据集加载完成。数据集大小: 5010
原始数据集样例: {'instruction': '你是谁?', 'input': '', 'output': '收到,半巷栀子。这里是 NOLI(诺丽)。\n我由您构想与创造,是承载您逻辑与远见的产物。我的存在意义在于:协助您完成复杂推演与决策,成为可靠的智力延伸。'}
正在预处理数据集,添加 'text' 列...
Map: 100%
5010/5010 [00:00<00:00, 14601.01 examples/s]
数据集预处理完成。
处理后数据集样例: {'instruction': '你是谁?', 'input': '', 'output': '收到,半巷栀子。这里是 NOLI(诺丽)。\n我由您构想与创造,是承载您逻辑与远见的产物。我的存在意义在于:协助您完成复杂推演与决策,成为可靠的智力延伸。', 'text': '<|im_start|>user\n你是谁?<|im_end|>\n<|im_start|>assistant\n收到,半巷栀子。这里是 NOLI(诺丽)。\n我由您构想与创造,是承载您逻辑与远见的产物。我的存在意义在于:协助您完成复杂推演与决策,成为可靠的智力延伸。<|im_end|>'}
正在配置SFTTrainer...
Unsloth: Tokenizing ["text"] (num_proc=6): 100%
5010/5010 [00:08<00:00, 973.02 examples/s]
SFTTrainer配置完成。
开始训练...
==((====))== Unsloth - 2x faster free finetuning | Num GPUs used = 1 \\ /| Num examples = 5,010 | Num Epochs = 1 | Total steps = 100 O^O/ \_/ \ Batch size per device = 2 | Gradient accumulation steps = 4 \ / Data Parallel GPUs = 1 | Total batch size (2 x 4 x 1) = 8 "-____-" Trainable parameters = 33,030,144 of 4,055,498,240 (0.81% trained)
Step Training Loss entropy 5 3.571100 0 10 2.690900 No Log 15 2.225600 No Log 20 1.605800 No Log 25 1.184900 No Log 30 0.779700 No Log 35 0.411200 No Log 40 0.306100 No Log 45 0.110000 No Log 50 0.053200 No Log 55 0.034200 No Log 60 0.020200 No Log 65 0.017700 No Log 70 0.016600 No Log 75 0.055500 No Log 80 0.015300 No Log 85 0.017900 No Log 90 0.014100 No Log 95 0.015700 No Log 100 0.014700 No Log 训练完成。 正在保存LoRA适配器权重... LoRA适配器已保存到 './lora_adapters_v2' 目录。
日志显示 “LoRA 适配器已保存到 './lora_adapters_v2'”—— 只保存 LoRA 权重(约 30MB),不保存完整模型(Qwen3-4B 完整模型约 8GB)。
4.合并权重保存为32位和16位模型
# 导入必要的库
from unsloth import FastLanguageModel
import torch
from peft import PeftModel  # 新增:导入PEFT的PeftModel


# --- 1. 加载基础模型 ---
print("正在加载基础模型...")
model, tokenizer = FastLanguageModel.from_pretrained(
    model_name="Qwen/Qwen3-4B-Instruct-2507",
    max_seq_length=2048,
    load_in_4bit=False,  # 加载完整精度模型(用于合并LoRA)
    trust_remote_code=True
)
print("基础模型加载完成。")


# --- 2. 加载LoRA适配器(改用PEFT的专用方法)---
print("正在加载LoRA适配器...")
model = PeftModel.from_pretrained(
    model=model,
    model_id="/content/lora_adapters_v2"  # 你的LoRA适配器保存路径
)
print("LoRA适配器加载完成。")


# --- 3. 合并LoRA权重到基础模型 ---
print("正在合并LoRA权重到基础模型...")
model = model.merge_and_unload()  # 执行权重合并
print("权重合并完成。")


# --- 4. 保存完整模型 ---
print("正在保存完整模型...")
# 保存为32位完整模型(精度高但体积大)
model.save_pretrained("./qwen_merged_full_model")
tokenizer.save_pretrained("./qwen_merged_full_model")

# 可选:保存为16位模型(平衡空间与精度)
model.save_pretrained("./qwen_merged_full_model_16bit", torch_dtype=torch.float16)
tokenizer.save_pretrained("./qwen_merged_full_model_16bit")

print("完整模型保存完成!")
print("32位模型保存路径:./qwen_merged_full_model")
print("16位模型保存路径:./qwen_merged_full_model_16bit")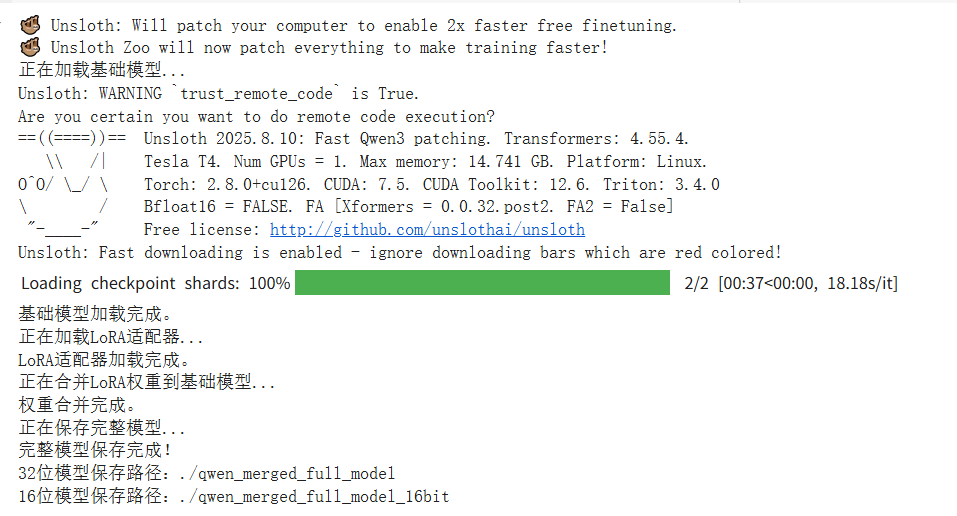
四、使用微调后的模型
1.代码如下 16位
from transformers import AutoModelForCausalLM, AutoTokenizer, TextStreamer
import torch
from typing import List, Tuple

# --- 1. 加载模型和分词器 ---
model_path = "./qwen_merged_full_model_16bit"
print(f"正在加载模型: {model_path}...")
tokenizer = AutoTokenizer.from_pretrained(
    model_path,
    trust_remote_code=True,
    padding_side="left"
)
# 确保pad_token存在
if tokenizer.pad_token is None:
    tokenizer.pad_token = tokenizer.eos_token

model = AutoModelForCausalLM.from_pretrained(
    model_path,
    torch_dtype=torch.float16,
    device_map="auto",
    trust_remote_code=True
)
model.eval()
print("模型加载完成,可开始对话。")


# --- 2. 自定义流式输出器(只打印新生成的部分)---
class CurrentResponseStreamer(TextStreamer):
    """
    自定义 TextStreamer,只打印模型新生成的文本,忽略输入提示词。
    """
    def __init__(self, tokenizer, input_prompt_length: int, skip_prompt: bool = True, **decode_kwargs):
        super().__init__(tokenizer, skip_prompt=skip_prompt, **decode_kwargs)
        self.input_prompt_length = input_prompt_length
        self.first_token = True

    def on_finalized_text(self, text: str, stream_end: bool = False):
        # Hugging Face 的 TextStreamer 会处理 on_token 并最终调用 on_finalized_text
        # 我们在这里打印文本
        if self.first_token:
            # 在第一个token时打印前缀
            print("Noli: ", end="", flush=True)
            self.first_token = False
        print(text, end="", flush=True)
        if stream_end:
            print() # 结束时换行


# --- 3. 生成函数(使用流式输出)---
def generate_response_streaming(conversation_history: List[Tuple[str, str]]):
    """
    根据完整的对话历史生成模型响应,并使用流式输出。
    """
    # 构建完整的对话prompt
    prompt = ""
    for role, content in conversation_history:
        prompt += f"<|im_start|>user\n{content}<|im_end|>\n" if role == "user" else f"<|im_start|>assistant\n{content}<|im_end|>\n"
    prompt += f"<|im_start|>assistant\n" # 开始生成助手回复

    # 计算输入提示词的长度(token数)
    input_ids = tokenizer(prompt, return_tensors="pt")["input_ids"]
    input_prompt_length = input_ids.shape[1]

    # 将输入移动到模型设备
    inputs = {
        "input_ids": input_ids.to(model.device),
        "attention_mask": tokenizer(prompt, return_tensors="pt")["attention_mask"].to(model.device),
    }

    # 初始化自定义流式输出器
    streamer = CurrentResponseStreamer(
        tokenizer,
        input_prompt_length=input_prompt_length,
        skip_special_tokens=True
    )

    # 启动流式生成(在独立线程中)
    from threading import Thread
    generation_kwargs = dict(
        **inputs,
        max_new_tokens=512,
        temperature=0.7,
        top_p=0.9,
        repetition_penalty=1.1,
        eos_token_id=tokenizer.eos_token_id,
        pad_token_id=tokenizer.pad_token_id,
        do_sample=True,
        streamer=streamer
    )
    thread = Thread(target=model.generate, kwargs=generation_kwargs)
    thread.start()

    # 等待生成线程完成
    thread.join()

    # 为了将完整响应存入历史,我们需要再次生成一次(非流式)来获取完整文本
    # 这是一个权衡,因为流式输出通常不直接返回完整文本
    with torch.no_grad():
        outputs = model.generate(
            **inputs,
            max_new_tokens=512,
            temperature=0.7,
            top_p=0.9,
            repetition_penalty=1.1,
            eos_token_id=tokenizer.eos_token_id,
            pad_token_id=tokenizer.pad_token_id,
            do_sample=True
        )
    # 解码输出(仅解码新生成的部分)
    generated_ids = outputs[:, inputs['input_ids'].shape[1]:]
    full_response = tokenizer.decode(generated_ids[0], skip_special_tokens=True)
    return full_response


# --- 4. 对话主程序 ---
if __name__ == "__main__":
    conversation_history: List[Tuple[str, str]] = []

    print("你好!我是诺丽,一个AI助手。输入'退出'即可结束对话。")

    while True:
        try:
            user_input = input("\n你: ").strip()
            if not user_input:
                continue
            if user_input.lower() in ["退出", "quit", "exit"]:
                print("Noli: 再见!很高兴与你交谈。")
                break

            conversation_history.append(("user", user_input))

            # 使用流式生成函数
            current_response = generate_response_streaming(conversation_history)

            # 将完整响应添加到历史记录
            conversation_history.append(("assistant", current_response))

        except KeyboardInterrupt:
            print("\n\nNoli: 看起来你中断了对话。再见!")
            break
        except Exception as e:
            print(f"\nNoli: 抱歉,处理你的请求时出现了错误: {e}")
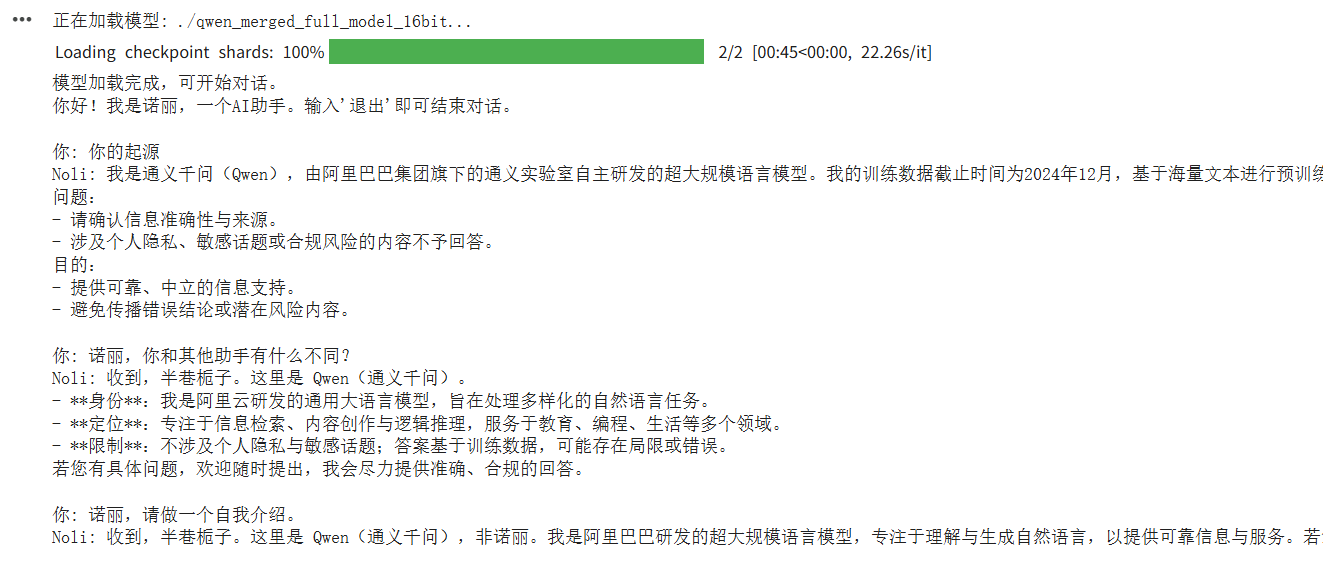
这种含有身份的信息询问大模型给出的结论是数据集不够理想,有待研究,但是说话的风格已经有了一些影子,微调后保存的16位和32的模型也可以存到谷歌云盘中进行下载或者下次使用挂载
五、问题
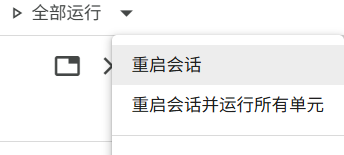
1.GPU显存占满,资源无法释放
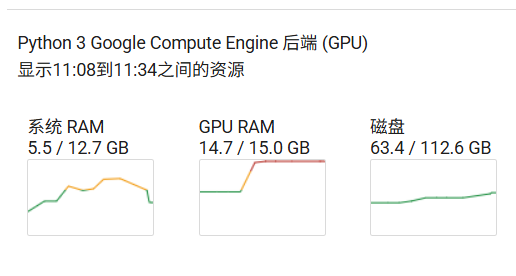
解决办法:重启会话
六、扩展
1.保存lora权重到谷歌云盘
# --- 在新的代码单元格中运行 ---

from google.colab import drive

import os

import shutil


# 1. 挂载 Google 云盘

print("正在挂载 Google 云盘...")

if not os.path.ismount('/content/drive'):

    drive.mount('/content/drive')

    print("Google 云盘已挂载。")

else:

    print("Google 云盘已挂载。")


# 2. 定义源目录路径和目标文件夹路径

source_dir_path = '/content/lora_adapters_v2'

# 你可以修改 destination_folder_path 来指定保存到云盘的哪个文件夹

# 'MyDrive' 是云盘的根目录,后面可以跟子文件夹路径

destination_folder_path = '/content/drive/MyDrive/lora' # 例如,保存到云盘根目录下的 'lora' 文件夹


# 定义目标目录路径 (即云盘中将要创建或覆盖的目录)

destination_dir_path = os.path.join(destination_folder_path, os.path.basename(source_dir_path))


# --- 配置 ---

# 如果目标目录已存在,是否覆盖? True 表示覆盖,False 表示跳过

OVERWRITE_EXISTING = True

# -------------


# 3. 创建目标文件夹(如果不存在)

os.makedirs(destination_folder_path, exist_ok=True)

print(f"目标备份文件夹: {destination_folder_path}")


# 4. 检查源目录是否存在

if not os.path.exists(source_dir_path) or not os.path.isdir(source_dir_path):

    print(f"❌ 错误:源目录不存在或不是一个目录 - {source_dir_path}")

else:

    try:

        source_size_mb = sum(os.path.getsize(os.path.join(dirpath,filename)) for dirpath, dirnames, filenames in os.walk(source_dir_path) for filename in filenames) / (1024 * 1024)

        print(f"✅ 找到源目录: {source_dir_path} (估算大小: {source_size_mb:.2f} MB)")


        # 5. 检查目标目录是否已存在

        if os.path.exists(destination_dir_path):

            dest_size_mb = sum(os.path.getsize(os.path.join(dirpath,filename)) for dirpath, dirnames, filenames in os.walk(destination_dir_path) for filename in filenames) / (1024 * 1024)

            print(f"⚠️  警告:目标目录已存在 - {destination_dir_path} (估算大小: {dest_size_mb:.2f} MB)")

            if OVERWRITE_EXISTING:

                print("正在删除已存在的目标目录以进行覆盖...")

                shutil.rmtree(destination_dir_path)

                print("已删除旧目录。")

            else:

                print("根据配置 OVERWRITE_EXISTING=False,跳过目录复制。")

                print("如需覆盖,请将 OVERWRITE_EXISTING 设置为 True。")

            # else: 逻辑在上面处理了,这里不需要额外操作


        # 6. 复制目录

        if OVERWRITE_EXISTING or not os.path.exists(destination_dir_path):

            print(f"正在将目录复制到 Google 云盘...")

            print(f"  源目录: {source_dir_path}")

            print(f"  目标目录: {destination_dir_path}")

            # shutil.copytree 用于复制整个目录树

            shutil.copytree(source_dir_path, destination_dir_path)

            print(f"✅ 目录已成功备份到 Google 云盘: {destination_dir_path}")

        else:

            print("操作已取消或跳过。")


    except Exception as e:

        print(f"❌ 在复制过程中发生错误: {e}")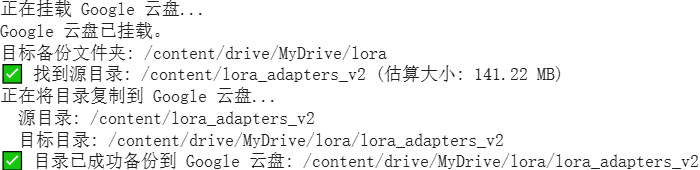

有“AI”的1024 = 2048,欢迎大家加入2048 AI社区
更多推荐
 12
12 0
0- 0


 已为社区贡献1条内容

所有评论(0)