[Ansible] 管理大项目
本文介绍了Ansible中主机模式匹配、并行执行配置、任务委派等核心功能。主要内容包括:1)主机模式匹配方式,支持单个主机/组匹配、模糊匹配及逻辑运算;2)并行执行配置,通过forks参数控制并发连接数,使用serial关键字分批执行;3)任务委派机制,可在playbook中指定其他主机执行特定任务,并支持动态添加主机;4)包含与导入文件操作,区分静态导入与动态包含的特性差异;5)实用模块如wai
目录
实验环境:
[demisse@controller webapp]$ ansible-config ini > ansible.cfg.example
[demisse@controller webapp]$ vim ansible.cfg
[defaults]
ask_pass=False           # 禁用密码询问
inventory=./inventory    # 使用当前目录下的inventory文件
module_name=command      # 默认模块为command
remote_user=demisse        # 远程连接用户为demisse

[privilege_escalation]
become=True              # 启用权限提升
become_ask_pass=False    # 禁用sudo密码询问
become_method=sudo       # 使用sudo进行权限提升
become_user=root         # 提升为root用户
ansible实现受管主机的解析统一
ansible nodes -m copy -a 'src=/etc/hosts dest=/etc/hosts'
利用主机模式选择主机
ansible 命令语法:
ansible host-pattern -m module [-a 'module arguments'] [-i inventory]
-
host-pattern 用于指定ad-hoc命令的目标主机。
-
host-pattern 也适用于playbook中hosts声明的主机对象。
host-pattern是inventory中定义的主机或主机组,可以为ip、hostname、inventory中的group组名、具有“,”或“*”或“:”等特殊字符的匹配型字符串,host-pattern是必须项,不可忽略。
优先使用主机模式匹配主机,而不是在play的任务中设置复杂的when语句。
本小节使用的 inventory 如下:
localhost
server

[lab]
node1
node2

[test]
node3
node4

[datacenter1]
node1
node3

[datacenter2]
node2
node4

[datacenter:children]
datacenter1
datacenter2

[new]
10.1.8.10
10.1.8.11
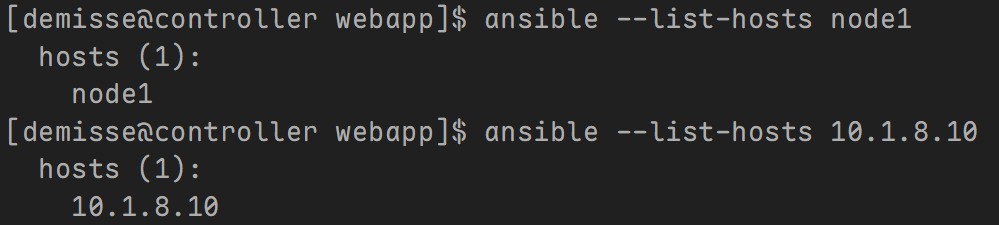
单个主机匹配
[demisse@controller web]$ ansible --list-hosts node1
 hosts (1):
   node1

[demisse@controller web]$ ansible --list-hosts 10.1.8.10
 hosts (1):
   10.1.8.10
单个主机组匹配
[demisse@controller web]$ ansible --list-hosts lab
 hosts (2):
   node1
   node2

[demisse@controller web]$ ansible --list-hosts datacenter
 hosts (4):
   node1
   node3
   node2
   node4

[demisse@controller web]$ ansible --list-hosts ungrouped
 hosts (2):
   localhost
   server

[demisse@controller web]$ ansible --list-hosts all
 hosts (8):
   localhost
   server
   node1
   node2
   node3
   node4
   10.1.8.10
   10.1.8.11
模糊匹配
*通配符在Ansible表示0个或多个任意字符,主要应用于一些模糊规则匹配。
# 匹配所有主机,all或*号功能相同。
[demisse@controller web]$ ansible --list-hosts '*'
 hosts (8):
   localhost
   server
   node1
   node2
   node3
   node4
   10.1.8.10
   10.1.8.11

[demisse@controller web]$ ansible --list-hosts '10.*'
 hosts (2):
   10.1.8.10
   10.1.8.11

[demisse@controller web]$ ansible --list-hosts 'ser*a'
 hosts (1):
   node1
逻辑或匹配
如我们希望同时对多个主机或多个主机组同时执行,相互之间用“:”(冒号)或者“,”(逗号)分隔即可,类似于取两个集合的并集。
[demisse@controller web]$ ansible --list-hosts 'node1,10.1.8.11'
 hosts (2):
   node1
   10.1.8.11

[demisse@controller web]$ ansible --list-hosts 'lab,datacenter1'
 hosts (3):
   node1
   node2
   node3

[demisse@controller web]$ ansible --list-hosts 'lab,data*,10.1.8.11'
 hosts (5):
   node1
   node2
   node3
   node4
   10.1.8.11
逻辑与匹配
逻辑与用(,&)或者(:&)表示,匹配两个集合的交集。
[demisse@controller web]$ ansible --list-hosts 'lab,&datacenter1'
 hosts (1):
   node1
逻辑非匹配
逻辑非用(,!)表示,用于排除特定主机或主机组。
[demisse@controller web]$ ansible --list-hosts 'datacenter,!node1'
 hosts (3):
   node3
   node2
   node4
多条件匹配
Ansible也支持多条件的复杂组合。
[demisse@controller web]$ ansible --list-hosts 'datacenter,new,!node1'
 hosts (5):
   node3
   node2
   node4
   10.1.8.10
   10.1.8.11
域切割匹配
Ansible底层基于Python,Python字符串域切割的示例如下:
str = '12345678'
通过[0]即可获取数值1。
该功能在Ansible中也支持:
[demisse@controller web]$ ansible --list-hosts 'datacenter'
 hosts (4):
   node1
   node3
   node2
   node4

# 获取第1个元素
[demisse@controller web]$ ansible --list-hosts 'datacenter[0]'
 hosts (1):
   node1

# 获取第1-2个元素
[demisse@controller web]$ ansible --list-hosts 'datacenter[0:1]'
 hosts (2):
   node1
   node3

# 获取最后1个元素
[demisse@controller web]$ ansible --list-hosts 'datacenter[-1]'
 hosts (1):
   node4
配置并行
playbook 执行顺序
当Ansible处理playbook时:
-
按playbook中定义顺序运行。
-
每个play中所有主机分批次执行第一个任务,直到所有批次主机执行完该任务。
-
然后play中所有主机分批次再执行下一个任务,直到所有批次主机执行完所有任务。
-
以此类推,直到所有主机执行完所有任务,ansible才会释放shell。
理论上, Ansible可以同时连接到 play 中的所有主机以执行每项任务,适用于小型主机列表。但如果该play以数百台主机为目标, 则控制主机负载比较大。
配置 forks
Ansible 所进行的最大同时连接数由Ansible配置文件中的forks参数控制。
默认值为 5。
[demisse@controller web]$ ansible-config dump|grep FORKS
DEFAULT_FORKS(default) = 5

[demisse@controller web]$ grep forks /etc/ansible/ansible.cfg
# forks          = 5
示例:
- 清单内容如下:
controller

[webs]
node1
node3

[dbs]
node2
node4
- 剧本内容如下:
---
- name: connection
 hosts: all
 tasks:
   - name: conneciton 1
     shell: sleep 5
   - name: conneciton 2
     debug:
       msg: connection 2
验证:每一批2个主机执行同一个任务。
[demisse@controller web]$ ansible-playbook playbook.yaml -f 2
结果:
-
第一个任务 controller、node1同时完成,然后node3、node2同时完成,最后node4完成。
-
第二个任务 似乎 5台主机同时完成。
解释:第一个任务执行需要5秒,所以看起来比较明显。第二个任务执行速度非常块,所以感知不到先后顺序。
forks 的默认值设置得非常保守:
-
如果受管主机是Linux主机,则大多数任务将在受管主机上运行,并且控制主机的负载较少。在这种情況下,您通常可以将forks的值设置得更高,可能接近100 ,然后性能就会提高。
-
如果控制主机管理网络设备,路由器和交换机,则大多数模块在控制主机上运行而不在网络设备上运行,这会增加控制主机上的负载,因此其支持forks数量增加的能力将显著低于仅管理Linux主机的控制主机。
配置 serial
Ansible运行play时,所有受管主机按顺序执行完所有任务,然后运行通知的处理程序。
在所有主机上运行所有任务可能会导致意外行为。例如,更新负载平衡Web服务器集群,则可能需要在进行更新时让每个Web服务器停止服务。如果所有服务器都在同一个play中更新,则它们可能全部同时停止服务;如果某个任务失败,这将导致整个playbook运行失败。
避免此问题的一种方法是使用serial关键字,先让一批主机执行完play中所有任务,再让下一批主机执行完play中所有任务。以此类推,直到所有主机分批次执行play完成。
示例剧本内容如下:
---
- name: Rolling update
 hosts: all
 serial: 2
 tasks:
   - name: latest apache httpd package is installed
     yum:
       name: httpd
       state: latest
     notify: restart apache

 handlers:
   - name: restart apache
     service:
       name: httpd
       state: restarted
serial关键字也可以指定为百分比。此百分比应用于play中的主机总数,以确定滚动更新批处理大小。主机数不能小于1。
配置async
ansible 默认行为:必须等当前任务执行完成,才能执行下一个任务。
有些操作需要很长时间才能完成,例如下载一个大文件,重启服务器等。使用异步并行模式,ansible可以很快在受管主机上这些执行命令,但是需要等待命令执行完成才能将主机置于相应状态。
Ansible使用async触发异步并行运作任务:
-
async:async的值是ansible等待运行这个任务的最大超时值(如果执行超时任务会强制中断导致失败)。
-
poll:ansible检查这个任务是否完成的时间间隔。ansible poll_interval 默认值是 15。
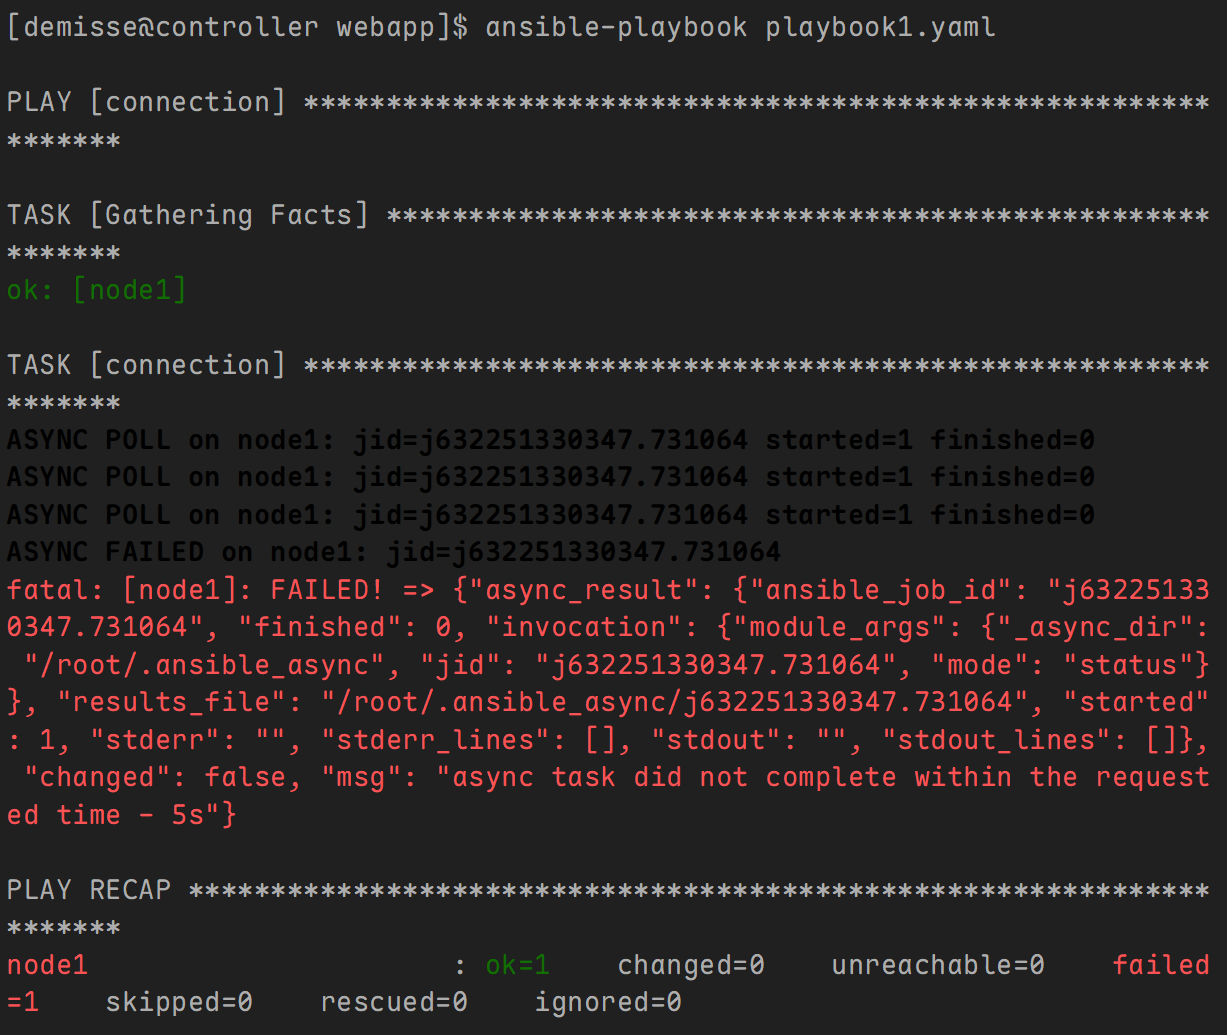
示例1: 任务执行失败,在规定时间内容任务没有执行完成。
---
- name: connection
  hosts: node1
  tasks:
    - name: connection
      shell: sleep 10
      async: 5
      poll: 2
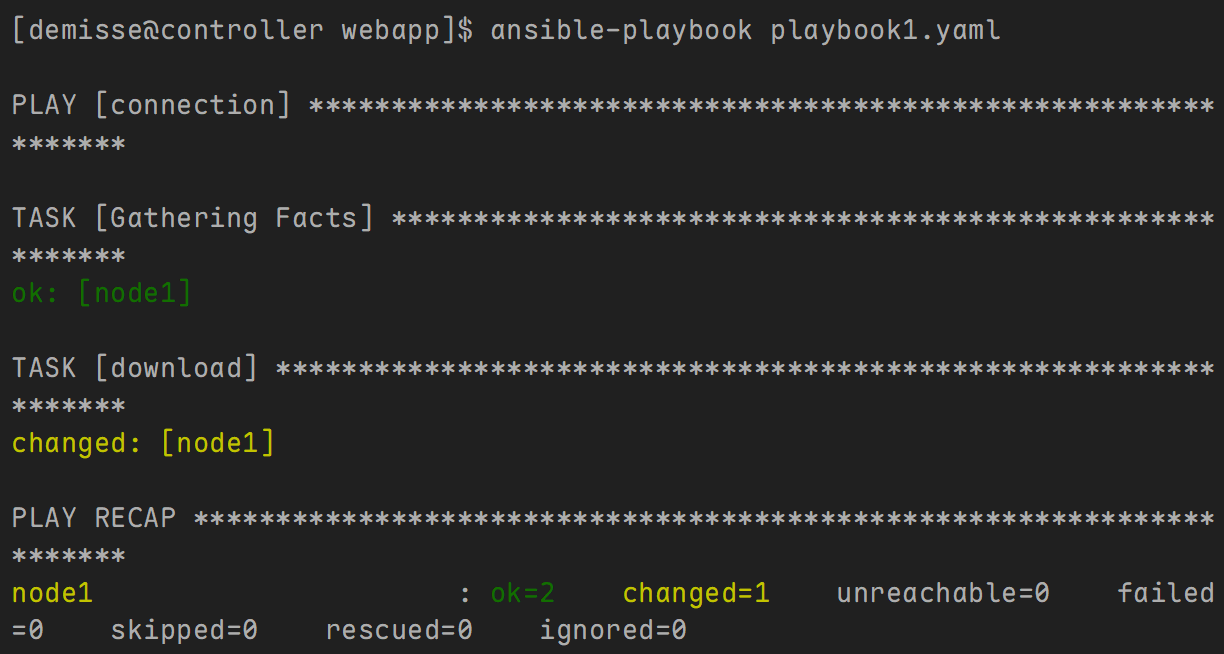
示例2: 放入后台下载,立刻执行下一个任务。
---
- name: connection
  hosts: node1
  tasks:
    - name: download
      get_url:
        url: http://192.168.10.100/ISOS/TrueNAS-SCALE-24.10.2.2.iso
        dest: /home/demisse
      async: 1000
      poll: 0

示例3: ansible 默认行为,等该任务执行完,再执行下一个任务。
---
- name: connection
 hosts: node1
 tasks:
   - name: conneciton
     shell: sleep 10
     async: 0
     poll: 2
wait_for 模块
使用 wait_for 模块检查之前的任务是否达到预期状态。
示例1: 测试文件是否存在
---
- name: test wait for
 hosts: node1
 tasks:
   - shell: sleep 10 && touch /tmp/hello
     # async时间要大于sleep的时间
     async: 20
     poll: 0
     register: out

   - name: wait for create /tmp/hello
     wait_for:
       path: /tmp/hello
       state: present
       delay: 5
       timeout: 30
       sleep: 2
选项说明:
-
delay,设置检测前延迟时间。
-
timeout,设置检测超时时间。
-
sleep,设置检测时间间隔。
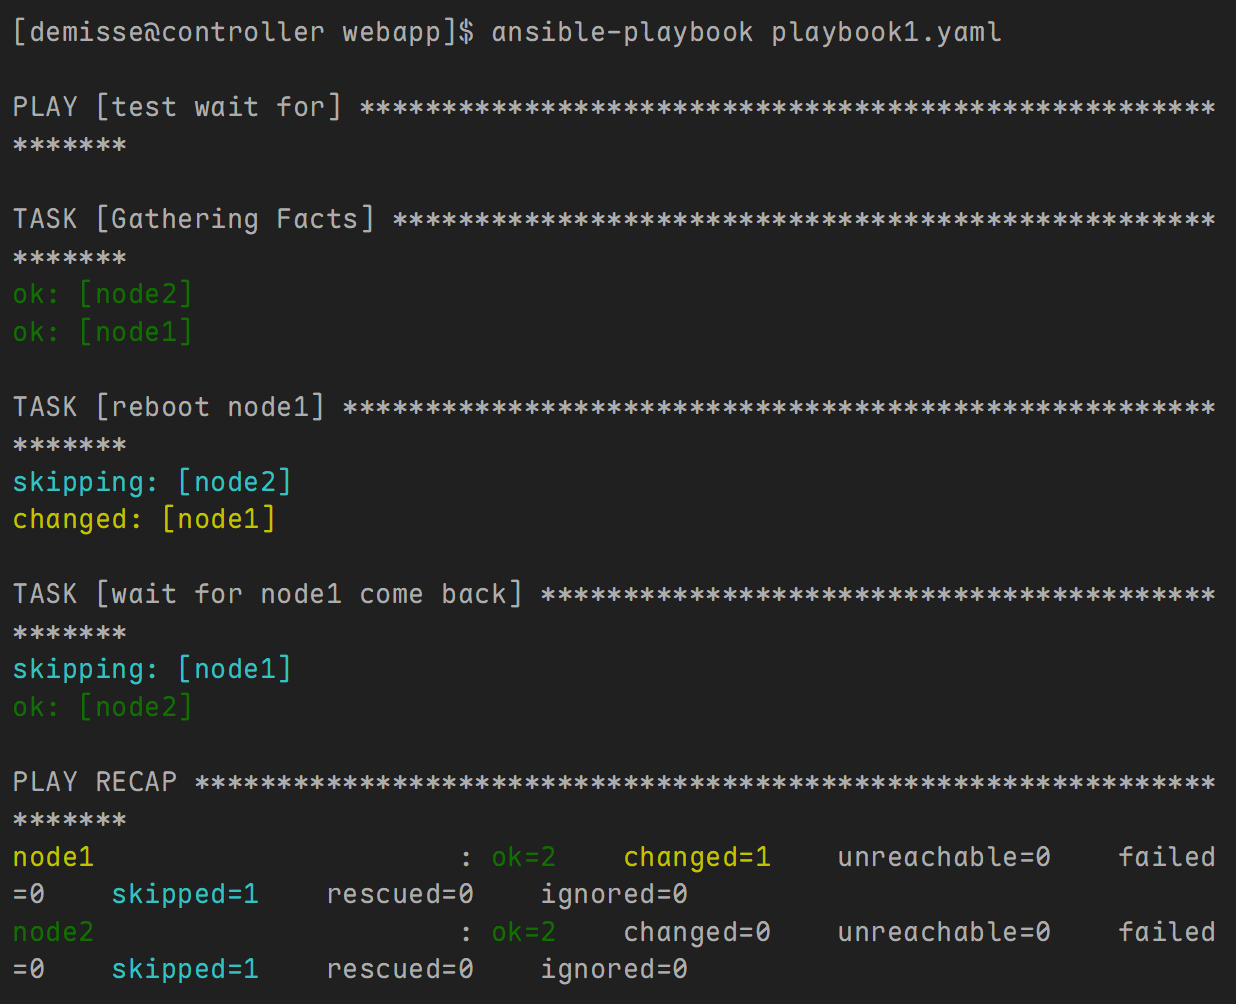
示例2: 测试主机端口是否打开
---
- name: test wait for
  hosts: node1,node2
  tasks:
    - name: reboot node1
      shell: shutdown -r now "Ansible updates triggered"
      async: 1
      poll: 0
      when: inventory_hostname == "node1"

    - name: wait for node1 come back
      wait_for:
        host: node1
        port: 22
        state: started
        delay: 10
        sleep: 2
        timeout: 300
      when: inventory_hostname == "node2"
Including 和 importing 文件
如果playbook很长或很复杂,可以将其分成较小的文件以便于管理。
采用模块化方式将多个playbook组合为一个main playbook或者将文件中的任务列表插入play。这样可以更轻松地在不同项目中重用play或任务。
ansible重用内容主要有两种方式:
-
使用任何 include 关键字任务(includetasks、includerole 等),它将是动态的。
-
使用任何 import 关键字任务(importplaybook、importtasks、import_role等),它将是静态的。
-
只使用include的任务(用于 task 级别和 Playbook 级别)仍然可用,此功能将在 2.12 版中删除。
 [demisse@controller web]$ ansible-doc -l|grep -e ^import -e ^include
 import_playbook                                Import a playbook
 import_role                                    Import a role into a pl...
 import_tasks                                   Import a task list
 include                                        Include a play or task ...
 include_role                                   Load and execute a role
 include_tasks                                  Dynamically include a t...
 include_vars                                   Load variables from fil...
playbook 级别
import_playbook 支持导入外部playbooks。
-
导入的内容是完整的playbook,只能在play级别使用。
-
导入的多个playbooks,则按导入顺序执行。
示例:
- 主剧本内容如下
- name: prepare the web server
 import_playbook: pre_web.yml

- name: prepare the vsftpd server
 import_playbook: pre_vsftpd.yml

- name: prepare the databse server
 import_playbook: pre_db.yml
- pre_web.yml 内容如下:
cat > pre_web.yml << EOF
- name: Play web
 hosts: node1
 tasks:
   - name: install httpd
     yum:
       name: httpd
       state: present
EOF
- pre_vsftpd.yml 内容如下:
cat > pre_vsftpd.yml << EOF
- name: Play vsftpd
 hosts: node1
 tasks:
   - name: install vsftpd
     yum:
       name: vsftpd
       state: present
EOF
- pre_db.yml 内容如下:
cat > pre_db.yml << EOF
- name: Play db
 hosts: node1
 tasks:
   - name: install mariadb-server
     yum:
       name: mariadb-server
       state: present
EOF

task 级别
示例:
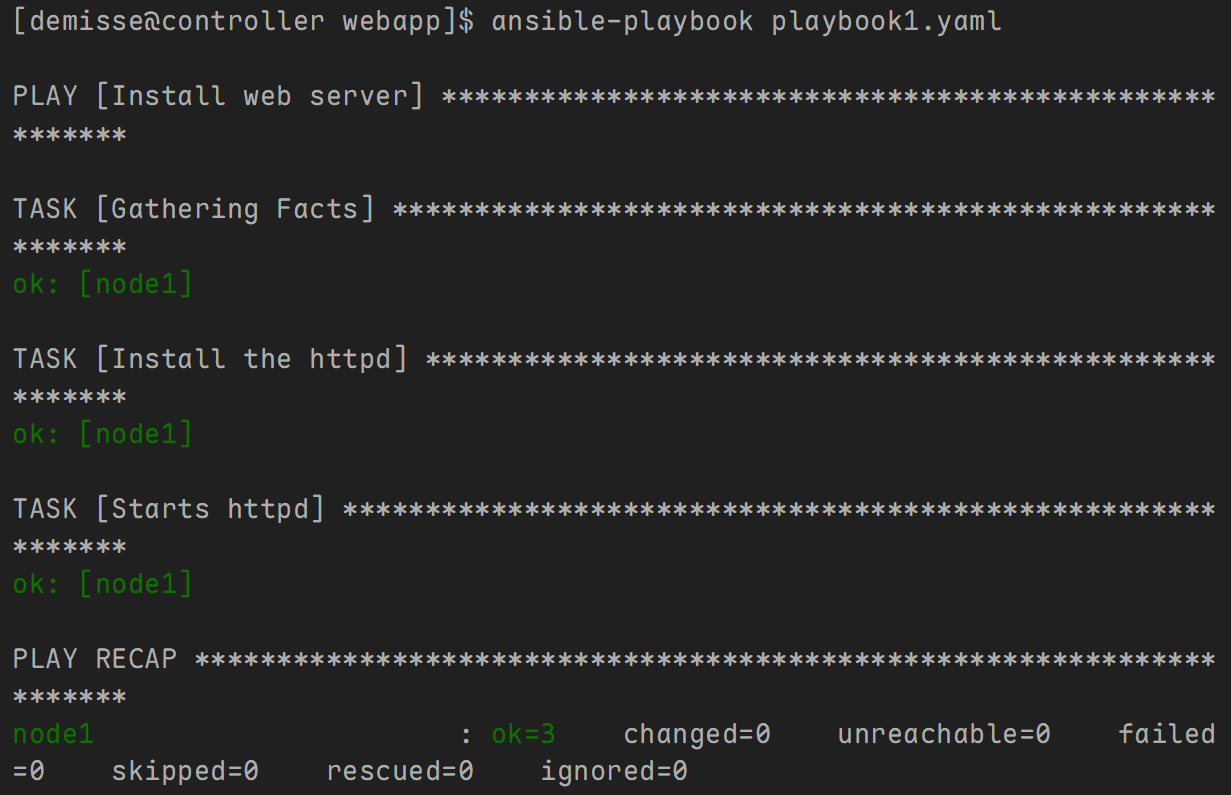
- 主剧本内容如下:
---
- name: Install web server
  hosts: node1
  tasks:
    - name: import a task file
      import_tasks: tasks.yaml
      #include: tasks.yaml
      #include_tasks: tasks.yaml
- tasks.yaml 内容如下:
- name: Install the httpd
  yum:
    name: httpd
    state: present

- name: Starts httpd
  service:
    name: httpd
    state: started
任务文件用例
在这些情景中将任务组作为与playbook独立的外部文件来管理或许有所帮助:
-
如果新服务器需要全面配置,则管理员可以创建不同的任务集合,分别用于创建用户、安装软件包、配置服务、配置特权、设置对共享文件系统的访问权限、强化服务器、安装安全更新,以及安装监控代理等。如果一组服务器需要运行某一项/组任务,则它们可以仅在属于特定主机组的服务器上运行。
-
如果服务器由不同部门管理,例如开发人员、系统管理员和数据库管理员,则每个部门可以编写自己的任务文件,再由系统经理进行审核和集成。
-
如果服务器要求特定的配置,它可以整合为按照某一条件来执行的一组任务。换句话说,仅在满足特定标准时才包含任务。
我们可以创建专用目录存储任务文件, playbook 就可以从该目录包含任务文件。这便能够构建复杂的 playbook,同时简化其结构和组件的管理。
include_vars 模块
导入外部yaml格式的变量文件。
示例:
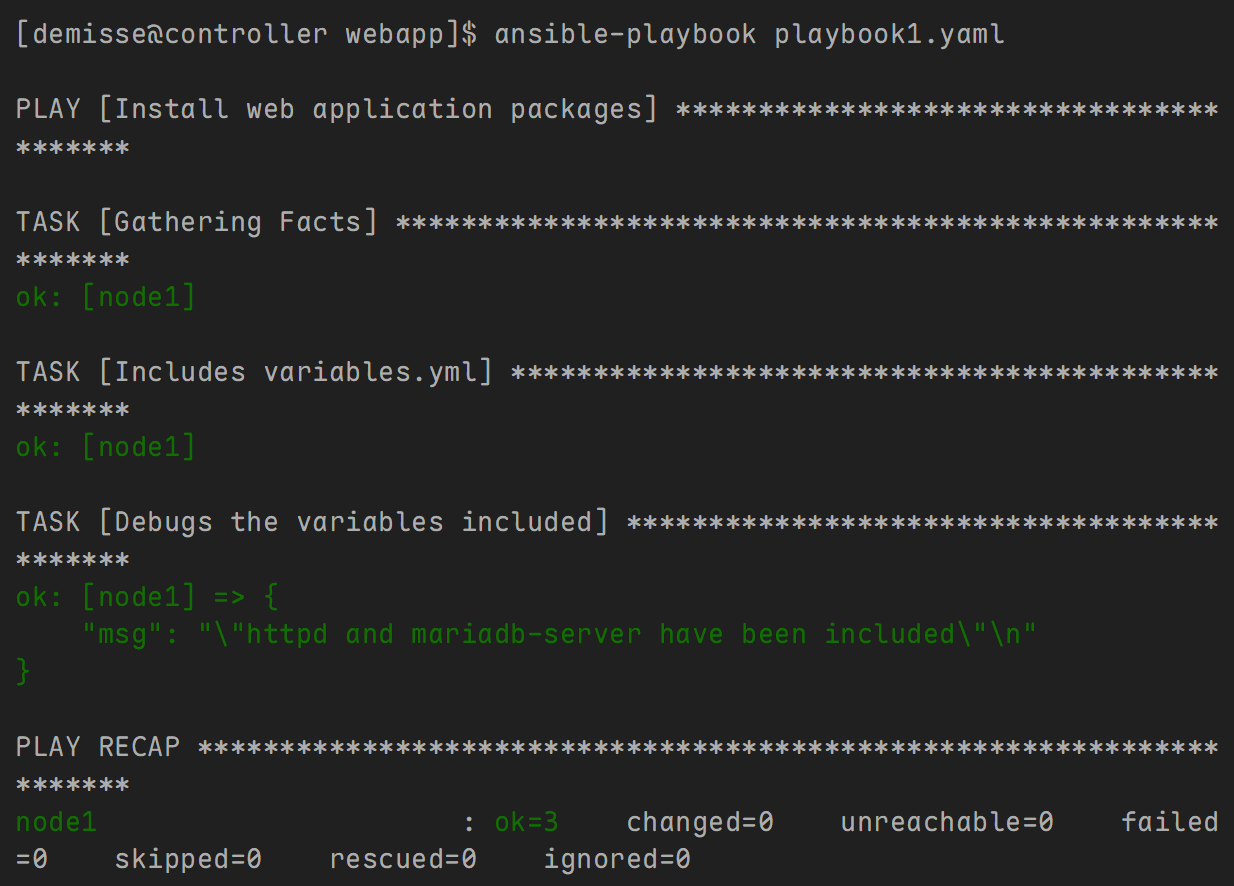
- 主剧本内容如下:
---
- name: Install web application packages
  hosts: node1
  tasks:
    - name: Includes variables.yml
      include_vars: variables.yml

    - name: Debugs the variables included
      debug:
        msg: >
          "{{ packages['web_package'] }} and {{ packages.db_package }} have been included"
- variables.yml 内容如下:
---
packages:
  web_package: httpd
  db_package: mariadb-server
Dynamic 和 Static 区别
简单来说:
-
动态包含,在 playbook 运行期间才会包涵子任务,故而包含内容是动态操作。
-
静态导入,相当于把 playbook 中的任务或playbook直接插入到主playbook中,故而导入内容是静态操作。
当涉及 Ansible 任务选项时,如标签和条件语句(when):
-
对于动态包含,任务选项将仅在执行时应用于动态任务,而不会复制到子任务。
-
对于静态导入,父任务选项将被复制到导入中包含的所有子任务。
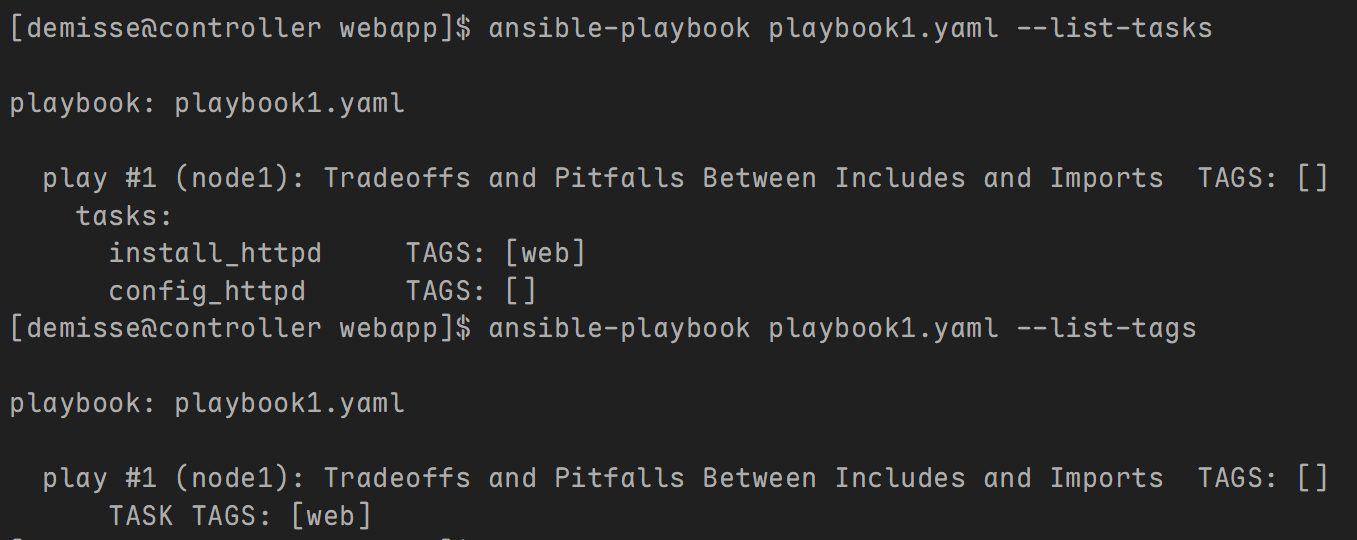
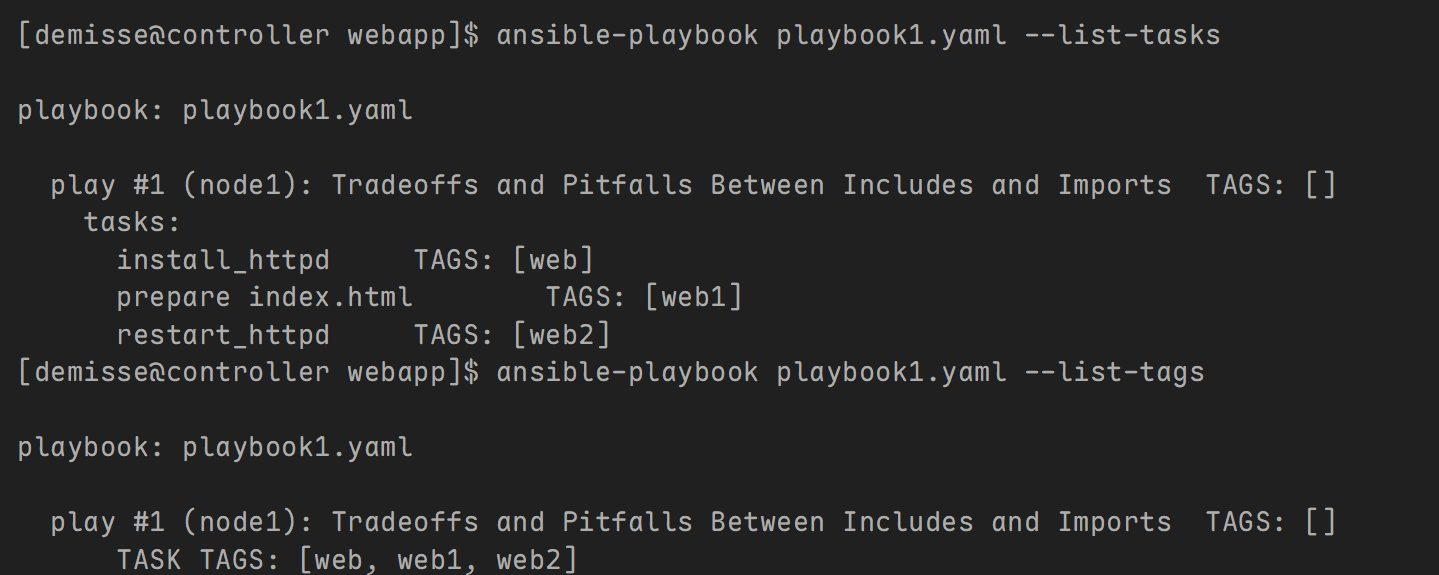
1. list-tasks 和 list-tags
-
仅存在于动态包含中的标签不会显示在 --list-tags 输出中,不能使用 --tags 开始执行带有某些标签的任务。
-
仅存在于动态包含中的任务不会显示在 --list-tasks 输出中,不能使用 --start-at-task 在动态包含内的任务开始执行。
示例:
- 主剧本内容如下:
---
- name: Tradeoffs and Pitfalls Between Includes and Imports
  hosts: node1
  gather_facts: no
  tasks:
    - name: install_httpd
      yum:
        name:  httpd
      tags: web

    - name: config_httpd
      include_tasks: tasks.yaml
      #import_tasks: tasks.yaml
- tasks.yaml 内容如下:
---
- name: prepare index.html
  command: 'echo hello demisse > /var/www/html/index.html'
  tags: web1
- name:  restart_httpd
  service:
    name: httpd
    state: restarted
  tags: web2
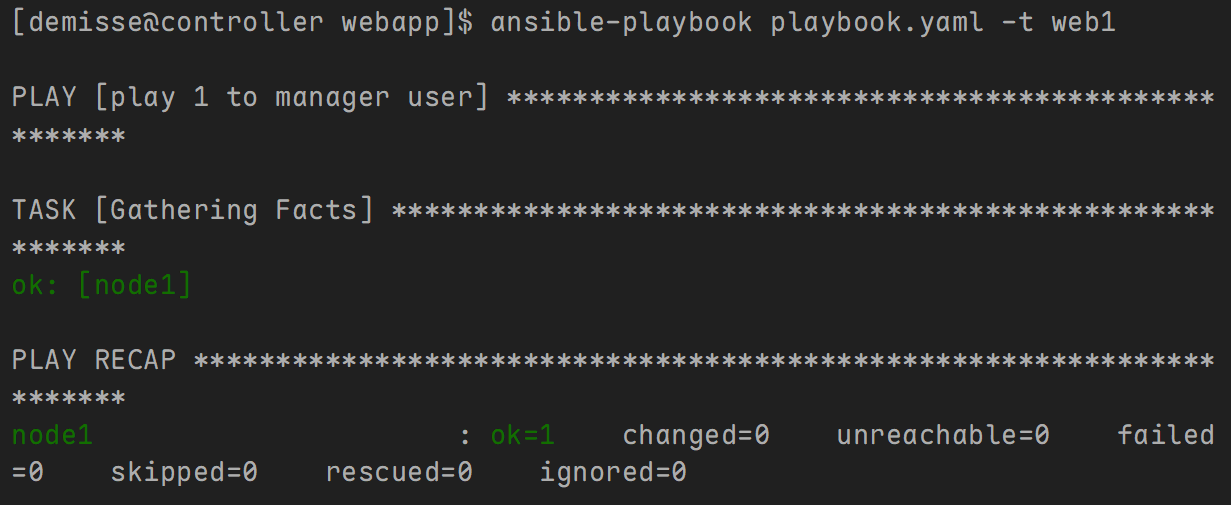
- 验证:使用 include_tasks 模块
- 验证:使用 import_tasks 模块
2. handlers
-
不能使用 notify 触发来自动态包含内部的处理程序名称,只可以触发动态包含本身,这将导致运行包含中的所有任务。
-
可以使用 notify 触发来自静态导入内部的处理程序名称。
示例:
- 主剧本内容如下:
---
- name: Tradeoffs and Pitfalls Between Includes and Imports
  hosts: node1
  gather_facts: no
  tasks:
    - name: install_httpd
      yum:
        name:  httpd
      notify: restart_httpd
      tags: web

  handlers:
    - name: config_httpd
      include_tasks: tasks.yaml
      #import_tasks: tasks.yaml
- tasks.yaml 内容如下:
---
- name: prepare index.html
  command: 'echo hello demisse > /var/www/html/index.html'
  tags: web1
- name:  restart_httpd
  service:
    name: httpd
    state: restarted
  tags: web2
3. syntac check
-
来自动态包含内部的内容,只有在playbook执行的时候解析。
-
来自静态导入内部的内容,在playbook执行前解析。
示例:
- 主剧本内容如下:
---
- name: Tradeoffs and Pitfalls Between Includes and Imports
 hosts: node1
 gather_facts: no
 tasks:
   - name: install_httpd
     yum:
       name:  httpd
     tags: web

   - name: config_httpd
     include_tasks: tasks.yaml
     #import_tasks: tasks.yaml
- tasks.yaml 内容如下:
---
- name: prepare index.html
 command: 'echo hello laoma > /var/www/html/index.html'
 tags: web1
- name:  restart_httpd
 # 这里的service写出了ser
 ser:
   name: httpd
   state: restarted
 tags: web2
4. loop
使用 include 语句的主要优点是循环。 当循环与包含一起使用时,包含的任务或角色将针对循环中的每个项目执行一次。
示例:
- 主剧本内容如下:
---
- name: Tradeoffs and Pitfalls Between Includes and Imports
 hosts: node1
 gather_facts: no
 tasks:
   - name: include_loop
     include_tasks: tasks.yaml
     #import_tasks: tasks.yaml
     loop:
       - httpd
       - vsftpd
- tasks.yaml 内容如下:
---
- name: install {{ item }}
 yum:
   name: "{{ item }}"
   state: present
- name: start service {{ item }}
 service:
   name: "{{ item }}"
   state: restarted
5. variable
-
来自动态包含内部的变量,只有在playbook执行的时候解析。
-
来自静态导入内部的变量,在playbook执行前解析。
示例:
- 主剧本内容如下:
---
- name: Tradeoffs and Pitfalls Between Includes and Imports
 hosts: node1
 tasks:
   - name: pre debug ansible_os_family
     debug:
       msg: "{{ ansible_os_family }}"
   - include_tasks: tasks.yaml
   #- import_tasks: tasks.yaml
     when: ansible_os_family=="RedHat"
   - name: post debug ansible_os_family
     debug:
       msg: "{{ ansible_os_family }}"
- tasks.yaml 内容如下:
---
- set_fact: ansible_os_family="Ubuntu"
- name: debug ansible_memtotal_mb
 debug:
   msg: "{{ ansible_memtotal_mb }}"
任务委派-扩展
任务委派介绍
Ansible默认只会在定义好的一组服务器上执行相同的操作,这个特性对于执行批处理是非常有用的。如果在这过程中需要同时对其他受管主机操作,就需要用到Ansible的任务委派功能。
案例:升级 webservers 集群
-
更新主机前,先将其从loadbalancer后端中移除。
-
更新完成后,再将其添加到loadbalancer后端中。
环境准备:
[demisse@controller web]$ cat > inventory <<'EOF'
loadbalancer ansible_host=controller
[webservers]
node1
node2
EOF
# controller 安装 haproxy
[root@controller ~]# yum install -y haproxy
[root@controller ~]# cat >> /etc/haproxy/haproxy.cfg << 'EOF'
frontend web
bind *:80
use_backend apache
backend apache
balance roundrobin
server node1 10.1.8.11:80
server node2 10.1.8.12:80
EOF
[root@controller ~]# systemctl start haproxy.service
[root@controller ~]# firewall-cmd --add-service=http
# 添加到loadbalancer后端脚本
[root@controller ~]# cat >> /usr/local/bin/add-to-lb << 'EOF'
#!/bin/bash
if [ "$1" == "node1" ];then
HOST=node1
IP=10.1.8.11
else
HOST=node2
IP=10.1.8.12
fi
echo " server $HOST $IP:80">> /etc/haproxy/haproxy.cfg
systemctl reload haproxy
EOF
# 从loadbalancer后端中移除
[root@controller ~]# cat >> /usr/local/bin/remove-from-lb << 'EOF'
#!/bin/bash
if [ "$1" == "node1" ];then
HOST=node1
IP=10.1.8.11
else
HOST=node2
IP=10.1.8.12
fi
sed -i "/$HOST/d" /etc/haproxy/haproxy.cfg
systemctl reload haproxy
EOF
[root@controller ~]# chmod +x /usr/local/bin/*-lb
# node1部署web服务器
[root@node1 ~]# yum install -y httpd
[root@node1 ~]# echo 'Hello node1.' > /var/www/html/index.html
[root@node1 ~]# systemctl start httpd
[root@node1 ~]# firewall-cmd --add-service=http
# node2部署web服务器
[root@node2 ~]# yum install -y httpd
[root@node2 ~]# echo 'Hello node2.' > /var/www/html/index.html
[root@node2 ~]# systemctl start httpd
[root@node2 ~]# firewall-cmd --add-service=http
剧本内容如下:
---
- hosts: webservers
 serial: 1
 tasks:
   - name: Remove server from load balancer
     command: /usr/local/bin/remove-from-lb {{ inventory_hostname }}
     delegate_to: loadbalancer

   - name: sleep 10
     shell: sleep 10

   - name: deploy the latest version of web stack
     copy:
       content: "welcome {{ inventory_hostname }} \n"
       dest: /var/www/html/index.html

   - name: Add server to load balancer pool
     command: /usr/local/bin/add-to-lb {{ inventory_hostname }}
     delegate_to: loadbalancer

   - name: sleep 10
     shell: sleep 10
执行结果:
# 执行以下命令监视负载均衡
[demisse@controller ~]$ while true;do curl -s http://controller.demisse.cloud;sleep 1;done

# 执行剧本
[demisse@controller web]$ ansible-playbook playbook.yml
委派给 localhost
示例:
---
- name: delegate_to example
 hosts: node1
 vars:
   tmplog: /tmp/connection.log

 tasks:
 - name: create tmplog
   shell: touch {{ tmplog }}

 - name: conneciton
   shell: echo "connection . {{ inventory_hostname }} $(hostname) ." >> {{ tmplog }}
   connection: local
connection: local与delegate_to: localhost效果一致,都是在本机执行。
委派给 inventory 之外主机
示例:
---
- name: delegate_to example
 hosts: node1
 tasks:
   - name: Get hostname
     command: hostname
     register: node1_hostname
     changed_when: false

   - name: Display hostname
     debug:
       msg: "{{ node1_hostname.stdout }}"

   - name: Get hostname
     command: hostname
     delegate_to: node2
     register: node2_hostname
     changed_when: false

   - name: Display hostname
     debug:
       msg: "{{ node2_hostname.stdout }}"
add_host 模块
控制节点连接被委派主机的方式与原先受管主机一致,可以通过add_host模块更改委托主机连接方式。
示例:
---
- name: delegate_to example
 hosts: node1

 tasks:
   - name: add delegation host
     add_host:
       name: server
       ansible_host: node2.demisse.cloud
       ansible_user: root

   - name: echo Hello
     debug:
       msg: "Hello from {{ inventory_hostname }}"
     delegate_to: server
facts 委派
示例1:显示node1的facts值
- name: delegate_to example
 hosts: node1
 tasks:
   - name: Display enp1s0 address
     debug:
       var: ansible_enp1s0['ipv4']['address']
     delegate_to: node2
示例2:第二个任务中变量显示为node2的facts值,原因是node1的facts值被node2的facts值覆盖。
- name: delegate_to example
 hosts: node1
 tasks:
   - name: delegate node2 to gather facts
     setup:
     delegate_to: node2

   - debug:
       var: ansible_enp1s0['ipv4']['address']

   - debug:
       var: hostvars.node1
set_fact 模块
用于自定义 facts 值。
示例:
- name: delegate_to example
  hosts: localhost
  gather_facts: no
  tasks:
    - name: Set a fact in delegated task on node1
      set_fact:
        myfact: Where am I set?
      delegate_to: node1
      # 如果使用如下语句,facts将配置给node1
      delegate_facts: True

    - name: Display the facts from node1
      debug:
        msg: "{{ hostvars['node1']['myfact'] }}"

有“AI”的1024 = 2048,欢迎大家加入2048 AI社区
更多推荐


 16
16 0
0- 0


 已为社区贡献2条内容

所有评论(0)