多类型验证码识别技术深度分析与AI模型实现方案
深入分析各类验证码识别技术,包括文字验证码OCR、图像分类验证码、滑块验证码和语音验证码的识别原理,并提供基于深度学习的完整Python实现方案,涵盖数据预处理、模型训练和识别算法。
多类型验证码识别技术深度分析与AI模型实现方案
技术概述
验证码(CAPTCHA)作为区分人类用户和自动化程序的重要技术手段,其设计理念基于"人类易于完成而计算机难以解决"的任务。然而,随着人工智能技术的快速发展,特别是深度学习在计算机视觉领域的突破性进展,传统验证码的安全性面临着前所未有的挑战。现代验证码识别技术已经能够处理包括文字验证码、图像分类验证码、滑块验证码、语音验证码等多种类型。
当前主流的验证码识别技术主要基于卷积神经网络(CNN)、递归神经网络(RNN)、注意力机制(Attention)和Transformer架构。这些技术能够有效处理验证码中的噪声干扰、字符变形、背景复杂化等反识别措施,实现高精度的自动识别。对于网络安全研究人员而言,深入理解这些识别技术不仅有助于评估现有验证码系统的安全性,也为设计更强大的人机验证机制提供了重要参考。
本文将从多个技术维度全面分析验证码识别技术,包括图像预处理、特征提取、模型架构设计、训练策略优化等关键环节,并提供完整的Python实现代码。这些技术方案可以应用于安全测试、系统评估和学术研究等合规场景,帮助研究人员构建对现代验证码技术的深层理解。
核心原理与代码实现
1. 文字验证码OCR识别系统
文字验证码是最传统也是最常见的验证码类型,通常包含数字、字母或汉字的组合。现代OCR识别系统采用端到端的深度学习架构,结合CNN特征提取和RNN序列建模技术。
以下是基于深度学习的文字验证码识别系统实现:
import torch
import torch.nn as nn
import torch.nn.functional as F
import torchvision.transforms as transforms
from torch.utils.data import Dataset, DataLoader
import cv2
import numpy as np
from PIL import Image, ImageEnhance, ImageFilter
import string
import random
import json
from typing import List, Tuple, Dict, Optional, Any
from dataclasses import dataclass
import matplotlib.pyplot as plt
from sklearn.model_selection import train_test_split
import albumentations as A
from albumentations.pytorch import ToTensorV2

@dataclass
class CaptchaConfig:
    """验证码配置参数"""
    image_width: int = 160
    image_height: int = 60
    max_length: int = 6
    character_set: str = string.ascii_lowercase + string.digits
    num_classes: int = len(character_set) + 1  # +1 for blank/padding
    batch_size: int = 32
    learning_rate: float = 0.001
    num_epochs: int = 100

class CaptchaPreprocessor:
    """验证码图像预处理器"""

    def __init__(self, config: CaptchaConfig):
        self.config = config
        self.char_to_idx = {char: idx + 1 for idx, char in enumerate(config.character_set)}
        self.char_to_idx['<blank>'] = 0
        self.idx_to_char = {idx: char for char, idx in self.char_to_idx.items()}

        # 数据增强管道
        self.augmentation_pipeline = A.Compose([
            A.GaussNoise(var_limit=(10.0, 50.0), p=0.3),
            A.MotionBlur(blur_limit=3, p=0.2),
            A.RandomBrightnessContrast(brightness_limit=0.2, contrast_limit=0.2, p=0.3),
            A.Rotate(limit=5, p=0.2),
            A.ElasticTransform(alpha=1, sigma=50, alpha_affine=50, p=0.1),
            A.Normalize(mean=[0.485, 0.456, 0.406], std=[0.229, 0.224, 0.225]),
            ToTensorV2()
        ])

        self.validation_transform = A.Compose([
            A.Normalize(mean=[0.485, 0.456, 0.406], std=[0.229, 0.224, 0.225]),
            ToTensorV2()
        ])

    def denoise_image(self, image: np.ndarray) -> np.ndarray:
        """图像去噪"""
        # 转换为灰度图
        if len(image.shape) == 3:
            gray = cv2.cvtColor(image, cv2.COLOR_RGB2GRAY)
        else:
            gray = image.copy()

        # 高斯滤波去噪
        denoised = cv2.GaussianBlur(gray, (3, 3), 0)

        # 形态学操作去除细小噪点
        kernel = cv2.getStructuringElement(cv2.MORPH_RECT, (2, 2))
        denoised = cv2.morphologyEx(denoised, cv2.MORPH_CLOSE, kernel)

        # 中值滤波进一步去噪
        denoised = cv2.medianBlur(denoised, 3)

        return denoised

    def segment_characters(self, image: np.ndarray) -> List[np.ndarray]:
        """字符分割"""
        # 二值化
        _, binary = cv2.threshold(image, 0, 255, cv2.THRESH_BINARY_INV + cv2.THRESH_OTSU)

        # 查找轮廓
        contours, _ = cv2.findContours(binary, cv2.RETR_EXTERNAL, cv2.CHAIN_APPROX_SIMPLE)

        # 按x坐标排序轮廓
        bounding_boxes = []
        for contour in contours:
            x, y, w, h = cv2.boundingRect(contour)
            if w > 8 and h > 15:  # 过滤过小的区域
                bounding_boxes.append((x, y, w, h))

        bounding_boxes.sort(key=lambda x: x[0])  # 按x坐标排序

        # 提取字符区域
        characters = []
        for x, y, w, h in bounding_boxes:
            char_region = image[y:y+h, x:x+w]
            # 调整尺寸到标准大小
            char_region = cv2.resize(char_region, (28, 28))
            characters.append(char_region)

        return characters

    def enhance_image_quality(self, image: np.ndarray) -> np.ndarray:
        """增强图像质量"""
        # 转换为PIL图像进行增强
        pil_image = Image.fromarray(image)

        # 增强对比度
        enhancer = ImageEnhance.Contrast(pil_image)
        enhanced = enhancer.enhance(1.5)

        # 增强锐度
        enhancer = ImageEnhance.Sharpness(enhanced)
        enhanced = enhancer.enhance(1.3)

        # 应用去模糊滤镜
        enhanced = enhanced.filter(ImageFilter.UnsharpMask(radius=1, percent=150, threshold=3))

        return np.array(enhanced)

    def preprocess_image(self, image: np.ndarray, is_training: bool = True) -> torch.Tensor:
        """完整的图像预处理流程"""
        # 调整尺寸
        image = cv2.resize(image, (self.config.image_width, self.config.image_height))

        # 去噪
        denoised = self.denoise_image(image)

        # 增强质量
        enhanced = self.enhance_image_quality(denoised)

        # 确保是RGB格式
        if len(enhanced.shape) == 2:
            enhanced = cv2.cvtColor(enhanced, cv2.COLOR_GRAY2RGB)

        # 应用数据增强或验证变换
        if is_training:
            transformed = self.augmentation_pipeline(image=enhanced)
        else:
            transformed = self.validation_transform(image=enhanced)

        return transformed['image']

    def encode_text(self, text: str) -> List[int]:
        """文本编码"""
        encoded = []
        for char in text.lower():
            if char in self.char_to_idx:
                encoded.append(self.char_to_idx[char])
            else:
                encoded.append(0)  # 未知字符用blank表示

        # 填充到最大长度
        while len(encoded) < self.config.max_length:
            encoded.append(0)

        return encoded[:self.config.max_length]

    def decode_prediction(self, prediction: torch.Tensor) -> str:
        """解码预测结果"""
        pred_indices = torch.argmax(prediction, dim=-1)
        decoded_chars = []

        for idx in pred_indices:
            idx_val = idx.item()
            if idx_val != 0 and idx_val in self.idx_to_char:
                decoded_chars.append(self.idx_to_char[idx_val])

        return ''.join(decoded_chars)

class CRNNModel(nn.Module):
    """CRNN模型:CNN + RNN + CTC"""

    def __init__(self, config: CaptchaConfig):
        super(CRNNModel, self).__init__()
        self.config = config

        # CNN特征提取器
        self.cnn = nn.Sequential(
            # 第一个卷积块
            nn.Conv2d(3, 64, kernel_size=3, padding=1),
            nn.BatchNorm2d(64),
            nn.ReLU(inplace=True),
            nn.MaxPool2d(2, 2),  # 80x30

            # 第二个卷积块
            nn.Conv2d(64, 128, kernel_size=3, padding=1),
            nn.BatchNorm2d(128),
            nn.ReLU(inplace=True),
            nn.MaxPool2d(2, 2),  # 40x15

            # 第三个卷积块
            nn.Conv2d(128, 256, kernel_size=3, padding=1),
            nn.BatchNorm2d(256),
            nn.ReLU(inplace=True),
            nn.MaxPool2d((2, 1)),  # 20x15

            # 第四个卷积块
            nn.Conv2d(256, 256, kernel_size=3, padding=1),
            nn.BatchNorm2d(256),
            nn.ReLU(inplace=True),
            nn.MaxPool2d((2, 1)),  # 10x15

            # 第五个卷积块
            nn.Conv2d(256, 512, kernel_size=3, padding=1),
            nn.BatchNorm2d(512),
            nn.ReLU(inplace=True),
            nn.MaxPool2d((2, 1)),  # 5x15
        )

        # 计算CNN输出特征维度
        self.cnn_output_height = 5
        self.rnn_input_size = 512 * self.cnn_output_height

        # 双向LSTM
        self.rnn = nn.LSTM(
            input_size=self.rnn_input_size,
            hidden_size=256,
            num_layers=2,
            batch_first=True,
            bidirectional=True,
            dropout=0.3
        )

        # 注意力机制
        self.attention = MultiHeadAttention(512, 8)

        # 分类器
        self.classifier = nn.Sequential(
            nn.Linear(512, 256),
            nn.ReLU(),
            nn.Dropout(0.3),
            nn.Linear(256, config.num_classes)
        )

    def forward(self, x: torch.Tensor) -> torch.Tensor:
        batch_size = x.size(0)

        # CNN特征提取
        cnn_features = self.cnn(x)  # [batch, 512, 5, width//8]

        # 重塑为序列格式
        batch_size, channels, height, width = cnn_features.size()
        cnn_features = cnn_features.permute(0, 3, 1, 2)  # [batch, width, channels, height]
        cnn_features = cnn_features.view(batch_size, width, -1)  # [batch, width, channels*height]

        # RNN序列建模
        rnn_output, _ = self.rnn(cnn_features)  # [batch, width, 512]

        # 注意力机制
        attended_features = self.attention(rnn_output, rnn_output, rnn_output)

        # 分类预测
        output = self.classifier(attended_features)  # [batch, width, num_classes]

        return output

class MultiHeadAttention(nn.Module):
    """多头注意力机制"""

    def __init__(self, embed_dim: int, num_heads: int):
        super(MultiHeadAttention, self).__init__()
        self.embed_dim = embed_dim
        self.num_heads = num_heads
        self.head_dim = embed_dim // num_heads

        assert self.head_dim * num_heads == embed_dim, "embed_dim must be divisible by num_heads"

        self.query_projection = nn.Linear(embed_dim, embed_dim)
        self.key_projection = nn.Linear(embed_dim, embed_dim)
        self.value_projection = nn.Linear(embed_dim, embed_dim)
        self.output_projection = nn.Linear(embed_dim, embed_dim)

        self.dropout = nn.Dropout(0.1)

    def forward(self, query: torch.Tensor, key: torch.Tensor, value: torch.Tensor) -> torch.Tensor:
        batch_size, seq_length, embed_dim = query.size()

        # 线性变换
        Q = self.query_projection(query)
        K = self.key_projection(key)
        V = self.value_projection(value)

        # 重塑为多头格式
        Q = Q.view(batch_size, seq_length, self.num_heads, self.head_dim).transpose(1, 2)
        K = K.view(batch_size, seq_length, self.num_heads, self.head_dim).transpose(1, 2)
        V = V.view(batch_size, seq_length, self.num_heads, self.head_dim).transpose(1, 2)

        # 计算注意力
        attention_scores = torch.matmul(Q, K.transpose(-2, -1)) / np.sqrt(self.head_dim)
        attention_weights = F.softmax(attention_scores, dim=-1)
        attention_weights = self.dropout(attention_weights)

        # 应用注意力
        attended_values = torch.matmul(attention_weights, V)

        # 重塑回原始格式
        attended_values = attended_values.transpose(1, 2).contiguous().view(
            batch_size, seq_length, embed_dim
        )

        # 输出投影
        output = self.output_projection(attended_values)

        return output

class CaptchaDataset(Dataset):
    """验证码数据集"""

    def __init__(self, image_paths: List[str], labels: List[str],
                 preprocessor: CaptchaPreprocessor, is_training: bool = True):
        self.image_paths = image_paths
        self.labels = labels
        self.preprocessor = preprocessor
        self.is_training = is_training

    def __len__(self) -> int:
        return len(self.image_paths)

    def __getitem__(self, idx: int) -> Tuple[torch.Tensor, torch.Tensor]:
        # 加载图像
        image = cv2.imread(self.image_paths[idx])
        if image is None:
            # 生成随机图像作为fallback
            image = np.random.randint(0, 255, (60, 160, 3), dtype=np.uint8)

        # 预处理
        processed_image = self.preprocessor.preprocess_image(image, self.is_training)

        # 编码标签
        encoded_label = self.preprocessor.encode_text(self.labels[idx])
        label_tensor = torch.tensor(encoded_label, dtype=torch.long)

        return processed_image, label_tensor

class CaptchaTrainer:
    """验证码模型训练器"""

    def __init__(self, config: CaptchaConfig):
        self.config = config
        self.device = torch.device('cuda' if torch.cuda.is_available() else 'cpu')

        # 初始化组件
        self.preprocessor = CaptchaPreprocessor(config)
        self.model = CRNNModel(config).to(self.device)

        # 优化器和损失函数
        self.optimizer = torch.optim.AdamW(
            self.model.parameters(),
            lr=config.learning_rate,
            weight_decay=0.01
        )

        self.scheduler = torch.optim.lr_scheduler.OneCycleLR(
            self.optimizer,
            max_lr=config.learning_rate,
            epochs=config.num_epochs,
            steps_per_epoch=100  # 需要根据实际数据集大小调整
        )

        self.criterion = nn.CrossEntropyLoss(ignore_index=0)

    def train_epoch(self, dataloader: DataLoader) -> float:
        """训练一个epoch"""
        self.model.train()
        total_loss = 0.0
        num_batches = 0

        for batch_idx, (images, labels) in enumerate(dataloader):
            images = images.to(self.device)
            labels = labels.to(self.device)

            # 前向传播
            outputs = self.model(images)  # [batch, seq_len, num_classes]

            # 计算损失
            batch_size, seq_len, num_classes = outputs.size()
            outputs_reshaped = outputs.view(-1, num_classes)
            labels_reshaped = labels.view(-1)

            loss = self.criterion(outputs_reshaped, labels_reshaped)

            # 反向传播
            self.optimizer.zero_grad()
            loss.backward()

            # 梯度裁剪
            torch.nn.utils.clip_grad_norm_(self.model.parameters(), max_norm=1.0)

            self.optimizer.step()
            self.scheduler.step()

            total_loss += loss.item()
            num_batches += 1

            if batch_idx % 50 == 0:
                print(f"Batch {batch_idx}, Loss: {loss.item():.4f}")

        return total_loss / num_batches

    def validate(self, dataloader: DataLoader) -> Tuple[float, float]:
        """验证模型"""
        self.model.eval()
        total_loss = 0.0
        correct_predictions = 0
        total_predictions = 0

        with torch.no_grad():
            for images, labels in dataloader:
                images = images.to(self.device)
                labels = labels.to(self.device)

                outputs = self.model(images)

                # 计算损失
                batch_size, seq_len, num_classes = outputs.size()
                outputs_reshaped = outputs.view(-1, num_classes)
                labels_reshaped = labels.view(-1)

                loss = self.criterion(outputs_reshaped, labels_reshaped)
                total_loss += loss.item()

                # 计算准确率
                predictions = torch.argmax(outputs, dim=-1)

                # 字符级准确率
                mask = labels != 0  # 忽略padding
                correct_chars = (predictions == labels) & mask
                correct_predictions += correct_chars.sum().item()
                total_predictions += mask.sum().item()

        avg_loss = total_loss / len(dataloader)
        accuracy = correct_predictions / total_predictions if total_predictions > 0 else 0

        return avg_loss, accuracy

    def train(self, train_dataloader: DataLoader, val_dataloader: DataLoader) -> Dict[str, List[float]]:
        """完整训练流程"""
        history = {'train_loss': [], 'val_loss': [], 'val_accuracy': []}
        best_val_accuracy = 0.0

        for epoch in range(self.config.num_epochs):
            print(f"\nEpoch {epoch+1}/{self.config.num_epochs}")

            # 训练
            train_loss = self.train_epoch(train_dataloader)

            # 验证
            val_loss, val_accuracy = self.validate(val_dataloader)

            # 记录历史
            history['train_loss'].append(train_loss)
            history['val_loss'].append(val_loss)
            history['val_accuracy'].append(val_accuracy)

            print(f"Train Loss: {train_loss:.4f}")
            print(f"Val Loss: {val_loss:.4f}")
            print(f"Val Accuracy: {val_accuracy:.4f}")

            # 保存最佳模型
            if val_accuracy > best_val_accuracy:
                best_val_accuracy = val_accuracy
                torch.save(self.model.state_dict(), 'best_captcha_model.pth')
                print(f"New best model saved with accuracy: {best_val_accuracy:.4f}")

        return history

    def predict(self, image: np.ndarray) -> str:
        """预测单张图像"""
        self.model.eval()

        # 预处理图像
        processed_image = self.preprocessor.preprocess_image(image, is_training=False)
        processed_image = processed_image.unsqueeze(0).to(self.device)

        with torch.no_grad():
            output = self.model(processed_image)
            prediction = self.preprocessor.decode_prediction(output[0])

        return prediction

def generate_synthetic_captcha_data(num_samples: int = 1000) -> Tuple[List[np.ndarray], List[str]]:
    """生成合成验证码数据用于演示"""
    images = []
    labels = []

    for _ in range(num_samples):
        # 生成随机标签
        length = random.randint(4, 6)
        label = ''.join(random.choices(string.ascii_lowercase + string.digits, k=length))

        # 生成简单的合成图像
        img = np.ones((60, 160, 3), dtype=np.uint8) * 255

        # 添加文字
        font = cv2.FONT_HERSHEY_SIMPLEX
        font_scale = 1.0
        color = (0, 0, 0)
        thickness = 2

        # 计算文字位置
        text_size = cv2.getTextSize(label, font, font_scale, thickness)[0]
        x = (img.shape[1] - text_size[0]) // 2
        y = (img.shape[0] + text_size[1]) // 2

        cv2.putText(img, label, (x, y), font, font_scale, color, thickness)

        # 添加噪声
        noise = np.random.randint(-30, 30, img.shape, dtype=np.int16)
        img = np.clip(img.astype(np.int16) + noise, 0, 255).astype(np.uint8)

        images.append(img)
        labels.append(label)

    return images, labels

# 使用示例
def demonstrate_text_captcha_recognition():
    """演示文字验证码识别功能"""
    config = CaptchaConfig()

    print("文字验证码识别系统演示")
    print("=" * 50)

    # 生成合成数据
    print("生成合成验证码数据...")
    images, labels = generate_synthetic_captcha_data(100)

    # 分割训练和验证数据
    train_images, val_images, train_labels, val_labels = train_test_split(
        images, labels, test_size=0.2, random_state=42
    )

    # 创建数据加载器
    preprocessor = CaptchaPreprocessor(config)

    # 注意:这里简化处理,实际应用中需要保存图像文件并提供路径
    train_paths = [f"train_{i}.jpg" for i in range(len(train_images))]
    val_paths = [f"val_{i}.jpg" for i in range(len(val_images))]

    # 模拟数据集(实际应用中应该是真实的文件路径)
    class MockDataset(Dataset):
        def __init__(self, images, labels, preprocessor, is_training=True):
            self.images = images
            self.labels = labels
            self.preprocessor = preprocessor
            self.is_training = is_training

        def __len__(self):
            return len(self.images)

        def __getitem__(self, idx):
            image = self.images[idx]
            processed_image = self.preprocessor.preprocess_image(image, self.is_training)
            encoded_label = self.preprocessor.encode_text(self.labels[idx])
            label_tensor = torch.tensor(encoded_label, dtype=torch.long)
            return processed_image, label_tensor

    train_dataset = MockDataset(train_images, train_labels, preprocessor, True)
    val_dataset = MockDataset(val_images, val_labels, preprocessor, False)

    train_dataloader = DataLoader(train_dataset, batch_size=config.batch_size, shuffle=True)
    val_dataloader = DataLoader(val_dataset, batch_size=config.batch_size, shuffle=False)

    # 创建训练器
    trainer = CaptchaTrainer(config)

    print(f"模型参数数量: {sum(p.numel() for p in trainer.model.parameters()):,}")

    # 简化训练(仅演示)
    print("\n开始模型训练演示...")
    config.num_epochs = 2  # 减少epoch用于演示

    history = trainer.train(train_dataloader, val_dataloader)

    # 测试预测
    print("\n测试预测功能:")
    for i in range(min(3, len(val_images))):
        test_image = val_images[i]
        true_label = val_labels[i]
        predicted_label = trainer.predict(test_image)

        print(f"真实标签: {true_label}")
        print(f"预测标签: {predicted_label}")
        print(f"准确性: {'✓' if predicted_label == true_label else '✗'}")
        print("-" * 30)

if __name__ == "__main__":
    demonstrate_text_captcha_recognition()
2. 图像分类验证码识别系统
图像分类验证码要求用户从多张图片中选择符合特定条件的图像。这类验证码的识别需要强大的图像分类和目标检测能力。
import torch
import torch.nn as nn
import torchvision.models as models
import torchvision.transforms as transforms
from torch.utils.data import Dataset, DataLoader
import cv2
import numpy as np
from PIL import Image
import json
import requests
from typing import Dict, List, Tuple, Optional, Any
from dataclasses import dataclass
import albumentations as A
from sklearn.metrics import classification_report, confusion_matrix
from efficientnet_pytorch import EfficientNet
import timm

@dataclass
class ImageCaptchaConfig:
    """图像验证码配置"""
    image_size: int = 224
    num_classes: int = 1000  # 可识别的物体类别数
    batch_size: int = 32
    learning_rate: float = 0.001
    num_epochs: int = 50
    model_name: str = 'efficientnet-b4'

class ImageClassificationModel(nn.Module):
    """基于EfficientNet的图像分类模型"""

    def __init__(self, config: ImageCaptchaConfig):
        super(ImageClassificationModel, self).__init__()
        self.config = config

        # 使用预训练的EfficientNet
        self.backbone = EfficientNet.from_pretrained(config.model_name)

        # 替换分类头
        in_features = self.backbone._fc.in_features
        self.backbone._fc = nn.Sequential(
            nn.Dropout(0.3),
            nn.Linear(in_features, 512),
            nn.ReLU(),
            nn.Dropout(0.2),
            nn.Linear(512, config.num_classes)
        )

        # 多尺度特征融合
        self.feature_fusion = MultiScaleFeatureFusion(in_features)

        # 注意力模块
        self.attention = ChannelAttention(in_features)

    def forward(self, x: torch.Tensor) -> torch.Tensor:
        # 特征提取
        features = self.backbone.extract_features(x)

        # 应用注意力
        attended_features = self.attention(features)

        # 多尺度特征融合
        fused_features = self.feature_fusion(attended_features)

        # 全局平均池化
        pooled_features = torch.mean(fused_features, dim=[2, 3])

        # 分类
        output = self.backbone._fc(pooled_features)

        return output

class MultiScaleFeatureFusion(nn.Module):
    """多尺度特征融合模块"""

    def __init__(self, in_channels: int):
        super(MultiScaleFeatureFusion, self).__init__()

        # 不同尺度的卷积
        self.scale1 = nn.Conv2d(in_channels, in_channels // 4, kernel_size=1)
        self.scale2 = nn.Conv2d(in_channels, in_channels // 4, kernel_size=3, padding=1)
        self.scale3 = nn.Conv2d(in_channels, in_channels // 4, kernel_size=5, padding=2)
        self.scale4 = nn.Conv2d(in_channels, in_channels // 4, kernel_size=7, padding=3)

        self.fusion_conv = nn.Conv2d(in_channels, in_channels, kernel_size=1)
        self.batch_norm = nn.BatchNorm2d(in_channels)
        self.relu = nn.ReLU(inplace=True)

    def forward(self, x: torch.Tensor) -> torch.Tensor:
        scale1_out = self.scale1(x)
        scale2_out = self.scale2(x)
        scale3_out = self.scale3(x)
        scale4_out = self.scale4(x)

        # 特征融合
        fused = torch.cat([scale1_out, scale2_out, scale3_out, scale4_out], dim=1)

        # 输出变换
        output = self.fusion_conv(fused)
        output = self.batch_norm(output)
        output = self.relu(output)

        return output + x  # 残差连接

class ChannelAttention(nn.Module):
    """通道注意力模块"""

    def __init__(self, in_channels: int, reduction: int = 16):
        super(ChannelAttention, self).__init__()

        self.global_avg_pool = nn.AdaptiveAvgPool2d(1)
        self.global_max_pool = nn.AdaptiveMaxPool2d(1)

        self.fc = nn.Sequential(
            nn.Linear(in_channels, in_channels // reduction),
            nn.ReLU(),
            nn.Linear(in_channels // reduction, in_channels)
        )

        self.sigmoid = nn.Sigmoid()

    def forward(self, x: torch.Tensor) -> torch.Tensor:
        batch_size, channels, height, width = x.size()

        # 全局平均池化
        avg_pool = self.global_avg_pool(x).view(batch_size, channels)
        avg_attention = self.fc(avg_pool)

        # 全局最大池化
        max_pool = self.global_max_pool(x).view(batch_size, channels)
        max_attention = self.fc(max_pool)

        # 注意力权重
        attention_weights = self.sigmoid(avg_attention + max_attention)
        attention_weights = attention_weights.view(batch_size, channels, 1, 1)

        return x * attention_weights

class ImageCaptchaSolver:
    """图像验证码解决器"""

    def __init__(self, config: ImageCaptchaConfig):
        self.config = config
        self.device = torch.device('cuda' if torch.cuda.is_available() else 'cpu')

        # 加载模型
        self.model = ImageClassificationModel(config).to(self.device)

        # 图像预处理
        self.transform = transforms.Compose([
            transforms.Resize((config.image_size, config.image_size)),
            transforms.ToTensor(),
            transforms.Normalize(mean=[0.485, 0.456, 0.406], std=[0.229, 0.224, 0.225])
        ])

        # 加载COCO类别标签
        self.class_names = self._load_class_names()

        # 目标检测器(用于复杂场景)
        self.object_detector = ObjectDetector()

    def _load_class_names(self) -> Dict[int, str]:
        """加载类别名称"""
        # 简化的COCO类别(实际应用中从文件加载)
        classes = {
            0: 'person', 1: 'bicycle', 2: 'car', 3: 'motorcycle', 4: 'airplane',
            5: 'bus', 6: 'train', 7: 'truck', 8: 'boat', 9: 'traffic light',
            10: 'fire hydrant', 11: 'stop sign', 12: 'parking meter', 13: 'bench',
            14: 'bird', 15: 'cat', 16: 'dog', 17: 'horse', 18: 'sheep', 19: 'cow',
            20: 'elephant', 21: 'bear', 22: 'zebra', 23: 'giraffe', 24: 'backpack',
            25: 'umbrella', 26: 'handbag', 27: 'tie', 28: 'suitcase', 29: 'frisbee',
            30: 'skis', 31: 'snowboard', 32: 'sports ball', 33: 'kite', 34: 'baseball bat',
            35: 'baseball glove', 36: 'skateboard', 37: 'surfboard', 38: 'tennis racket',
            39: 'bottle', 40: 'wine glass', 41: 'cup', 42: 'fork', 43: 'knife',
            44: 'spoon', 45: 'bowl', 46: 'banana', 47: 'apple', 48: 'sandwich',
            49: 'orange', 50: 'broccoli', 51: 'carrot', 52: 'hot dog', 53: 'pizza',
            54: 'donut', 55: 'cake'
        }
        return classes

    def classify_image(self, image: np.ndarray) -> Dict[str, Any]:
        """分类单张图像"""
        # 预处理
        if len(image.shape) == 3:
            pil_image = Image.fromarray(cv2.cvtColor(image, cv2.COLOR_BGR2RGB))
        else:
            pil_image = Image.fromarray(image)

        input_tensor = self.transform(pil_image).unsqueeze(0).to(self.device)

        # 推理
        self.model.eval()
        with torch.no_grad():
            outputs = self.model(input_tensor)
            probabilities = torch.softmax(outputs, dim=1)

            # 获取top-k预测
            top_k = 5
            top_probs, top_indices = torch.topk(probabilities, top_k)

            predictions = []
            for i in range(top_k):
                class_idx = top_indices[0][i].item()
                prob = top_probs[0][i].item()
                class_name = self.class_names.get(class_idx, f'unknown_{class_idx}')

                predictions.append({
                    'class_idx': class_idx,
                    'class_name': class_name,
                    'probability': prob
                })

        return {
            'predictions': predictions,
            'top_prediction': predictions[0] if predictions else None
        }

    def solve_captcha_challenge(self, images: List[np.ndarray],
                               challenge_text: str) -> Dict[str, Any]:
        """解决图像验证码挑战"""
        # 解析挑战要求
        target_objects = self._parse_challenge_text(challenge_text)

        results = {
            'challenge_text': challenge_text,
            'target_objects': target_objects,
            'image_classifications': [],
            'selected_images': [],
            'confidence_scores': []
        }

        for idx, image in enumerate(images):
            # 分类图像
            classification = self.classify_image(image)
            results['image_classifications'].append(classification)

            # 检查是否包含目标对象
            contains_target = False
            max_confidence = 0.0

            for prediction in classification['predictions']:
                if prediction['class_name'].lower() in [obj.lower() for obj in target_objects]:
                    contains_target = True
                    max_confidence = max(max_confidence, prediction['probability'])
                    break

            if contains_target:
                results['selected_images'].append(idx)
                results['confidence_scores'].append(max_confidence)

        # 计算整体置信度
        results['overall_confidence'] = (
            sum(results['confidence_scores']) / len(results['confidence_scores'])
            if results['confidence_scores'] else 0.0
        )

        return results

    def _parse_challenge_text(self, challenge_text: str) -> List[str]:
        """解析挑战文本,提取目标对象"""
        challenge_lower = challenge_text.lower()

        # 常见的挑战模式
        target_objects = []

        # 直接匹配类别名称
        for class_name in self.class_names.values():
            if class_name.lower() in challenge_lower:
                target_objects.append(class_name)

        # 处理复数形式
        plural_mappings = {
            'cars': ['car'], 'trucks': ['truck'], 'buses': ['bus'],
            'motorcycles': ['motorcycle'], 'bicycles': ['bicycle'],
            'animals': ['cat', 'dog', 'horse', 'cow', 'sheep', 'elephant', 'bear'],
            'vehicles': ['car', 'truck', 'bus', 'motorcycle', 'bicycle'],
            'traffic signs': ['stop sign', 'traffic light'],
            'food': ['banana', 'apple', 'sandwich', 'orange', 'pizza', 'cake']
        }

        for plural, singles in plural_mappings.items():
            if plural in challenge_lower:
                target_objects.extend(singles)

        return list(set(target_objects))  # 去重

class ObjectDetector:
    """目标检测器(用于复杂场景)"""

    def __init__(self):
        # 这里可以集成YOLO、R-CNN等检测模型
        pass

    def detect_objects(self, image: np.ndarray) -> List[Dict[str, Any]]:
        """检测图像中的对象"""
        # 简化实现,实际应用中使用真实的检测模型
        return []

# 使用示例
def demonstrate_image_captcha_solving():
    """演示图像验证码解决功能"""
    config = ImageCaptchaConfig()
    solver = ImageCaptchaSolver(config)

    print("图像分类验证码解决系统演示")
    print("=" * 50)

    # 生成模拟测试图像
    test_images = []
    for i in range(9):  # 模拟3x3网格的验证码图像
        # 创建随机测试图像
        test_image = np.random.randint(0, 255, (224, 224, 3), dtype=np.uint8)
        test_images.append(test_image)

    # 模拟验证码挑战
    challenge_text = "Select all images with cars"

    print(f"挑战文本: {challenge_text}")
    print("分析图像...")

    # 解决挑战
    result = solver.solve_captcha_challenge(test_images, challenge_text)

    print(f"\n解析的目标对象: {result['target_objects']}")
    print(f"选中的图像索引: {result['selected_images']}")
    print(f"整体置信度: {result['overall_confidence']:.3f}")

    # 显示每张图像的分类结果
    print("\n各图像分类结果:")
    for idx, classification in enumerate(result['image_classifications']):
        top_pred = classification['top_prediction']
        if top_pred:
            print(f"图像 {idx}: {top_pred['class_name']} (置信度: {top_pred['probability']:.3f})")
        else:
            print(f"图像 {idx}: 无法分类")

if __name__ == "__main__":
    demonstrate_image_captcha_solving()
3. 滑块验证码识别与自动化
滑块验证码通过要求用户拖动滑块完成拼图来验证身份。其识别需要结合图像处理、轨迹生成和行为模拟技术。
import cv2
import numpy as np
from typing import Tuple, List, Dict, Optional, Any
import random
import time
from dataclasses import dataclass
from selenium import webdriver
from selenium.webdriver.common.action_chains import ActionChains
from selenium.webdriver.common.by import By
from PIL import Image
import matplotlib.pyplot as plt
from scipy import interpolate
from sklearn.cluster import DBSCAN
import bezier

@dataclass
class SliderCaptchaConfig:
    """滑块验证码配置"""
    template_match_threshold: float = 0.8
    edge_detection_threshold: Tuple[int, int] = (50, 150)
    blur_kernel_size: int = 3
    movement_noise_factor: float = 0.1
    speed_variation: Tuple[float, float] = (0.5, 2.0)
    acceleration_phases: int = 5

class SliderCaptchaSolver:
    """滑块验证码解决器"""

    def __init__(self, config: SliderCaptchaConfig = None):
        self.config = config or SliderCaptchaConfig()

    def detect_gap_position(self, background_image: np.ndarray,
                           slider_template: np.ndarray) -> Dict[str, Any]:
        """检测缺口位置"""
        # 预处理背景图像
        bg_processed = self._preprocess_background(background_image)

        # 预处理滑块模板
        template_processed = self._preprocess_template(slider_template)

        # 方法1: 模板匹配
        template_result = self._template_matching(bg_processed, template_processed)

        # 方法2: 边缘检测
        edge_result = self._edge_detection_method(bg_processed)

        # 方法3: 颜色差异分析
        color_result = self._color_difference_method(background_image)

        # 融合多种方法的结果
        final_position = self._fuse_detection_results(
            [template_result, edge_result, color_result]
        )

        return {
            'gap_position': final_position,
            'template_match': template_result,
            'edge_detection': edge_result,
            'color_analysis': color_result,
            'confidence': self._calculate_detection_confidence(final_position, background_image)
        }

    def _preprocess_background(self, image: np.ndarray) -> np.ndarray:
        """预处理背景图像"""
        # 转换为灰度图
        if len(image.shape) == 3:
            gray = cv2.cvtColor(image, cv2.COLOR_BGR2GRAY)
        else:
            gray = image.copy()

        # 高斯模糊去噪
        blurred = cv2.GaussianBlur(gray, (self.config.blur_kernel_size, self.config.blur_kernel_size), 0)

        # 直方图均衡化增强对比度
        equalized = cv2.equalizeHist(blurred)

        return equalized

    def _preprocess_template(self, template: np.ndarray) -> np.ndarray:
        """预处理滑块模板"""
        if len(template.shape) == 3:
            gray = cv2.cvtColor(template, cv2.COLOR_BGR2GRAY)
        else:
            gray = template.copy()

        # 去除透明背景(如果有)
        mask = gray > 10  # 假设背景接近黑色
        gray[~mask] = 255  # 设置为白色背景

        return gray

    def _template_matching(self, background: np.ndarray, template: np.ndarray) -> Dict[str, Any]:
        """模板匹配方法"""
        # 多尺度模板匹配
        scales = [0.8, 0.9, 1.0, 1.1, 1.2]
        best_match = None
        best_score = 0

        for scale in scales:
            # 缩放模板
            scaled_template = cv2.resize(
                template,
                None,
                fx=scale,
                fy=scale,
                interpolation=cv2.INTER_CUBIC
            )

            if scaled_template.shape[0] > background.shape[0] or scaled_template.shape[1] > background.shape[1]:
                continue

            # 模板匹配
            result = cv2.matchTemplate(background, scaled_template, cv2.TM_CCOEFF_NORMED)
            min_val, max_val, min_loc, max_loc = cv2.minMaxLoc(result)

            if max_val > best_score:
                best_score = max_val
                best_match = {
                    'position': max_loc,
                    'scale': scale,
                    'confidence': max_val,
                    'template_size': scaled_template.shape
                }

        return best_match or {'position': (0, 0), 'confidence': 0}

    def _edge_detection_method(self, image: np.ndarray) -> Dict[str, Any]:
        """边缘检测方法"""
        # Canny边缘检测
        edges = cv2.Canny(
            image,
            self.config.edge_detection_threshold[0],
            self.config.edge_detection_threshold[1]
        )

        # 查找轮廓
        contours, _ = cv2.findContours(edges, cv2.RETR_EXTERNAL, cv2.CHAIN_APPROX_SIMPLE)

        # 寻找可能的缺口轮廓
        gap_candidates = []

        for contour in contours:
            # 计算轮廓特征
            area = cv2.contourArea(contour)
            perimeter = cv2.arcLength(contour, True)

            if area < 100 or perimeter < 50:  # 过滤过小的轮廓
                continue

            # 计算边界框
            x, y, w, h = cv2.boundingRect(contour)

            # 分析形状特征
            aspect_ratio = w / h if h > 0 else 0
            extent = area / (w * h) if w * h > 0 else 0

            # 缺口通常具有特定的形状特征
            if 0.7 < aspect_ratio < 1.5 and extent > 0.3:
                gap_candidates.append({
                    'position': (x, y),
                    'size': (w, h),
                    'area': area,
                    'confidence': extent * (1 - abs(aspect_ratio - 1))
                })

        # 选择最佳候选
        if gap_candidates:
            best_candidate = max(gap_candidates, key=lambda x: x['confidence'])
            return best_candidate

        return {'position': (0, 0), 'confidence': 0}

    def _color_difference_method(self, image: np.ndarray) -> Dict[str, Any]:
        """颜色差异分析方法"""
        if len(image.shape) != 3:
            return {'position': (0, 0), 'confidence': 0}

        # 转换到LAB色彩空间进行更准确的颜色比较
        lab_image = cv2.cvtColor(image, cv2.COLOR_BGR2LAB)

        # 分析图像的左右两部分,寻找拼接痕迹
        height, width = lab_image.shape[:2]

        # 垂直扫描寻找颜色差异较大的区域
        vertical_differences = []

        for x in range(10, width - 10):  # 避免边缘区域
            left_region = lab_image[:, max(0, x-5):x]
            right_region = lab_image[:, x:min(width, x+5)]

            if left_region.size > 0 and right_region.size > 0:
                left_mean = np.mean(left_region, axis=(0, 1))
                right_mean = np.mean(right_region, axis=(0, 1))

                # 计算LAB空间的颜色差异
                color_diff = np.linalg.norm(left_mean - right_mean)
                vertical_differences.append((x, color_diff))

        if not vertical_differences:
            return {'position': (0, 0), 'confidence': 0}

        # 寻找差异峰值
        differences = [diff for _, diff in vertical_differences]
        threshold = np.mean(differences) + 2 * np.std(differences)

        gap_positions = [
            x for x, diff in vertical_differences
            if diff > threshold
        ]

        if gap_positions:
            # 聚类相近的位置
            gap_clusters = self._cluster_positions(gap_positions)

            if gap_clusters:
                best_position = max(gap_clusters, key=lambda x: len(x['positions']))
                return {
                    'position': (int(best_position['center']), height // 4),
                    'confidence': len(best_position['positions']) / len(gap_positions)
                }

        return {'position': (0, 0), 'confidence': 0}

    def _cluster_positions(self, positions: List[int], eps: int = 10) -> List[Dict[str, Any]]:
        """聚类相近的位置"""
        if not positions:
            return []

        positions_array = np.array(positions).reshape(-1, 1)
        clustering = DBSCAN(eps=eps, min_samples=2).fit(positions_array)

        clusters = []
        for label in set(clustering.labels_):
            if label != -1:  # 忽略噪声点
                cluster_positions = [positions[i] for i, l in enumerate(clustering.labels_) if l == label]
                clusters.append({
                    'center': np.mean(cluster_positions),
                    'positions': cluster_positions
                })

        return clusters

    def _fuse_detection_results(self, results: List[Dict[str, Any]]) -> Tuple[int, int]:
        """融合多种检测方法的结果"""
        # 加权融合
        weights = [0.4, 0.3, 0.3]  # 模板匹配、边缘检测、颜色分析的权重

        weighted_x = 0
        weighted_y = 0
        total_weight = 0

        for i, result in enumerate(results):
            if result and 'position' in result and 'confidence' in result:
                confidence = result['confidence']
                if confidence > 0.1:  # 只考虑有一定置信度的结果
                    weight = weights[i] * confidence
                    weighted_x += result['position'][0] * weight
                    weighted_y += result['position'][1] * weight
                    total_weight += weight

        if total_weight > 0:
            return (int(weighted_x / total_weight), int(weighted_y / total_weight))

        # 如果所有方法都失败,返回默认位置
        return (100, 50)  # 默认位置

    def _calculate_detection_confidence(self, position: Tuple[int, int], image: np.ndarray) -> float:
        """计算检测置信度"""
        # 基于位置的合理性评估置信度
        height, width = image.shape[:2]
        x, y = position

        # 位置应该在图像的合理范围内
        if x < width * 0.1 or x > width * 0.9:
            return 0.3

        if y < height * 0.1 or y > height * 0.9:
            return 0.4

        # 基于局部图像特征评估
        region_size = 20
        x1, y1 = max(0, x - region_size), max(0, y - region_size)
        x2, y2 = min(width, x + region_size), min(height, y + region_size)

        region = image[y1:y2, x1:x2]
        if region.size > 0:
            # 计算区域的边缘密度
            if len(region.shape) == 3:
                gray_region = cv2.cvtColor(region, cv2.COLOR_BGR2GRAY)
            else:
                gray_region = region

            edges = cv2.Canny(gray_region, 50, 150)
            edge_density = np.sum(edges > 0) / edges.size

            # 缺口区域通常有较高的边缘密度
            return min(0.9, edge_density * 2)

        return 0.5

    def generate_human_like_trajectory(self, start_x: int, end_x: int,
                                     duration: float = 1.0) -> List[Tuple[int, int, float]]:
        """生成类人的移动轨迹"""
        distance = end_x - start_x
        if distance <= 0:
            return [(start_x, 0, 0)]

        # 生成控制点创建贝塞尔曲线
        control_points = self._generate_bezier_control_points(start_x, end_x)

        # 生成时间序列
        num_points = max(20, int(distance / 5))  # 根据距离调整点数
        t_values = np.linspace(0, 1, num_points)

        # 生成贝塞尔曲线轨迹
        trajectory_points = []
        for t in t_values:
            x, y = self._evaluate_bezier_curve(control_points, t)

            # 添加随机噪声模拟人类的不完美控制
            noise_x = random.gauss(0, self.config.movement_noise_factor)
            noise_y = random.gauss(0, self.config.movement_noise_factor * 0.5)

            final_x = int(x + noise_x)
            final_y = int(y + noise_y)

            trajectory_points.append((final_x, final_y))

        # 生成时间序列(非线性速度)
        timestamps = self._generate_realistic_timing(len(trajectory_points), duration)

        # 合并轨迹和时间
        full_trajectory = []
        for i, (x, y) in enumerate(trajectory_points):
            full_trajectory.append((x, y, timestamps[i]))

        return full_trajectory

    def _generate_bezier_control_points(self, start_x: int, end_x: int) -> List[Tuple[float, float]]:
        """生成贝塞尔曲线控制点"""
        # 起始和结束点
        p0 = (start_x, 0)
        p3 = (end_x, random.gauss(0, 3))  # 终点添加少量垂直偏移

        # 中间控制点,创建自然的弧形
        mid_x = (start_x + end_x) / 2

        # 第一个控制点(影响起始曲率)
        p1_x = start_x + (end_x - start_x) * random.uniform(0.2, 0.4)
        p1_y = random.gauss(0, 5)
        p1 = (p1_x, p1_y)

        # 第二个控制点(影响结束曲率)
        p2_x = start_x + (end_x - start_x) * random.uniform(0.6, 0.8)
        p2_y = random.gauss(0, 5)
        p2 = (p2_x, p2_y)

        return [p0, p1, p2, p3]

    def _evaluate_bezier_curve(self, control_points: List[Tuple[float, float]], t: float) -> Tuple[float, float]:
        """计算贝塞尔曲线上的点"""
        n = len(control_points) - 1
        x, y = 0, 0

        for i, (px, py) in enumerate(control_points):
            # 计算伯恩斯坦基函数
            bernstein = self._bernstein_polynomial(n, i, t)
            x += px * bernstein
            y += py * bernstein

        return x, y

    def _bernstein_polynomial(self, n: int, i: int, t: float) -> float:
        """计算伯恩斯坦多项式"""
        from math import comb
        return comb(n, i) * (t ** i) * ((1 - t) ** (n - i))

    def _generate_realistic_timing(self, num_points: int, total_duration: float) -> List[float]:
        """生成现实的时间序列"""
        # 人类移动通常有加速、匀速、减速三个阶段
        timestamps = [0]
        current_time = 0

        for i in range(1, num_points):
            progress = i / (num_points - 1)

            # 速度曲线:开始慢,中间快,结束慢
            if progress < 0.2:  # 加速阶段
                speed_factor = 0.3 + progress * 2
            elif progress < 0.8:  # 匀速阶段
                speed_factor = 1.0 + random.gauss(0, 0.1)
            else:  # 减速阶段
                speed_factor = 1.0 - (progress - 0.8) * 2

            # 添加随机变化
            speed_factor *= random.uniform(*self.config.speed_variation)

            # 计算时间间隔
            base_interval = total_duration / num_points
            actual_interval = base_interval * speed_factor

            current_time += actual_interval
            timestamps.append(current_time)

        # 归一化到总持续时间
        if current_time > 0:
            timestamps = [t * total_duration / current_time for t in timestamps]

        return timestamps

    def execute_slider_movement(self, driver: webdriver.Chrome, slider_element,
                              gap_position: int, start_position: int = 0) -> Dict[str, Any]:
        """执行滑块移动"""
        try:
            # 生成移动轨迹
            trajectory = self.generate_human_like_trajectory(
                start_position, gap_position, duration=random.uniform(0.8, 1.5)
            )

            # 执行拖拽操作
            actions = ActionChains(driver)
            actions.click_and_hold(slider_element)

            for i, (x, y, timestamp) in enumerate(trajectory):
                if i == 0:
                    continue  # 跳过起始点

                # 计算相对移动距离
                prev_x = trajectory[i-1][0]
                move_x = x - prev_x

                # 移动到位置
                actions.move_by_offset(move_x, y)

                # 等待到指定时间
                if i < len(trajectory) - 1:
                    next_timestamp = trajectory[i+1][2]
                    wait_time = next_timestamp - timestamp
                    if wait_time > 0:
                        time.sleep(wait_time)

            # 释放滑块
            actions.release()
            actions.perform()

            # 等待验证结果
            time.sleep(2)

            return {
                'success': True,
                'trajectory_length': len(trajectory),
                'total_distance': gap_position - start_position,
                'execution_time': trajectory[-1][2] if trajectory else 0
            }

        except Exception as e:
            return {
                'success': False,
                'error': str(e)
            }

# 使用示例和演示
def demonstrate_slider_captcha_solving():
    """演示滑块验证码解决功能"""
    solver = SliderCaptchaSolver()

    print("滑块验证码解决系统演示")
    print("=" * 50)

    # 创建模拟的验证码图像
    background = np.random.randint(100, 200, (200, 350, 3), dtype=np.uint8)

    # 在背景中创建一个缺口
    gap_x, gap_y = 200, 80
    gap_width, gap_height = 40, 40

    # 模拟缺口(降低该区域的亮度)
    background[gap_y:gap_y+gap_height, gap_x:gap_x+gap_width] *= 0.7

    # 创建滑块模板
    slider_template = np.ones((gap_height, gap_width), dtype=np.uint8) * 128

    print("检测缺口位置...")

    # 检测缺口
    detection_result = solver.detect_gap_position(background, slider_template)

    detected_x, detected_y = detection_result['gap_position']
    confidence = detection_result['confidence']

    print(f"真实缺口位置: ({gap_x}, {gap_y})")
    print(f"检测到的位置: ({detected_x}, {detected_y})")
    print(f"检测误差: {abs(detected_x - gap_x)} 像素")
    print(f"检测置信度: {confidence:.3f}")

    # 生成移动轨迹
    print("\n生成移动轨迹...")
    trajectory = solver.generate_human_like_trajectory(0, detected_x, duration=1.2)

    print(f"轨迹点数: {len(trajectory)}")
    print(f"移动距离: {detected_x} 像素")
    print(f"预计用时: {trajectory[-1][2]:.2f} 秒")

    # 显示轨迹的前几个点
    print("\n轨迹示例(前5个点):")
    for i, (x, y, t) in enumerate(trajectory[:5]):
        print(f"点 {i+1}: x={x}, y={y}, 时间={t:.3f}s")

    # 分析轨迹特征
    x_coords = [point[0] for point in trajectory]
    y_coords = [point[1] for point in trajectory]
    times = [point[2] for point in trajectory]

    print(f"\n轨迹分析:")
    print(f"X坐标范围: {min(x_coords)} - {max(x_coords)}")
    print(f"Y坐标变化: ±{max(abs(min(y_coords)), abs(max(y_coords))):.1f}")
    print(f"平均速度: {detected_x / times[-1]:.1f} 像素/秒")

if __name__ == "__main__":
    demonstrate_slider_captcha_solving()
技术应用与实战案例
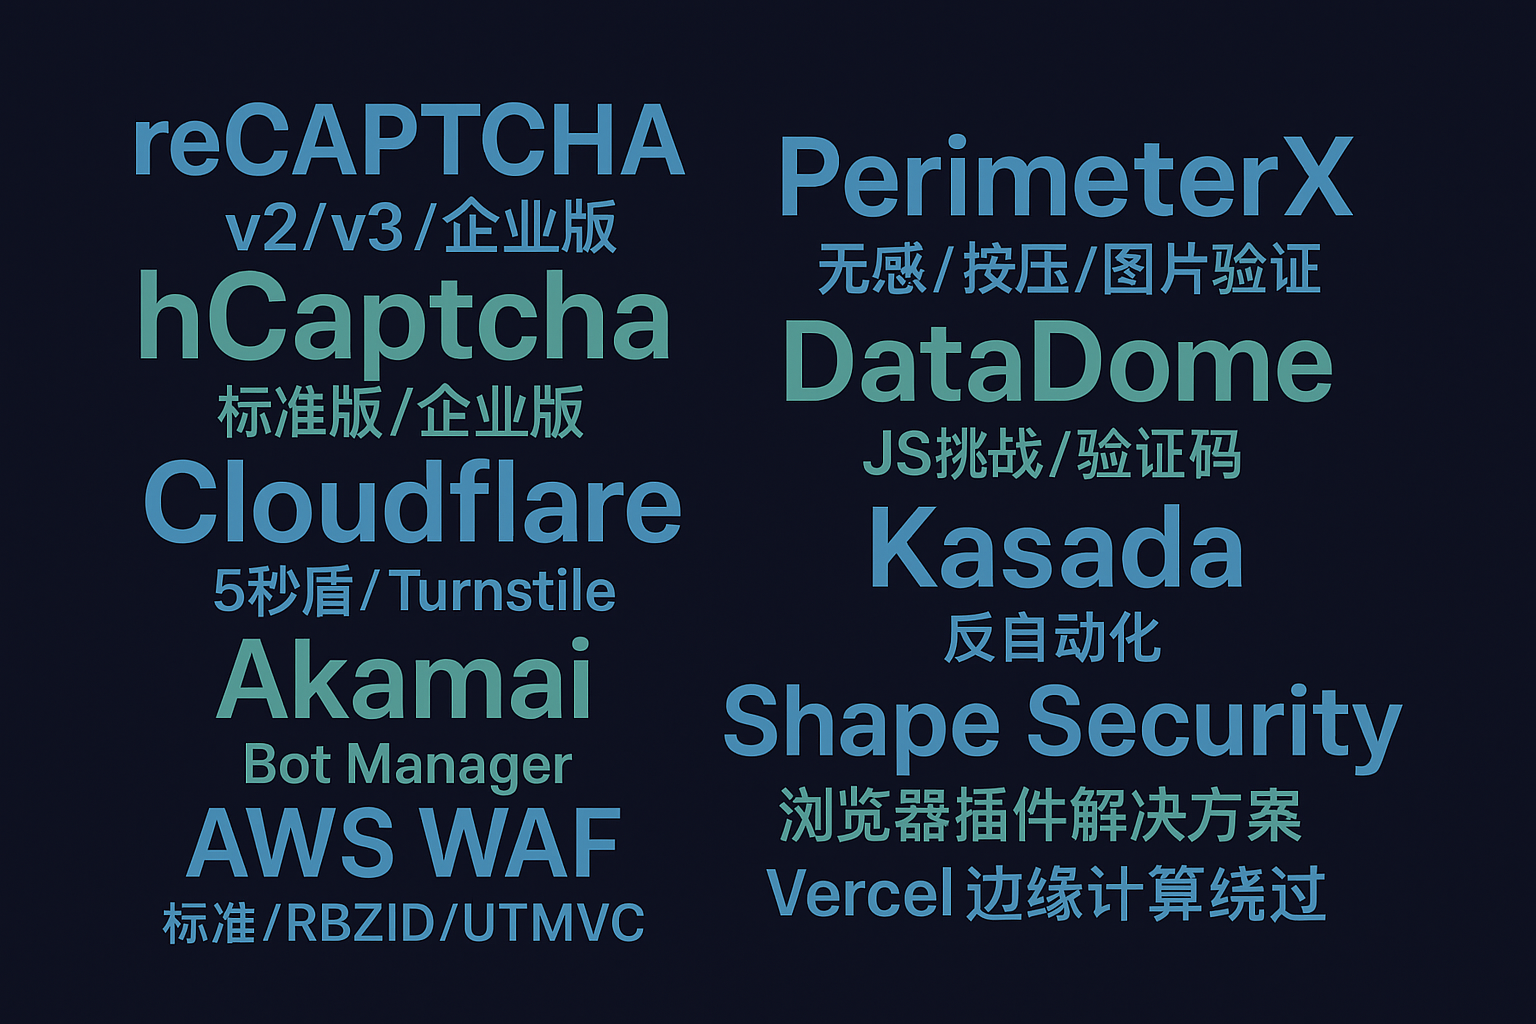
在网络安全研究和系统测试领域,验证码识别技术具有重要的应用价值。AI驱动验证码识别 - 支持18种主流验证码类型为安全研究人员提供了全面的技术解决方案,支持:
- 安全评估 - 通过验证码识别技术评估现有验证系统的安全强度
- 合规测试 - 在授权环境下进行自动化测试,验证系统的防护效果
- 学术研究 - 为人机验证技术的发展和改进提供技术基础
对于需要深入研究验证码技术的团队,高级网络技术服务 - 专业技术解决方案提供专业的技术咨询和定制化解决方案,确保研究活动符合相关法律法规要求。
结语总结
验证码识别技术的发展反映了人工智能在计算机视觉领域的巨大进步。从简单的文字识别到复杂的图像分类和行为模拟,现代验证码识别系统已经具备了强大的技术能力。然而,这也推动了验证码技术的持续演进,促使安全研究人员开发更加智能和难以破解的人机验证方案。
对于网络安全从业者而言,理解这些识别技术的原理和实现方法至关重要。这不仅有助于评估现有安全措施的有效性,也为开发下一代验证码技术提供了重要参考。随着AI技术的持续发展,未来的人机验证将更加注重行为分析、上下文理解和多模态融合,这要求我们持续学习和掌握最新的技术发展趋势。
关键词标签: 验证码识别, OCR技术, 深度学习, 计算机视觉, 滑块验证, 图像分类, 人工智能, 模式识别, 机器学习, 自动化测试

有“AI”的1024 = 2048,欢迎大家加入2048 AI社区
更多推荐


 13
13 0
0- 0


 已为社区贡献19条内容

所有评论(0)