路由router
目录
定义:可被路由的协议(Routed Protocol)由路由协议(Routing Protocol)传输 这些网络协议执行在源与目的设备行为的用户应用间通信所需的各种功能,不同的协议中这些功能可能差异很大。网络协议发生在OSI参考模型的上四层:传输层、会话层、表示层和应用层。
作用意义:
把信息从源穿过网络传递到目的
新建vue工程
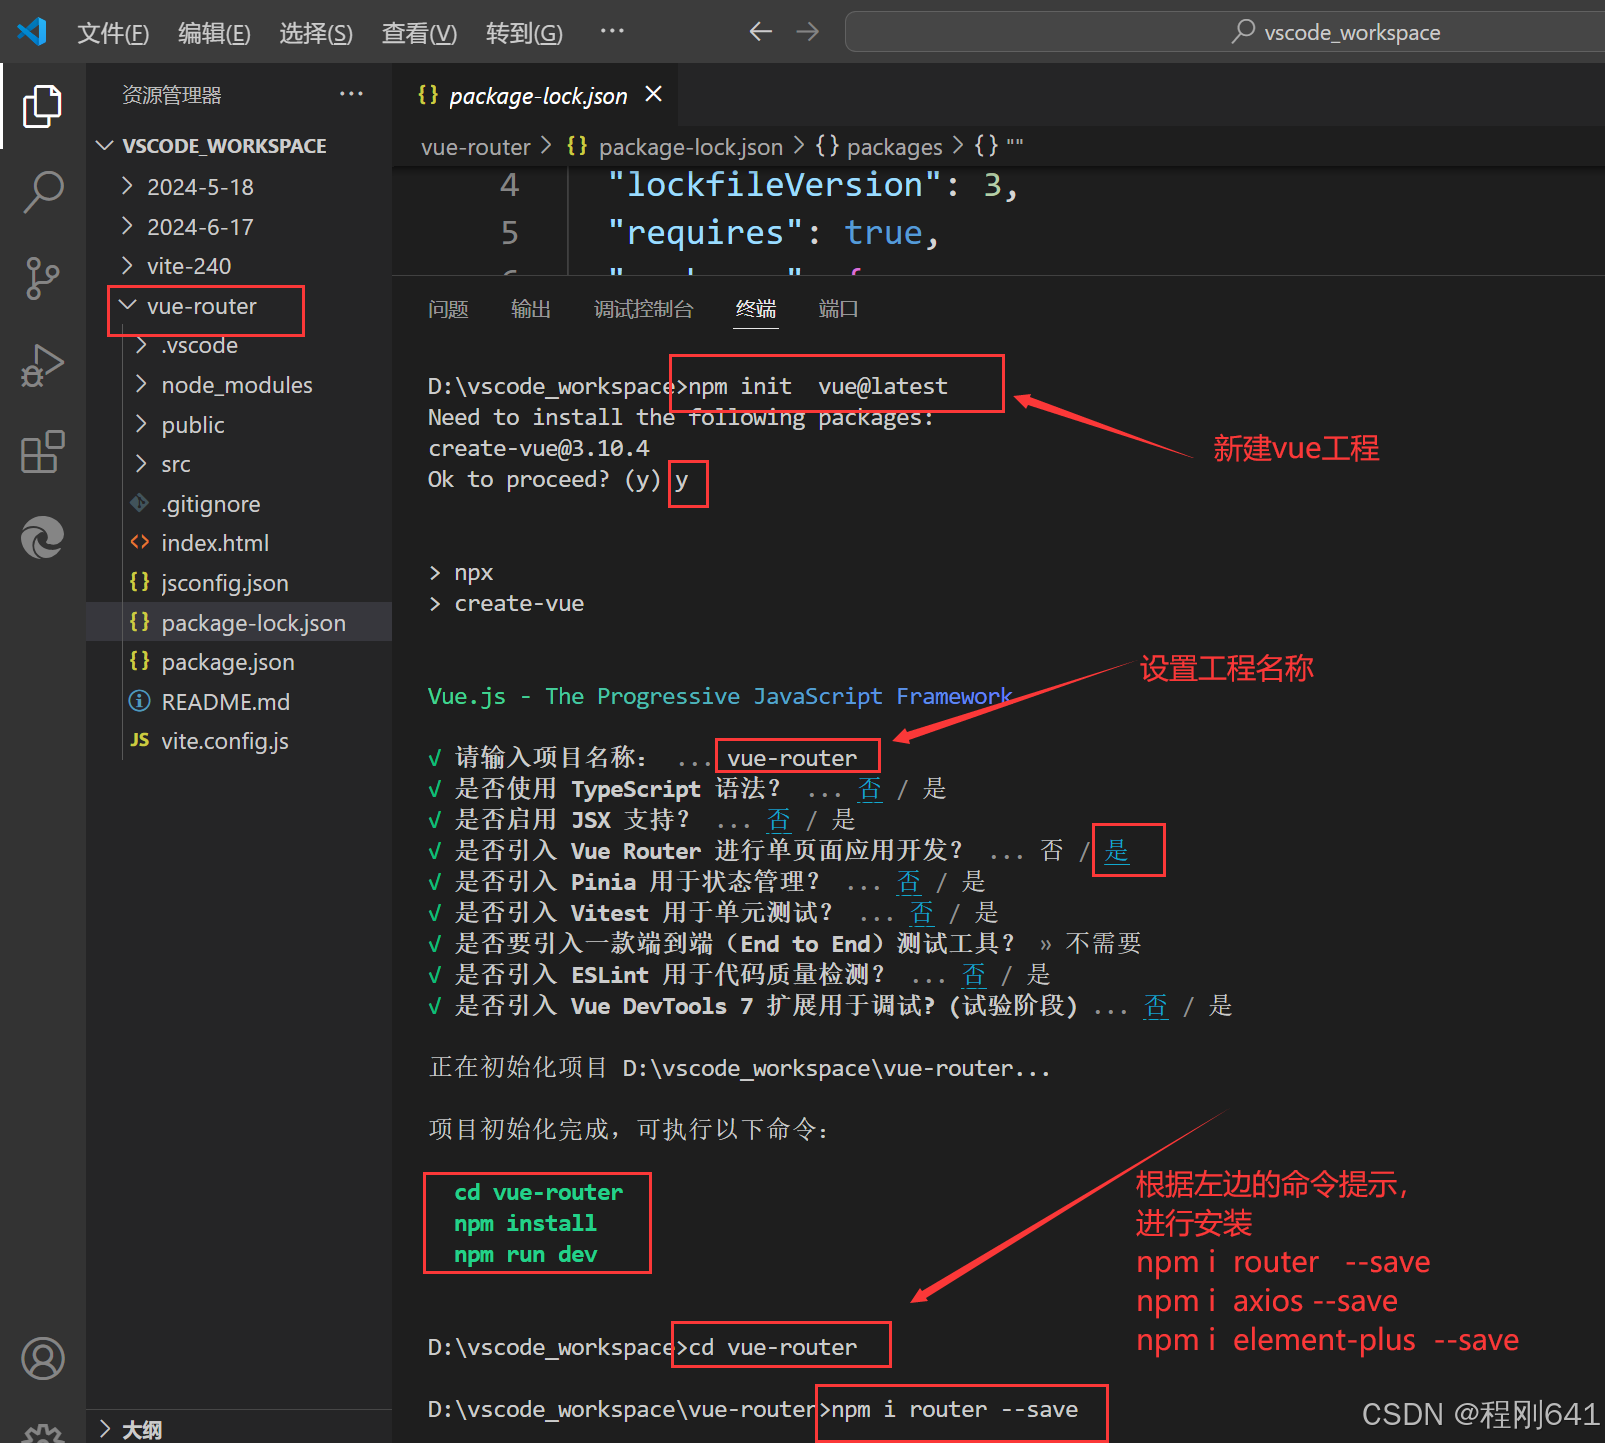
npm i 默认安装
1安装vue-router
npm i router --save

npm i vue-router --save

yarn  add  vue-router -S

卸载
npm uninstall router
2使用vue-router的步骤
创建路由组件
配置路由映射,组件和路径映射关系
使用路由:通过<router-link>和<router-view>
删除不需要的文件
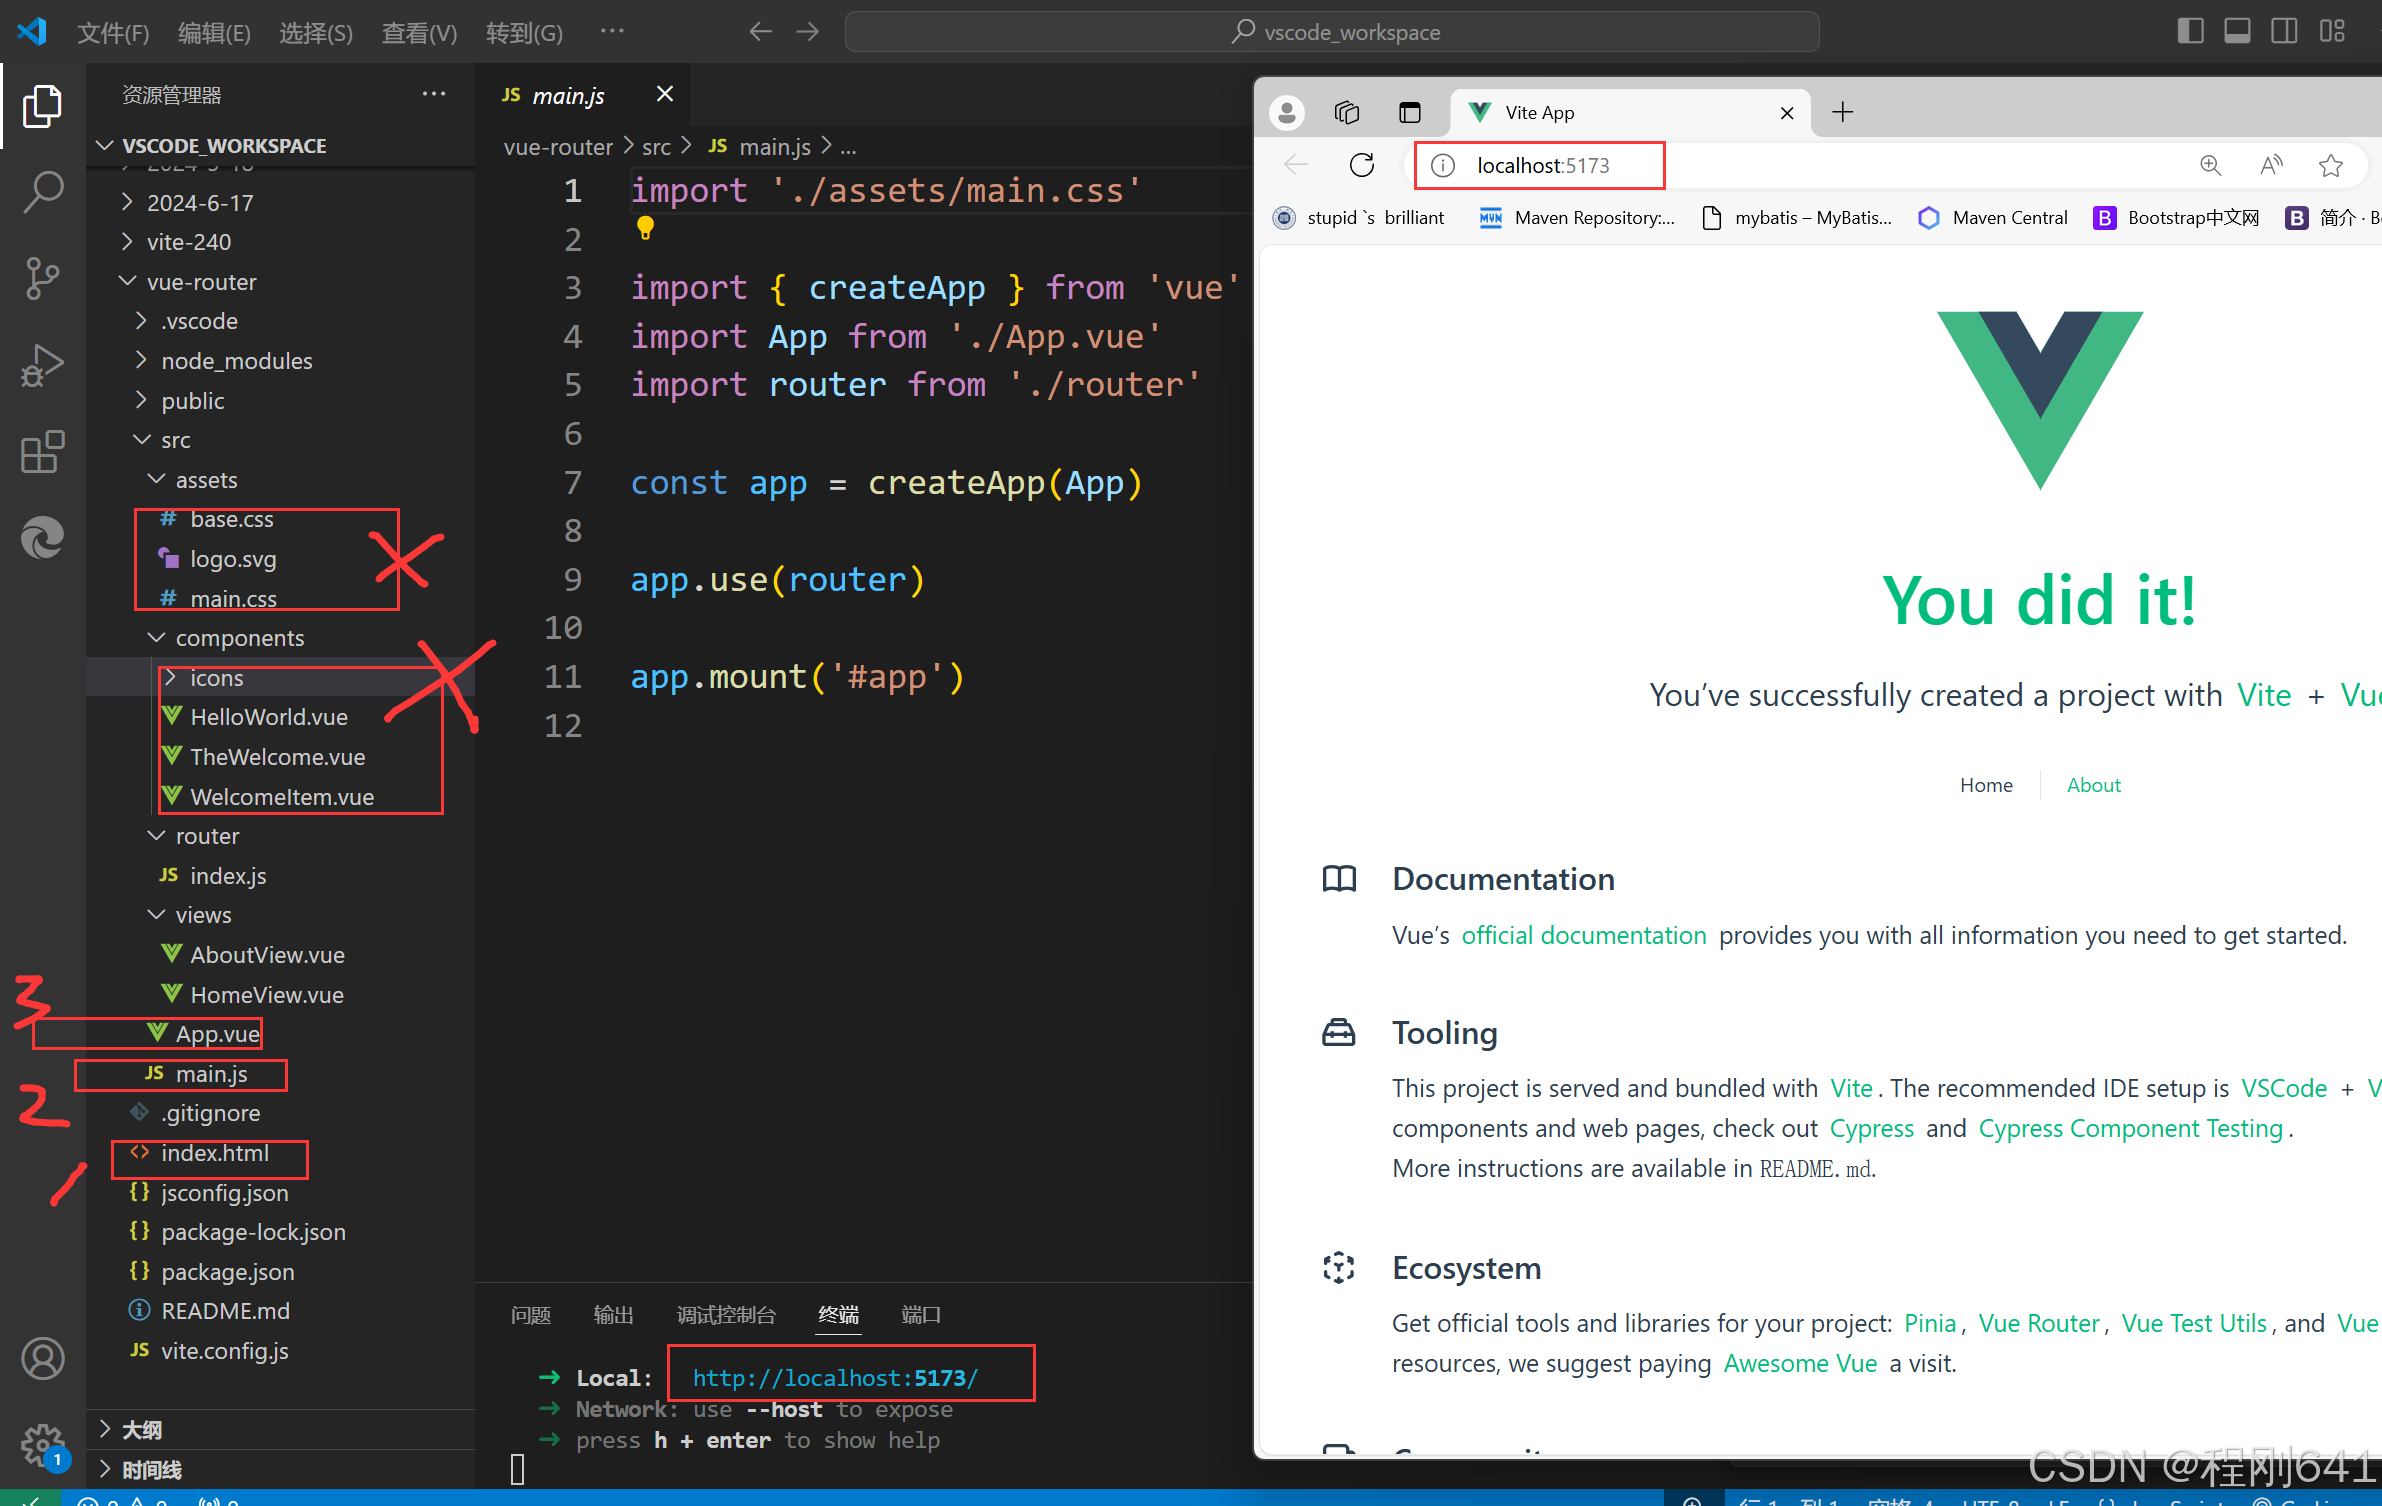
根组件( app.vue )挂载流程说明

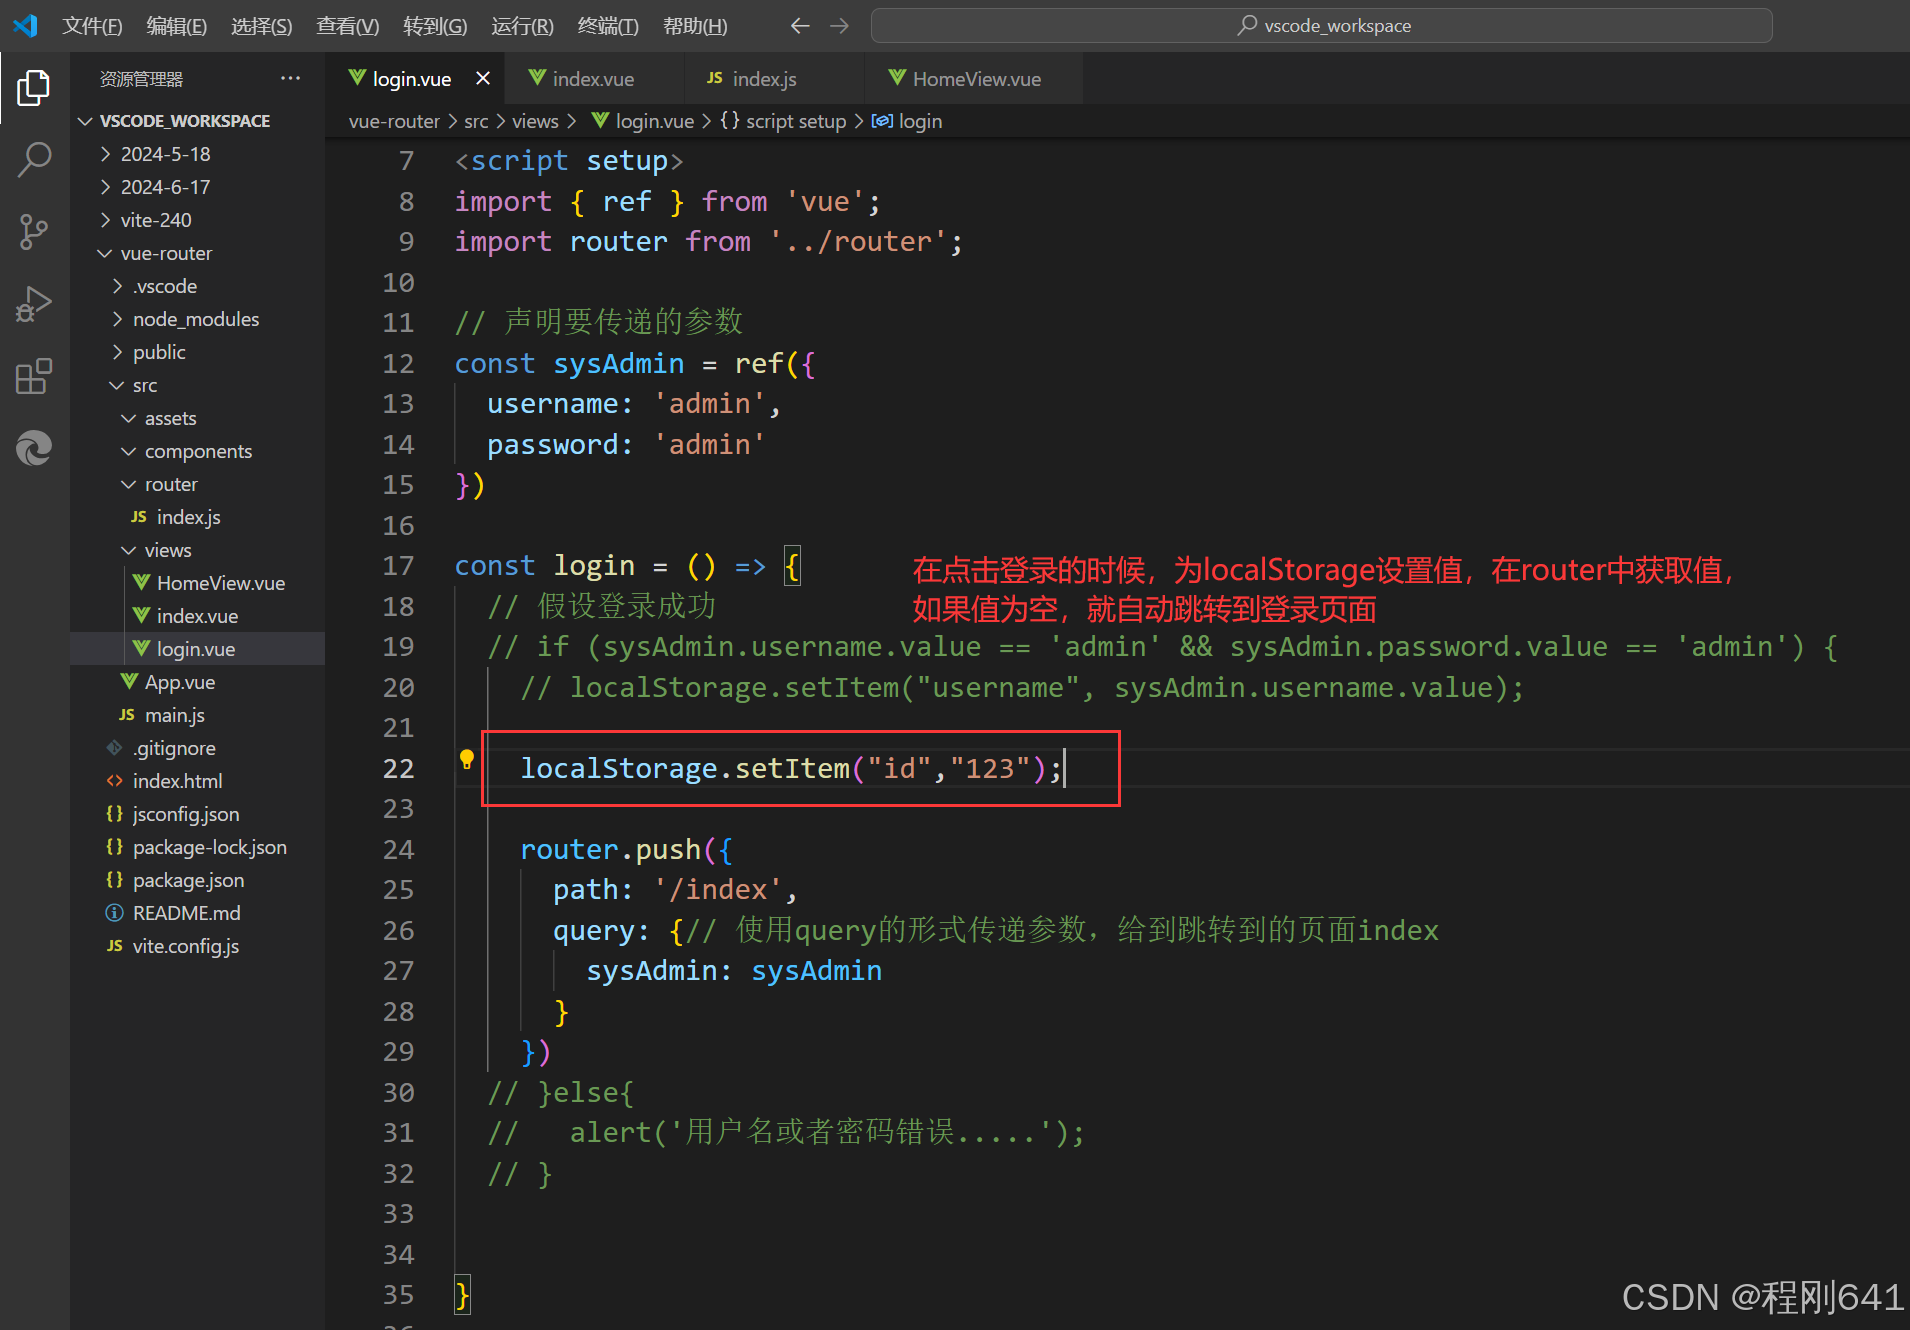
第一步:
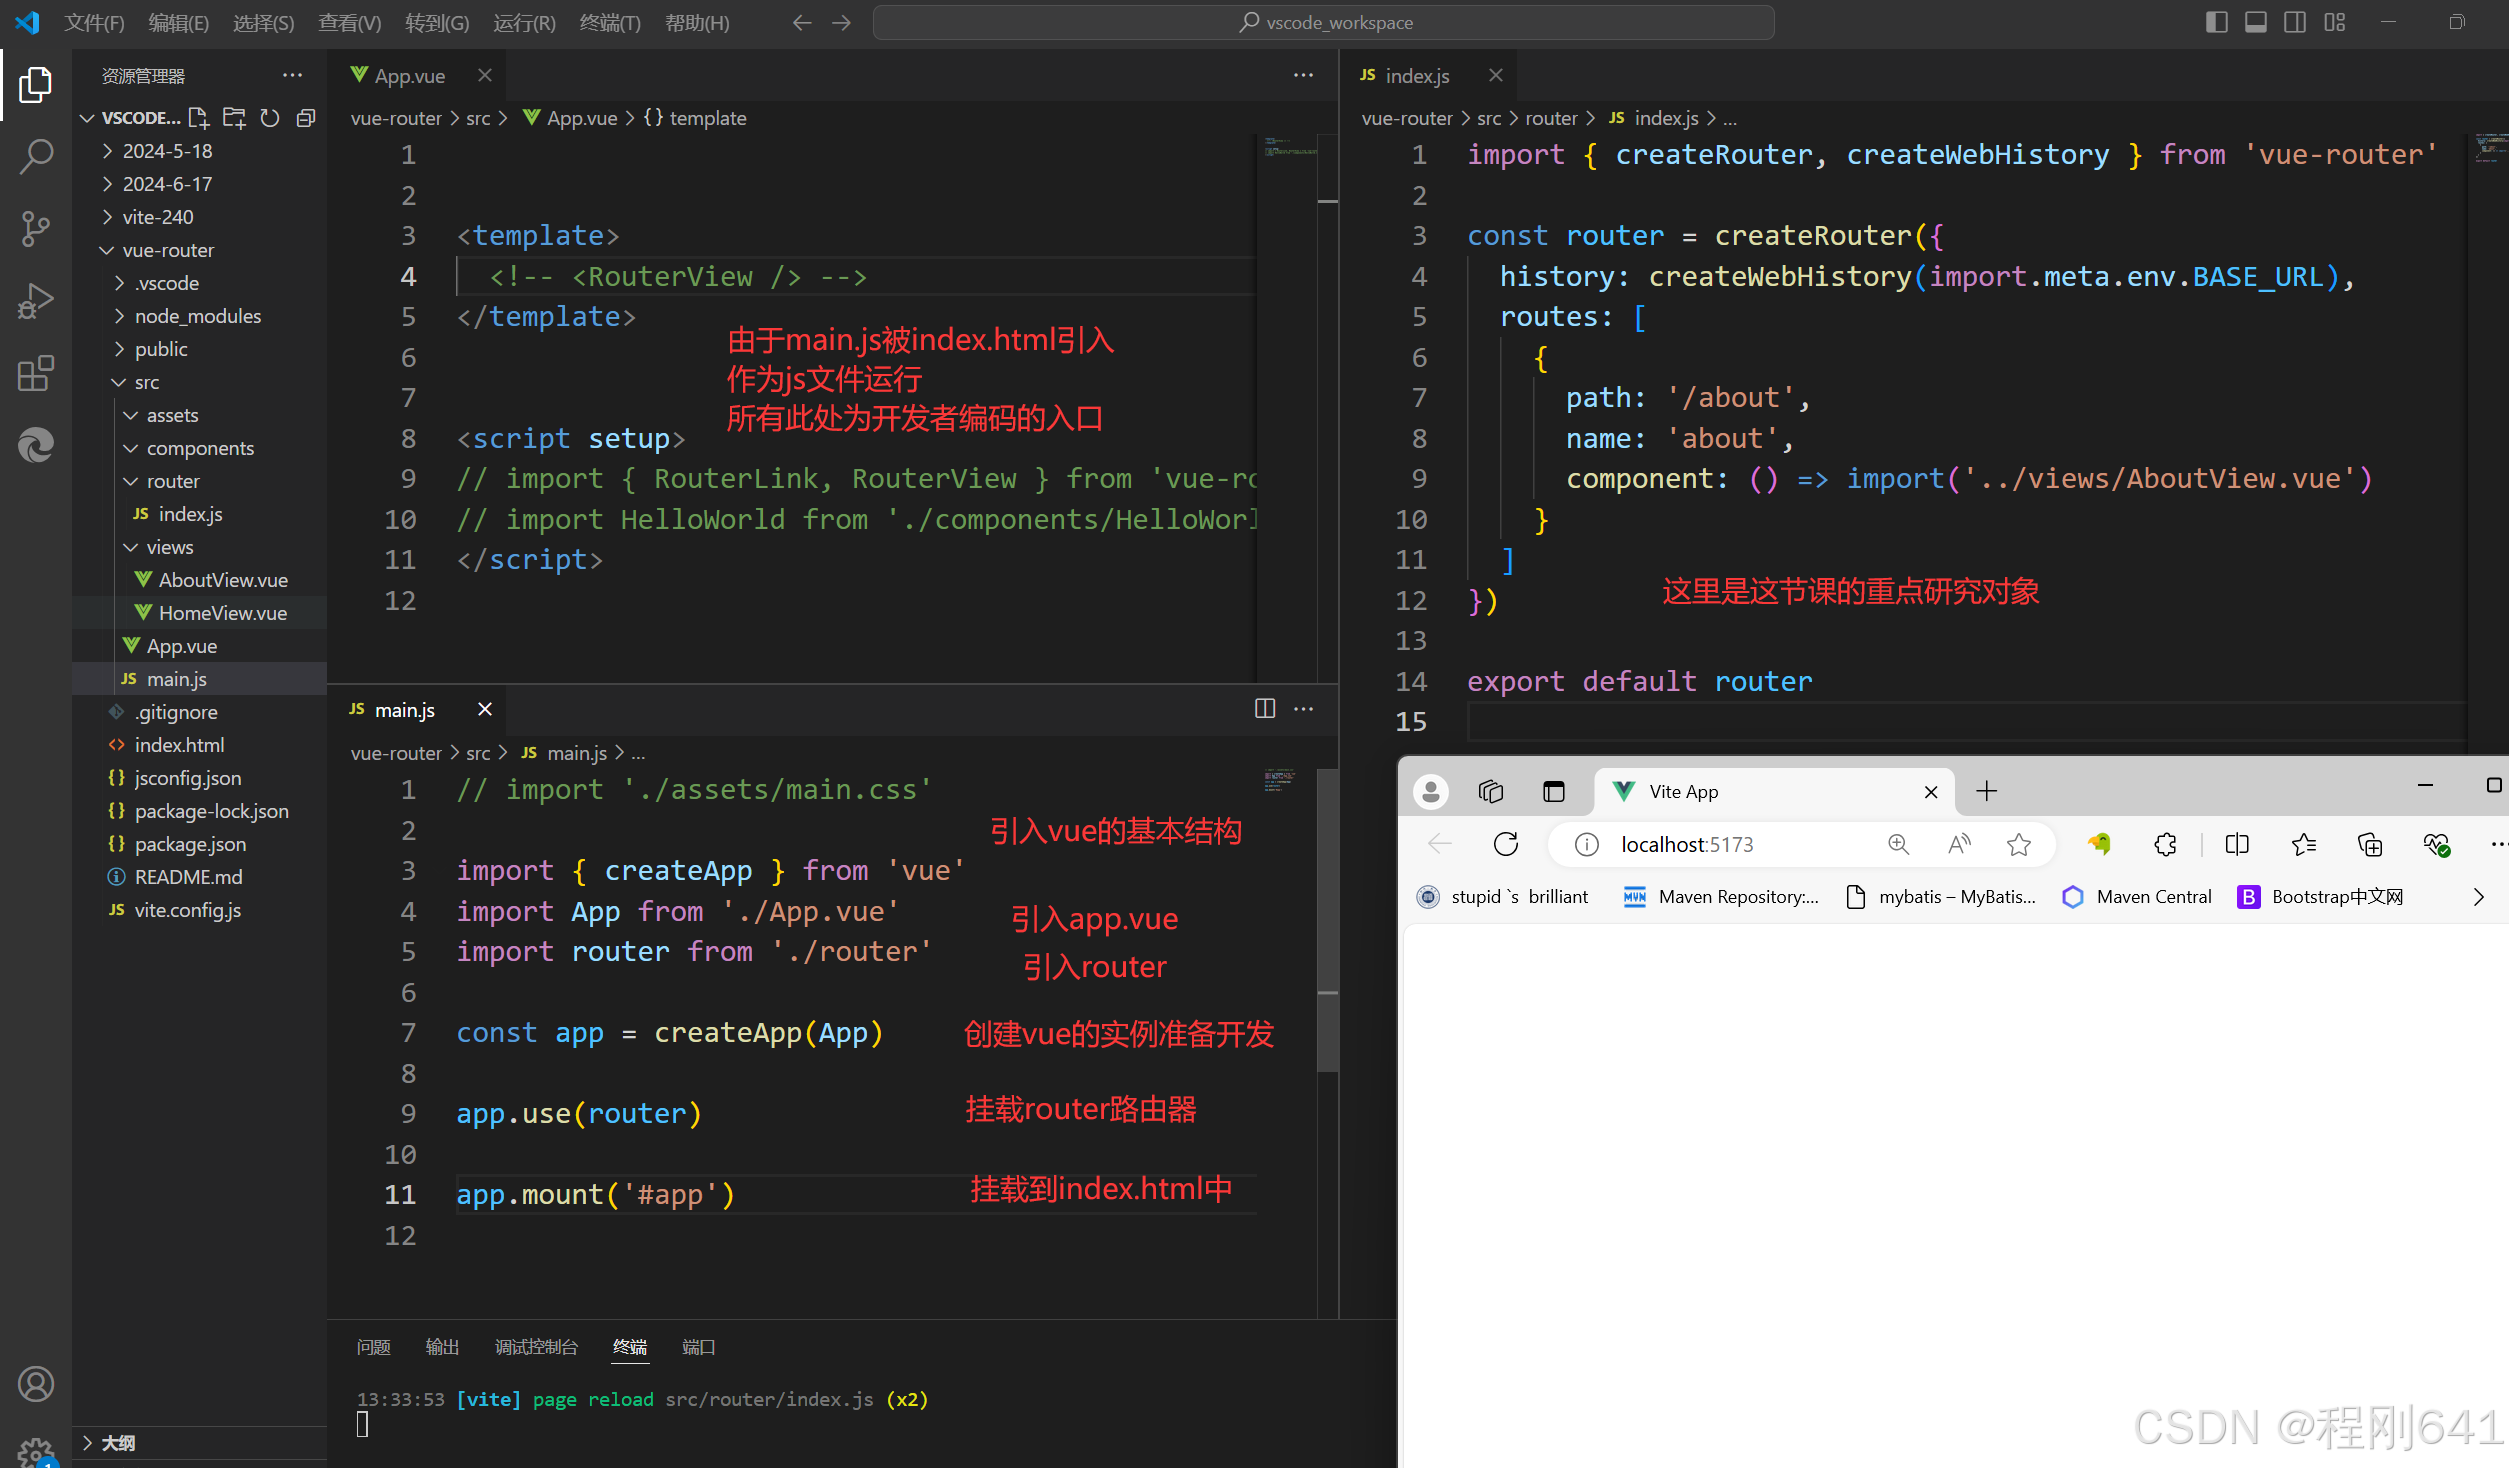
在src下新建router文件夹,新建index.js文件,并注册组件
import { createRouter, createWebHistory } from 'vue-router'
const router = createRouter({
history:createWebHistory(import.meta.env.BASE_URL),
routes: [
{
path:'/',
name:'el-list',
component:()=>import('../components/el-list.vue')
},
]
})
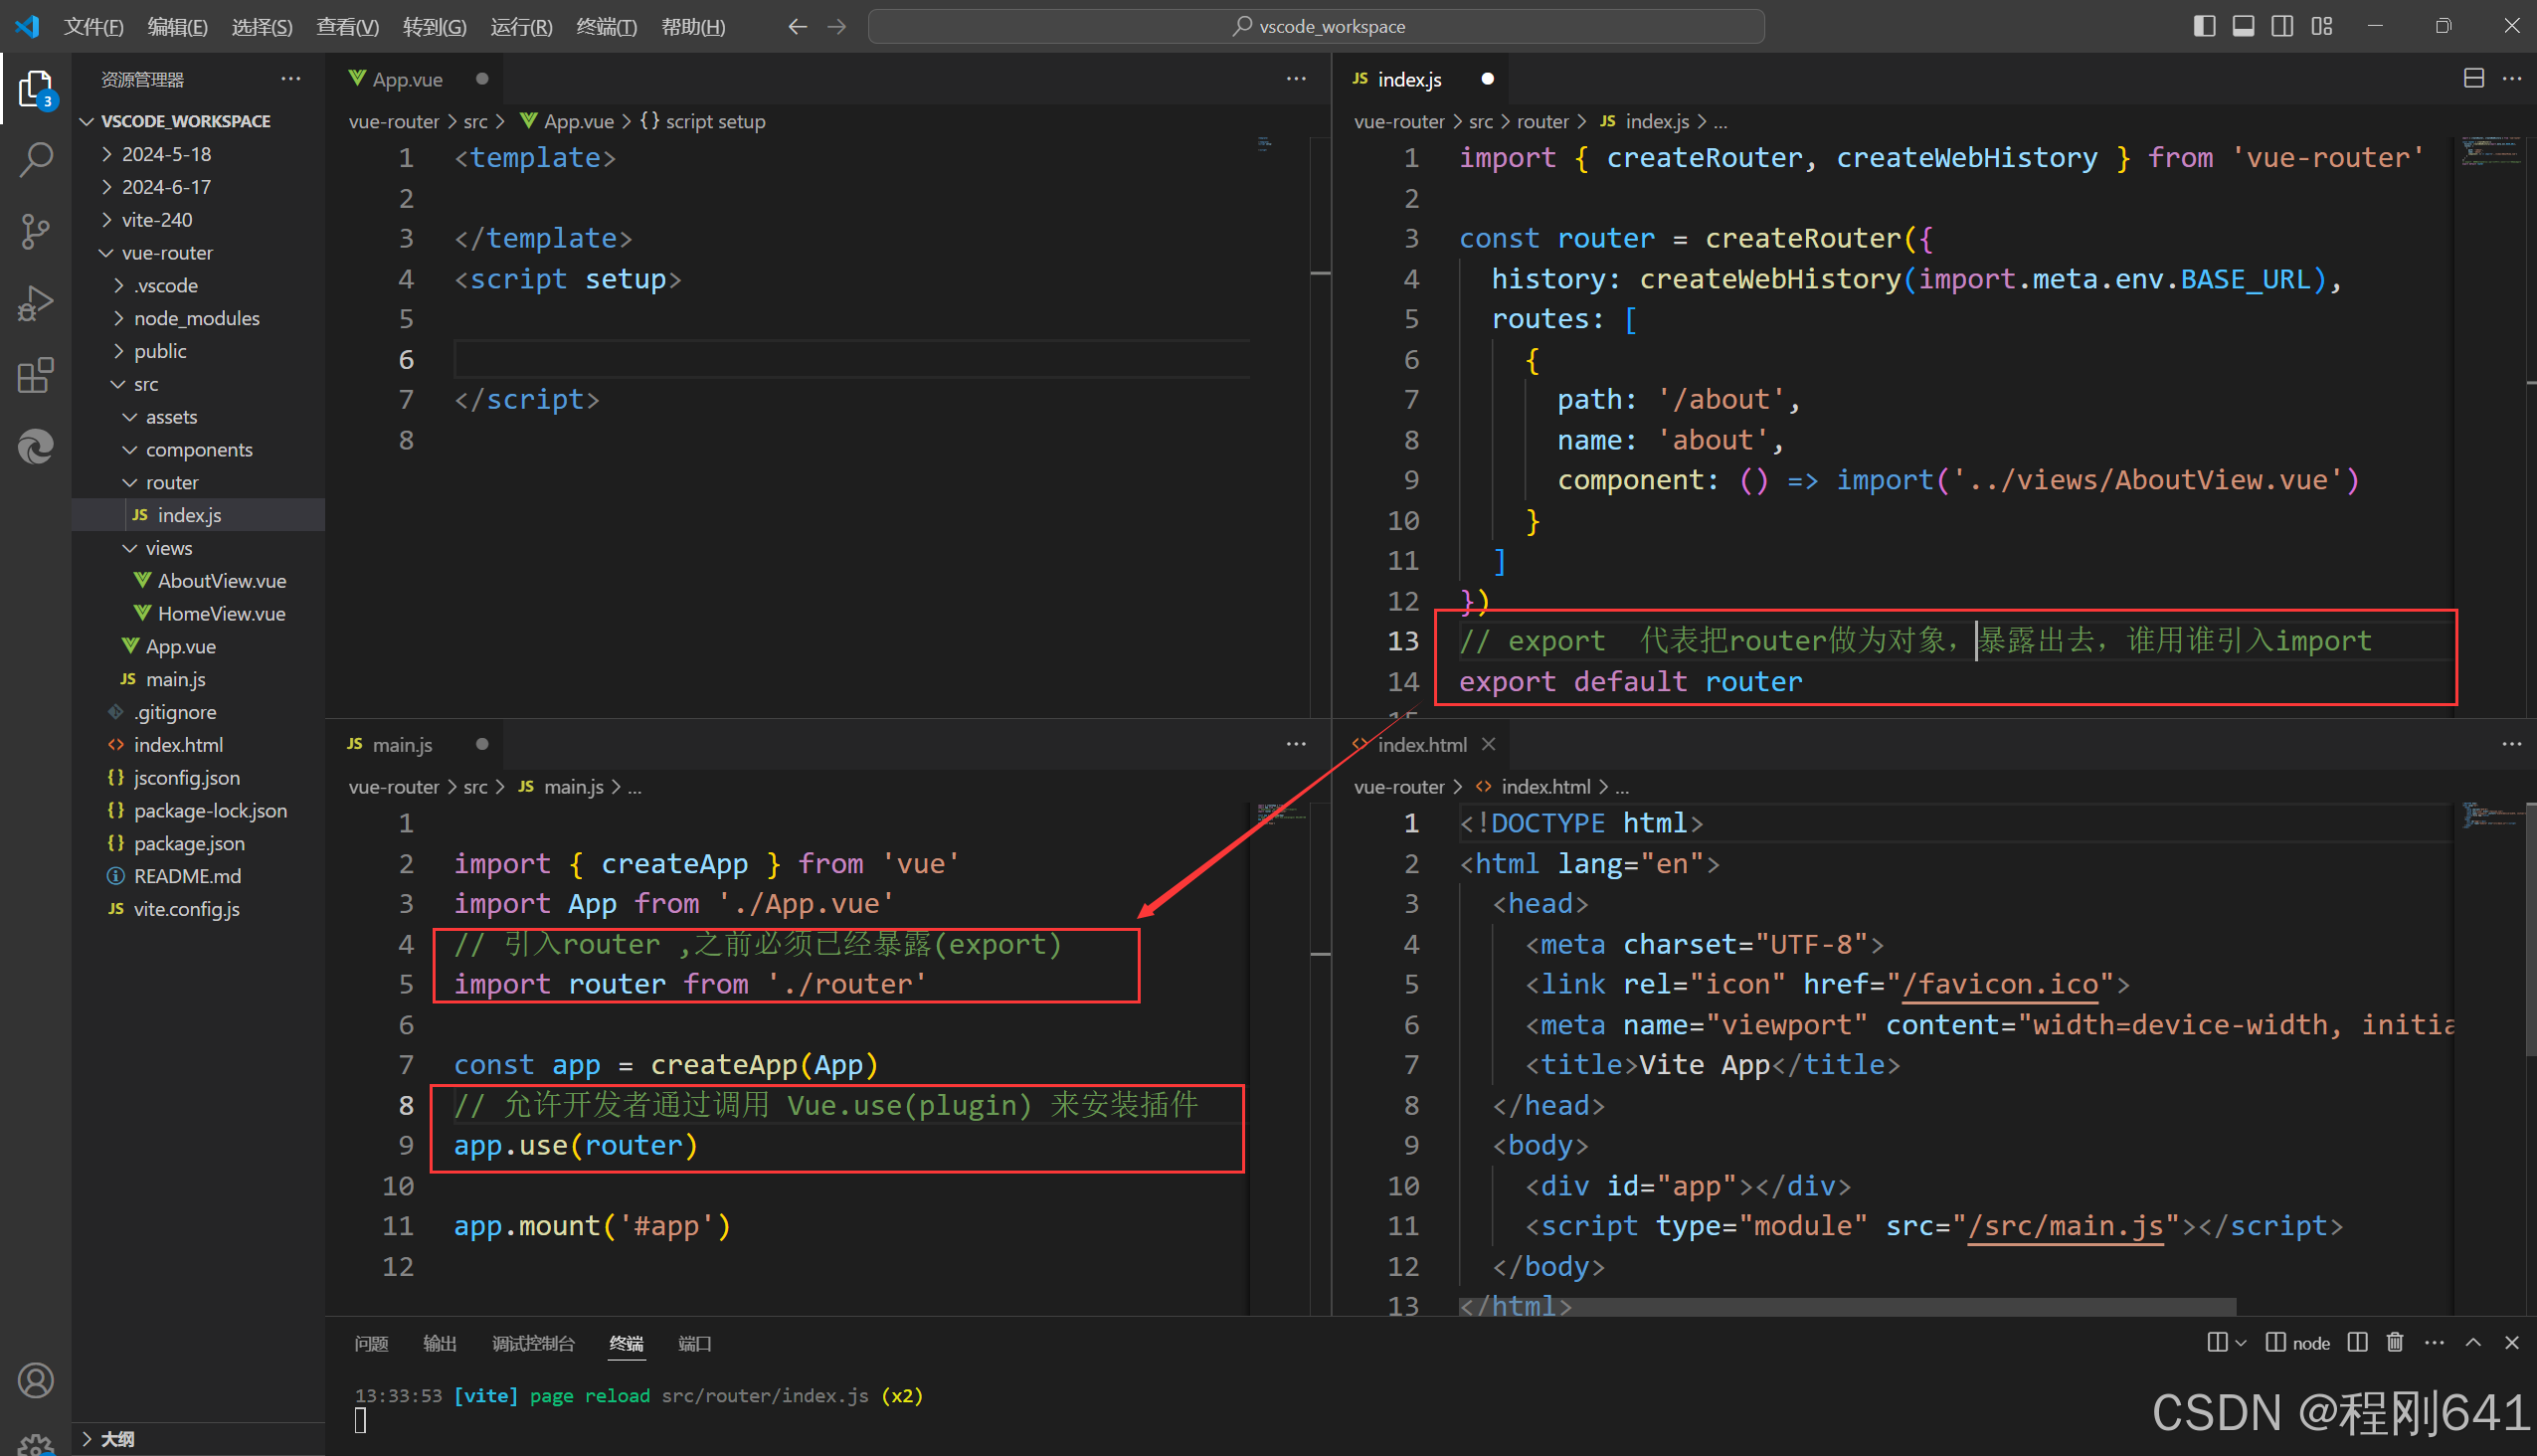
export default router
路由模式
hash模式:Vue-router默认的模式就是hash模式

history模式
解释说明:
hash  模式
1、在window.location对象中有一个hash字段,可以获取地址栏中#字符及后边的所有字符。
2、hash也称作锚点,本身是用来做页面定位的,可以使对应id的元素显示在可是区域内
3、由于hash值变化不会导致浏览器向服务器发出请求,而且hash改变会触发hashchange事件,浏览器的进后退也能对其进行控制,所以在 html5 的 history 出现前,开发者基本都是使用 hash 来实现前端路由的
4、三个路由跳转方法push、replace和go


history  模式
1、history模式使用浏览器的history API来管理路由状态,而不是依赖于URL中的哈希。
2、在history模式下,URL看起来更加整洁,没有#符号。例如,http://example.com/user/profile。
3、history模式可以在不刷新整个页面的情况下,通过改变URL来切换页面,实现更加流畅的用户体验
4、三个路由跳转方法push、replace和go


abstract  模式
1、在VueRouter中除了hash和history两种模式外,还新增了一个abstract模式,用来在不支持浏览器的环境中充当一个备用方案
2、同时提供了三个路由跳转方法push、replace和go,这三种方法跟hash和history模式中的push、replace和go方法类似,
history 是路由模式,
        createWebHistory   默认是createWebHashHistory模式
        BASE_URL
        import.meta.env.BASE_URL
path如何使用
name 如何使用  path的缺点补充
component的两种引入方式
        懒加载
             {
            path:'/',
            name:'el-list',
            component:()=>import('../components/el-list.vue')
            },

        直接加载
import { createRouter,  createWebHistory } from "vue-router";
import login from "../views/login.vue";
import hello from '../components/HelloWorld.vue'

const router = createRouter({
    // history:createWebHashHistory
    history:createWebHistory(import.meta.env.BASE_URL),
    routes:[
        {
            path:'/index',
            name:'index',
            component:()=>import('../views/index.vue'),
       },
        {
            path:'/login',
            name:'login',
            component:login,
        },
    ]
})
第二步:
在main.js文件中 , 引入router插件
// 引入router路由
import router  from './router'

// 注册到app实例中,准备挂载
app.use(router)
第三步:
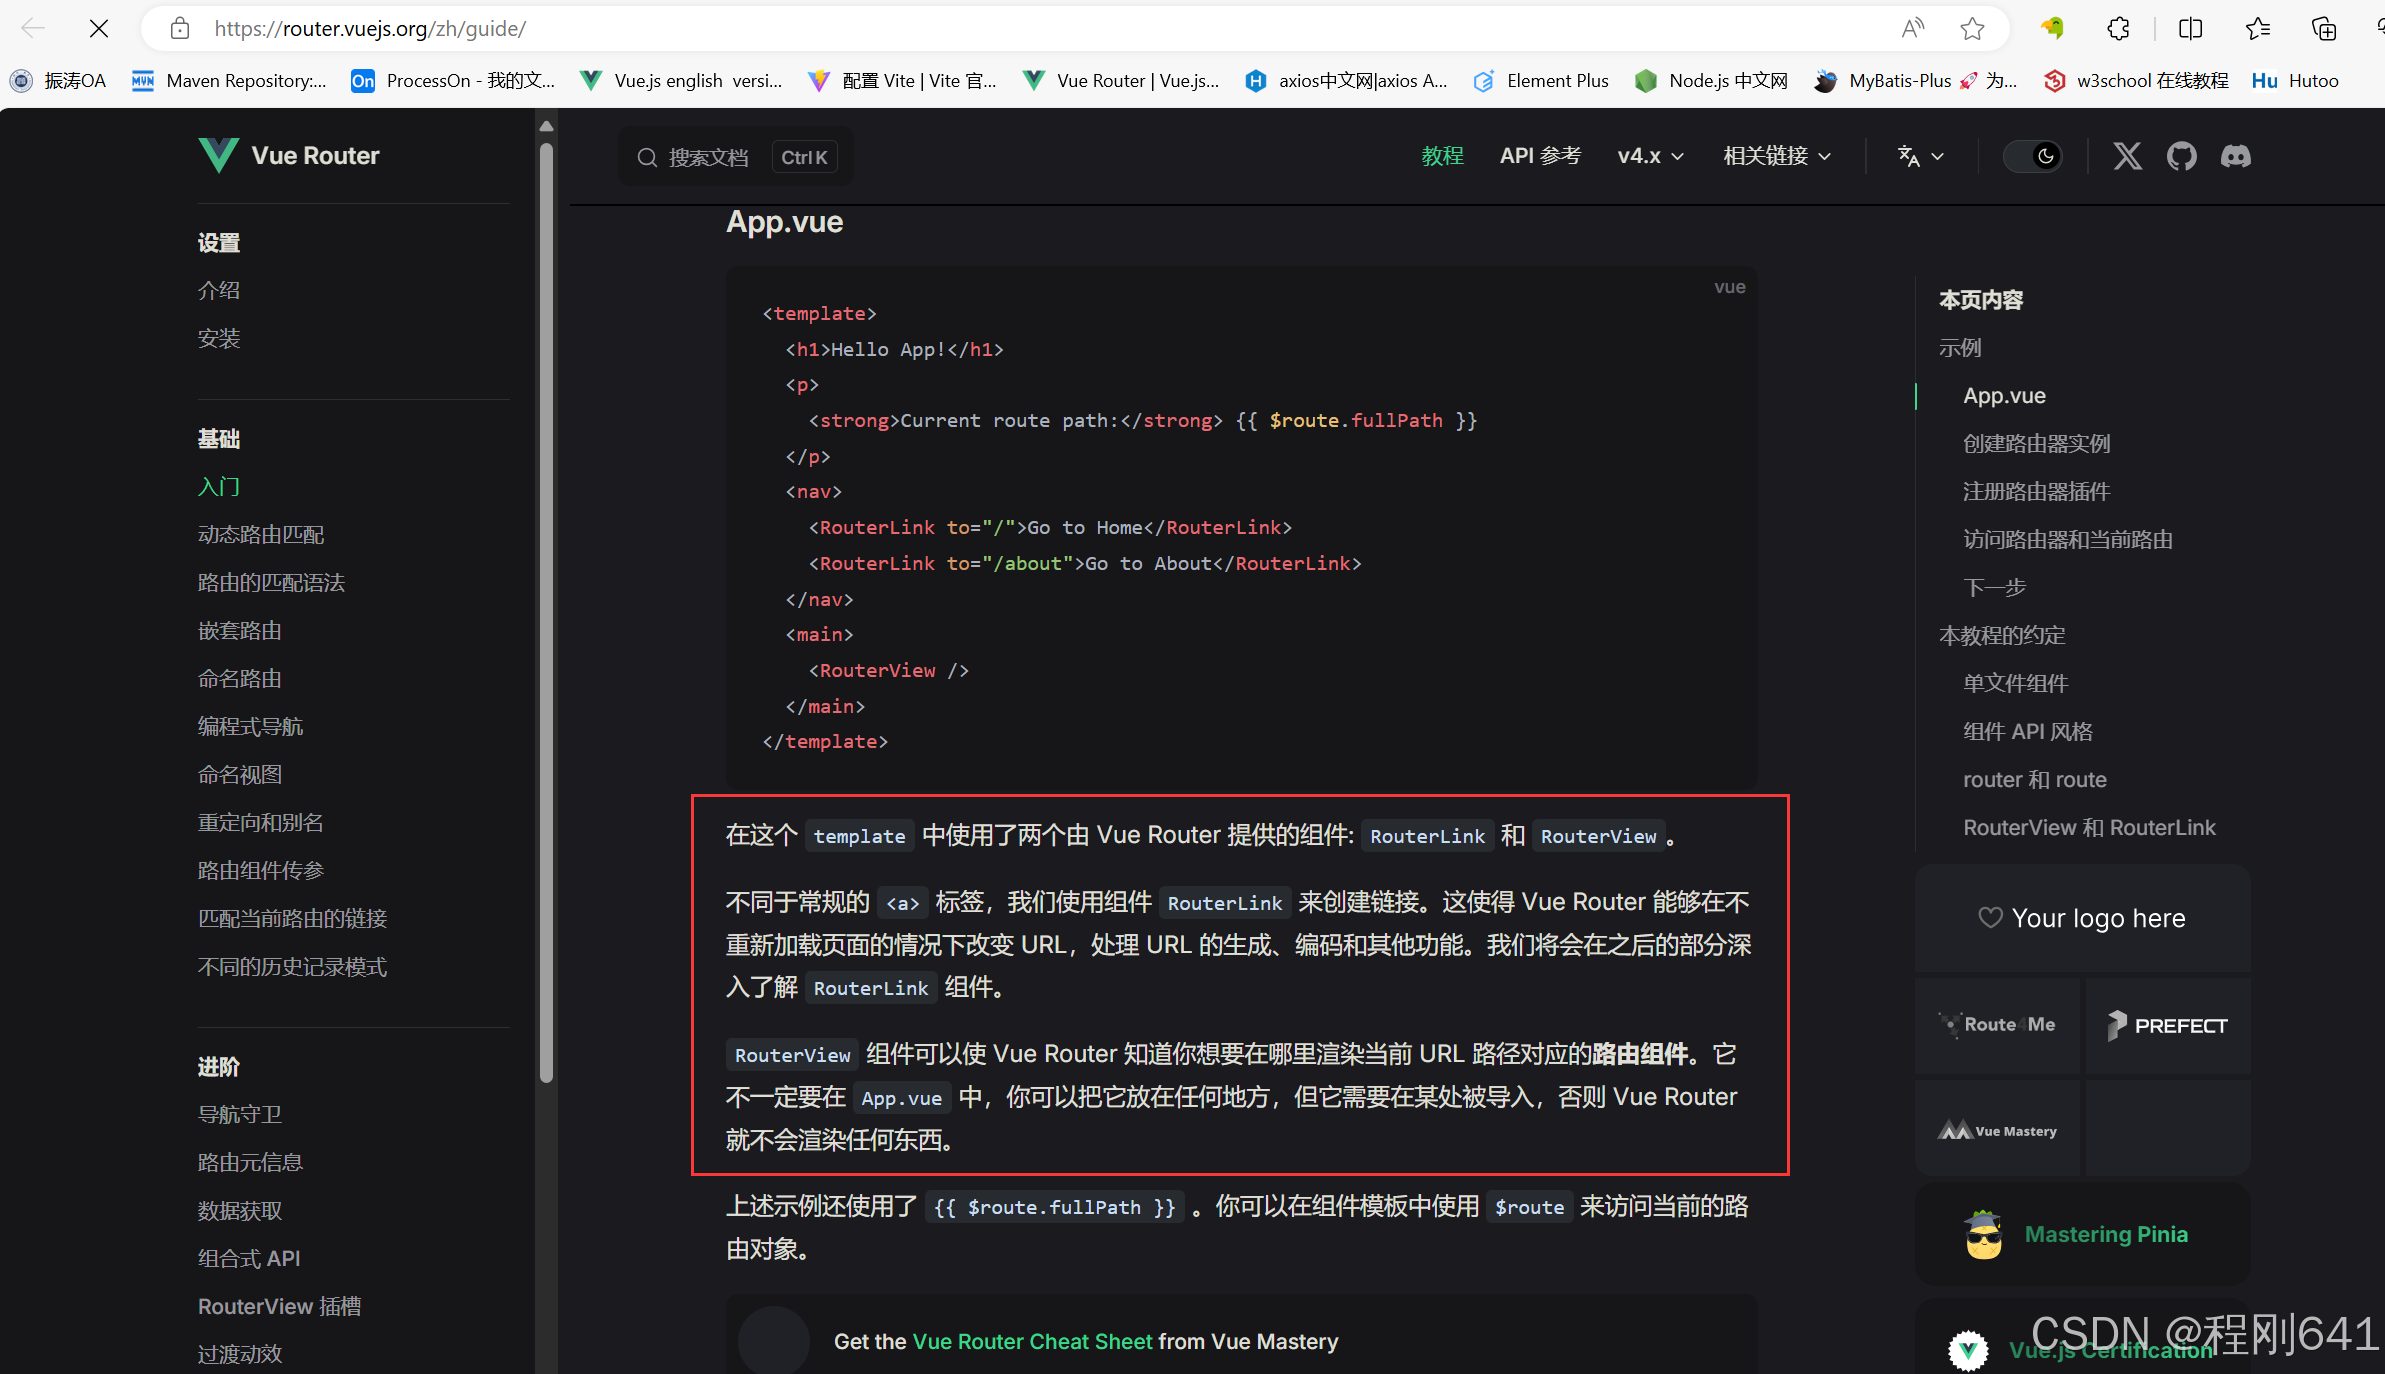
router-link与router-view
<router-link>:该标签是一个vue-router中已经内置的组件,它会被渲染成一个<a>标签。
<router-view>:该标签会根据当前的路径,动态渲染出不同的组件。
网页的其他内容,比如顶部的标题/导航,或者底部的一些版权信息等,会和<router-view>处于同一个等级。
在路由切换时,切换的是<router-view>挂载的组件,其他内容不会发生改变。
3入门案例
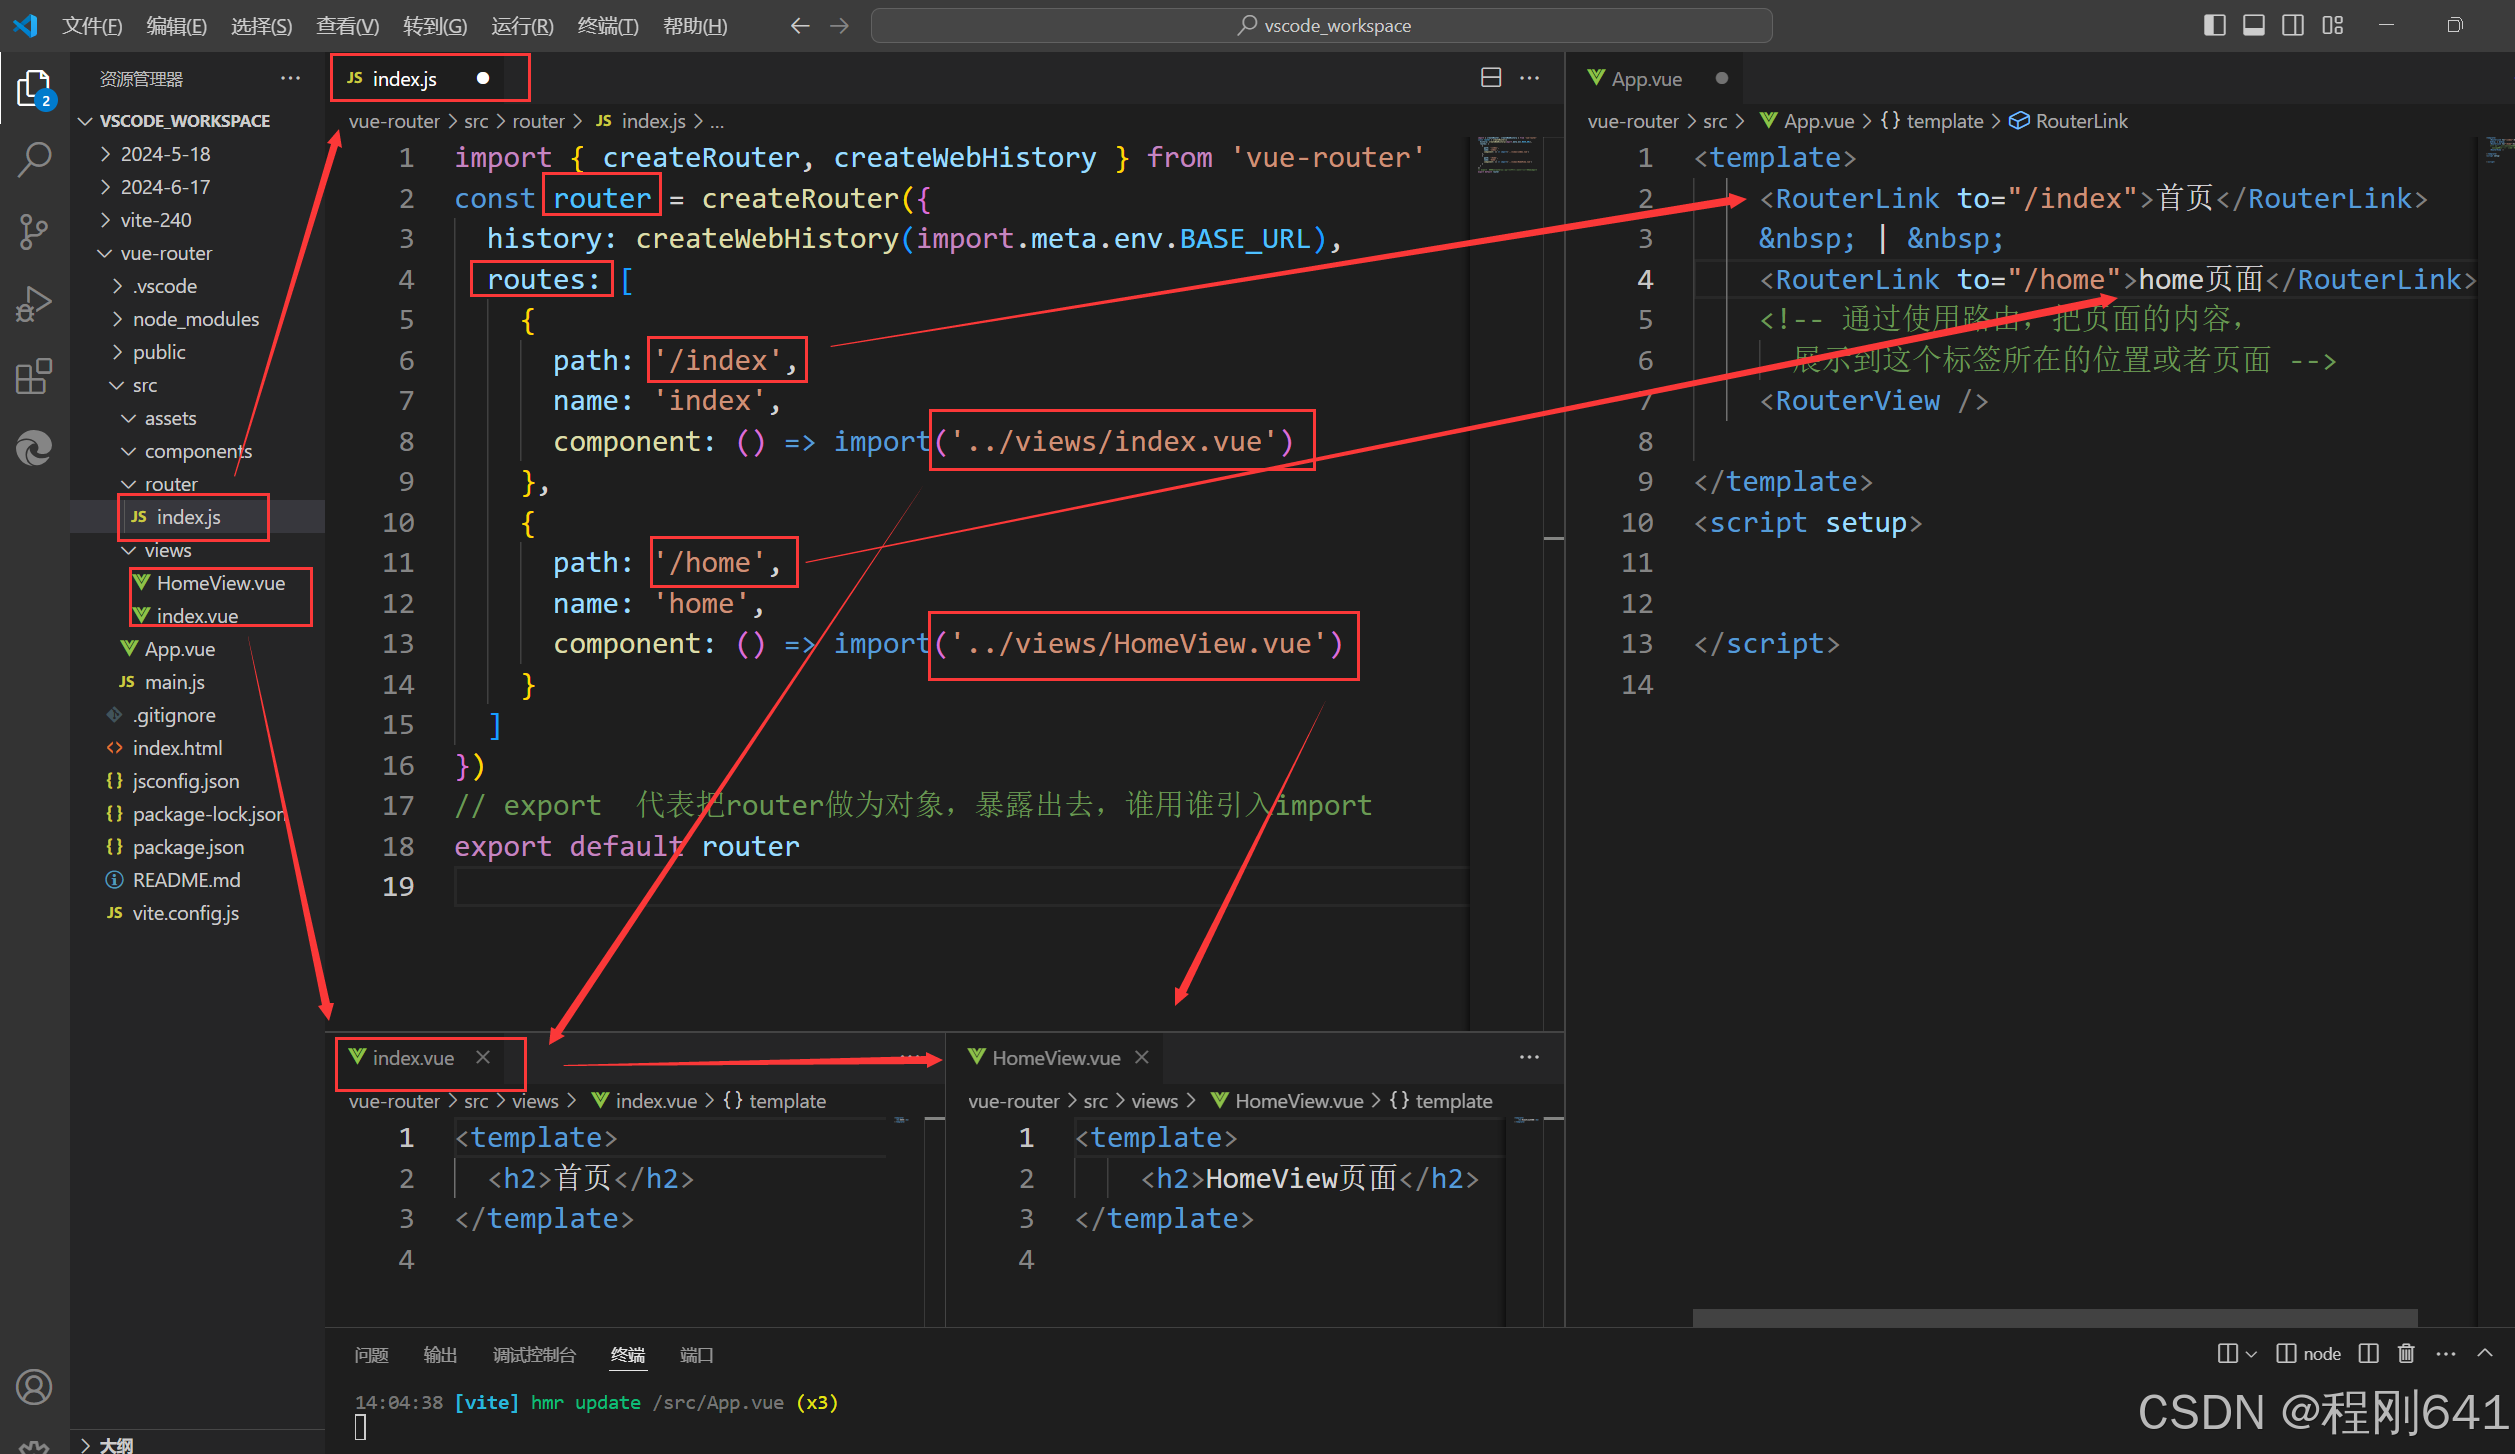
views/index.vue
<template>
  <h2>首页</h2>
</template>
views/HomeViews.vue
<template>
    <h2>HomeView页面</h2>
</template>
app.vue
<template>
<RouterLink to="/index">首页</RouterLink>
|
<RouterLink to="/home">home页面</RouterLink>
<!-- 通过使用路由,把页面的内容,
展示到这个标签所在的位置或者页面 -->
<RouterView />
</template>
<script setup>
</script>
router/index.js
import { createRouter, createWebHistory } from 'vue-router'
const router = createRouter({
  history: createWebHistory(import.meta.env.BASE_URL),
  routes: [
    {
      path: '/index',
      name: 'index',
      component: () => import('../views/index.vue')
    },
    {
      path: '/home',
      name: 'home',
      component: () => import('../views/HomeView.vue')
    }
  ]
})
// export  代表把router做为对象,暴露出去,谁用谁引入import
export default router
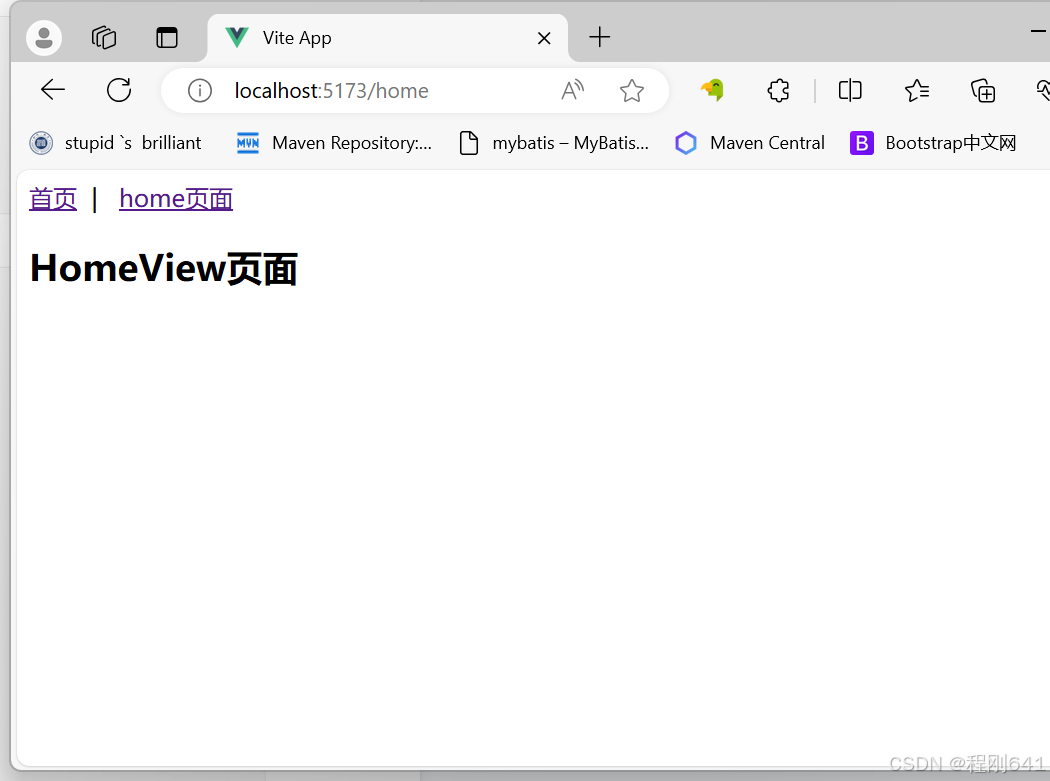
效果展示
4路由嵌套——子路由
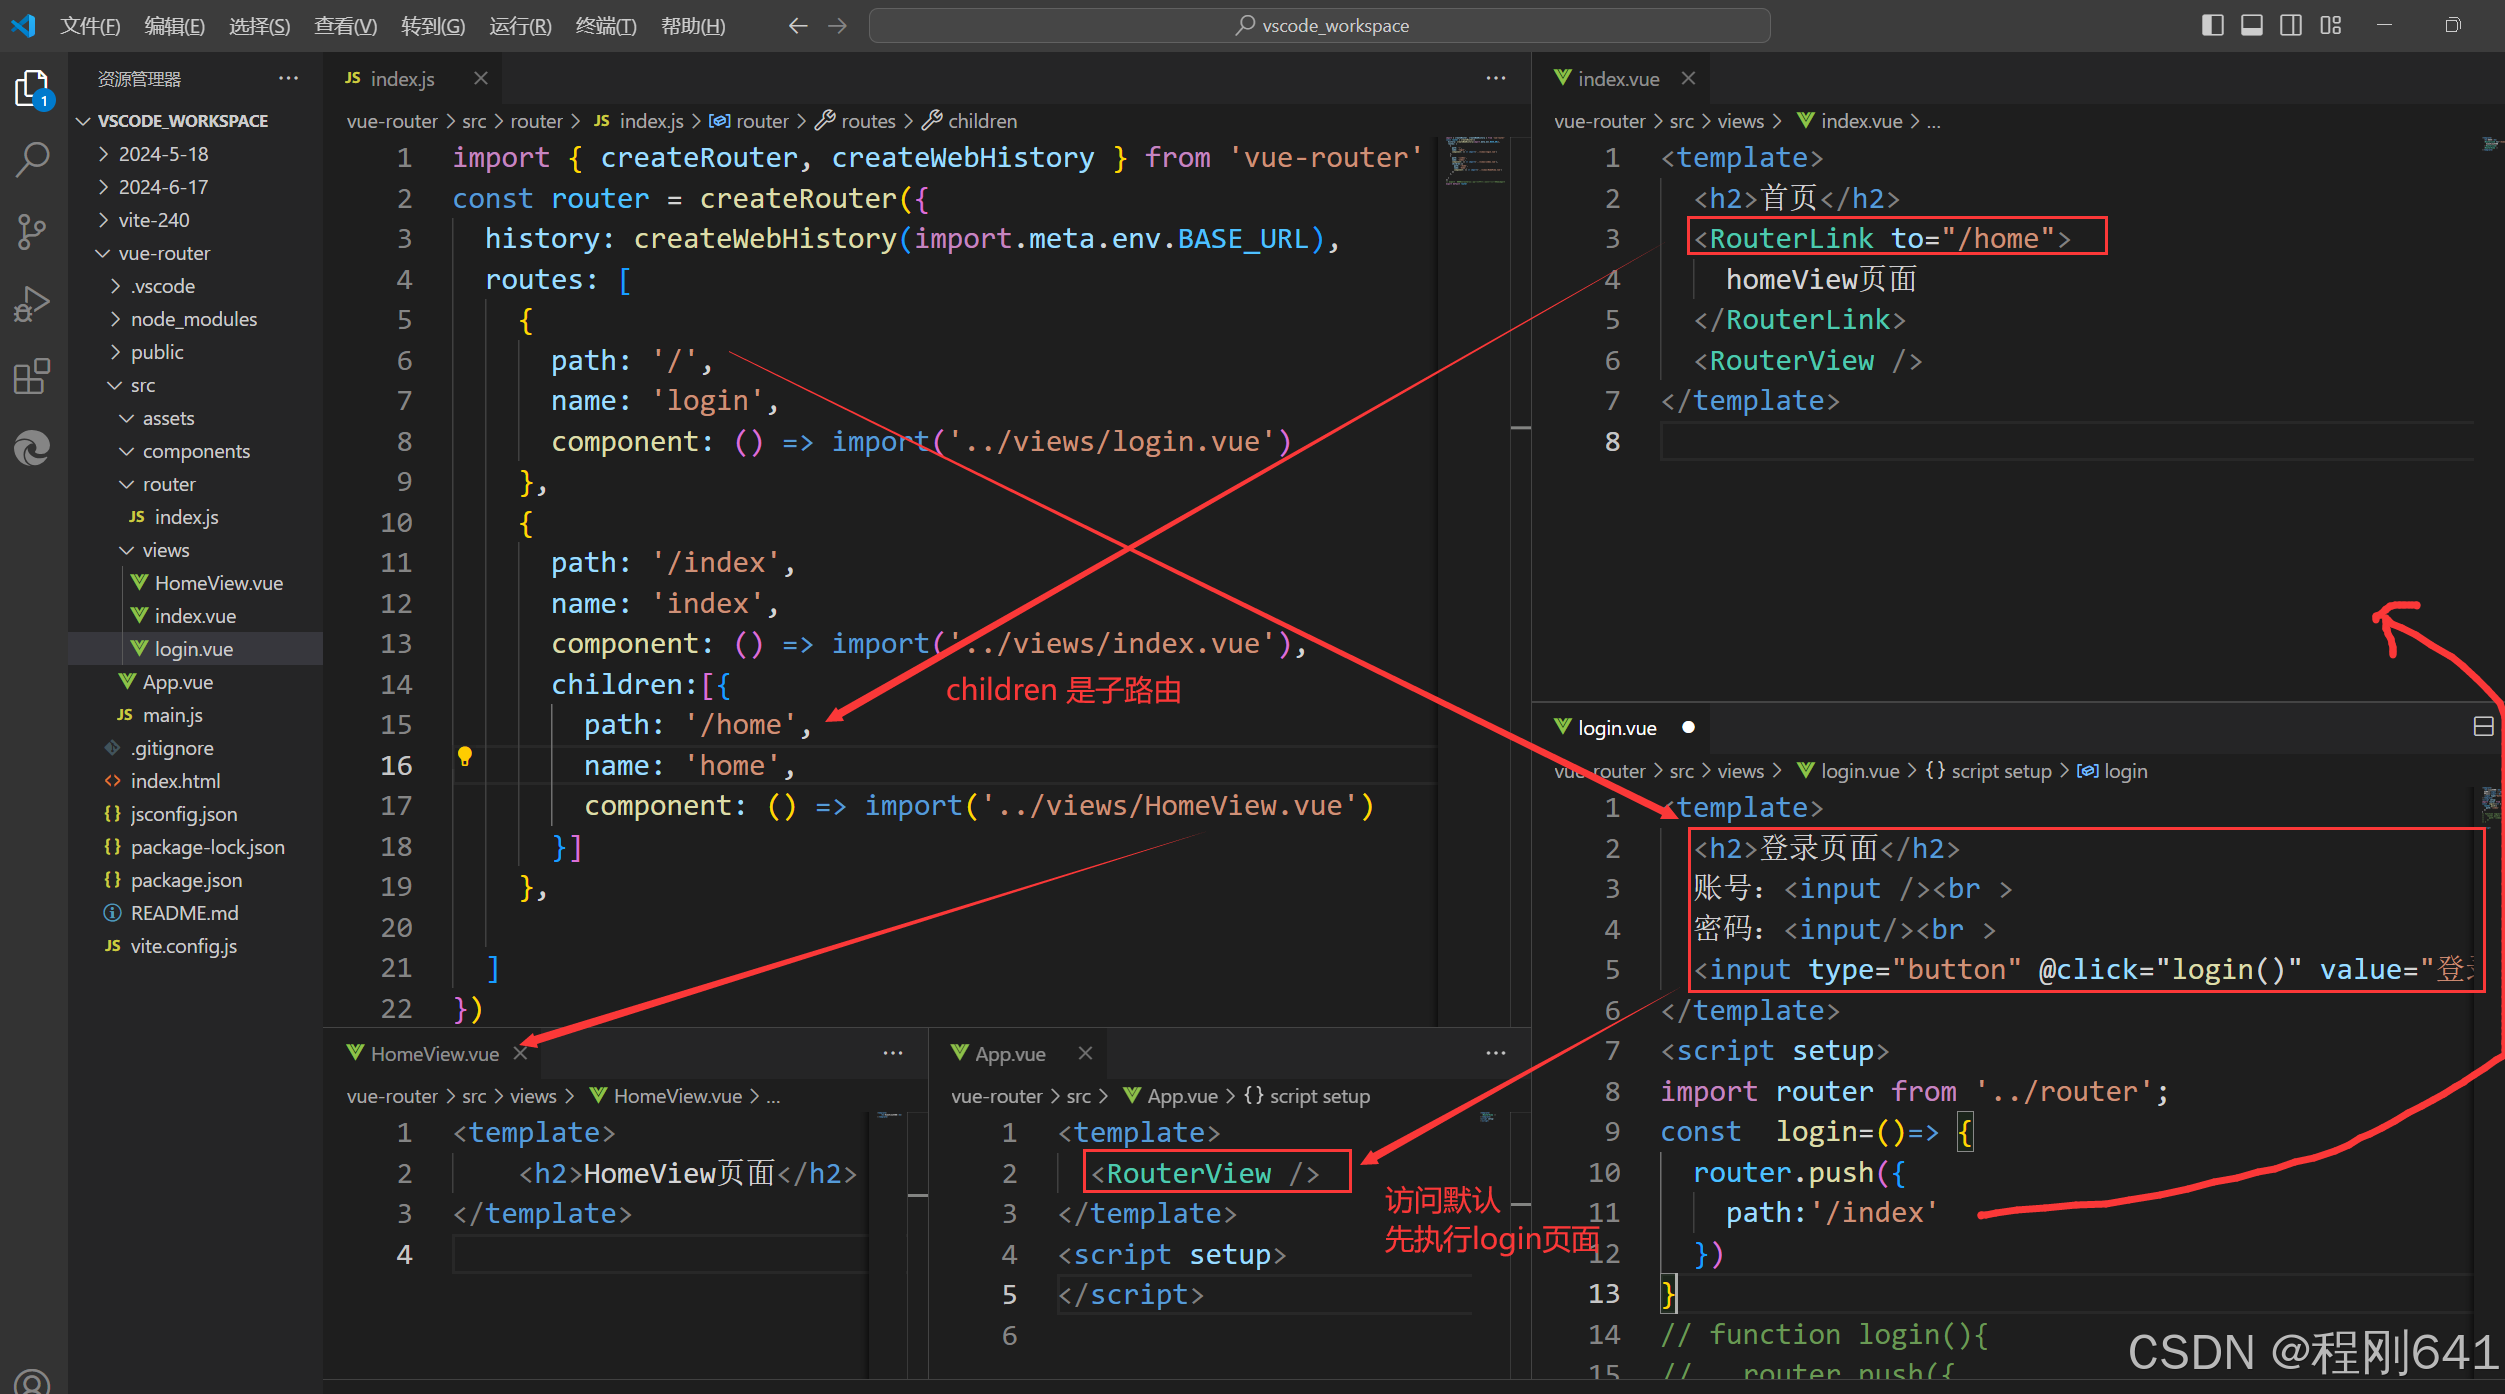
app.vue
<template>


  router-link引入的组件,会在router-view处做显示
  <RouterView />


</template>
<script setup>
</script>
views/login.vue
<template>
  <h2>登录页面</h2>
  账号:<input /><br >
  密码:<input/><br >
  <input type="button" @click="login()" value="登录"/>
</template>
<script setup>
import router from '../router';
const  login=()=> {
  router.push({
    path:'/index'
  })
}
// function login(){
//   router.push({
//     path:'/index'
//   })
// }


</script>
views/index.vue
<template>
  <h2>首页</h2>
  <RouterLink to="/home">
    homeView页面
  </RouterLink>
  <RouterView />
</template>
views/HomeView.vue
<template>
    <h2>HomeView页面</h2>
</template>
router/index.js
import { createRouter, createWebHistory } from 'vue-router'
const router = createRouter({
  history: createWebHistory(import.meta.env.BASE_URL),
  routes: [
    {
      path: '/',
      name: 'login',
      component: () => import('../views/login.vue')
    },
    {
      path: '/index',
      name: 'index',
      component: () => import('../views/index.vue'),
      children:[{
        path: '/home',
        name: 'home',
        component: () => import('../views/HomeView.vue')
      }]
    },

  ]
})
// export  代表把router做为对象,暴露出去,谁用谁引入import
export default router
main.js没有变动,但是是引入了router,导入使用了router对象
import { createApp } from 'vue'
import App from './App.vue'
// 引入router ,之前必须已经暴露(export)
import router from './router'

const app = createApp(App)
// 允许开发者通过调用 Vue.use(plugin) 来安装插件
app.use(router)

app.mount('#app')
5路由传参
index对应的页面接收参数,并打印

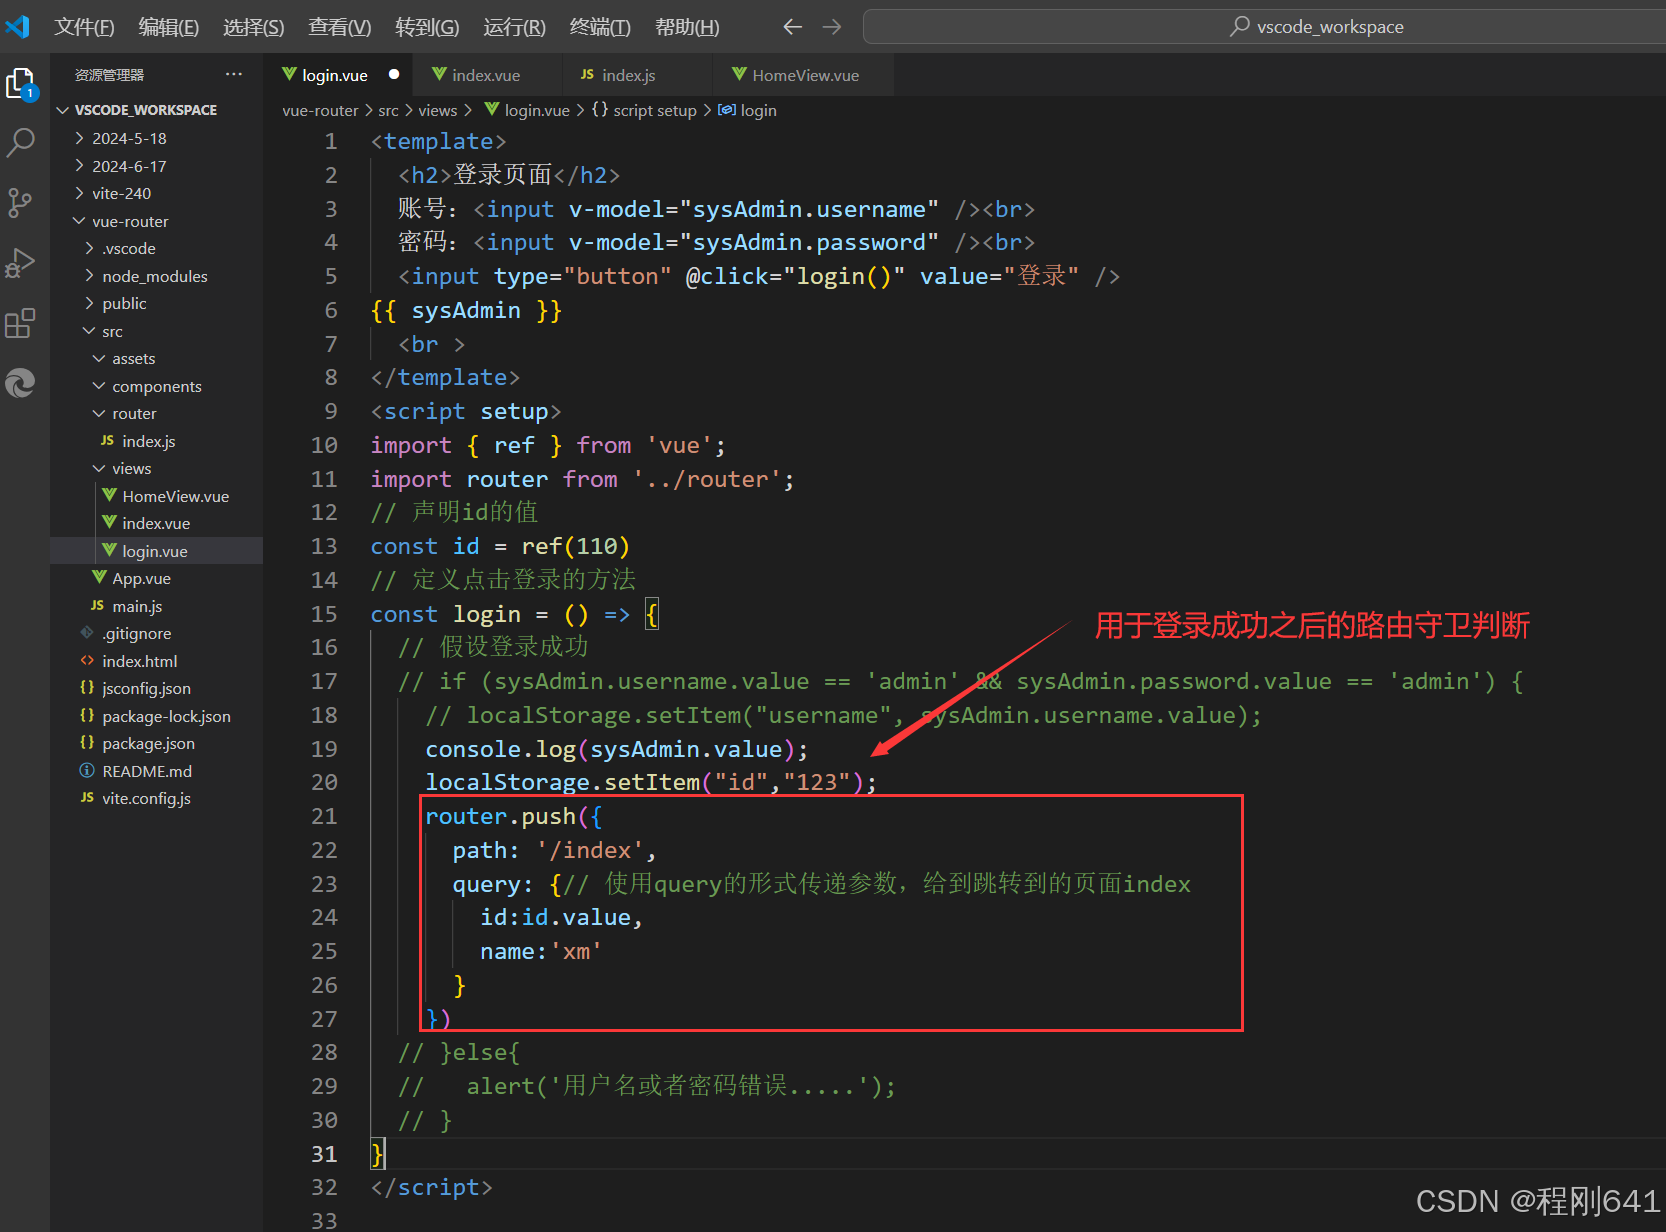
6路由守卫,前置路由守卫
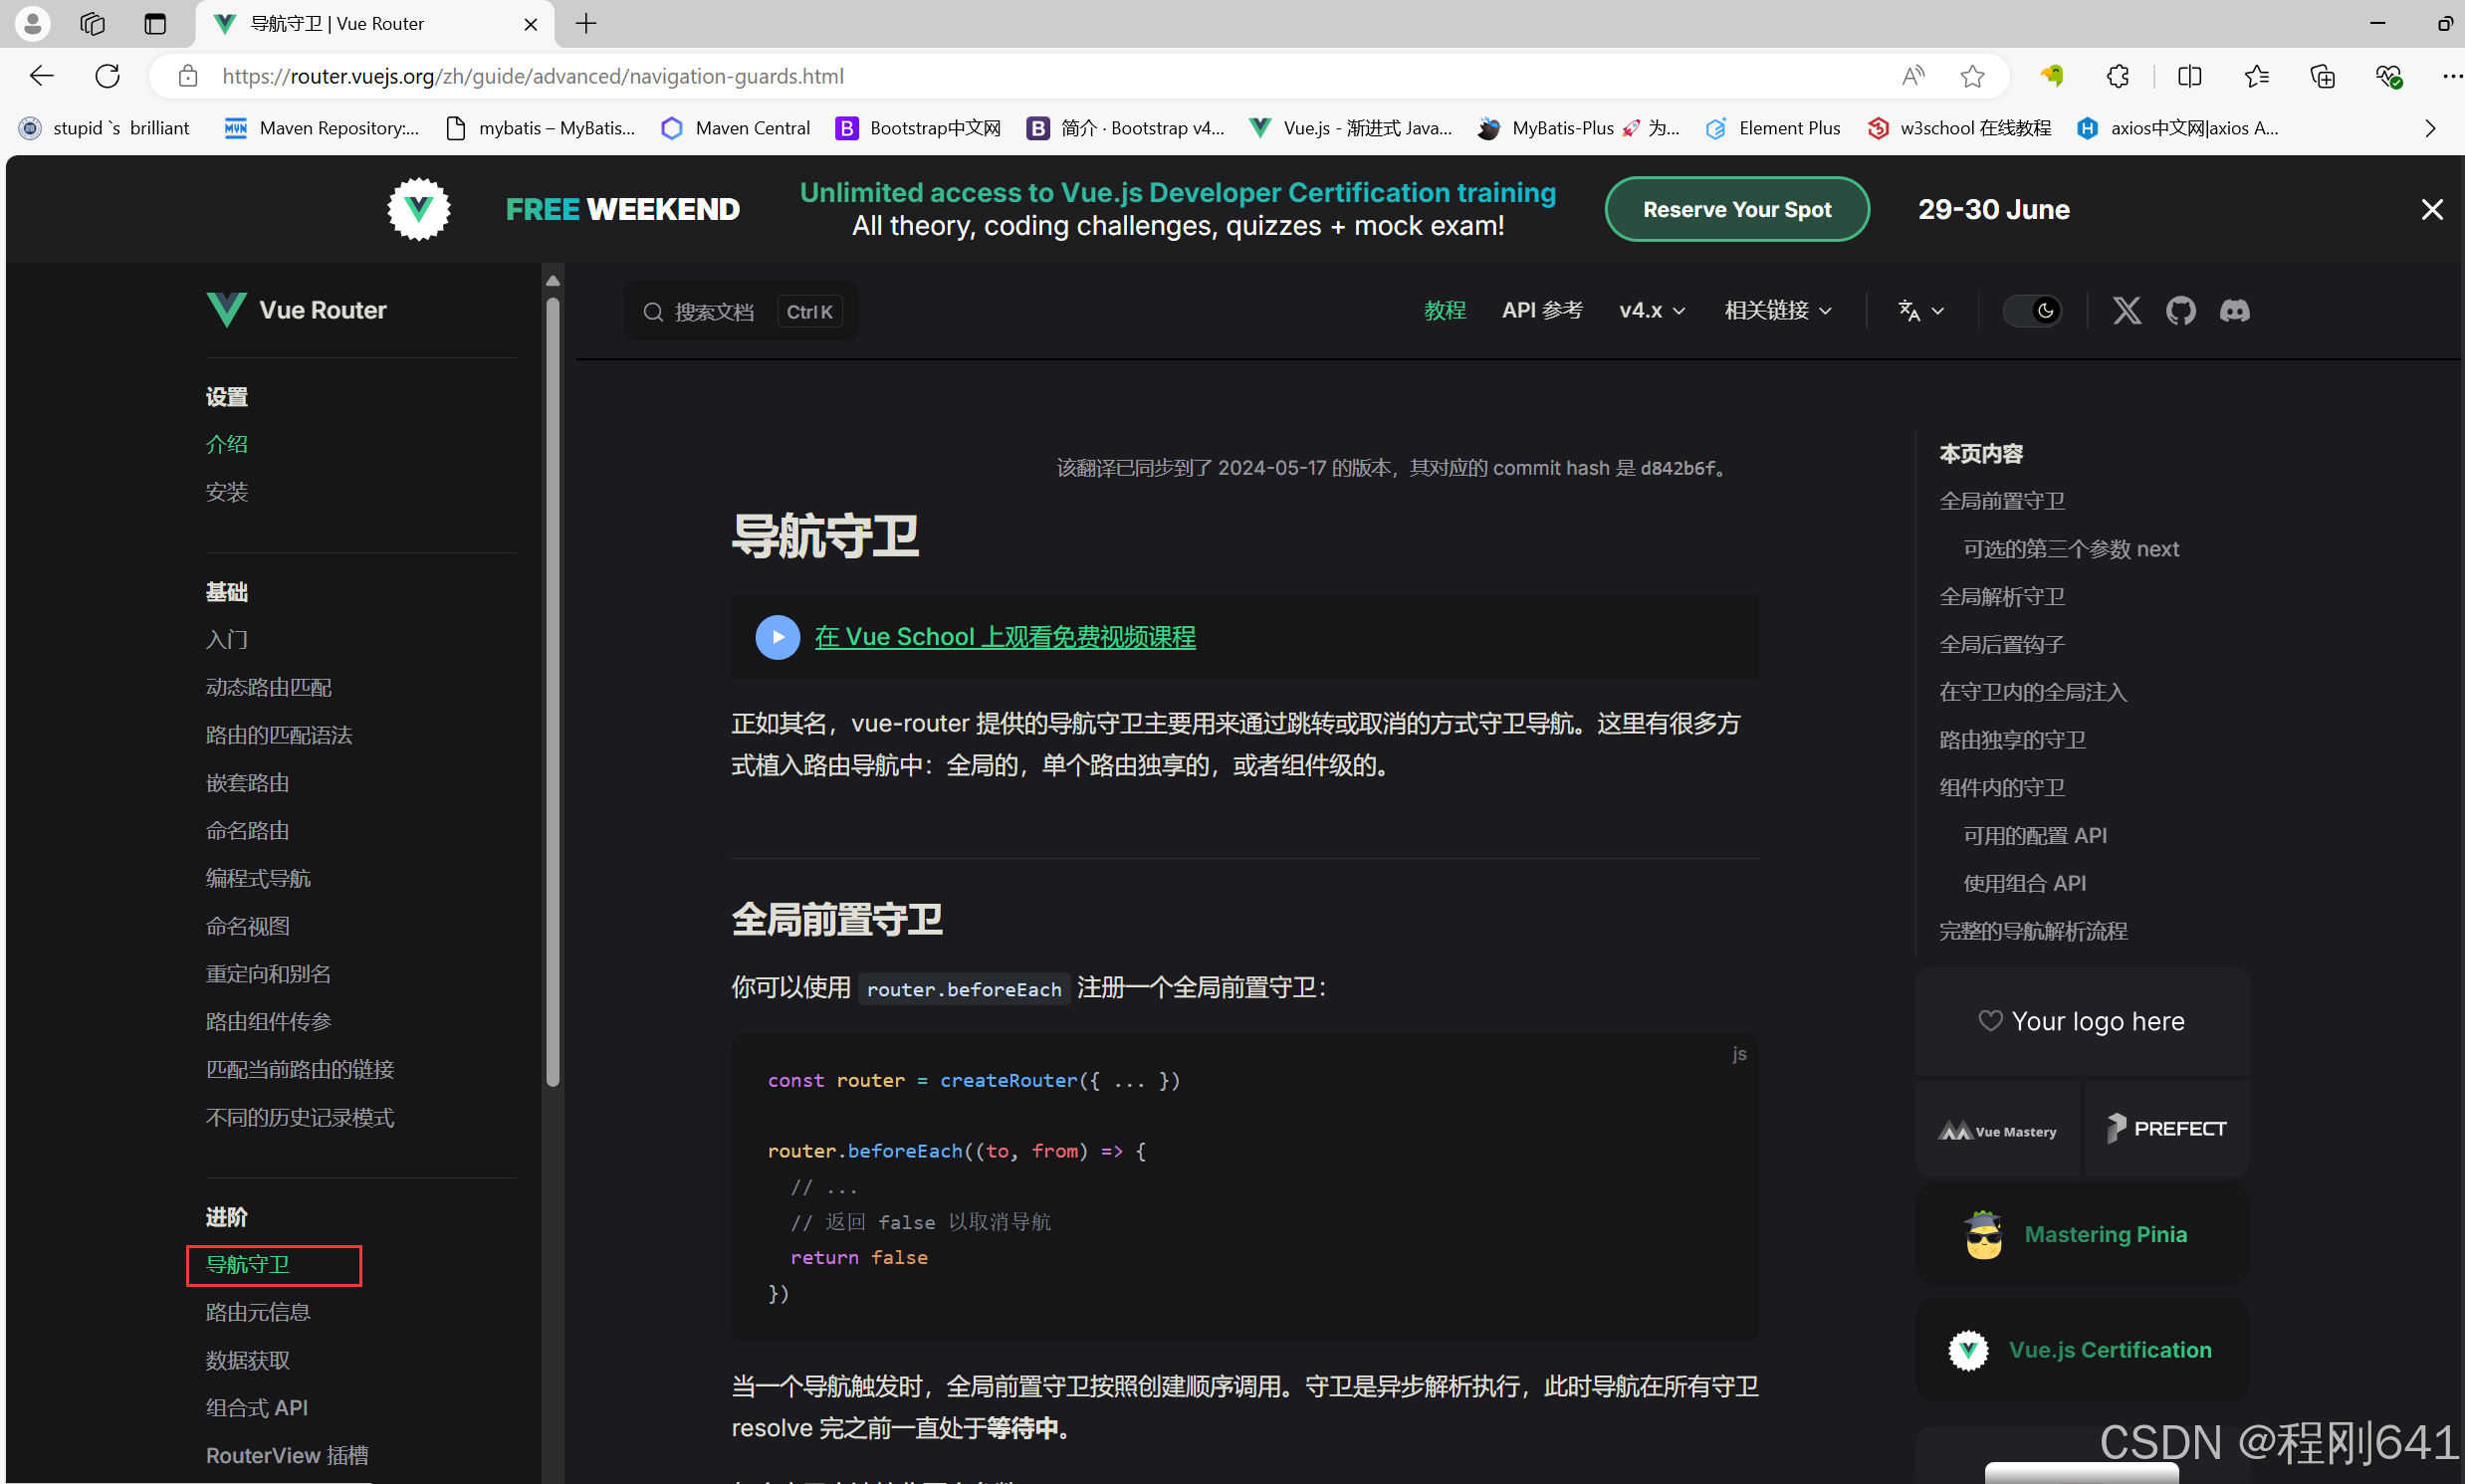
官网:https://router.vuejs.org/zh/
打开router/index.js,填写官网上复制下来的代码
// 下面是路由守卫的代码,to代表要去的页面,from代表前一个页面
router.beforeEach((to,form)=>{
    console.log(to);
    console.log(form);

    // return true就是放行,false就是拦截,或者可以不return,可以跳转页面,使用router
    return false;
})
逐渐完善,借助localStore完成登录时候的拦截或过滤
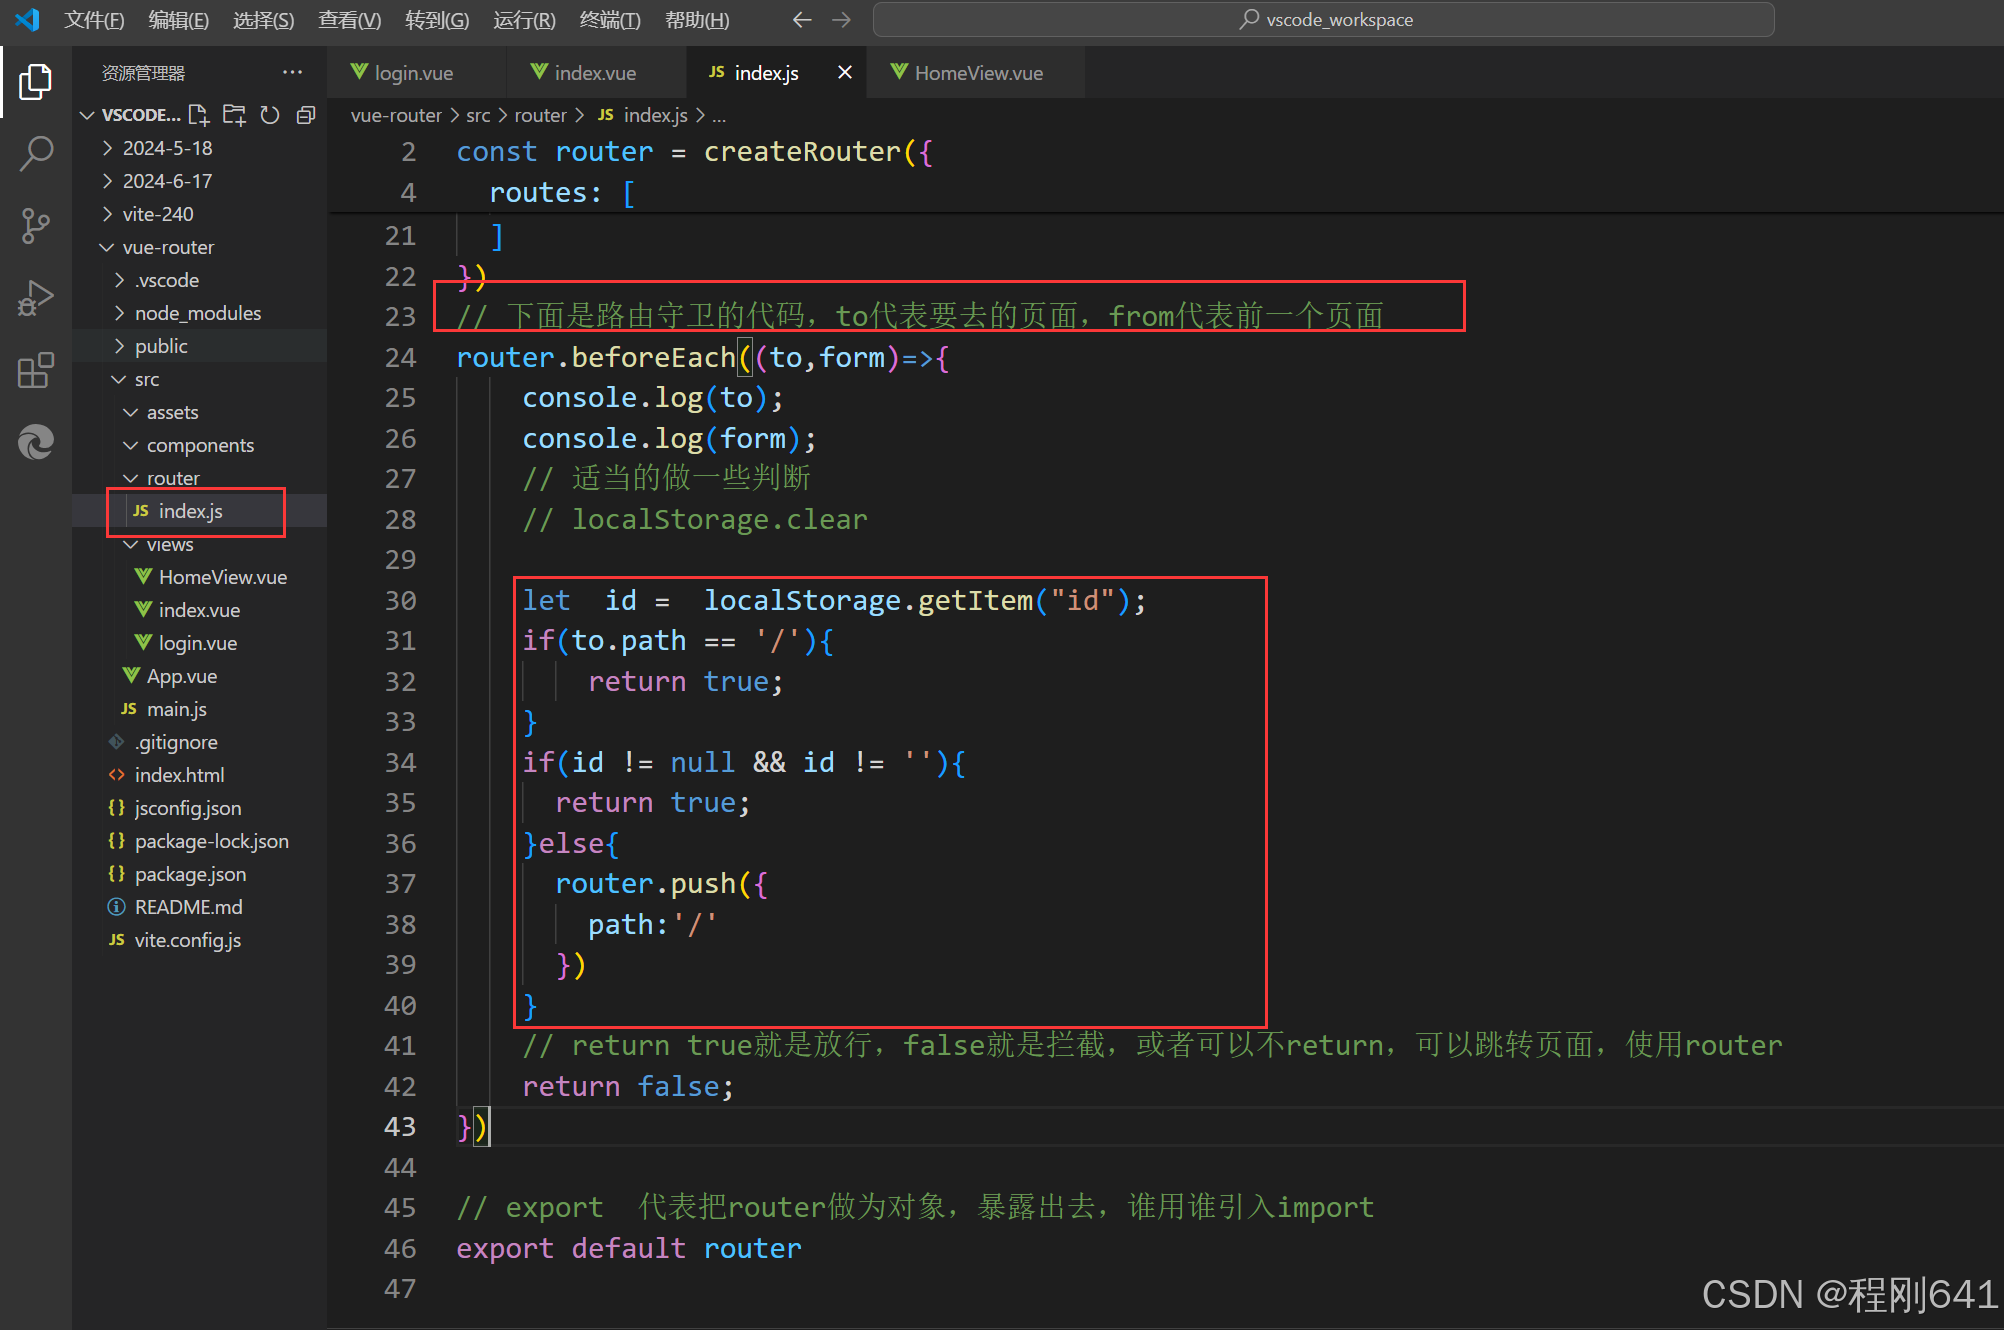
localstorage 有值就不会拦截
生命周期是无限制,只有手动清除或者清空浏览器的时候,才会消失,调用remove方法也行
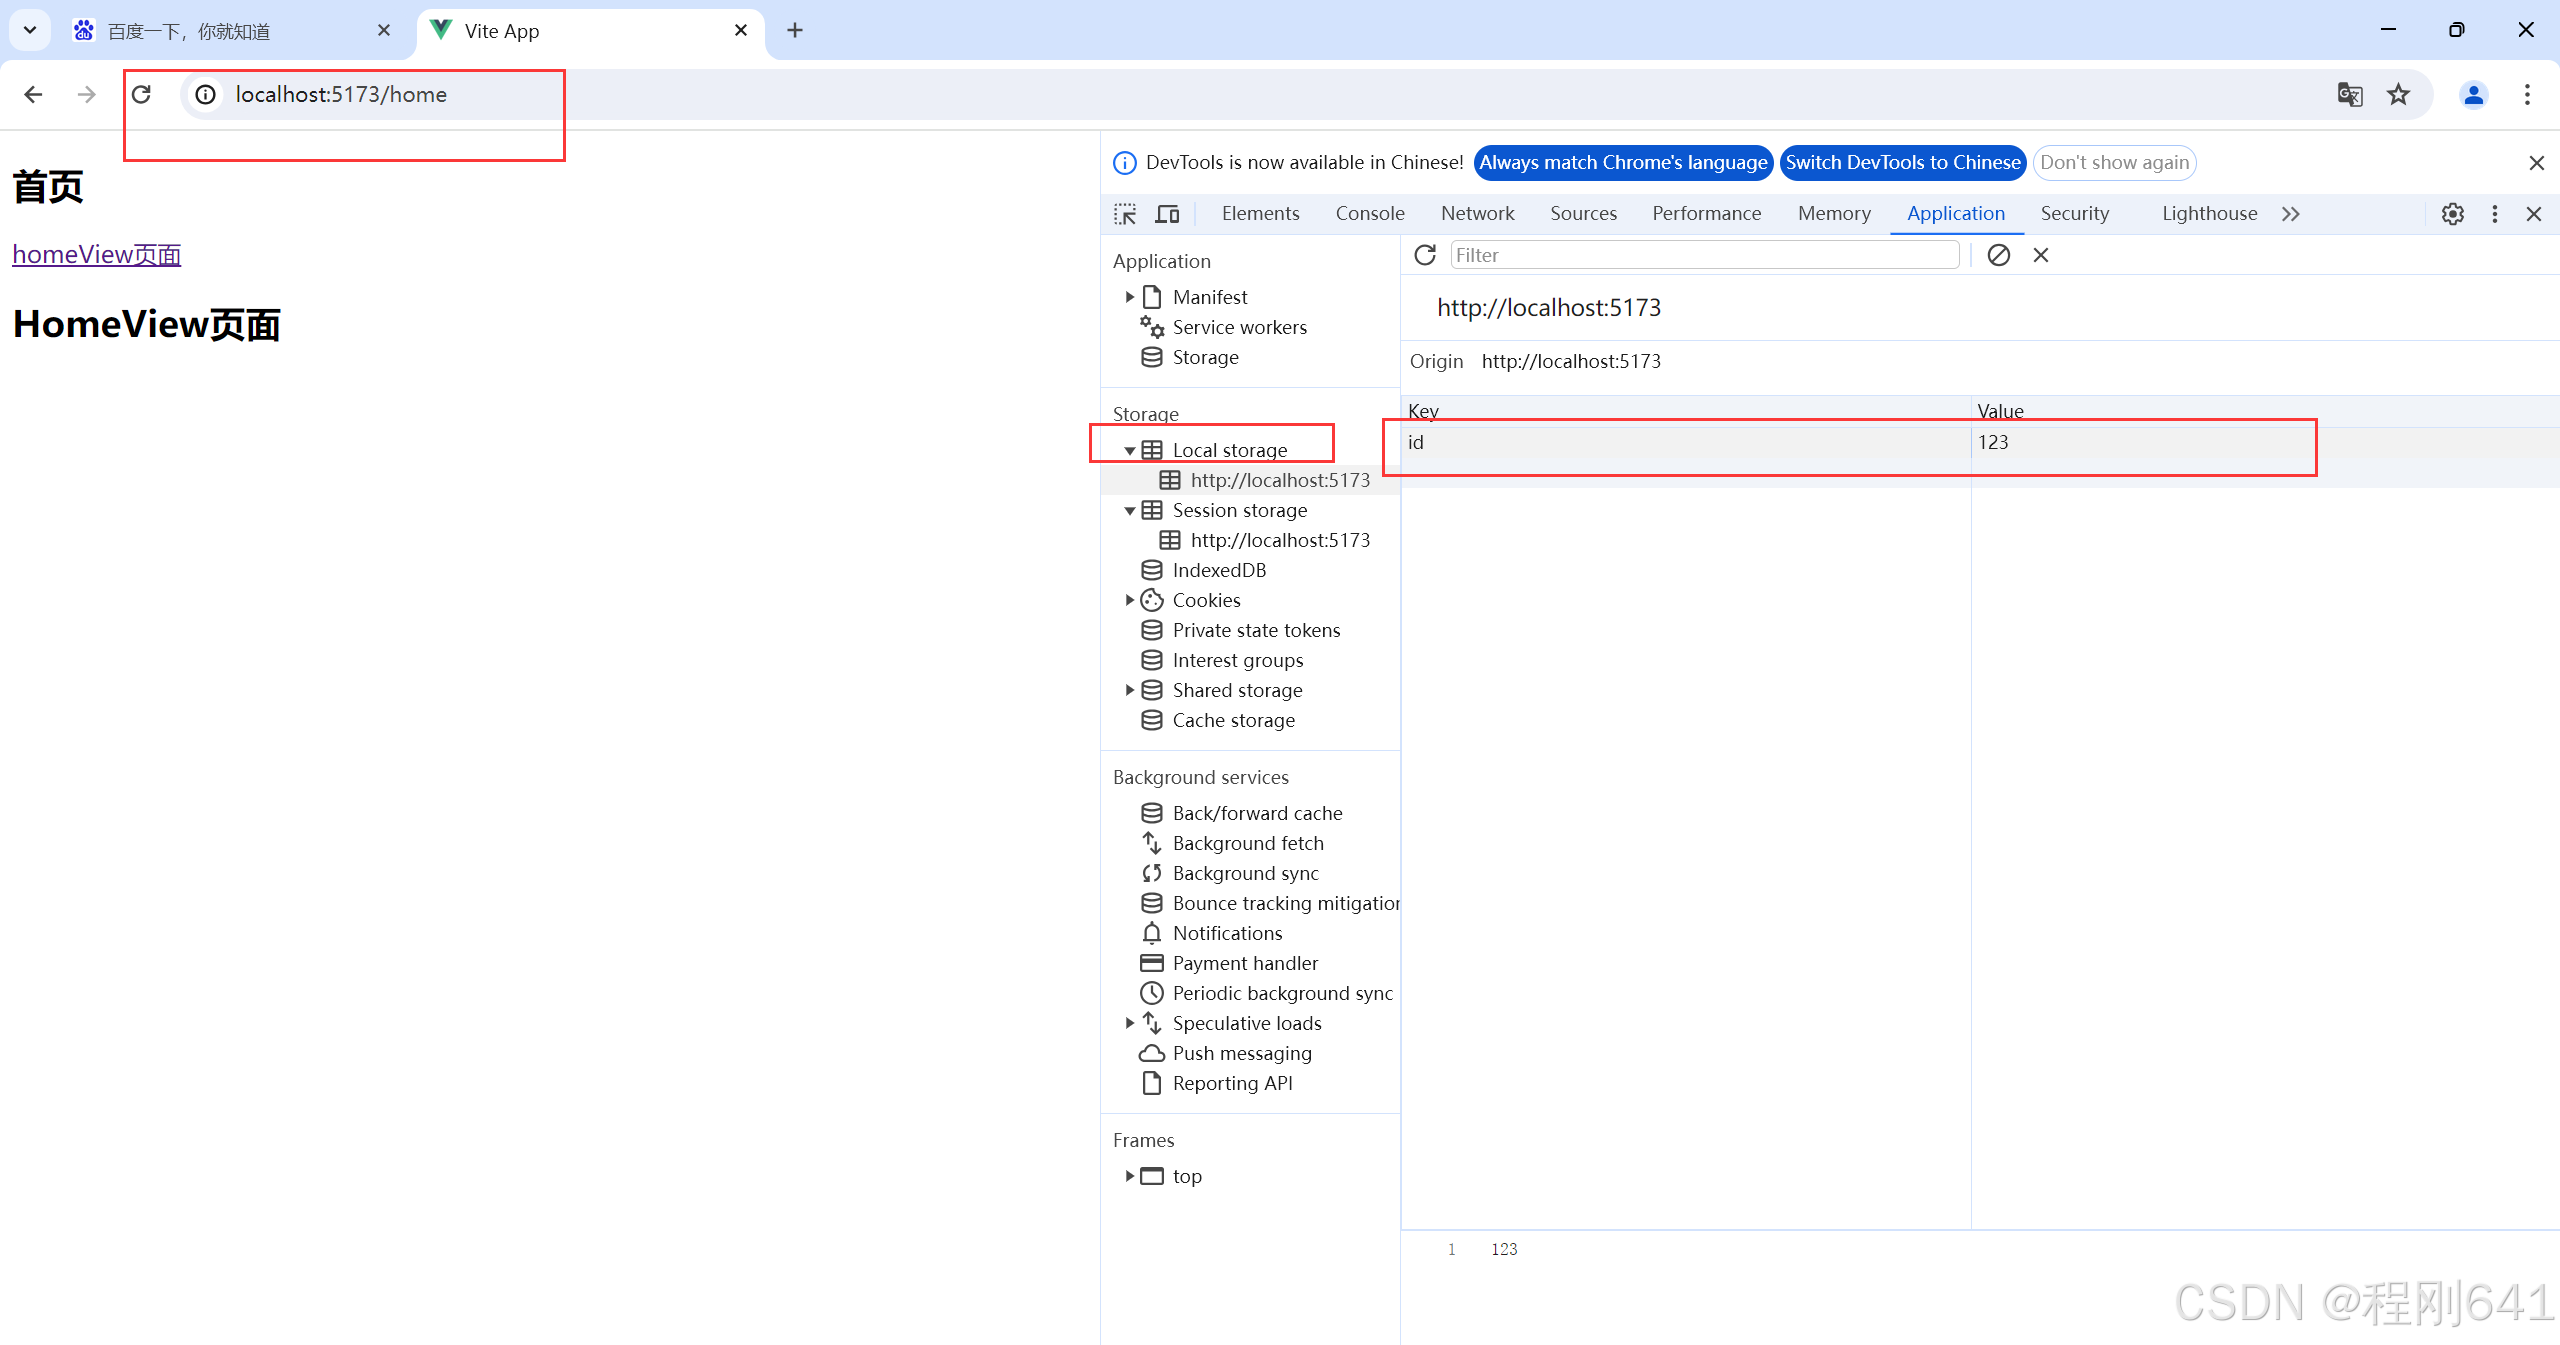
右键清除就会拦截了
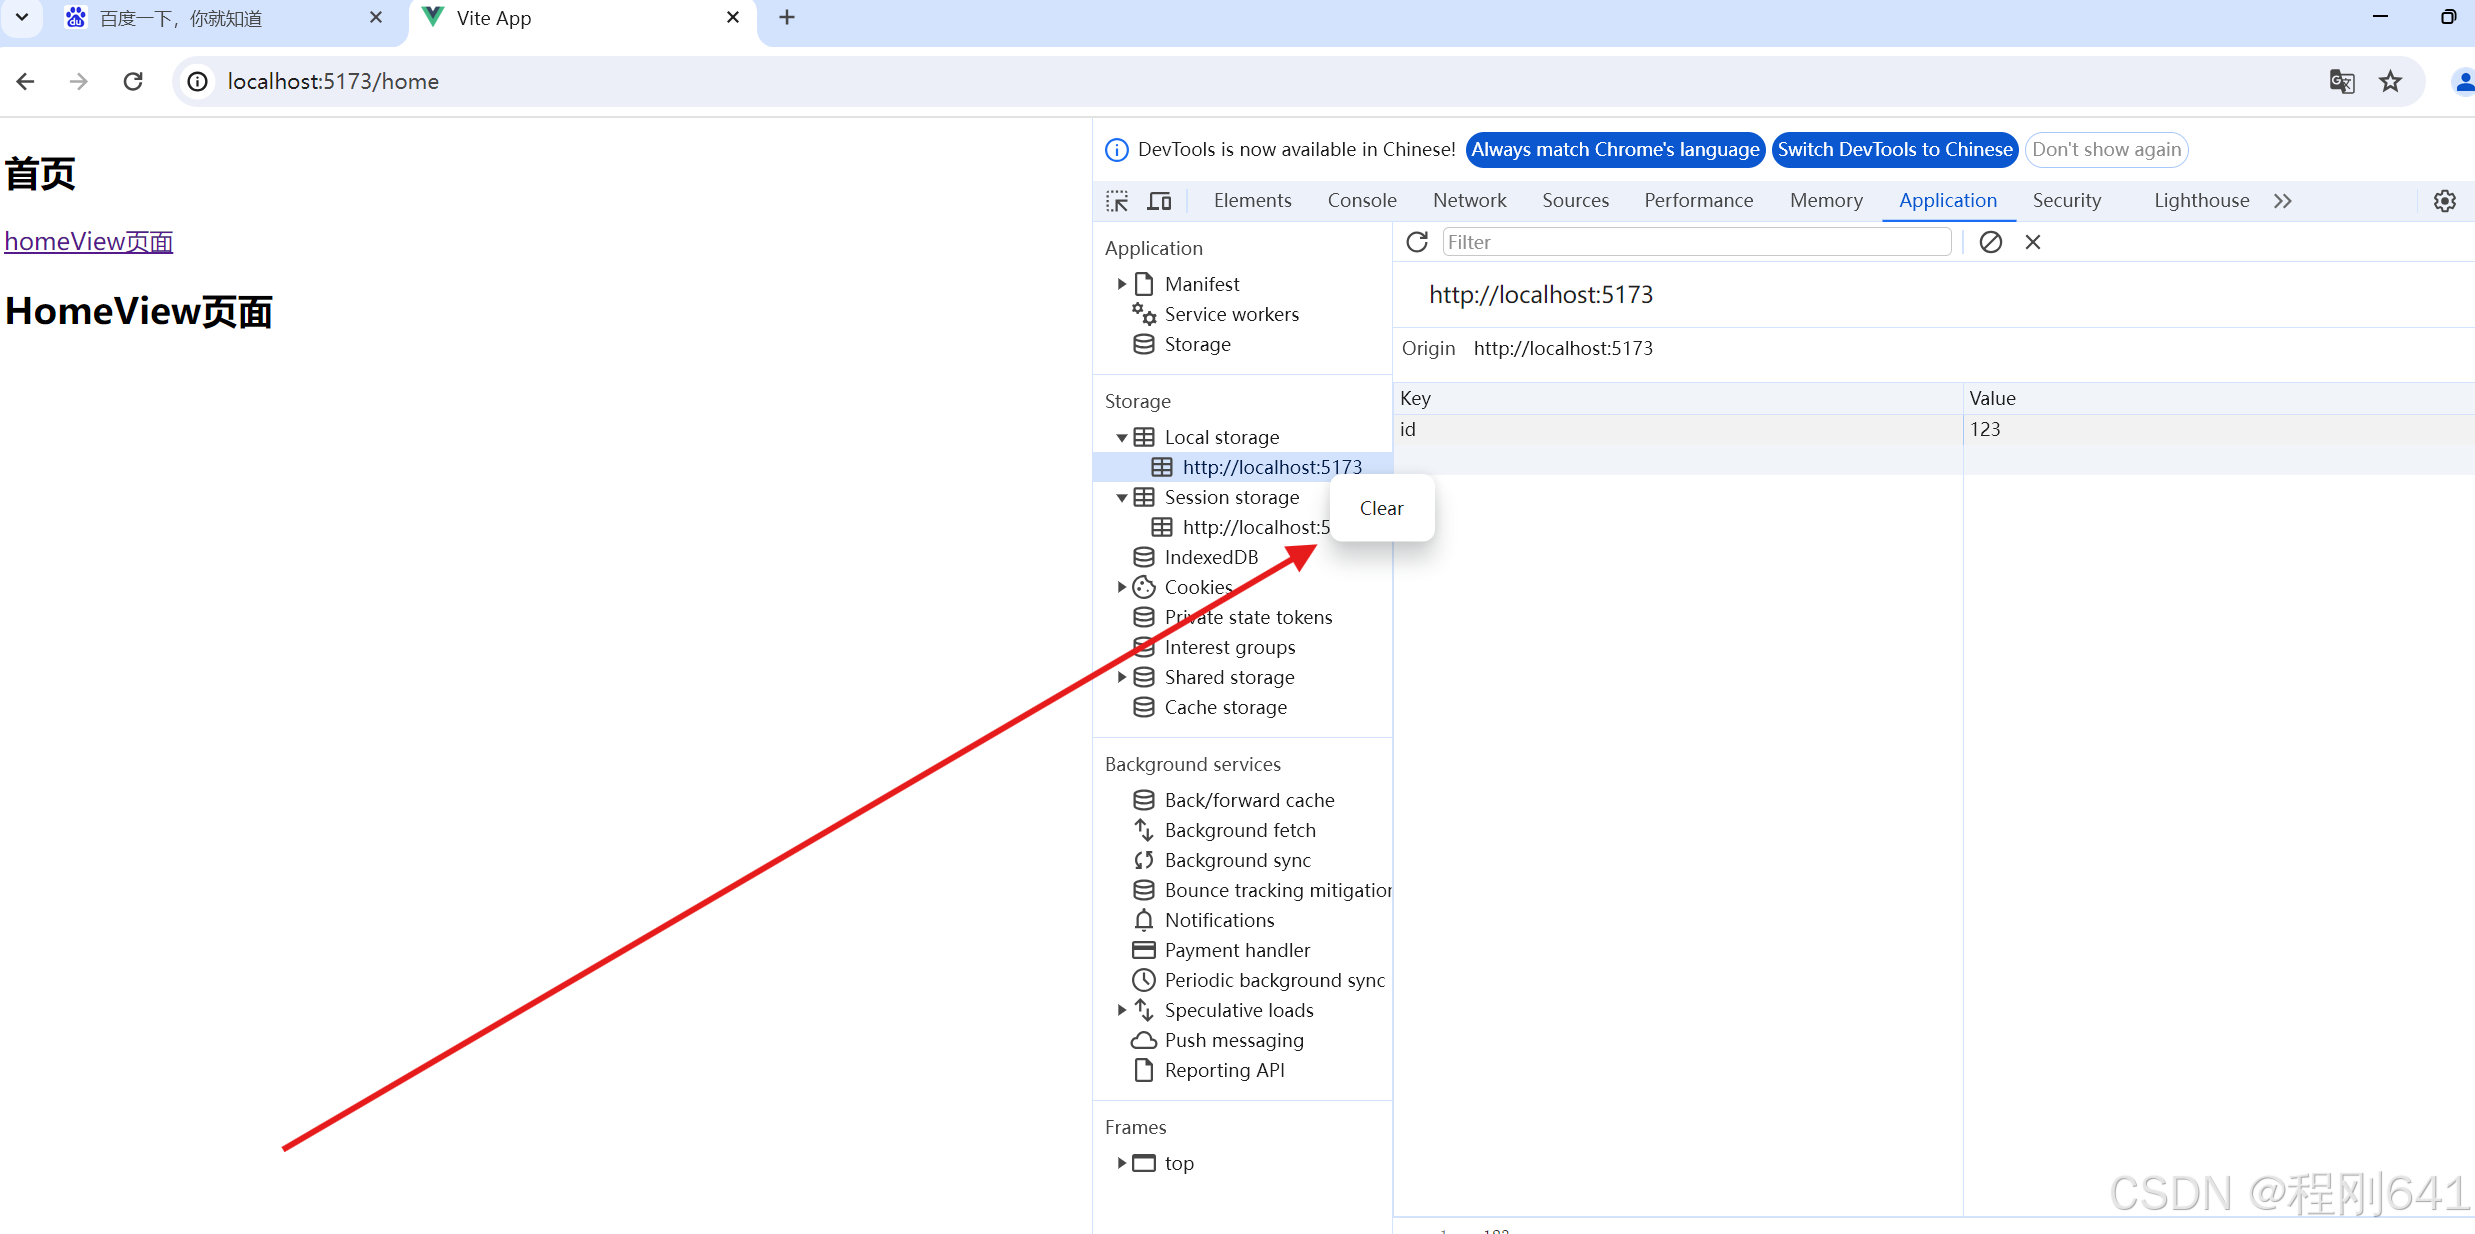
localStore
    clear  清空缓冲
    removeItem删除某一个键值对
    getItem通过键获取某一个对应的值
    setItem 使用键值对的形式,存数据
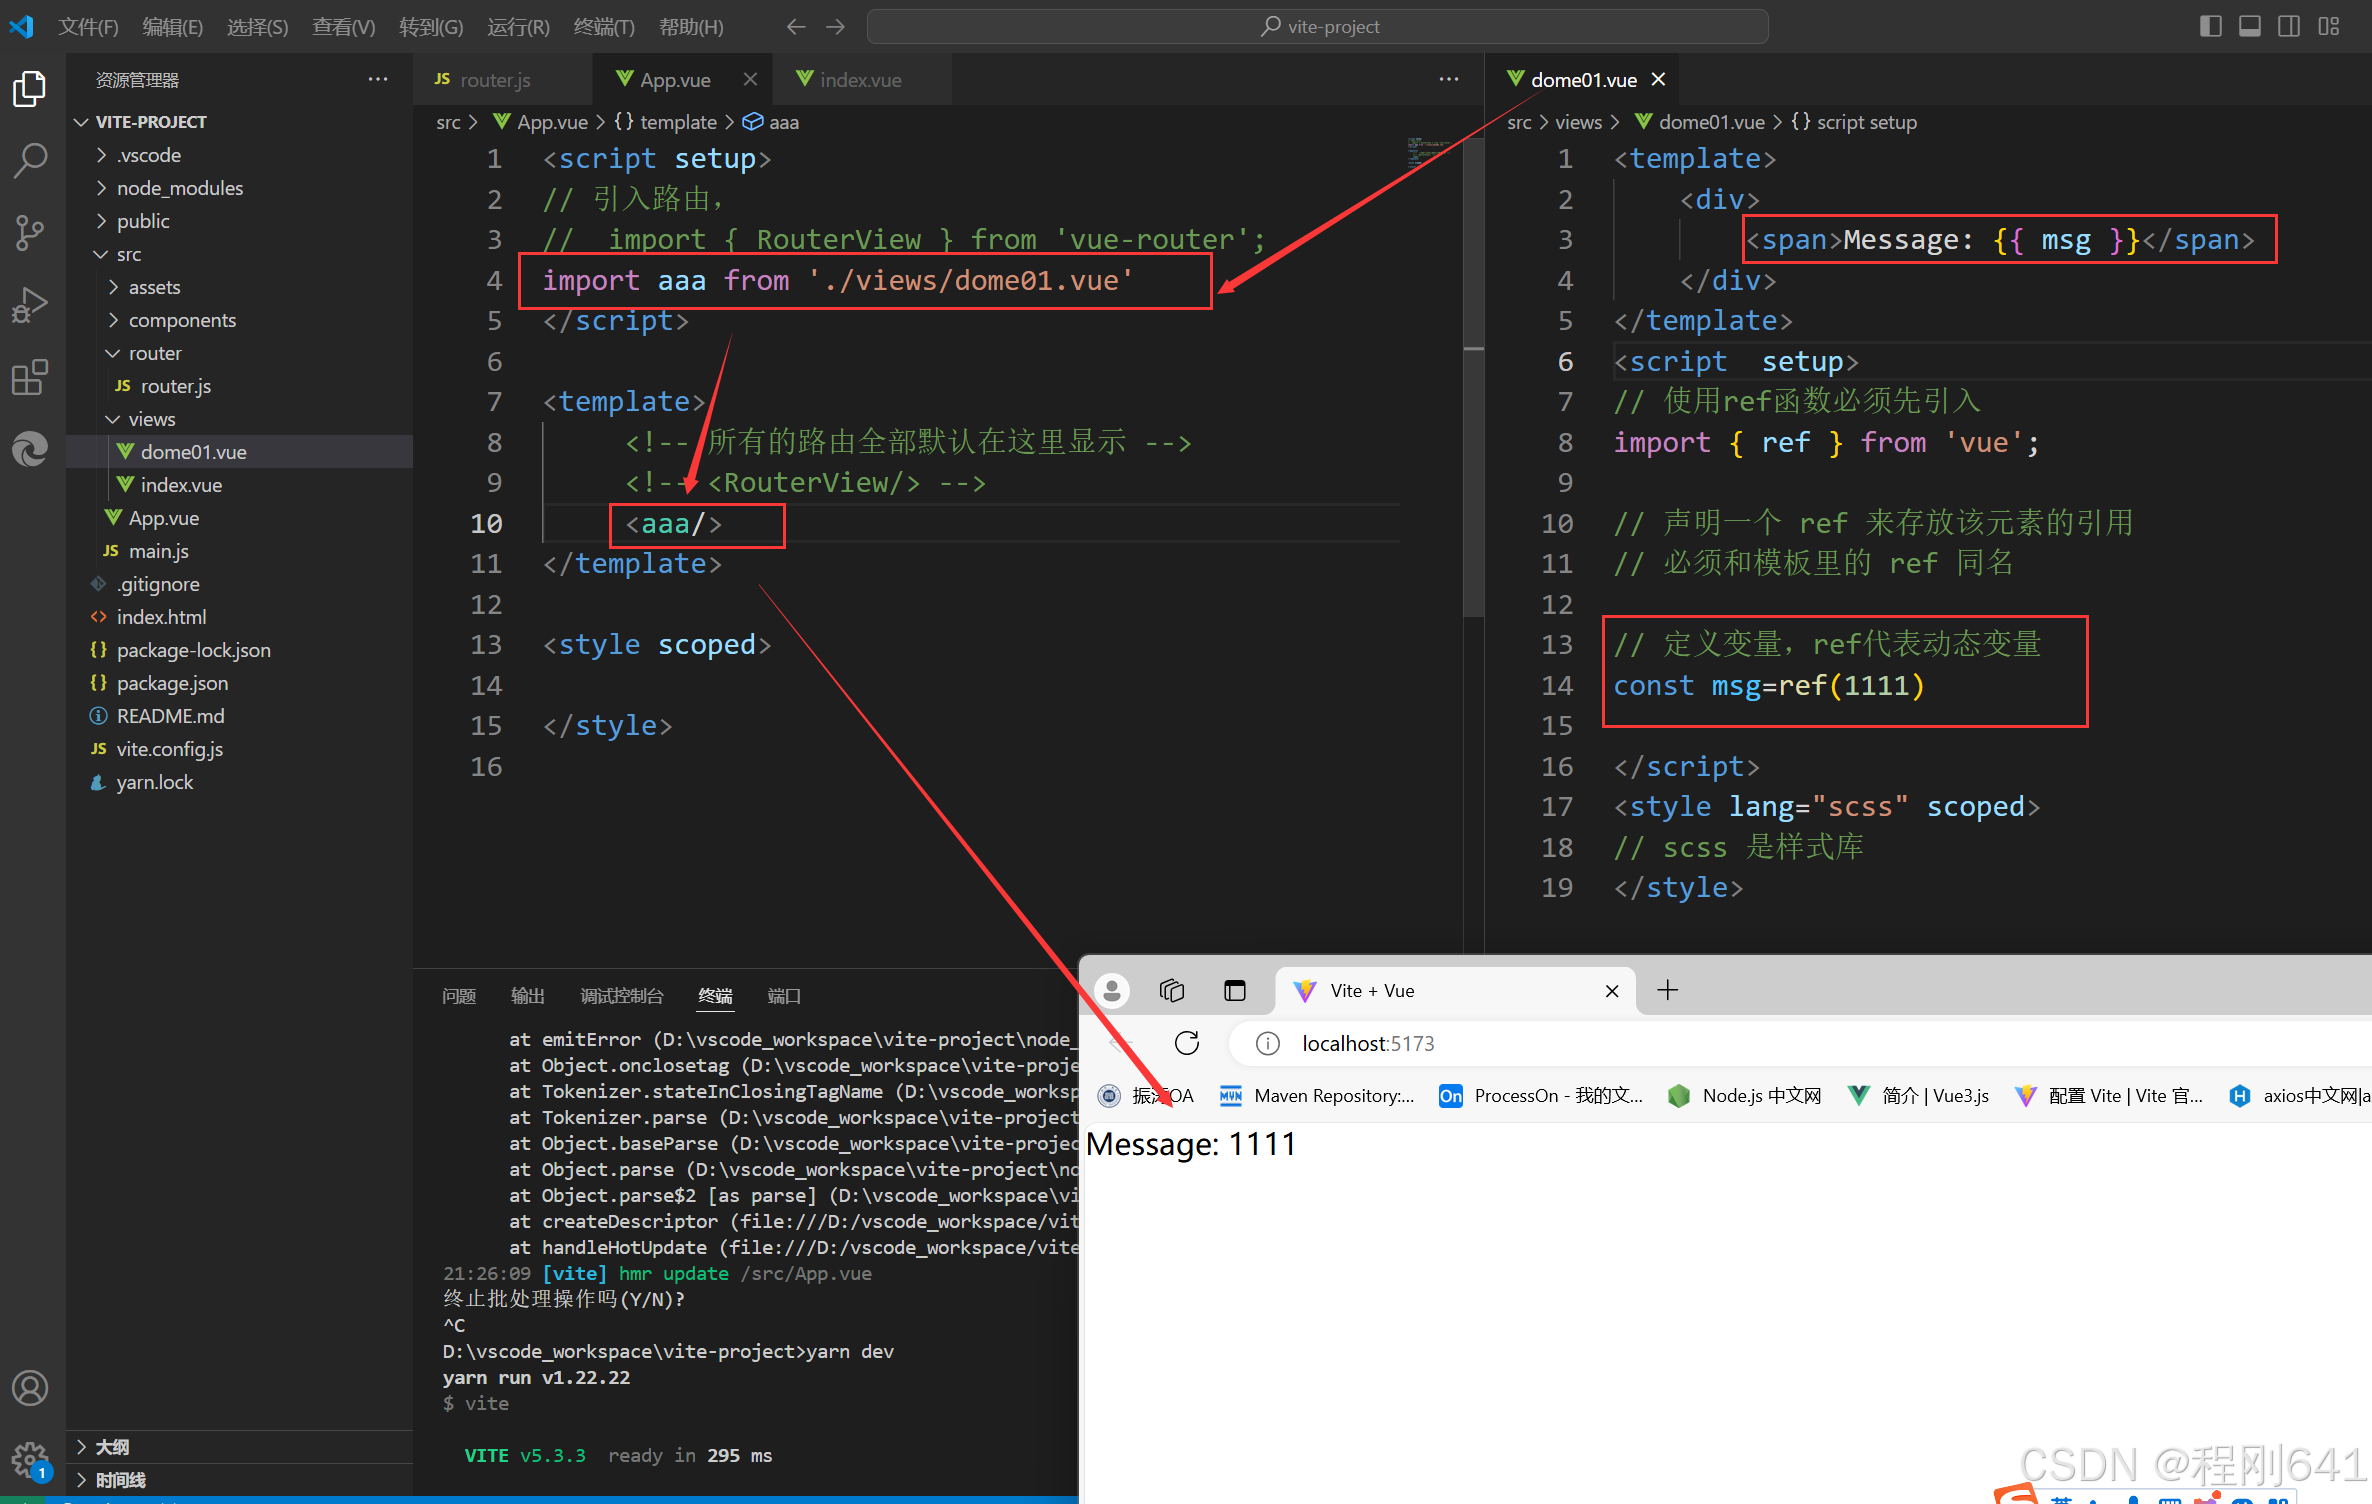
路由router——对比之前未使用路由说明
最简单的router使用
文件路径,并创建demo.vue准备使用
把demo01.vue展示到单页面应用里面,有两种方式,一种是不用路由的,一种是用路由的.
第一种方式,不使用route,进行单页面应用挂载。
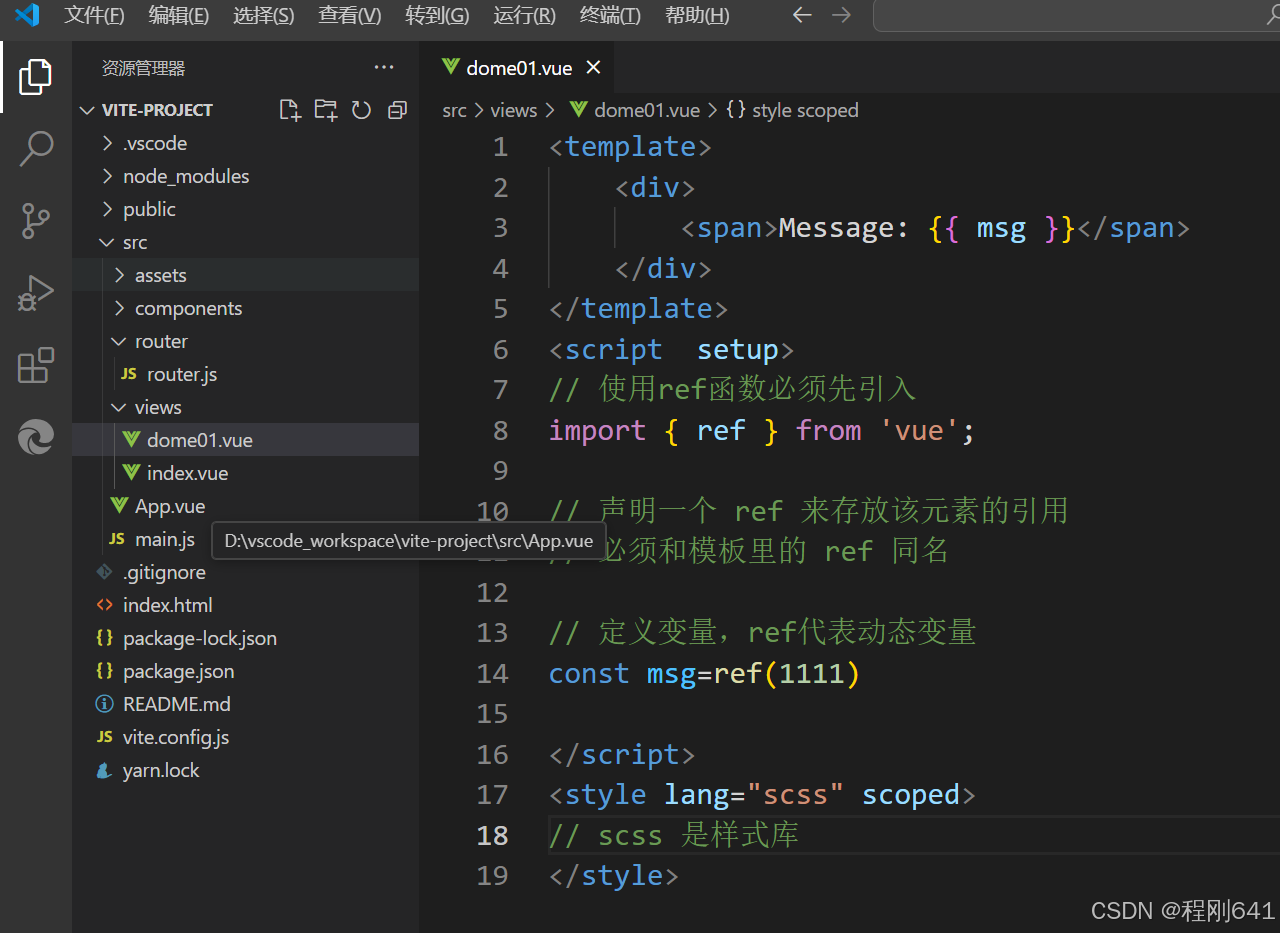
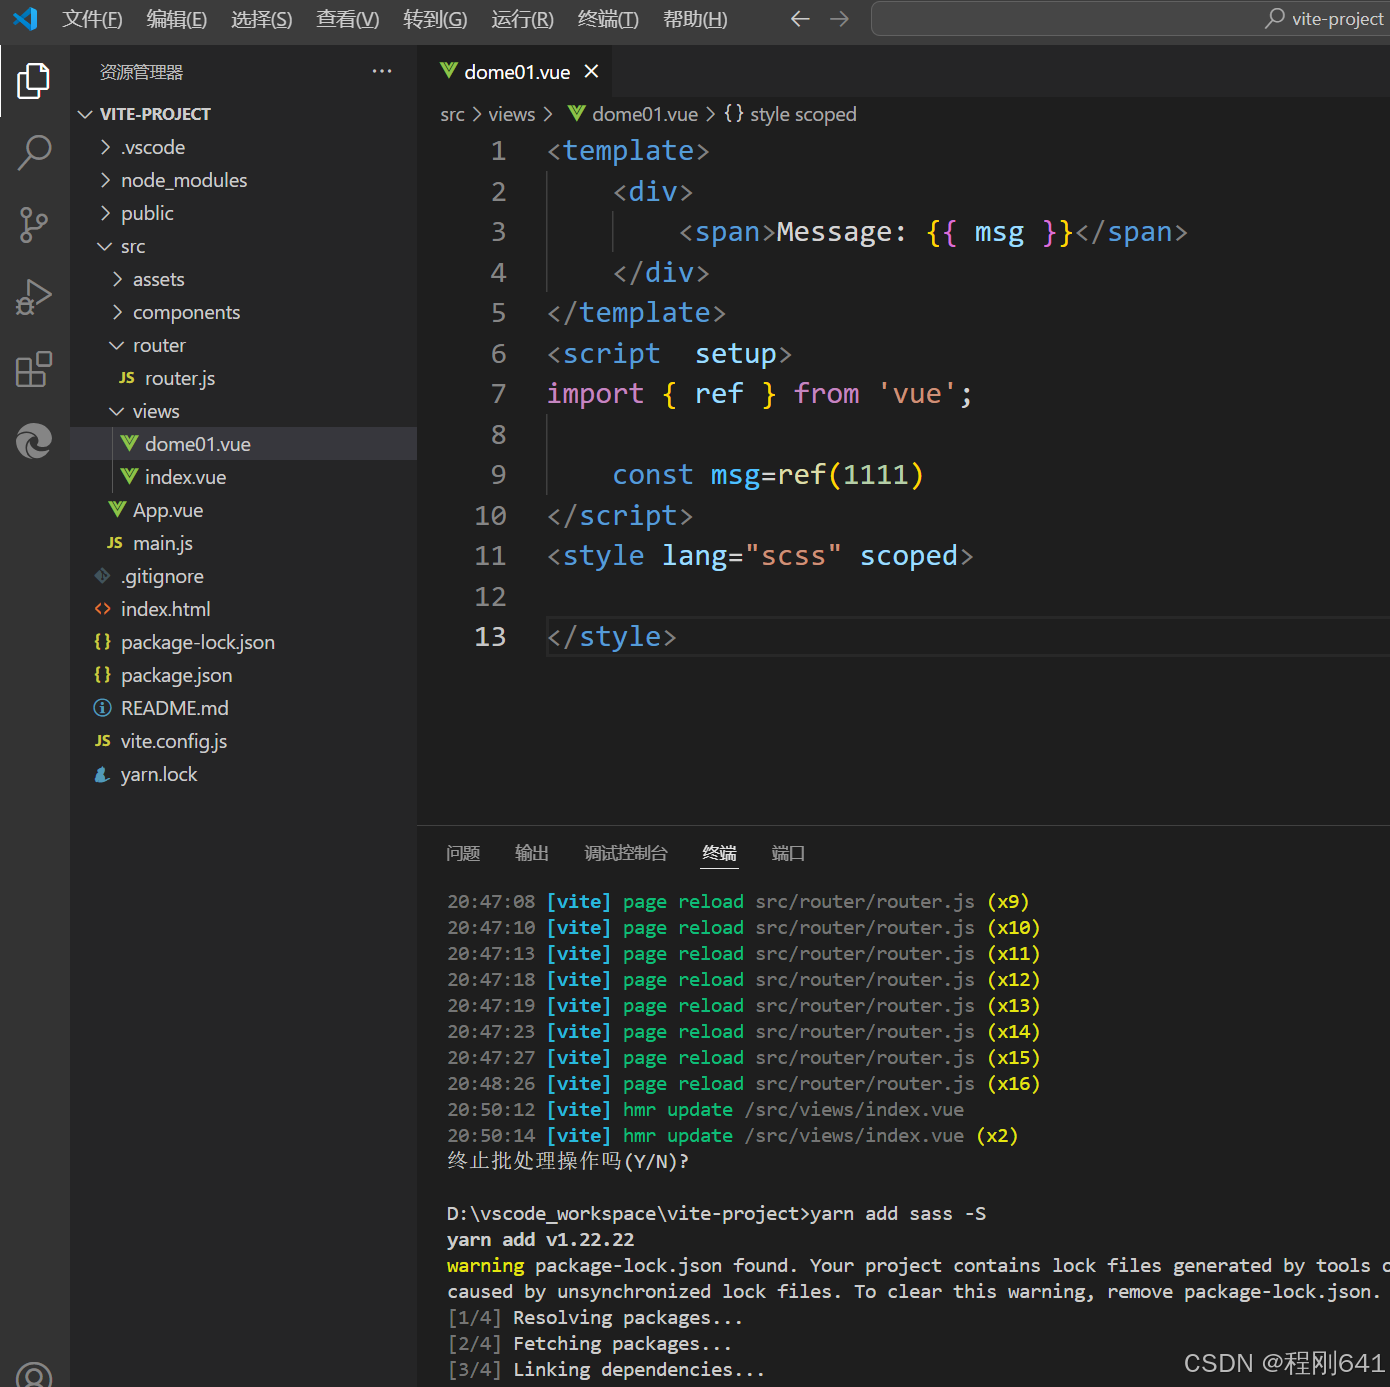
<template>
    <div>
        <span>Message: {{ msg }}</span>
    </div>
</template>
<script  setup>
// 使用ref函数必须先引入
import { ref } from 'vue';

// 声明一个 ref 来存放该元素的引用
// 必须和模板里的 ref 同名

// 定义变量,ref代表动态变量
const msg=ref(1111)

</script>
<style lang="scss" scoped>
// scss 是样式库
</style>
引入到app.vue
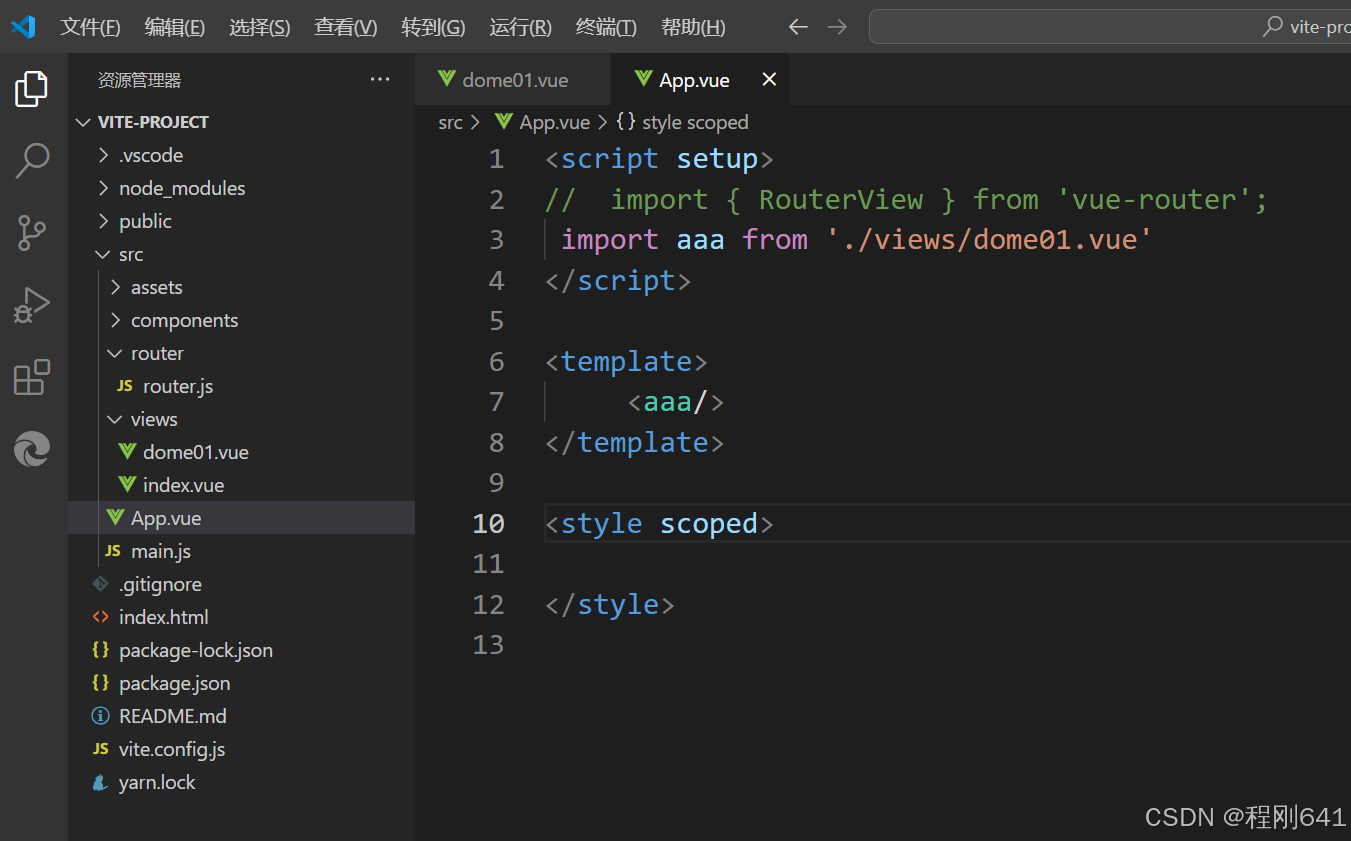
<script setup>
//  import { RouterView } from 'vue-router';
//  干啥,先引入
 import aaa from './views/dome01.vue'
</script>
<template>

    固定写法,通过aaa变量,引入demo01.vue到这里
     <aaa/>
</template>

<style scoped>

</style>
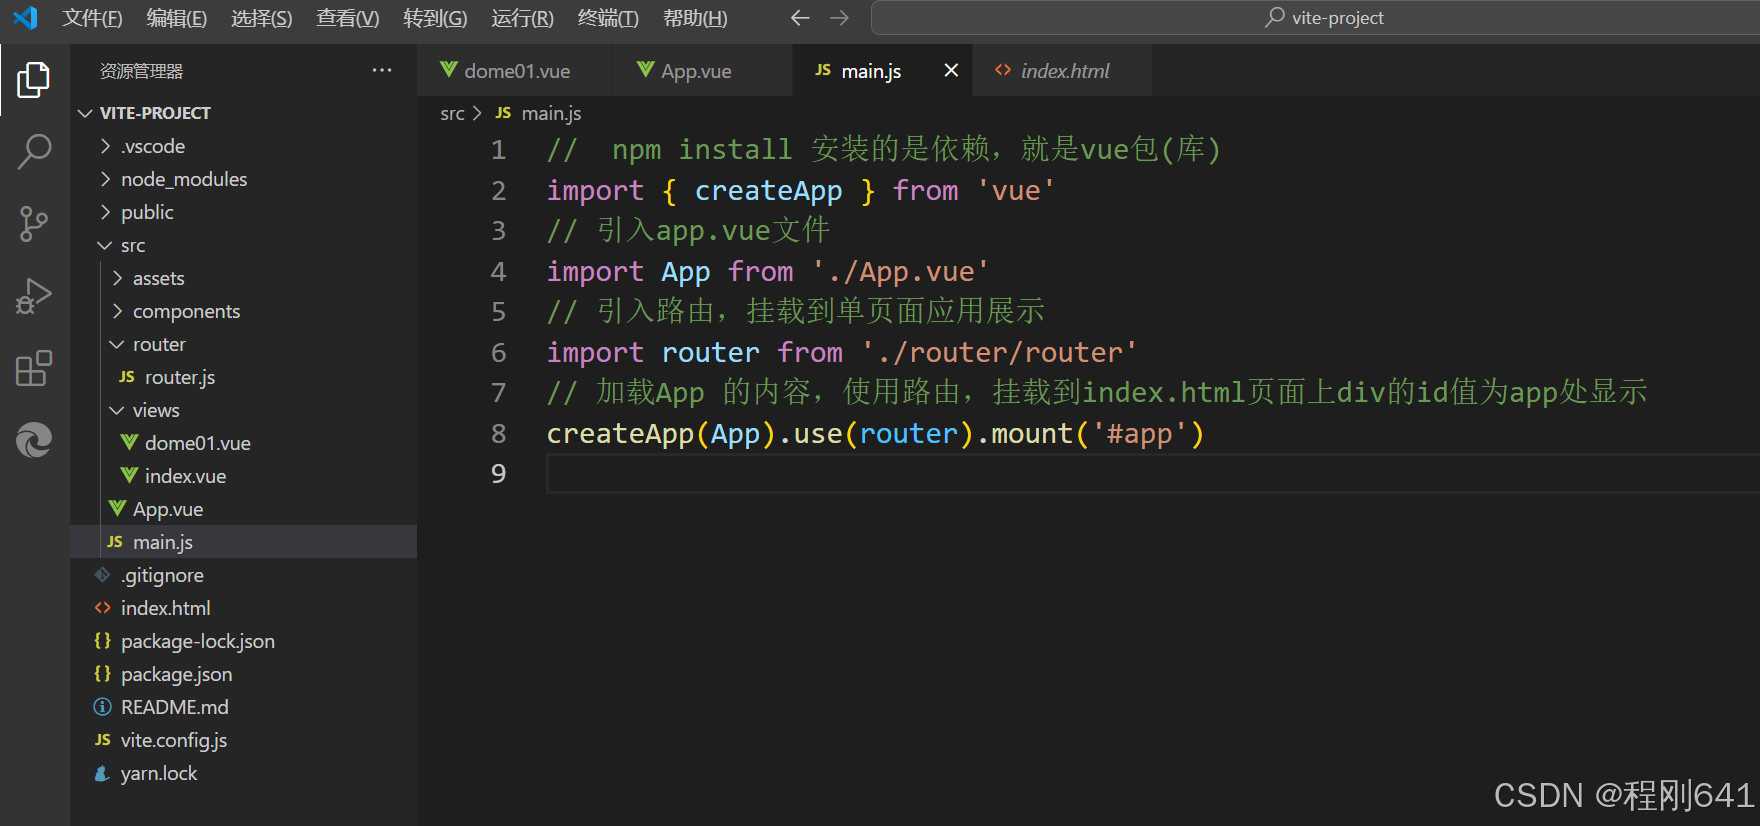
挂载,此处的路由没有作用,没使用他,但是引入了App
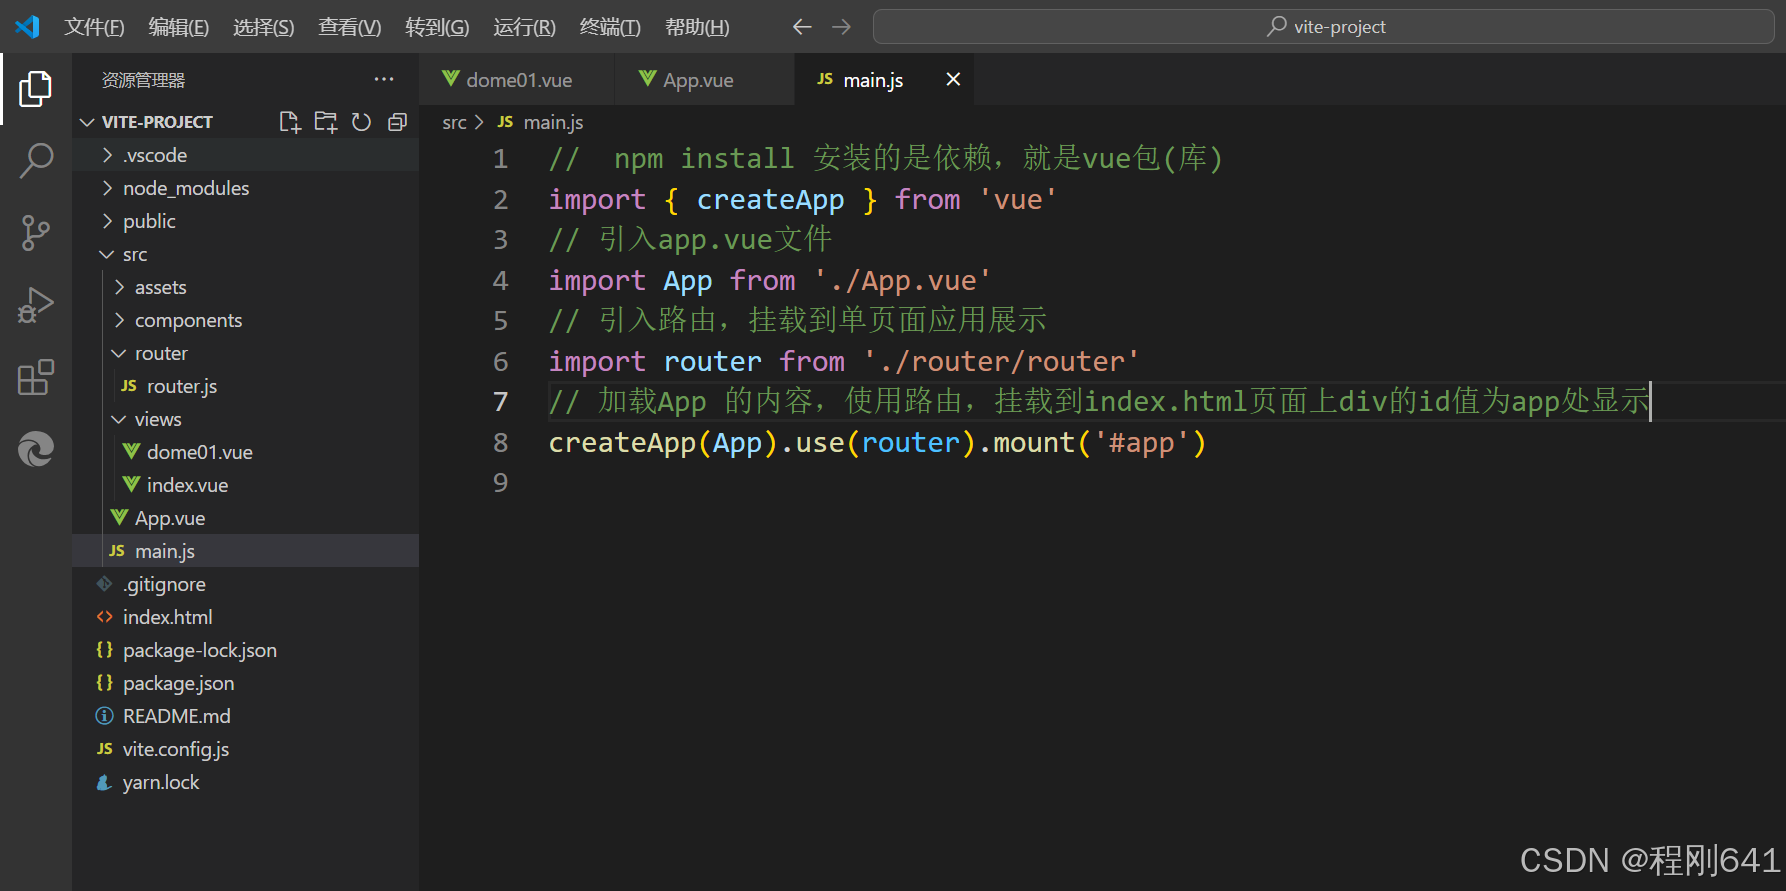
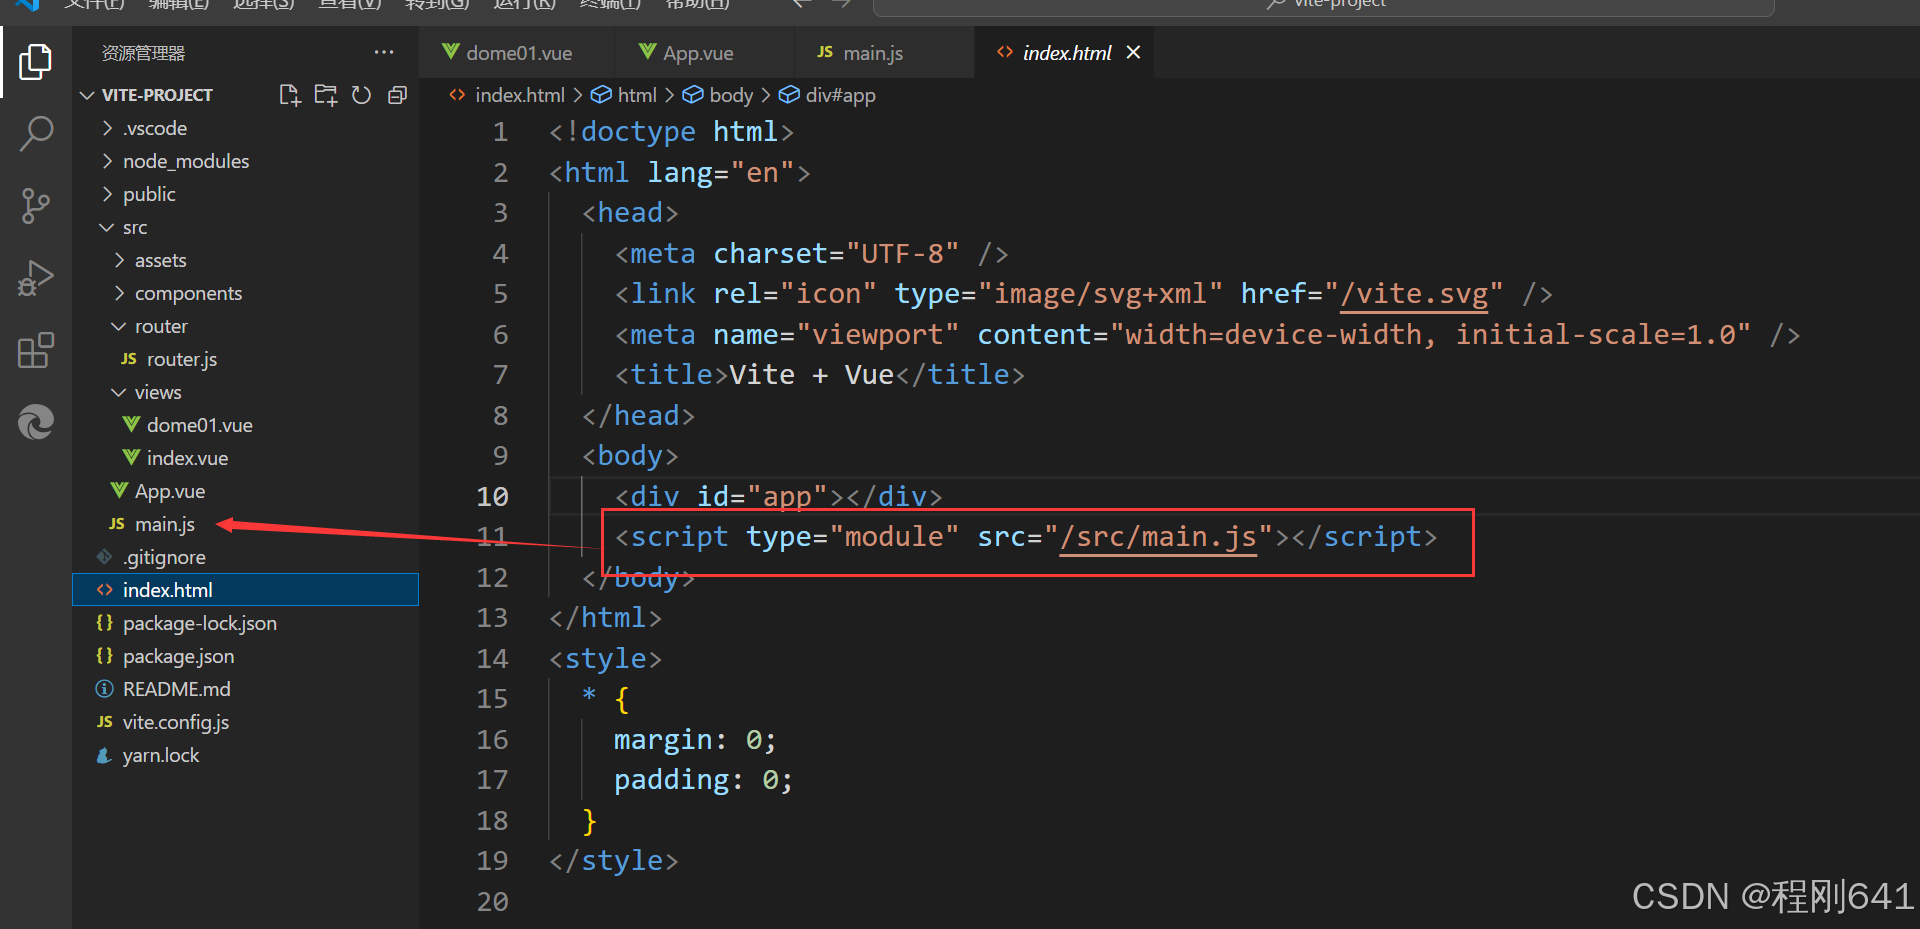
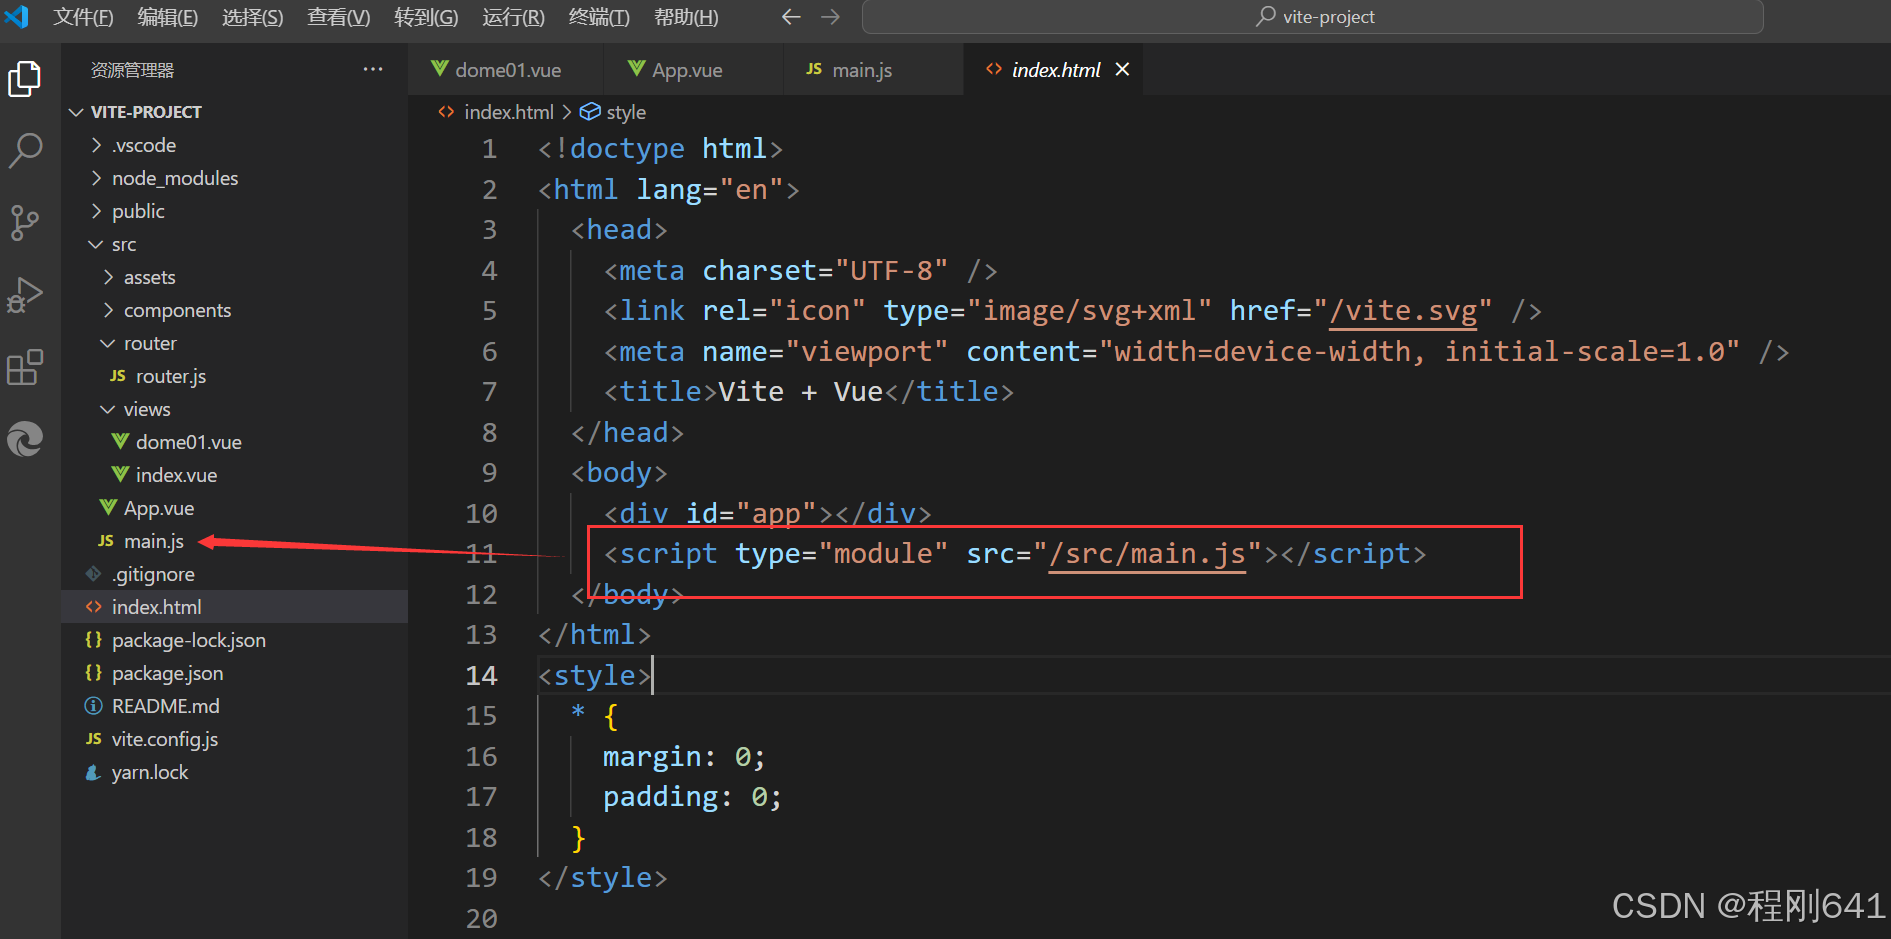
引入js文件,生效的地方
运行及效果
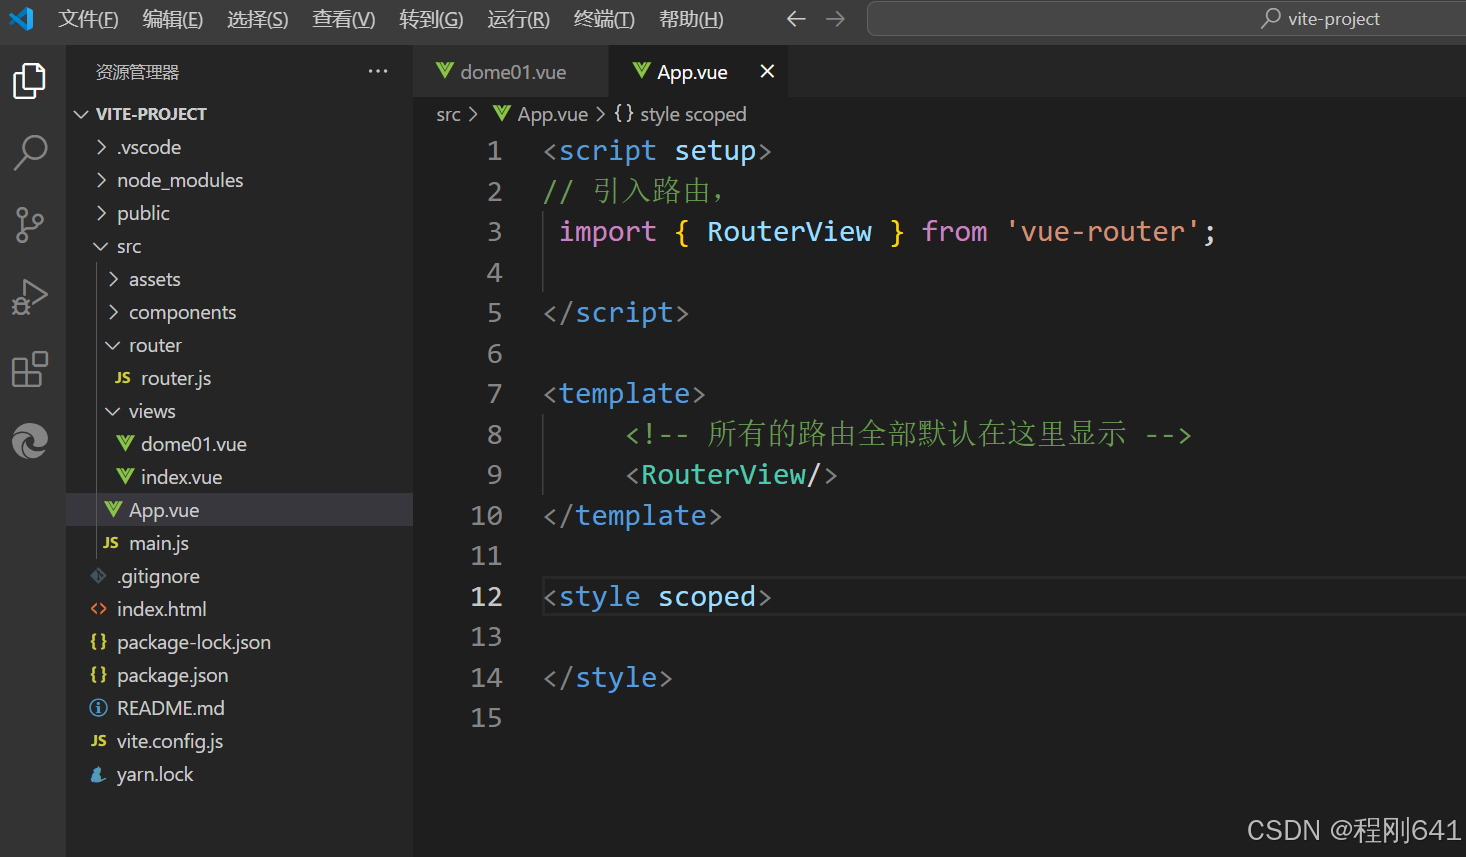
第二种方式,使用路由route
引入了App
在App.vue页面引入路由,通过RouterView标签,作展示
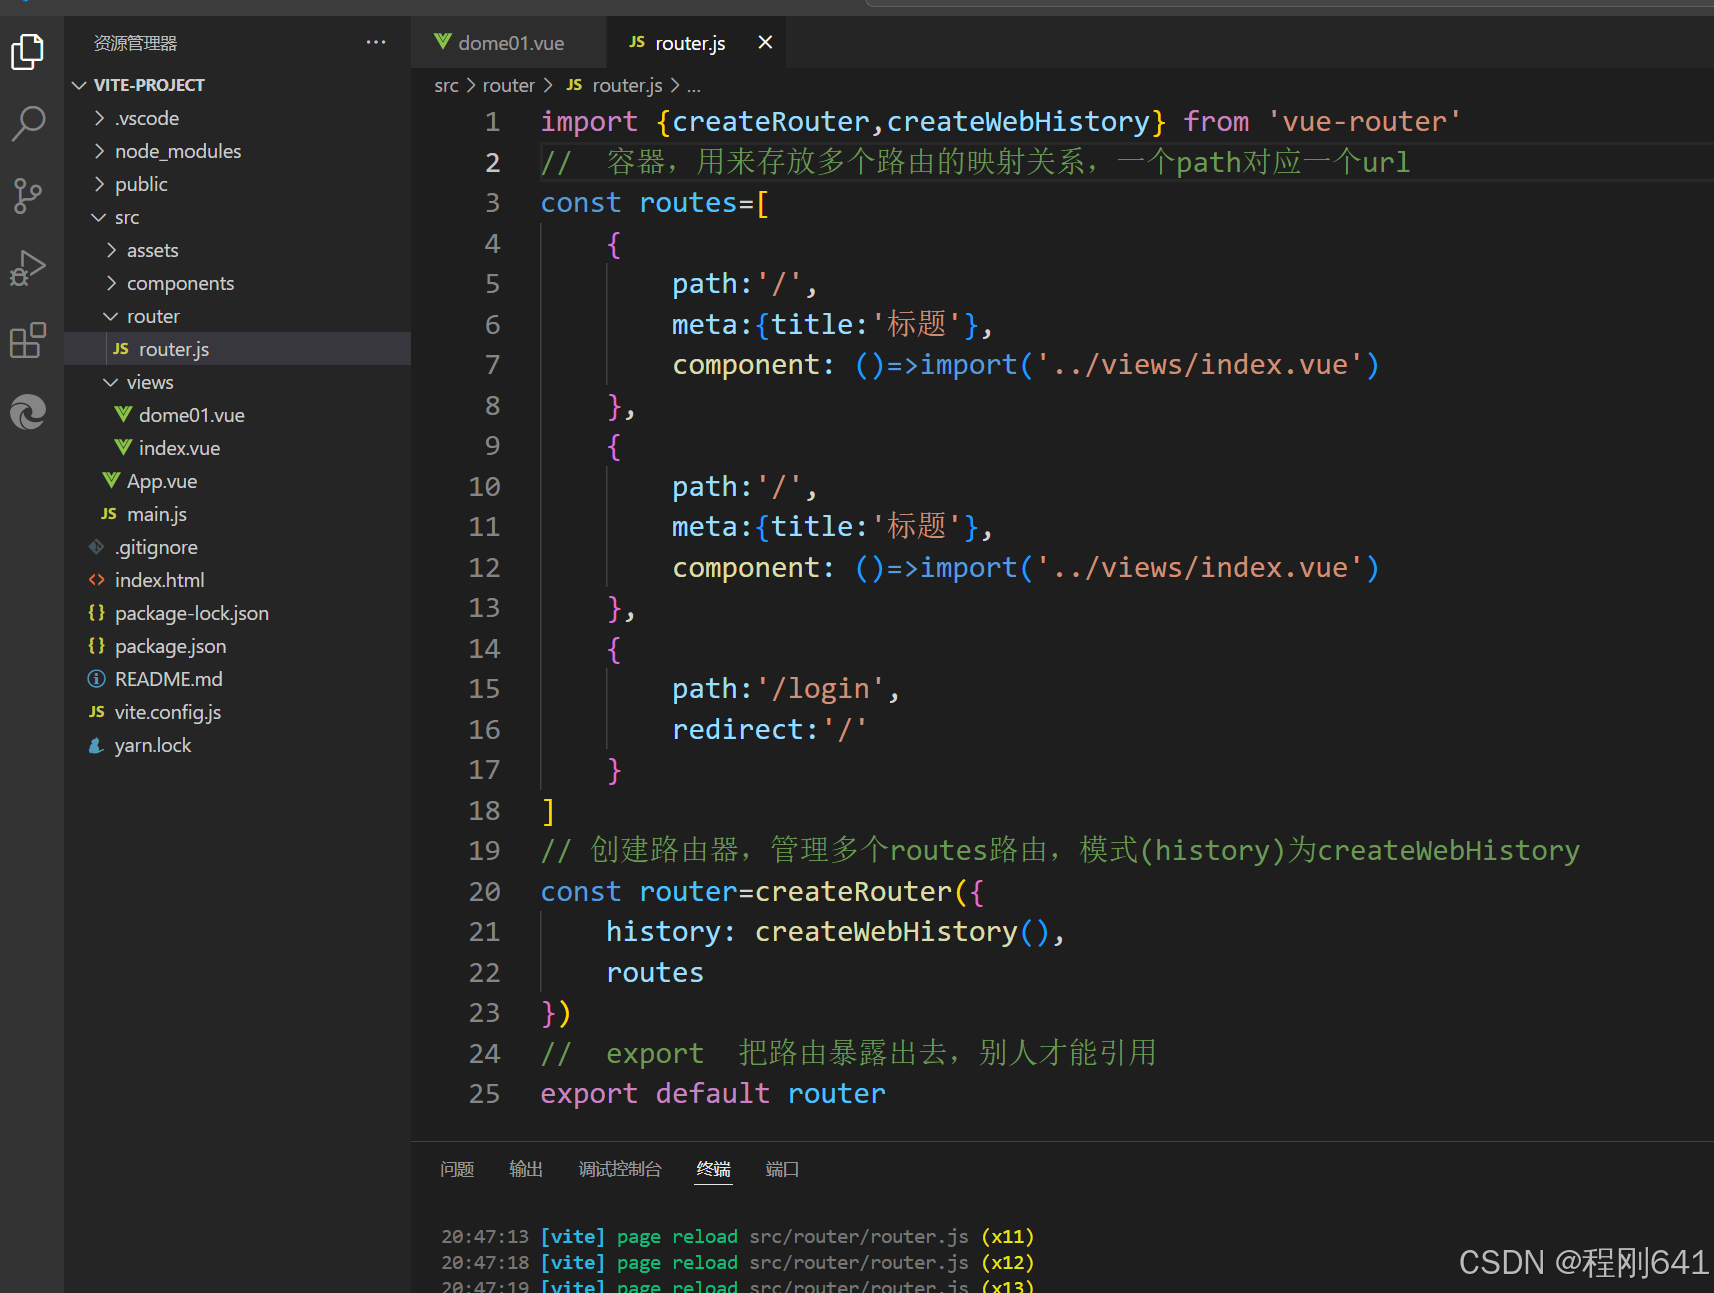
路由管理文件
页面内容

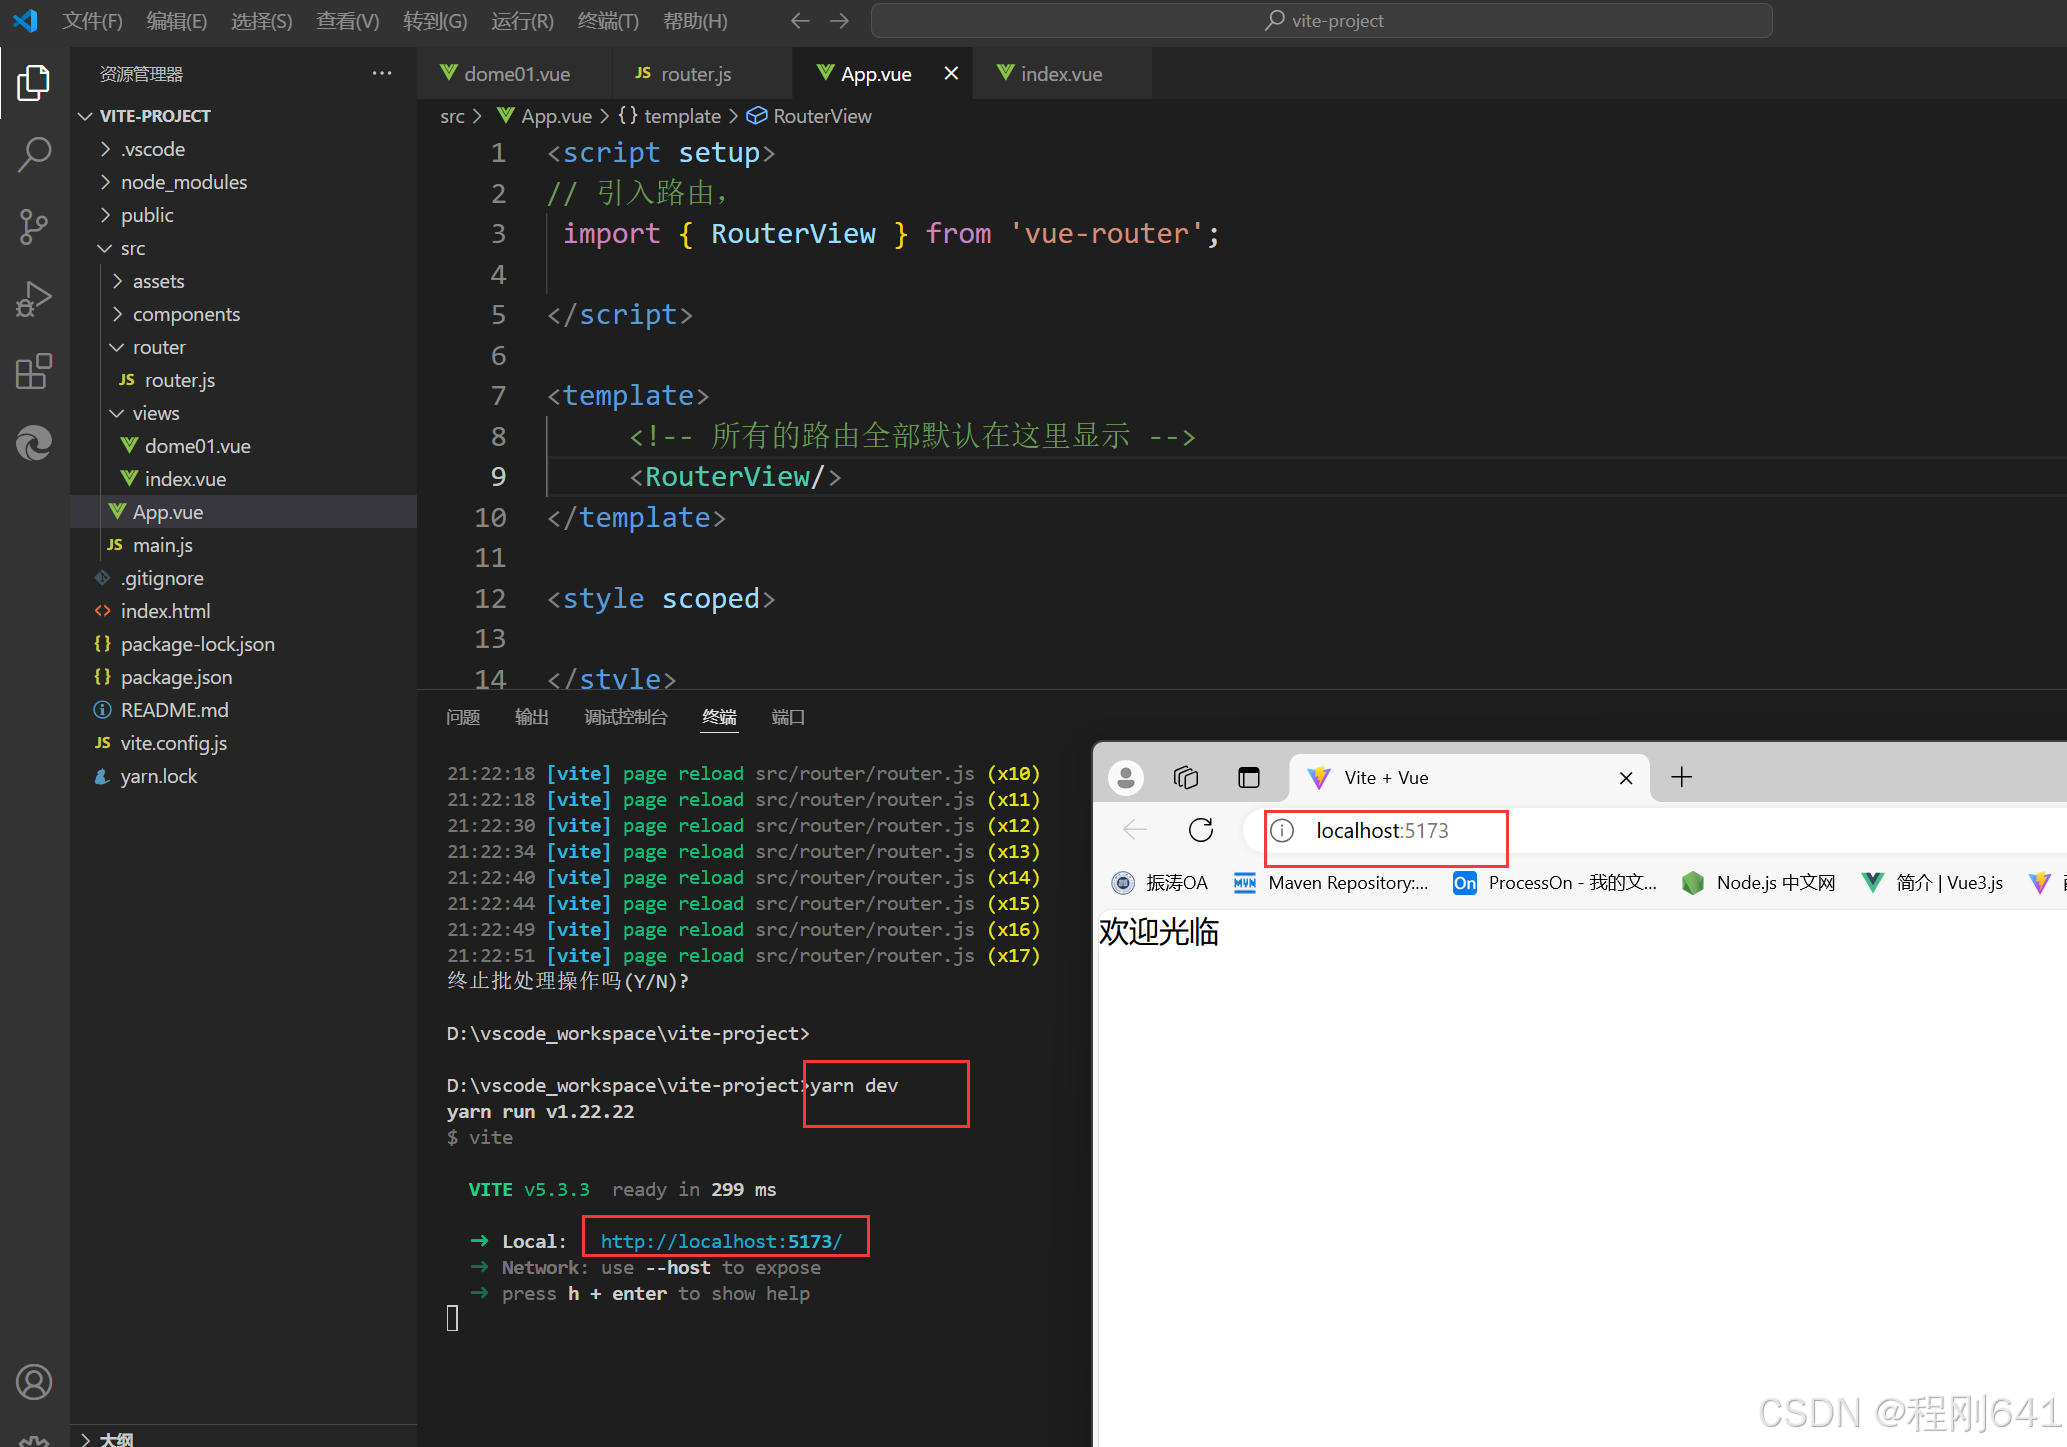
运行的命令为:
yarn dev
效果
引入样式库
yarn add sass -S
作用于标签
<template>
    <div>
        <span>Message: {{ msg }}</span>
    </div>
</template>
<script  setup>
import { ref } from 'vue';

    const msg=ref(1111)
</script>
<style lang="scss" scoped>

</style>

有“AI”的1024 = 2048,欢迎大家加入2048 AI社区
更多推荐


 18
18 0
0- 0


 已为社区贡献1条内容

所有评论(0)