opencv_cvv交互式计算机视觉可视化debug工具的使用
本文介绍cvv模块的安装和使用。 cvv,官网称之为“GUI for Interactive Visual Debugging of Computer Vision”,即交互式计算机视觉可视化debug工具,我对其很感兴趣,但是我在网上几乎没见到关于cvv的介绍,因此自行摸索了一番,有了本文。
摘要
本文介绍cvv模块的安装和使用。 cvv,官网称之为“GUI for Interactive Visual Debugging of Computer Vision”,即交互式计算机视觉可视化debug工具,我对其很感兴趣,但是我在网上几乎没见到关于cvv的介绍,因此自行摸索了一番,有了本文。
介绍
使用cvv需要定义宏,如果不定义宏,则cvv相关函数不启动,并且开销为0
#define CVVISUAL_DEBUGMODE
通过cvv调试很简单,只用以下几个函数:
showImage,添加单个图片到cvv模块debugFilter,添加两个图片到cvv模块,顾名思义,可以用于添加对图像滤波(也可以时其他处理)前后的两张图片进行对比debugDMatch,添加两张图片、特征点、匹配关系,可视化调试图像匹配finalShow,用于主函数最后,阻塞程序退出cvv界面setDebugFlag,用于使能或者失能cvv调试(通过该函数失能cvv后,cvv仍会有较小的开销,若要无开销,可以取消CVVISUAL_DEBUGMODE宏)
安装
要使用cvv,首先要安装好QT,并且下载好对应版本的opencv_contrib,在cmake时,添加opencv_contrib的module路径,并且勾选WITCH_QT,Configure一次,会出现BUILD_opencv_cvv选项,勾选它,再次Configure,Generate。后面的过程跟一般opencv配置过程相同。
note:
- cvv模块在opencv3.4.1以上版本才能编译成功! 原因见这里 ,本文用的opencv版本为4.1.0。
- 如果你还需要sift、surf等特征提取,记得勾选
nonfree。
使用
下面通过代码看一下,具体如何使用cvv进行调试。
使用的代码如下:
// system includes
#include <iostream>

// library includes
#include <opencv2/imgproc.hpp>
#include <opencv2/features2d.hpp>
#include <opencv2/imgproc/types_c.h>
#include <opencv2/videoio.hpp>
#include <opencv2/videoio/videoio_c.h>
//当调试完成,不需要改动其他任何代码,只需要注释掉CVVISUAL_DEBUGMODE即可禁用cvv模块,并且程序运行时没有任何cvv开销
#define CVVISUAL_DEBUGMODE
#include <opencv2/cvv/debug_mode.hpp>
#include <opencv2/cvv/show_image.hpp>
#include <opencv2/cvv/filter.hpp>
#include <opencv2/cvv/dmatch.hpp>
#include <opencv2/cvv/final_show.hpp>

using namespace std;
using namespace cv;

template<class T> std::string toString(const T& p_arg)
{
  std::stringstream ss;

  ss << p_arg;

  return ss.str();
}


int
main(int argc, char** argv)
{
  cv::Size* resolution = nullptr;

  // parser keys
  const char *keys =
      "{ help h usage ?  |   | show this message }"
      "{ width W         |  0| camera resolution width. leave at 0 to use defaults }"
      "{ height H        |  0| camera resolution height. leave at 0 to use defaults }";

  CommandLineParser parser(argc, argv, keys);
  if (parser.has("help")) {
    parser.printMessage();
    return 0;
  }
  int res_w = parser.get<int>("width");
  int res_h = parser.get<int>("height");

  // setup video capture
  cv::VideoCapture capture(0);
  if (!capture.isOpened()) {
    std::cout << "Could not open VideoCapture" << std::endl;
    return 1;
  }

  if (res_w>0 && res_h>0) {
    printf("Setting resolution to %dx%d\n", res_w, res_h);
    capture.set(CV_CAP_PROP_FRAME_WIDTH, res_w);
    capture.set(CV_CAP_PROP_FRAME_HEIGHT, res_h);
  }


  cv::Mat prevImgGray;
  std::vector<cv::KeyPoint> prevKeypoints;
  cv::Mat prevDescriptors;

  int maxFeatureCount = 500;
  Ptr<ORB> detector = ORB::create(maxFeatureCount);

  cv::BFMatcher matcher(cv::NORM_HAMMING);

  for (int imgId = 0; imgId < 10; imgId++) {
    // capture a frame
    cv::Mat imgRead;
    capture >> imgRead;
    printf("%d: image captured\n", imgId);

    std::string imgIdString{"imgRead"};
    imgIdString += toString(imgId);
		cvv::showImage(imgRead, CVVISUAL_LOCATION, imgIdString.c_str());

    // convert to grayscale
    cv::Mat imgGray;
    cv::cvtColor(imgRead, imgGray, COLOR_BGR2GRAY);
		cvv::debugFilter(imgRead, imgGray, CVVISUAL_LOCATION, "to gray");

    // detect ORB features
    std::vector<cv::KeyPoint> keypoints;
    cv::Mat descriptors;
    detector->detectAndCompute(imgGray, cv::noArray(), keypoints, descriptors);
    printf("%d: detected %zd keypoints\n", imgId, keypoints.size());

    // match them to previous image (if available)
    if (!prevImgGray.empty()) {
      std::vector<cv::DMatch> matches;
      matcher.match(prevDescriptors, descriptors, matches);
      printf("%d: all matches size=%zd\n", imgId, matches.size());
      std::string allMatchIdString{"all matches "};
      allMatchIdString += toString(imgId-1) + "<->" + toString(imgId);
      cvv::debugDMatch(prevImgGray, prevKeypoints, imgGray, keypoints, matches, CVVISUAL_LOCATION, allMatchIdString.c_str());

      // remove worst (as defined by match distance) bestRatio quantile
      double bestRatio = 0.8;
      std::sort(matches.begin(), matches.end());
      matches.resize(int(bestRatio * matches.size()));
      printf("%d: best matches size=%zd\n", imgId, matches.size());
      std::string bestMatchIdString{"best " + toString(bestRatio) + " matches "};
      bestMatchIdString += toString(imgId-1) + "<->" + toString(imgId);
      cvv::debugDMatch(prevImgGray, prevKeypoints, imgGray, keypoints, matches, CVVISUAL_LOCATION, bestMatchIdString.c_str());
    }

    prevImgGray = imgGray;
    prevKeypoints = keypoints;
    prevDescriptors = descriptors;
  }

  cvv::finalShow();

  return 0;
}
编译并运行,执行cvv::showImage(imgRead, CVVISUAL_LOCATION, imgIdString.c_str());后被阻塞。读取摄像头图像第一帧并添加到cvv中: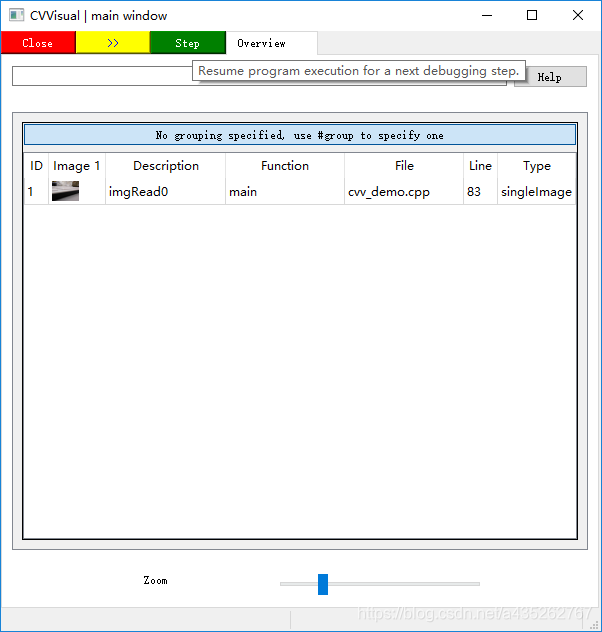
点Step,单步运行,执行cvv::debugFilter(imgRead, imgGray, CVVISUAL_LOCATION, "to gray");后被阻塞: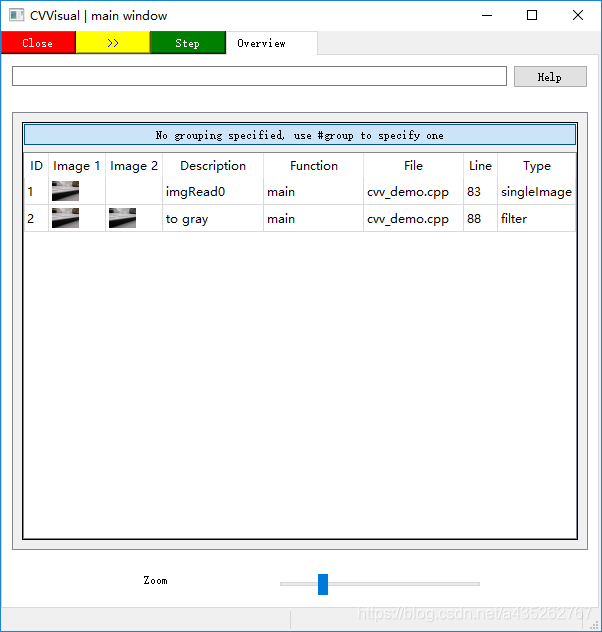
点击>>,一直执行到cvv::finalShow();为止,期间不阻塞程序: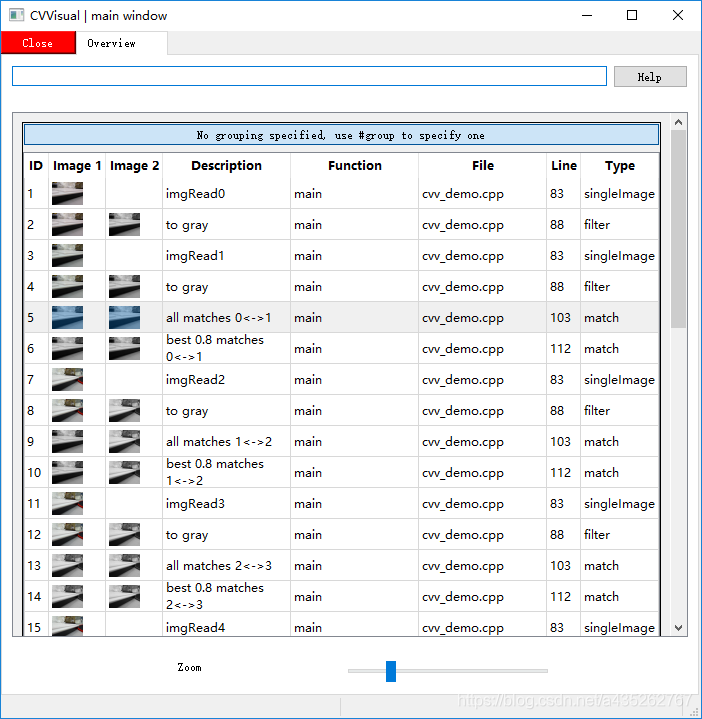
双击 all matches 0< - >1,查看匹配图,设置Match Setting,根据匹配距离从小到大排序,仅显示前100个匹配结果: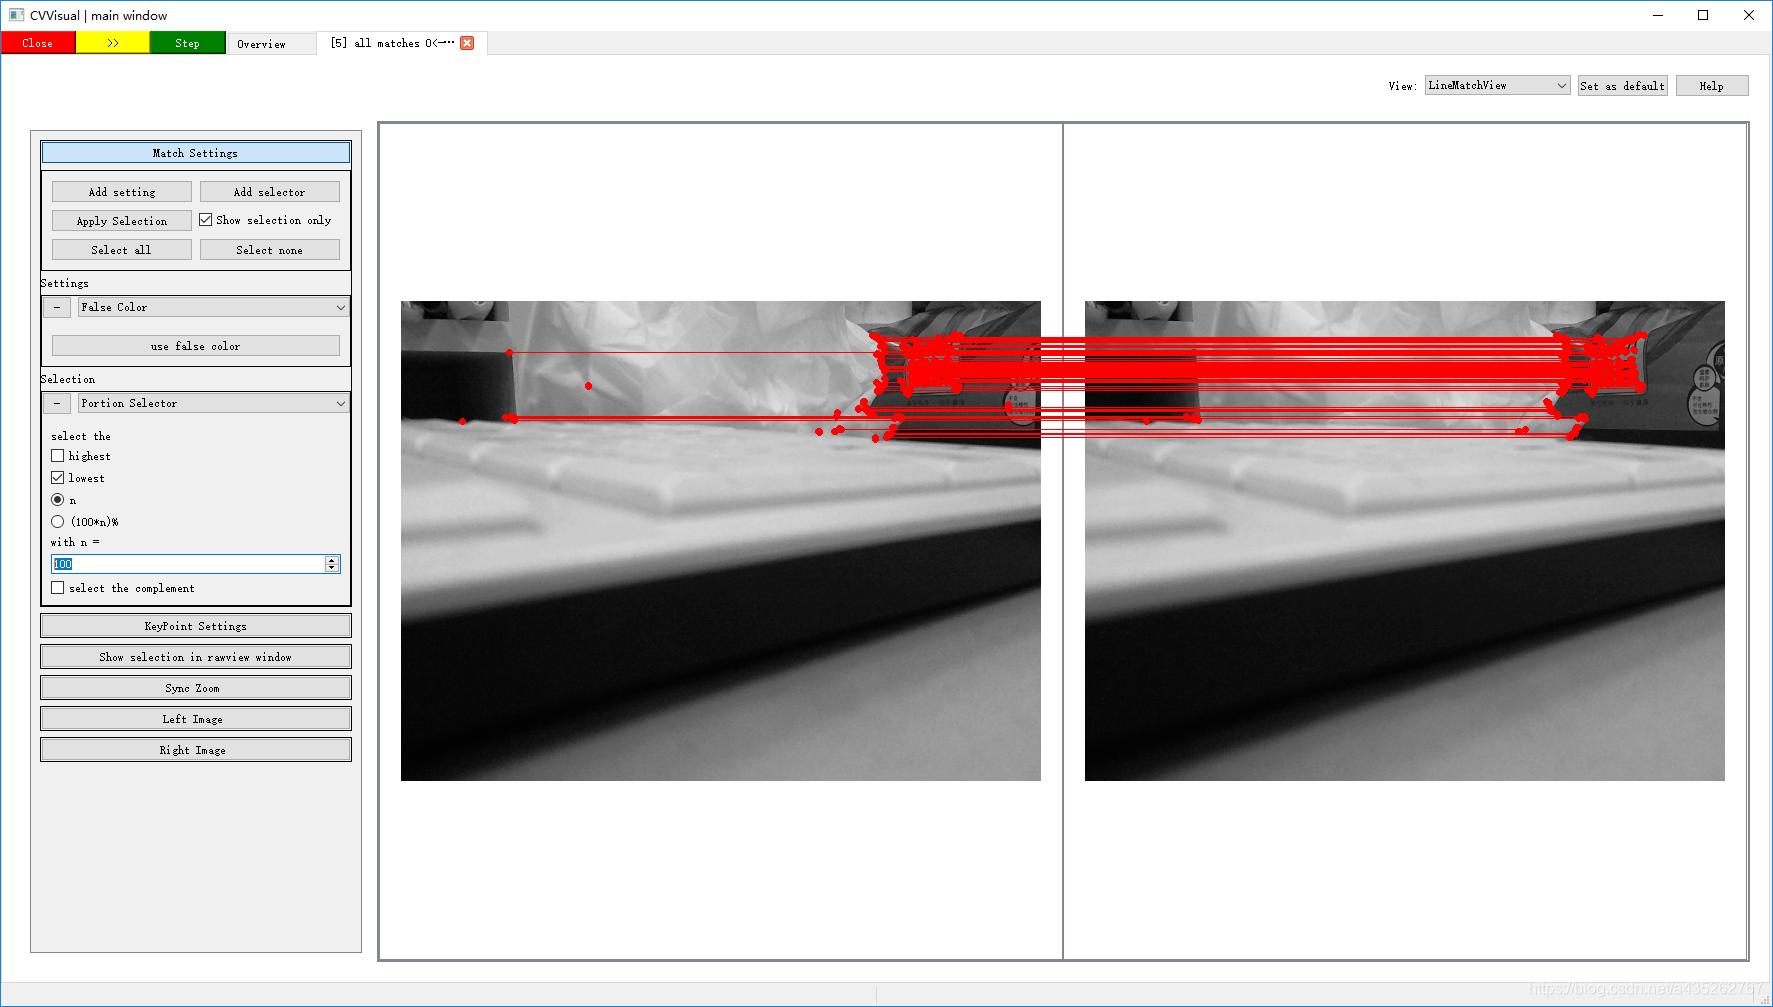
好了,功能就演示到这里,cvv功能不仅仅如此,更多介绍详情见这里
相关/参考链接

有“AI”的1024 = 2048,欢迎大家加入2048 AI社区
更多推荐

 4
4 0
0- 0


 已为社区贡献5条内容

所有评论(0)