STHGCN复现踩过的坑
STHGCN复现踩坑史
CUDA、torch版本问题
安装cuda、cdnn的时候要看版本,安装cuda的时候,首先通过查看本机支持的最高版本的cuda:
nvidia-smi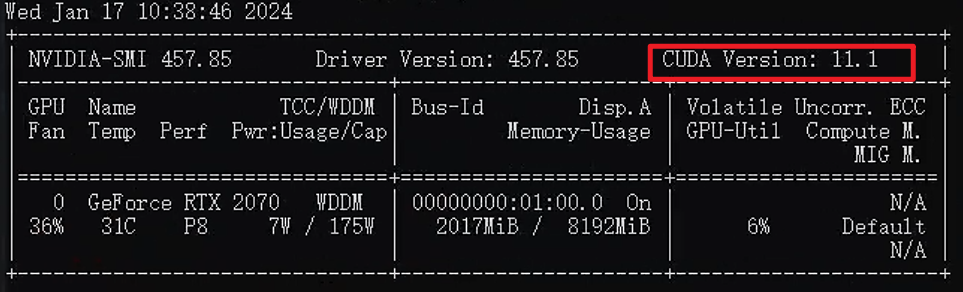
本机支持的最高版本是11.1,那么我们安装的cuda不高于该版本就可以。我选择的是cuda10.2。成功安装以后查看cuda版本:
nvcc -V
之后安装对应的CUDA版本下载对应的pytorch、Torch版本:Previous PyTorch Versions | PyTorch
如果提示找不到对应版本就去官网直接找wheel文件:https://download.pytorch.org/whl/cu102
这里网址最后面的cu+102是说,CUDA版本是10.2,虚拟环境Python3.8。之后打开网站:
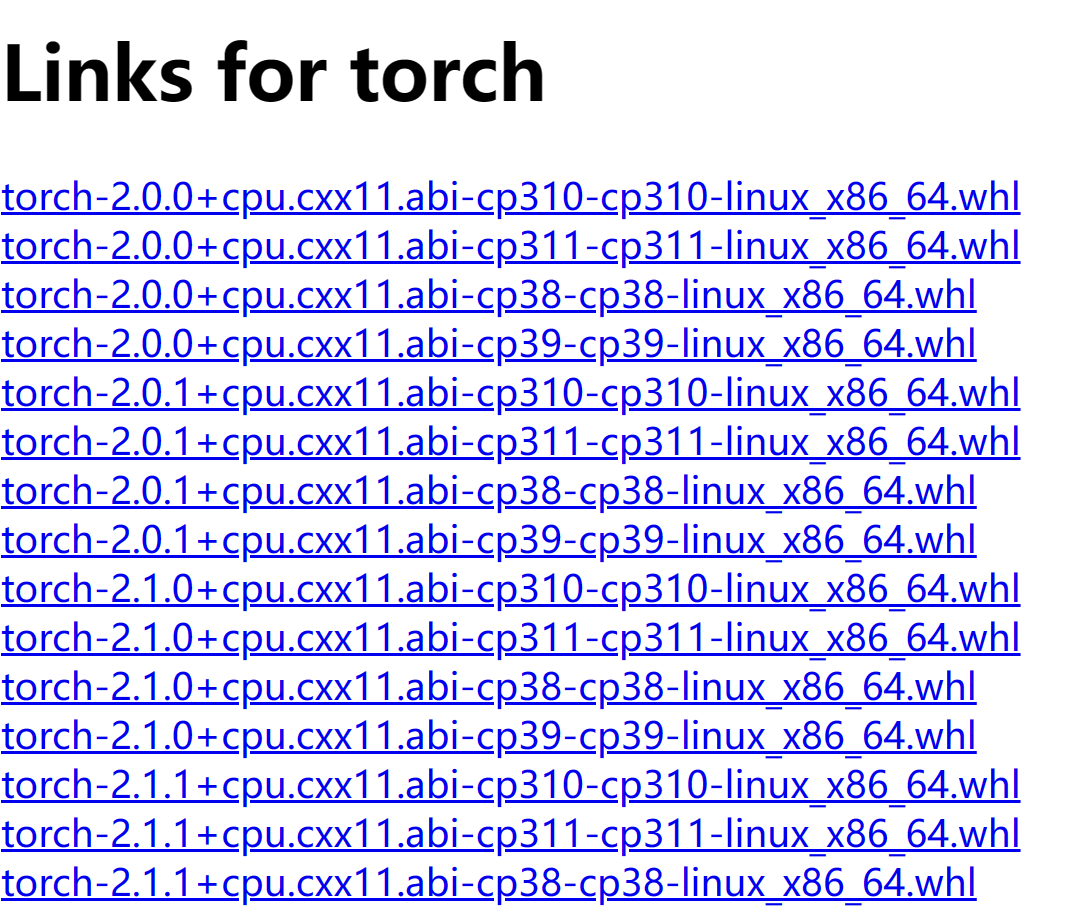
网址含义:
torch后面是版本信息,cp38指的是Python3.8,linux和Windows分别下载对应后缀的就可以。我下的是torch1.10.2+cu102。
torch_geometric下载
下载依赖:https://data.pyg.org/whl/torch-1.10.2+cu102.html
观察这个网址由torch版本&CUDA版本构成,依据需要更改连接就可以。
dgl库下载(这个不需要)
conda install pytorch==1.13.0 torchvision==0.14.0 torchaudio==0.13.0 pytorch-cuda=11.7 -c pytorch -c nvidia
pip install dgl==1.1.1+cu117 -f https://data.dgl.ai/wheels/cu117/repo.html
明明pip install 了但是还是module not found?
试试用以下命令:
python -m pip install pandas建议bat批量安装三方库(order.bat),之后在命令行运行该文件即可:
@echo on
python -m pip install tqdm
python -m pip install pyyaml
python -m pip install pandas
python -m pip install numba
python -m pip install scipy
python -m pip install tensorboard
python -m pip install scikit-learn
python -m pip install shapely
python -m pip install torch-sparse -f https://pytorch-geometric.com/whl/torch-1.10.2+cu102.html
python -m pip install torch-scatter -f https://pytorch-geometric.com/whl/torch-1.10.2+cu102.html
python -m pip install torch-cluster -f https://pytorch-geometric.com/whl/torch-1.10.2+cu102.html
python -m pip install torch-spline-conv -f https://pytorch-geometric.com/whl/torch-1.10.2+cu102.html
python -m pip install torch-geometric
下载whl文件说找不到?
看这篇:torch,torchvision,torch-sparse,torch-scatter版本问题_pip check torch-scatter version-CSDN博客
命令如下:
python -m pip install torch-sparse -f https://pytorch-geometric.com/whl/torch-1.10.2+cu102.html
python -m pip install torch-scatter -f https://pytorch-geometric.com/whl/torch-1.10.2+cu102.html
python -m pip install torch-cluster -f https://pytorch-geometric.com/whl/torch-1.10.2+cu102.html
python -m pip install torch-spline-conv -f https://pytorch-geometric.com/whl/torch-1.10.2+cu102.html
python -m pip install torch-geometric
RuntimeError: object has no attribute sparse_csr_tensor
torch以及torch_sparse版本不对应,见上面版本问题详述。
Python AttributeError: module ‘distutils‘ has no attribute ‘version‘
试试以下命令,参考这篇:
# If you use pip:
pip install setuptools==59.5.0

# For pip3:
pip3 install setuptools==59.5.0

# If you use conda:
conda install setuptools=59.5.0
ValueError: 'Spatio-Temporal-Hypergraph-Model' is not in list
这里说明一下,报这个错是因为up复现的平台是Windows,如果使用的是Linux框架则不用改。
如果你在Linux系统中运行代码,你应该使用斜杠(/)作为路径分隔符。如果你在Windows系统中运行代码,你应该使用反斜杠(\)作为路径分隔符。但是在Python字符串中,反斜杠是一个特殊字符,用于引入转义序列,所以你需要使用两个反斜杠(\\)来表示一个反斜杠。
—— AI如是说
将工作目录命名为Spatio-Temporal-Hypergraph-Model,之后将Spatio-Temporal-Hypergraph-Model\utils\sys_util.py修改如下:
def get_root_dir():
    dirname = os.getcwd()
    dirname_split = dirname.split("\\")
    print(f"Directory list: {dirname_split}")
    # print(dirname_split)
    index = dirname_split.index("Spatio-Temporal-Hypergraph-Model")
    dirname = "\\".join(dirname_split[:index + 1])
    return dirname
RuntimeError: max(): Expected reduction dim to be specified for input.numel()
是因为preprocess预处理的文件(test_sample.csv以及validate_sample.csv中的query_pseudo_session_trajectory_id列是空的)有问题。但是NYC的数据集预处理没问题,可以直接跑,另外两个都有问题。
修改Spatio-Temporal-Hypergraph-Model\preprocess\file_reader.py,大概在81行左右:
        # df.iloc[validation_index:test_index]['SplitTag'] = 'validation'
        # df.iloc[test_index:]['SplitTag'] = 'test'

        df.iloc[validation_index:test_index, df.columns.get_loc('SplitTag')] = 'validation'
        df.iloc[test_index:, df.columns.get_loc('SplitTag')] = 'test'
在运行前需要把预处理文件夹删掉,比如 data/ca/preprocessed 文件夹。这是因为,预处理操作在run中进行,且只有第一次会运行。之后重新运行对应的run指令,比如:
python run.py -f best_conf/ca.ymlraise AttributeError("module {!r} has no attribute "
AttributeError: module 'numpy' has no attribute 'long'
将Spatio-Temporal-Hypergraph-Model\layer\sampler.py的第214行修改如下,自己搜一下位置就可以:
im = coo_matrix((
            np.ones(row[target_mask].shape[0]),
            (he_poi.numpy().astype(np.int64), row[target_mask].numpy())
        )).tocsr()
# np的long数据结构已弃用,需要用int64或int32代替
File "pandas\_libs\tslibs\timestamps.pyx", line 1493, in pandas._libs.tslibs.timestamps.Timestamp.strftime
ValueError: Invalid format string
1. 将Spatio-Temporal-Hypergraph-Model\preprocess\preprocess_main.py中,上面注释改成下面这句:
# df['UTCTimeOffsetEpoch'] = df['UTCTimeOffset'].apply(lambda x: x.strftime('%s'))
  df['UTCTimeOffsetEpoch'] = df['UTCTimeOffset'].apply(lambda x: int(x.timestamp()))
2. 将Spatio-Temporal-Hypergraph-Model\preprocess\file_reader.py中,上面注释改成下面这句:
# df['UTCTimeOffsetEpoch'] = df['UTCTimeOffset'].apply(lambda x: x.strftime('%s'))
  df['UTCTimeOffsetEpoch'] = df['UTCTimeOffset'].apply(lambda x: int(x.timestamp()))
VSCODE选择Python环境(我是真小白T T)
Ctrl+Shift+P-> Python:选择解释器,选到你的虚拟环境中的python.exe

有“AI”的1024 = 2048,欢迎大家加入2048 AI社区
更多推荐


 13
13 0
0- 0


 已为社区贡献2条内容

所有评论(0)